Eduard 1/48 P-39Q Airacobra
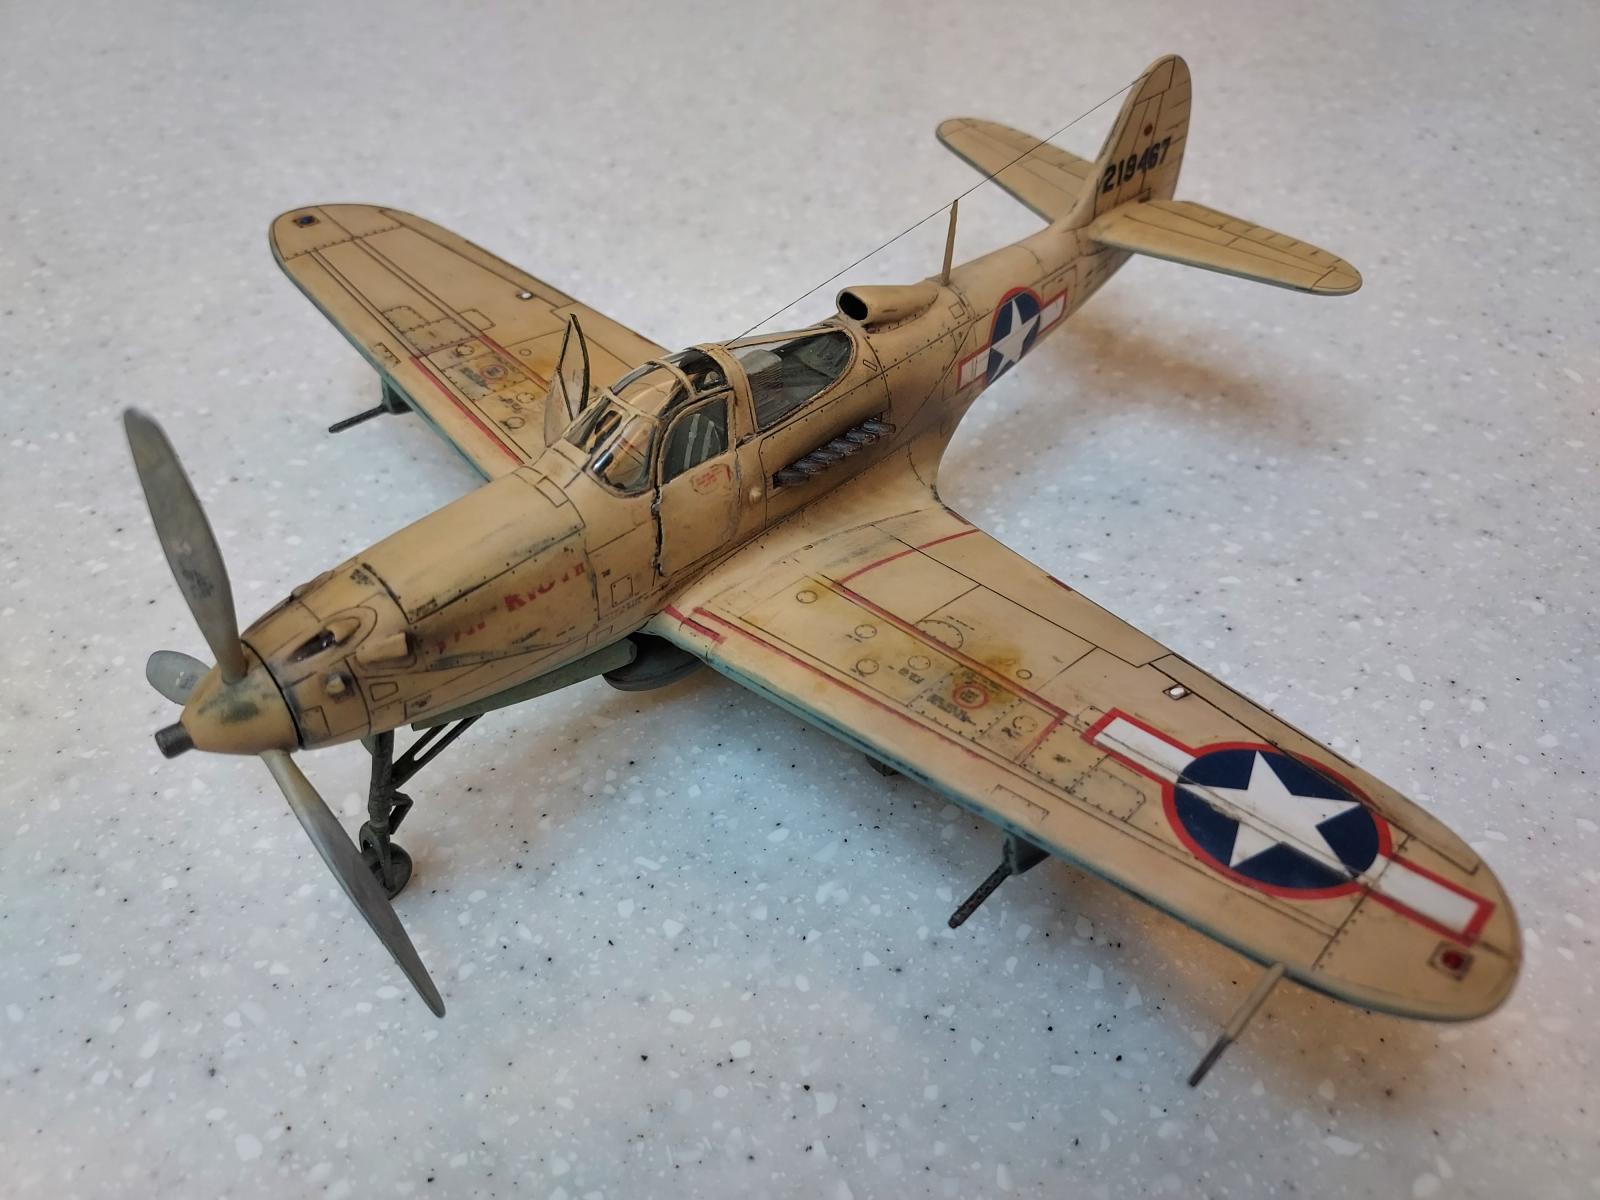
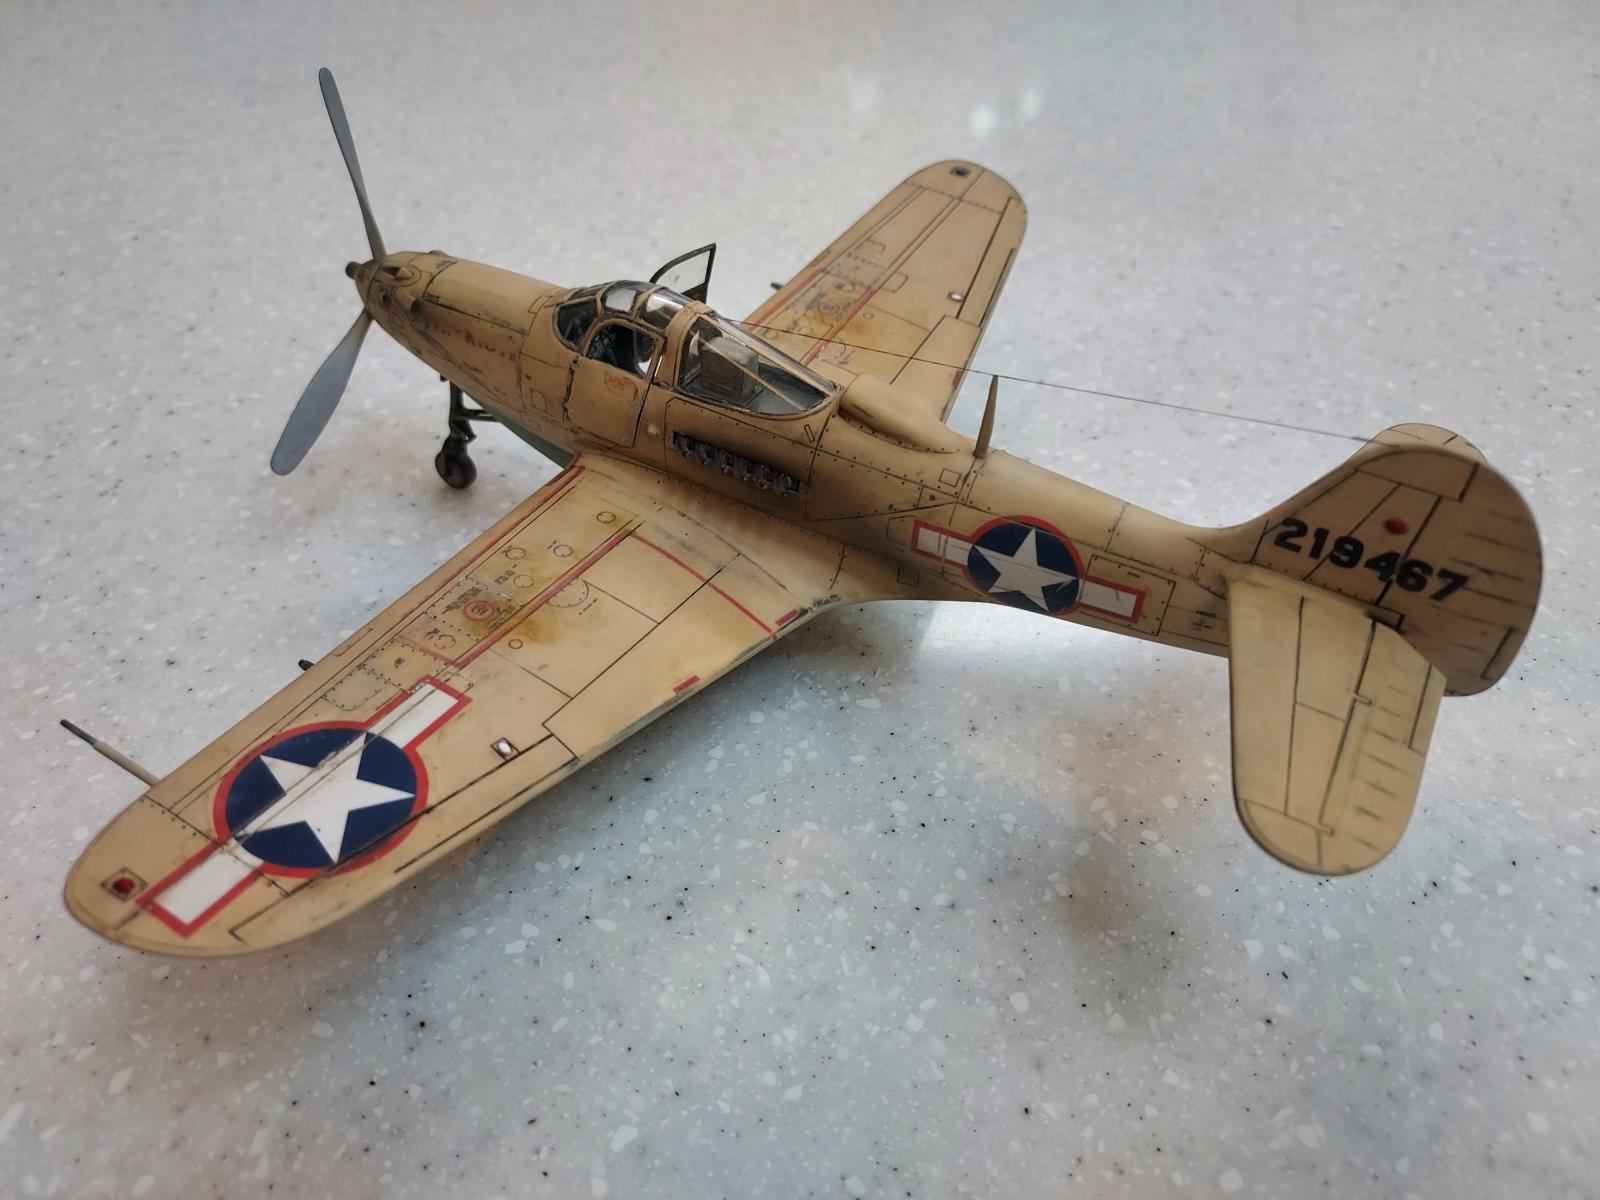
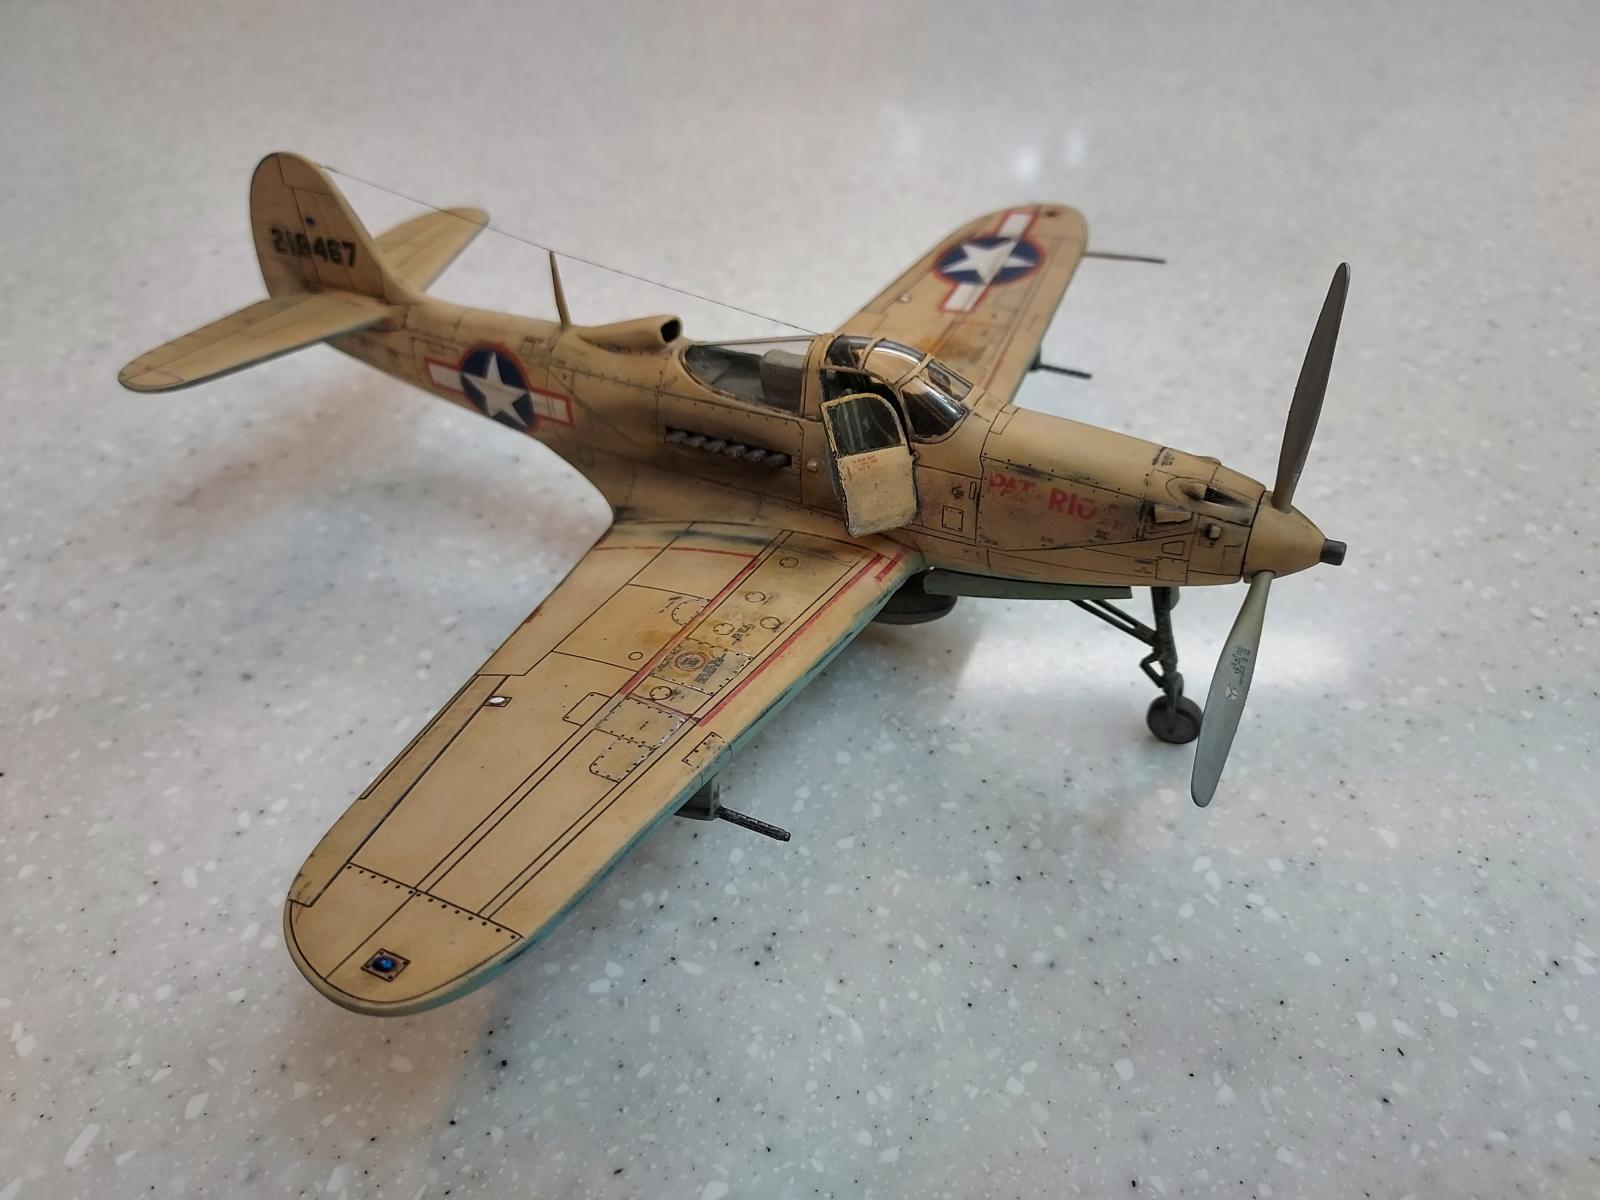
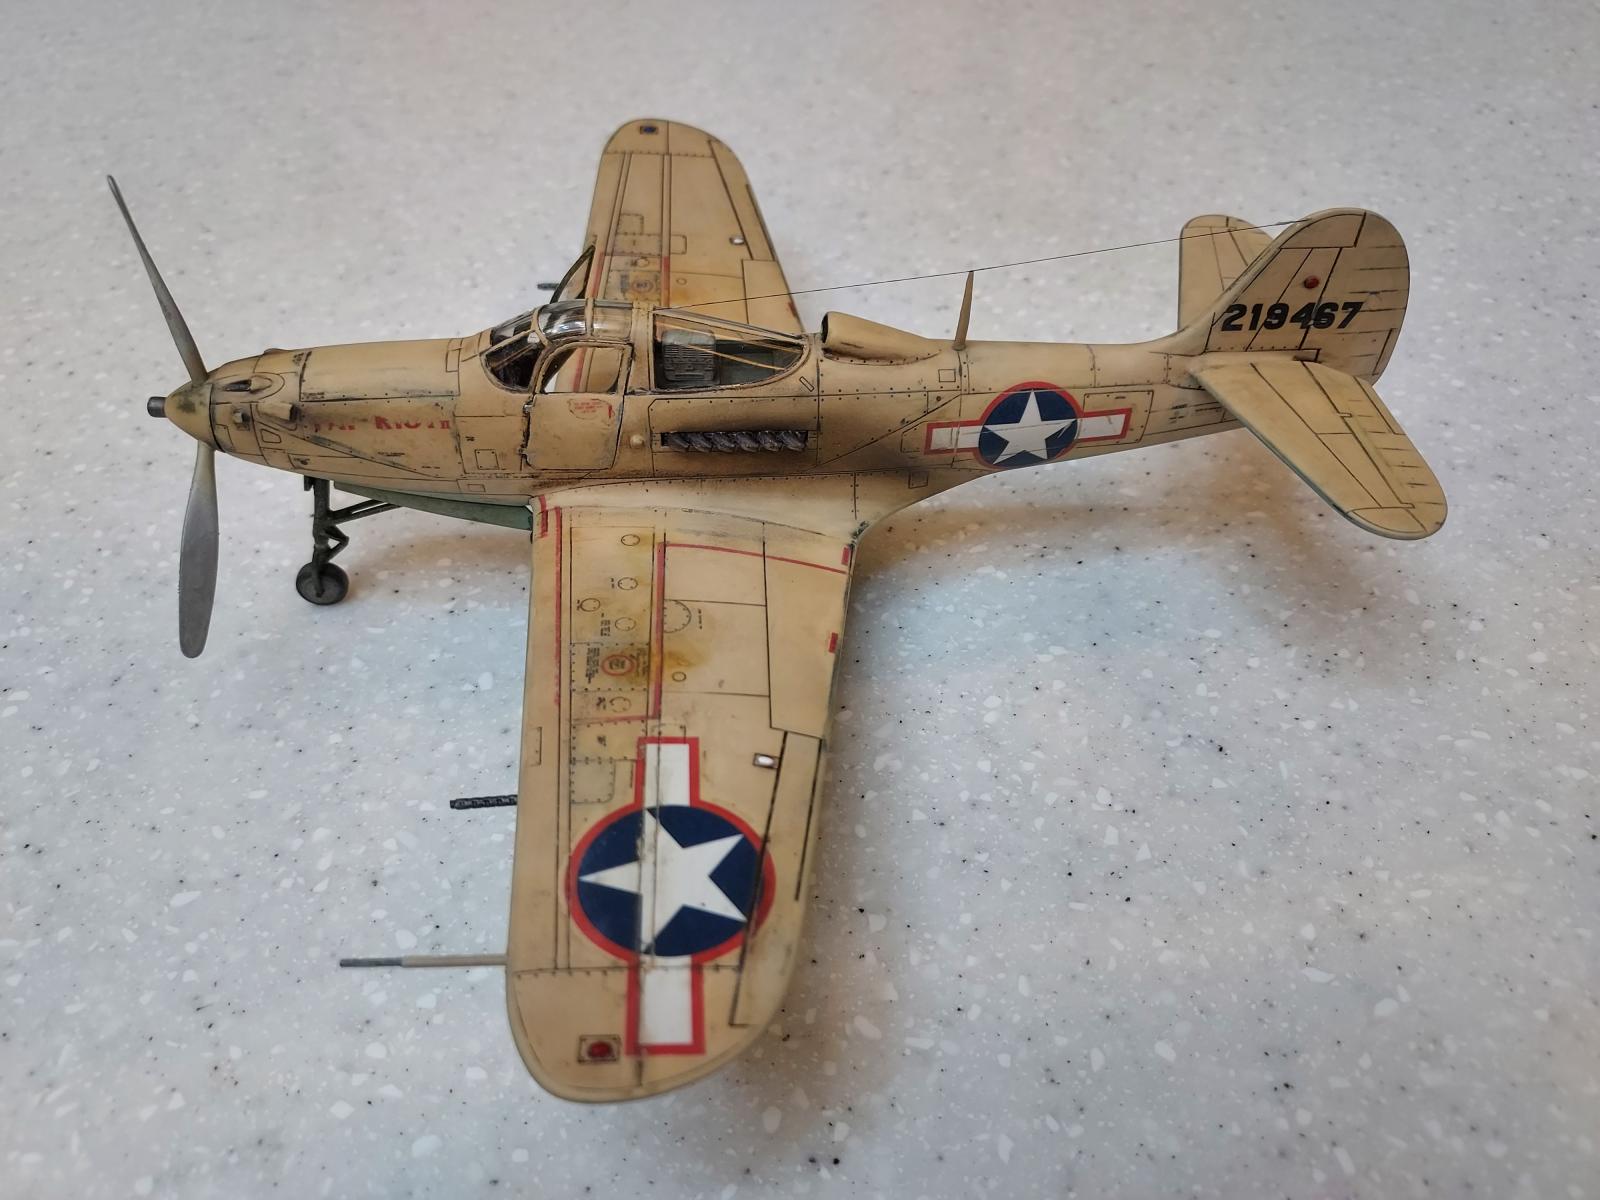
This is the third model in my model-building career. This P-39 represents the 46th fighter squadron that was stationed at Kanton Atoll from the spring of 1943 through December 1943. The sand and light blue camouflage pattern was painted over the existing olive drab and gray pattern. Thus, my painting shows minimal paint chipping to the exposed bare aluminum and highlights the exposed olive drab from the wear patterns on the sand top coat.
This is my first Eduard kit and I love the molded details, four paint schemes to choose from, and excellent colored instructions. However, this kit does have some weaknesses. There are no alignment pins in the fuselage or wing halves so aligning the two halves when gluing them together is somewhat of a challenge. Eduard provided a decal for the seat belt harness assembly. I used it in my model but it looks very unrealistic. I probably won't use decals for seat belt harnesses again. The decal sheet was horrible. There was an existing film on top of the sheet that had bubbles all over it. Many of decals disintegrated and/or tore when I applied them which is why the Pat Riot II nose art is hardly visible. After the decals were partly dried, a film appeared on top of them. I was able to pull this film off without major damage to most of the decals but not sure why a film layer was on top of the decals and if it should have remained. The air intakes on the leading wing edges comprise three exposed joints which have to be filled and sanded. Eduard could have engineered the air intakes in another way to make this installation easier.
I positioned the right door open as that is the one the pilot uses for P-39 cockpit access unlike most other planes where the pilot enters/exits from the left side. The one thing I couldn't confirm from historical photos was the antenna cable installation. I found probably 10 different variations of antenna cable installation on various Airacobras but couldn't confirm which standard was used for the fighter squadron that this plane represents.
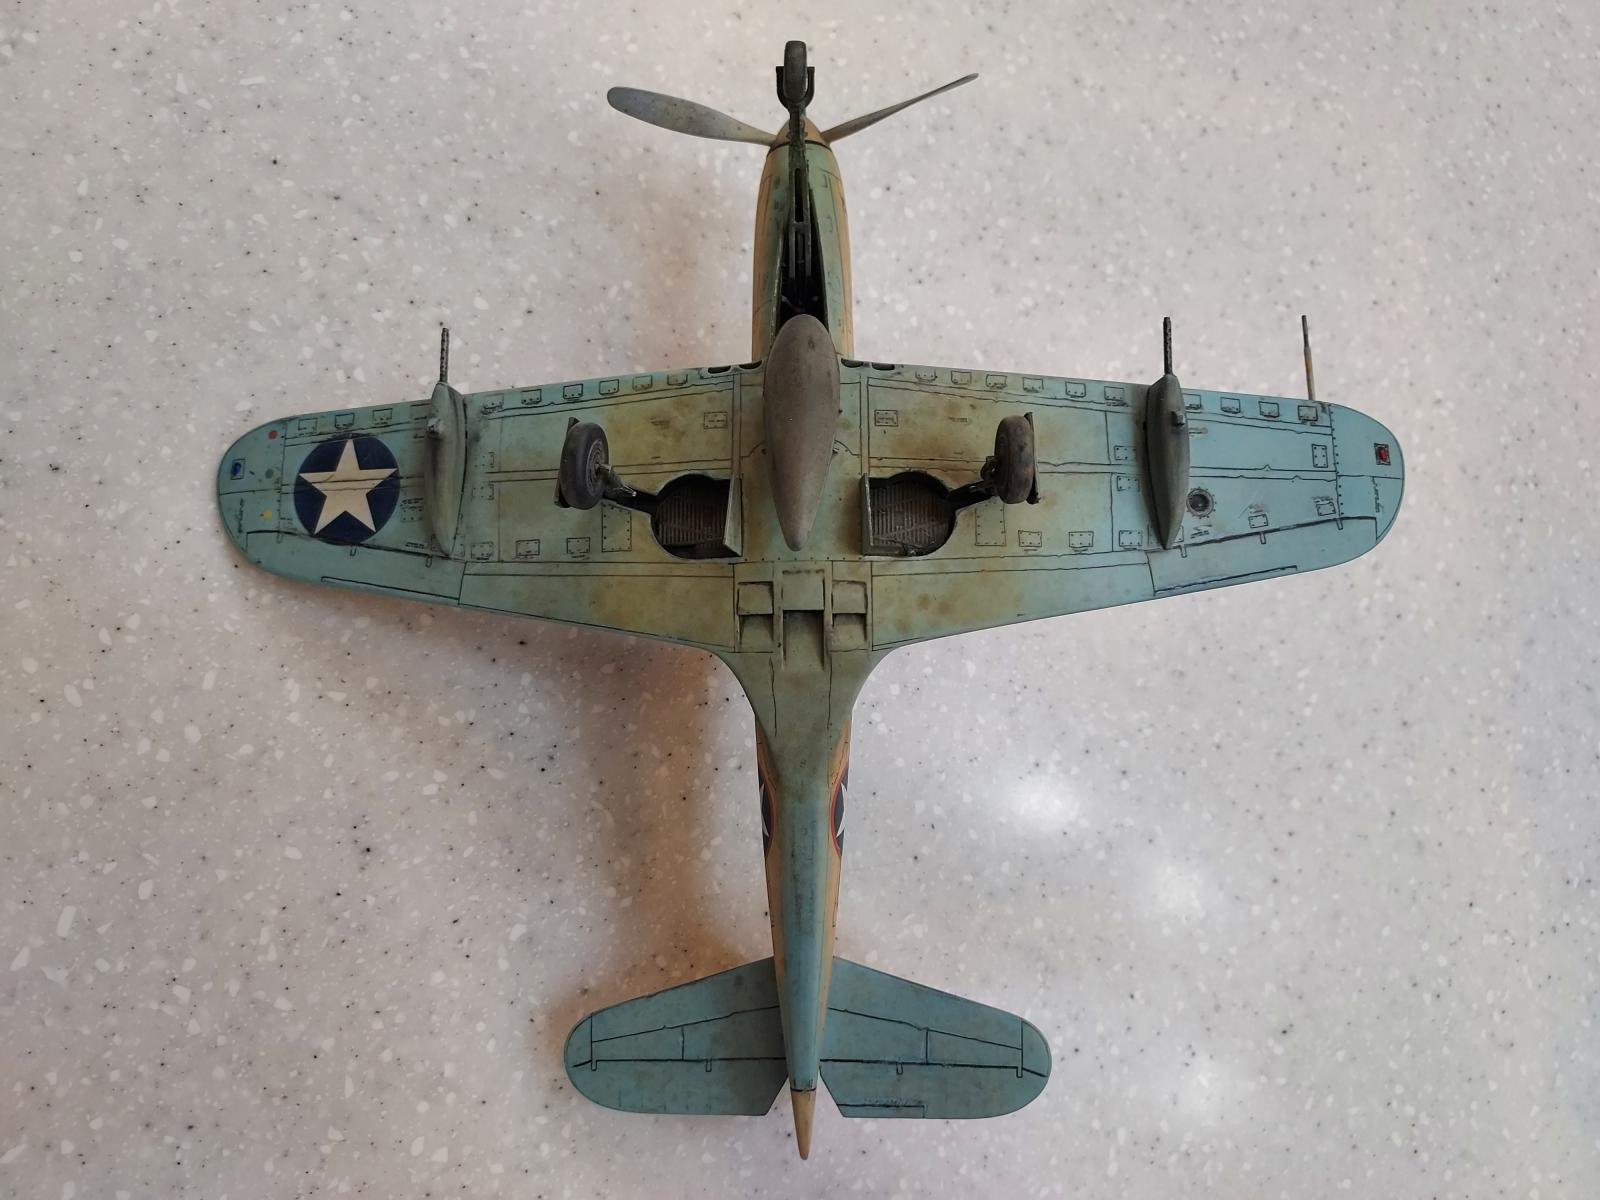
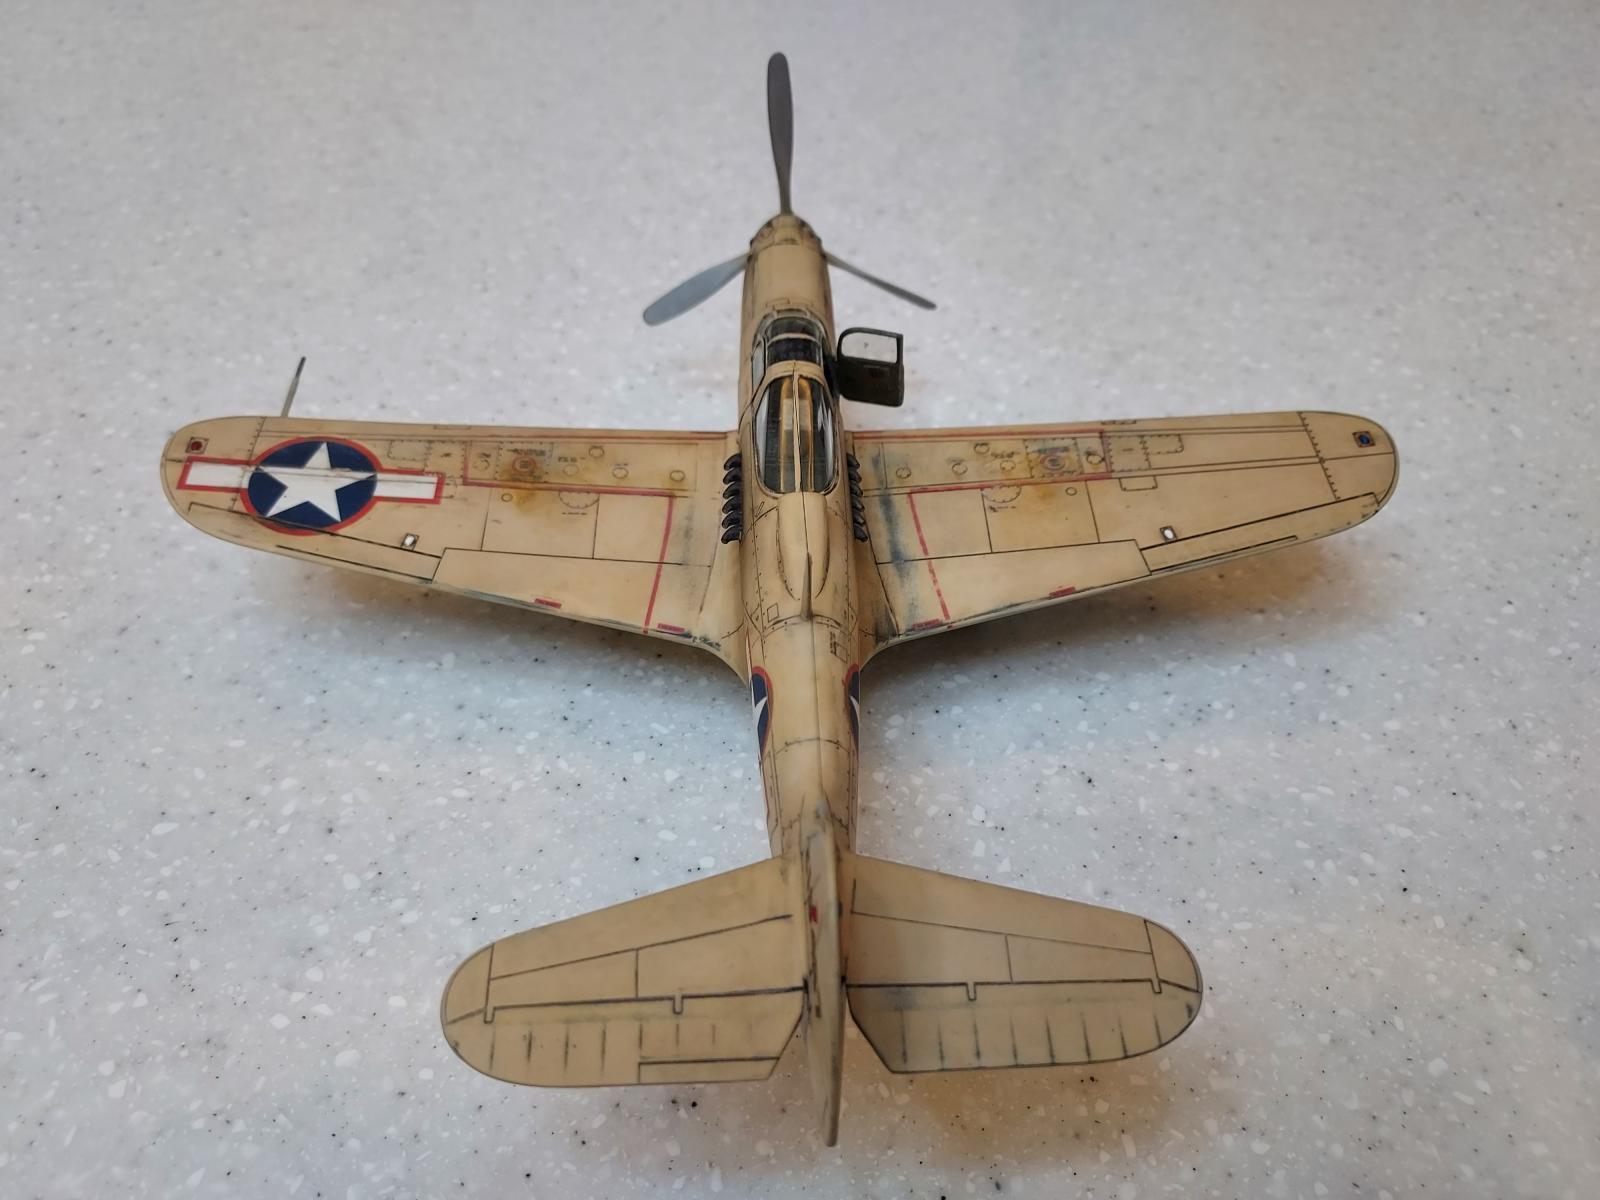
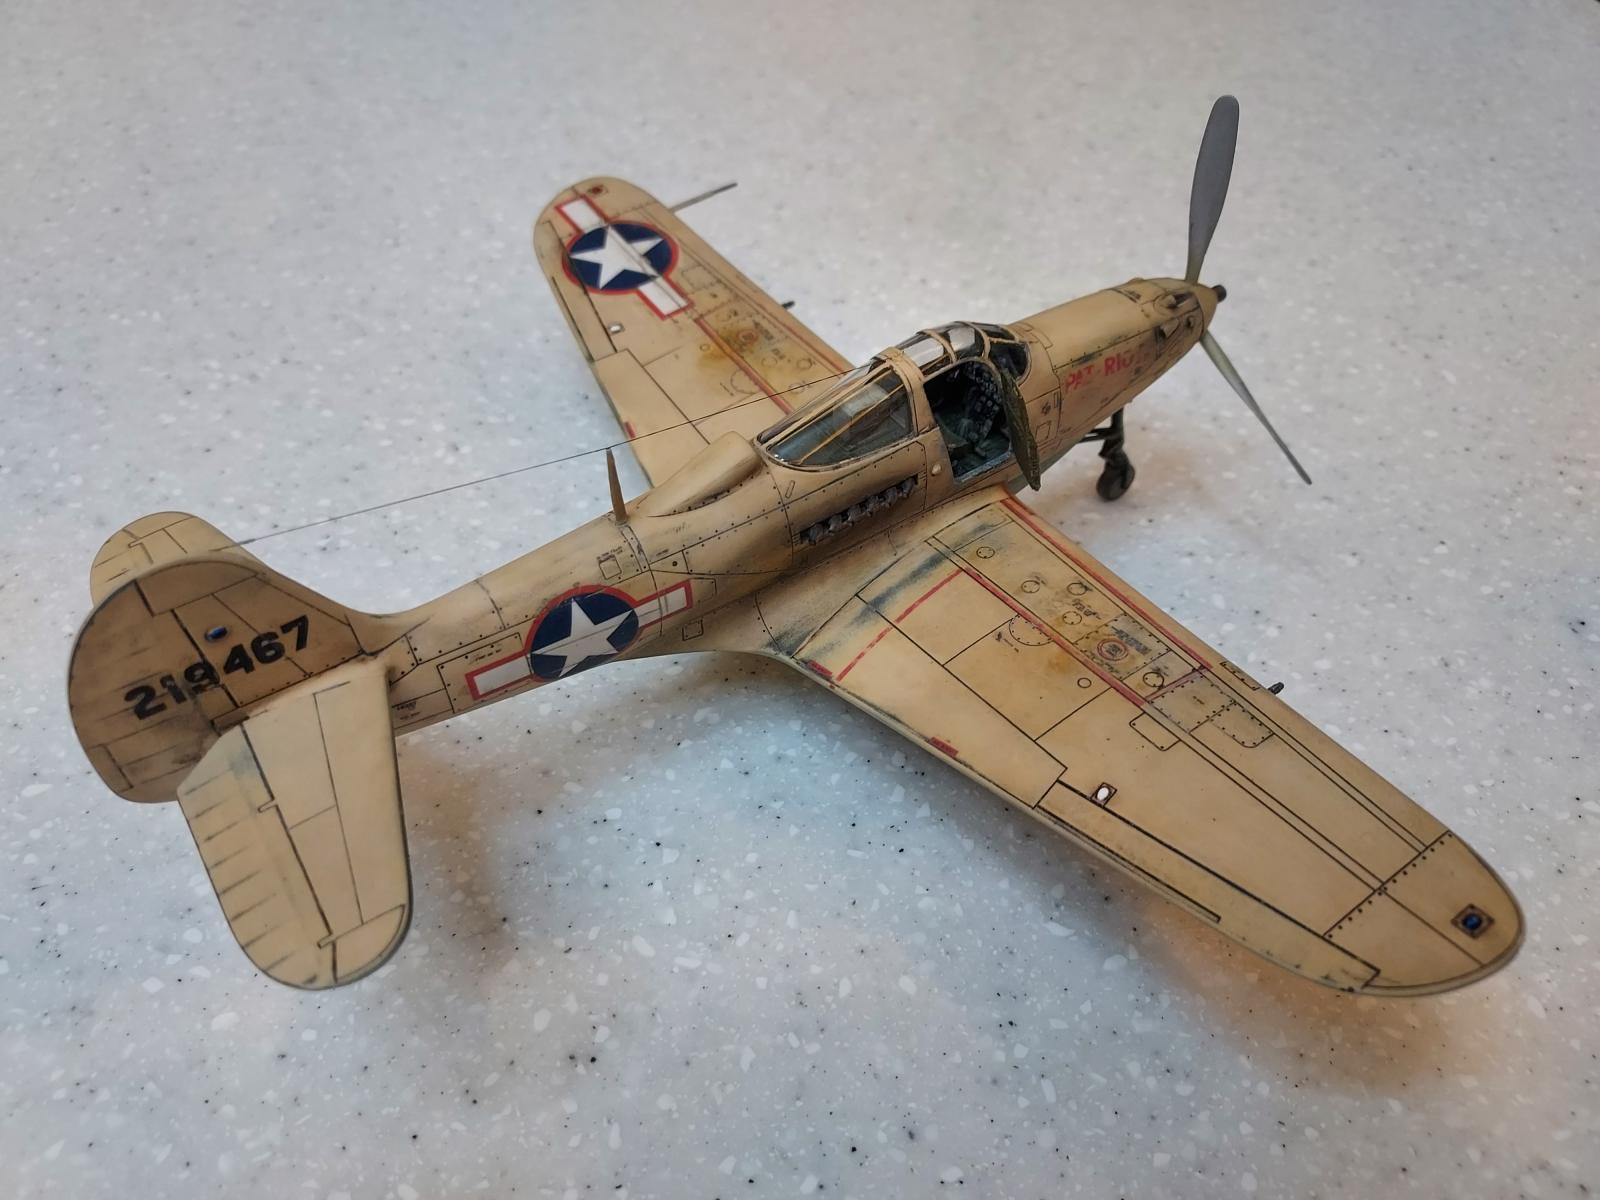
The primary technical challenge I had on this build is that the flat clear coat I sprayed on the model after doing the panel line wash literally wicked the pigment out of the panel lines and turned the pigment into wiggly lines. This is clearly visible on the photo of the bottom of the plane. I didn't know how to fix it without stripping the clear coat from the entire plane and starting over which would have been a major effort so I just left it as-is. I have no idea what caused this or how to prevent it. Any suggestions would be appreciated. I used the Mr. Color panel line wash and Mr. Color flat clear coat (aerosol can).

Very nice considering. I can't help with the clear coat as I only use acrylics. You might have gone a little heavy with the spray bomb. While I can't say for sure but you may have the new breed of Eduard decals. Others have used them and may be able to walk you through the process. Have a look here to see if is similar to your problem
https://hamfisted-modeller.blogspot.com/2021/11/to-peel-or-not-to-peel-testing-eduards.html
Thanks for providing that blog posting on the Eduard decals. He had the exact same problem as me. Nice to know that I'm not the only one that experienced ripping of the decals when removing the film.
If the decal sheet had existing bubbles prior to applying, maybe you could email Eduard and get a replacement as they were defective? I've heard Eduard has good customer support but I've never personally tested that.
That's not the new Eduard decals - that's a problem in where this kit was stored and for how long. That's heat damage/humidity to the decals.
As to going through all the peel or not of the new decals, I treat them just like normal decals and get results just like normal. The people who go on about the decals are proof to me that the "3M Theory" of modeling is correct (Many Modelers are Mo...")
Still a great result, despite all challenges met, Derek! A beautiful Airacobra!
Despite some troubles, you turned this kit into a great looking Airacobra, Derek @mrocs2000
No experience with those Eduard decals myself, but seems like you did well on them.
Looks good, Derek. Learning as we go is all a part of the hobby and for me never stops...your doing a great job, keep 'em coming.
I like the worn paint on the upper wing. I have used the "new" Eduard decals and had no issues. I think Tom is right about the decals being stored incorrectly. It is a nice model, and the finish looks properly worn.
Looks pretty nice , I like it. Decals can certainly be problematic from time to time. Seems like you persevered and overcame the problems you had .
That sure looks a Damm sight better than my 3rd model, that's for sure.
Yeah the bleed problem is most likely from the aerosol spray can, too heavy an application, which melted the panel line wash. The wash being the same base as the spray, the spray will melt it.
You pretty much have to use an airbrush for everything.
I think you're right about using too heavy of an application. This was also my first time using the Mr. Color panel line wash. I used the Tamiya panel line wash on my other models with no problems. I can't find any matte or flat clear coat in bottles for airbrushing where I live which is why I have to resort to the aerosol can for my flat clear coat.
Nice model Derek. Have you considered decanting the matte spray and then airbrushing it for more control? There are lots of tutorials online on how to decant spray bomb paint/clear for airbrushing.
Love the scheme and the paint and weathering work - that is totally fantastic for a 3rd model, and even looks great for a vet!
Sometimes better to use different mediums for various layers so they don't interfere with each other (as Bill alluded to above). My preference is to use an oil-based panel line wash over an acrylic lacquer clear coat laid down via AB, then clear coat again once decals are down (gloss first through AB, then first coat of flat using Tamiya spray can or acrylic laquer via AB). Then depending on weathering mediums, there may be another couple of flat coats in between.
Thanks for the suggestion. I'll try an oil-based panel line wash on my current project- an F4F Wildcat. Do you have a suggested ratio of oil to thinner you use for the oil wash? How long do you wait to clean off the excess panel line wash residue?
Nicely done!
That is a great result, and to know that is only your 3rd model ever... you are a master in the making! Excellent work!
Fantastic! Brilliant!, lovely, lovely rendition of a very nice looking (although maybe not performing) warbird. Excellent!
Really great Aircobra Derek, I love the dirt and weathering on it. looks incredible.