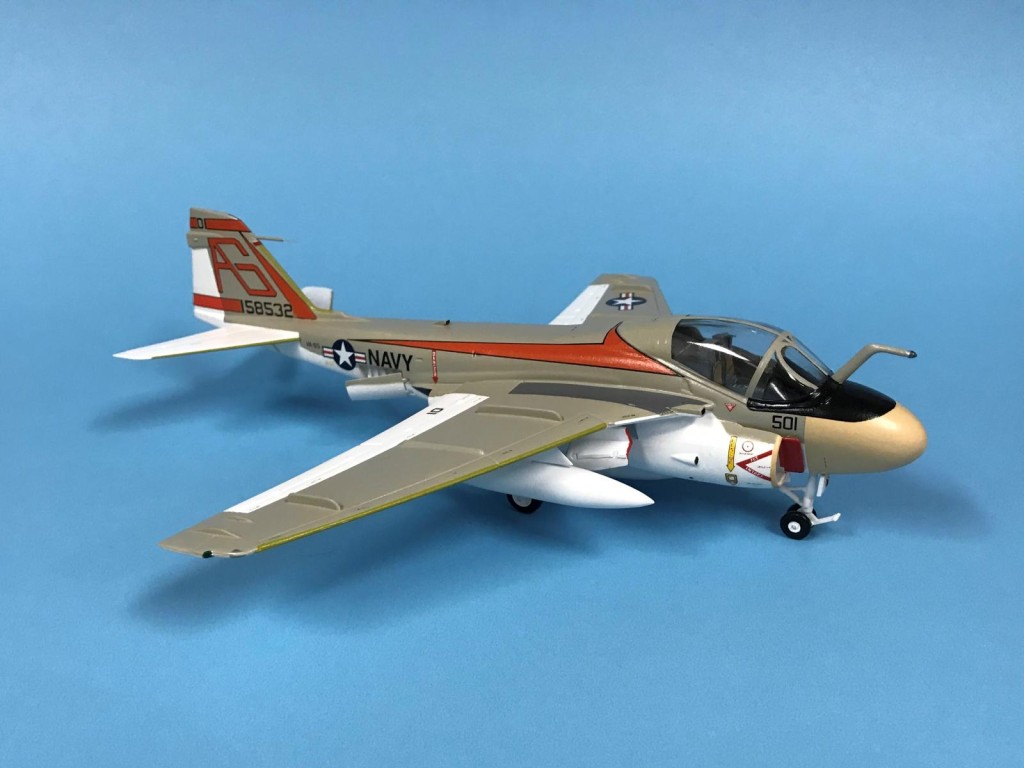
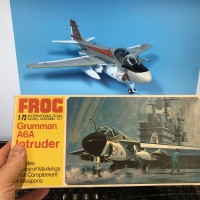
1/72 A-6 Intruder – Frog kit F272
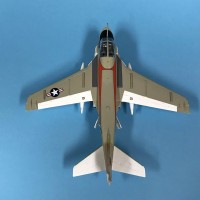
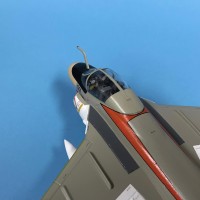
When I started this Frog Yellow Series F272 kit, it must have been back in the mid ‘80s and this Frog/Hasegawa mold may have been the only A-6 Intruder tooling in 1/72 at that time. Cockpit….what cockpit? There isn't even a joystick! Hasegawa has released the kit again and again with some refinements to the arrestor hook and updated ordnance but even the most recent Hasegawa kit has the blasted two piece canopy. The newer Fujimi and Italeri kits in 1/72 look WAAAAY nicer.
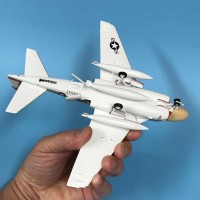
I pulled this old timer out of storage within the last year, finding it was about 60% completed with the fuselage and wings done and pretty much every joint puttied with red car bondo. More putty was needed to finish including a big gap on the upper surfaces of the ailerons/flaperons. I also found it with the front radome slightly deformed as for some reason I originally used Testors Plastic cement to secure the nose weight and the whole front end melted slightly. This thing almost went back into its storage box, but… I heard it whimpering and when I found its old Microscale 72-128 Decal Set in the box I decided to show this old kit some respect and give it a home on a display shelf. I'd go with the VA-65 Tigers flying the A-6E, I found photos of VA-65 flying from USS Independence and other photos from USS Dwight D. Eisenhower. Fancying the then red intake separator blades and tan radome and grey camo on the air intakes, I went that route though not the most accurate for the decals used. Wiki also indicated VA-65's impressive list of carrier ops which actually included flying cross deck ops off HMS Royal Ark.
Painted with Tamiya's XF-55 and after a lot of Microscale Liquid Decal film, I had only minor issues with the ancient decals which turn out to be very delicate with a lot of care needed to float them into place. Tanks were added for the photos, and Mk.82's added before it went onto the shelf.
Thanks for viewing.

Wow, George! I built that kit with those markings in ‘77 or ‘78. Nice work.
Thanks John (@j-healy), the orange ?spine striping made me choose this scheme.
Great job on this oldie, George! Good decision to finish it!
Thanks Spiros (@fiveten), glad to have it on my shelf.
Your persistance really paid off, George @georgeswork
A truly nice Intruder.
Thanks John (@johnb), it turned out better than I thought i would.
Nice! It's funny how some decals survive, and others just wither away. I too did the same kit with those markings while I was in the Navy. I used flat white model paint for undersides, for the top I got a spray can of genuine gull gray from the corrosion control shop. As it began to dry, the wings began to warp, the real stuff was too strong for the plastic.
Thanks Robert (@roofrat), good idea to get a perfect colour match, use the actual paint! Too bad it didn't work.
Great build with this old biscuit! Very fine painting!
Thanks Lis (@lis), I'm finding that thinned Tamiya acrylics never fail.
Looks great - especially with what you started with! Reminds me of the Revell version of this I build - since I build wheels-up, seems like the entire underside was putty, and none of the gear doors were made to fit in the closed position.
I love the Intruder and need to get a more recent one in my display cases! Working on the old Hasegawa Prowler at the moment - in Desert Storm colors.
Thanks Greg (@gkittinger), I used your printed fan blades on this kit and it certainly adds depth to the jet intakes - thanks for the file.
Gonna use them again on my upcoming ‘in flight’ Fujimi VF-51 F-4B.
1 attached image. Click to enlarge.
Glad they were useful! They look great in there. I'm working on a Hasegawa Prowler now, and didn't think about inserting fan blades before I put the fuselage together, then realized I was going to ream out the intakes, add some putty to shape them internally, so it looked more realistic. But now I'm scrambling to figure out how to get the fan blades back there in the hole! Should have thought through it before I started gluing!
So glad you finished it George - it looks really good the great paint work hides any lack of detail there may be.
You've finished it off into a great model.
Thanks Anthony (@anthonyricco), it 'almost' ended up in the trash can when saw the deformed radome nose. I'm glad to get this one done.
You did an amazing job - well done.