Review: Further Thoughts About the New Eduard F4F-3
Mostly I tend to work with older kits, usually things that have been sitting in my storage for a while, but every once in a while I'll jump on The Latest and Greatest, whatever that may happen to be at the moment. The new Eduard -3 Wildcat is one of those Latest and Greatest things, at least in my world. As it turns out, there's more than a passing interest in the Bad Old Days in the Pacific around here, and I've been waiting for "the" kit of an early F4F for many years. In my world this model is it; "THE" F4F-3 that I've wanted forever. You might say I couldn't resist it.
Let's begin by stating that Tom Cleaver has already posted an excellent historical overview and review of this kit and there's no point in trying to improve upon that effort. Instead, I'd like to mention a couple of things strictly from my own occasionally obsessive point of view that I picked up on while building the model. Look on it as a brief squawk list if you will!
First and foremost, the kit's instructions repeatedly steer the modeler towards things they're defining as "early model" and "late model". I don't think they're discussing early or late versions of the present kit's -3 variant when they say that but rather the F4F-4, FM-1 and -2, and maybe even the Martlets to eventually follow this initial release. What they seem to mean is that "early" means -3 and "late" means anything else, so I took it that way and mostly ignored it.
With that as a definition, here are some minor things you can do to improve the basic kit if you want to go down that road. You can obtain a superb model from the kit with no aftermarket whatsoever other than a set of wide lap belts, should you end up with an inevitable Weekend or Overtree edition of the model, although you'll probably want a different set of wheels no matter which kitting you have; we'll get to that in a moment.
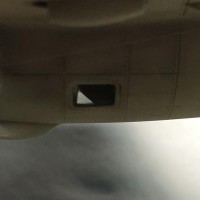
Starting with the cockpit, the F4F-3 used the wide pre-War style lap belts without shoulder harnesses. That means the molded-on harness guide that lives just under the kit's headrest needs to go. You also need to select the appropriate instrument panel from the abundance of offerings the kit provides and, while you're messing around in and about the cockpit, you might also take a moment to scratch up a main fuel tank, or at least a baffle that's shaped like one in profile view. It's a key part of the -3 and -4 Wildcat's personality and can be readily, if somewhat poorly, seen through those little fuselage windows that live under the wings. I chose to do a simple painted baffle and it took less time to fabricate one than it's taking to describe the effort here.
The main wheels and tires are beautifully molded but they're also wrong if the airplane you're modeling was operating from a carrier. You actually want smooth tires rather than the ribbed ones provided by the kit; Eduard has an appropriate set in their own aftermarket but in my extraordinarily jaundiced view they should have been in the box in the first place. (Bad Eduard. BAD!) Note that the smaller of the two tailwheels provided replicates the hard rubber item used on the real airplane for carrier operations, a definite plus for the modeler.
The crankcase cover on the face of the engine is missing a bit of detail. I ignored it but you may choose not to. I mention it only because it's a problem, albeit a small one, that exists with the kit.
There's an error in the instructions as well, one which switches the position between the radio antenna mast and the fuselage ID navigation light---the radio mast goes up by the canopy, but you already knew that, right? This is probably as good a time as any to note that the F4F-3 used several different variations of antenna wires throughout its life in the Fleet. They're difficult to see in most photographs but options exist, should you care to chase down that particular rabbit hole.
Finally, there are the decals. They're Eduard's new ones and they don't look very good on their paper backing. They also look fairly shabby after they're applied to the model but they look absolutely great, almost painted-on in fact, if you let them cure out completely and then peel off that nasty carrier film that's on top of the markings. I shamelessly cribbed a method from a guy on another web site and it worked perfectly for me so I'd like to share it, along with an apology to the individual who came up with it first because I can't remember his name or the web site I saw it on!
-
Flood the area where the decal goes with Mr Mark Setter, then apply the decal.
-
Press the decal down firmly once it's in place, getting rid of any air bubbles or wrinkles that may occur.
-
Hit any raised areas that aren't conforming, such as flap guides, with Mr Mark Softer. You won't need it anywhere else, though.
-
Walk away from the model and LEAVE IT ALONE for at least 24 hours.
-
Once everything is dry and cured out, take some Tamiya masking tape or similar, or the tip of a hobby knife blade, and lift an edge of the decal film. It will come off, and you can then gently lift away all of the carrier film with a pair of tweezers.
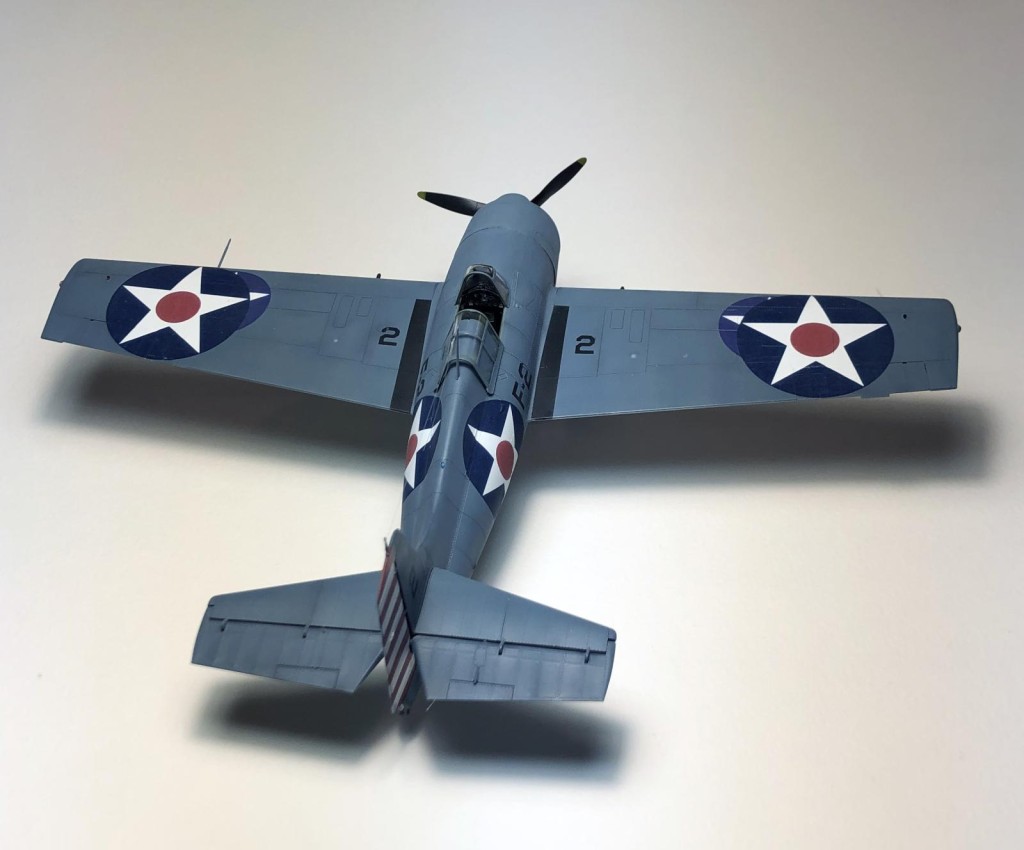
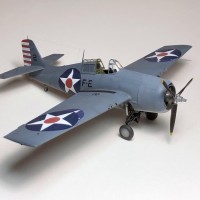
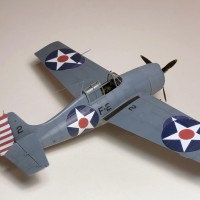
All of the decals on my model are from the kit and were applied in the manner described above. I ended up with one minor issue by using this technique, where a small part of the number 2 on the fuselage pulled away when I removed the tape, but it almost looks like wear and tear on the airplane and I left it the way you see it here, mentioning it because there is an element of risk involved in using the kit decals with this process. You might want to take some of the decals you don't plan on using and practice with them to become comfortable with the procedure before you commit to it! Remember also that Tom mentioned Yellow Wing decals as a viable alternative to Eduard's offerings should you be uncomfortable with using them. I certainly concur with that.
Finally, here are a few general notes that may be of use.
The mounting holes Eduard provide for the landing gear and other components that live inside the forward fuselage around the wheel wells are probably more than adequate for their job but I didn't trust them, preferring instead to drill them all the way through. That has the added benefit of allowing the modeler to completely seat those fragile components and wick in some Tamiya Super Thin or similar, applied from behind. A different approach, using white glue after the model was painted, was employed to set all the exterior navigation lights in place. They're very tiny and you'll probably want to stack the odds in your favor when dealing with them so opening up those holes a bit is a good idea, at least in my world.
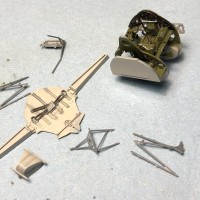
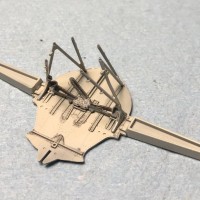
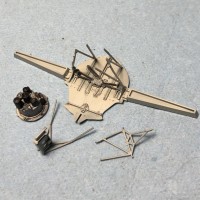
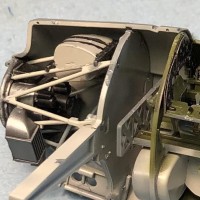
As Tom also noted, care is required to fit the interior and the stuff that lives in the wheel wells. The kit offers many opportunities for construction drama due to its fidelity to scale and the resulting tiny size of many of its components. Slow and steady will definitely win the race here! I've enclosed a couple of images from the kit's construction to illustrate that---please note that things that can't be seen in the completed model aren't particularly well-finished on the model, and that it hasn't been weathered yet.
At some point in the future it's entirely possible, and even probable, that someone will improve upon this kit. For now, though, it's very much the gold standard, F4F-wise. Its issues are minor and easily resolved.
Pilots; Man your planes!
Nice model Philip! Nothing wrong with the guilty pleasure of buying the “latest mean toy” around
Like others here, I have some experience with these “peel the film” Eduard decals, and quite frankly am not as enthusiastic about them as you are.
In fact I observed that removing the film over single colour layer decals, like white numerals or Hinomarus was problematic. However those more “layer thick” decals like German crosses went smooth and problem free. I can also say that if the film isnt removed the decal will look quite nice also.
Great job as usual, Phillip!
Thanks for all this important kit info!
Excellent build, Phillip @phillipfriddell
Thanks a lot for sharing this valuable information.
Great job, Phillip (@phillipfriddell). You have certainly brought additional clarity to the build process. The model and markings are spectacular.
Philip - Great work on the kit and a superb result.
Eduard is referring to the "early," "middle" and "late" refer to different versions of the F4F-3 - the different engines have different cowlings, there are different windscreens, etc. The instructions are clear if you decide which one of the markings options you want to do, then look at the instructions where they refer to that specific sub-type. It has nothing to do with the F4F-4 or FM-2, etc.
Also, according to photos Dana Bell put up of the F4F-3 interior, Eduard has it right about the fuel tank. Also, once the fuselage is closed up, you can't see anything anyway, making the whole point extremely moot.
As to the decals, if you use Solvaset on them as you would on any other decal, the whole thing settles in without problem and looks good. That peeling business was invented by someone who could flunk the IQ test low enough to be a HyperFlailer.
Thanks for the compliments, guys---much appreciated!
Tom, thanks very much for your kind words regarding the finished model. I'm a still a bit confused about the early/middle/late thing, though. I went back and pulled my instructions, the early/middle/late comment actually involves less than I remembered it to; just the seat belts and instruments between the rudder pedals. My bad! The variations between the various -3s including cowlings and engines are defined in Eduard's usual way coding upper-case letters within blue "boxes" as are most of the other differences without reference to the early/late thing---a minor mystery as to why they chose those descriptions in the first place, unless they were in a hurry to get the kit released before the Nats maybe. The -3 only had lap belts so in that regard the late thing needs to be disregarded.
I have to disagree with you regarding the main fuel tank, however. It's definitely there and can be seen if the observer is in a position to look straight through the fuselage windows out the other side of the airplane. It's hard to see it but it's there!
Thanks for the tip regarding setting solutions used without peeling the carrier on the decals. My own experience was a bit different in that regard but I plan on building at least one more -3 so I'll give it a try next time around.
Best,
phil
Nice info on the build, Phil and an awesome looking Wildcat.
Wild looking Wildcat!
I am in awe of the work and research you guys achieve. I have only ever modeled 1:20 F1 cars and 1:12 bikes, but this is certainly whetting my appetite to build a plane or two. Great job Phillip!
Beautiful Wildcat Phil !
Nice work, Phillip!
Very nice Phillip! Thanks for sharing your insights on the kit. ?
Thanks for the info, congratulations for the build!
Superbly written/explained. Thank you Phillip.
Not much a fan of the Wildcat series, however if there's a release with a pre-war 'yellow wings' option or better yet a Martlet, then I'll be investing in it !
All the best from NZ.
Thanks to everyone for your kindness and comments regarding the Eduard F4F-3. They're all much appreciated.
Ian, it's time to do some investing! The initial ProfiPack release of the the F4F-3 includes markings for a pre-War yellow wing -3, plus all of the necessary parts---engine, cowling, windscreen, instrument panel and shroud, and collimator (better known to most as a telescopic sight). If I'm not mistaken, Eduard have stated they'd be doing a Martlet or two as well, but you can have your classic early Wildcat right now!
Best,
phil
Good looking Wildcat!
Very nice build review, Phillip! I just got the dual Midway release (-3 and -4 in one box) and am drooling over it. Haven't decided yet whether to peel the decals or not, but I might try it with some under-wing markings first to see how it goes.
Michael
Hi Michael.
Thanks for your kindness. For what it's worth, I've tried two of the three ways the decals will supposedly work out, and with varying results
Using a conventional decal system with no further manipulation---I've used the Mr Mark Setter/Softer system and it really works well, but I haven't been able to eliminate the film on the top of the decals by doing only that.
Using the Mr Mark process to thoroughly seat the decals and then peeling the film as noted in the build after letting them sit for 24 hours. It worked pretty well on that model but I've had issues with others. I'm calling it Operator Error!
Next up for me will be applying the decals to a model, thoroughly seating them and letting them sit for 24 hours as before, and then going over them with a light application of mineral spirits, a method which has been suggested as a non-destructive way to deal with the issue. With any luck that will provide the key to the highway---we shall see!
phil
I look forward to your report!
Michael