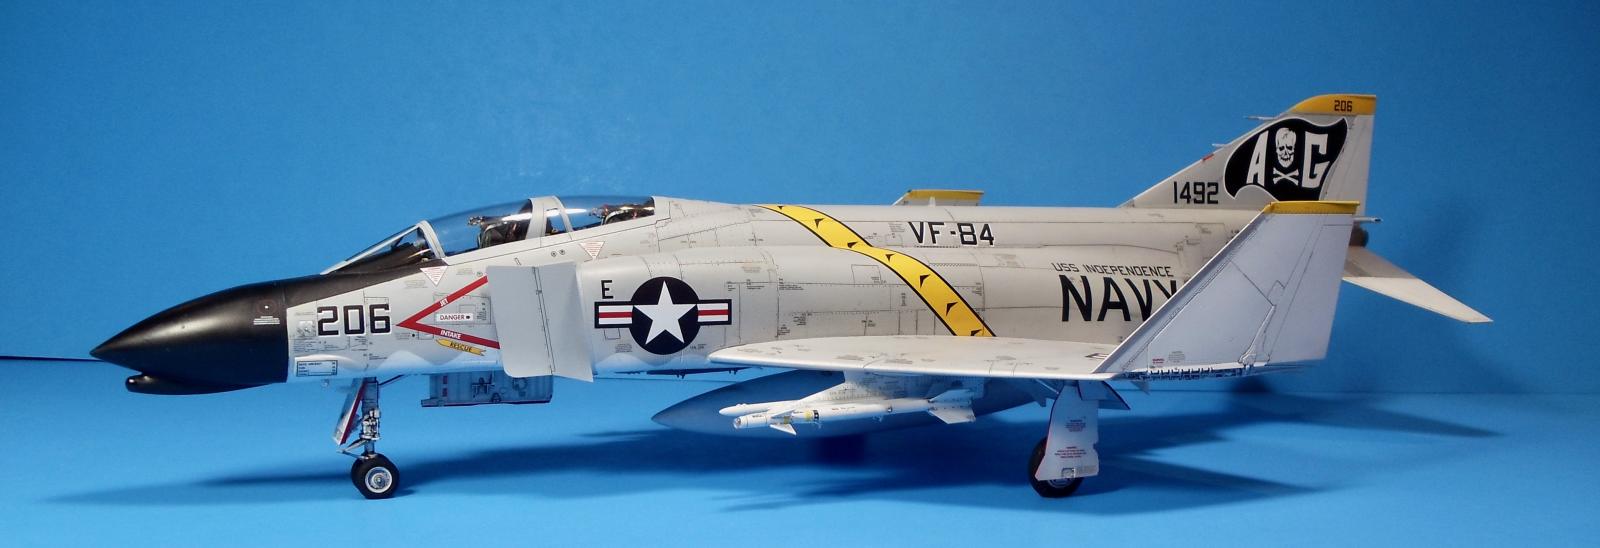
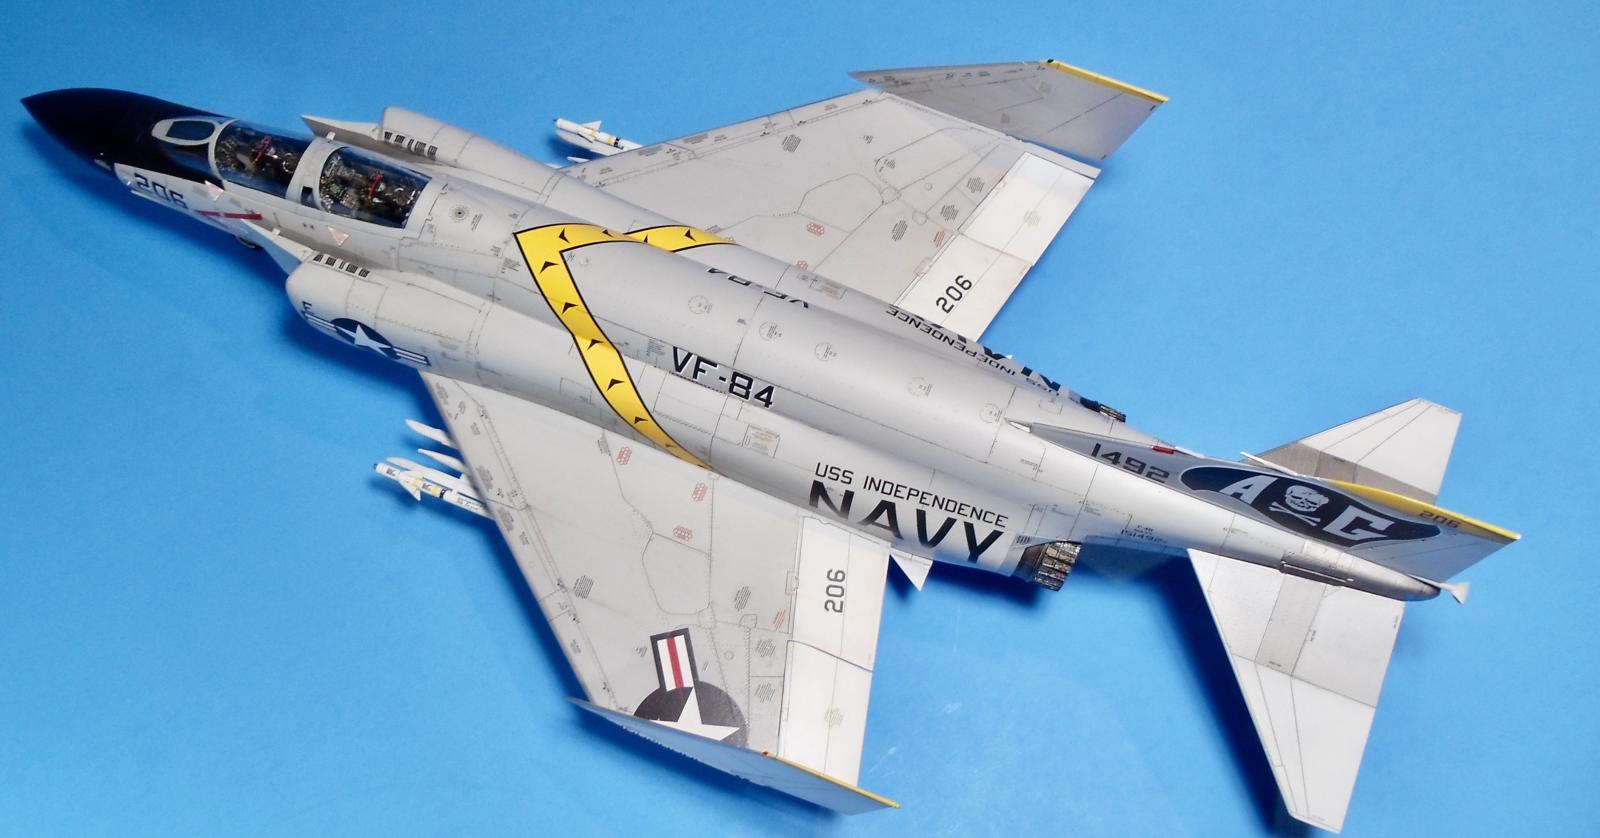
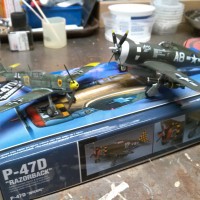
When I close my eyes I see teeeny tiiiny stencils.....Tamiya 1/48 F-4B
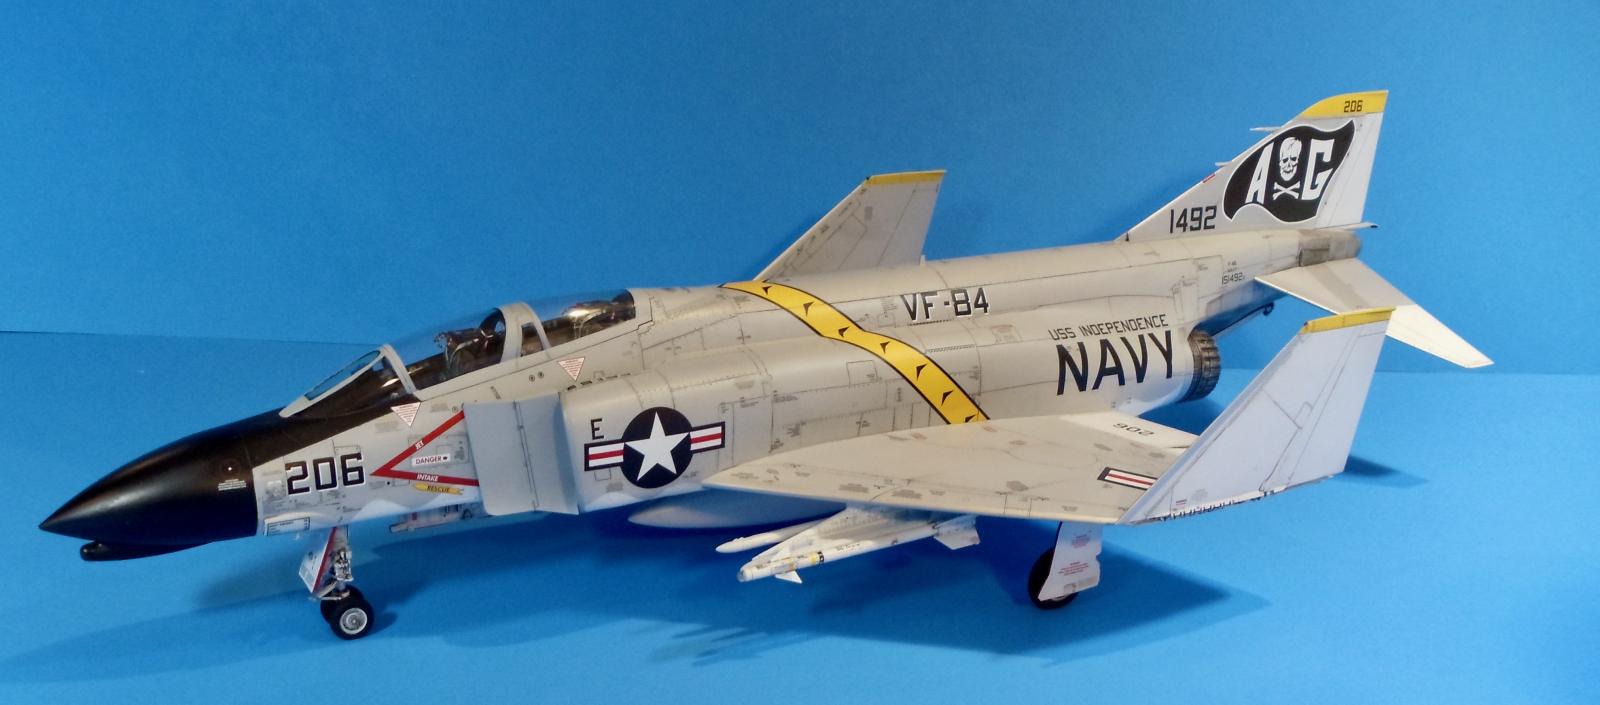
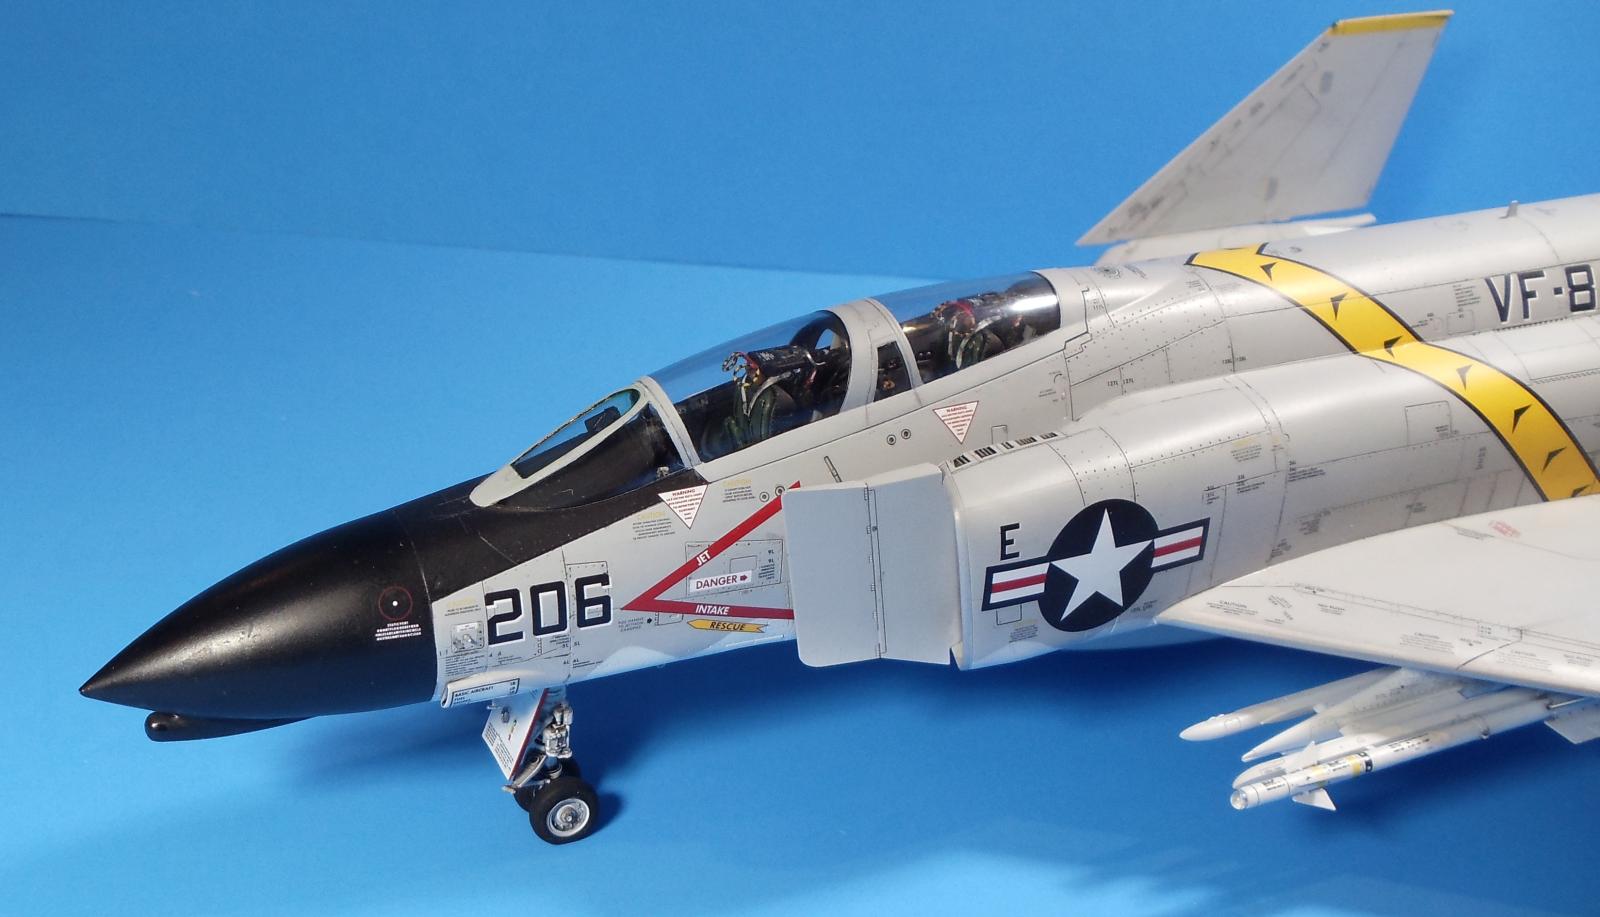
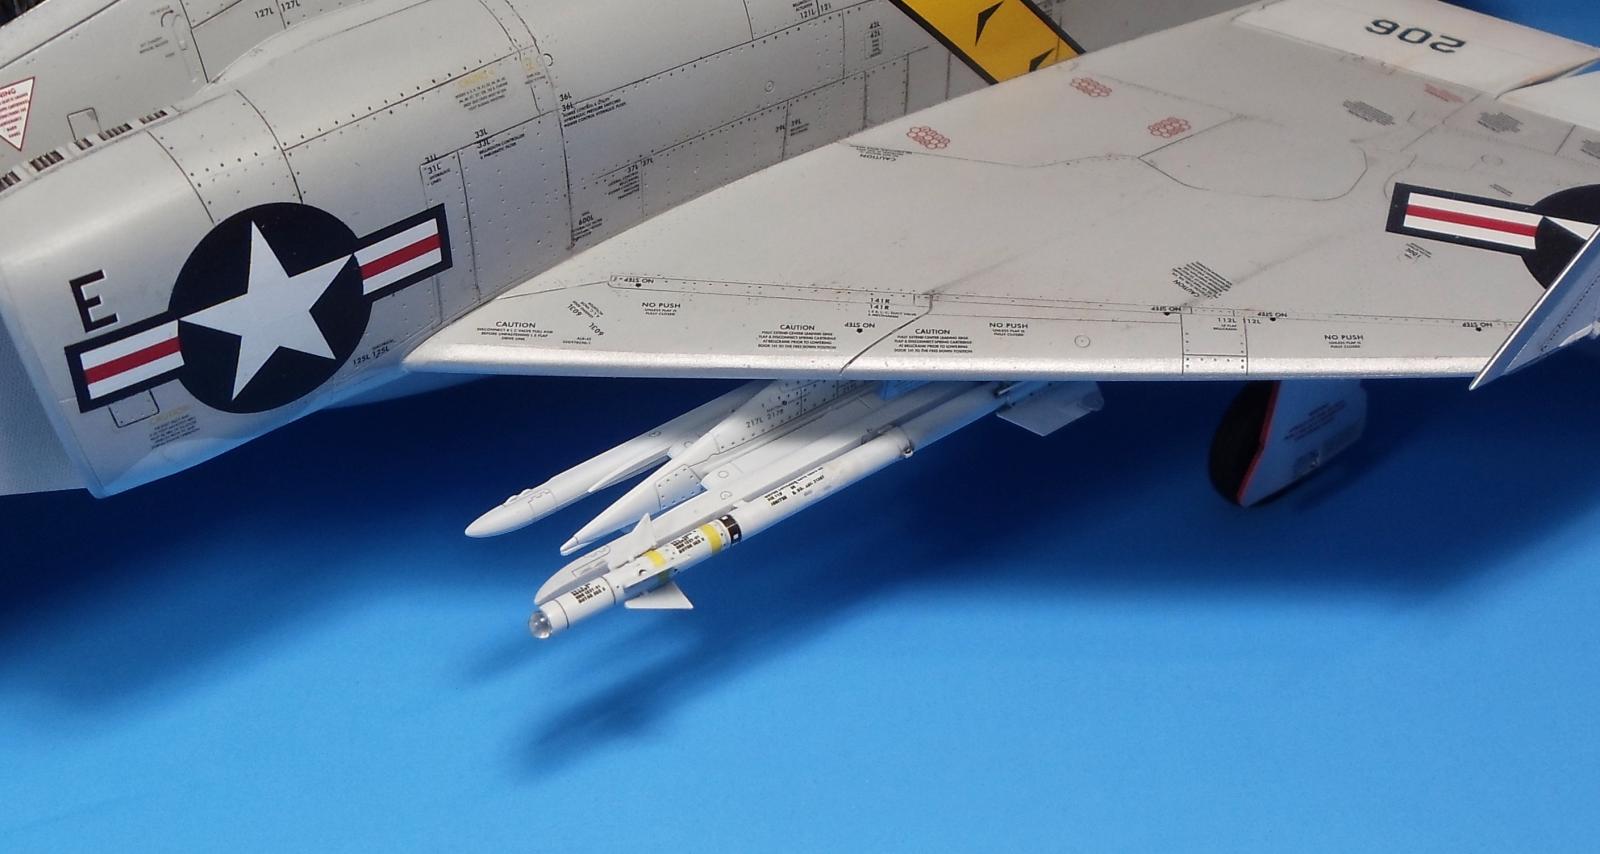
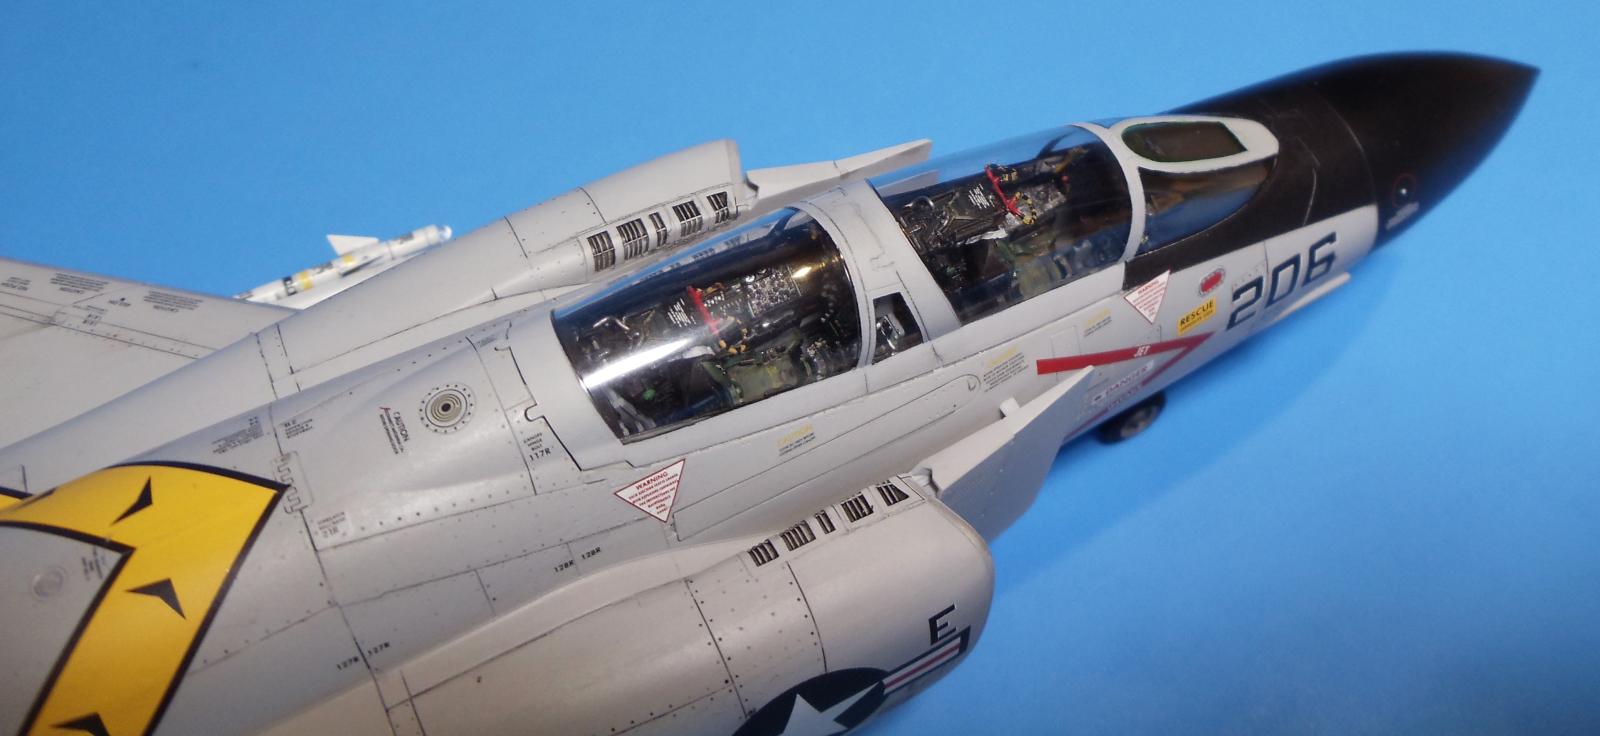
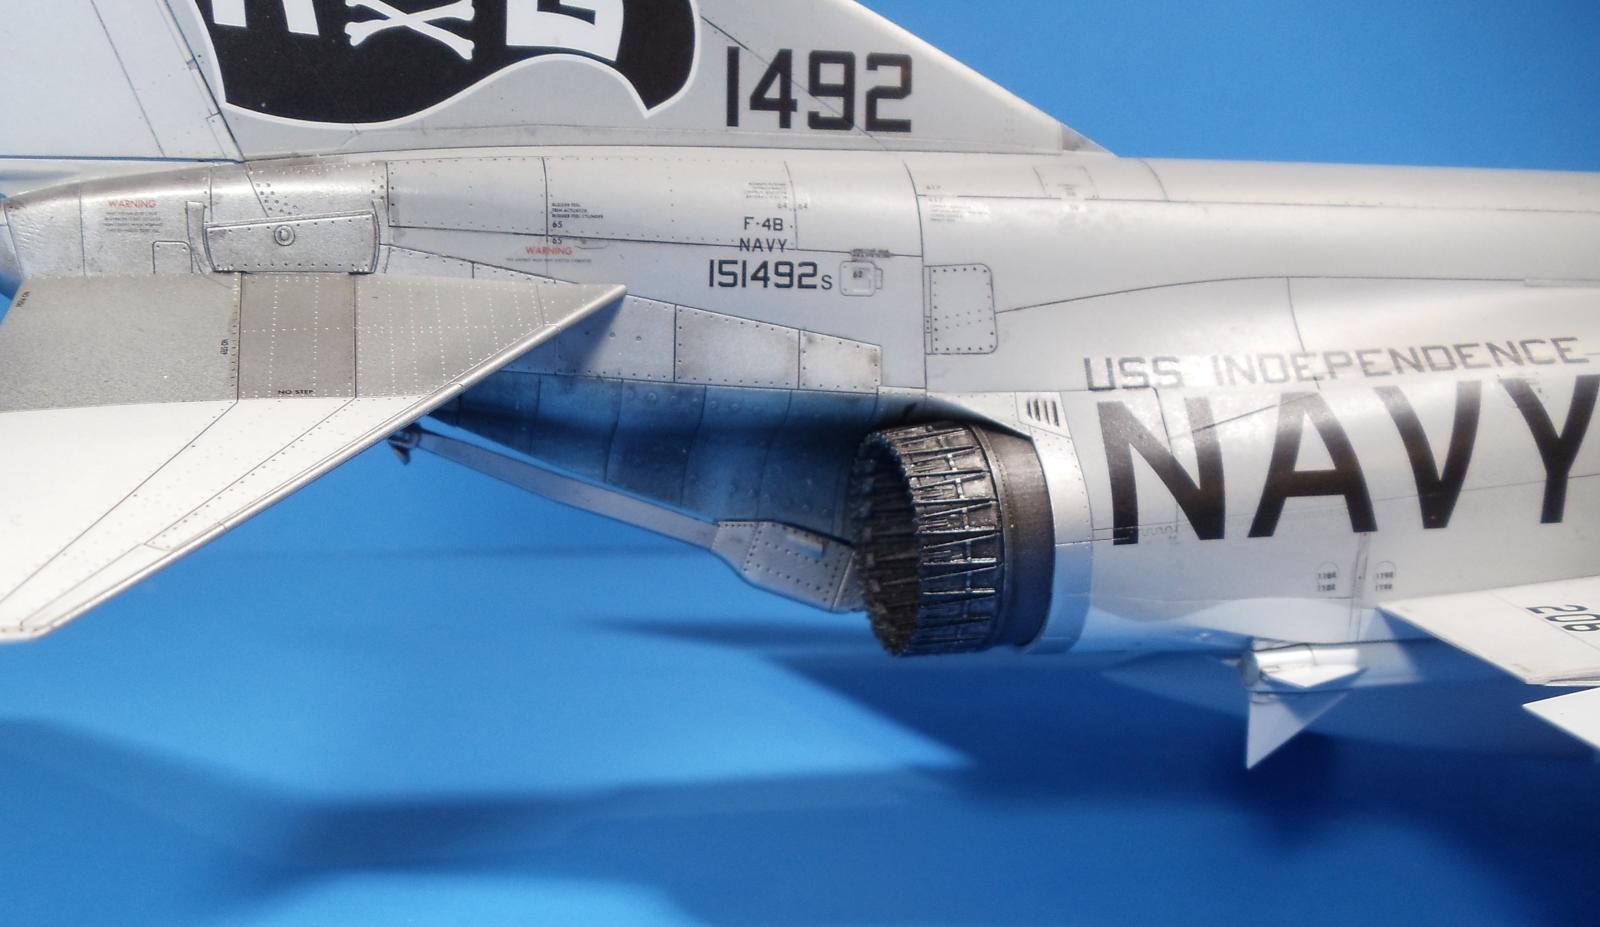
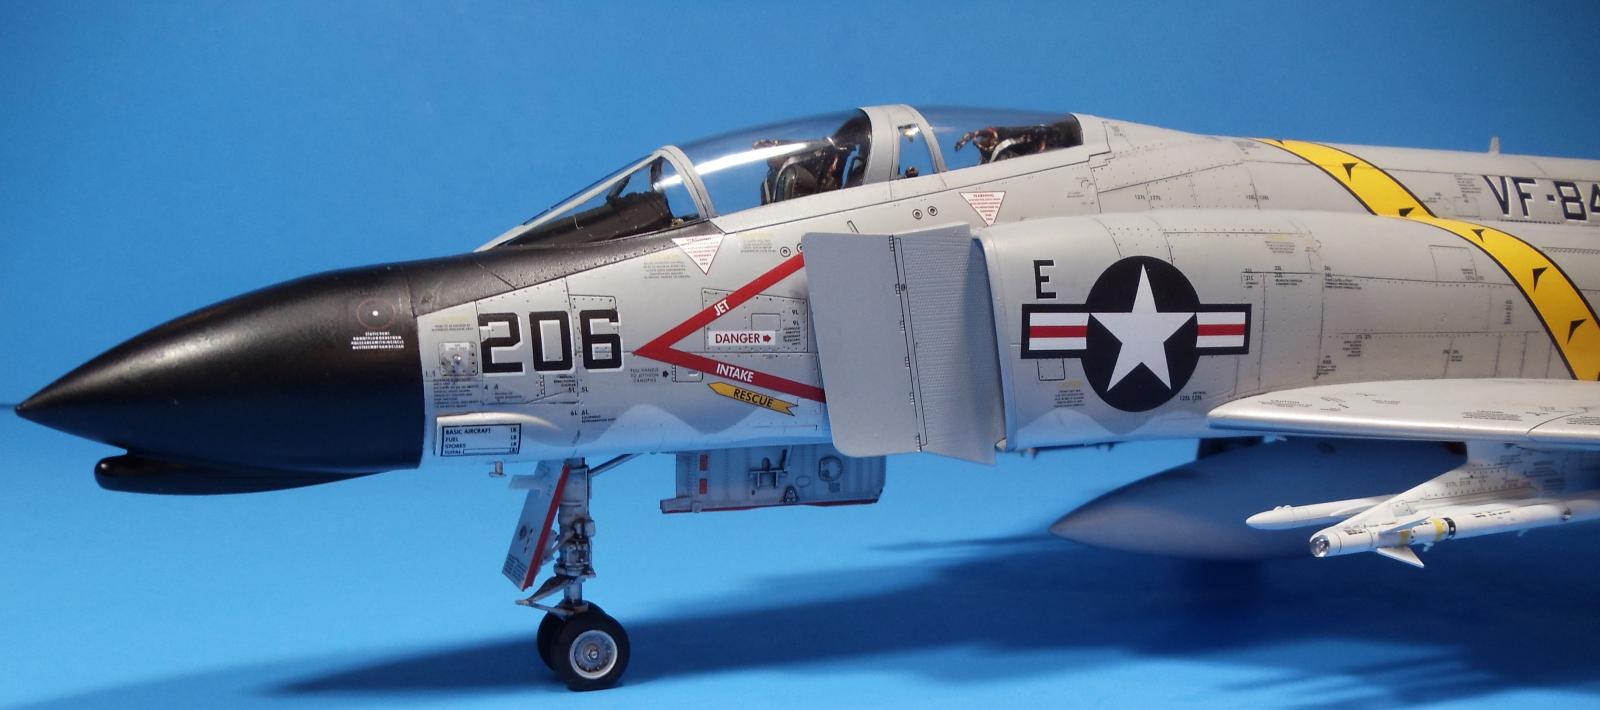
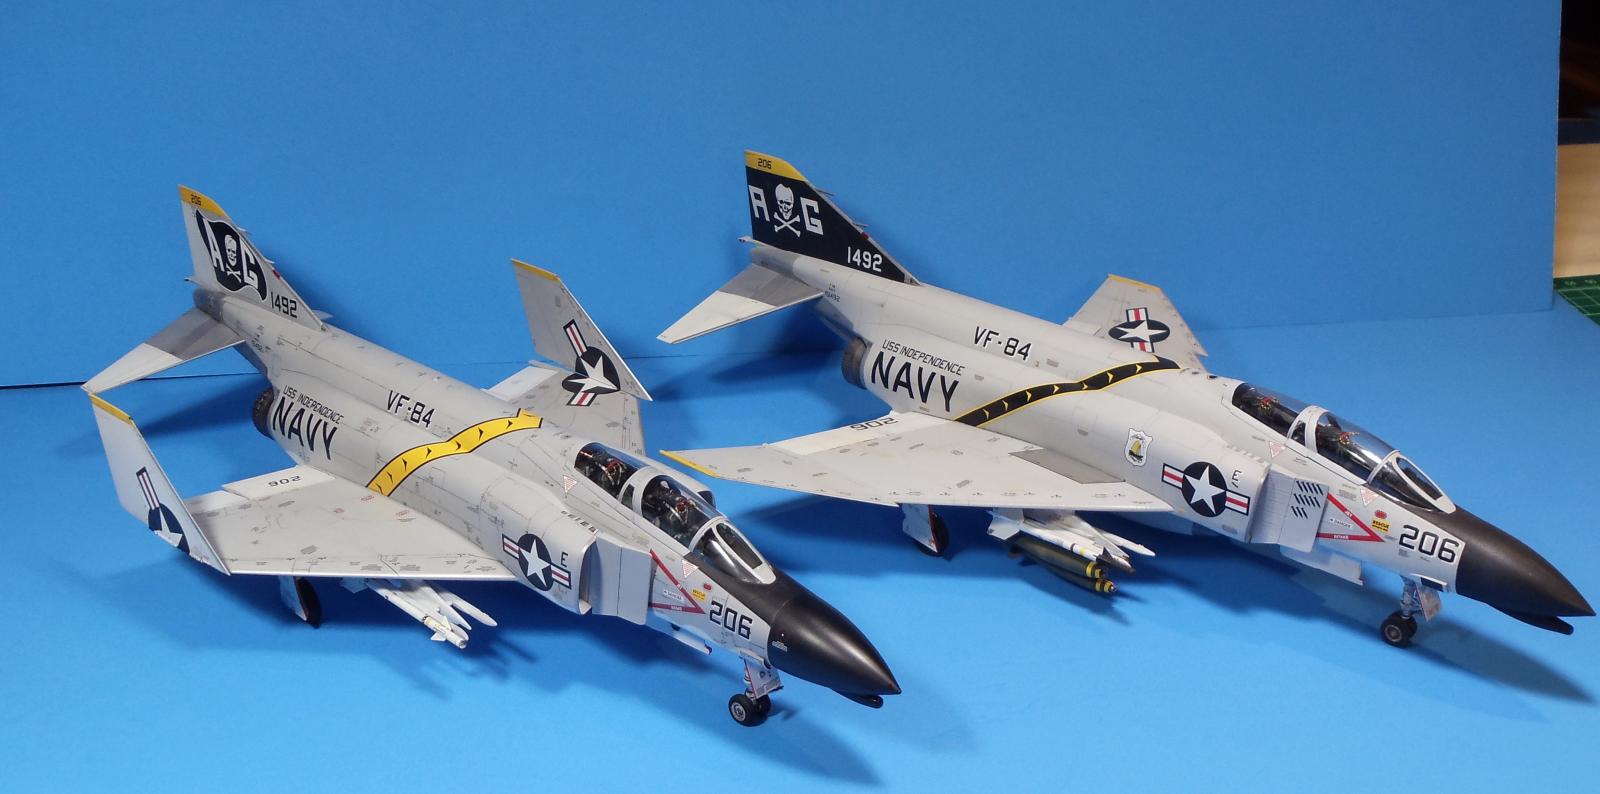
I won't add much to the narrative of what a great kit this is, but one feature I really enjoyed was the folded wing option. I used Furball decals for the VF-84 markings (anyone else think their national insignia is too light of a blue?) and the stencil set, which was INSANE! It took me at least three weeks to stencil the thing and I did not use all of them, most of them, but not all. Eduard exhaust nozzles, early 'winders, tail hook, MK5 seats, bronze landing gear and wheels. Quinta Studios interior set, just amazing lost because I closed the canopy (AECS Anderson will NOT have his canopies open on the deck unless we are launching or maintaining!) and tinted the armored glass with future and food coloring. I also scratch built the early chin pod since the ones in the kit were for far later versions. The Eduard parts were all great, but I would say the bronze gear was a major waste of money. The gear didn't fit well, and while well detailed one of the newer 3D sets that are out would be a better choice for less$$. It is far superior to the Academy kit, side by side there is no comparison as. far as detail goes. Now at twice the price is it worth it? The Academy kit builds well and looks the part, but Tamiya blows it's doors off. I realized as I was decaling that I had built the Academy kit as the same aircraft, but with markingsfor later in the Indy's war cruise. At any rate, I hope I did the kit. justice! Now for something a bit less stressful!
The result is amazing, Rob! An air force joke is that one does not have to read F-4's technical publication, as it is all imprinted on the plane 🙂
Really great work here, Chief!
Fantastic build, Rob @robandy
All the stenciling came out perfect.
Great work on all the additional parts.
You did a great job on this, Rob, is the Meng F4-G Wild Weasel next?
Looks great Rob, adding all those stickers makes her look like the real thing. However,how's your eye sight?
Well done, Rob! Looks like, in the top pic, that you can still see the cockpit detail. Looks nice next to it's stablemate.
Fabulous result! Thanks for sharing- all the time and effort paid off big time!
Awesome Phantom, Rob! Cockpit and Quinta stuff look amazing, even through the canopies. I'm using their stuff in an Meng F-18 build and the detail is pretty cool. Someone should come out with a No Step and No Push stamp in 1/48 scale, help save my eyes from going batty.
Very nice Phantom!
A beautiful Phantom! I love building Phantoms, but the two things that always slow me down from starting another are a) stencils and b) having to paint/mask the NMF on the tail section. I feel your pain (and eye strain)!
Thanks everyone!
Amazing build of an amazing model. I'm finishing up using my copy using the Sundowners markings which don't have all these crazy stencils (which is partially why I picked those markings.)
Yes stencils always tend to go by the wayside as the aircraft go through re-paints, at least in the Navy. I know a sister squadron got brand new Hawkeyes when I was in VAW-124 and I was amazed at how many stencils were on it, as well as the screws for various panels on the wings being color coded (try doing THAT on a model). Ours in 124 were fairly old E-2Cs and only had the essential warnings and "danger" markings left at that point.
G'day Rob (@robertandy),
This is a great (pair of) build(s).
Santa is bringing me the Zoueki-Mura F-4E (early, solid wing) so I can build a RAAF aircraft for a club comp next year.
These were 24 brand-new aircraft that we leased for 3 years while we waited for the F-111.
They were then handed back to the USAAF and converted to F-4Gs (I think).
As such, they would have had all the stencils when in RAAF service, so I guess that is something I have to look forward to.
I guess the other challenge will be the bare metal tail.
Yours looks great, so I'll be looking it up for reference.
Liked!
Nice work, Rob!
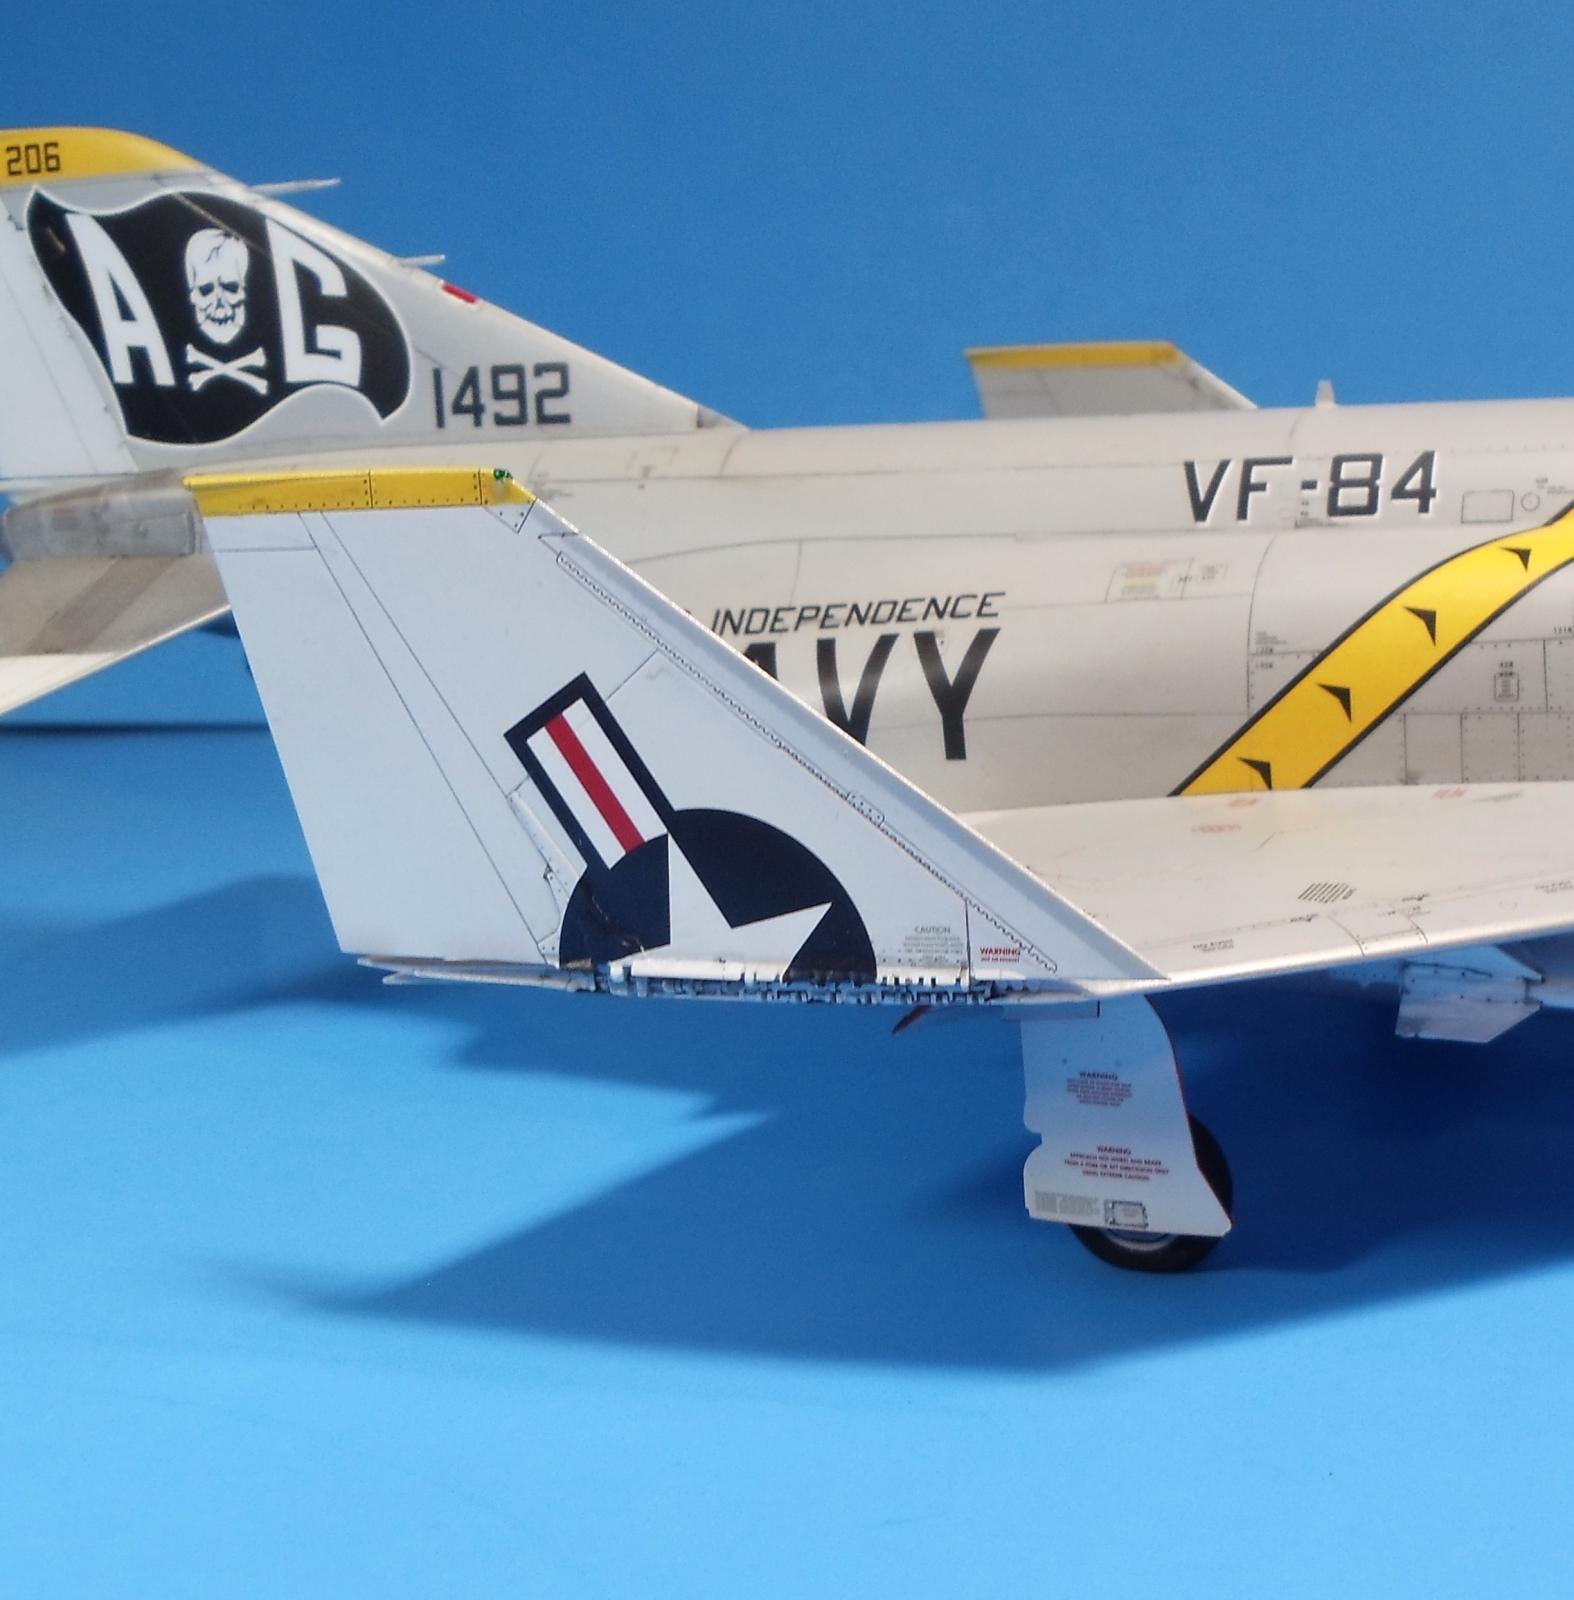
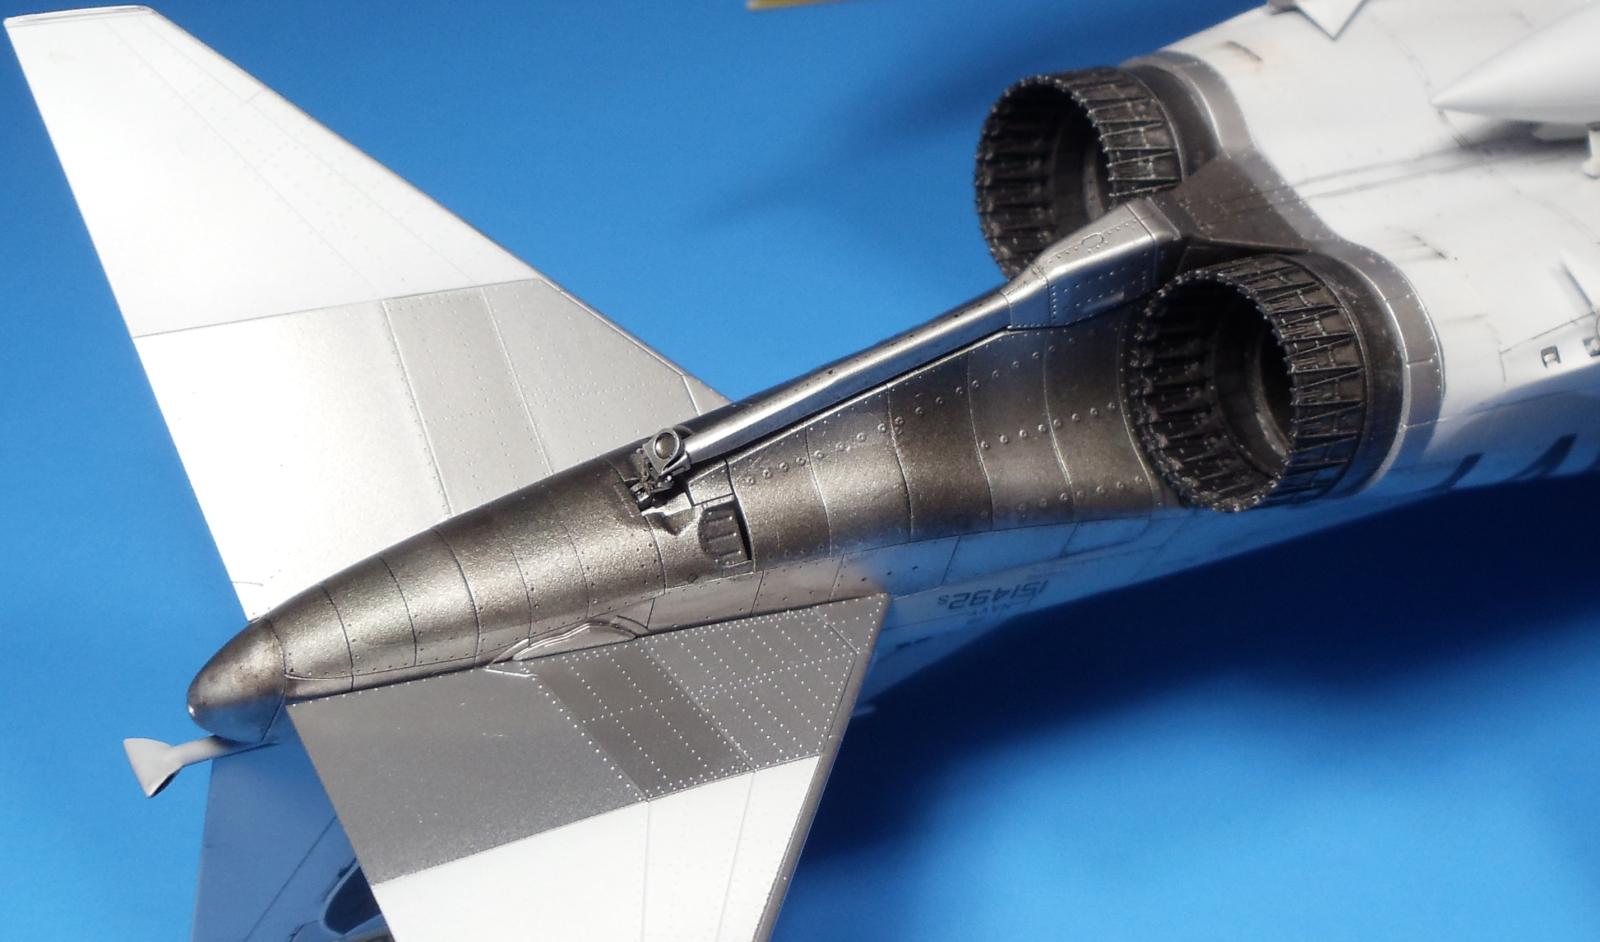
A couple folks mentioned the metal on the tail. The bare metal tail was not too hard I painted it and the corroguard leading edges last using Tamiya AS-12 decanted into a bottle for airbrusing and cut it with Mr leveling thinner. I painted the base color, then took some and darkened it with some black and layered it in thin coats to get the varied panel effects. Lastly I took Tamiya black panel wash with a wide brush and further darkened some areas. I then a q-tip with enamel thinner and further varied the effect by lightening areas that I had darkened, just a bit so they were more varied. Sounds complicated, but really was pretty easy. The hardest part was masking around the horizontal stabs. The way Tamiya has them attach they are built into the tail early on so they are moveable so they don't attach at the end as is often the case.
Beautiful Phantom. I should get this kit some time.
Having just built the Academy kit, I felt that the details were too "heavy" - deep panel lines and protruding rivets, which I had to sand down a bit. How does the Tamiya compare in this respect?
The detail on the Tamiya kit is very fine, the fit is near perfect if you are carful trimming the parts off the trees.
Great job, Rob (@robertandy). F-4s are a complex build, but you did it perfectly. My first assignment in the Air Force (a long time ago) was at Luke AFB, which was the training base for the F-4C. One of the things that always stands out in my mind was how many stencils there were on the plane. You don't realize how many there were until you build an F-4 model and put all the stencils on it. The good news here is that your model wasn't 1/72. :o) Well done.
Phantastic Phantom! Rob.@robertandy ***t Hot! With a very typical load out. We'd get a "new" bird straight out of NARF Naval Air Rework Facility, and it would be resplendent with stencils, by the end of a Med cruise many would have disappeared from corrosion control touch up work. we had one bird pulled from some corrosion work so it could fly, it was bespeckled with zinc chromate touch up spots up and down fuselage.
She’s a beauty Rob! I currently have an Academy version on the bench. I should have opted for the Tamiya version and aftermarket decals like you did. Oh well…thanks for sharing, this a wonderful result of the Jolly Rogers.
Naw, the Academy kit is great, for the price a steal really. A little extra TLC and she will build up just fine!