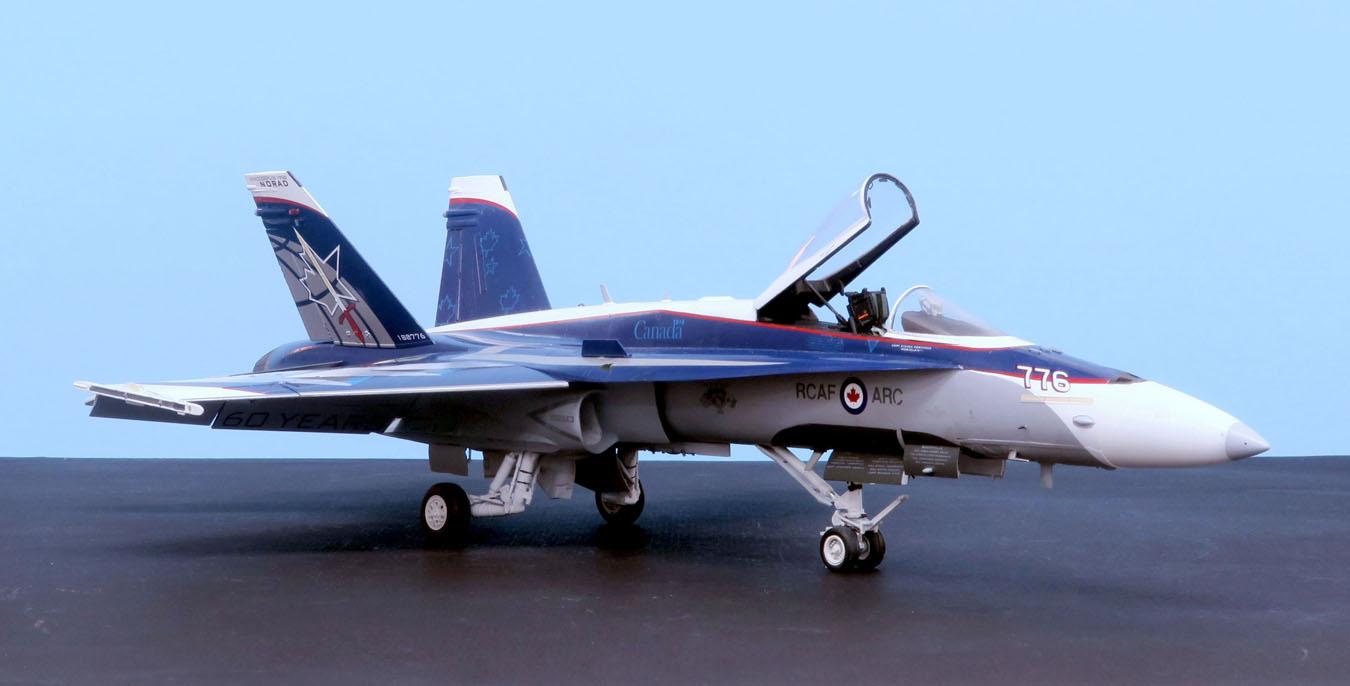
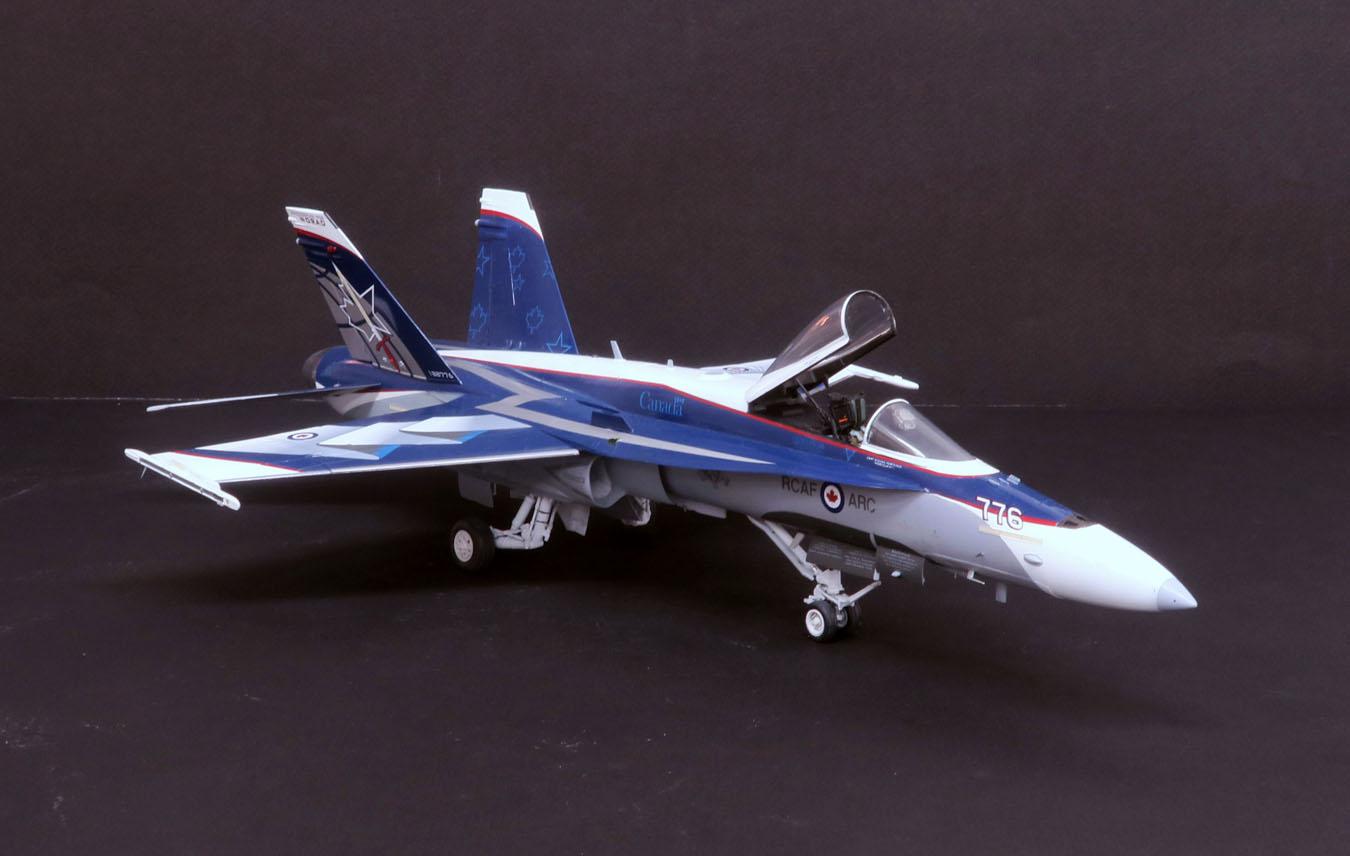
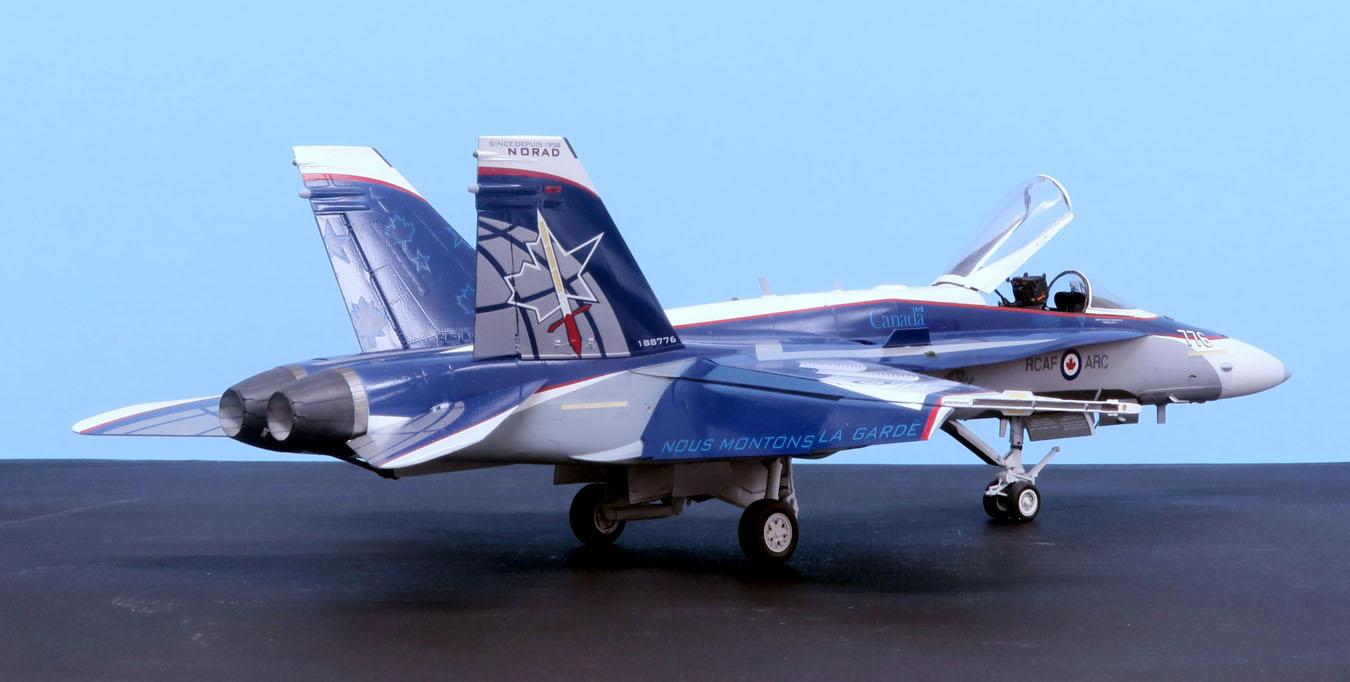
Kinetic 1:48 CF-188A Anniversary Hornet
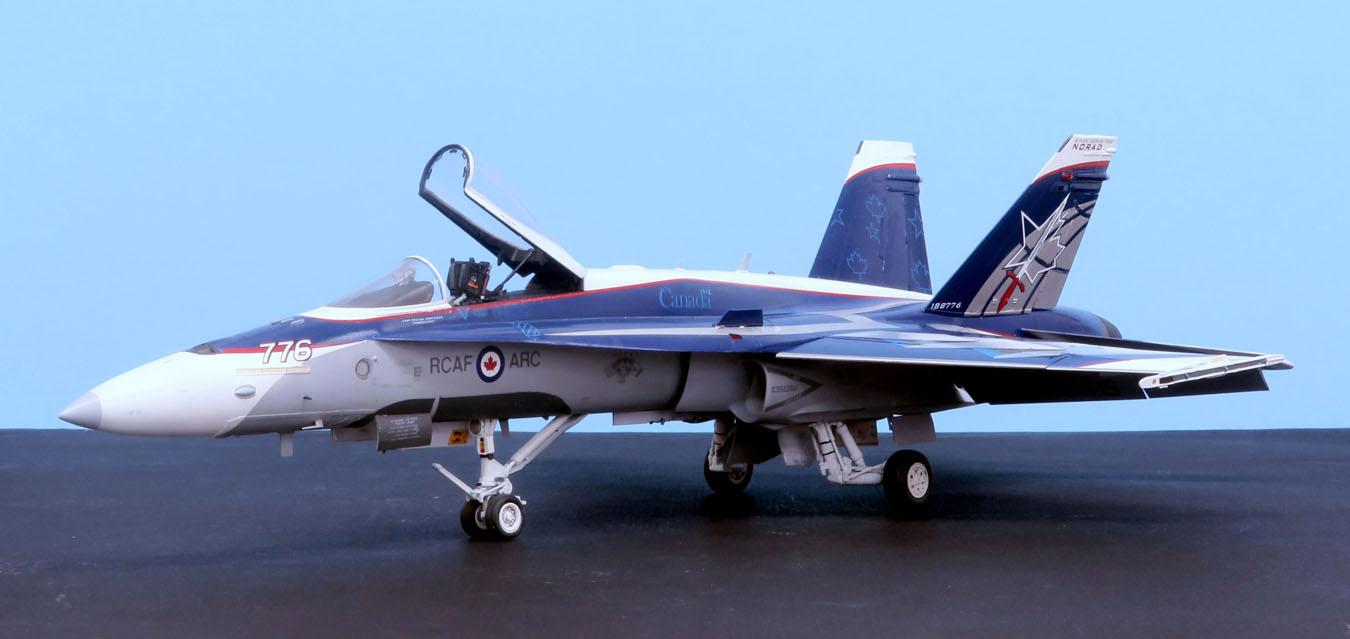
My club has an annual group build theme that culminates with a Show-and-Tell display at our December meeting. Our 2022 theme was "O Canada" comprising any subject built by Canada, manned in Canadian service, or manned by Canadians in any other service. I had a hankering to do an RCAF Hornet in one of those over-the-top anniversary schemes. When I saw the photograph of the "60 Years of NORAD" 2018 demo plane at the Two Bobs website, I knew I had to build it. I therefore invested in one of Kinetic's second generation Hornet kits, No. K48079, CF-188A, with decals for another striking anniversary scheme. From what I read online, this kit and others in the series had corrected some of the issues of windscreen fit and fin shape found in the first boxings. I also bought a Quinta Studio vinyl decal set for the cockpit and a set of Royale Resin wheels.
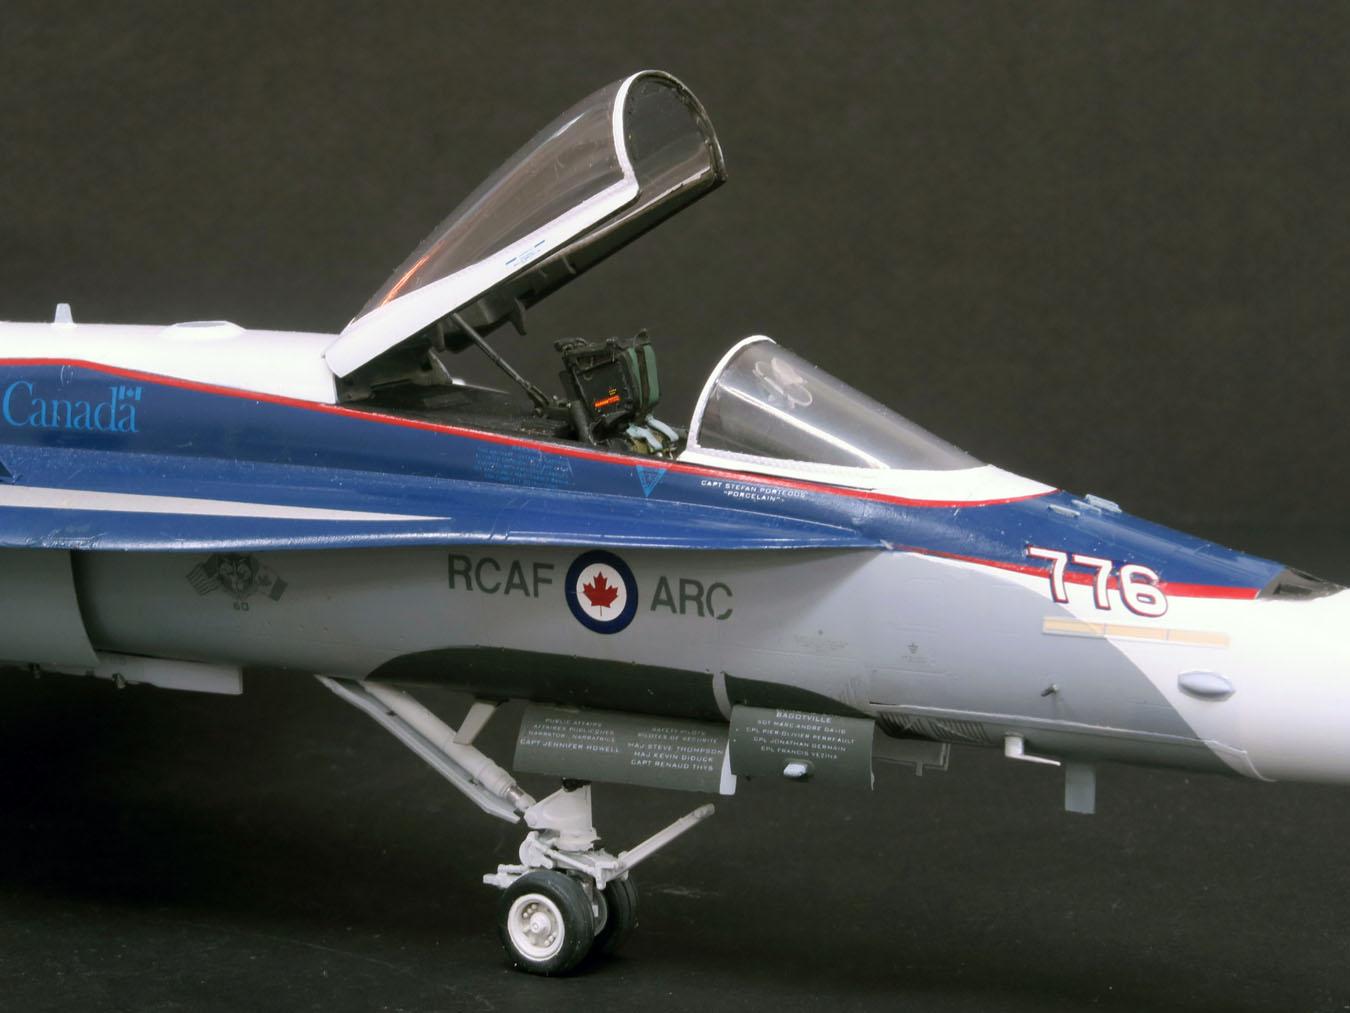
Construction began as usual with the cockpit. if you haven't tried a Quinta Studio set, I recommend them: they're easy to use and look great. You simply file/scrape all the raised detail of the cockpit parts. Then you cut a decal of the sheet, soak it briefly in water, slide it off the paper, blot it on a paper towel, and attach it to the cockpit with a bit of white glue (the decals themselves don't have enough adhesive to secure them). My only knit to pick is their rendering of the cockpit gray, which should be Dark Gull Gray. The QS color was closer to Light Ghost Gray, so I used that for the cockpit painting. With the canopy installed, it's not that obvious.
Overall I found the Kinetic kit an enjoyable build. Fit is pretty good, although some bits were pretty fiddly. For example, there are no attachment stubs for the four pieces comprising the flap hinge covers, which have to be attached drooped if the flaps are to be deployed. Fortunately there are any number of good photos showing the droop angle, but I know Tamiya would have done something to make the attachment more positive. The instructions also leave something to be desired. Although Kinetic has apparently corrected the parts mislabeling found in their earlier Hornet kits, the drawings are often vague and even misleading, seemingly reflecting earlier engineering details that were subsequently altered. A case in point is the small main gear links: The drawing shows them having a small stub that fits into a corresponding gap in the fitting on the strut; but in actuality, the link has a U-shaped end that fits around the bottom of the strut fitting, which has no gap.
I strayed from the instruction sequence in attaching the intakes. They would have you install the inner trunking pieces first and then the splitter plates and outer intakes. I had read of people having trouble here, so I started with the splitter plates, then the outer intake pieces, and finally the truncking. Without the trunking in place, I was able to flex the fuselage parts enough to get a good enough join with the outer intakes that only required a small amount of filler. Once those joints wiere solid, it was not too hard to get the trunking pieces to fit well enough that no gaps showed from outside.
Once piece of scratch-building was required: Most recent CF-188s (including this one) have a circular anti-jamming GPS antenna mounted on the top of the fuselage aft of the cockpit. The Kinetic kit didn't provide this item, nor am I aware of any aftermarket part for it. I fashioned the antenna by cutting three 3/8" diameter circles from .010" sheet styrene and gluing them together. I then cut a circular piece of masking tape to cover the central flat area which would be left in gray. I used sanding sticks to bevel the fitting, and I rubbed the bottom of the fitting over sandpaper placed on the fuselage piece so that it would conform to the contours.
When it came to joining the top and bottom fuselage assemblies, I was prepared for a struggle getting the nose assembly to fit, but it went together surprisingly well—much better than various online articles had led me to believe. Test fitting the joint minus the nose gear bay front bulkhead looked promising. When I added the bulkhead, I found the small lower locating pins were too widely spaced for the piece to mate with the fuselage, so I simply cut them off. I also thinned the bulkhead slightly with sandpaper just in case. The resulting joint had no step and just a few small gaps to be filled.
It wasn't very clear how the refueling probe door fit the inner box, nor how the assembly would fit the fuselage. Since I intended to have the probe retracted, I left the pieces out and carefully glued the probe door in place once the nose had been attached. It fit just fine.
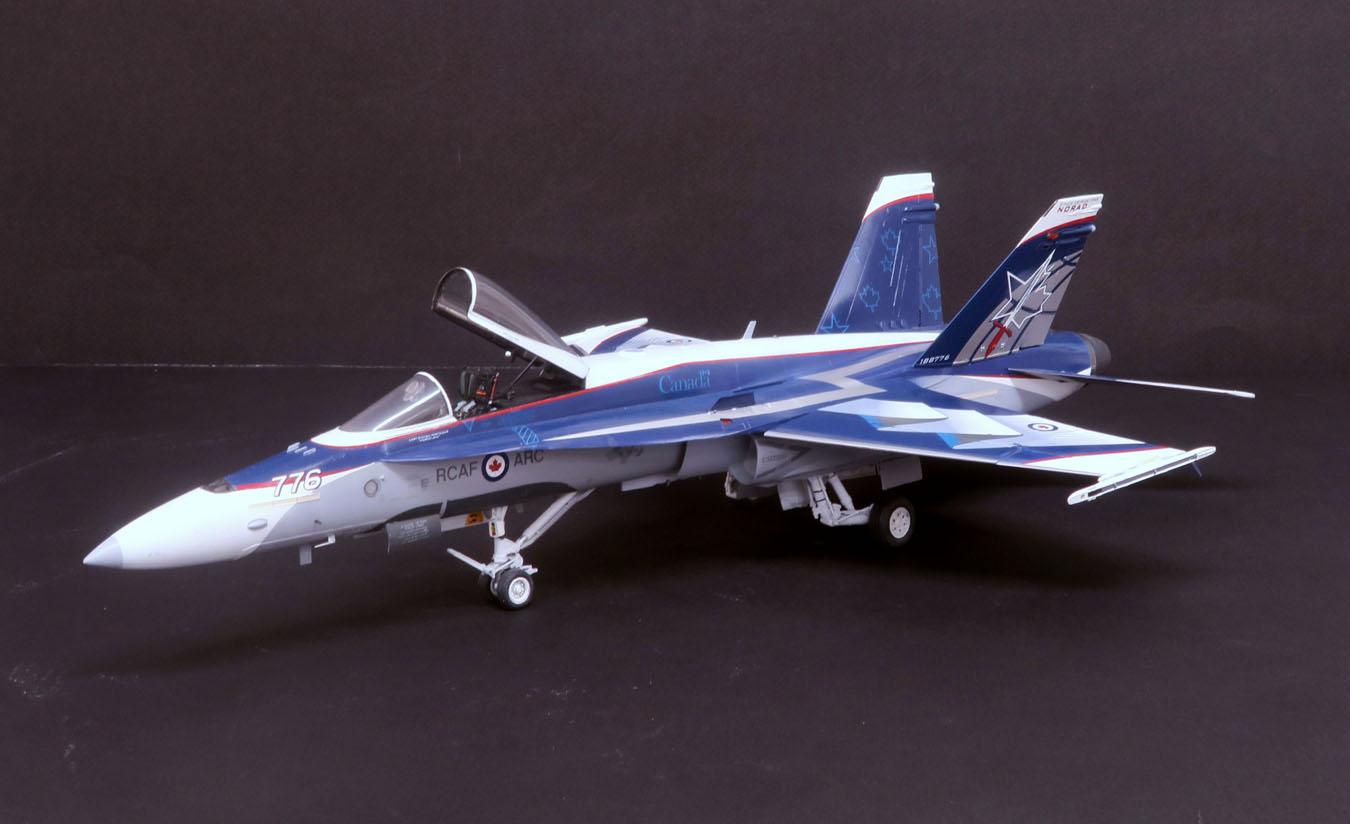
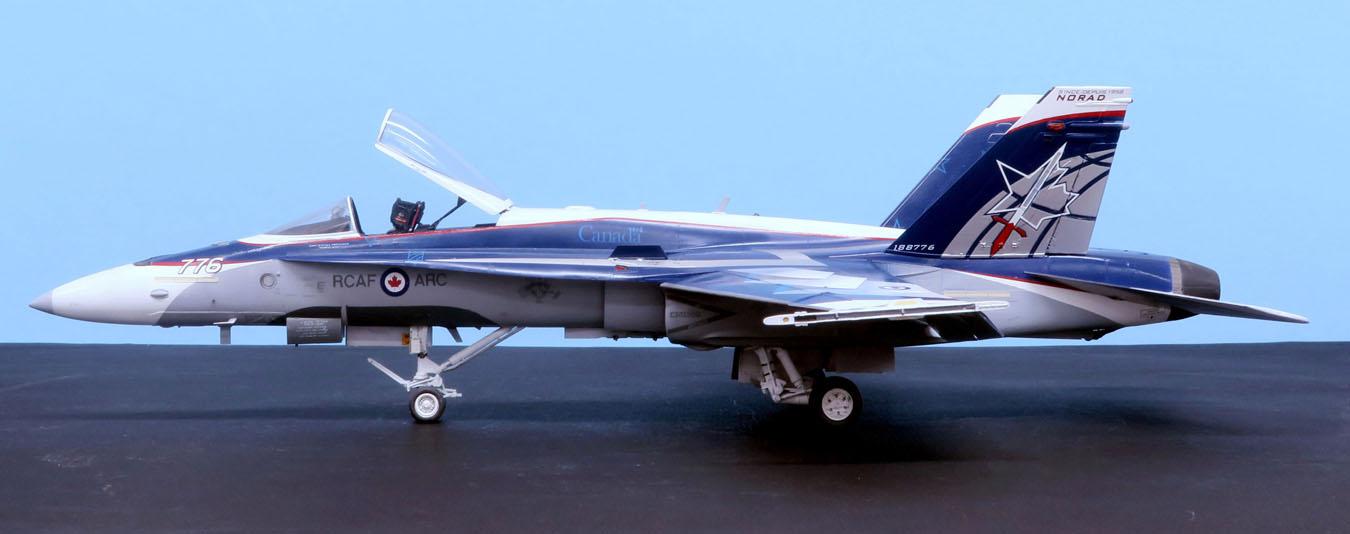
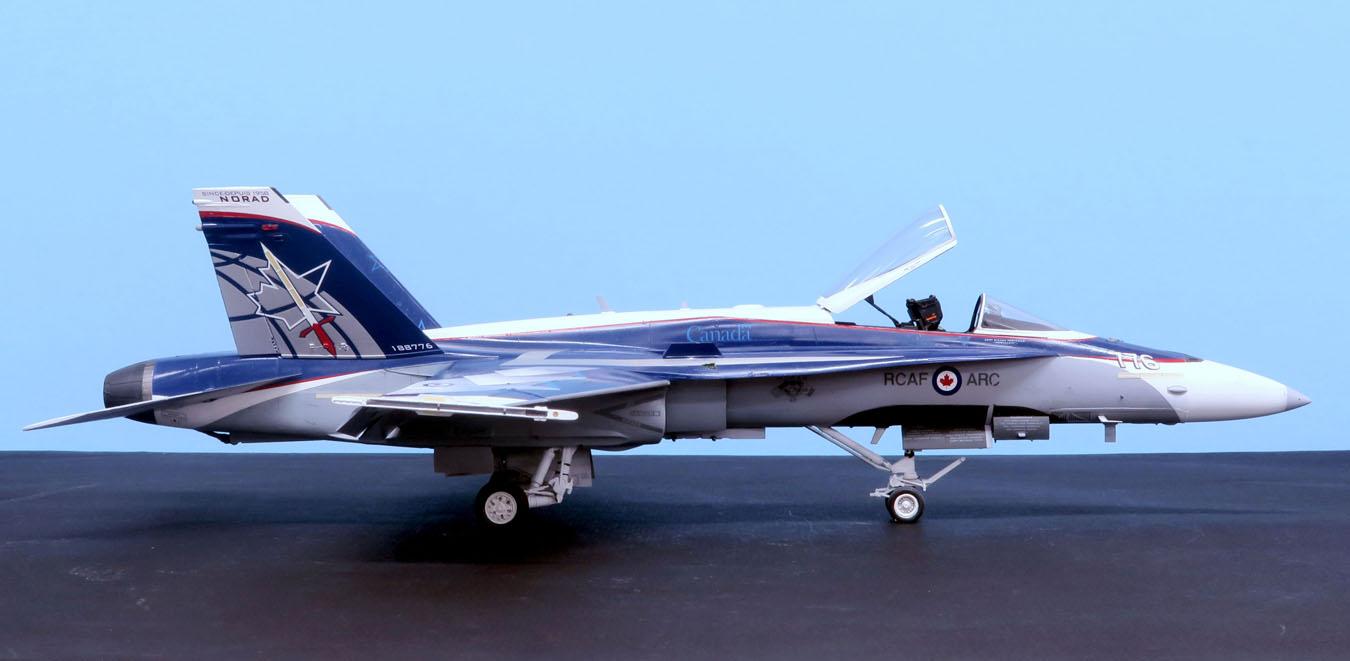
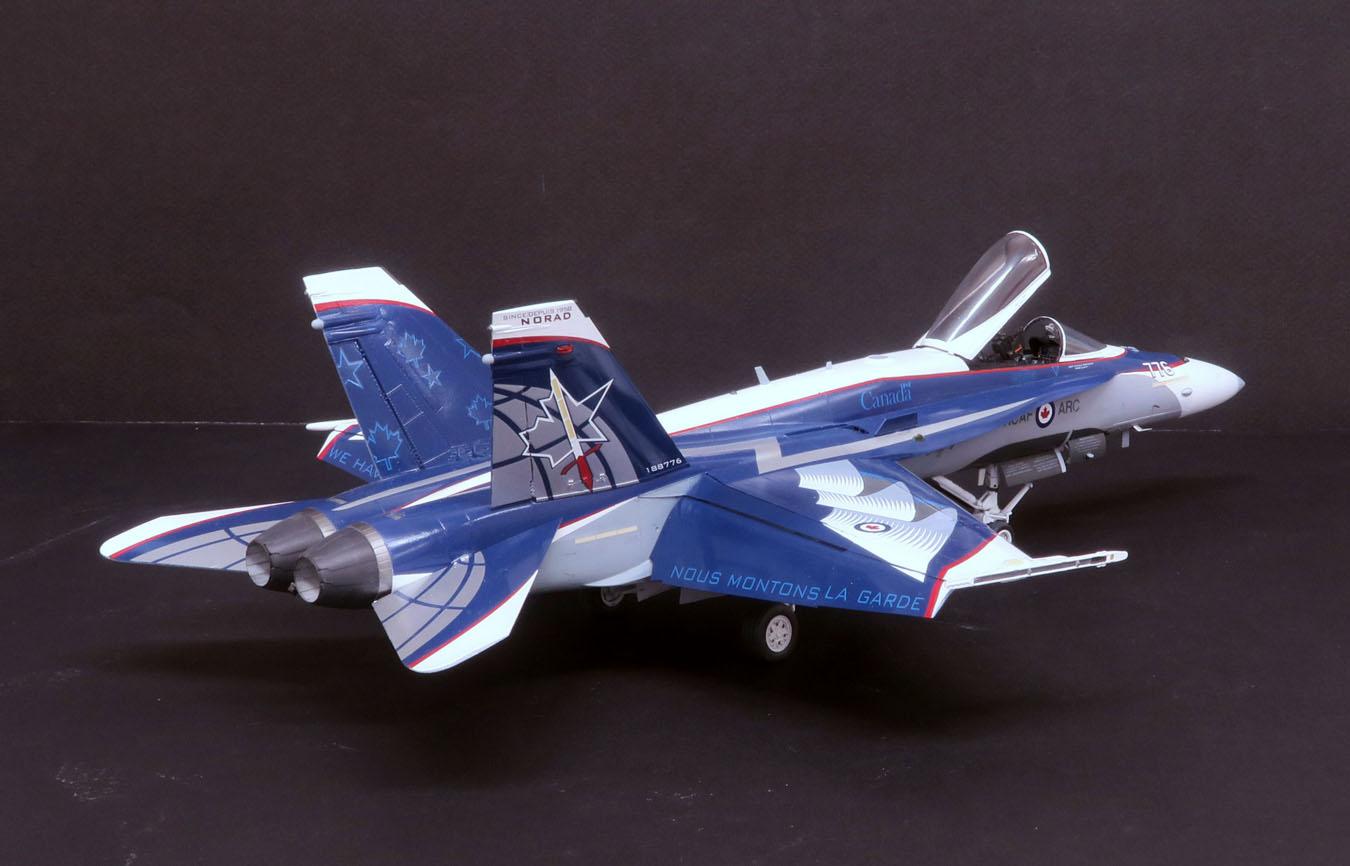
With the main assembly completed, it was time for what promised to be a long and complex paint job. All the white, blue and gray areas on the model are painted. All the red striping, top surface graphics and light blue items are decals. I used MRP Light Ghost Gray for the lower surfaces. The white is Mr. Color Gloss White; the blue is a mixture of Mr. Color Blue Angels Blue with a small amount of Mr. Color Purple. Two Bobs suggests Mr. Color Bright Blue, but I didn't think it looked like a good match to the many available color photos. I primed for white areas with Tamiya Spray White Primer decanted and airbrushed. The white-gray demarcations were simply freehand masked with thin strips of Tamiya tape. The white-blue demarcations had to be more precise because the had to match the curves of the red striping decals. To achieve this I laid Tamiya tape over the decal sheet and pencil traced the center-line of the stripes. Then I put the tape on a sheet of glass and cut along the lines. The hardest demarcation was the pair of long stripes that start at the rear of the fuselage and run along it, passing just underneath the cockpit and joining in a curve just ahead of the windscreen. The decals are produced in two pieces for each stripe. The front section includes the curve forward of the cockpit and a kink just about even with the strake on the LEX. This necessitated precision with the blue/white demarcation. To achieve this I scanned the decals and cut out the forward stripe. i also traced the center-line of the curved part of the decal onto masking tape and cut it out with a knife. I then taped the paper dummy onto the model, lining up the kink with the panel lines. Finally, as carefully as possible, I applied the masking tape to line up with the curve of the paper dummy. The final result was successful beyond my hopes.
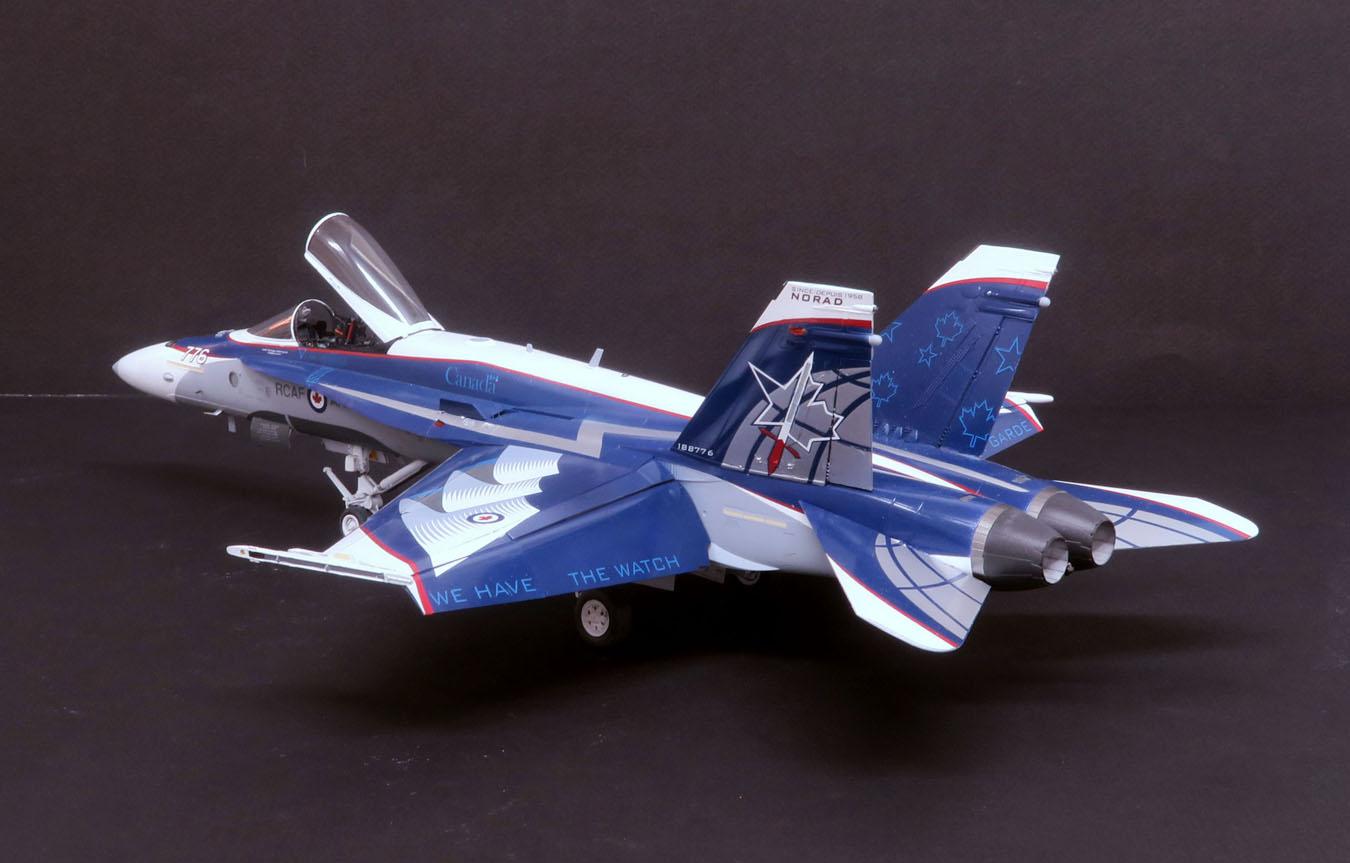
The Two Bobs decals are printed by Microscale. They worked very well—thin, but strong, and they lay down well with my current fave, Mr. Mark Softer. OTOH, they're not entirely correct dimensionally. For example, the metallic arrow markings on the top fuselage are two long, necessitating placing the light blue ladder location stripes further forward than they belong. Because of this I didn't install the ladder deployed since it glaringly didn't match the location stripes.
I won't go on at much length about the remainder of the build. I had purchased a Quickboost resin ejection seat, but ended up using an SJU-17 NACES from an old Black Box set I had kicking around. The Royale Resin wheels are a definite improvement over the kit parts. The main gear struts have been criticized for the amount of slop in the installation, but I found that the link pieces worked fine to define and solidify the strut angles. Both the windscreen and canopy have central mold lines that have to be sanded off and smoothed. Micro-Mesh and Novus 2 to the rescue. I really appreciated the photo-etch forward canopy bow that included the mirrors and grab handles.
All in all, this was an interesting and challenging build that I really enjoyed. Hope you all enjoy looking at it.
Cheers, Pip

Nice work, Pip. That’s a great scheme. Thanks for sharing.
Well done, Pip! Love the Canadian scheme.
That's some super-duper painting and decal work Pip! I like it a lot.
Awesome looking Hornet! I love that phrase, "We have the watch."
Amazing job, Pip!
That's one colourful bird, Pip! Looks amazing, nice to see the RCAF so well presented.
She looks amazing in this scheme, Pip @seawinder
Great job done.
Very neat work with that masking and matching up the transfers. Was the group build inspired by the Joni Mitchell song?
Very nice Hornet build up. That's a complex scheme that present well, I like it. Also, thanks for the notes on this Kinetic kit, I've got one in the stash, as it seems to be the best legacy Hornet available.
Great work on a model with a really complicated paint scheme, Pip (@seawinder). Well done.
Wow - quite a complex scheme, and you pulled it off flawlessley! Fantastic build.
Thank you all for the comments. They're much appreciated.
Pip