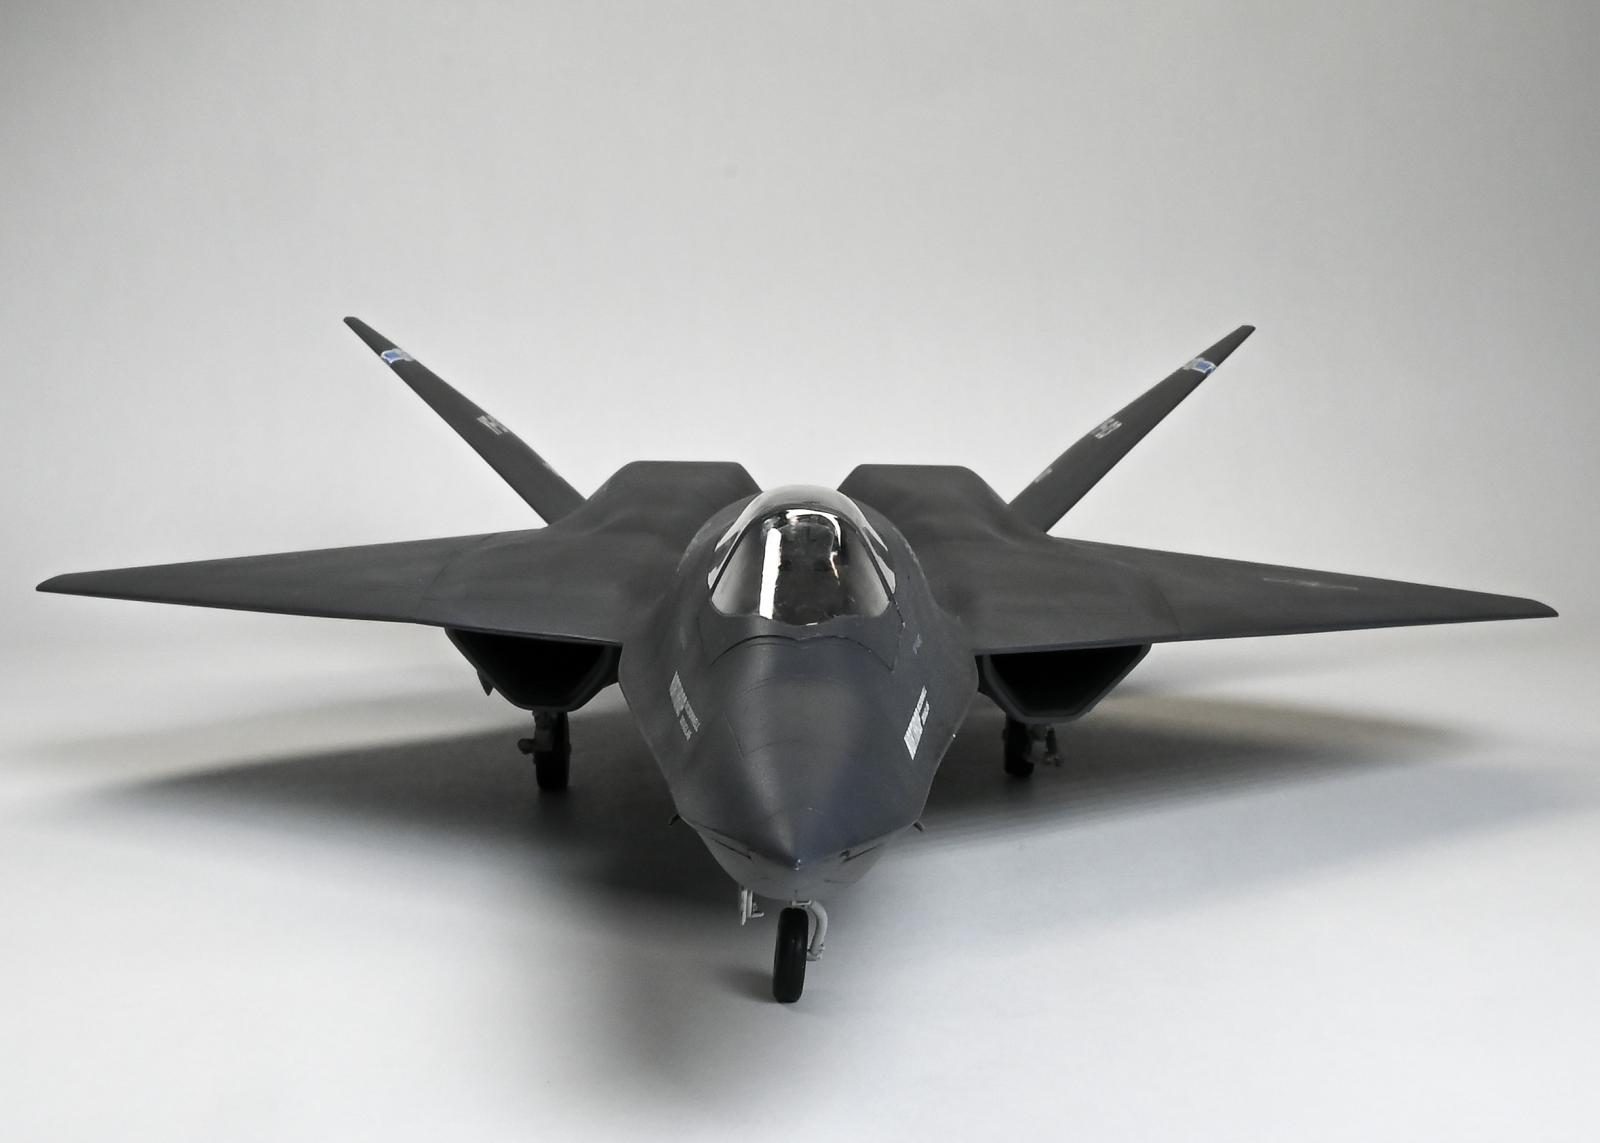
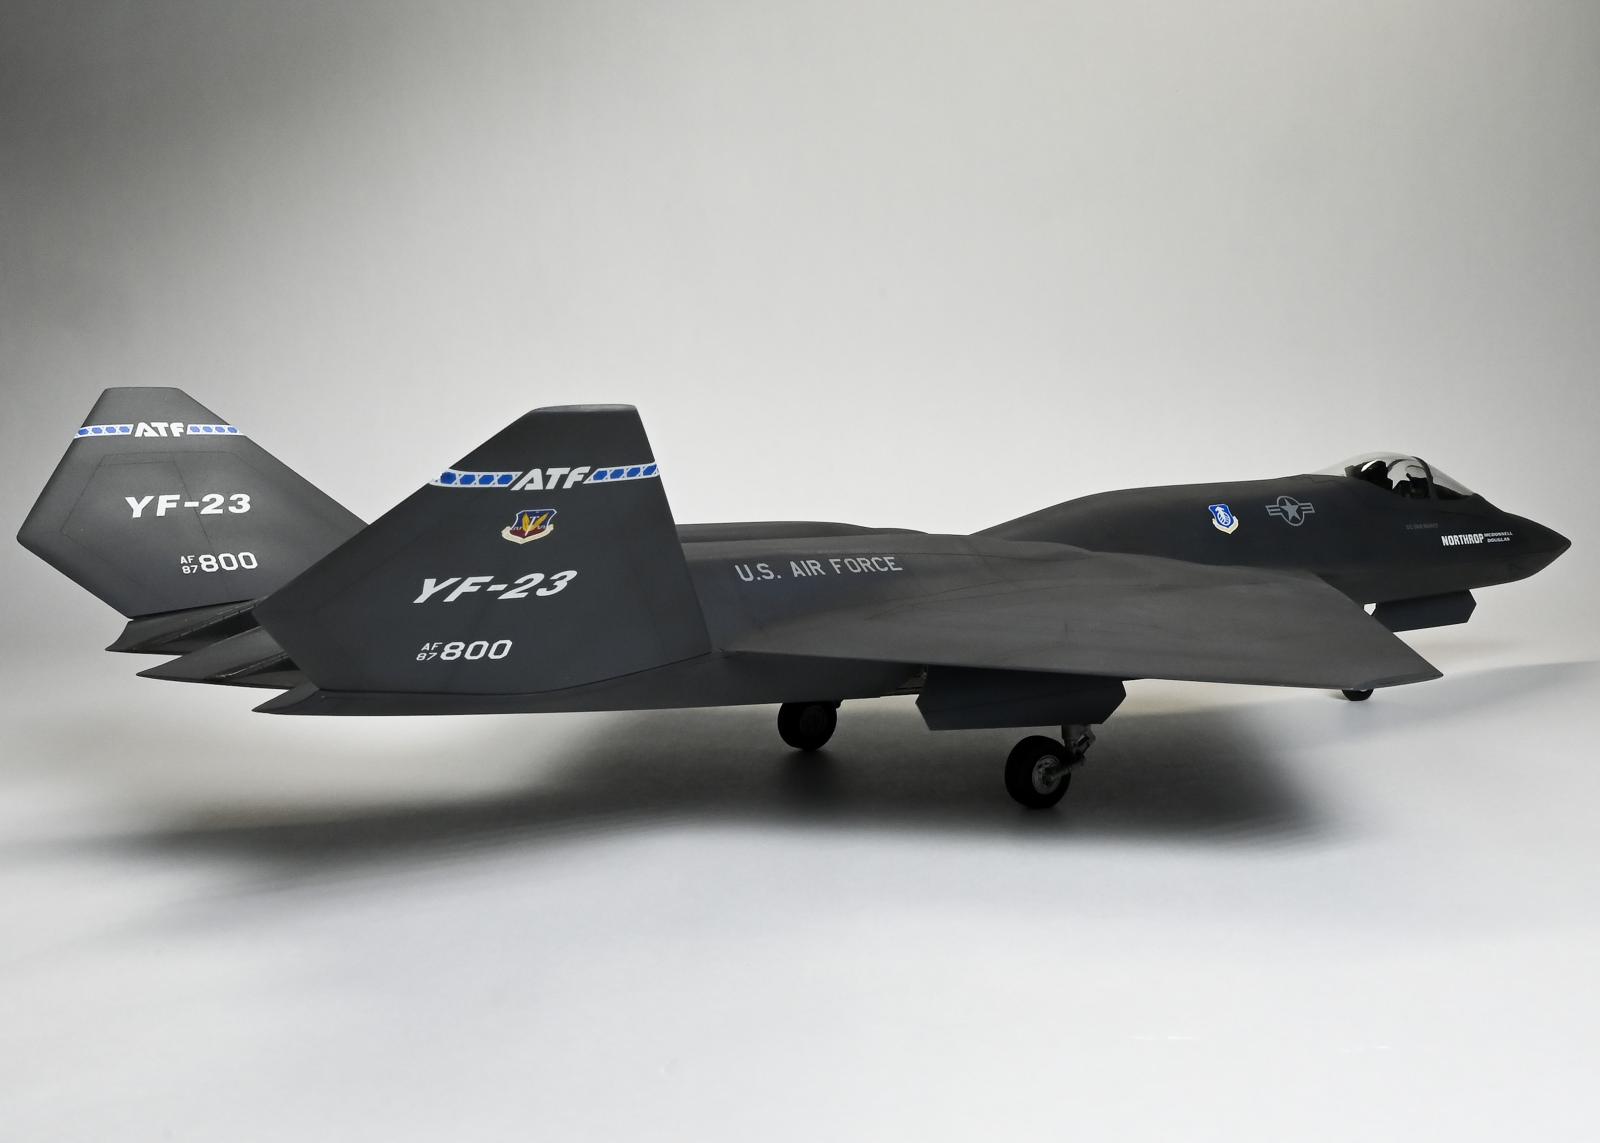
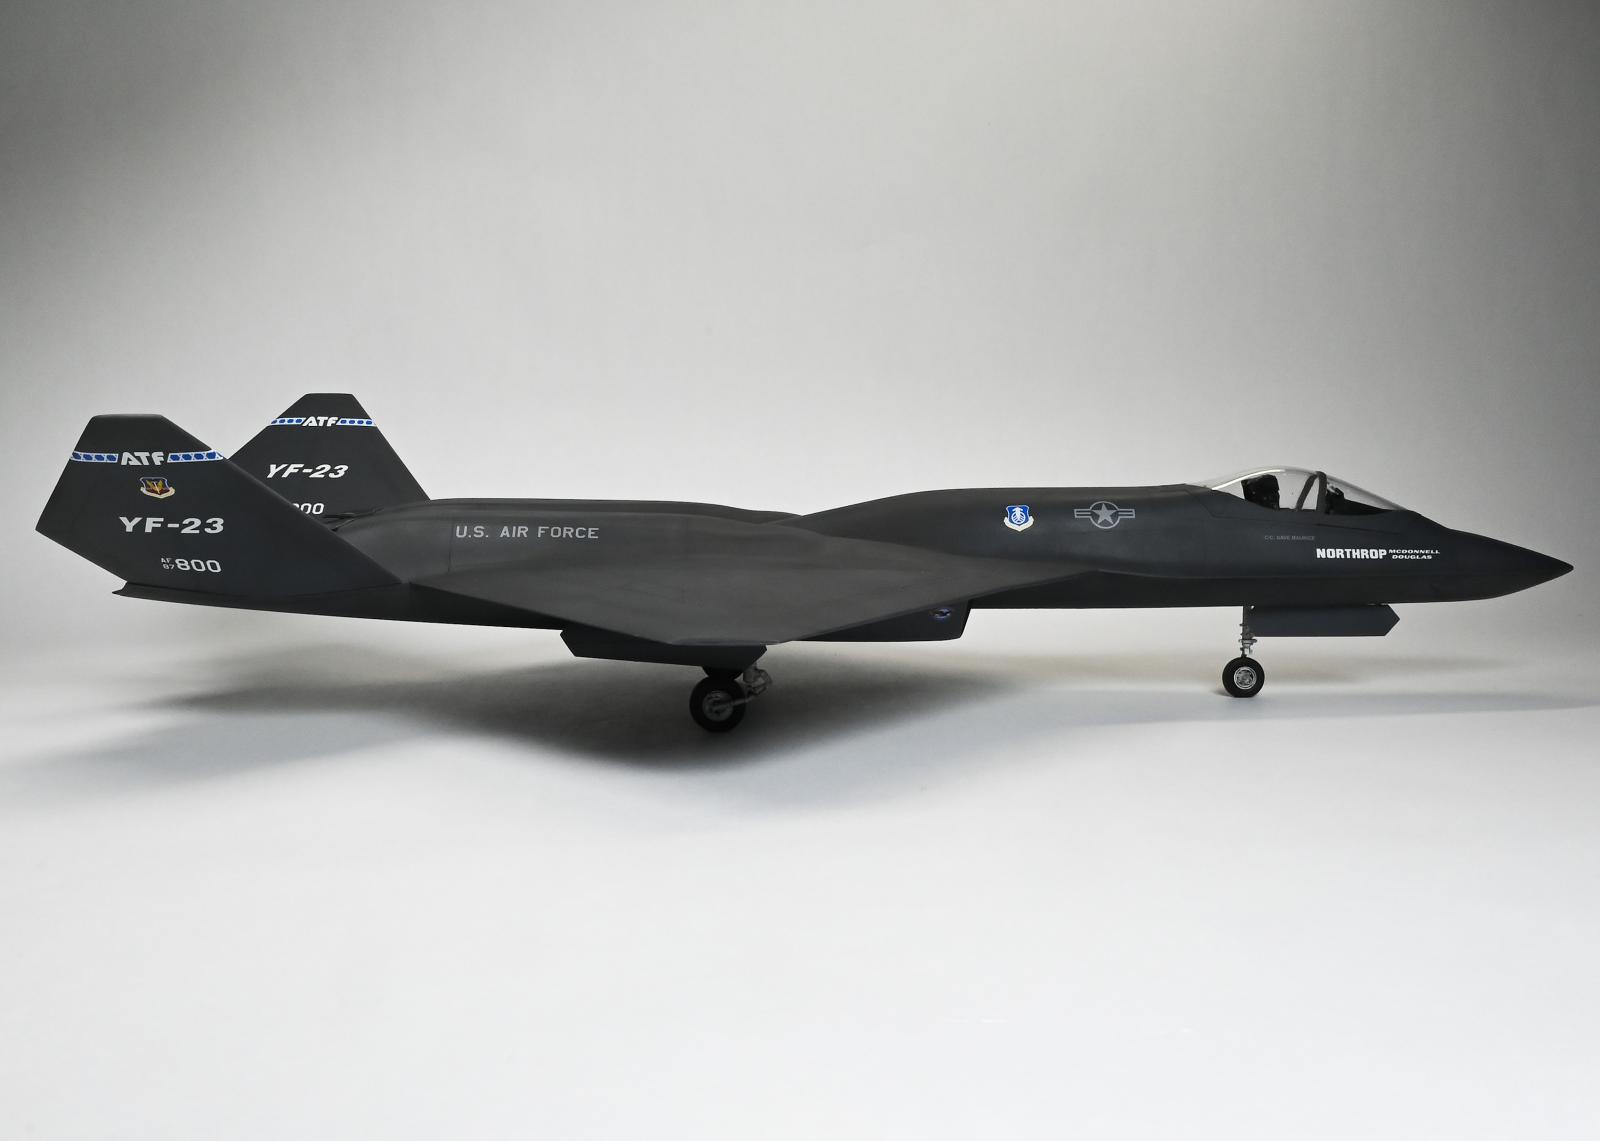
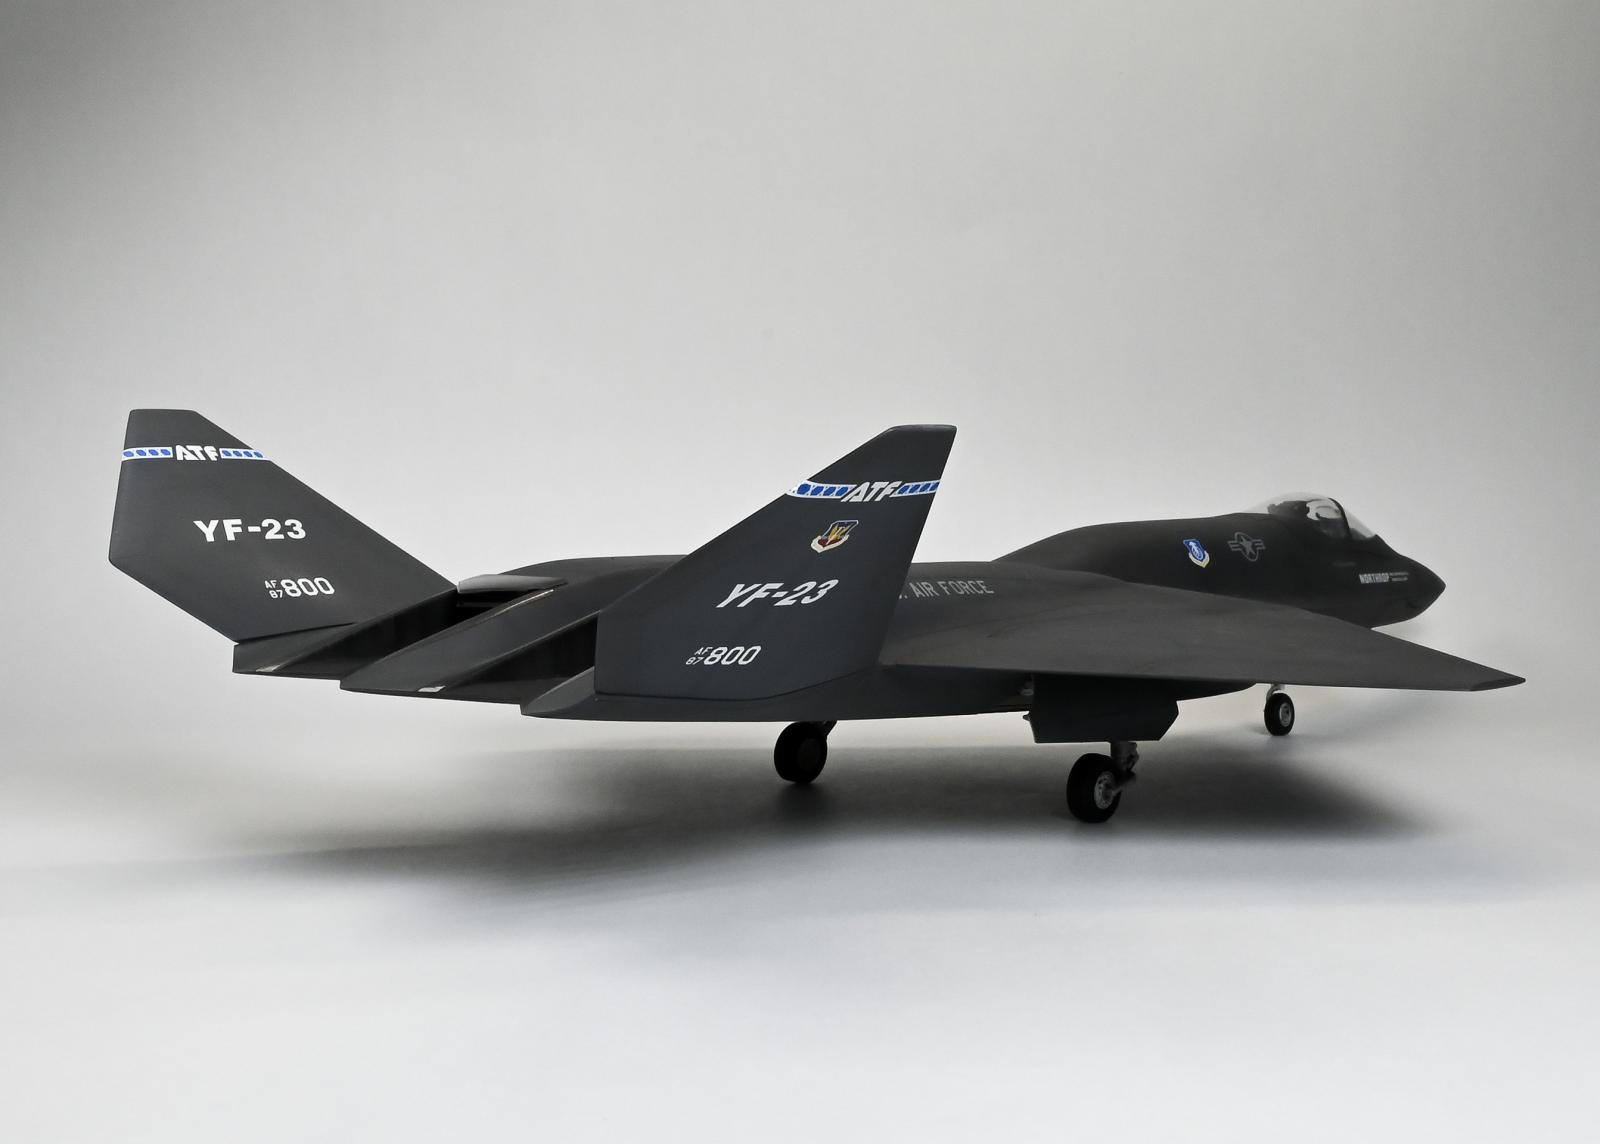
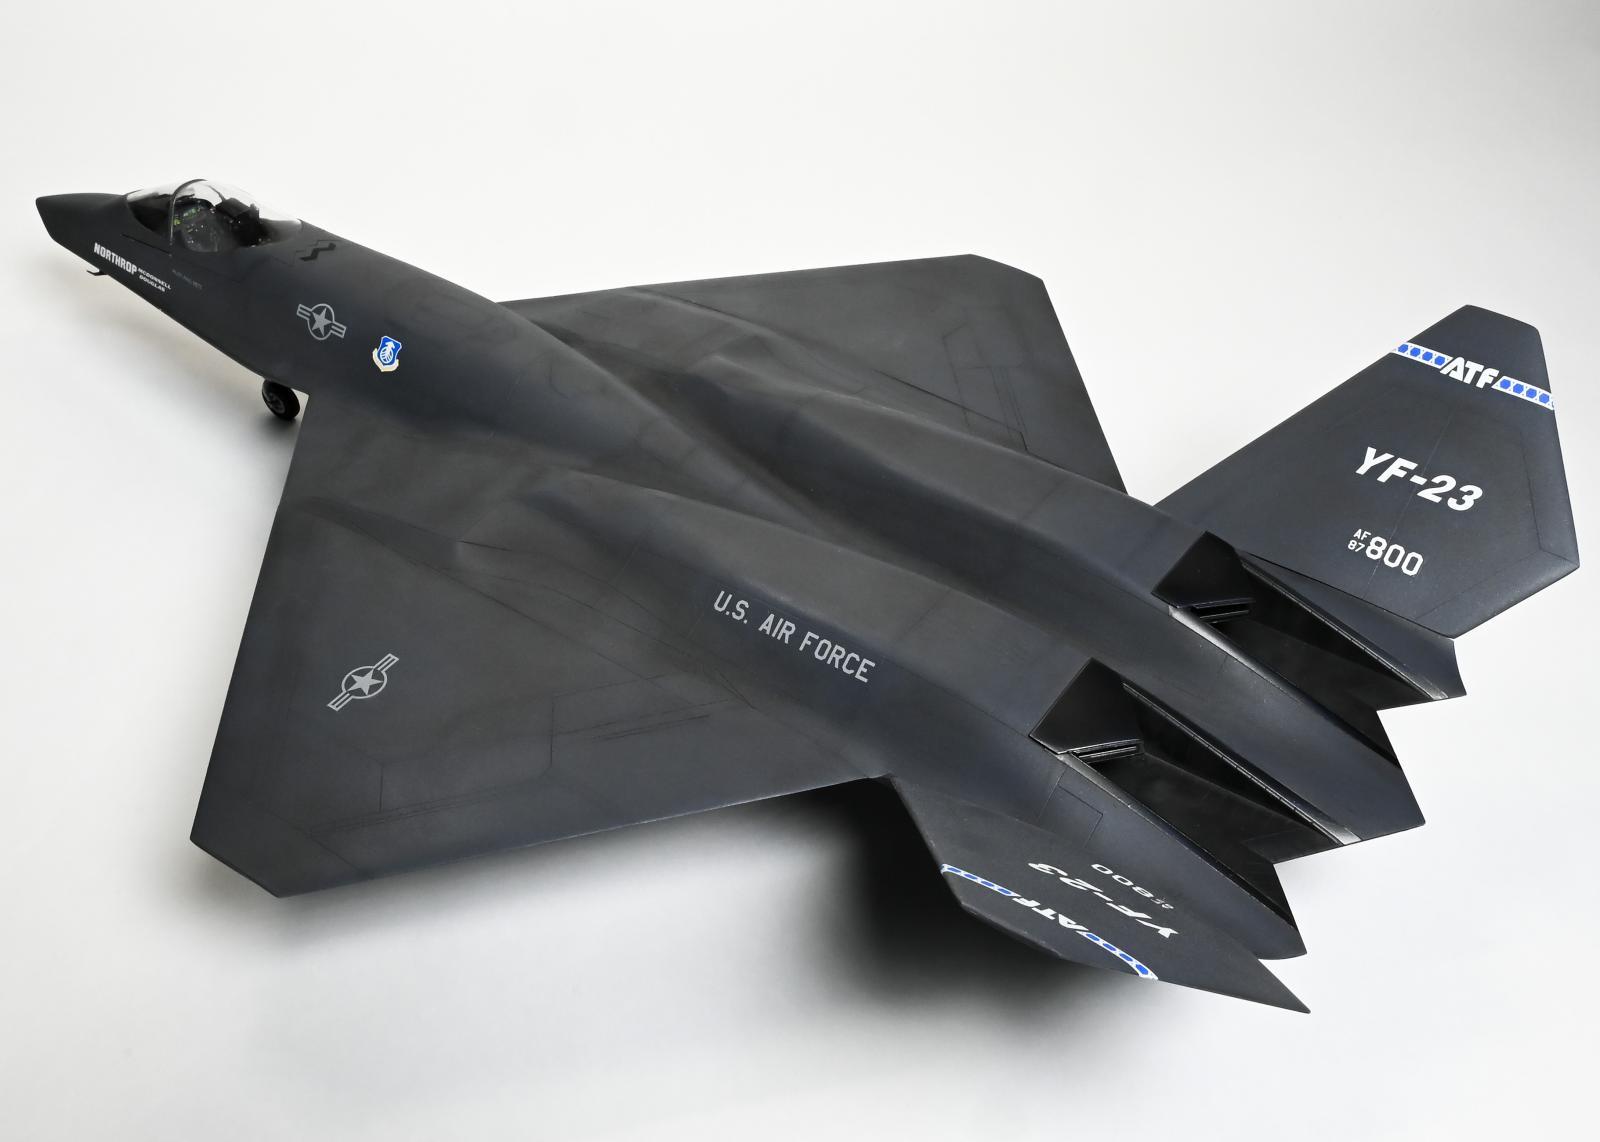
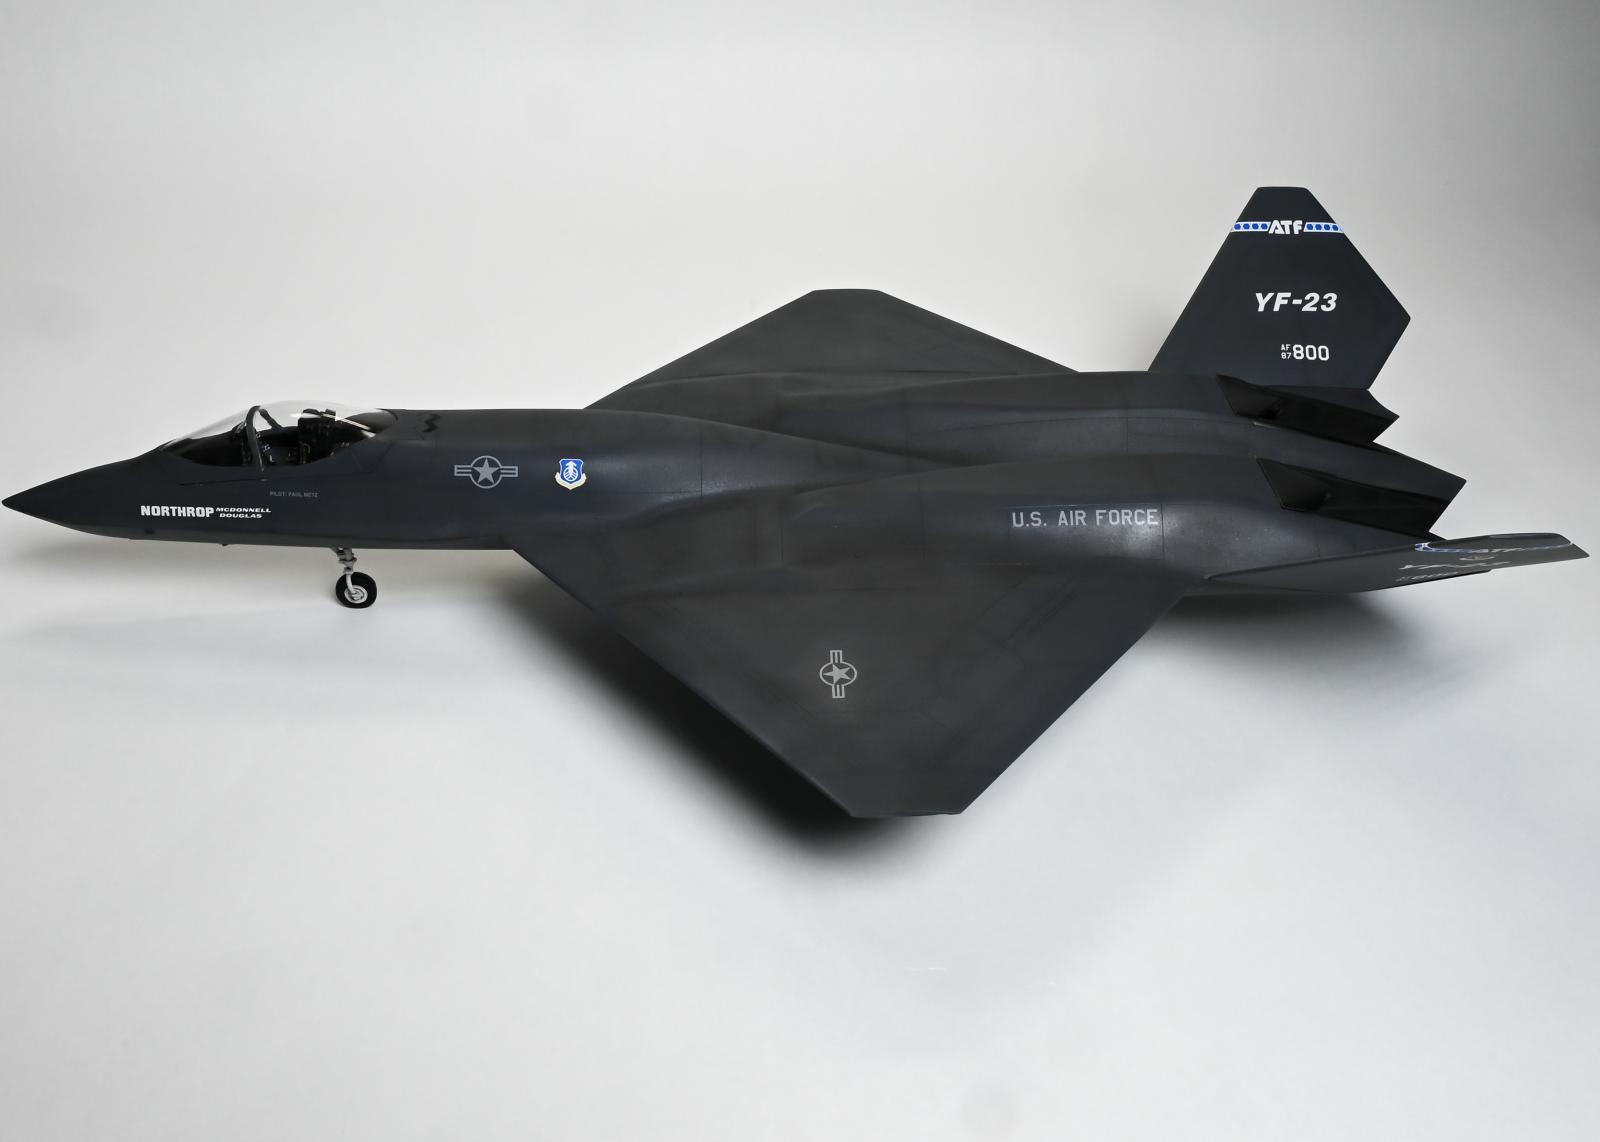
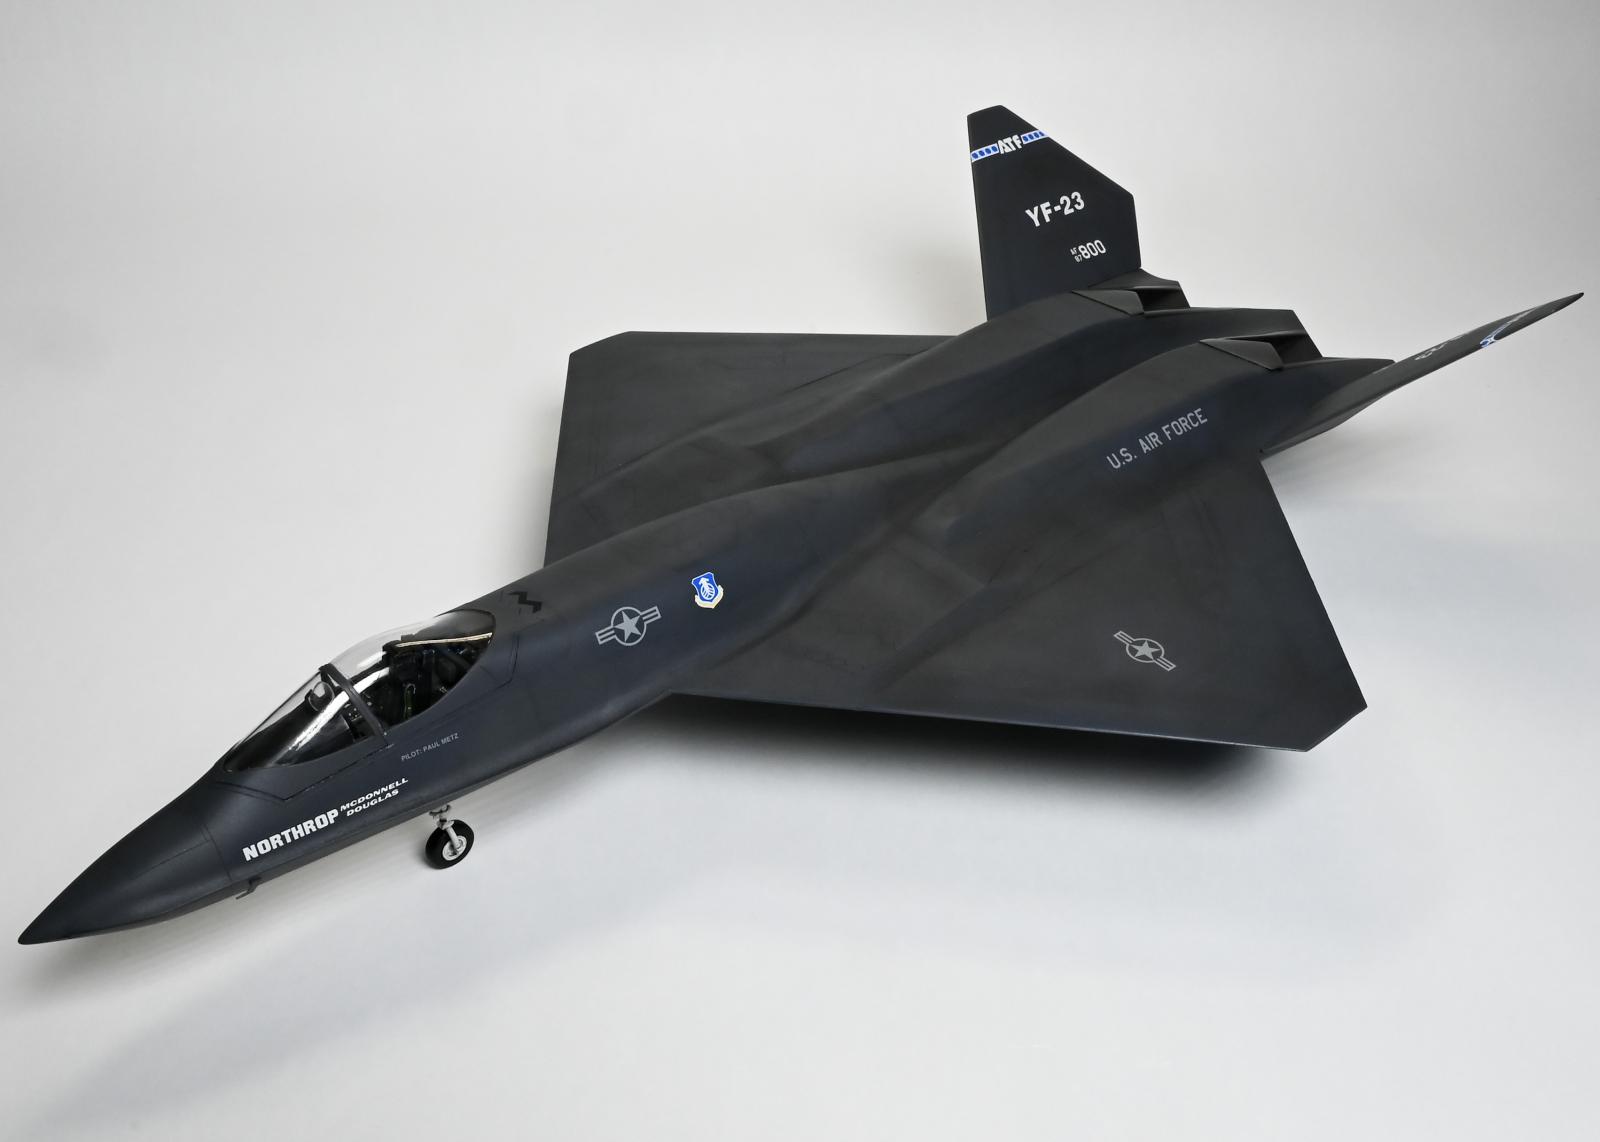
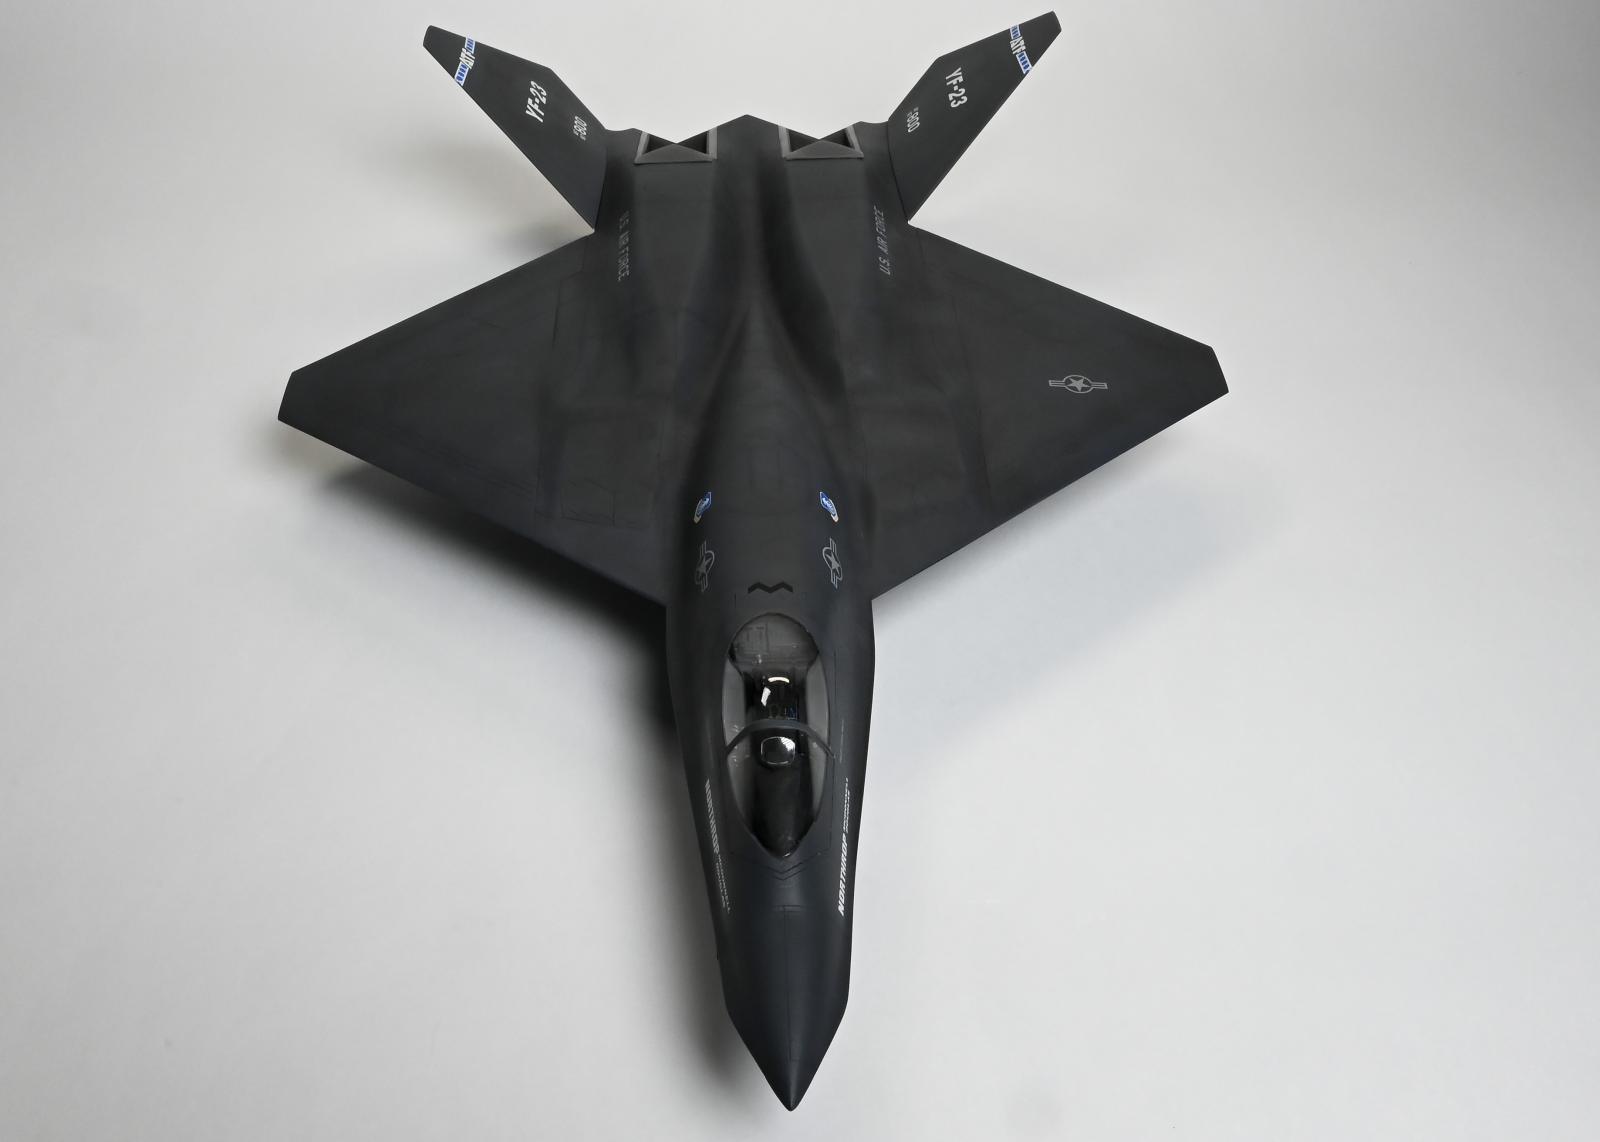
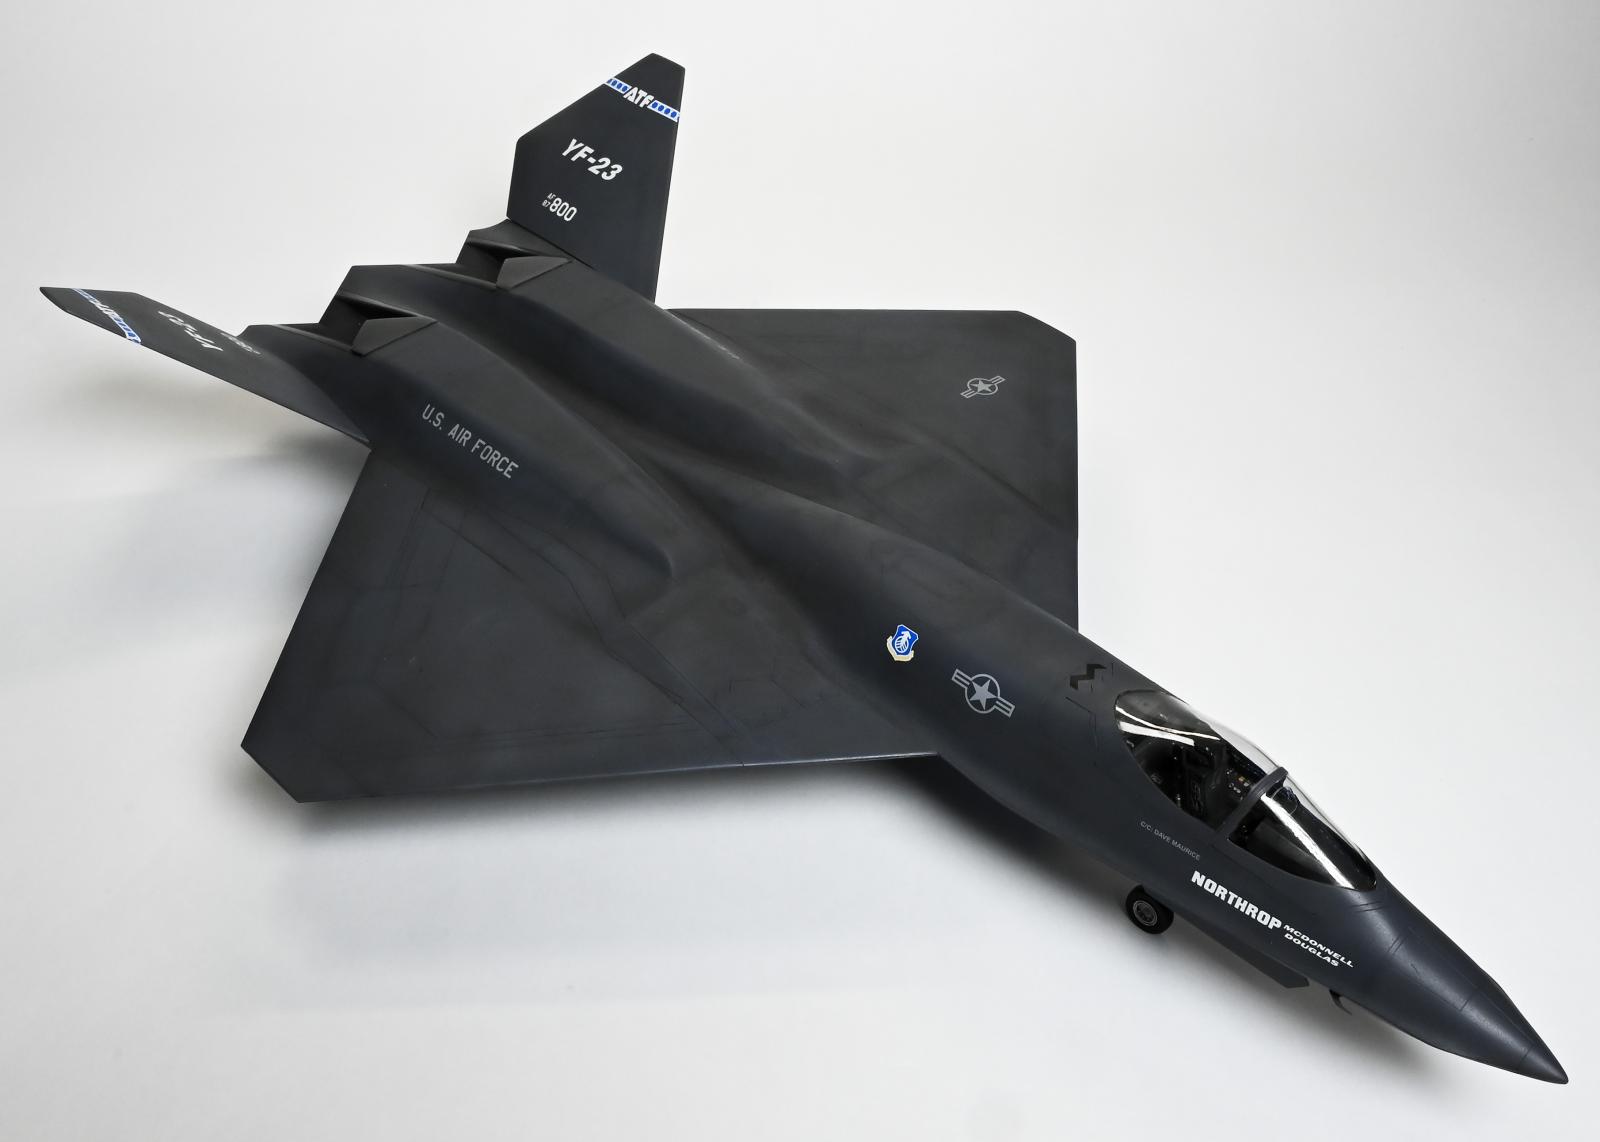
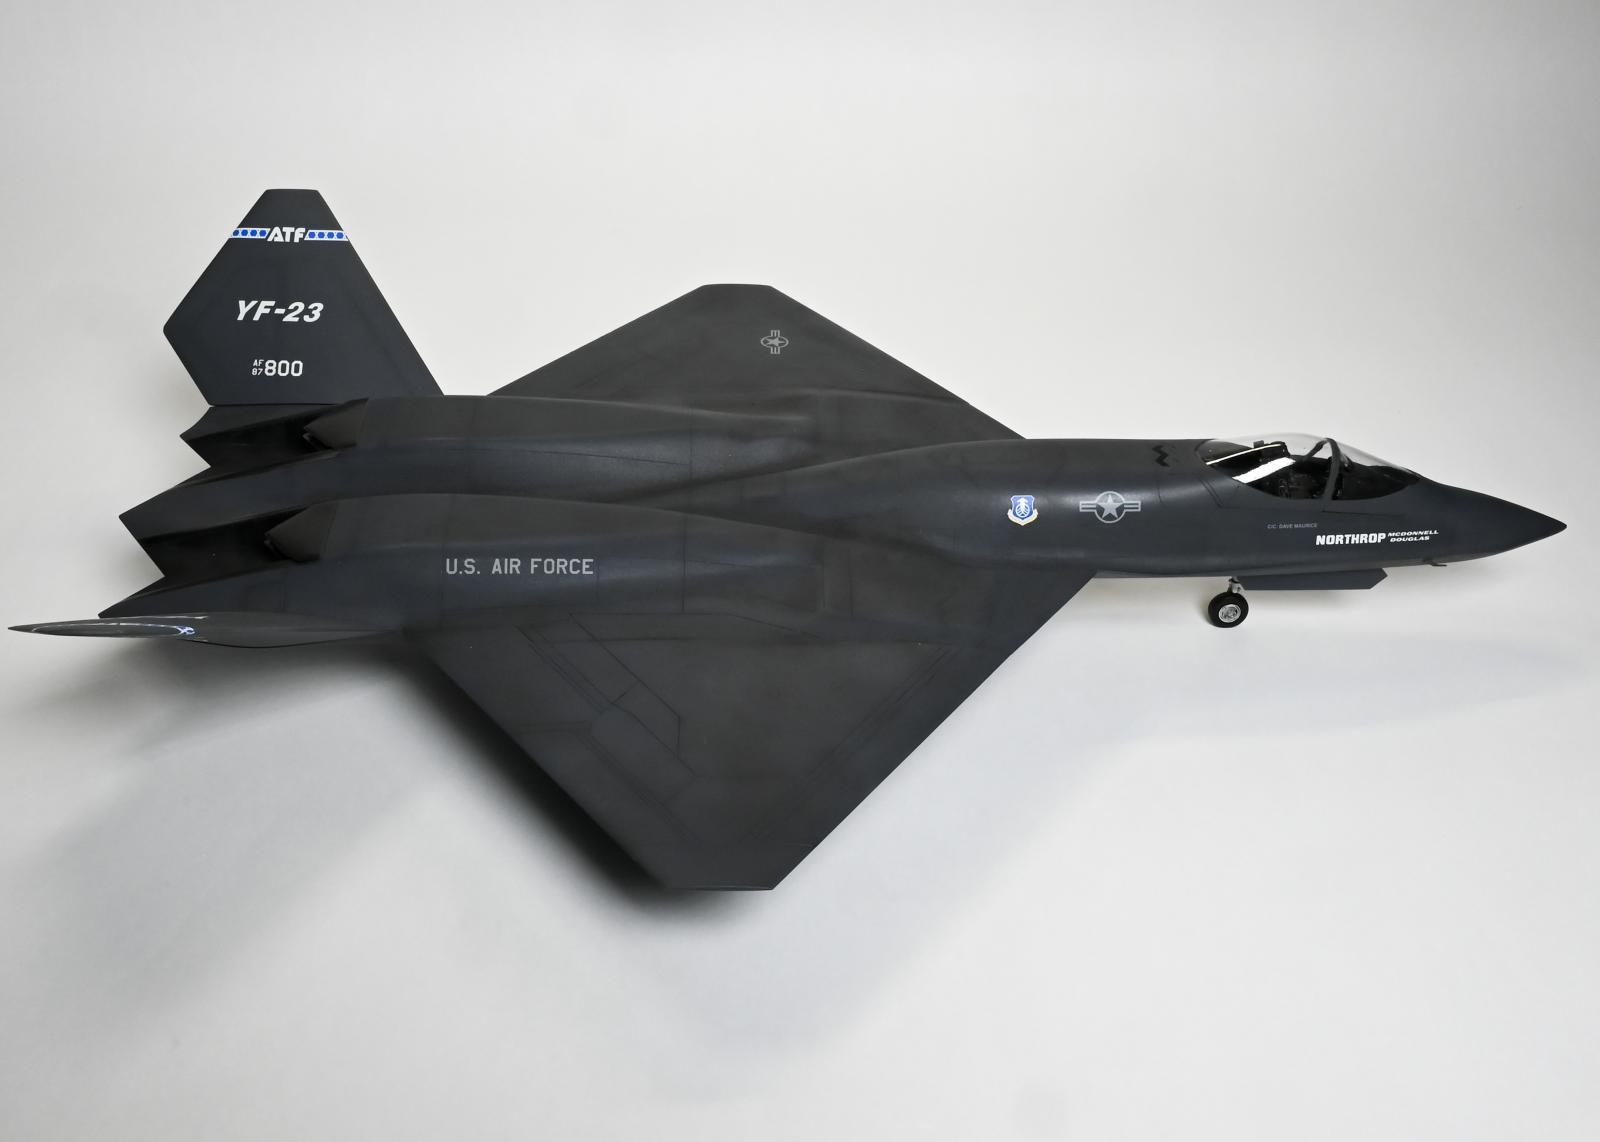
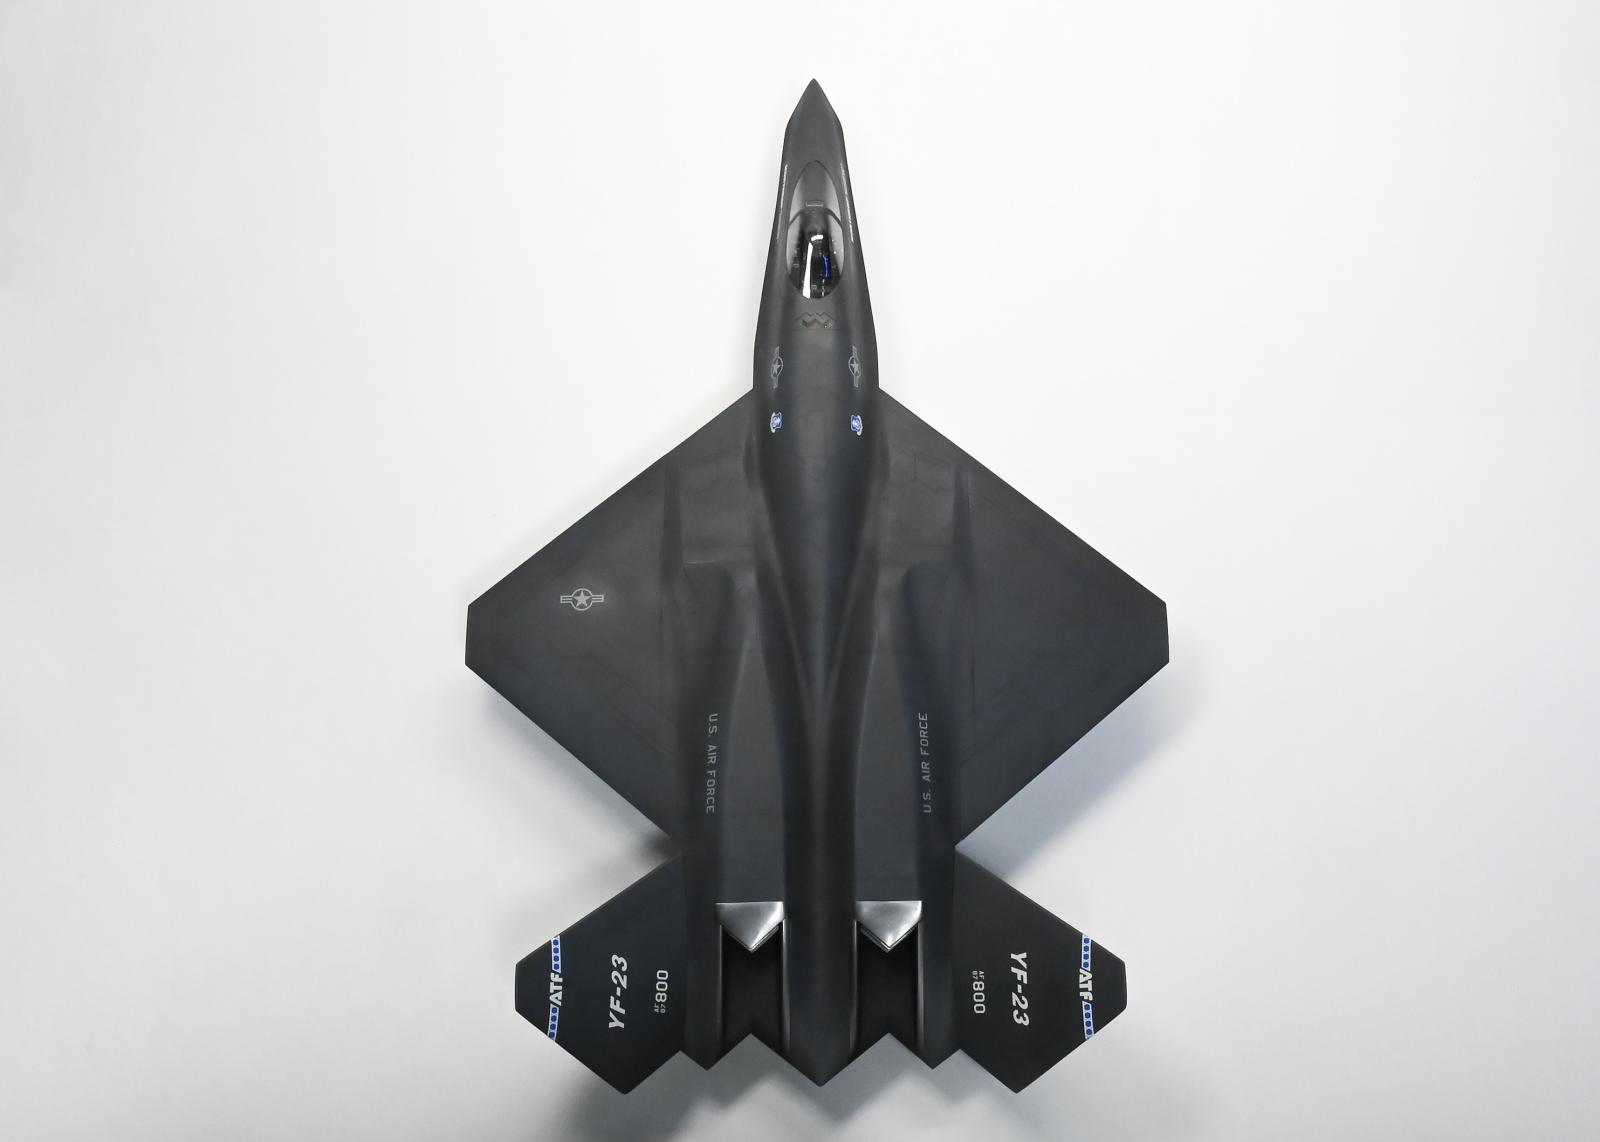
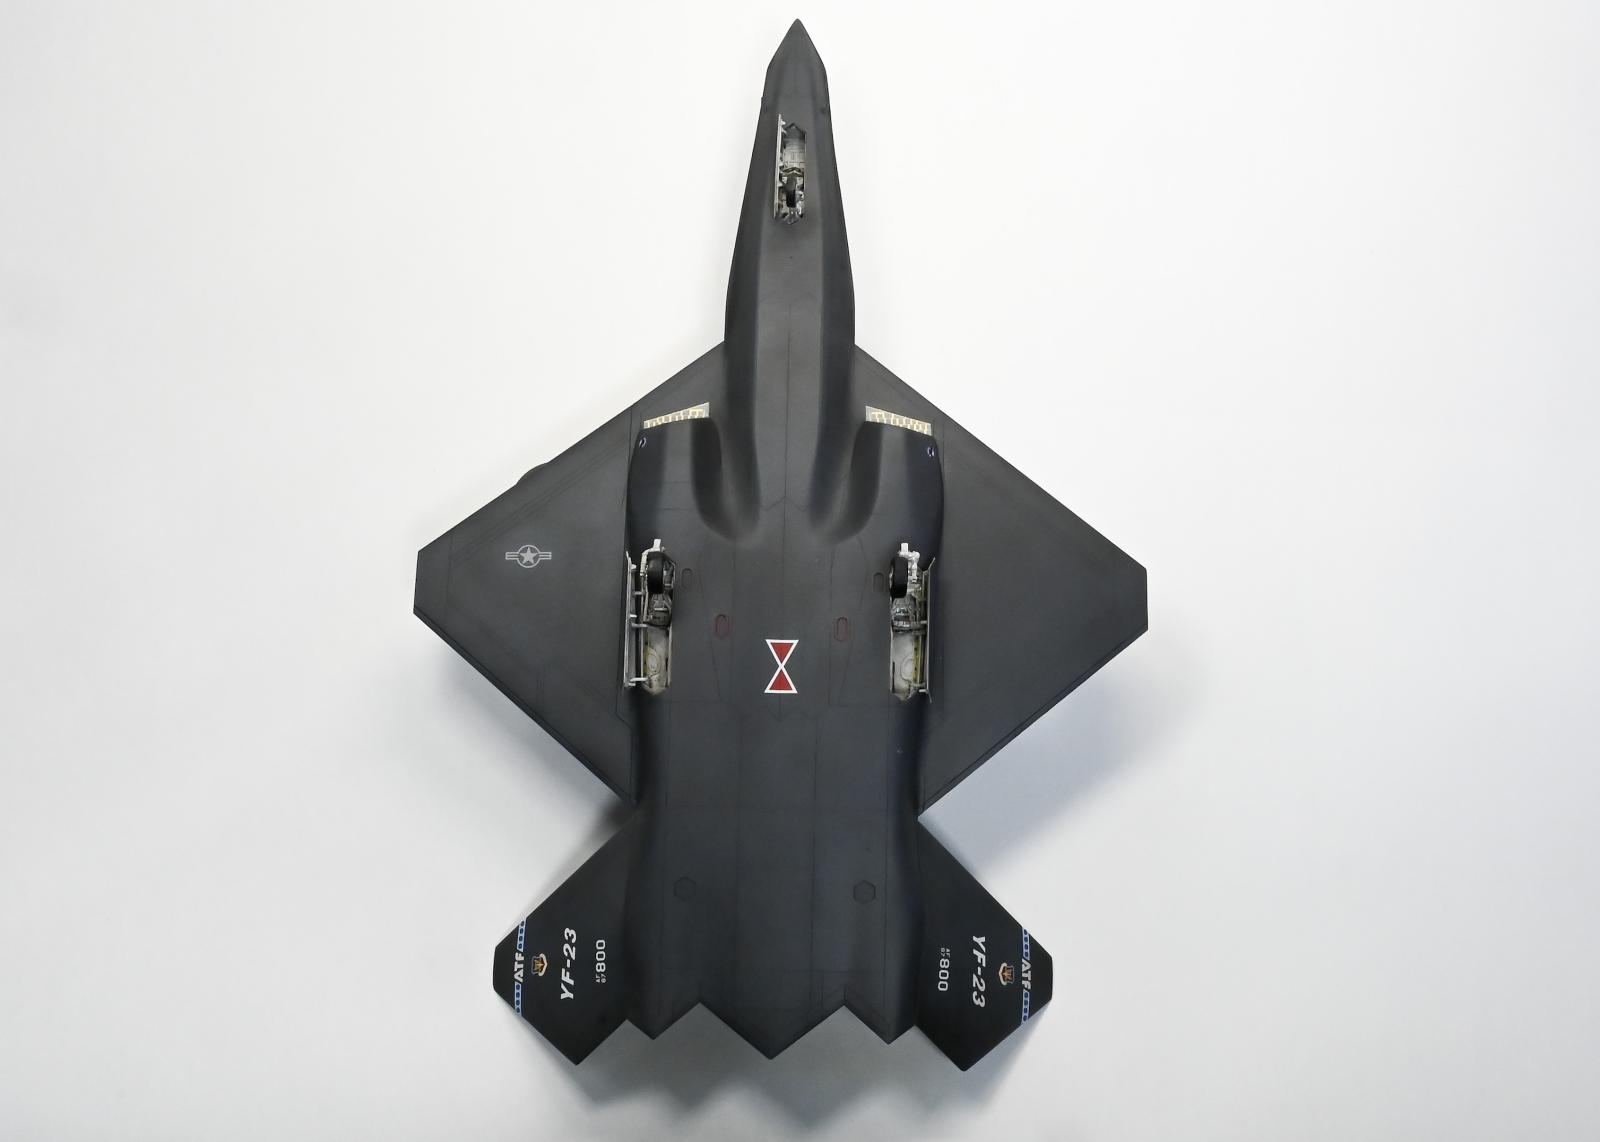
HobbyBoss 1/48 YF-23
I recently decided to build my first jet model and went with the YF-23. The YF-23 was designed by Northrop/McDonnell Douglas when the USAF began looking for a replacement for its fighter aircraft.
The USAF chose proposals from two companies Northrop and Lockheed. Northrop teamed with McDonnell Douglas to develop the YF-23, while Lockheed, Boeing, and General Dynamics developed the YF-22.
Ultimately the YF-22 was announced the winner and entered production as the Lockheed Martin F-22 Raptor.
Northrop developed two test planes known as the PAV1 and PAV2. This model depicts the PAV1 which was later referred to by the Northrop development team as the Black Widow due to it's spider like appearance when seen on radar.


Overall I enjoyed building this kit, but it did offer a hefty amount of obstacles.
First off, HobbyBoss includes theoretical decals which do not depict markings of either the PAV1 or PAV2. To remedy this, I purchased a decal set from Caracal models. This set has the correct markings for both the PAV1/PAV2.

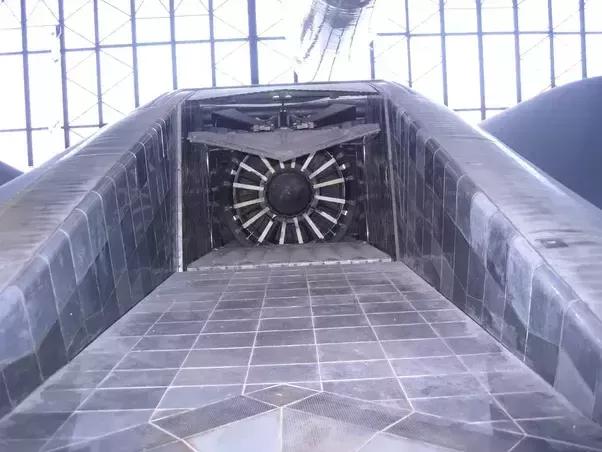
The exhaust area of this kit is semi-accurate. There are heat-ablating tiles which are used to shield a heat signature from infrared detection. Both PAV1 and PAV2 had square shaped tiles, where HobbyBoss chose to use rectangular tiles. I could have fixed this issue, but was a bit lazy and didn't realize it until I had already done multiple layers of paint/varnish.
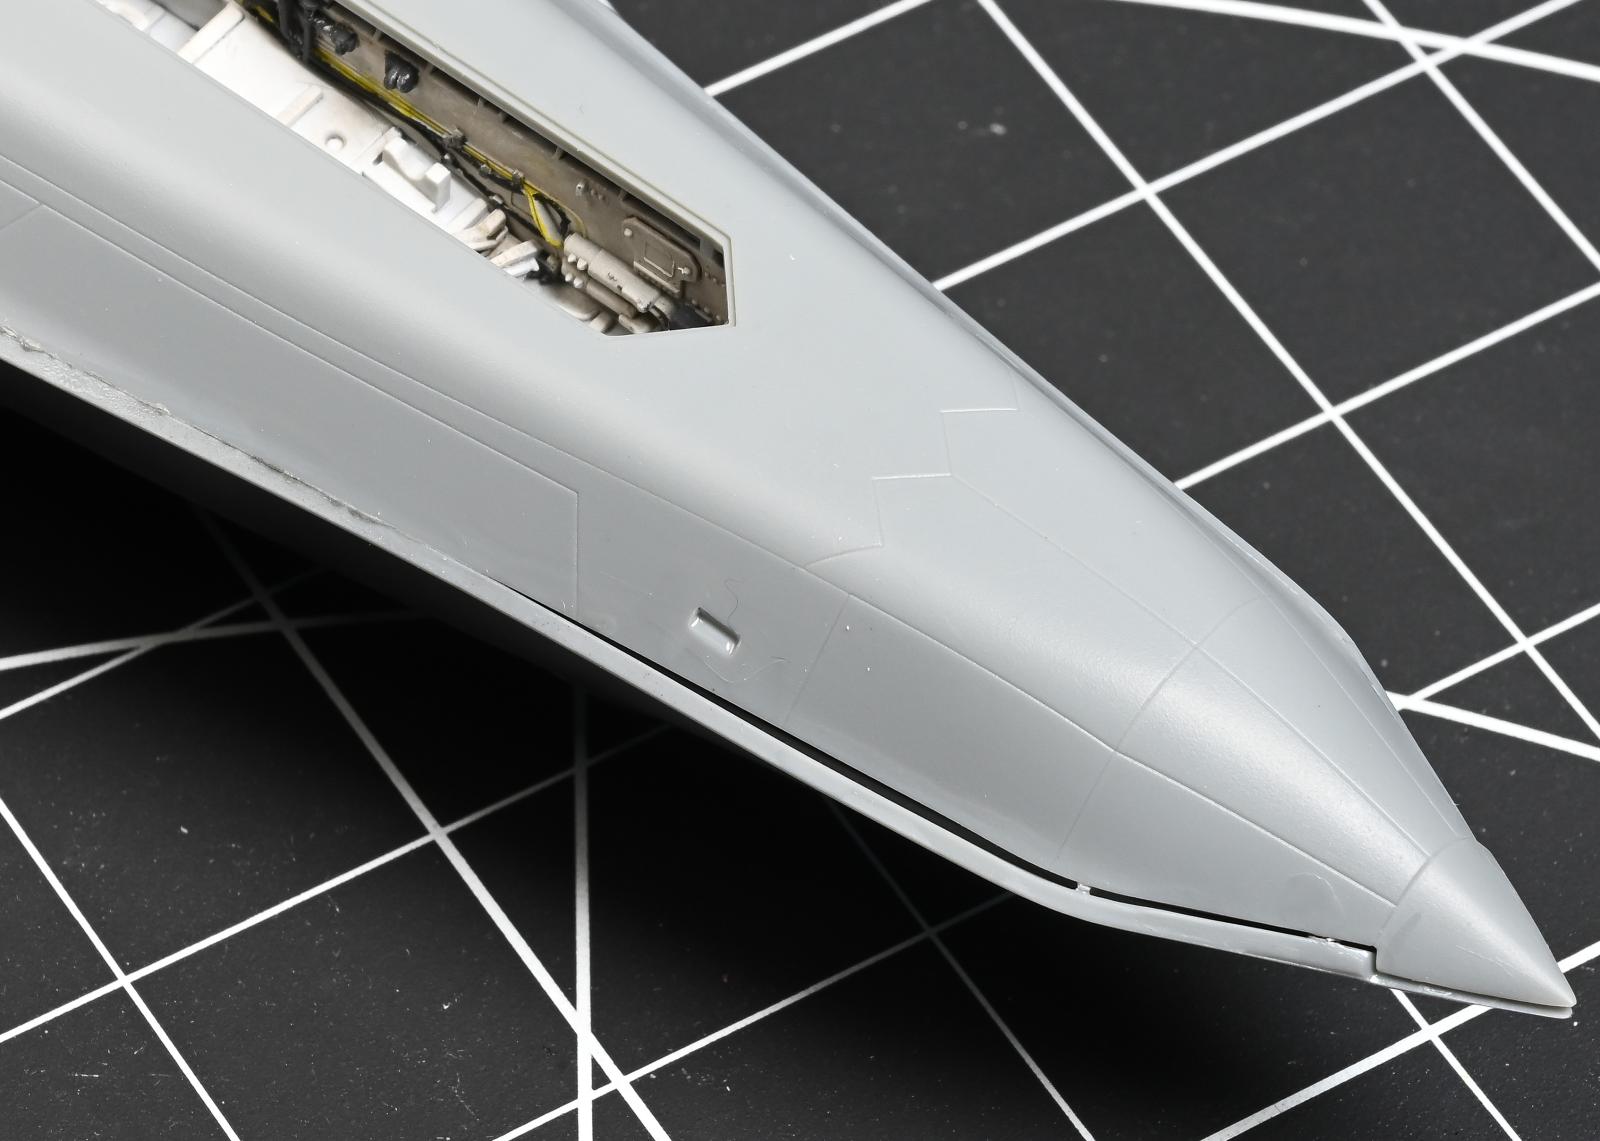
My next issue was the fitting of the fuselage and wings. After gluing it all up, there were large gaps which needed to be corrected. I used both Tamiya gray putty as well as Vallejo white putty. This step was followed by sanding and re-scribing of panel lines.

Lastly one major issue of this kit is the landing gear. They are very fragile. Fragile to the point to where I had to install metal pints in both the wheel connection, and one other area. Even after the metal pins, the right set of gear still kept breaking under the weight of the model. The only way to remedy this without ordering an aftermarket set of gear was to cut 2 pieces of sprue from the runners and add more structural support.
Cheers!
A convincing and impressive model - congratulations, well done!
That means a lot coming from you @rosachsenhofer. Your builds are inspiring. Thanks for the compliment!
Very nicely done Keith, your paint work looks great, and more so the overall aircraft is very convincing. Thanks for pointing out some of the kit's shortcomings, as I've got this with the Caracal set to build one day. It was a pleasure to the follow the build! Liked
Thank you @pb_legend. Down the road I wouldn't mind also getting to the PAV-2. It has a more similar color and pattern to the YF-22/F-22.
Looks great Keith. In the blink of an eye you can see Clint Eastwood bold as brass walking up to one of these and stealing it. Excellent build
Thank you Guy @thom
An excellent model of a fantastic looking plane, Keith!
Well done!
Thank you my friend @fiveten
Nice build of what might have been.
Thanks Dan @dbdlee
Your build is as impressive as the aircraft itself, Keith @greenterrorz
Well done.
Thanks as always John @johnb
Despite the hurdles you completed a nice looking build, Keith. You did a fantastic job on the black paint scheme. Well done!
Thank you Gary @gwskat. The dark finish was daunting at first, especially since it is so lightly weathered.
Great looking first jet, Keith, are there more to come?
Thanks George @chinesegeorge. I have plans to do an F-22, and F-35 as well. Ideally it would be cool to have all 5th gen fighters on display. I have a few other builds planned first though.
That is super cool. Too bad you had to do the surgery on the seams, but the result is top-notch. Very Firefox-ish looking bird. Keep them coming.
Liked!
Thank you @coondog. It is a bit reminiscent of the jet from FireFox
Nice looking build! I'm a YF-23 fan - built the 1/72 Testors-boxed version. Much more pleasing airframe than the Raptor...
I have seen the PAV1 in person twice now and agree with you. The F22 is a grey looking plane.. but the YF-23 is next level. Thanks Greg @gkittinger
Still like the look of this craft! Great job!
Thank you Robert. @roofrat
Nice build, have this one in the stash as well waiting to be built. My indirect tie with the actual aircraft is my great uncle was one of the model shop/wind test tunnel guys for Northrop. The YF-23 was one of the programs he worked on.
Oh that is pretty cool. Must have been exciting to be a part of the program. Thanks Mark @dogsaber302