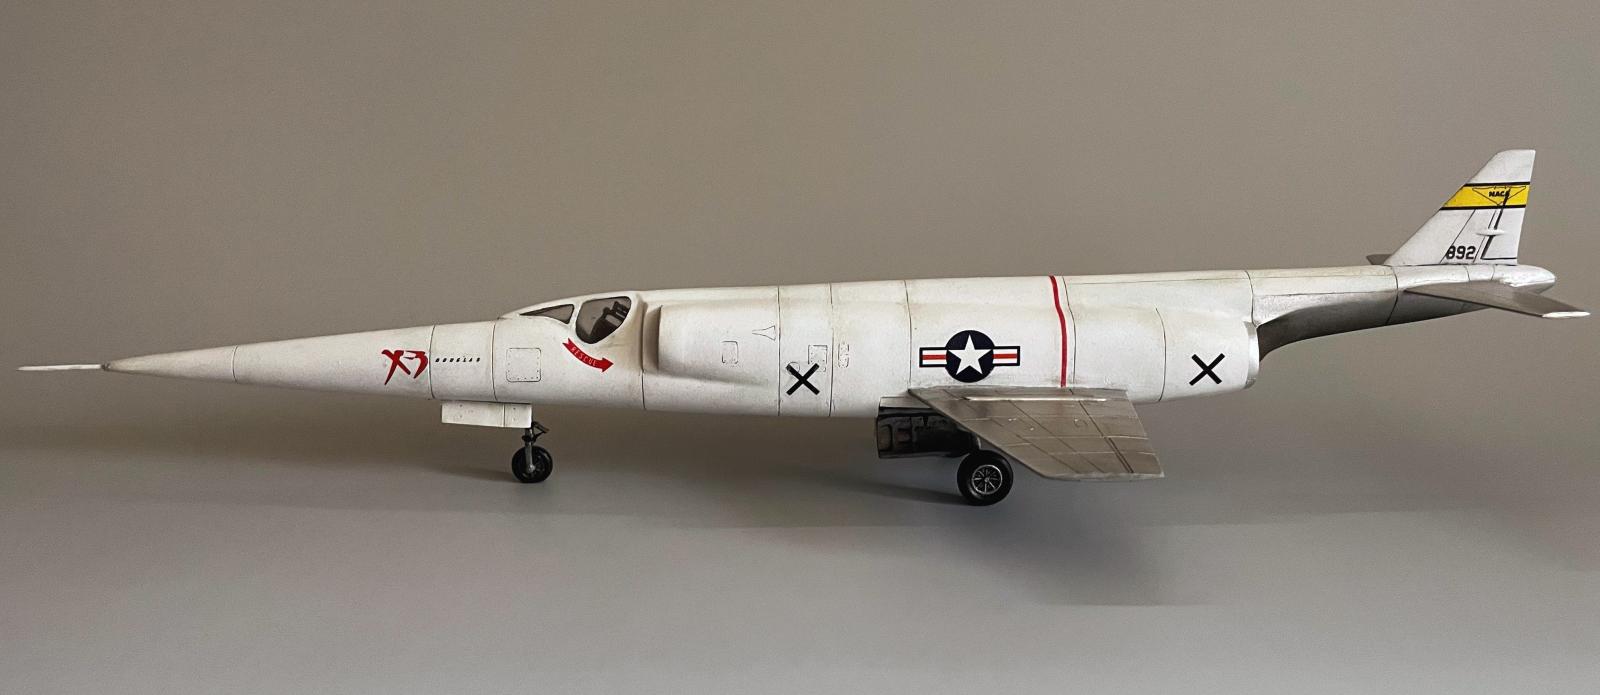
1/72 AZ Models X-3 Stiletto
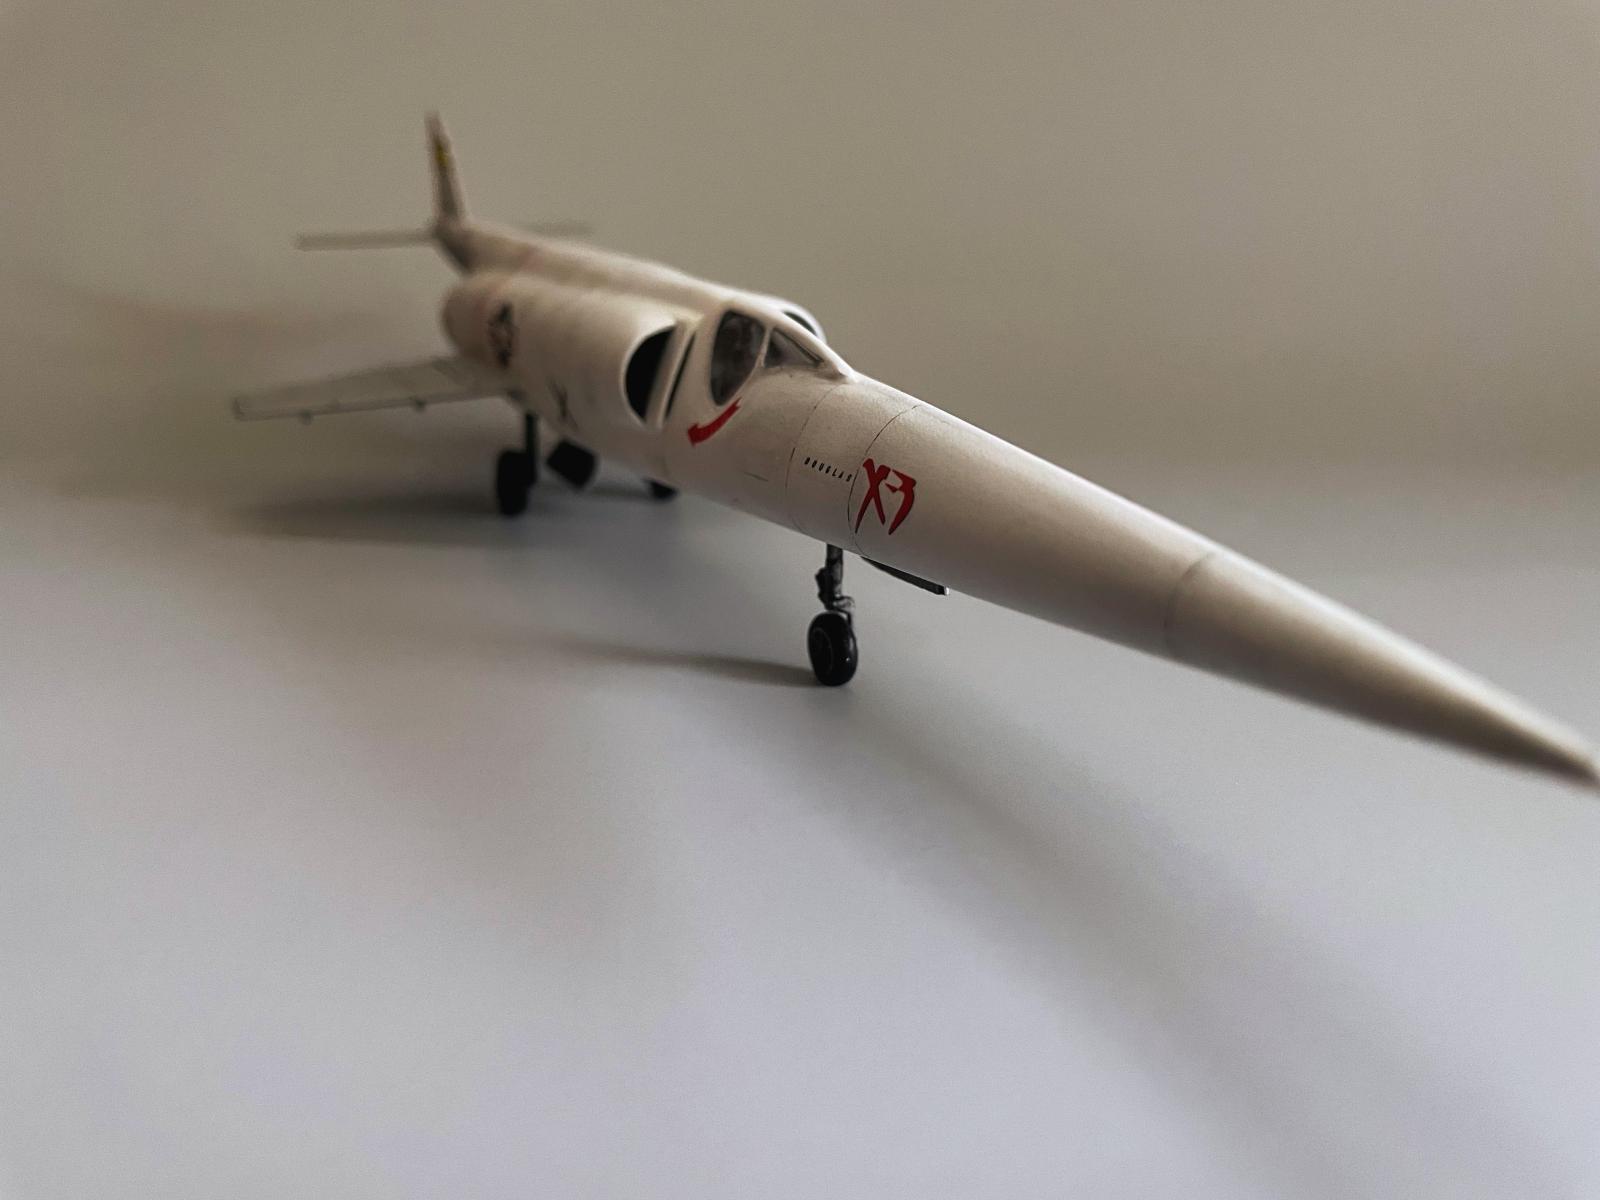
The Douglas X-3 Stiletto has the perhaps singular distinction among airplanes as not being nearly as cool as it looks. I mean, it screams FAST. Instead, it was stubbornly subsonic and exhibited potentially catastrophic roll instabilities. But, this roll-inertial coupling was instructive and taught engineers a great deal about the transonic performance of stub-wing aircraft, knowledge that would ultimately be put to use in developing the F-104 Starfighter a few years later. In the X-3's defense, fault didn't lie with the design (which was reasonably capable of greater than Mach 2 flight), but with underpowered engines: A sheep in wolf's clothing, if you will.
And so as the Stiletto is primarily known for being a disappointment, this seems to go for the available model kits as well: AZ, Mach 2, and Planet Models, with the latter kit noted as being the "least worst of the worst". Well, this is the AZ kit and it promises to give some trouble: this build thread both inspired and terrified me. So, here goes!
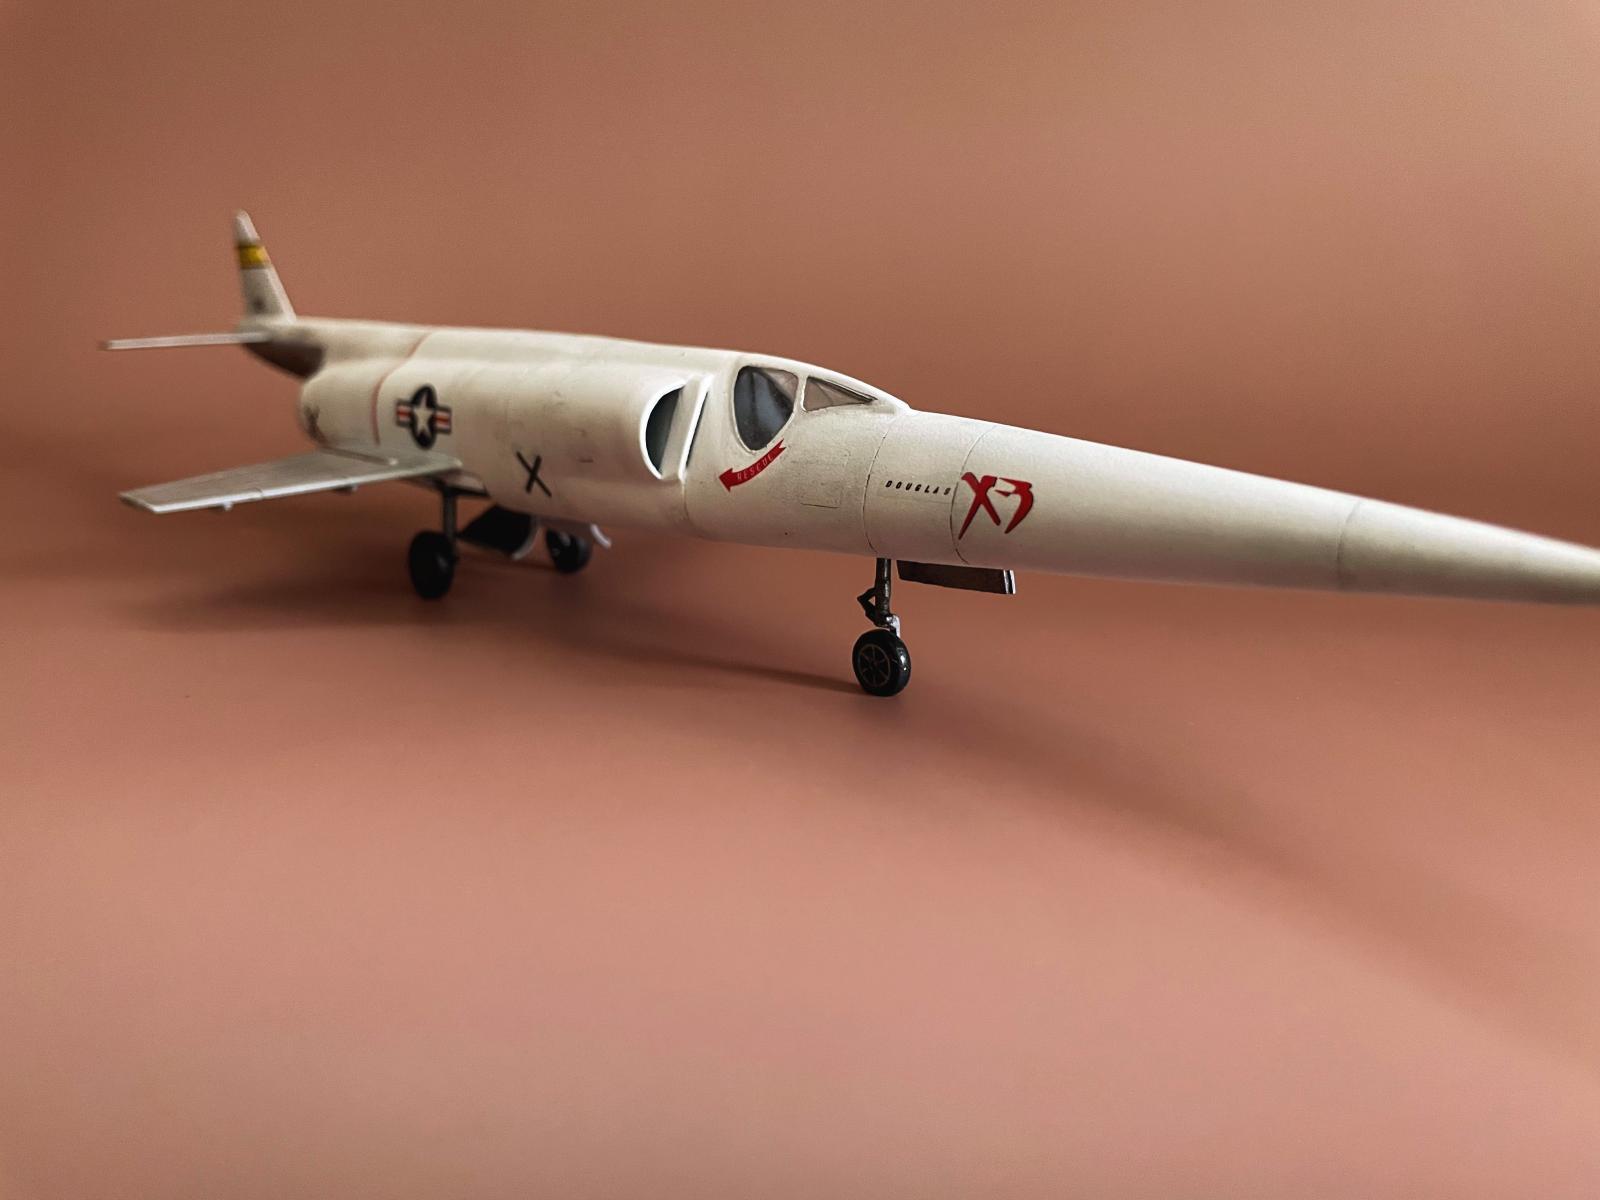
The AZ Models kit has 42 pieces in dark gray styrene, with the canopy as a separate clear piece. The molding has some nice engraved details, but there's a good bit of flash and edges are not crisp: you'll be doing a fair bit of filing and cutting and sanding. It seems to be fairly accurate, though one annoying nit is that the slit inlets under the engine intakes are not open. Following the above build thread, I used an Xacto (carefully!) to cut these open.
The canopy is seriously a terrible fit, and it needed considerable putty work:
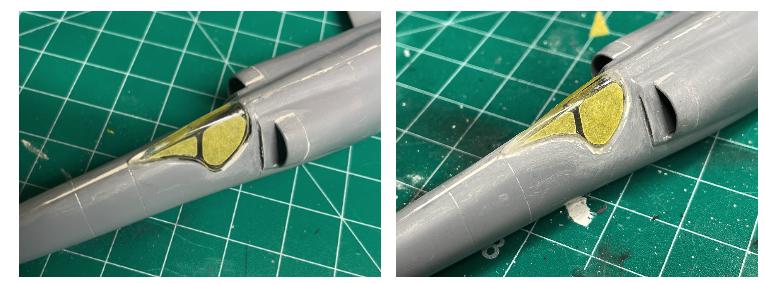
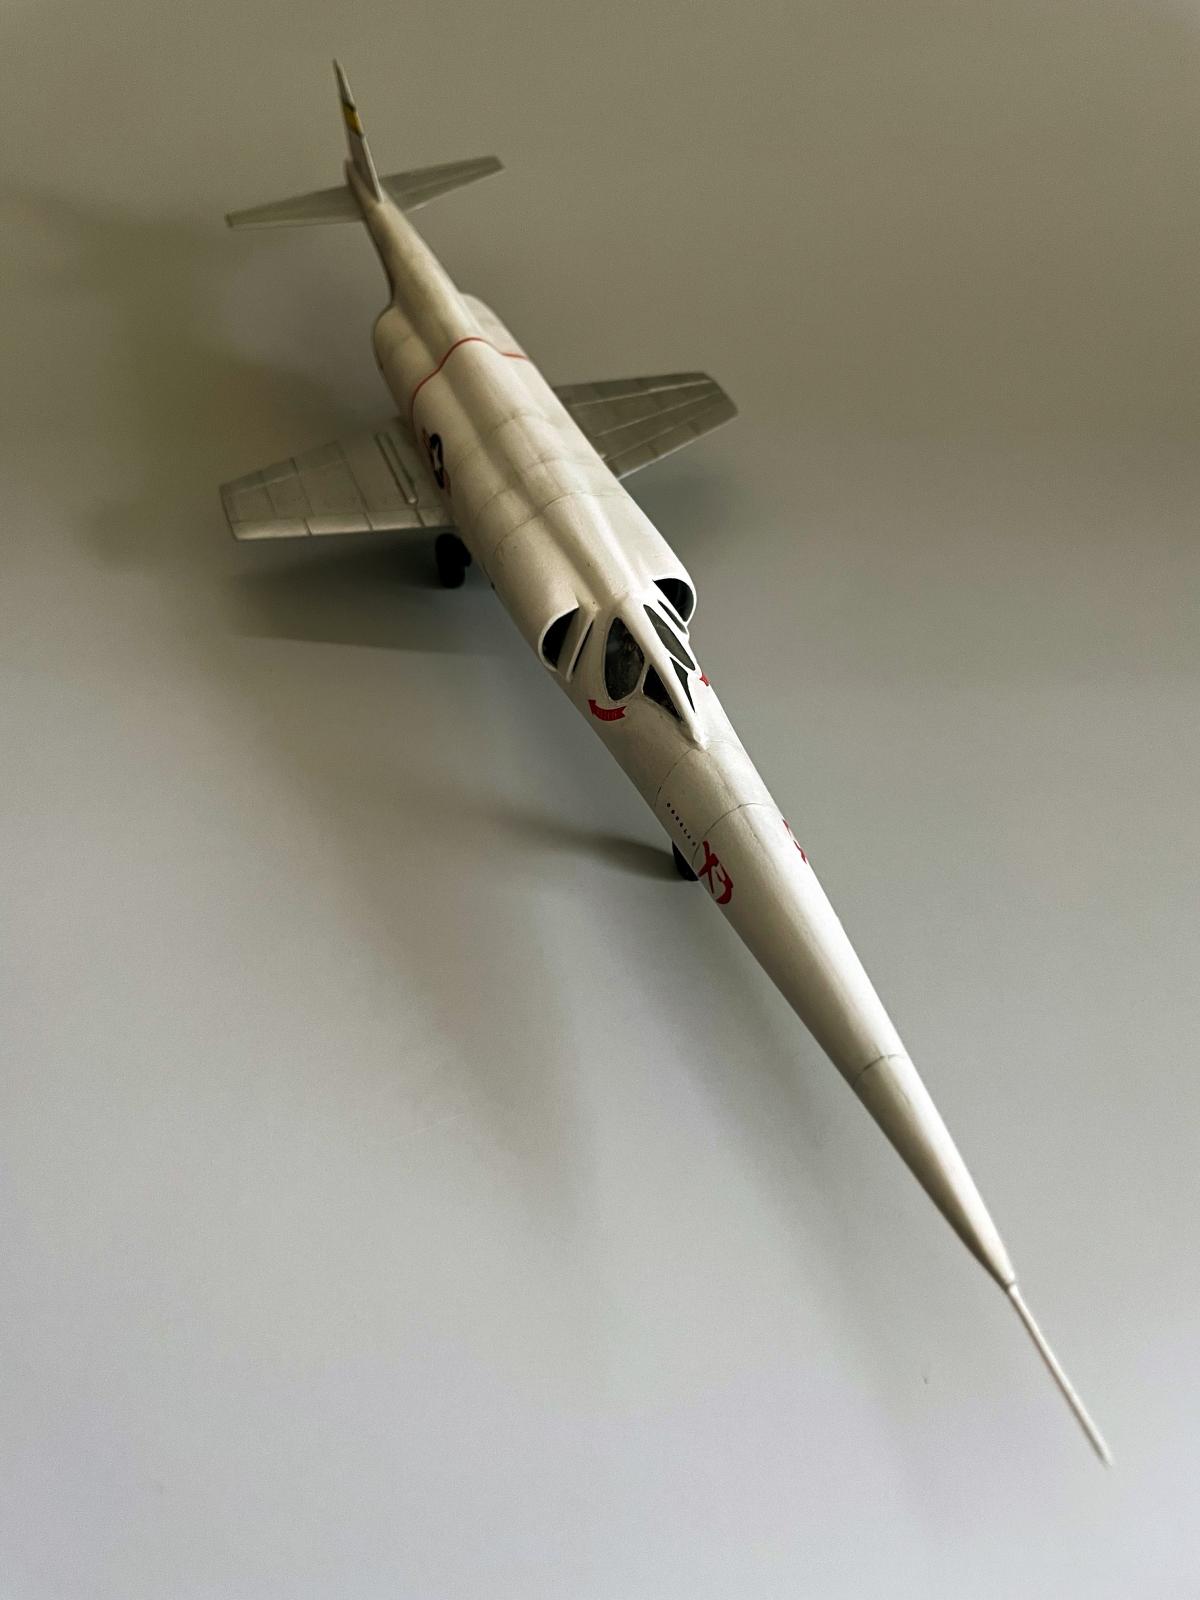
The canopy on the actual plane is part of the fuselage: it doesn't open! Instead, the pilot is raised into the cockpit through the bottom of the fuselage via a lifting mechanism. That's a definite plus of the Planet Models kit -- the canopy is part of the fuselage mold -- whereas here one needs to do their best to blend it into the fuselage. I must have primed, sanded, reprimed, resanded, ... multiple times before calling it a day.
The canopy windows are oddly but distinctively shaped, and I didn't trust myself to cut my own masks well enough. Luckily Peewit makes masks for this very model, and they fit perfectly. My only trouble was that upon removing them, they occasionally took some of the paint with them leaving slightly ragged edges in places. I suspect this was due to the several layers of paint and varnish that were sprayed over the canopy and given multiple days to harden up. This wasn't too difficult to touch up by hand.
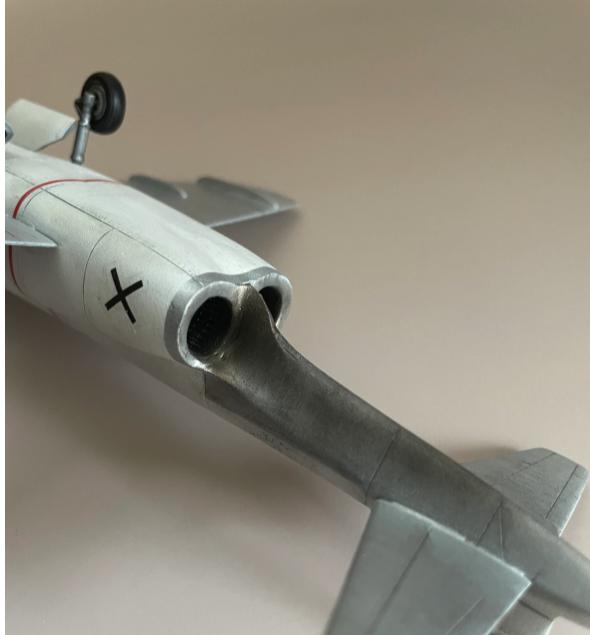
The engine nozzles are seriously messed up. For one, the real aircraft didn't have any (exhausts were fully housed in the fuselage). Second, the nozzles fit terribly. Both problems can be solved by simply doing without them. This left considerable space between the exhaust duct and the fuselage, which I filled with quarter mm plasticard and putty:

The result isn't true to the real thing, but it's the best I could manage.
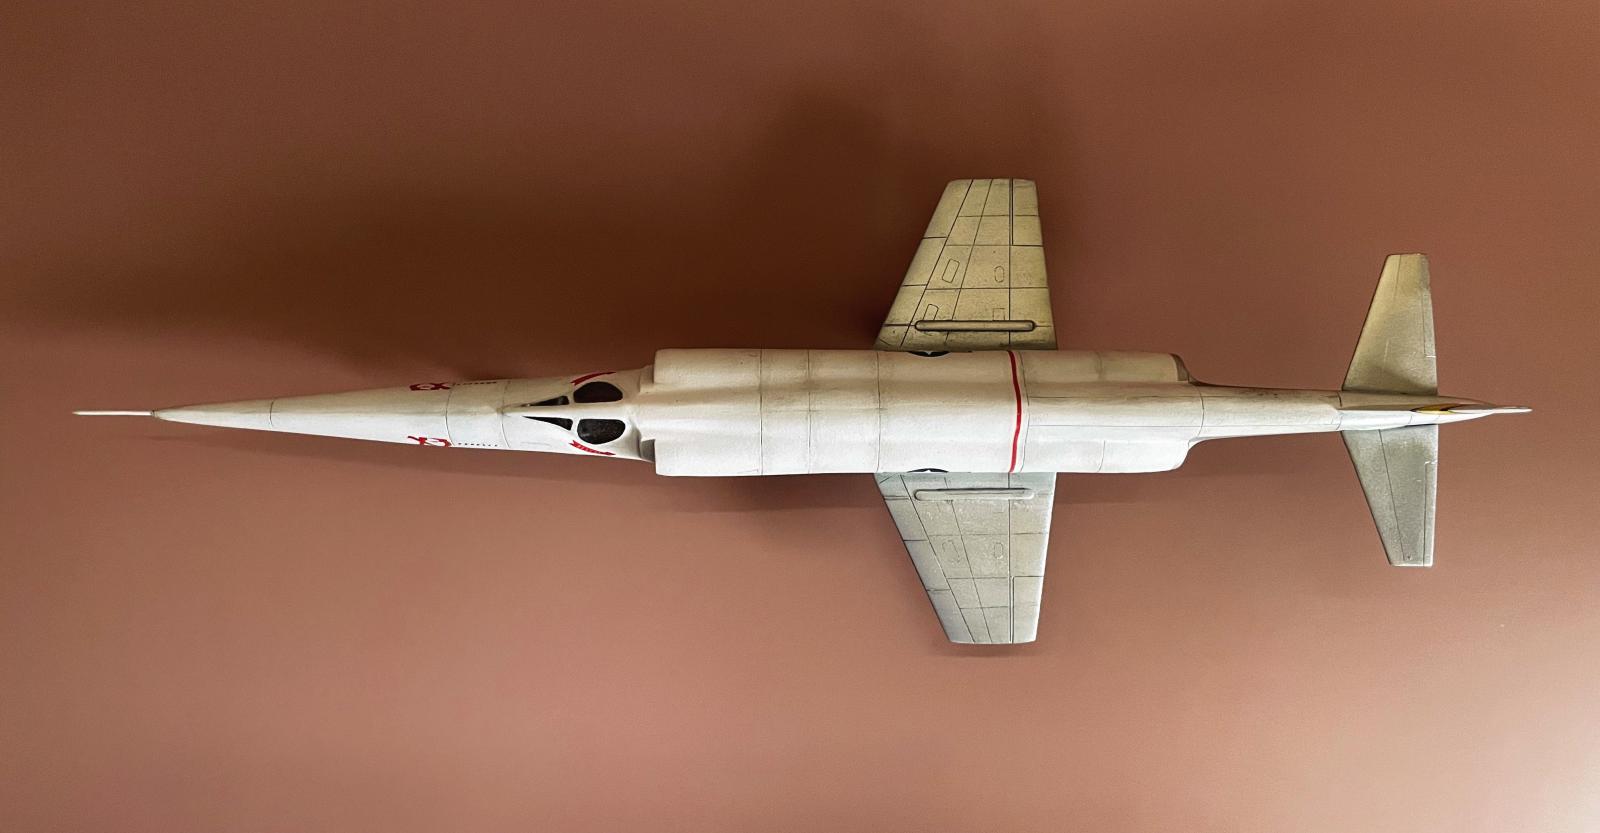
The wings were painted with Alclad Polished Aluminum (ALC 105). I tried an enamel pin wash on the wings with Tamiya Gray and found that either it or the mineral spirits attacked the finish. I've never seen this happen with Alclad before; luckily, this was easy to correct because it happened right away. I would apparently need to gloss coat these surfaces first, and, while Aqua Gloss was essentially made for the purpose of preserving Alclad metallic finishes, I balked at this. Instead, I opted for a gentle, water-based clay wash that worked well directly over the Polished Aluminum. Lesson learned.
For the metallic surface aft of the exhaust, I applied Alclad White Aluminum (ALC 106) followed by hints of Pale Burnt Metal (ALC 104) and Exhaust Manifold (ALC 123). I worked a small amount of light gray acrylic over the Exhaust Manifold, scuffing and partially removing it with a swab dipped in X-20A. This is a difficult process because it's a bit unpredictable: once the acrylic dries, it's on there for good. But, if done well, it can give a realistic heat stress effect which can be augmented with white pigments. Finally, I lightly brushed some Soot pigment around the exhausts.
As far as finish, I've seen several beautiful models of the X-3. These typically depict a clean and shiny subject, as the craft likely looked when it first rolled out of the hangar. I wanted instead to make the plane look a little worn, as various black and white photographs from the era show: there are smudges and chips marring the otherwise clean white surface.
After a base coat of Tamiya Flat White, I applied Tamiya Gray Panel Liner. I've had good luck using this light gray shade over white base without it looking too stark; however, in this case it appeared dark and too striking in places. I therefore softened it by going back over some of these lines with a white oil wash.
Wrapping up, I gave it a flat coat (Alclad Klear Kote Flat), but this made it look quite dead. So I went up a notch and tried Matte. Still mostly dead. So I went up a notch and tried Semi-Matte. This was much better. But, when I went to apply some oils (various shades of light gray), they reacted with the varnish in some areas, turning shiny and sticky. I just left it alone and let it dry for several hours, after which it settled down and looked normal. This was a first, though, as I've never had trouble with oils over Klear Kote Flat.
And almost forgot: I replaced the nose boom from the kit, which was a tad short, with a long, sharp straight pin:
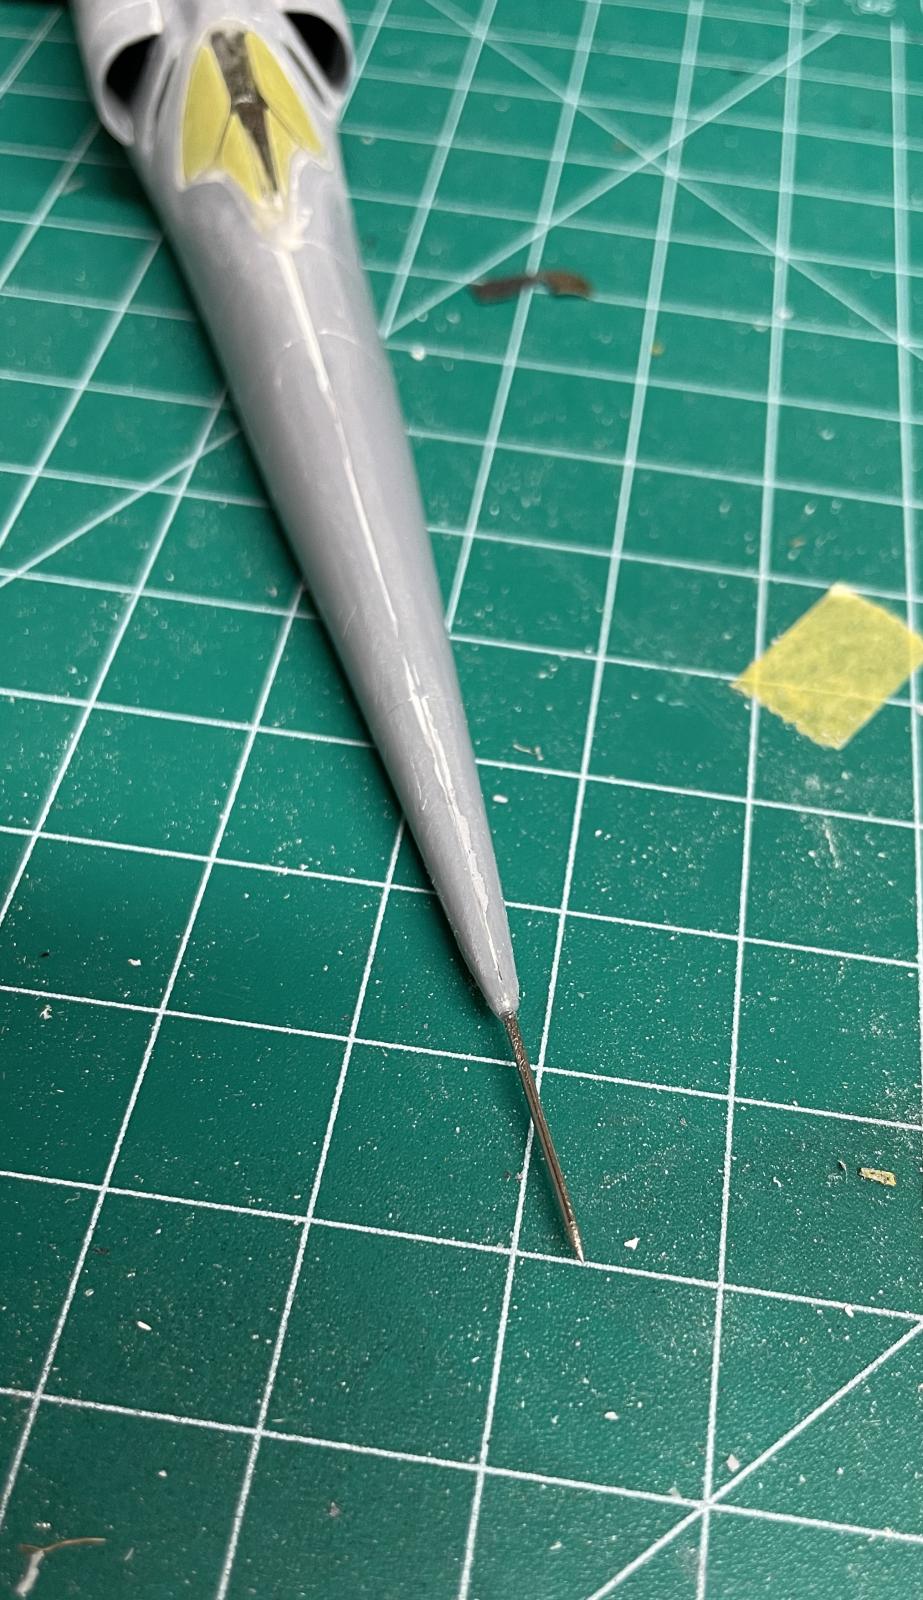
Because if any of my models is going to impale someone, it's going to be one named Stiletto.
All in all, this kit was a bit of a battle, but I think I ultimately won. The struggle is worth having this strikingly unusual aircraft on the shelf.


You wrote: "least worst of the worst"
I almost choked my Pepsi laughing! Very nicely done, Brian. @bapowellphys
Beautifully done. As with many aircraft of that time period under powered engines were a problem.
Turned out nicely in the end, Brian.
An amazing result out of a challenging kit, Brian!
Great, detailed write-up.
Congratulations!
Great build!
Great job on this build, she's a beauty!
Beautiful result out of this challenging kit, Brian @bapowellphys
A true gem.
Well done Brian, your challenges with building this kit was worth the outcome IMHO. There is an X-3 on display in the USAF Museum in Dayton, Ohio, an impressive looking A/C.