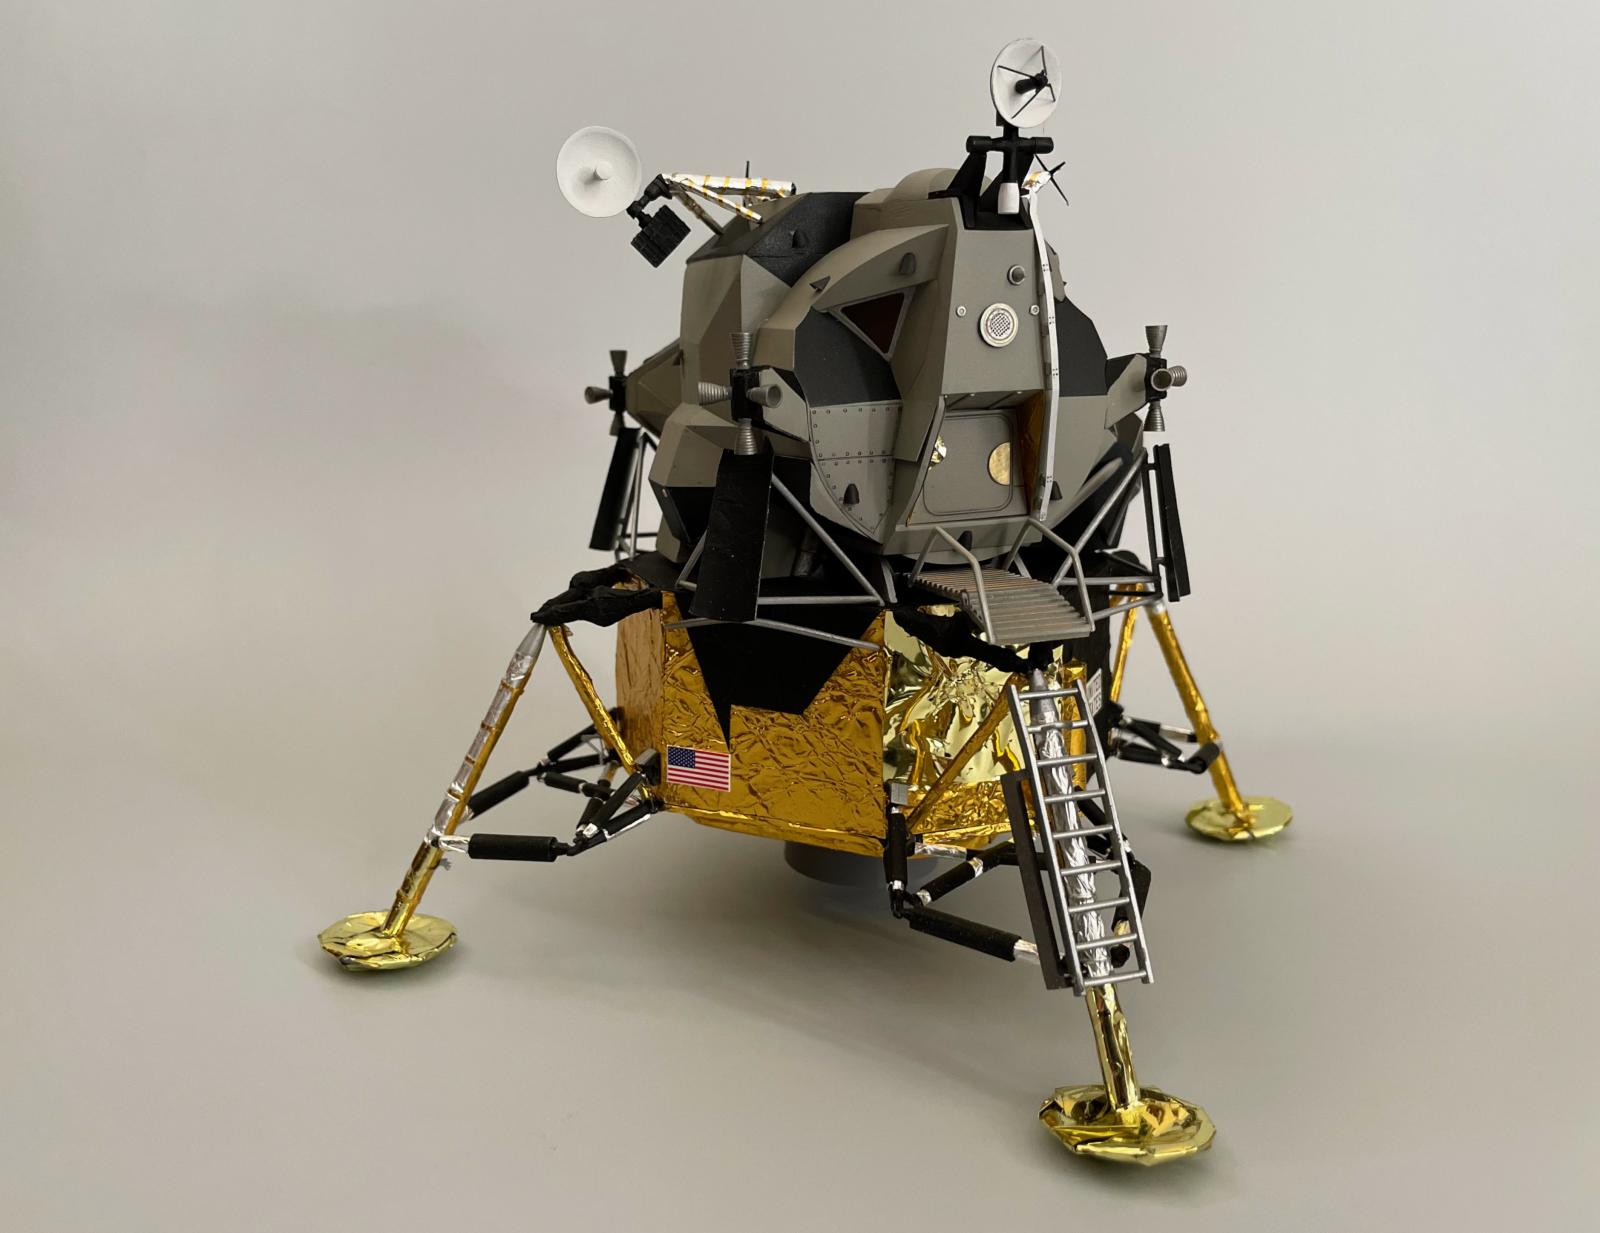
Monogram-New Ware Apollo Lunar Module
The NASA Apollo Program led to the successful landing of a human being on the surface of the Moon. Early missions in the series developed tactics and techniques and rehearsed the operational segments that would culminate in 1969 with the landing of Apollo 11 on the lunar surface. NASA would visit the moon five more times into the early 70s; Alan Shepard would smuggle a golf club onto the Moon and John Young would do donuts in a lunar rover before NASA shrugged and decided, "eh, maybe that's enough."
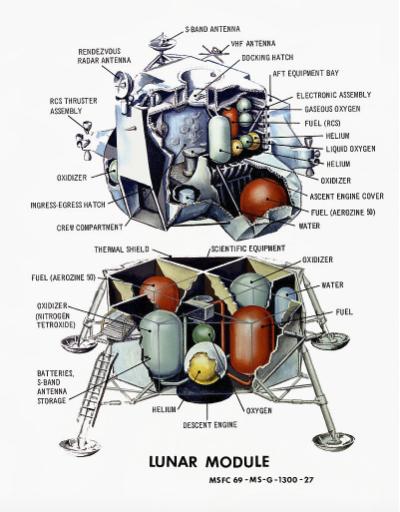
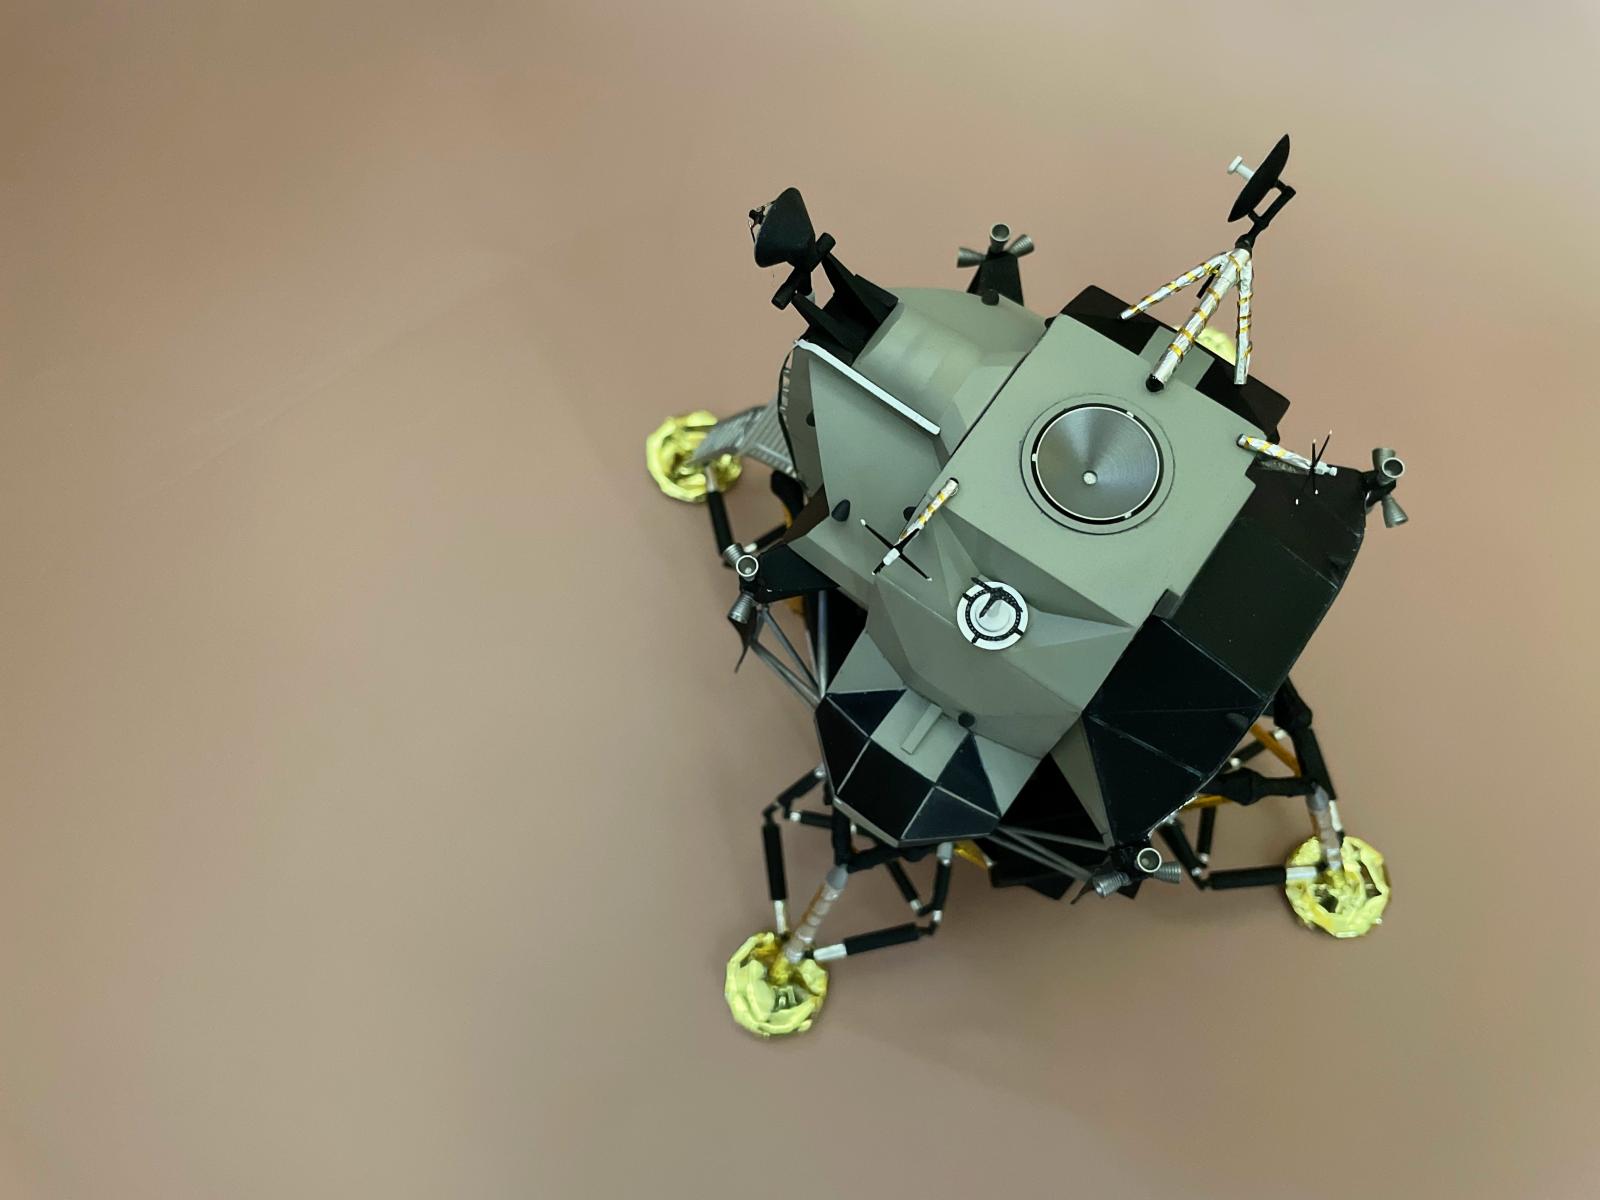
The Apollo mission adopted the lunar orbit rendezvous process for landing on the moon: upon achieving lunar orbit, a dedicated lander craft--the lunar module (LM, pronounced lem)--would separate from the command and service module (CSM) and fly down to the lunar surface. During descent, computers would control the thrust of the module's rocket until an altitude of 500 feet, after which the pilot would assume control and steer the module in for landing. When three 1.7 m-long surface probes protruding from the LM 'feet' sensed the surface, the astronauts would cut the rocket. These probes were rigid and would get snapped and mangled upon upon contact with the surface, cueing engineers to forego a probe on the leg with the crew ladder for fear that astronauts would tear their suits and/or impale themselves on the wreckage. To return to the CSM, the ascent stage would blast off (conveniently using the descent stage as a launch pad) and ferry the crew back to orbit; once safely aboard the CSM, the remains of the LM were jettisoned for a controlled crash onto the lunar surface.
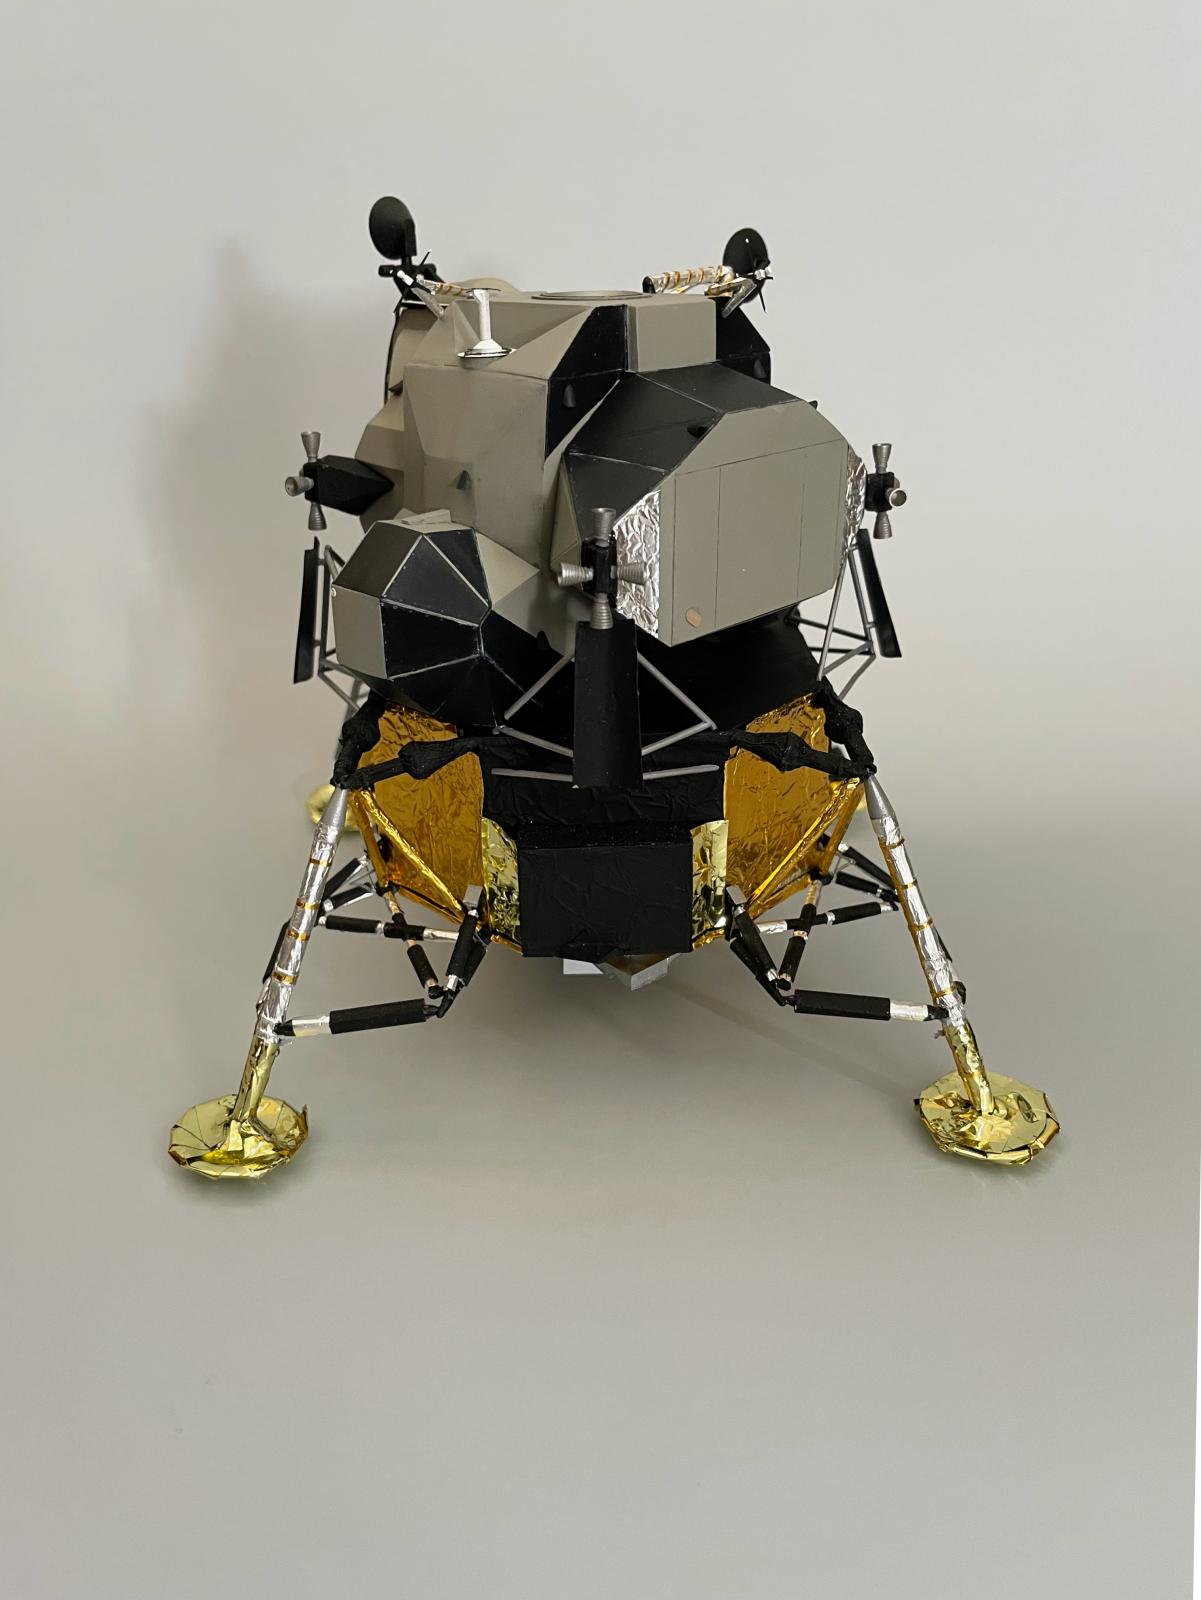
The LM was constructed almost entirely of aluminum, with Kapton foil blankets covering much of the descent stage surfaces. Besides a small crew compartment with two windows, the volume of the LM was almost entirely allocated to fuel:
And, yet, Armstrong on Apollo 11 still managed to touch down with a scant 15 seconds of fuel left!
The Kit
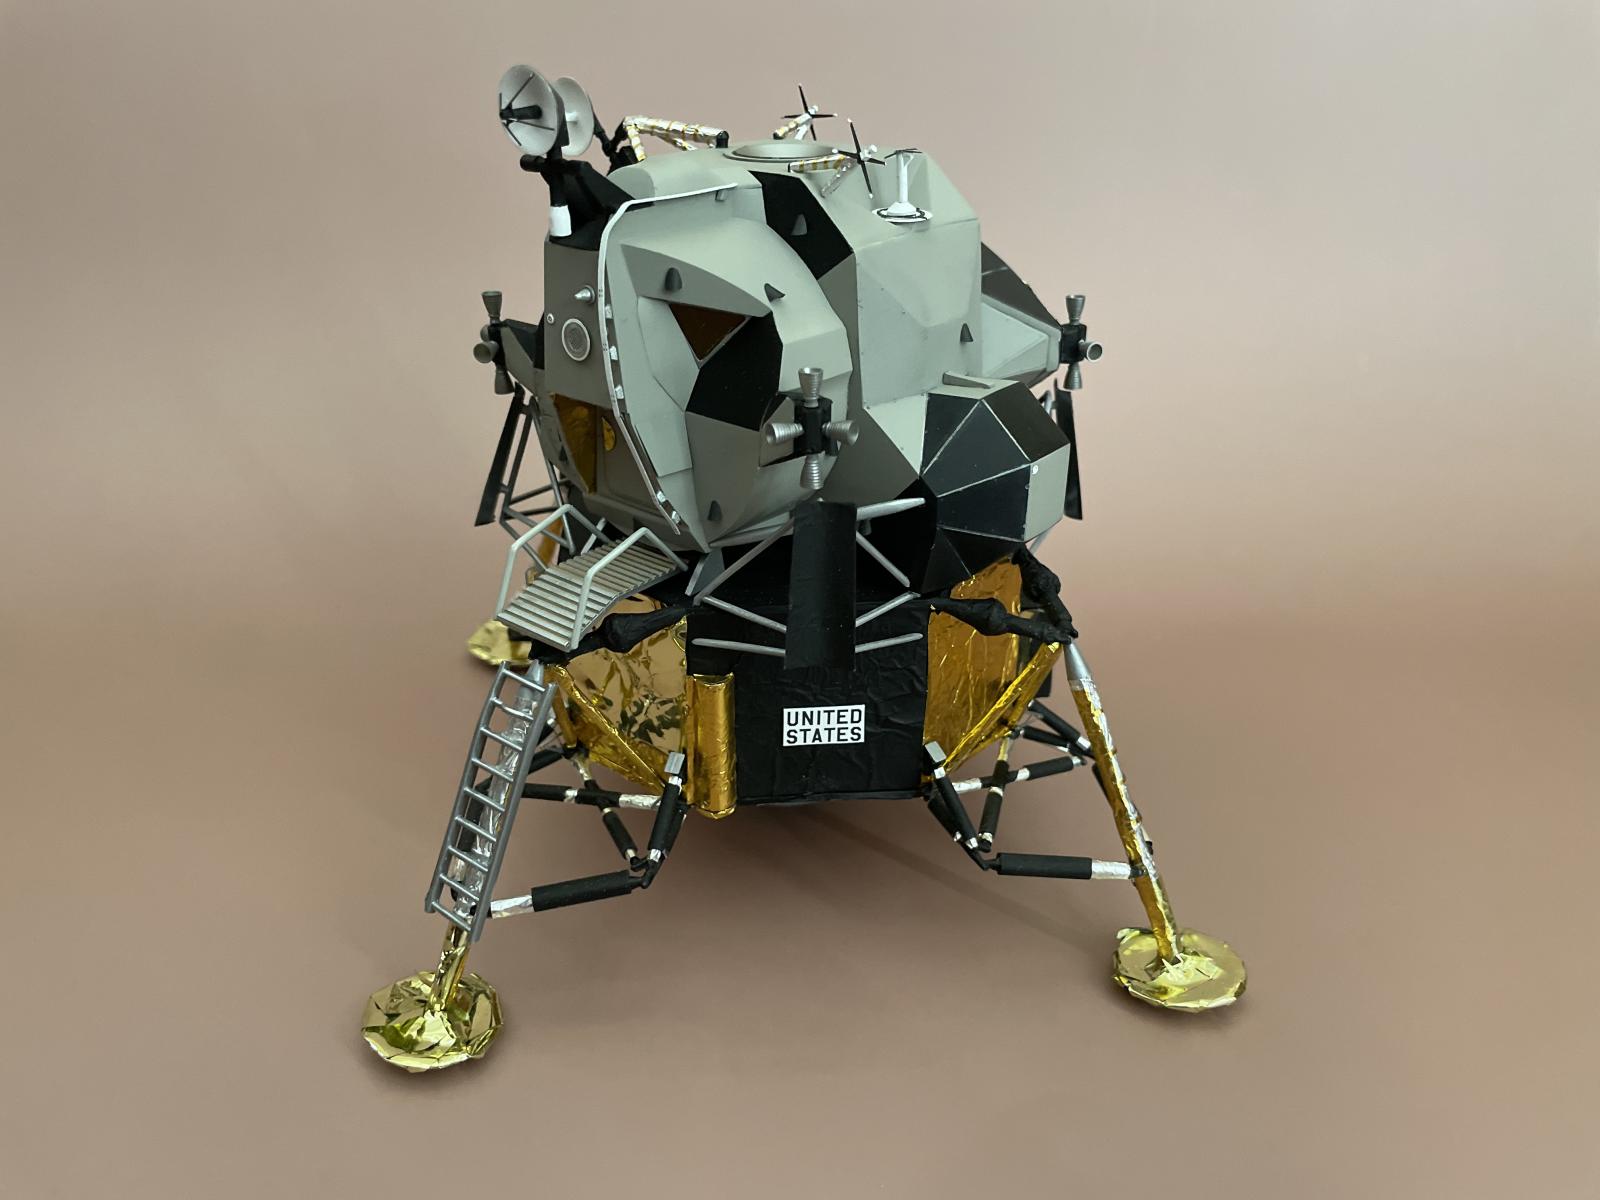
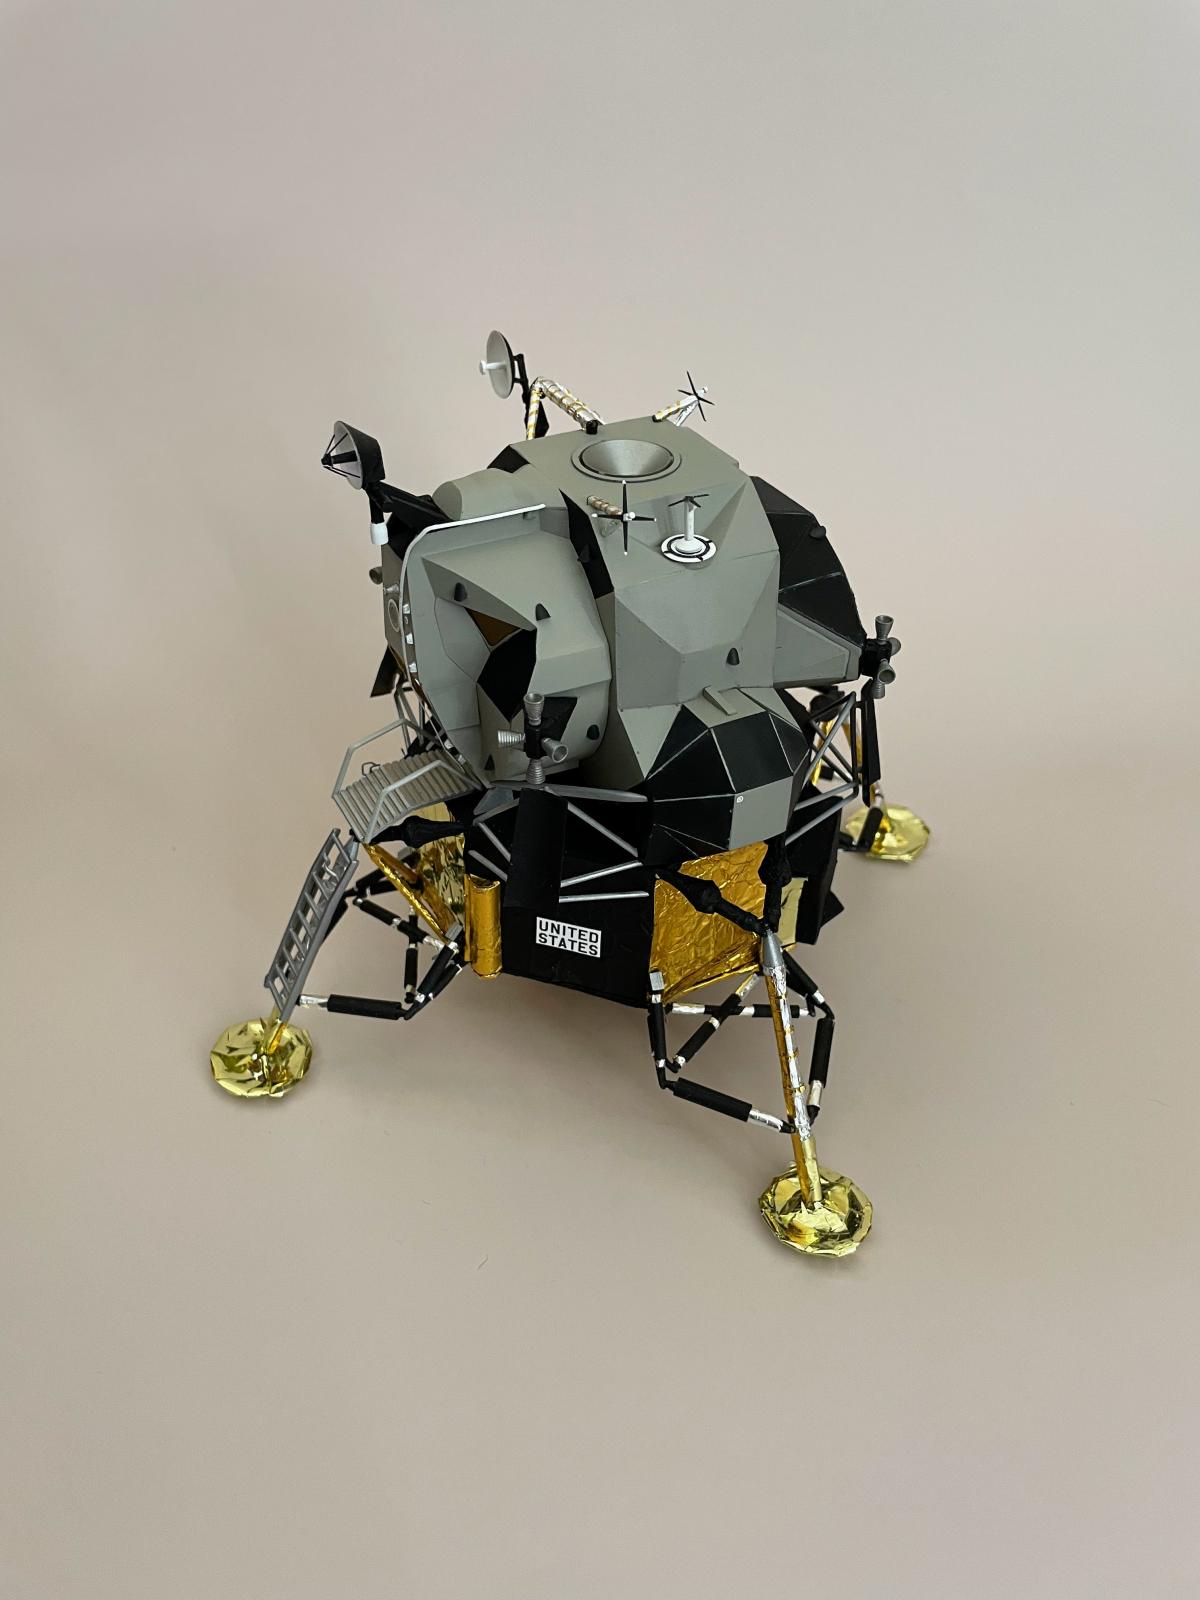
The Monogram 1/48 Lunar Lander was introduced in 1970 and has been re-boxed several times since then. It has obvious accuracy and detail issues, which we'll touch on, making the New Ware Lunar Module Detail Set an especially attractive add-on. This set provides more detailed and accurate radars, antennas and other fixtures like attitude thrusters, and fixes overall shape problems. Some of these are modifications made on top of existing pieces, and so are entirely new. The detail kit includes both resin and photo-etch pieces.
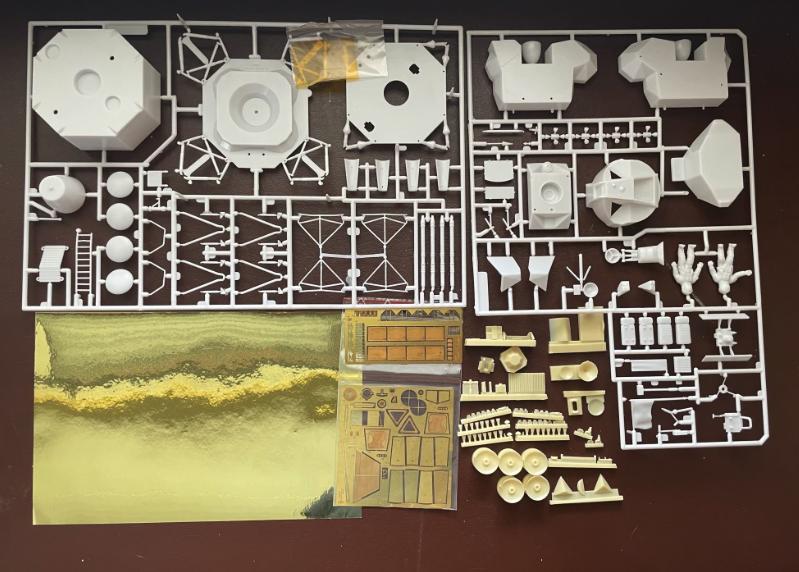
The Monogram kit includes parts for the module as well as astronauts, equipment for surface experiments, and the lunar surface itself, complete with footprints enough to complete a diorama:
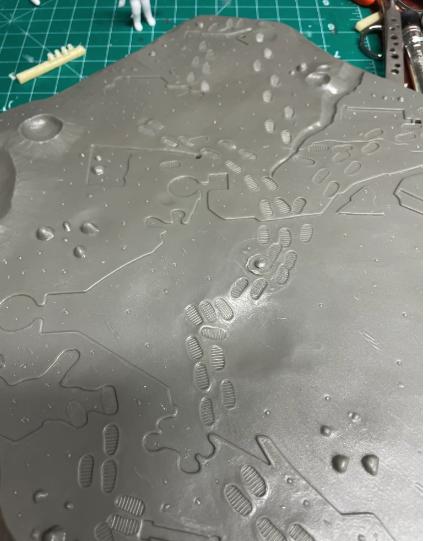
The various outlines on the surface are intended to mark some interesting angled shadows to be painted black, but as you can see, there is actually a variation in depth here that really messes with the realism of the piece. The surface equipment is also poorly detailed, especially in comparison with the improved lander (New Ware does apparently have a few equipment detail sets, but I don't know whether these replace or augment the stuff in the Monogram kit). For these reasons I decided against doing a full diorama here and instead focused all my energies on the LM itself.
A few examples of New Ware improvements include the reaction control thrusters (Monogram are white, featureless, and solid):

The rendezvous antenna:
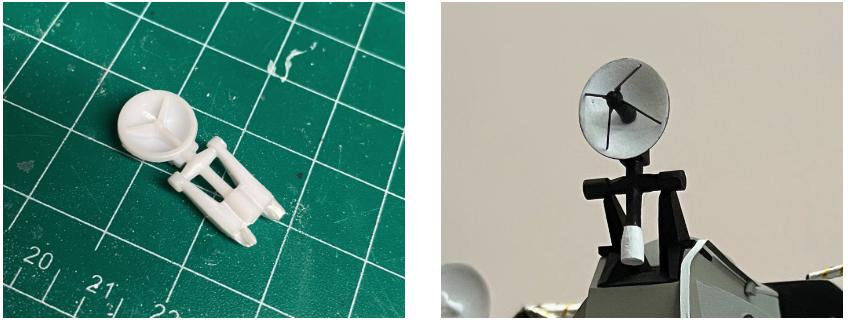
Granted, the New Ware antenna requires you bring your own craft wire to the party, but there's really no comparison. (Incidentally, I found 30 gauge wire to be a good size for the scale).
Some replacement parts are just more dainty or delicate versions of their Monogram counterparts, like the RCS plume deflectors,
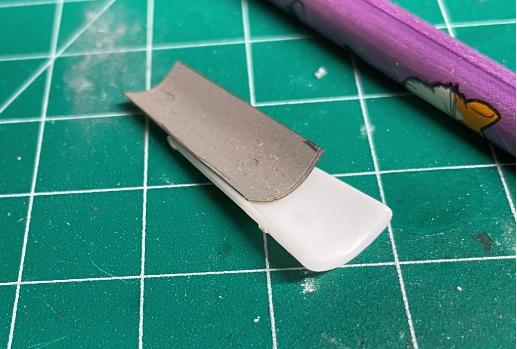
which were PE and much thinner than the plastic. I used the original piece as a template to bend the PE piece with the help of a pencil.
Finally, here is an example of shape correction:
This correction, however, comes back to haunt you in the very end as you go to place the ascent stage atop the descent stage. These protrusions bang up against the plume deflector supports and keep the ascent stage from lying flat:
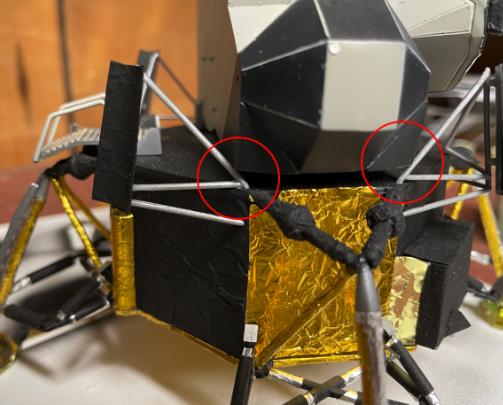
The only fix at this stage in the game is to snip a small portion out of each support.
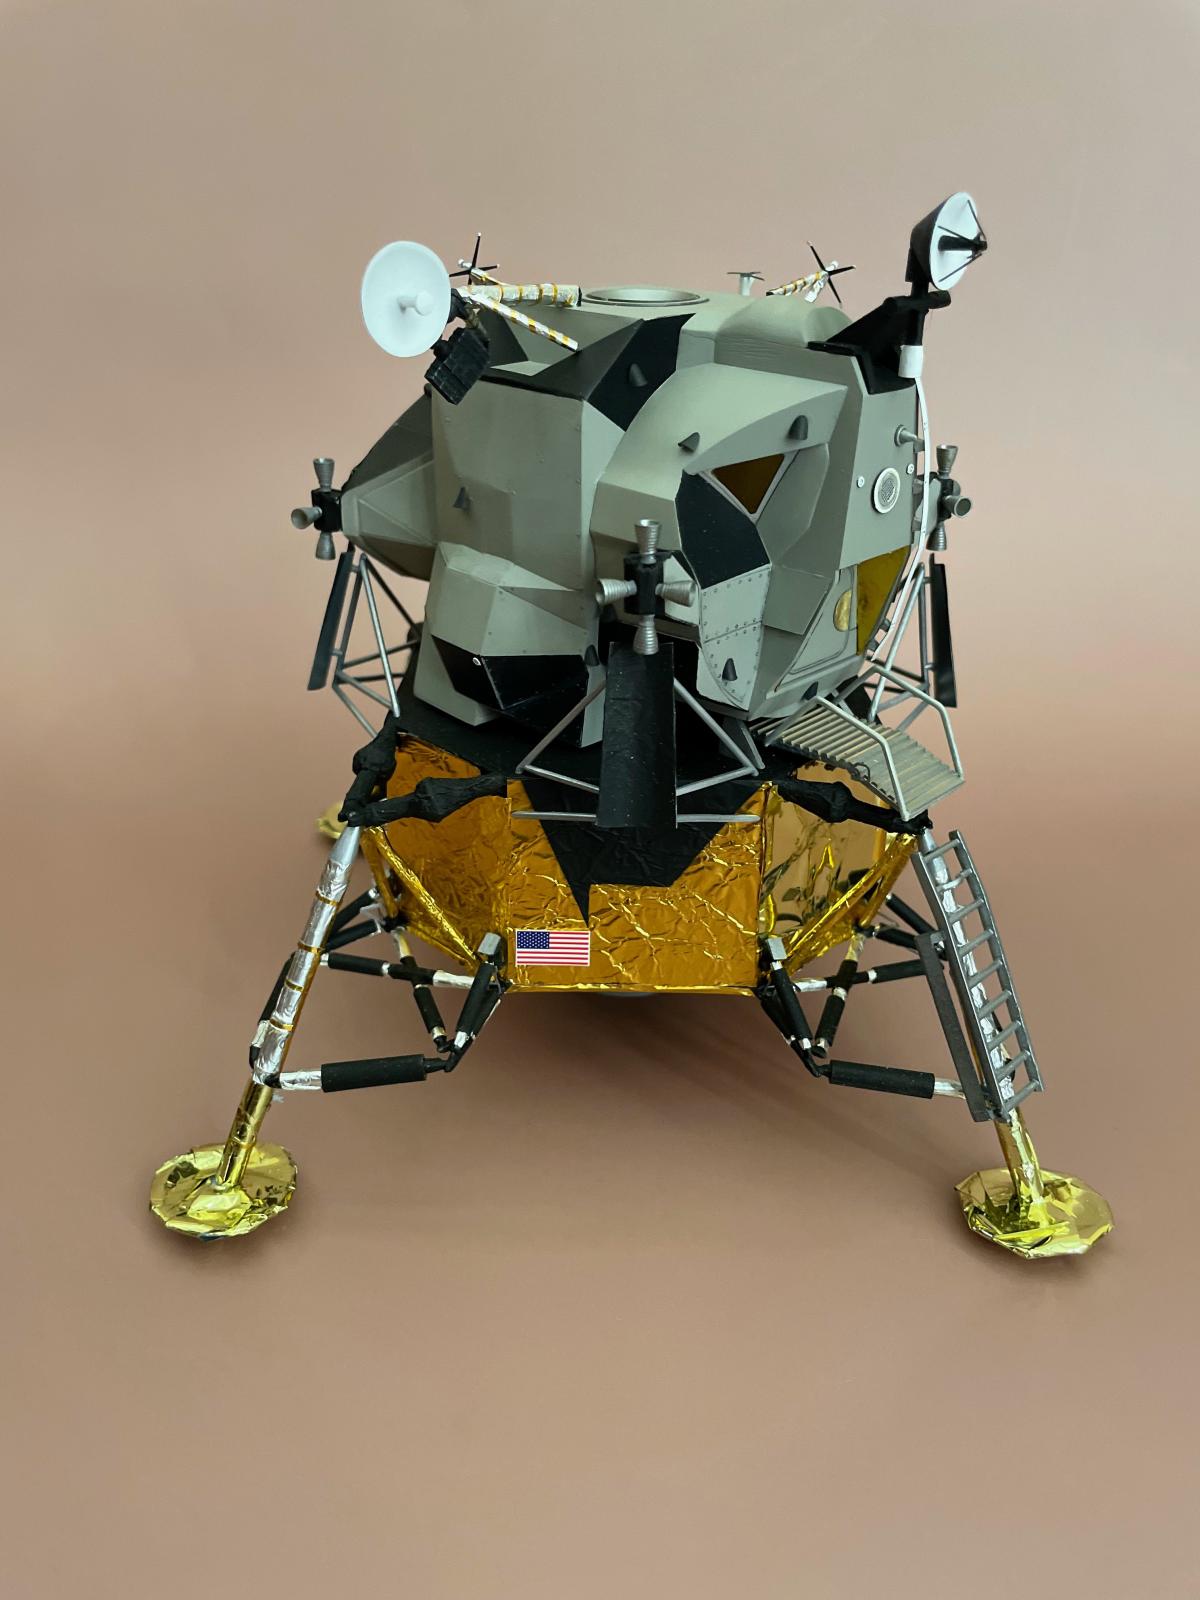
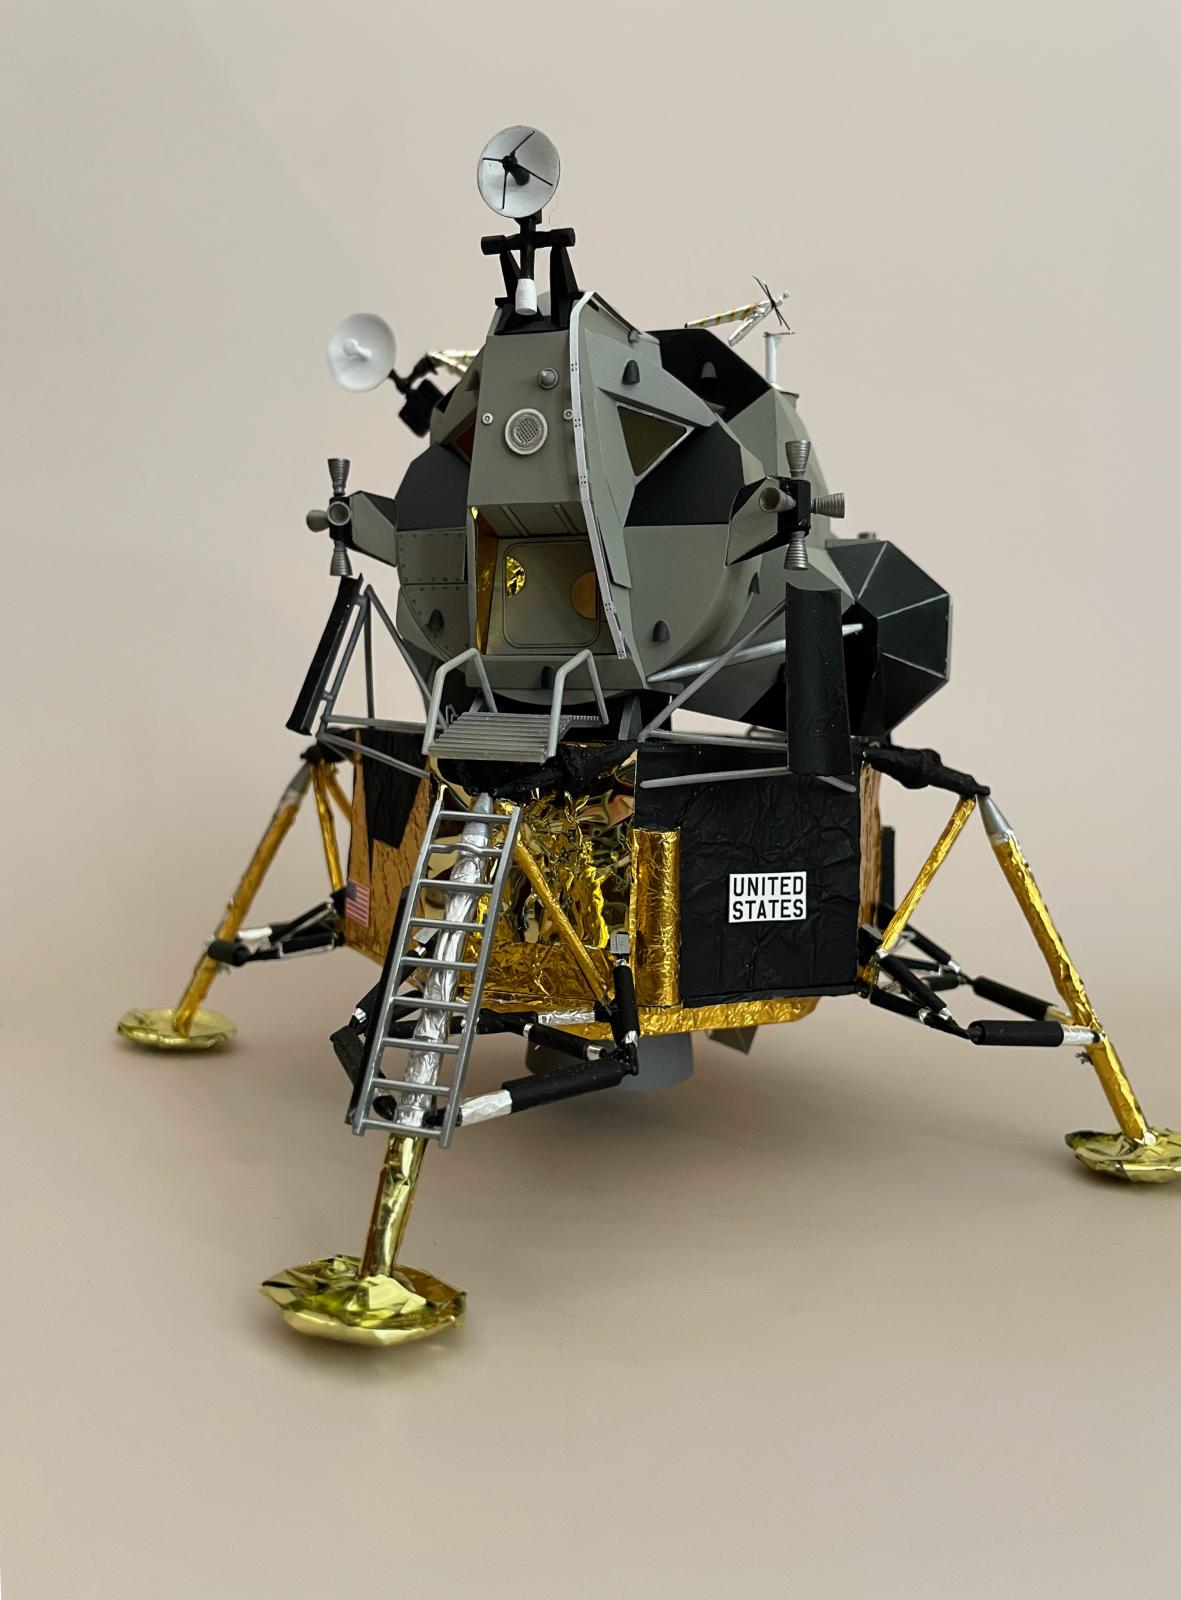
A major shortcoming of the New Ware kit (following I guess on the major if expected shortcoming of the Monogram kit) is the lack of an improved EVA antenna. This antenna looks like the frame of a small parasol, with delicate wires forming a cone atop a thicker metal stem. The Monogram piece is a non-starter, being a solid cone with a thick, squat support; sadly, it seems like an easy thing to improve on with some PE. And, so, I decided to omit(!) this part from the model: sorry, Buzz, no EVAs for you on this trip. (If and when my skills advance to the point where I can scratch build a decent EVA antenna, it's easy enough to just stick it on the finished model).
Glancing at photos of the various Apollo landers online reveal some obvious improvements one can make to the assembly. For example, the upper landing gear supports are covered in black foil/blanket material; whereas the kit calls for these parts to be simply painted black, we can do better by foiling them first:
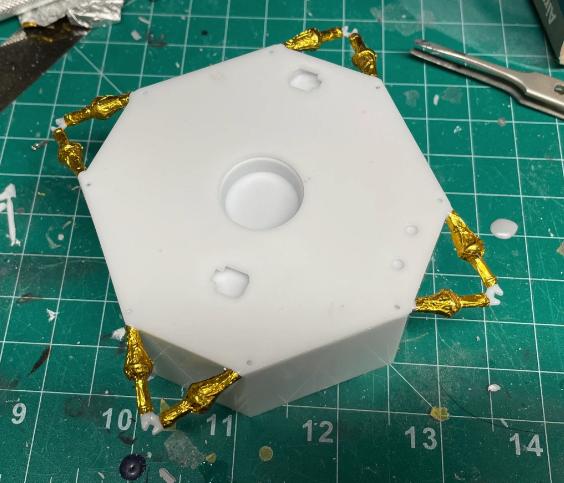
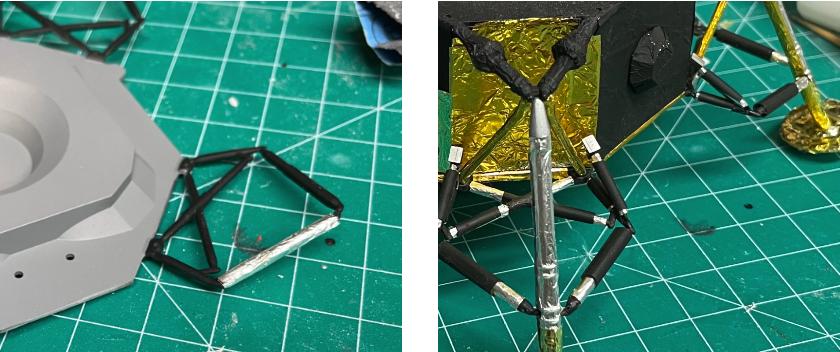
Also to be simply painted black are the lower landing gear supports, but photos show the various trusses and rods covered in foil which in turn is covered in some kind of smoother black sheathing: the detail set actually includes one such large sheath, but nothing else. I wanted to replicated this, rather than just paint the plastic trusses black, and so I decided to scratch build these cylindrical sheaths using Q-tips, which I could easily cut to size and were a good diameter to slide over the trusses,
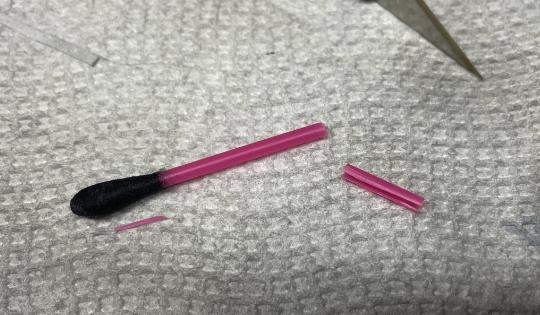
First, I foiled all the trusses, then painted the Q-tip pieces black and just fit them in place:
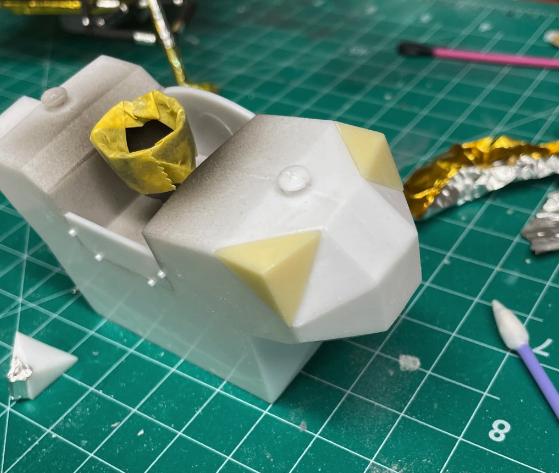
I should also mention foil at this point. As you can see in the photo of the kits parts above, the Monogram supplies you with gold foil. It has an adhesive on one side, and the backing is conveniently marked for cutting pieces to proper sizes. The problem is that the foil isn't quite the right color, which is more of an amber than a pale gold; furthermore, it's very "crinkly", like cellophane, and so doesn't shape so easily. I therefore purchased some actual foil closer to the real color, and primarily used that. Photos do reveal multiple shades of gold foil, however, and so I used the Monogram foil in places as well (like the landing gear feet).
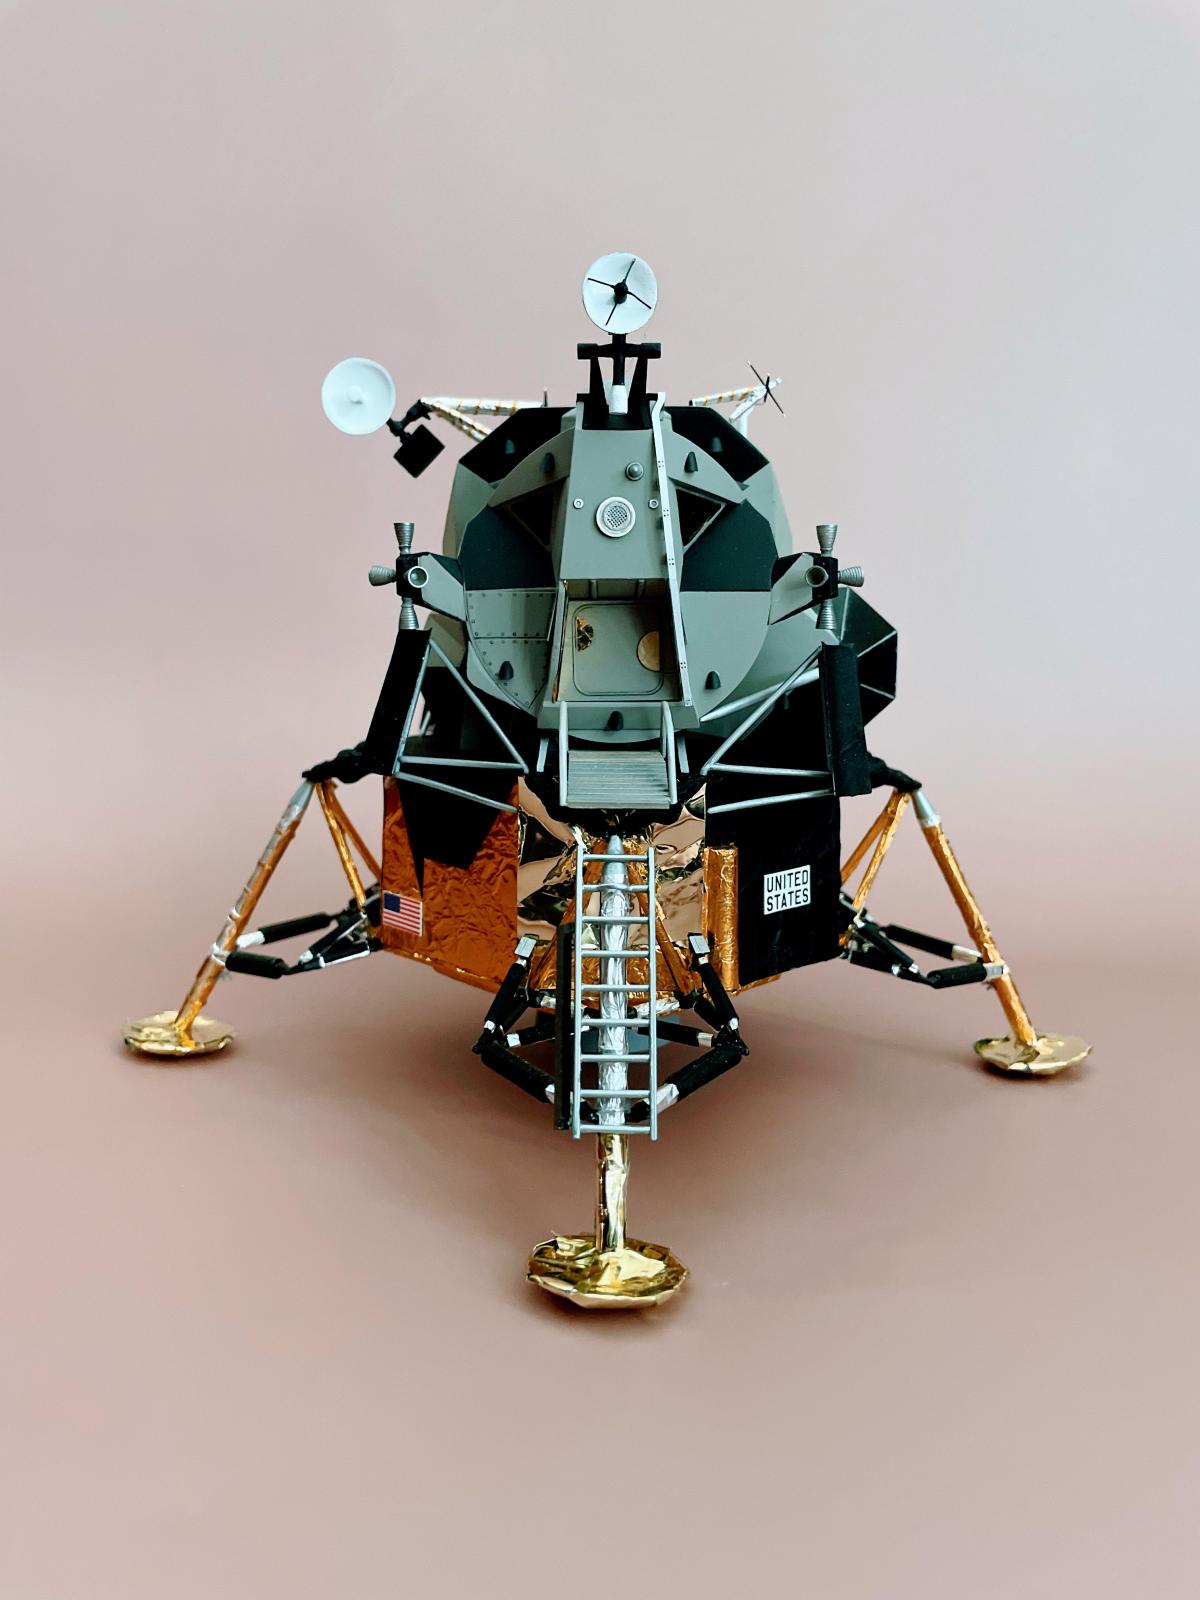
Once the descent stages is complete, set it safely aside as you work the ascent stage. These two shall not see each other until their wedding day. The color of the ascent stage is not obvious. With some research one learns that the non-black portions are actually made of anodized aluminum, which is described as having a finish like "titanium". The kit calls for these parts to be painted "silver". But the finish is not metallic in the photos I've seen, but rather an opaque earthy gray, described in places as "beige-gray" or even "beige-green-gray". I found Tamiya Medium Gray XF-20 to be a decent match to photos.
For detailing I applied some enamel washes to panel lines and rivets: Tamiya dark gray on the gray portions of the craft, and AK Interactive white wash on the black portions. Similar to white oils, the wash leaves a haze behind that cannot be removed with white spirit, even when applied over an acrylic varnish. This is, in this case, OK because it acts to mute the uniform, deep black tones; the effect also tends to diminish upon a coat of matte lacquer varnish.
Finally, in photos there is a lot of gold tape visible, notably wrapping the foil covering the landing gear and antenna supports. I decided early on that I would not attempt this: too tedious, too much in the weeds even at this scale. But, towards the end of construction I asked myself: "really, how many other chances in life are you going to have to spend a few hours minutely, fastidiously, insanely cutting thin strips of gold foil and precision-glueing them into place around odd and awkward shapes?" And so I ended up doing a little bit of taping; for sure a fully accurate accounting is beyond my abilities and patience at this scale.
In conclusion, this was a challenging, mixed-media piece. I didn't set out to reproduce any specific mission article, mostly since the few really useful and detailed photos I could find online were scattered across multiple missions. What I ended up, instead, with hopefully captures the essence of the quintessential Apollo lander.

Well done, Brian! Nice to see real space vehichles.
you nailed the look of this one, wow! Superb result
Brian (@bapowellphys) this is such a cool looking model. A fantastic replica of the real thing.
Very impressive result, Brian @bapowellphys
You definitely tackled this challenging kit.
@bapowellphys - Very nice work Brian. The final result looks fantastic.
Fantastic job, Brian!
Excellent improvements!
🙂 ... Greetings ... 🙂 :
Hope you are proud of this model Brian ( I would be ).
Your improvements make it look more complex and so full of life.
Hope to see it soon with a lunar base diorama.
Nice work improving this old kit. Here's an original. this was to be Apollo 18. The Cradle of Aviation on Long Island was lucky to have this. the last shot is a prototype. notice the earlier round hatch.
3 attached images. Click to enlarge.
Amazing work and attention to detail.
Love it. Really nice job. Something I have often wondered about building myself at some stage. Is this an off the shelf kit?
Thank you! Yes, it’s the Monogram kit with the New Ware detail set: links to the specific kits are in the write-up above. I used my own foil and added some sheathing to the landing gear; otherwise OOB.