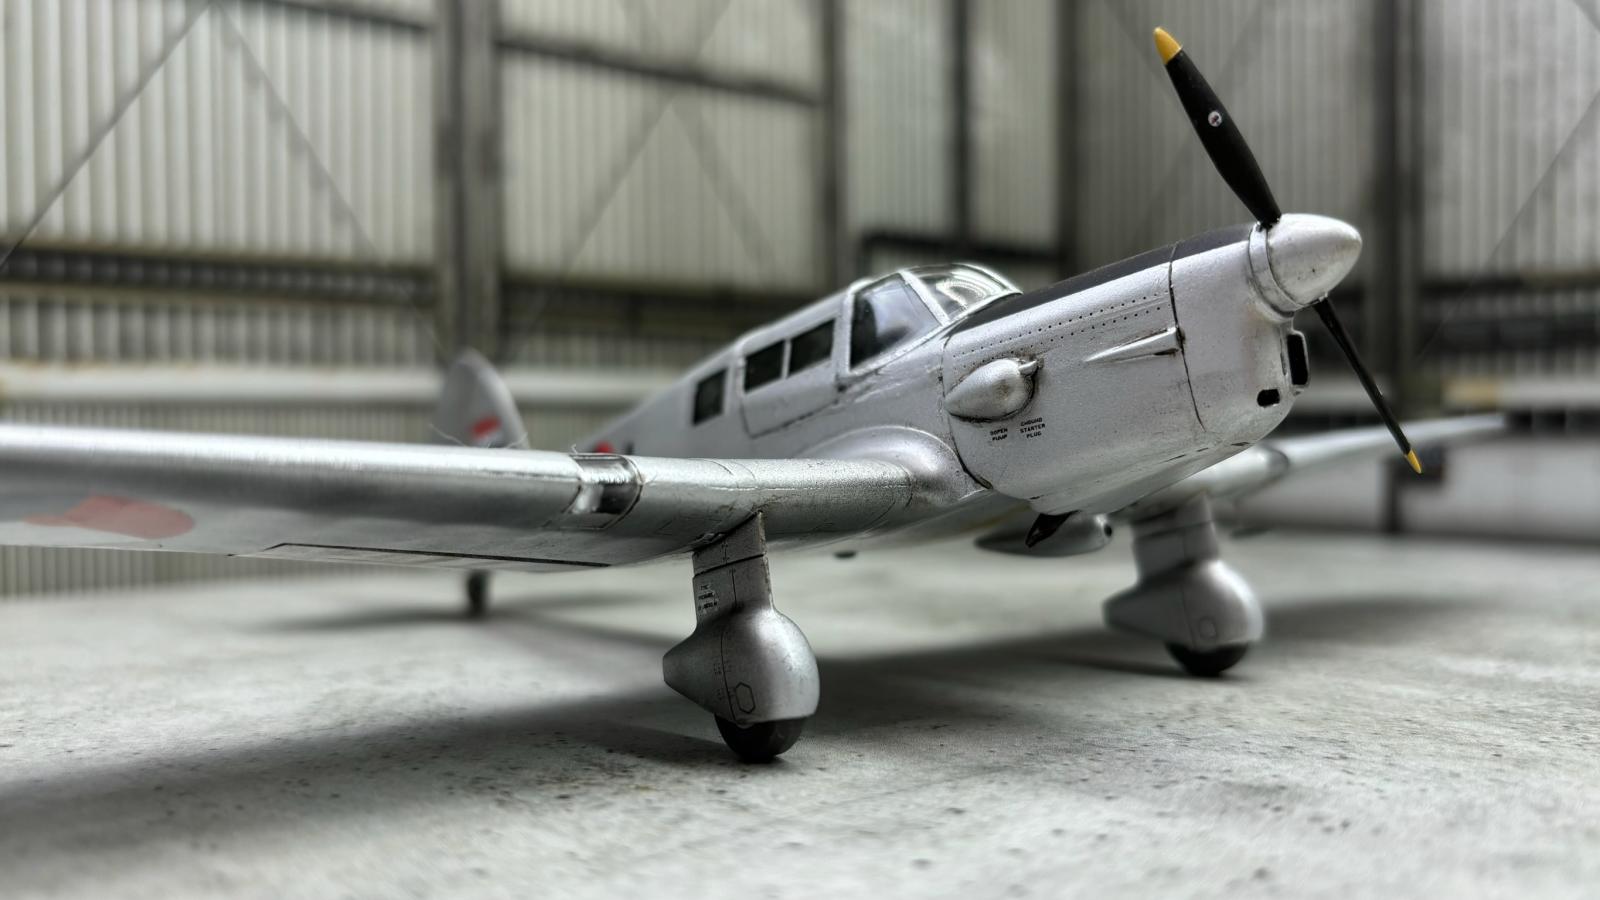
RNLAF Percival Proctor III 1/48 (Dora Wings DW48006)
Hi all, as far as I can see this is the first post of a Percival Proctor on iModeler.
I have to admit that I've never heard of this aircraft myself before, but in my quest for 1/48 scale aircraft that served in the Royal Netherlands Air Force (RNLAF), I came across this particular little airplane.
The aircraft's history.
The Percival Proctor was a development of the pre-war Percival Gull. The prototype D.1 Gull, a 3-seat tourer first appeared in 1932. The successor was D.2, designated Gull IV.
In 1934 Percival introduced the D.3 Gull VI, with a DH Gipsy Six engine, improved undercarriage and improved cabin layout (especially top and doors), but retained the Gull IV folding wing.
In November 1935, the four-seat K.1 Vega Gull was introduced, with a DH Gipsy Six engine and equipped with dual controls and flaps. This type was very successful and there were ninety examples built till July 1939.
The Proctor was originally a military version of the Vega Gull in which the number of seats was reduced to three. It was mainly used for training and communication work by the RAF and RNLAF.
The Proctor in Dutch service.
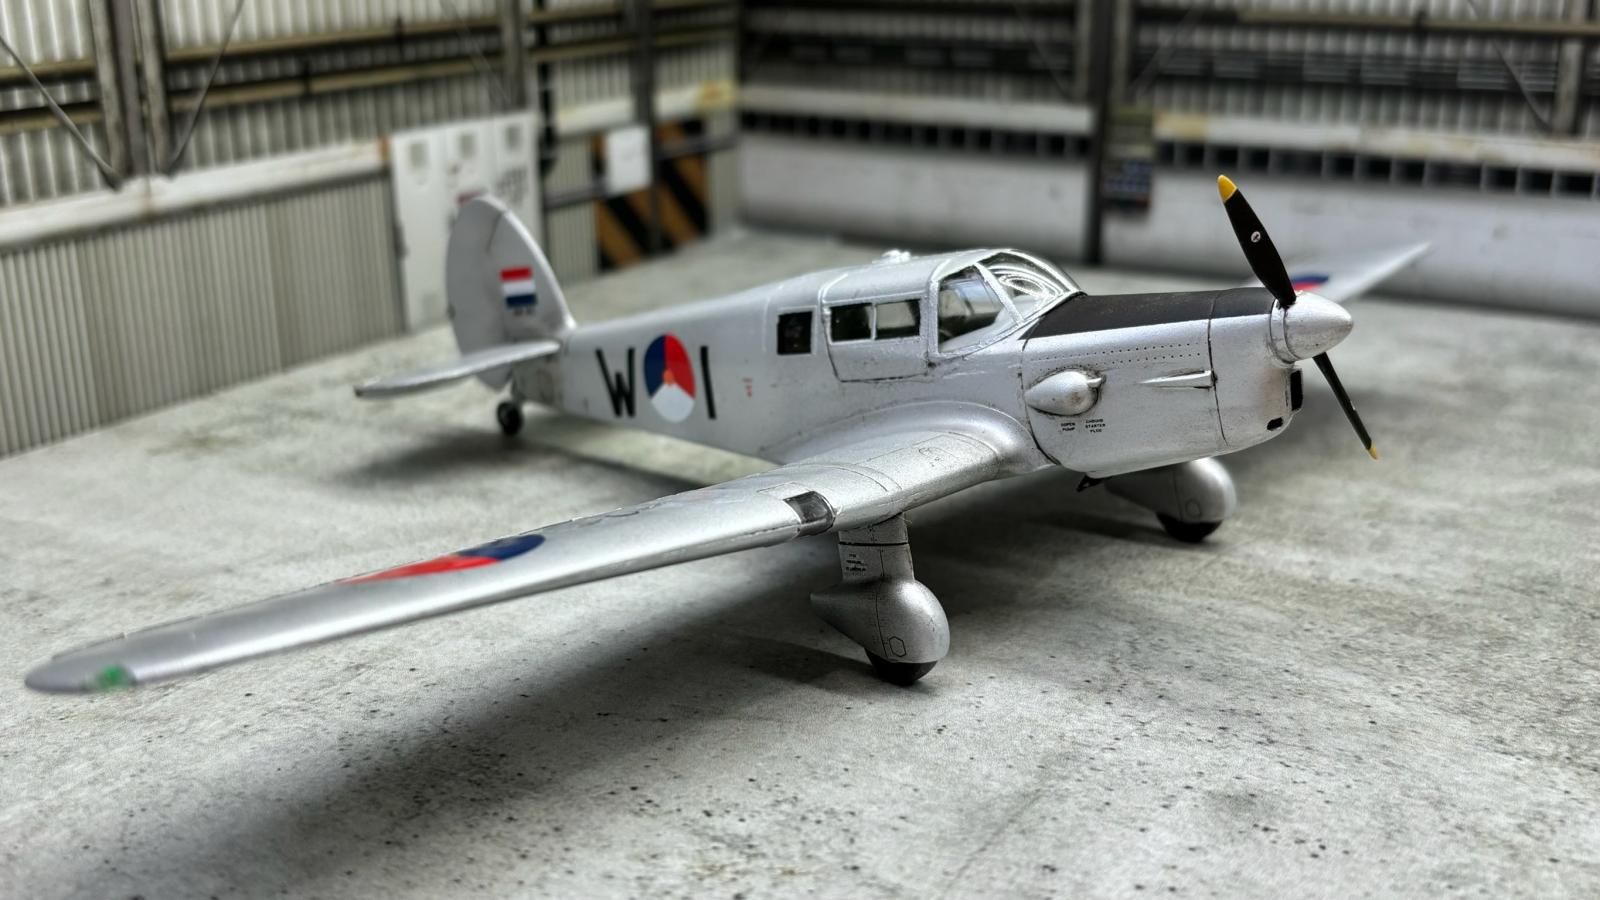
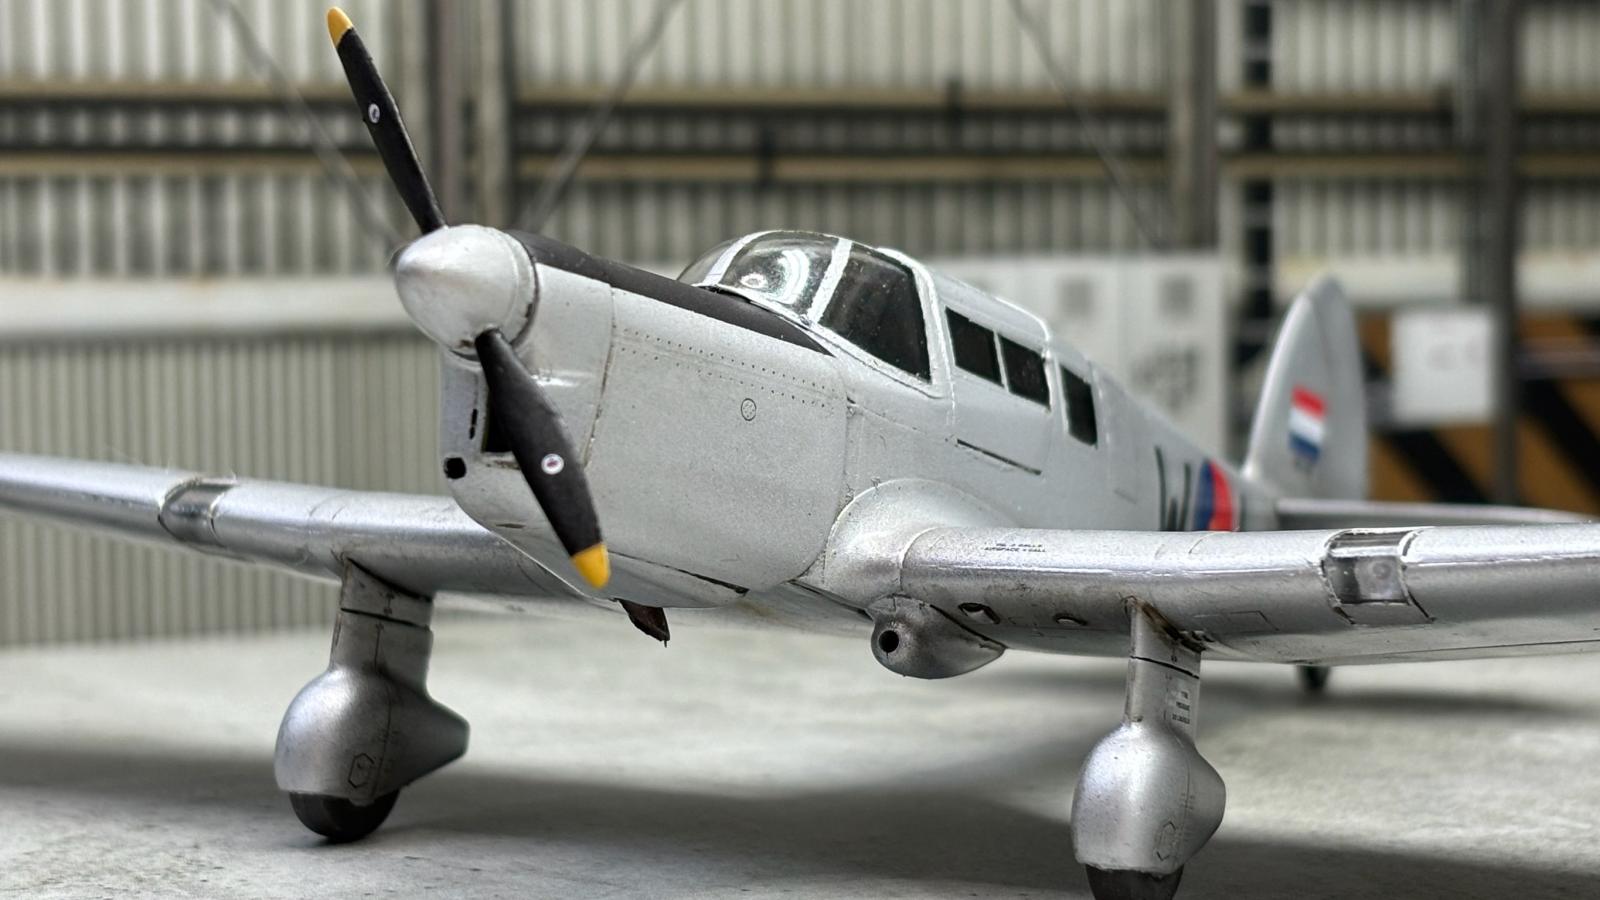
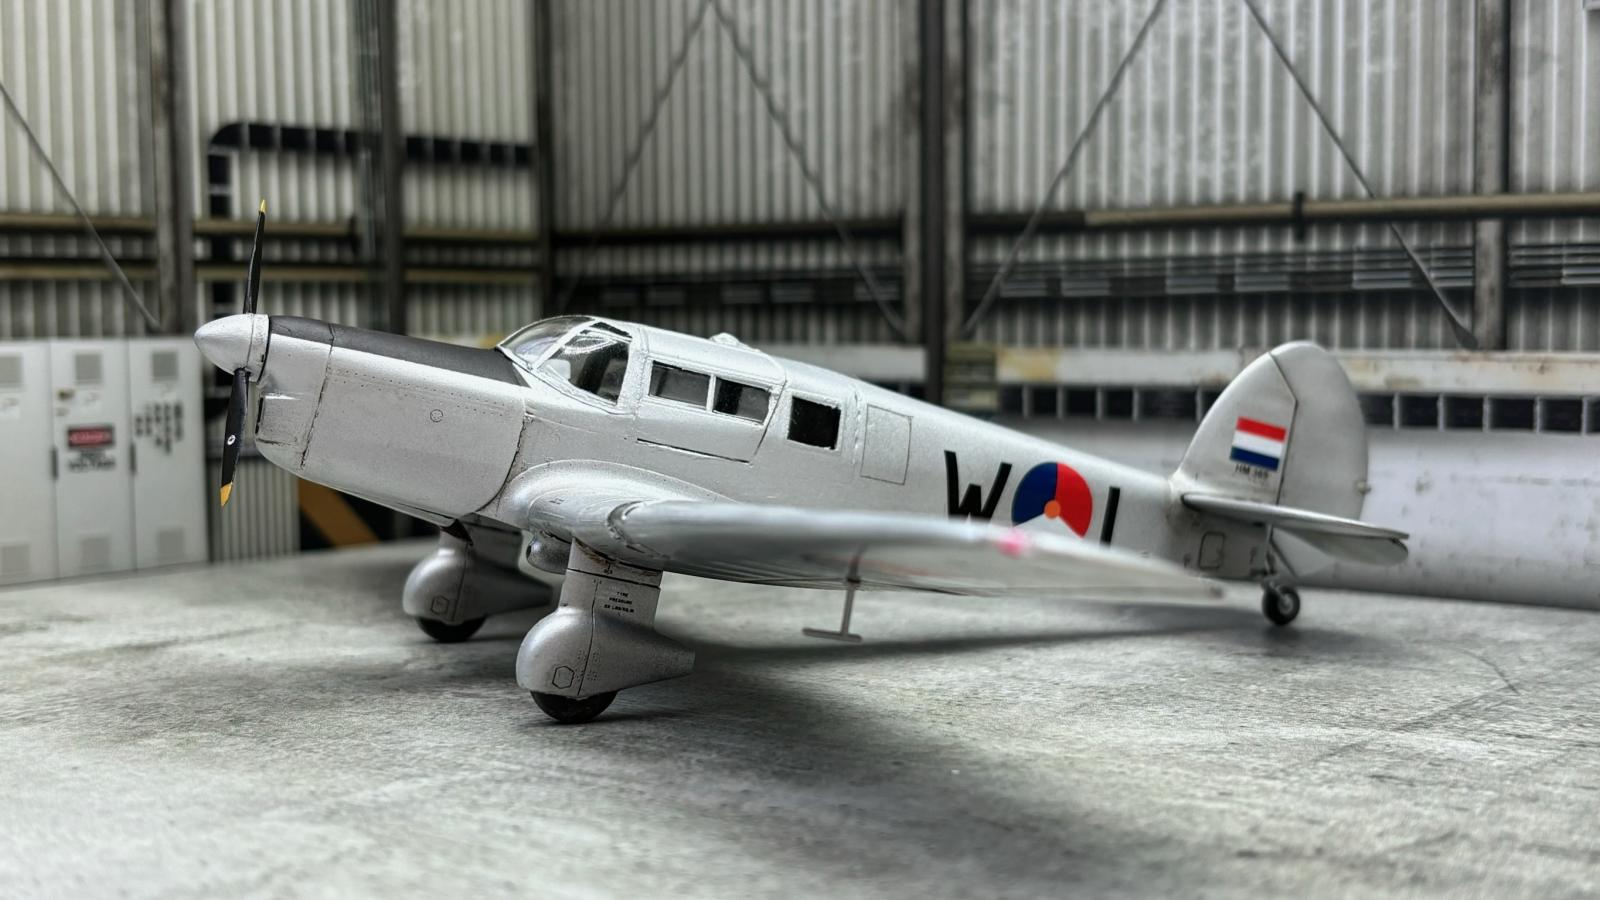
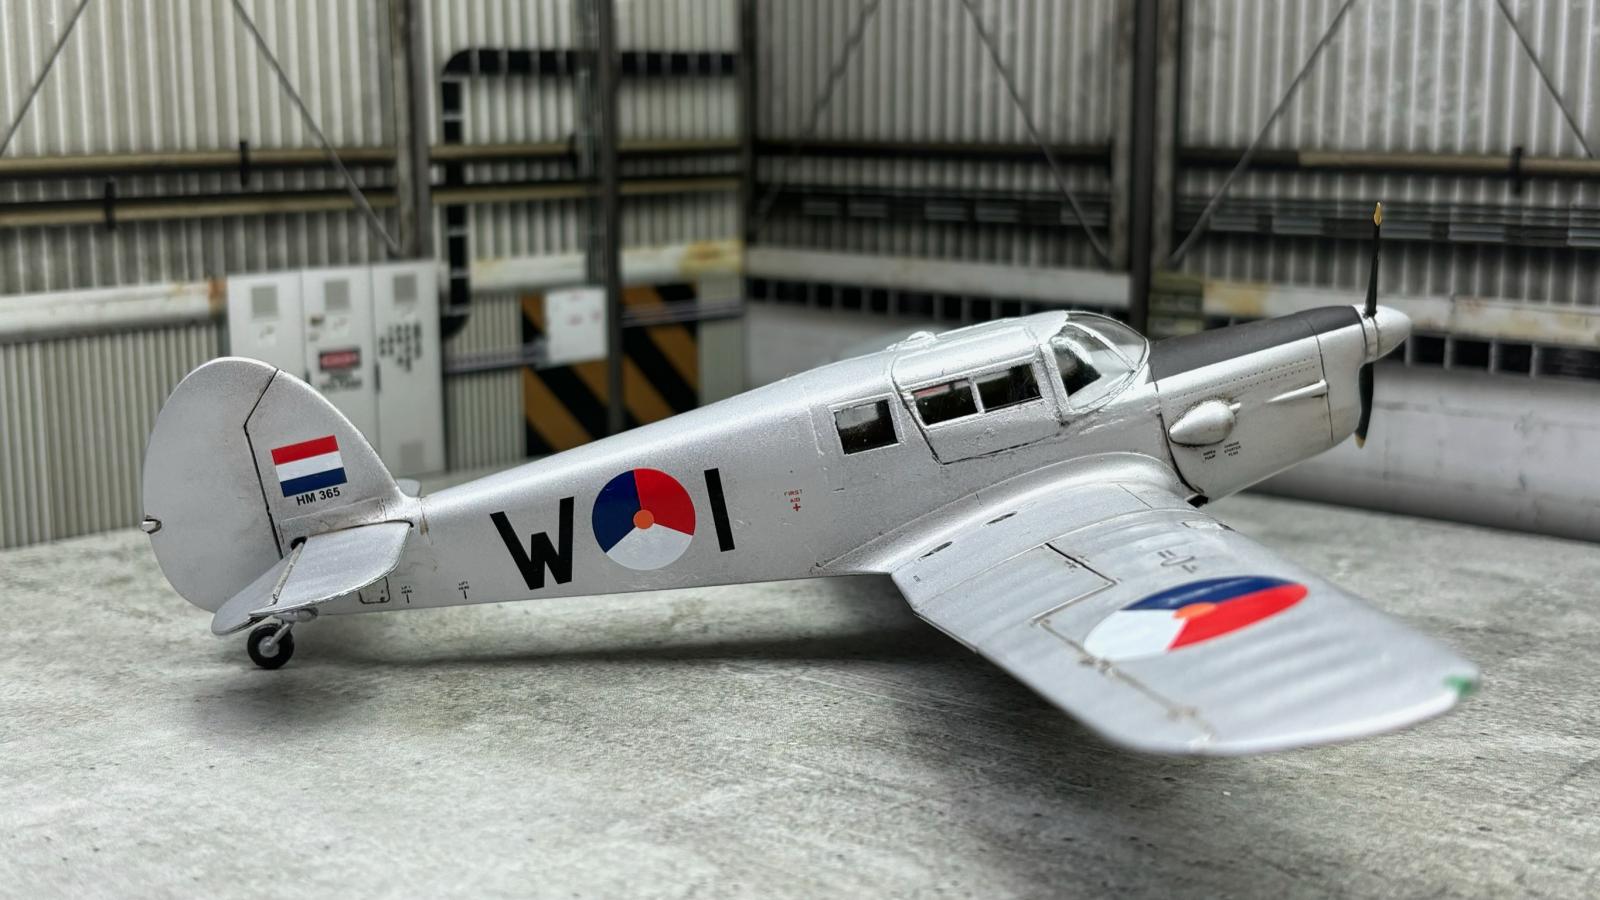
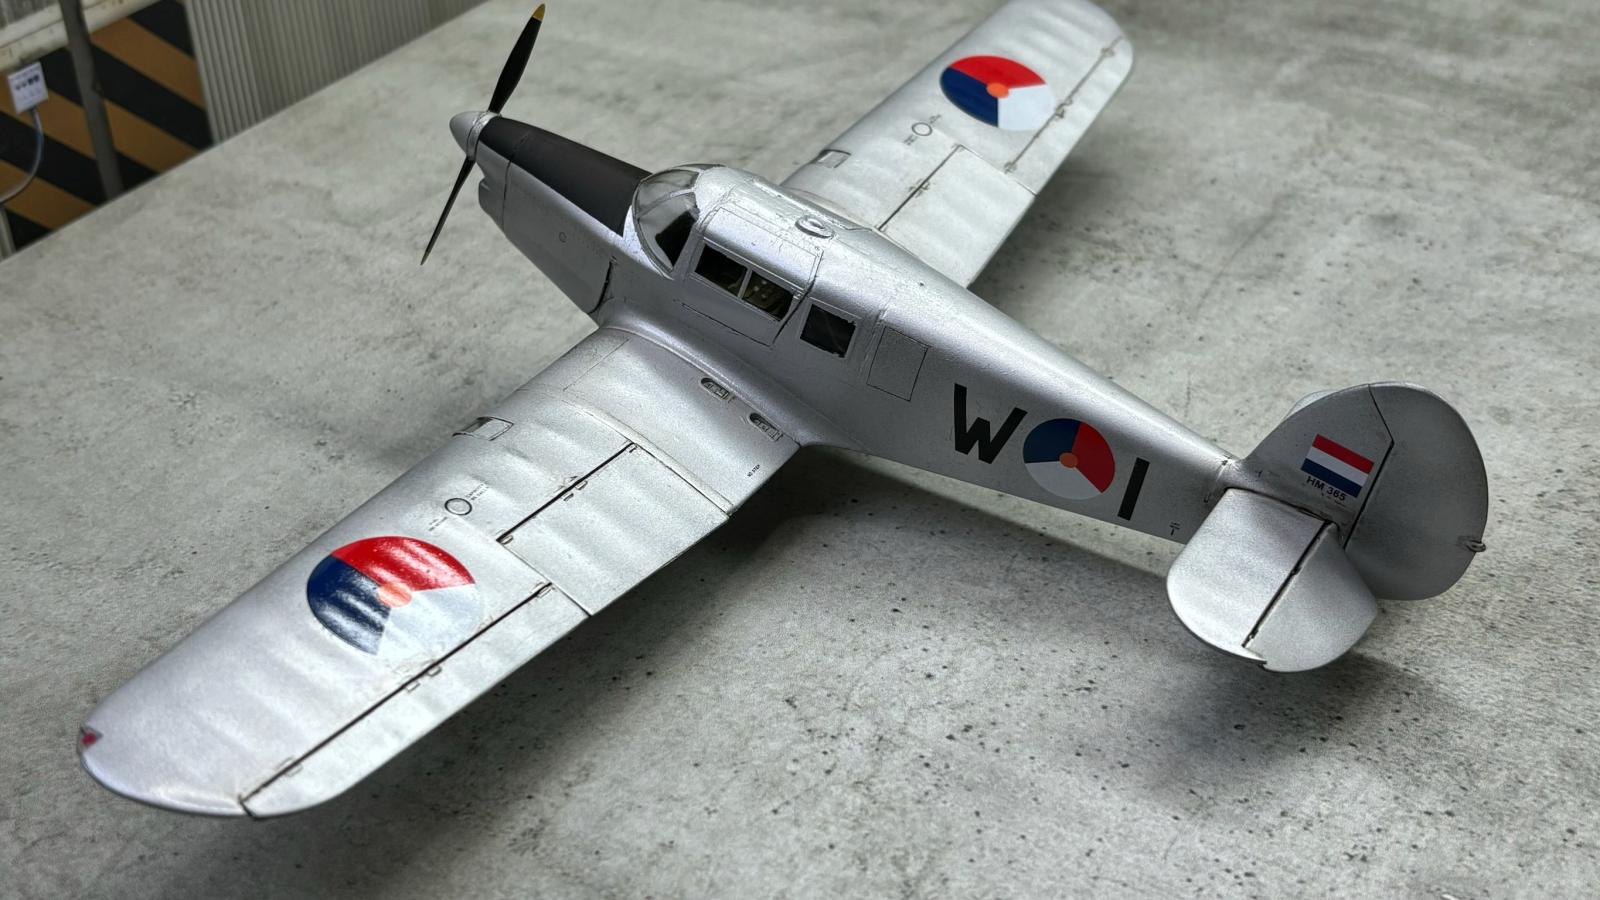
In 1946 the “Luchtstrijdkrachten” LSK (later renamed to RNLAF) purchased 11 Proctors (1 mk. III and 10 mk. IV's) from the WWII aircraft surplus of the RAF. They were delivered in their original RAF paint scheme. The RAF roundels were simply replaced by RNLAF ones.
The planes were mainly used as radio communication trainer and were stationed at Gilze Rijen AFB.
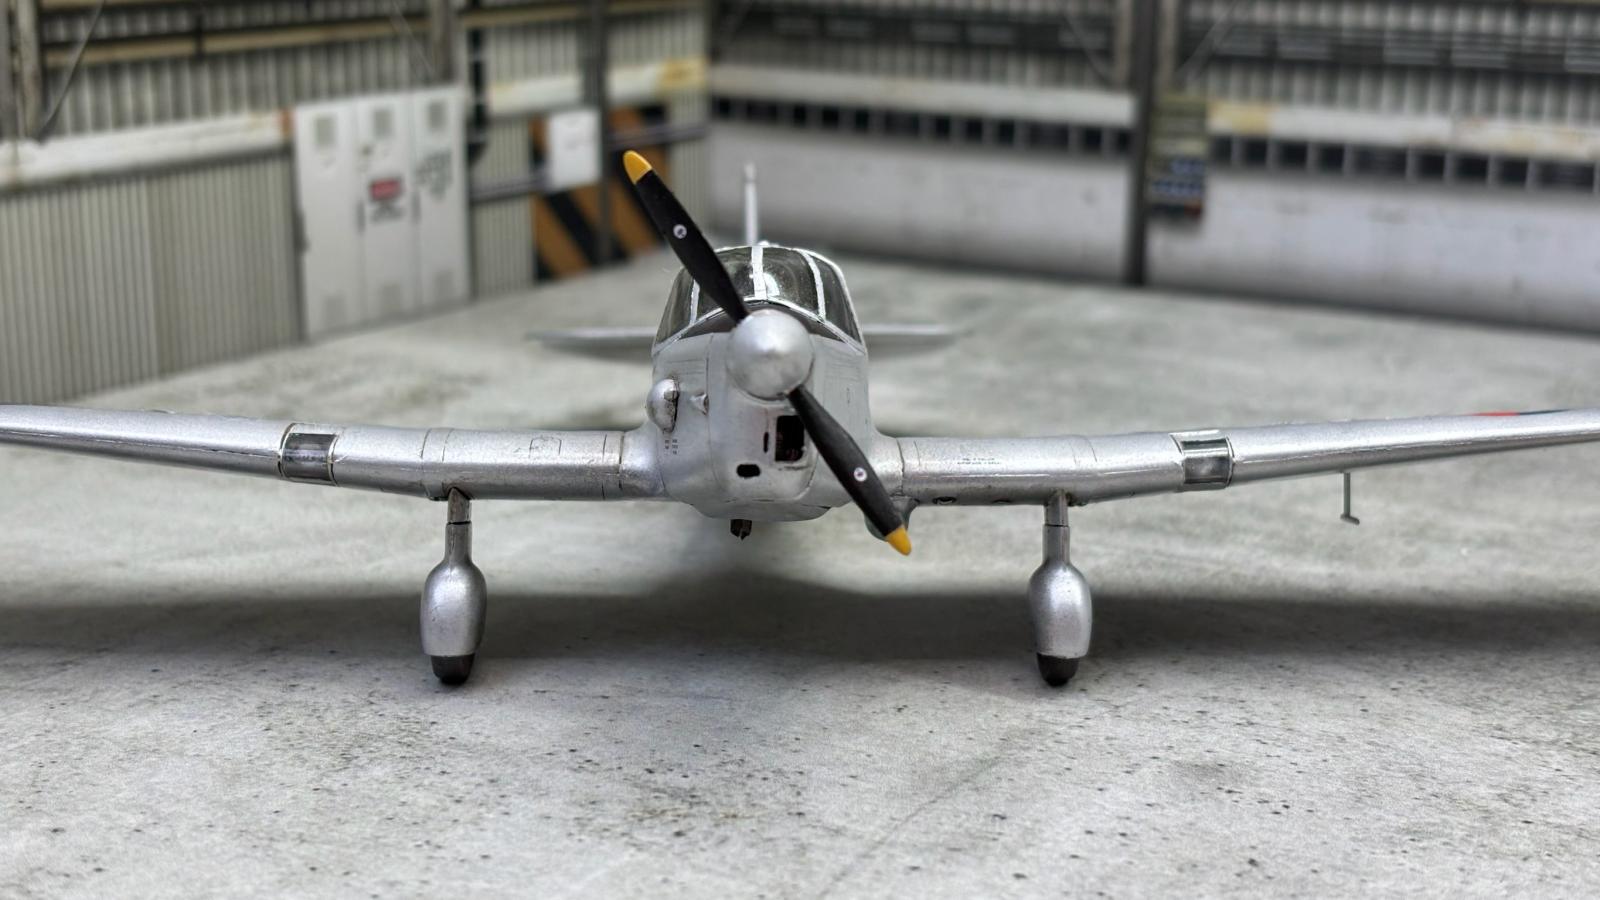
Later the Proctors were repainted in an overall yellow scheme with the exception of the W-1, being the only mk. III, which maintained its original aluminium dope finish.
In 1953 all Proctors were decommissioned and subsequently scrapped.
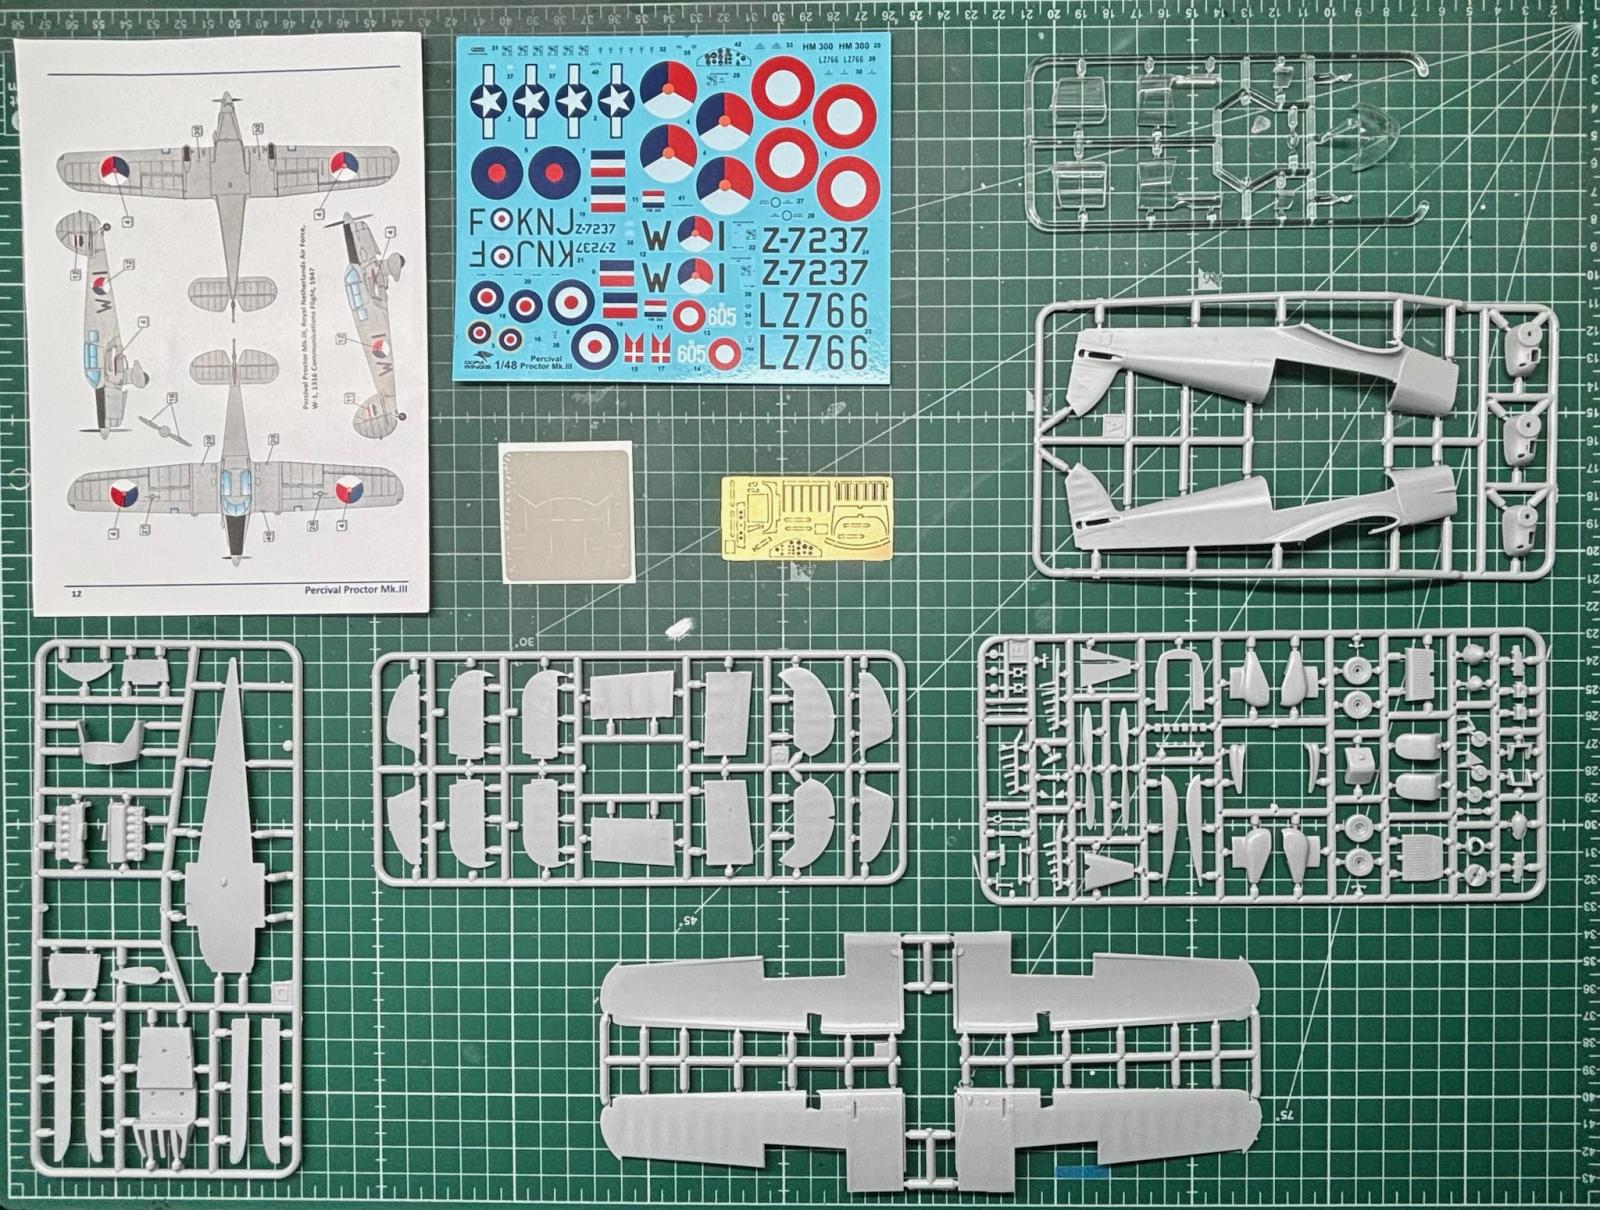
The 1/48 kit from Dora Wings DW 48006
The kit definitely has the looks of a short-run kit as there are no location pins, the usual fitting issues and some stubborn flash in certain areas.
Adding up to the difficulty level of this kit are lots of tiny photo etch parts and very basic and unclear assembly instructions without any color reference.
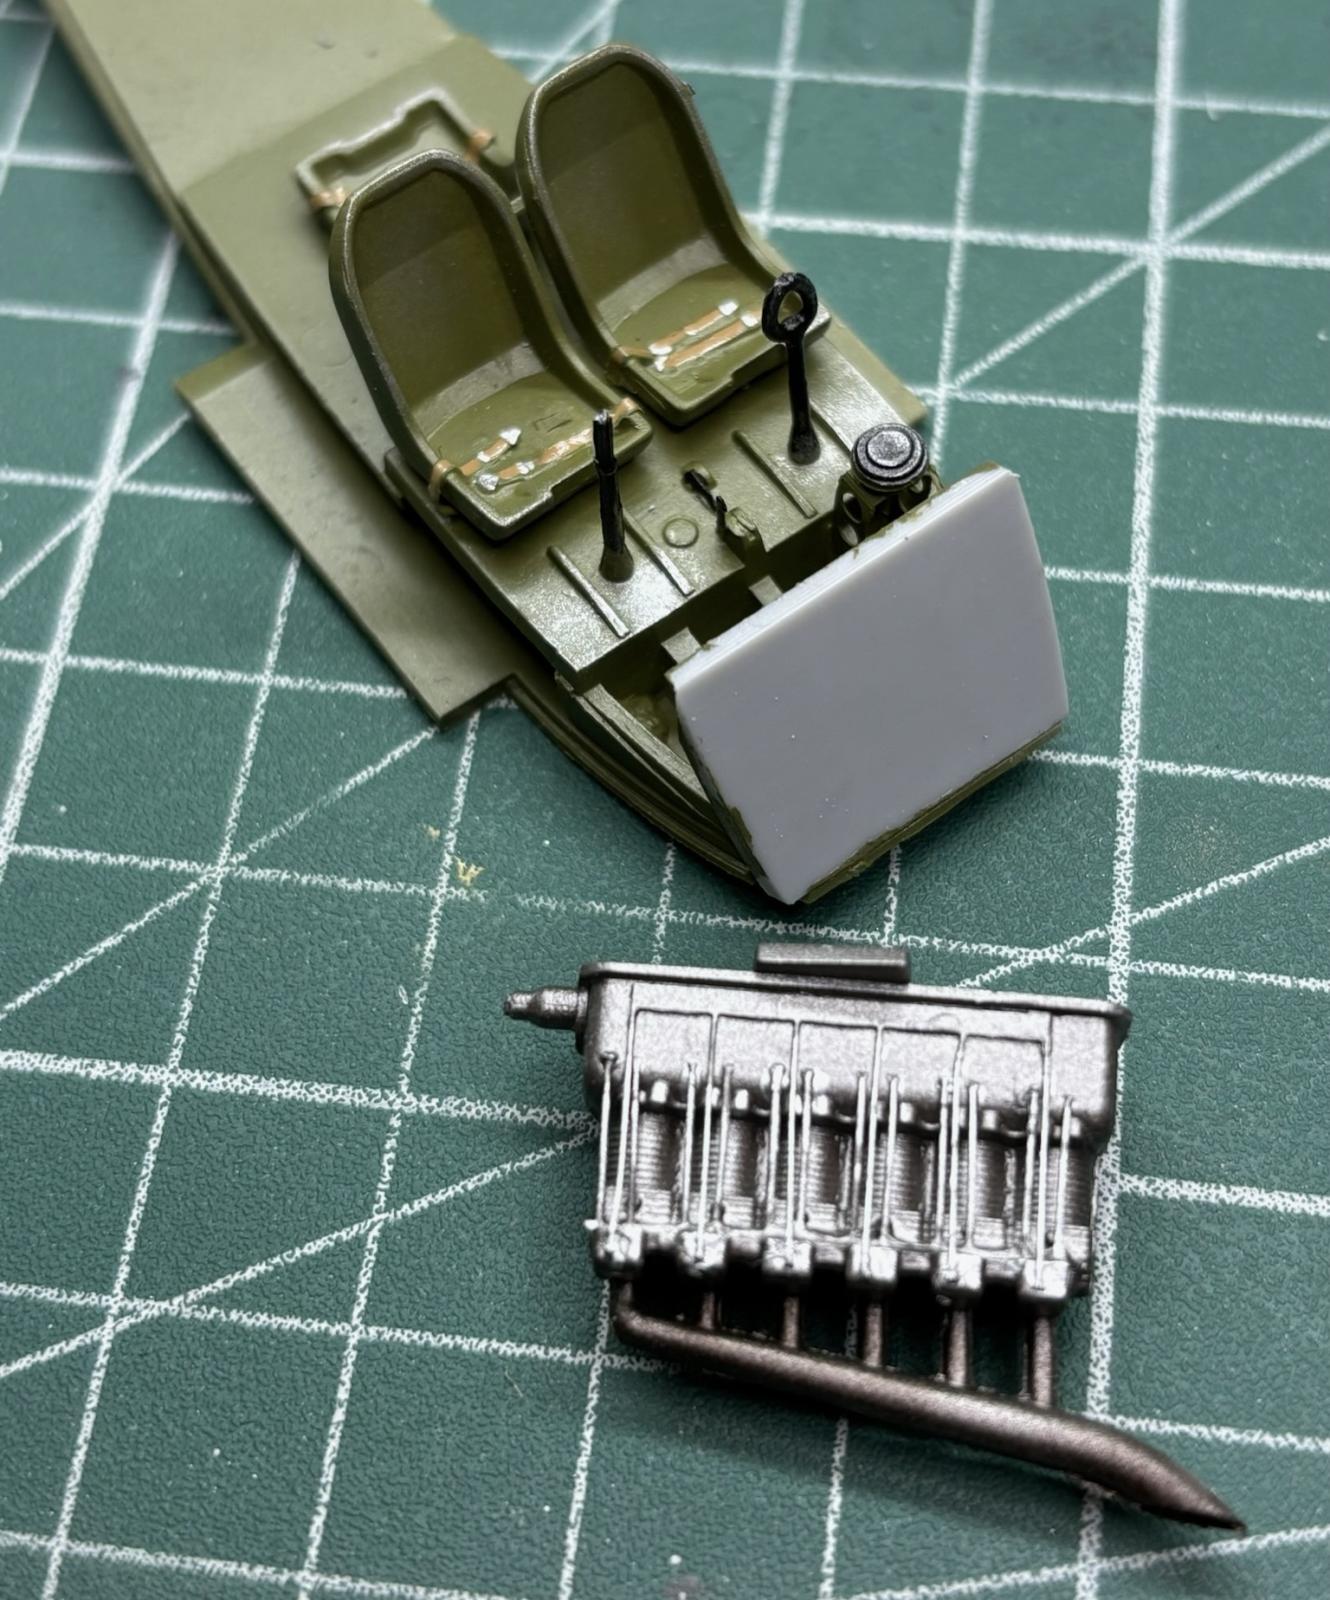
A nice feature of the kit though is a very detailed engine with some delicate photo etch parts. A pity the engine is not visible once the aircraft is assembled and on top of that the engine does not fit within the designated area in the fuselage.
To overcome this fitting problem, I decided to cut the engine in two halves and only install the front half of the engine in the fuselage.
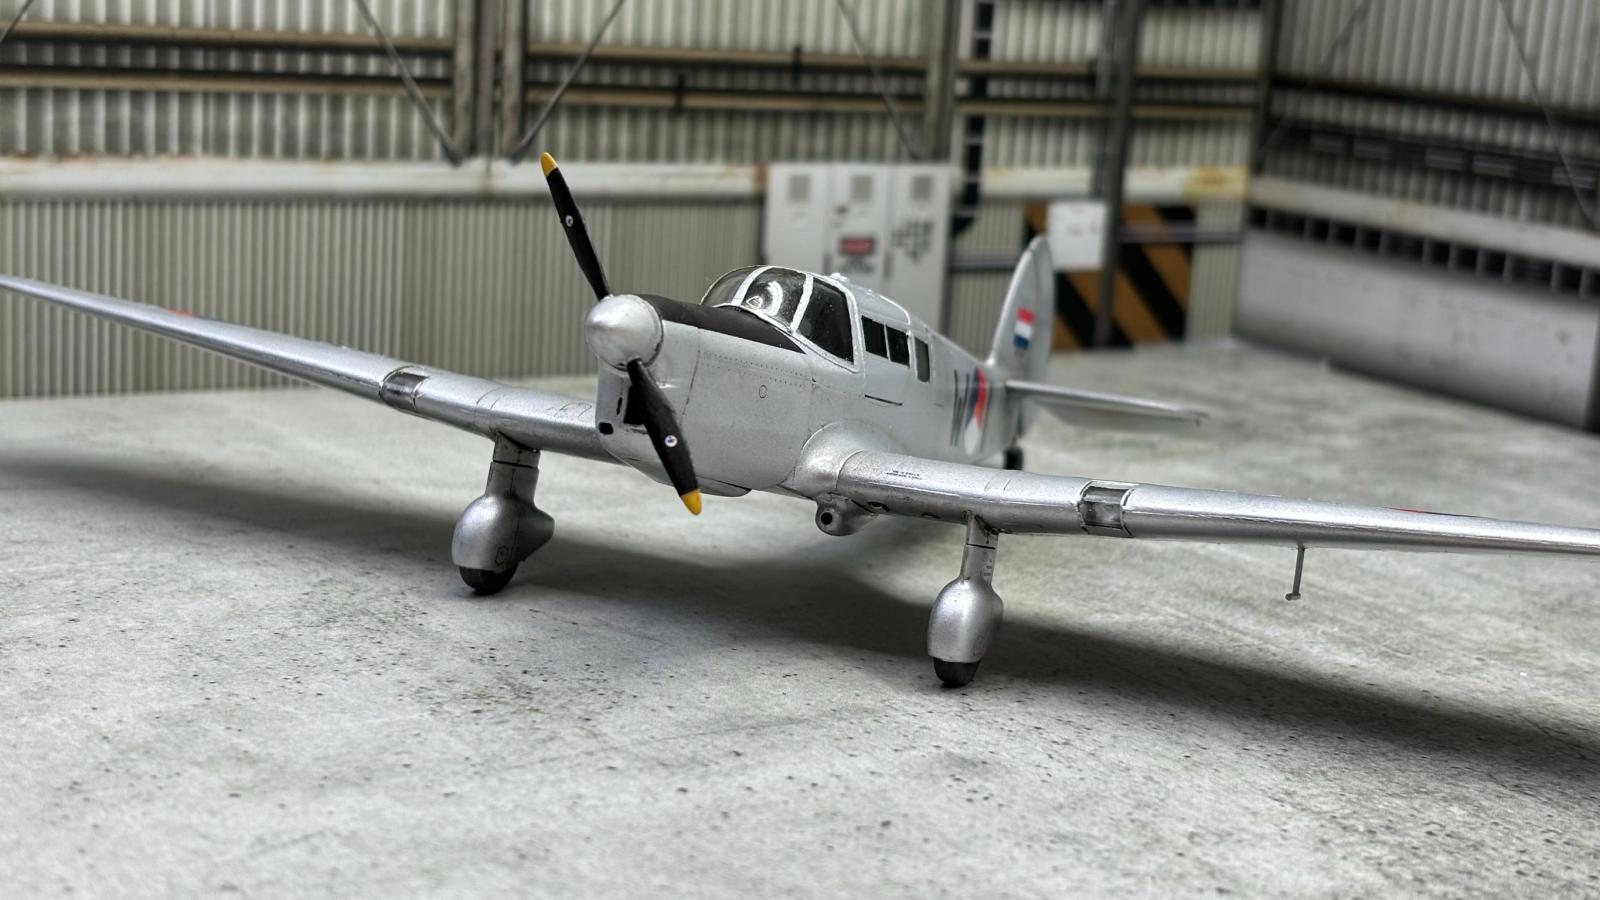
Assembling the canopy can be summarized as a true nightmare. It consists of 6 individual clear parts and once assembled does not fit on the fuselage. It is much too wide! I decided to disassemble the canopy again and attach it part by part to the fuselage with many iterations of filing, sanding and test fitting.
At a certain point I was about to ban the aircraft to the shelf of doom (or rather to the bin), and to be honest I'm still not happy with the result. As I was removing the masking tape from the canopy I discovered that I forgot to paint the area covering the instrument panel. Needless to say I did not want to take the canopy apart for a second time, sigh …
But anyway, here's the end result. I hope the build is still worth a thumbs-up despite its shortcomings.
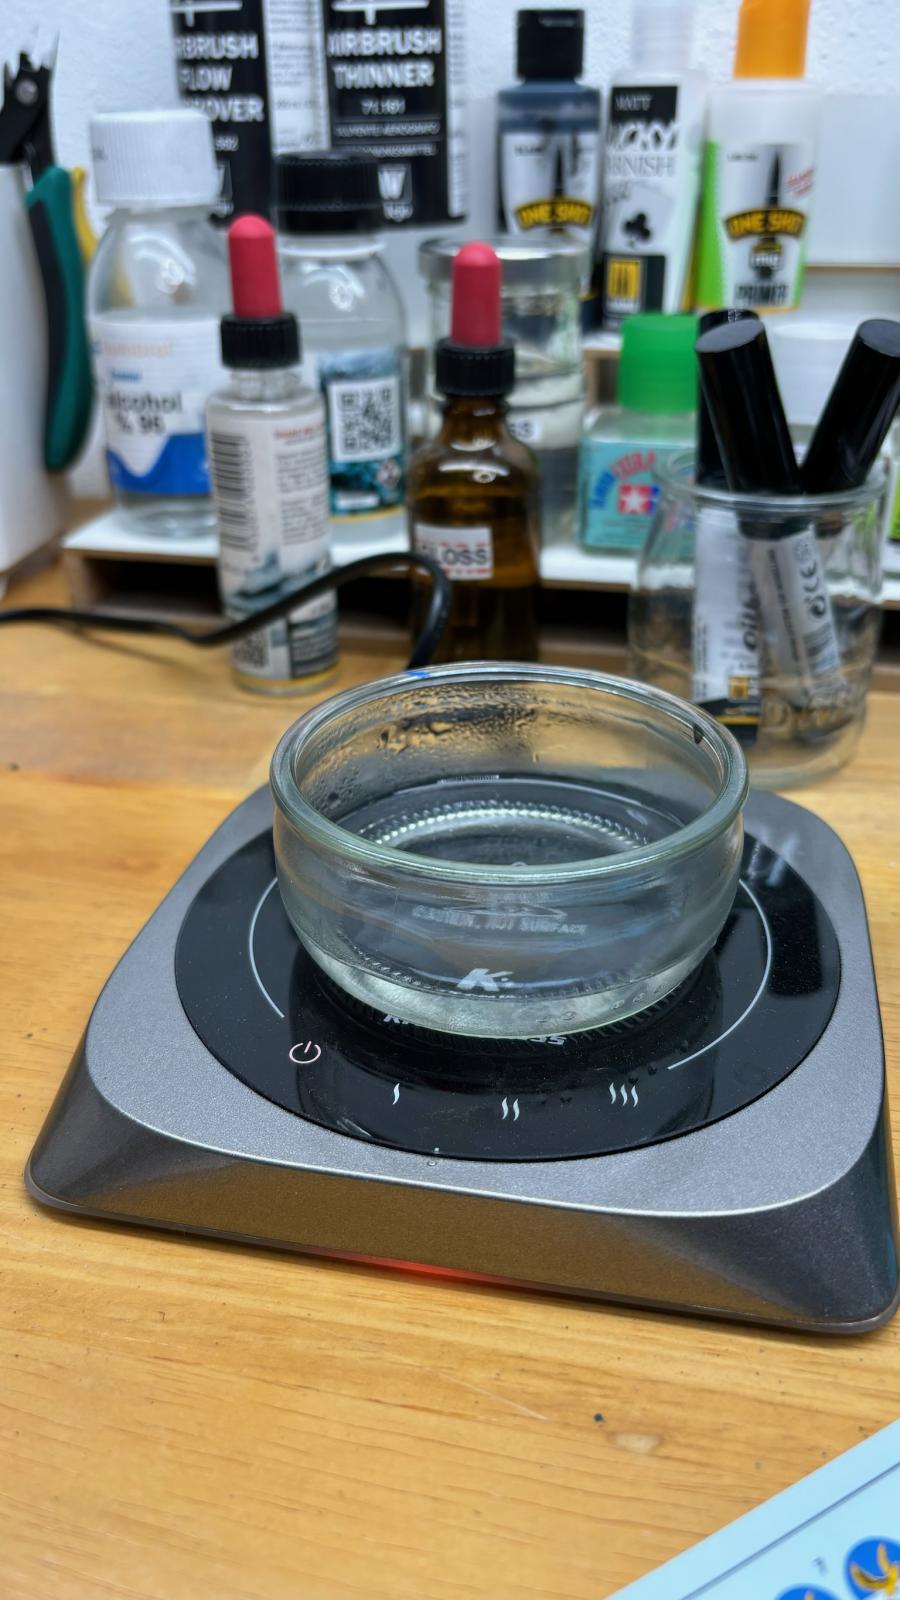
P.S. On a side note, and maybe some of you are already aware of this, an electric “mug warmer” proved to be very effective as a water warmer when it's decal time. See last picture.


Great job on a difficult kit. This is a very attractive and efficient little airplane. I'm glad that a relatively unknown but attractive plane is available as a 1:48 model in this era. Thanks for posting this!
Thanks so much, Bob! @bobd56az
Despite bad engineering and molding you've made an attractive model out of this one. Some builds of mine have hit the bin for less so I must admire you perseverance, fine job sir.
I'd never heard of one of these either
Much appreciated, Mark!
@markh
Great job on a challenging kit, Alfred! Great writeup as well!
Glad you like it, Spiros! @fiveten
No pain, no gain. Alfred, for all your efforts, troubles and expectations the end result is charming and is impressive of a subject that rarely see's the day of light on this forum. From a viewers point you can spot the kits that a builder has applied themselves. As Spiros stated a "Great writeup" and I'd add informative, the photography and back round lend them selves to two thumbs up. I'd add third one if I had it. Something to write home about.
Really appreciate your feedback, Stephen! @stephen-w-towle
You’re right about “no pain, no gain”.
Kits like this one can be a real pain in the … but sure sharpen one’s skills.
However when still in the process of overcoming problems you tend to see things differently… 😉
The model turned out great, despite being so difficult to build. Interesting write up too.
Many thanks, Jay! @ssgt
A beautiful addition to your Dutch Airforce collection, Alfred @alfred
I was also not aware of this aircraft, let alone that it served for the RNLAF.
A very nice idea to heat the water this way, where did you find this little mug heater.
Thanks John. @johnb
You can find the mug warmer on Amazon. https://amzn.eu/d/eQ6P8Hg
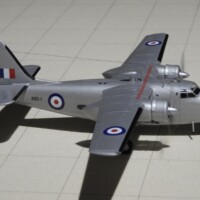
Congratulations for great build of a difficult kit - I know, as I built the Gull Vega awhile back, and like you , I thought the many pieces of the ill-fitting clear parts were a real nightmare. Thankfully, later Dora Wings kits have been much improved. As for the coffee mug warmer - I've been using one of those for decals for years, it works great! One for coffee, one for decals.
1 attached image. Click to enlarge.
That is a very nice Gull Vega, Chas! @chasbunch
Thanks for your kind words. Indeed, the mug warmer works like a charm.
The aircraft looks very nice. Ditto on the "mug warmer." @alfred
Thank you so much, John!
@jdtruby
Came out great in the end, Alfred.
Thank you very much, George!
@chinesegeorge
Canopy looks great, just like the entire aircraft!
Dankjewel Maurits!
@mauritsderidder
Looks great! Unusual subject- well done.