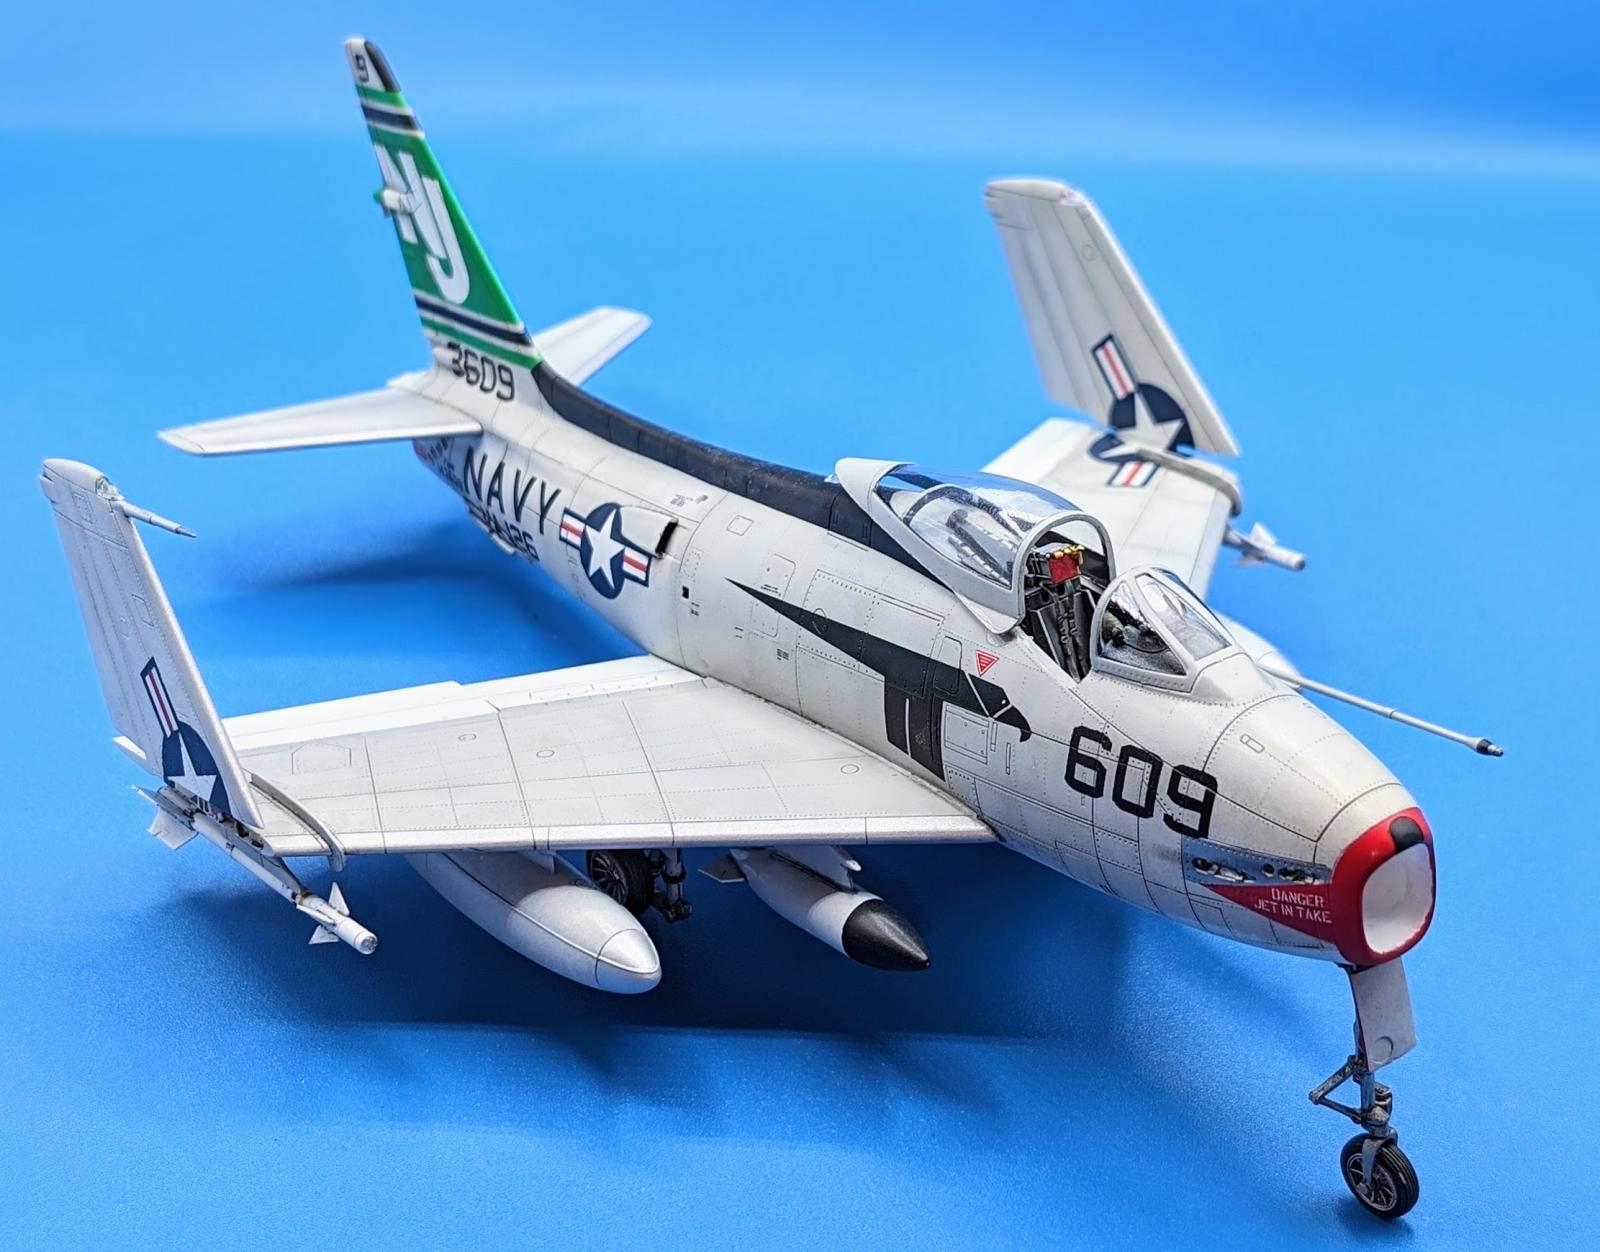
Hobby Boss 1/48 FJ-4B Fury
This is my build of the Hobby Boss North American FJ-4B Fury in 1/48 scale. I started this kit earlier this year prior to knowing about the “Sabre and FJ Fury” group build here in IModeler. Therefore, I initially started a build thread in the “Work In Progress - Aircraft” build group. When I found out about the “Sabre and FJ Fury” group build, I moved all remaining thread posts to that group.
https://imodeler.com/groups/f-86-sabre-and-fj-fury/forum/topic/representing-the-naval-side-fj-4b-fury/
When building a Fury in this scale, there are only a few choices, most of which are either difficult to build or very old releases. Grand Phoenix and Matchbox are the two I can recall at the moment. The HB kit is a more recent tooling, however it is limited to the FJ-4 and FJ-4B versions.
All of these kits, (Grand Phoenix, Matchbox, HB), have issues which are conveniently identified in the FJ Fury Detail and Scale series reference book by Bert Kinzey.
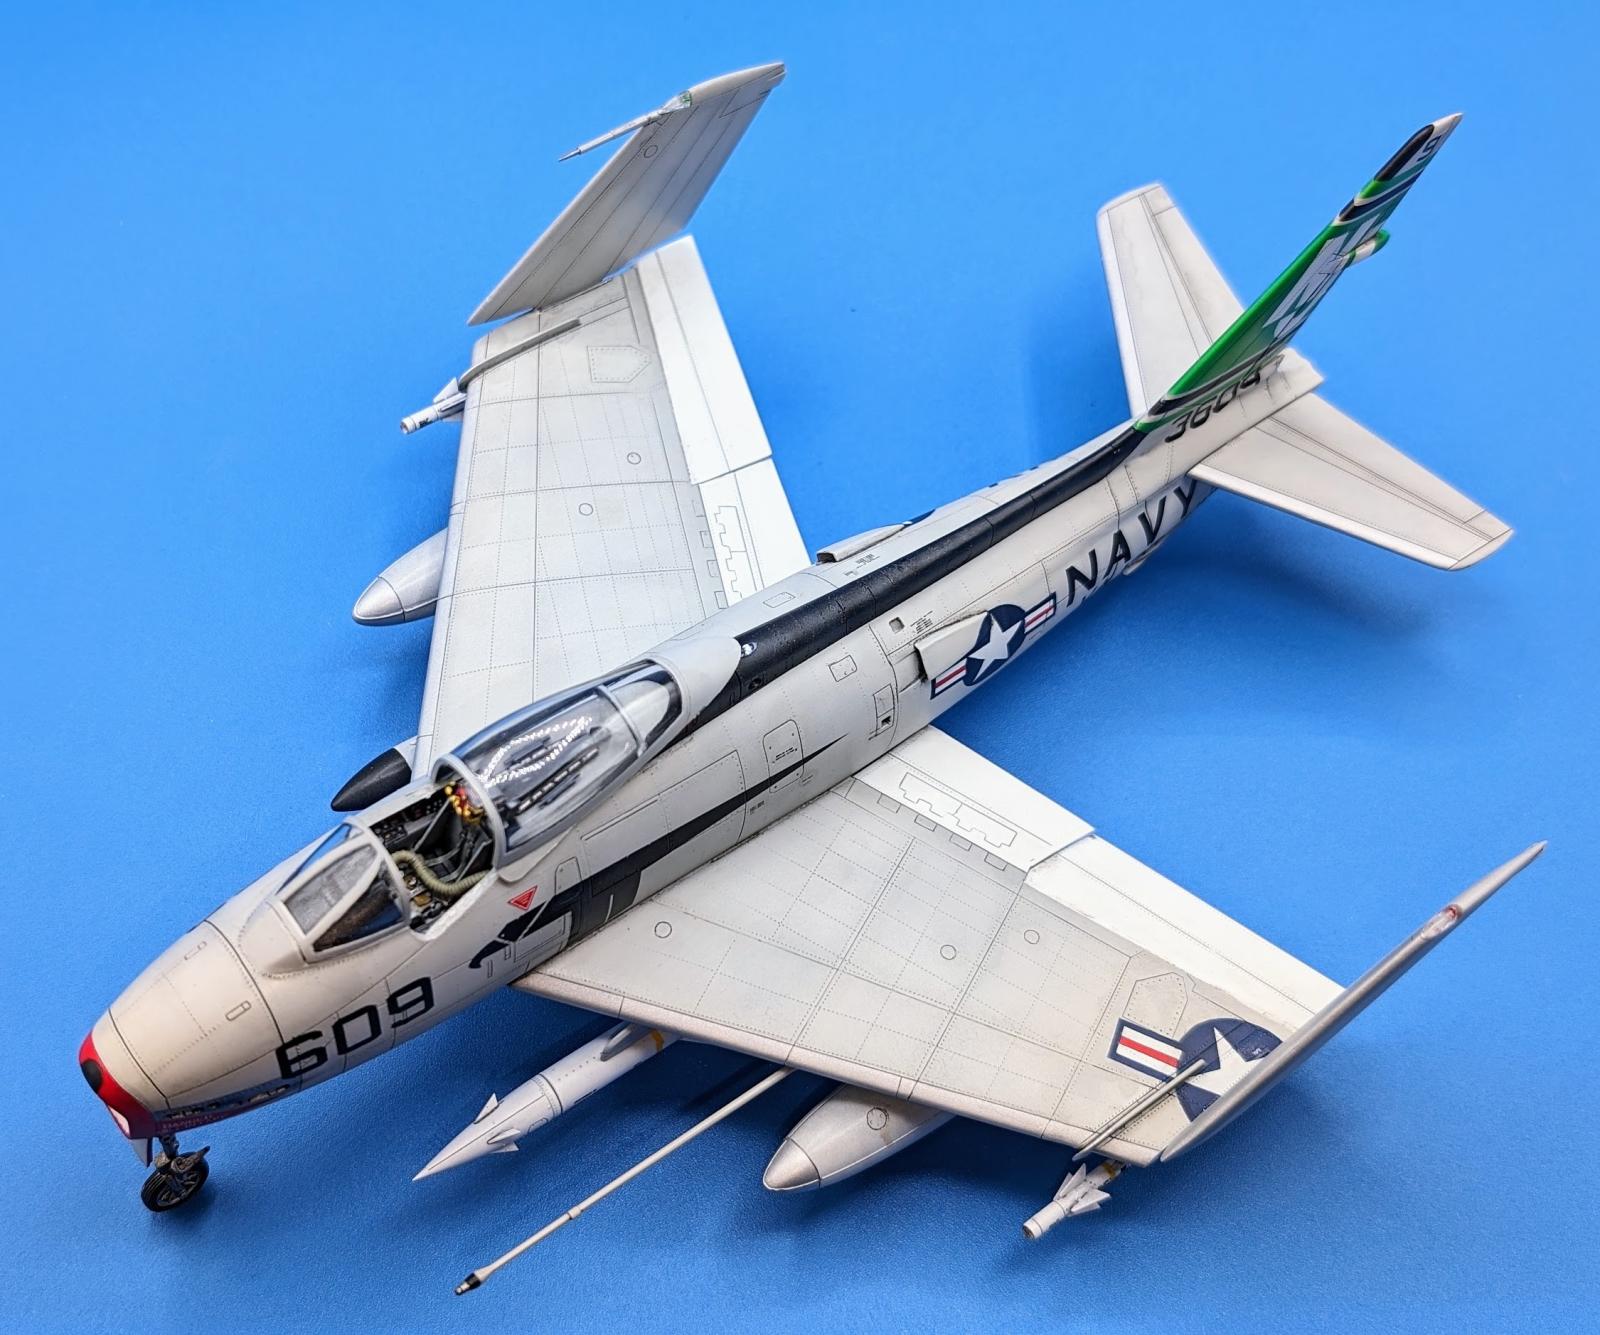
Being the newest, the HB kit is probably the best choice as a starting point as long as you want the -4 series. I wanted something that looked different from the -3 & -2 versions (which look essentially like navalized F-86 Sabres), so this kit was the obvious choice as the -4 versions were a significant change from the earlier versions.
You can see all the fixes, modifications, scratch builds, and other changes I made in the group build thread. However, I will give a bit of information about this specific scheme.
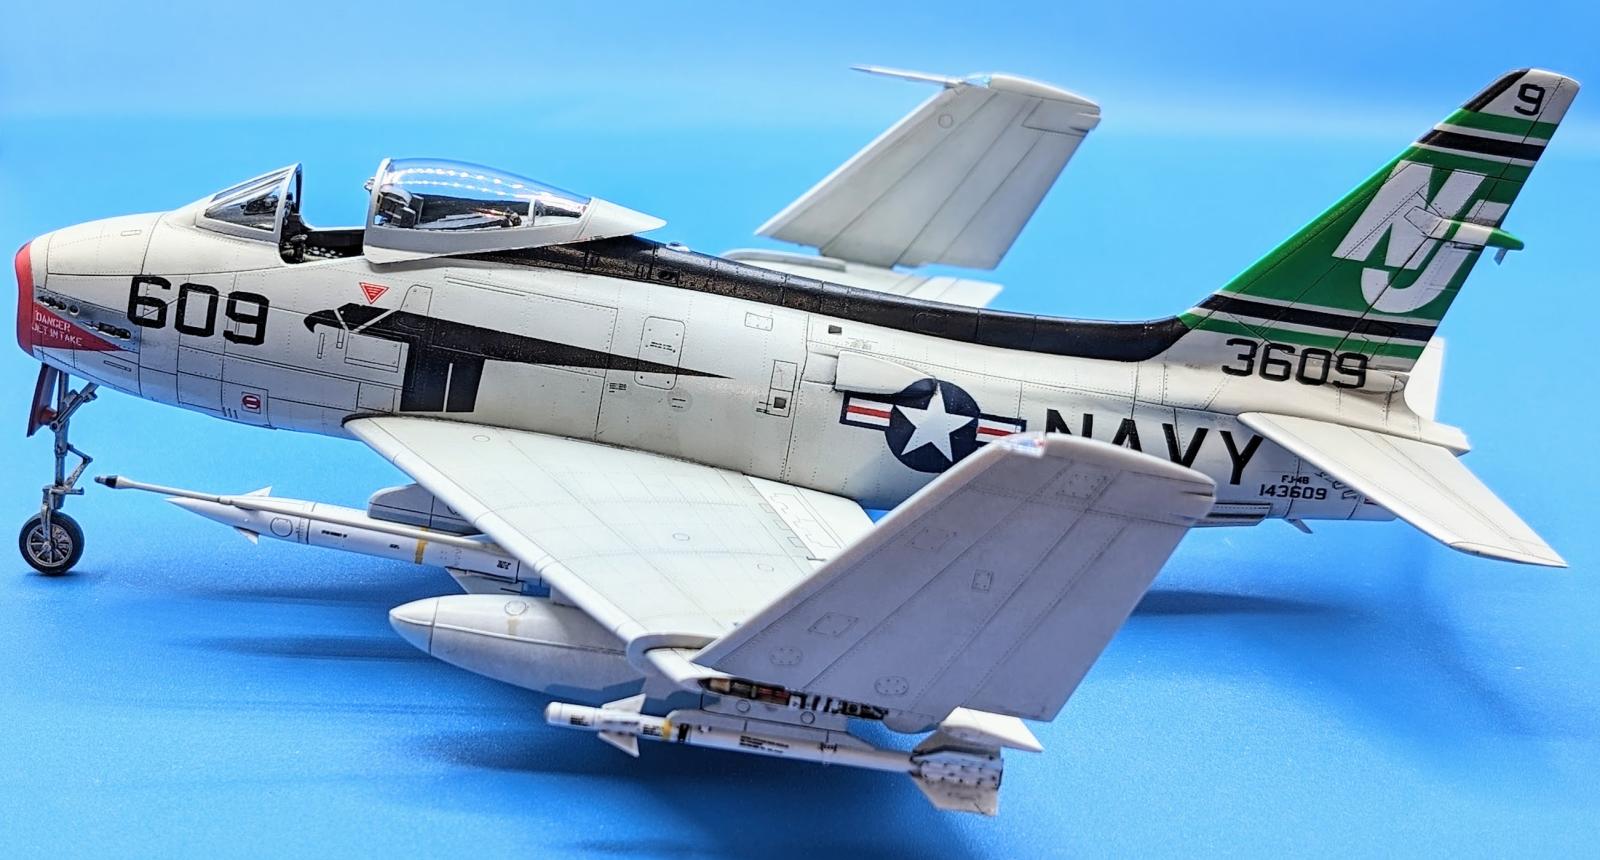
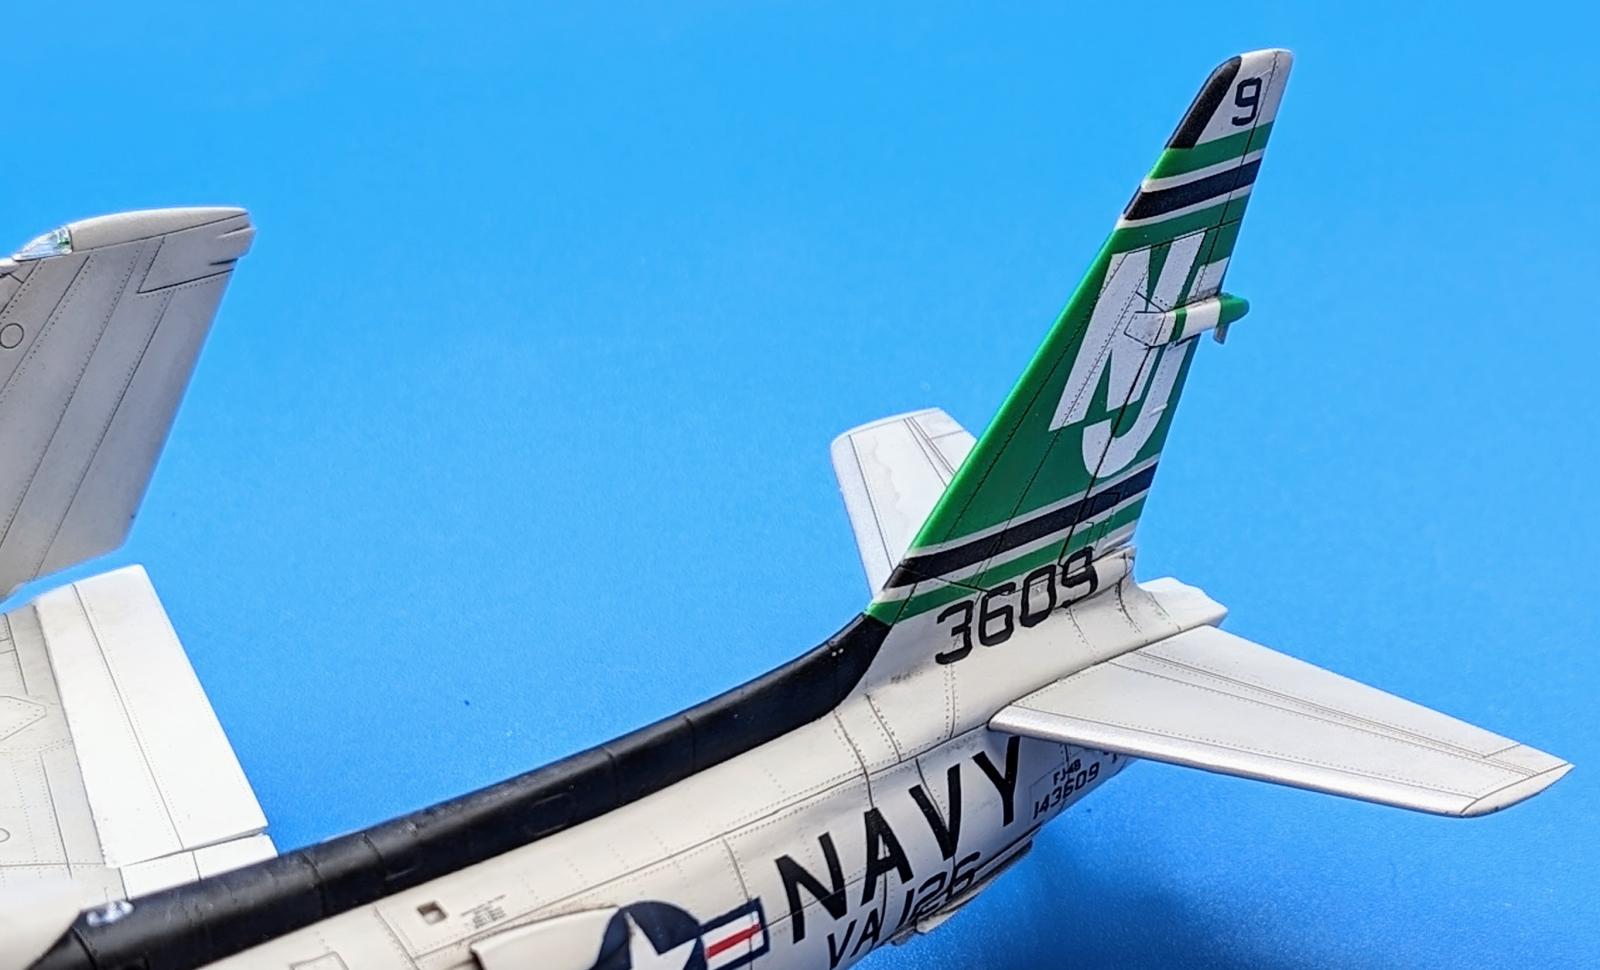
These markings are for VA-126, a familiarization squadron for the FJ Fury used to get naval aviators ready for fleet duty in that type. The few reference photos I have for this squadron show the aircraft in a less colorful scheme, however the Detail and Scale book has a color profile of this scheme and states that there was evidence that these additional colors were used for a period of time.
The HB decals do not provide for this scheme and even if they did, they have too many issues (including significant spelling errors).
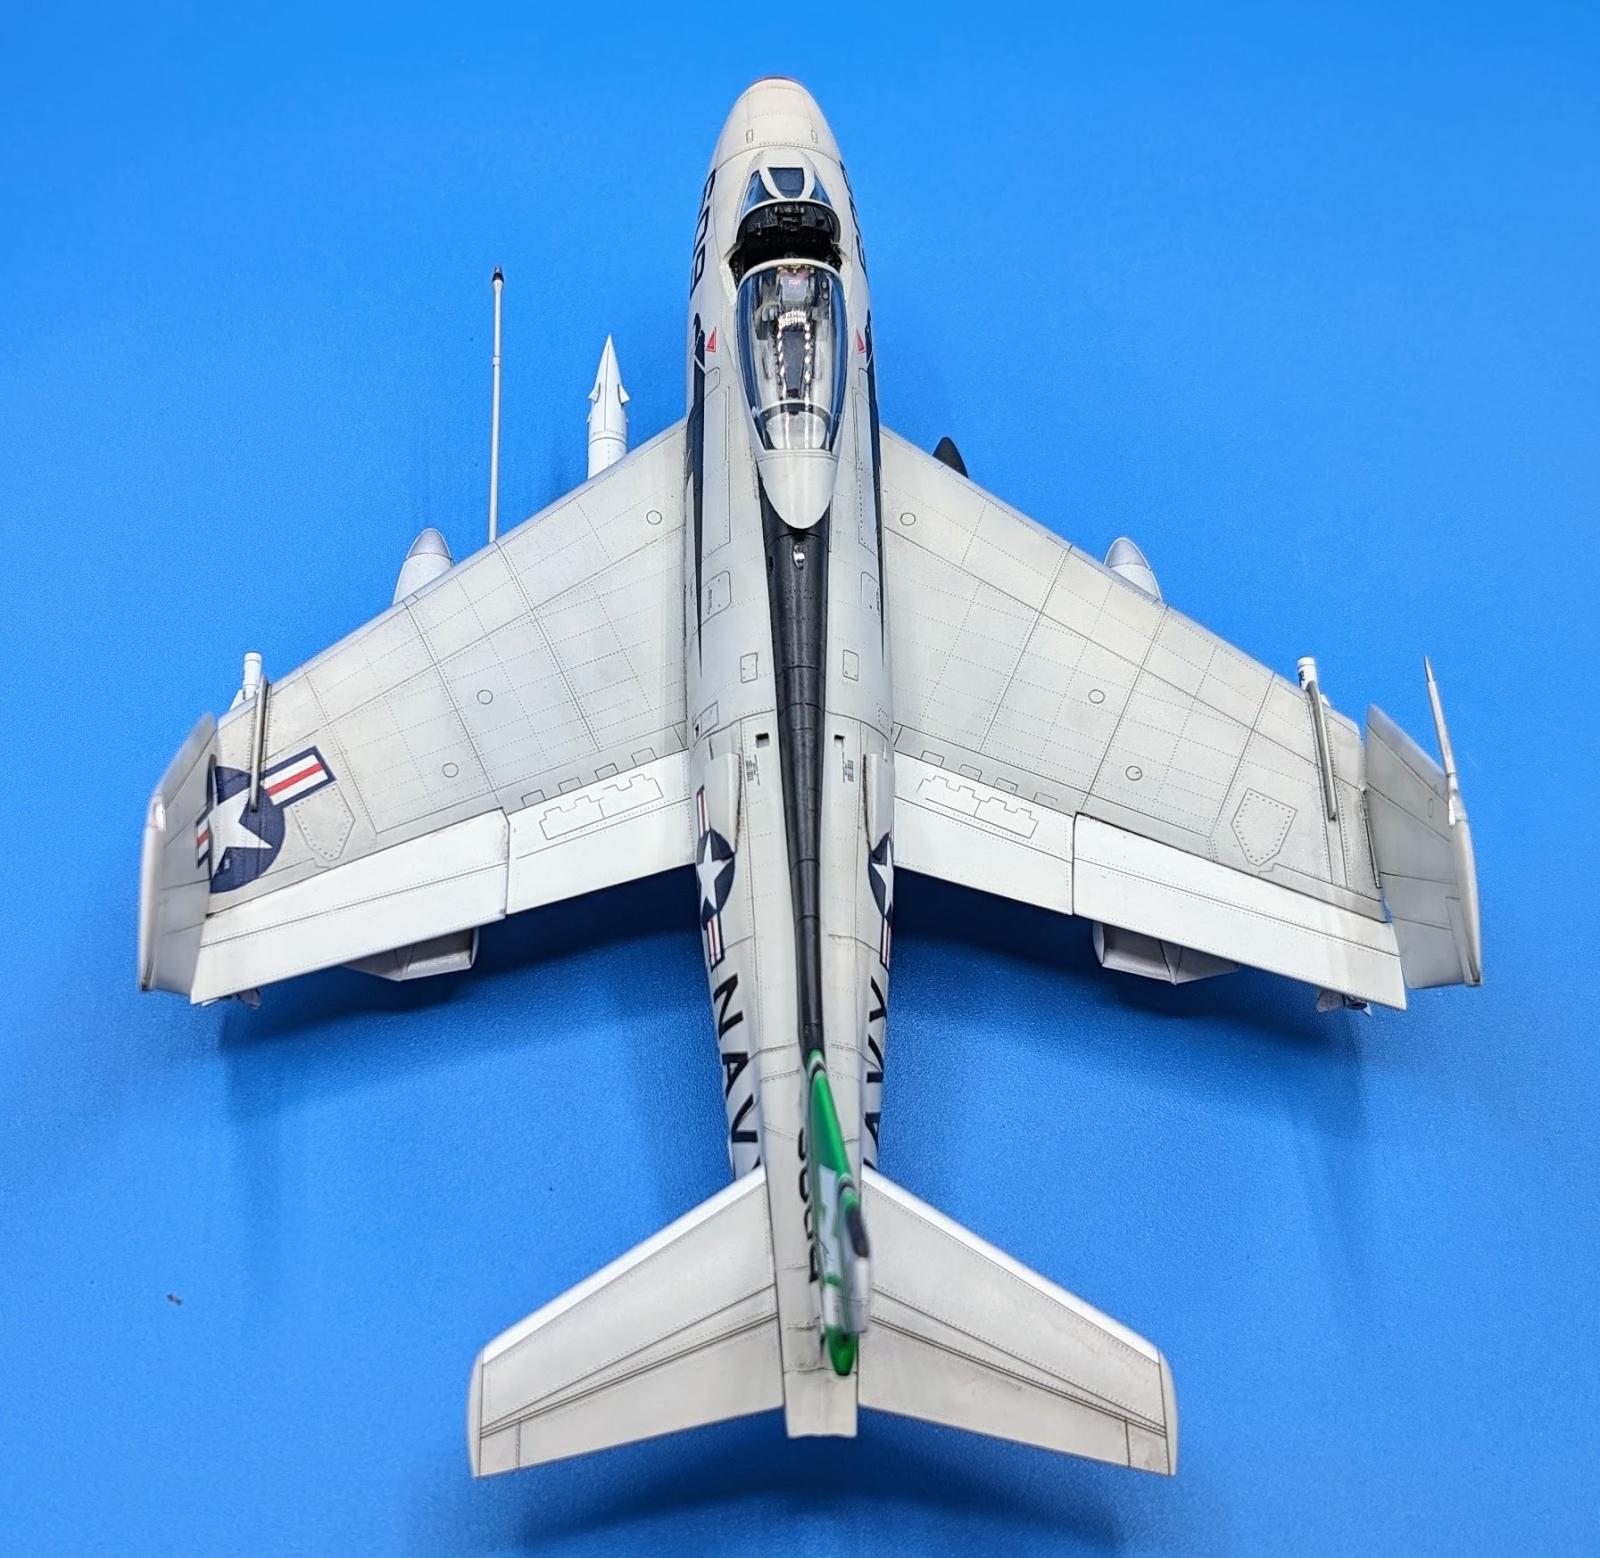
All of the markings except for stencils, warnings, and the serial numbers under the tail are airbrushed using masks created on a Silhouette Portrait 3 cutter and using Tamiya masking tape sheets.
The serial number decal is custom printed by me on decal paper and the remaining decals are pieced together from the kit. The build thread has more on this.
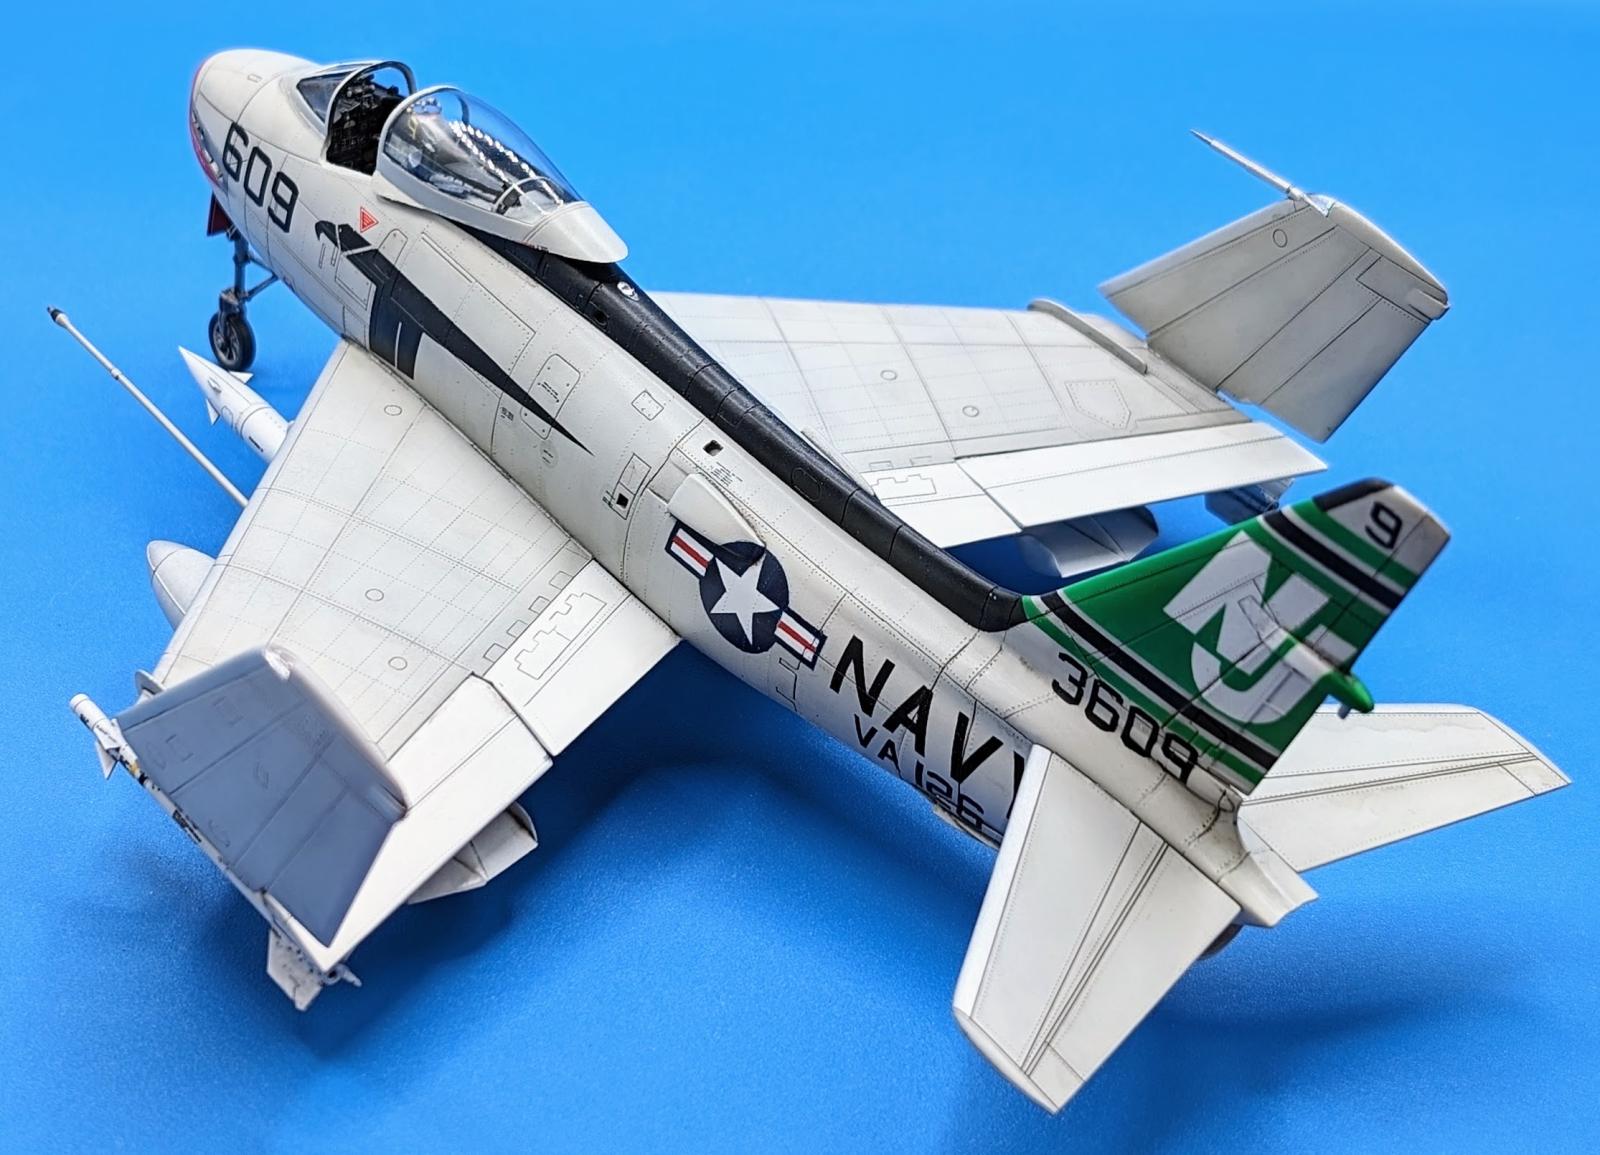
Making the "NJ" mask for the tail was the most challenging task for the painting because of the letter slant and the angle of the vertical tail. I also had only one side of the profile to work from.
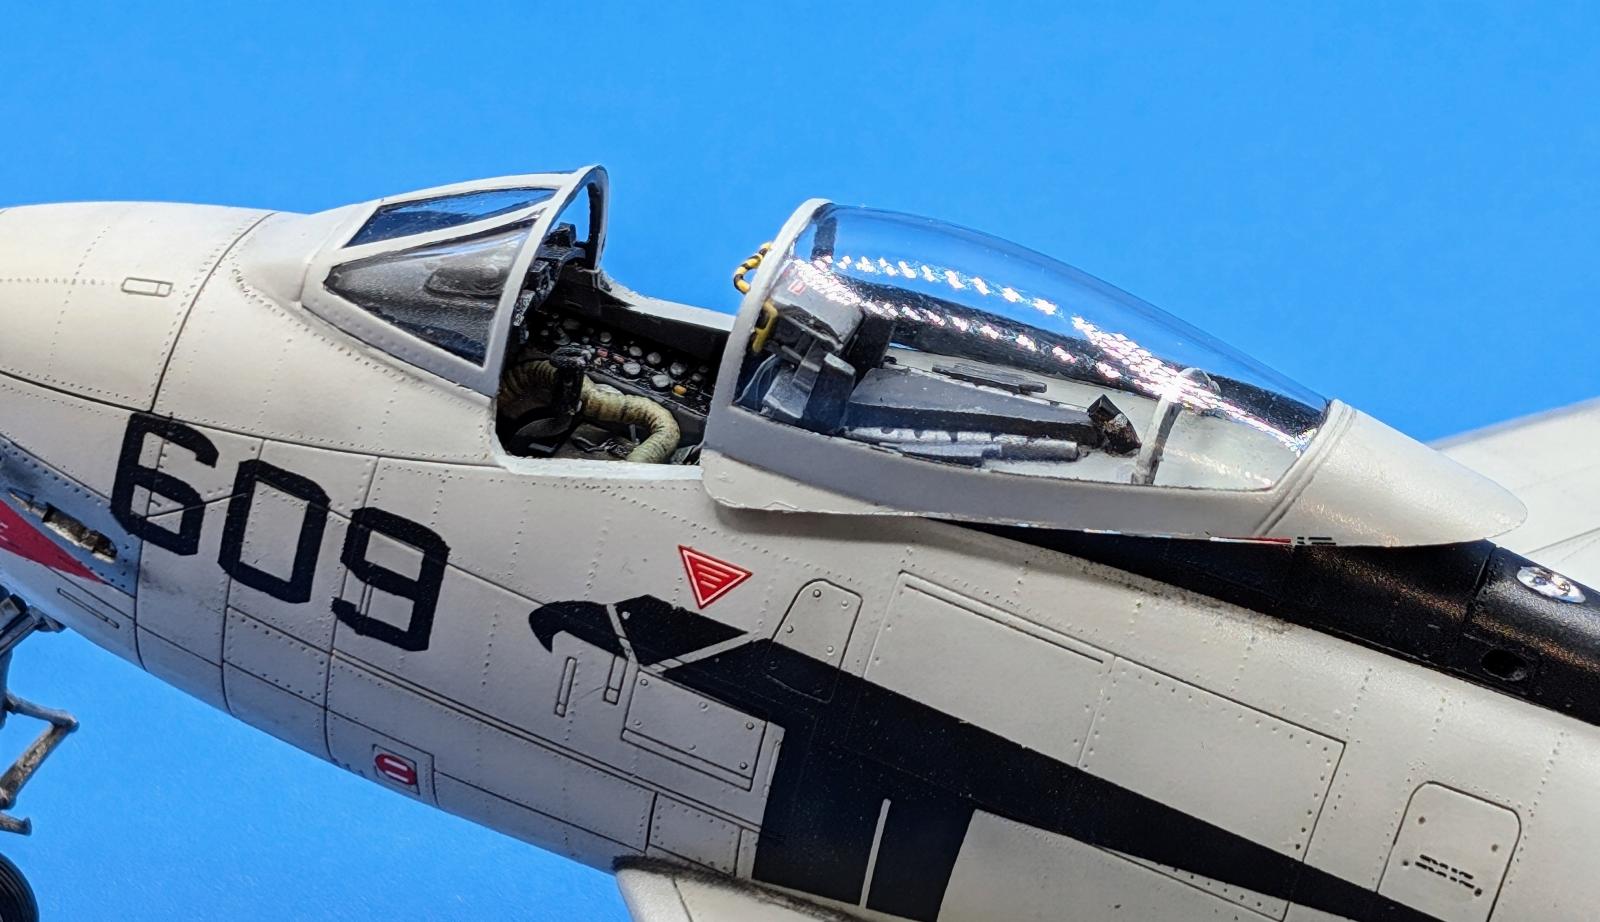
Because of a grammar error on the nose intake warning, I had to match the red decal in paint and cut up the lettering to get it correct, then piece it together on the sprayed red.
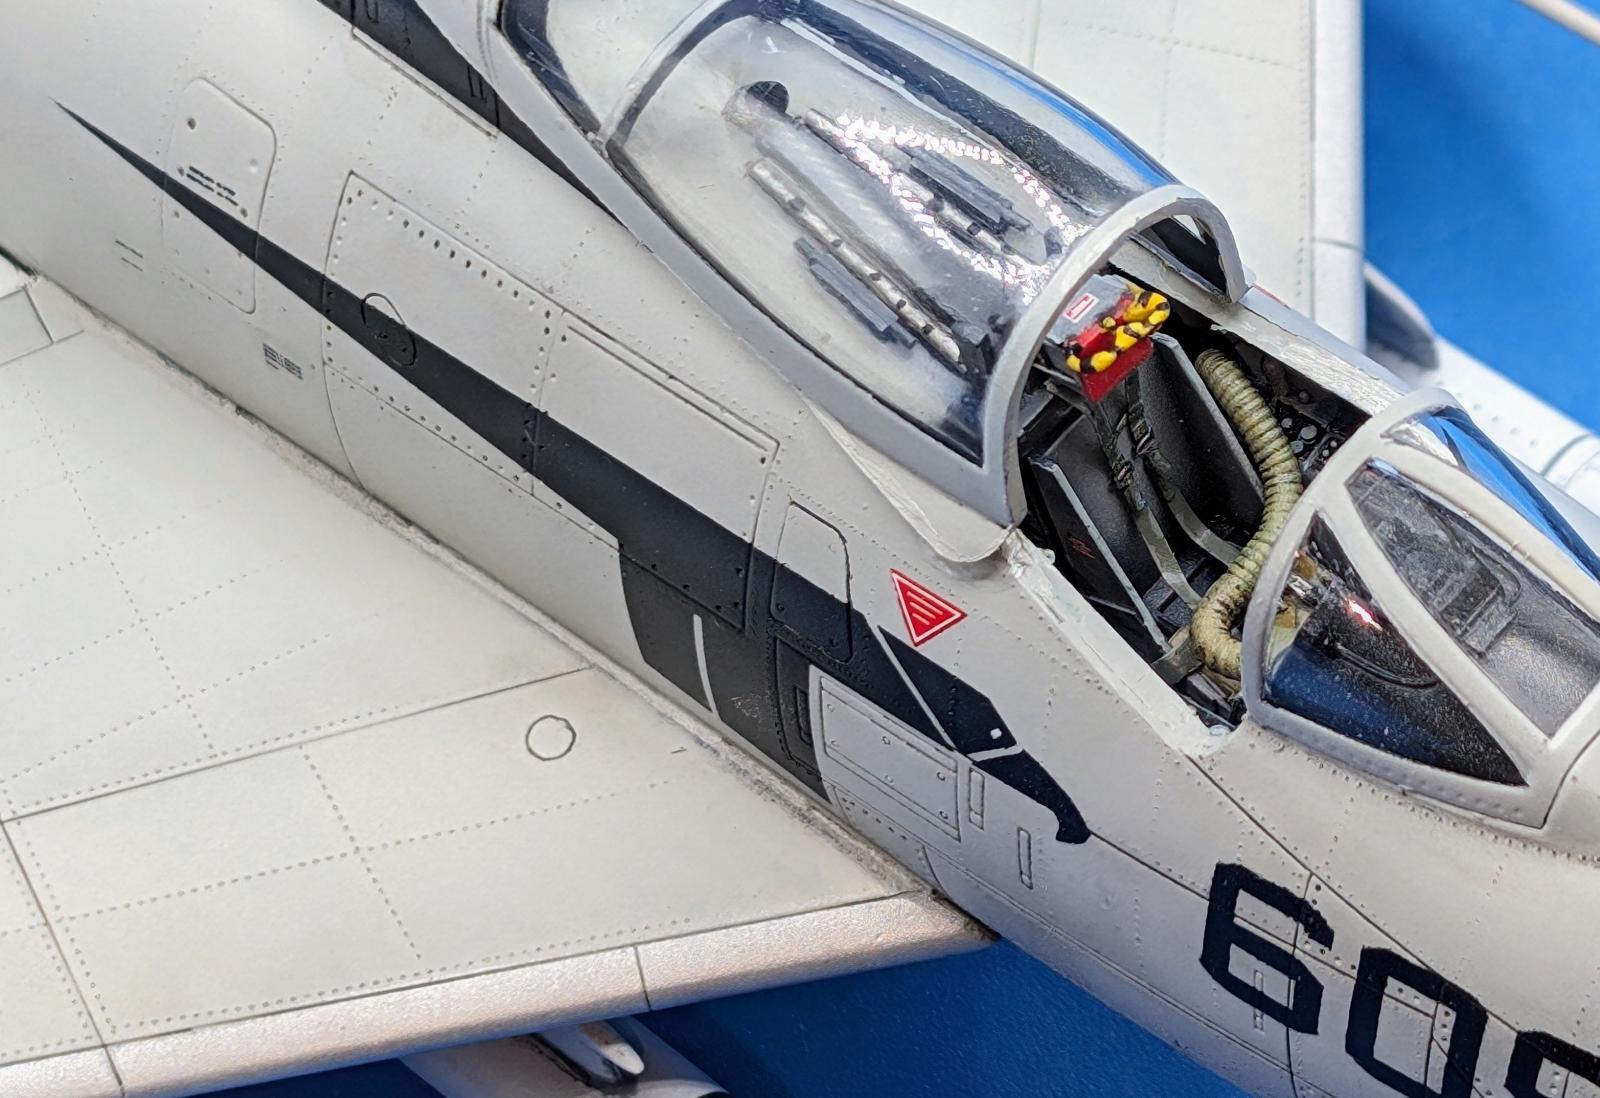
I tried to use the Aires cockpit, but it was too much trouble and it was easier to pick what I needed from that and add it to the kit cockpit.
For anyone interested in building a Fury from this kit, there are a few gotchas to watch for.
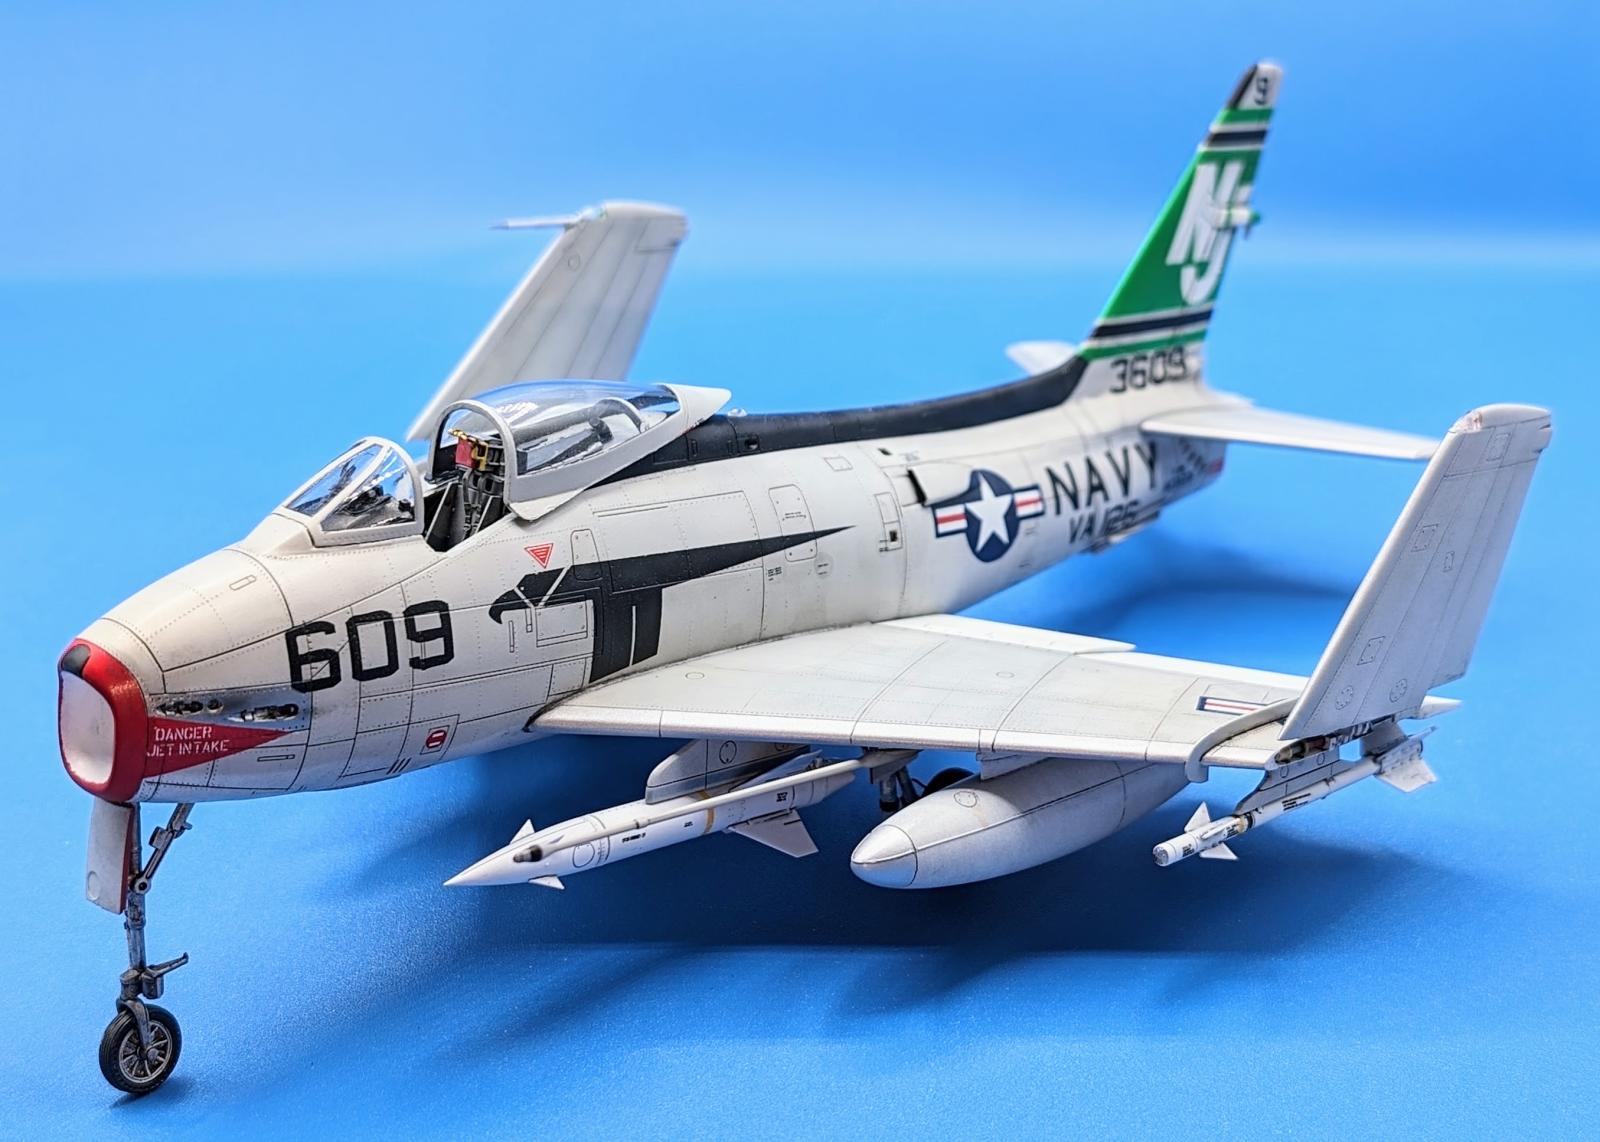
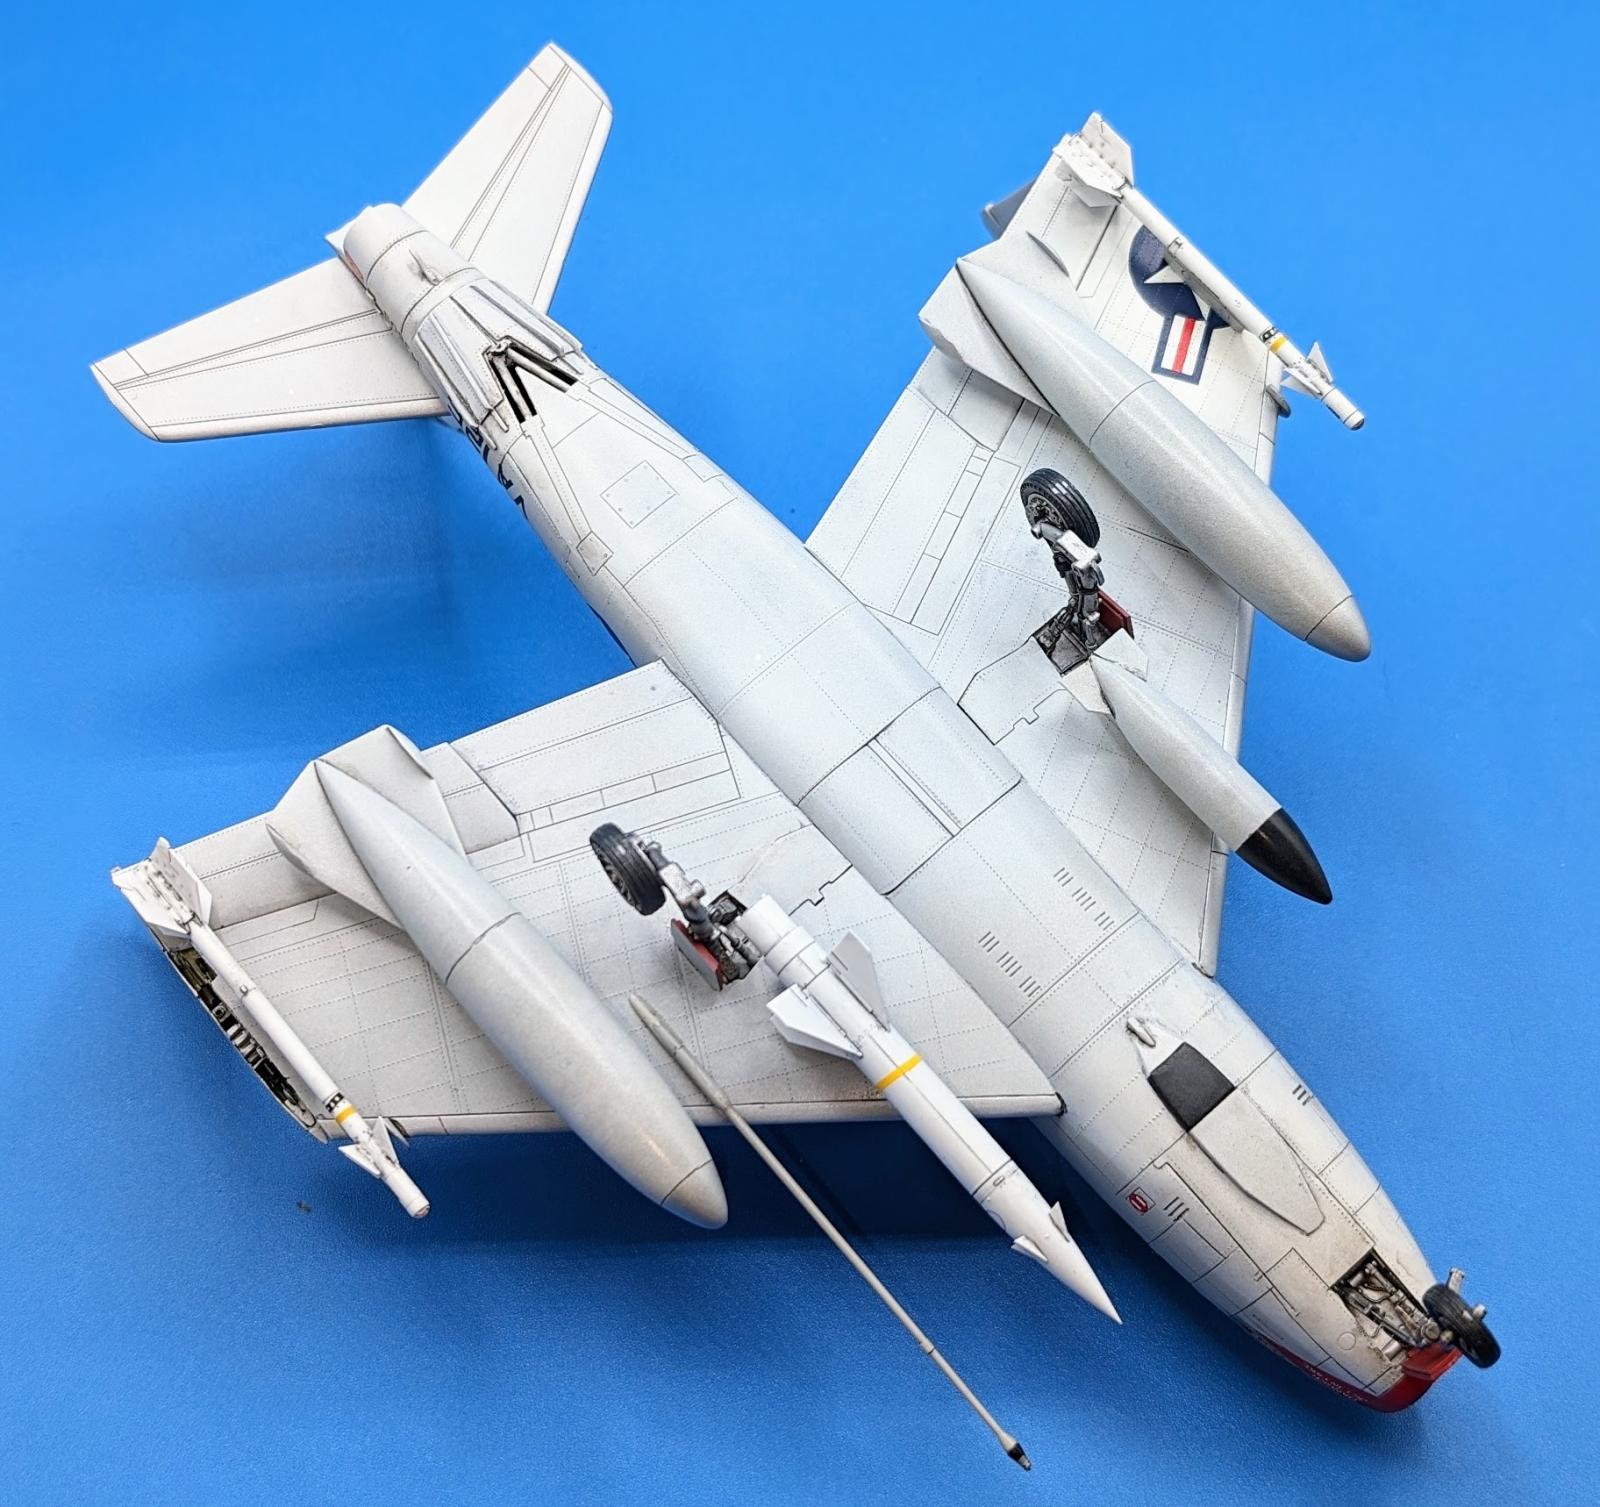
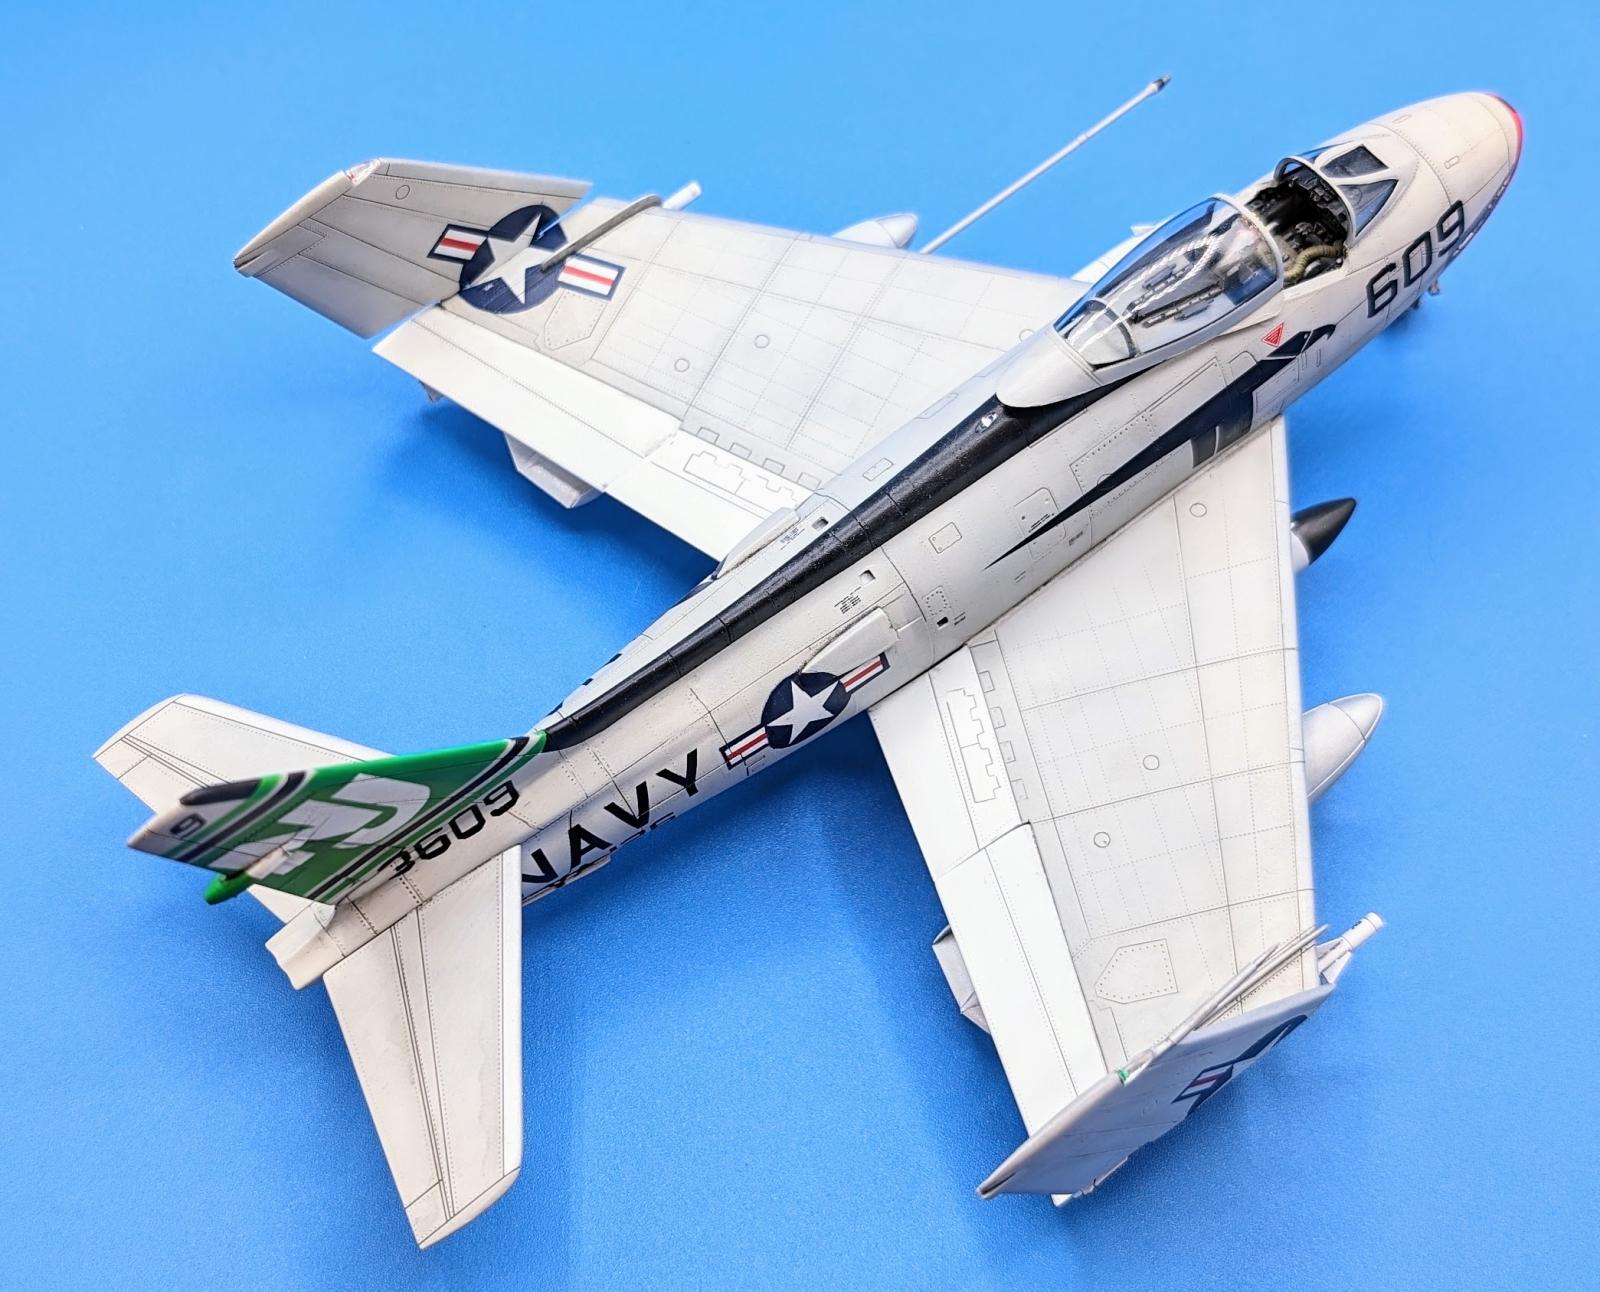
The cut lines on the inside of the wings for the wing folds will result in an outer wing that couldn't possibly close if it were real.
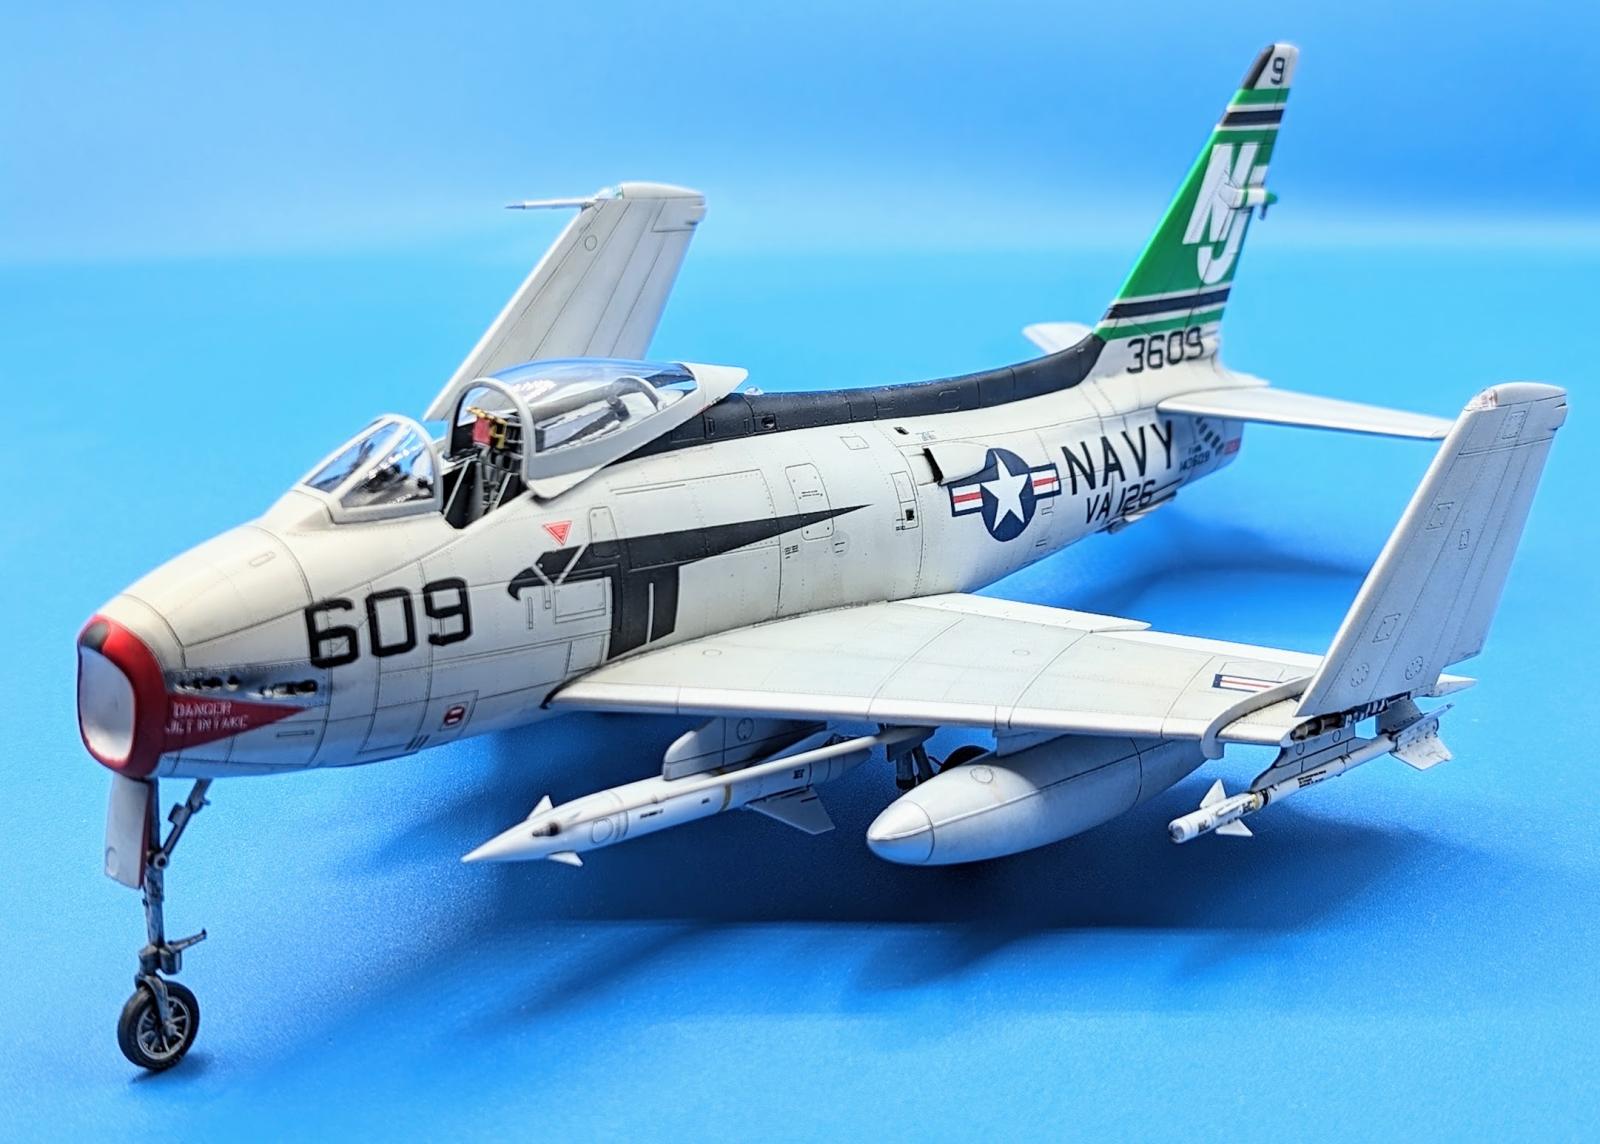
If you want to display the kit with Bullpup missiles, be aware that the Fury required a guidance pod on one of the wing stations for this and that only a maximum of 5 could be carried. The kit supplies you with six and there is no guidance pod. I had to scratchbuild mine.
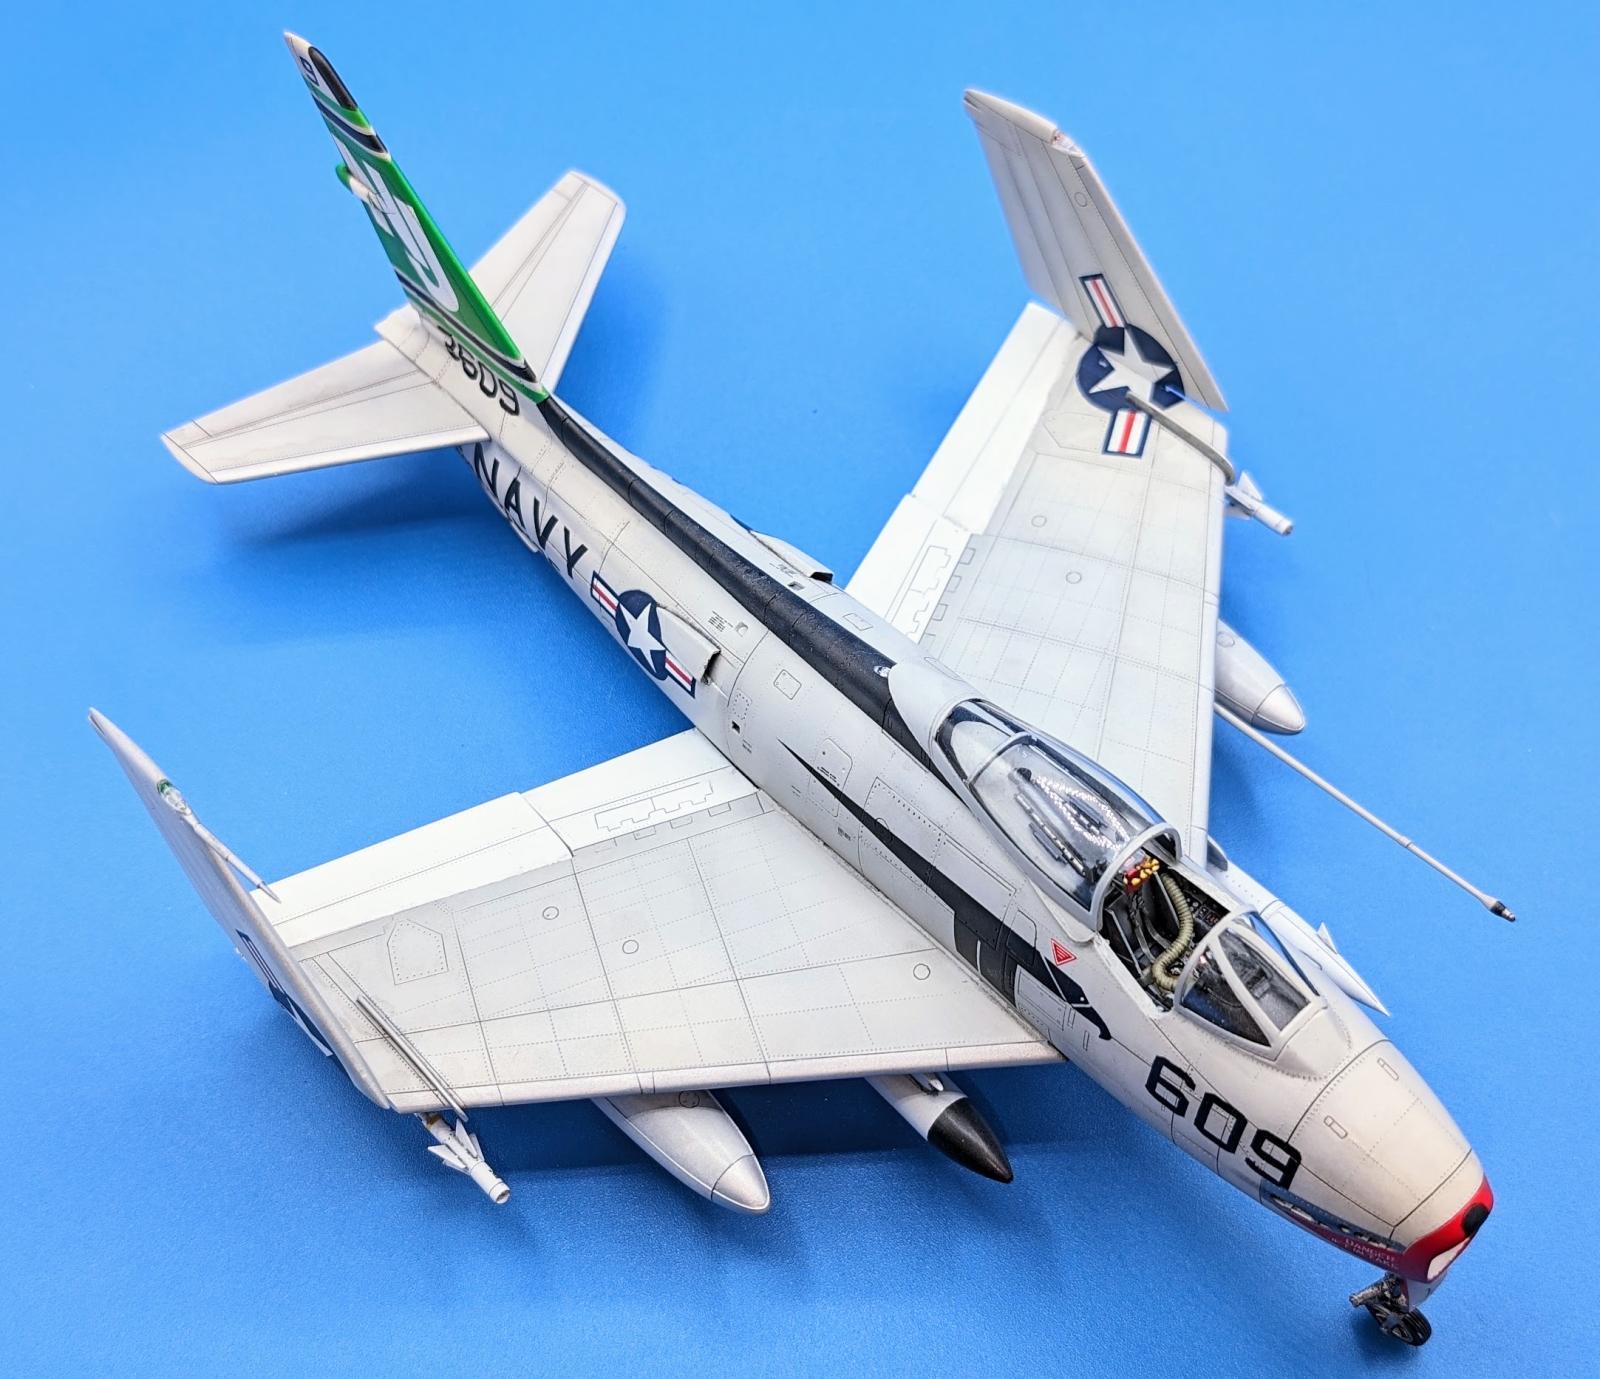
The lower dive brakes at the tail would not be there if building the FJ-4 version, they are only present on the -4B version.
And as I mentioned, there are other issues identified in the Detail And Scale book.
The kit went together well for the most part, but the large amount of masking and extra work I felt it needed, challenged my patience. It is, however, my first folded wing aircraft, so I am glad I put myself through the challenge.
Hope you all enjoy the photos of the completed build. I want to thank all those who visited the build thread as their encouragement kept me going.


Great looking Fury, Carl! We dont see the FJ-4s built often. I appriciate the warnings, and the extra attention to your build's authenticty and the chosen scheme all make for a great presentation.
Thanks Andrew (@pb_legend). I knew from the get go that it had to be a Fury as my next project even though I also have an F-86 kit in the stash, because I am ex Navy.
Such a cool looking jet and build, thanks for sharing.
Rod
Thanks Rod (@rodbettencourt), the green tail made it an easy choice for me as it's one of my favorite colors. 🙂
Your Fury turned out wonderful, Carl @clipper
All those extras you added are definitely worth it.
It was a pleasure to follow your thread, very learningful.
Thanks John (@johnb), I'm glad I could add to the knowledgebase on the kit.
Great looking build, Carl. I have both the Grand Phoenix and Hobby Boss nFJ-4 and the old ESCI FJ-2/-2 kits. I've read that the GP is a very tough build and was thinking to use some of the GP resin in a HB build.
Thanks for the build tips. I had not noticed the decal issues.
I'm really getting into the Fury line.
Thanks Chuck (@charleshorner), I have also appreciated your work on the FJ-1 build. Great stuff. As for the decals, the tail warning decals are completely hosed, but too small to make masks for and I can't print a bright enough red, so they went on anyway!
Well done, Carl. A very eye catching scheme.
Thanks Gary (@gwskat), it is easily one of the most colorful in the Detail and Scale book. I had wanted to do the one with the shooting star, but I couldn't come up with any good templates to use when creating the masks in the software.
Impressive looking Fury, Carl @clipper. Nice work on the green tail markings.
Thanks Eric (@eb801), the tail had to be done several times before I could get it to an acceptable point. The software I used for creating the masks didn't have any function for creating a opposite slant of the characters, only mirror images, so it was a case of chopping up the objects and piecing together the curves and lines to get the near correct lettering for the starboard fin side.
Great outcome from a challenging build. Wonderful job on the markings.
Thank you David (@tolss).
A beautiful Fury - love those markings, and excellent work painting the majority of them.
Thanks Greg (@gkittinger). Using masks is sometimes more trouble than decals, but the results can be better.
Gorgeous build I have the same kit and looking for decals I dont have a stencil cutter. so hope to find some decals
I will probably do an inflight with aviator-pilot.
Steve,
Thanks Steven (@sjcorvi). Caracal Decals is supposed to have released some FJ-4 decals, but they have not yet done so. An inflight display would be cool for this airplane. I generally like to do inflight displays, but I still also do ground displays. I was originally going to do a carrier deck for this, but my display piece is too small for this model and I was ready to move on rather than get bogged down in scratching a deck together.
Superb job and a wonderful result, Carl! Loved following your build thread.
Congratulations!
Thanks Spiros (@fiveten). It was my pleasure to share the build.
Beautiful work, Carl.
(BTW - it's Matchbox, not ESCI)
Thanks Tom (@tcinla). I forgot that it was Matchbox. I even remember looking for it under that name on Ebay. I will correct the article as well.
Excellent work, Carl. The painted markings look great.
Thank you John (@j-healy). I am trying to accumulate masking art work so that future builds will require less design work.
She’s a real stunner, Carl!
The extra work really paid off. It was a pleasure to follow your work in the GB.
Thanks Alfred (@alfred), and thanks for following along on the GB. It's nice to be able to interact with other builders and see what they are doing and hopefully to communicate something back to the group.
Awesome looking Fury
Thanks Dan(@dbdlee), it's a cool model to add to my display shelf
I received this following comment in an email notification, but for some reason it is not appearing here in the article comments. I also do not know who posted it. However there is a question so I thought I would answer here.
"That's a top-notch model, with a nice paint job and great build. I noticed that the wings are folded, I have the same kit and I know it's impossible to put on this position without cutting the wings; the question is, How did you make the folded system for the wings? Thanks in regard."
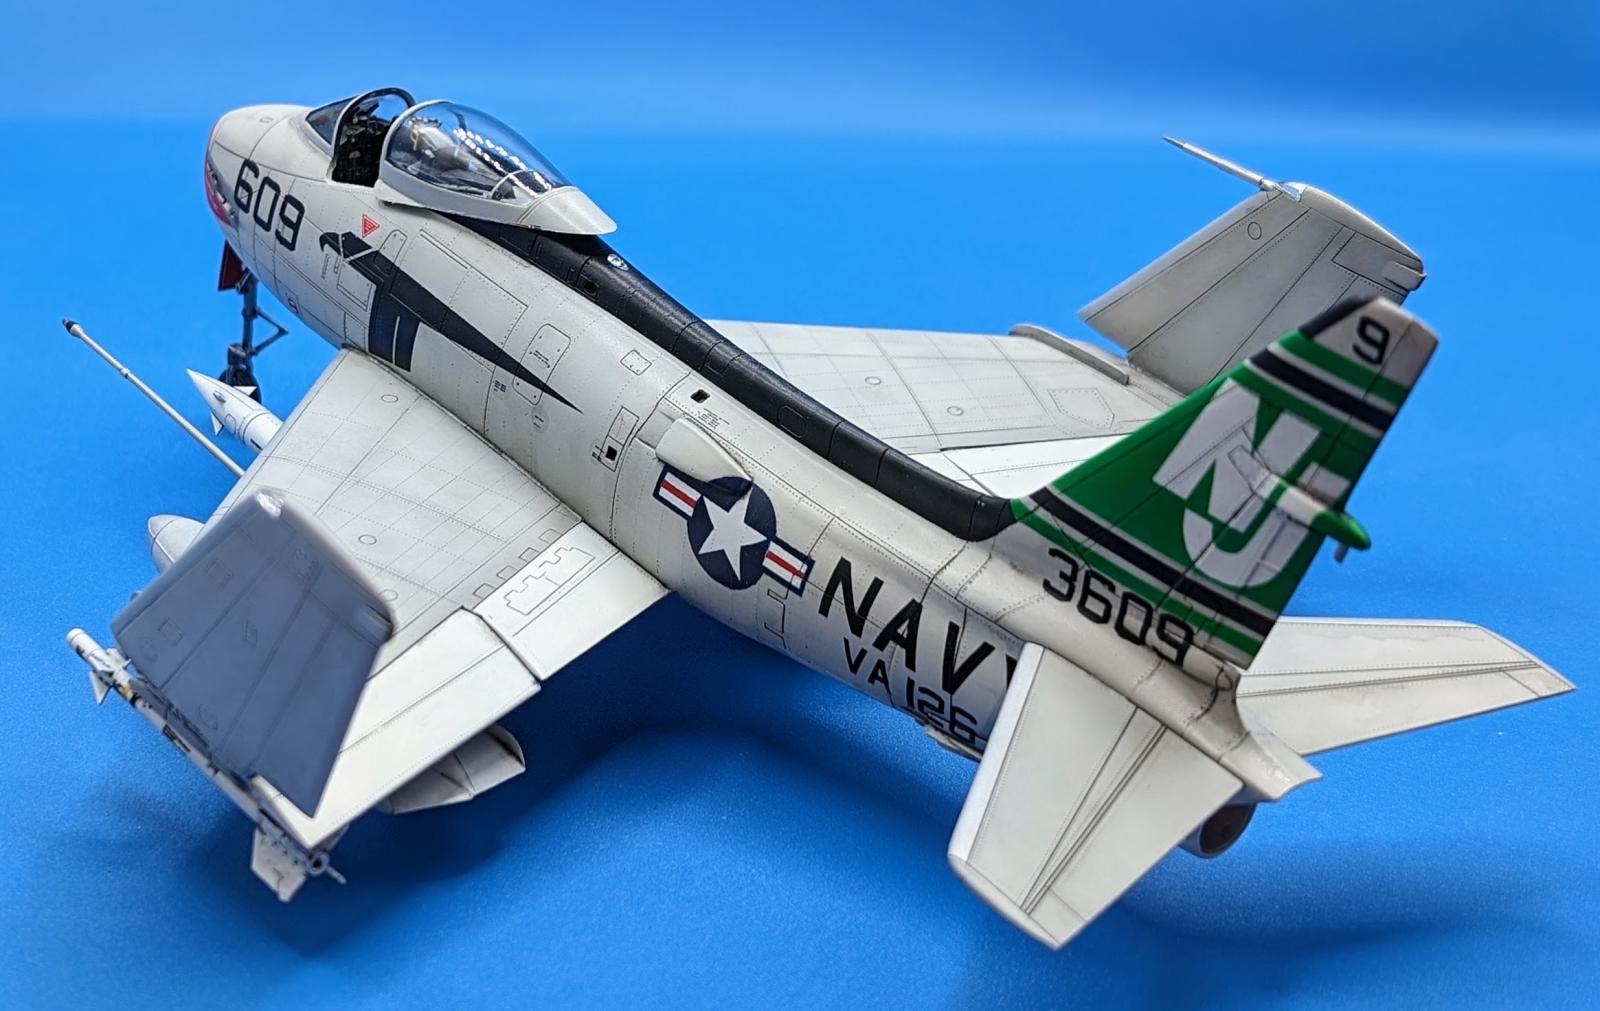
Thanks for the kind comment. The wing fold area was thinned down on the inside after making the cut.Then using what photos I could find, I made a few parts to simulate the "busyness" of this area. It was quite tedious, taking several days.
As for mounting, I had left a small section of the interior edge in the hinge area, thicker (unthinned down) o the outer wing sections. The corresponding inside detail on the inner wing section was a plastic rod with slices to simulate a hinge. The outer wing was glued directly to the top if the inner wing using 30 minute epoxy. I had thought about reinforcing it with a piece of wire, but I didn't think there was enough material to glue the wire in, so I relied upon the epoxy and being careful to avoid having the wing come off.