Martin BM-1/2 Scratch-build

Five years ago, after I'd completed building the VacWings O2U Corsair kit, I swore that I would never build another vacu-form biplane, because it was just too frustrating getting that top wing aligned properly on homemade wing struts. Apparently, time heals all wounds, because here I am, posting another vacu-form biplane model!
The occasion for venturing once again into this particular challenge was the fact that I had successfully collected examples of all Navy/Marine dive bombers that went into production - save one. Whether injection-molded, vacu-form or paper, I have been able to build/assemble 20 aircraft used by the Navy/Marines in the dive-bombing role for the years spanning 1919 to 1945. The one remaining gap in my lineup was the Martin BM-1/2, which has apparently never been offered as a kit in 1/48 scale. So, to complete my goal of modelling the whole line-up of aircraft, I concluded I would have to make my own.
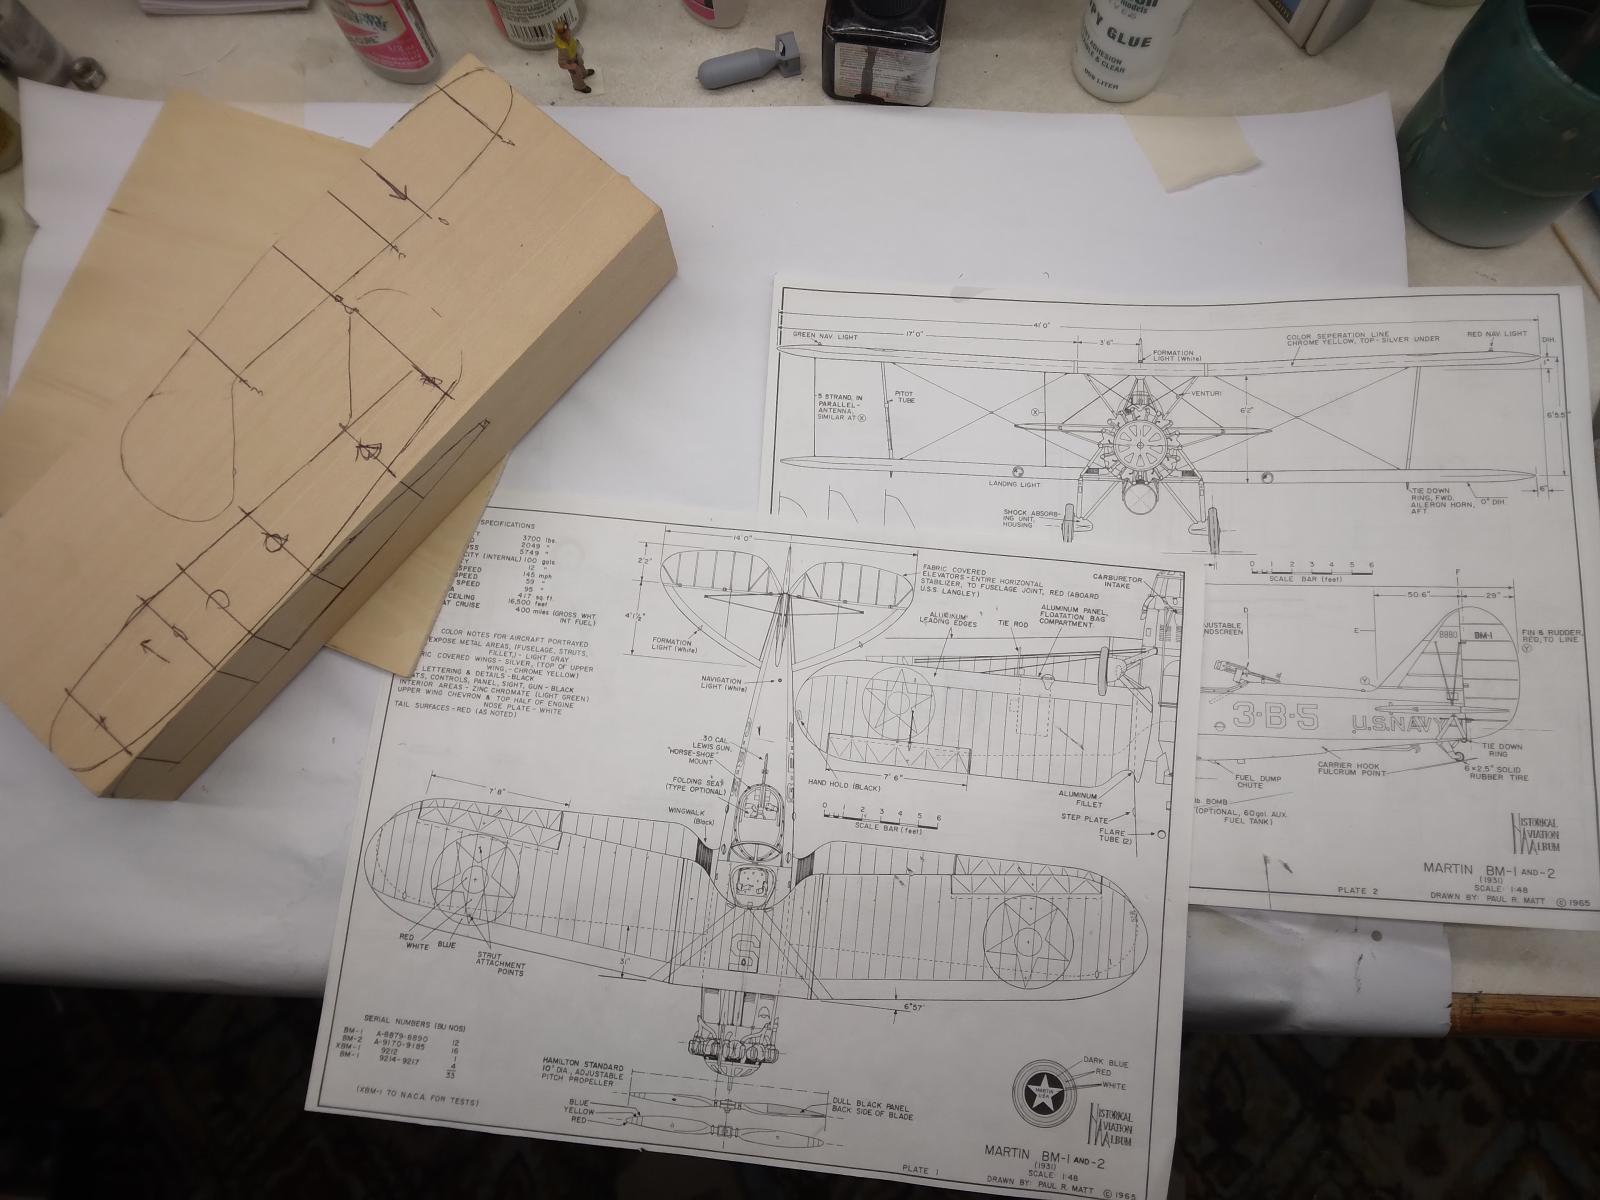
Two things helped make this goal feasible, 1) I had done a homemade vacu-form aircraft already when I built the Brewster SBN a while back, so I had the equipment and some experience to draw on, and 2) I found a really good set of three-view drawings in 1/48 scale on eBay. These drawings had cross-sections of the fuselage which aided greatly in shaping my vacu-form molds correctly.
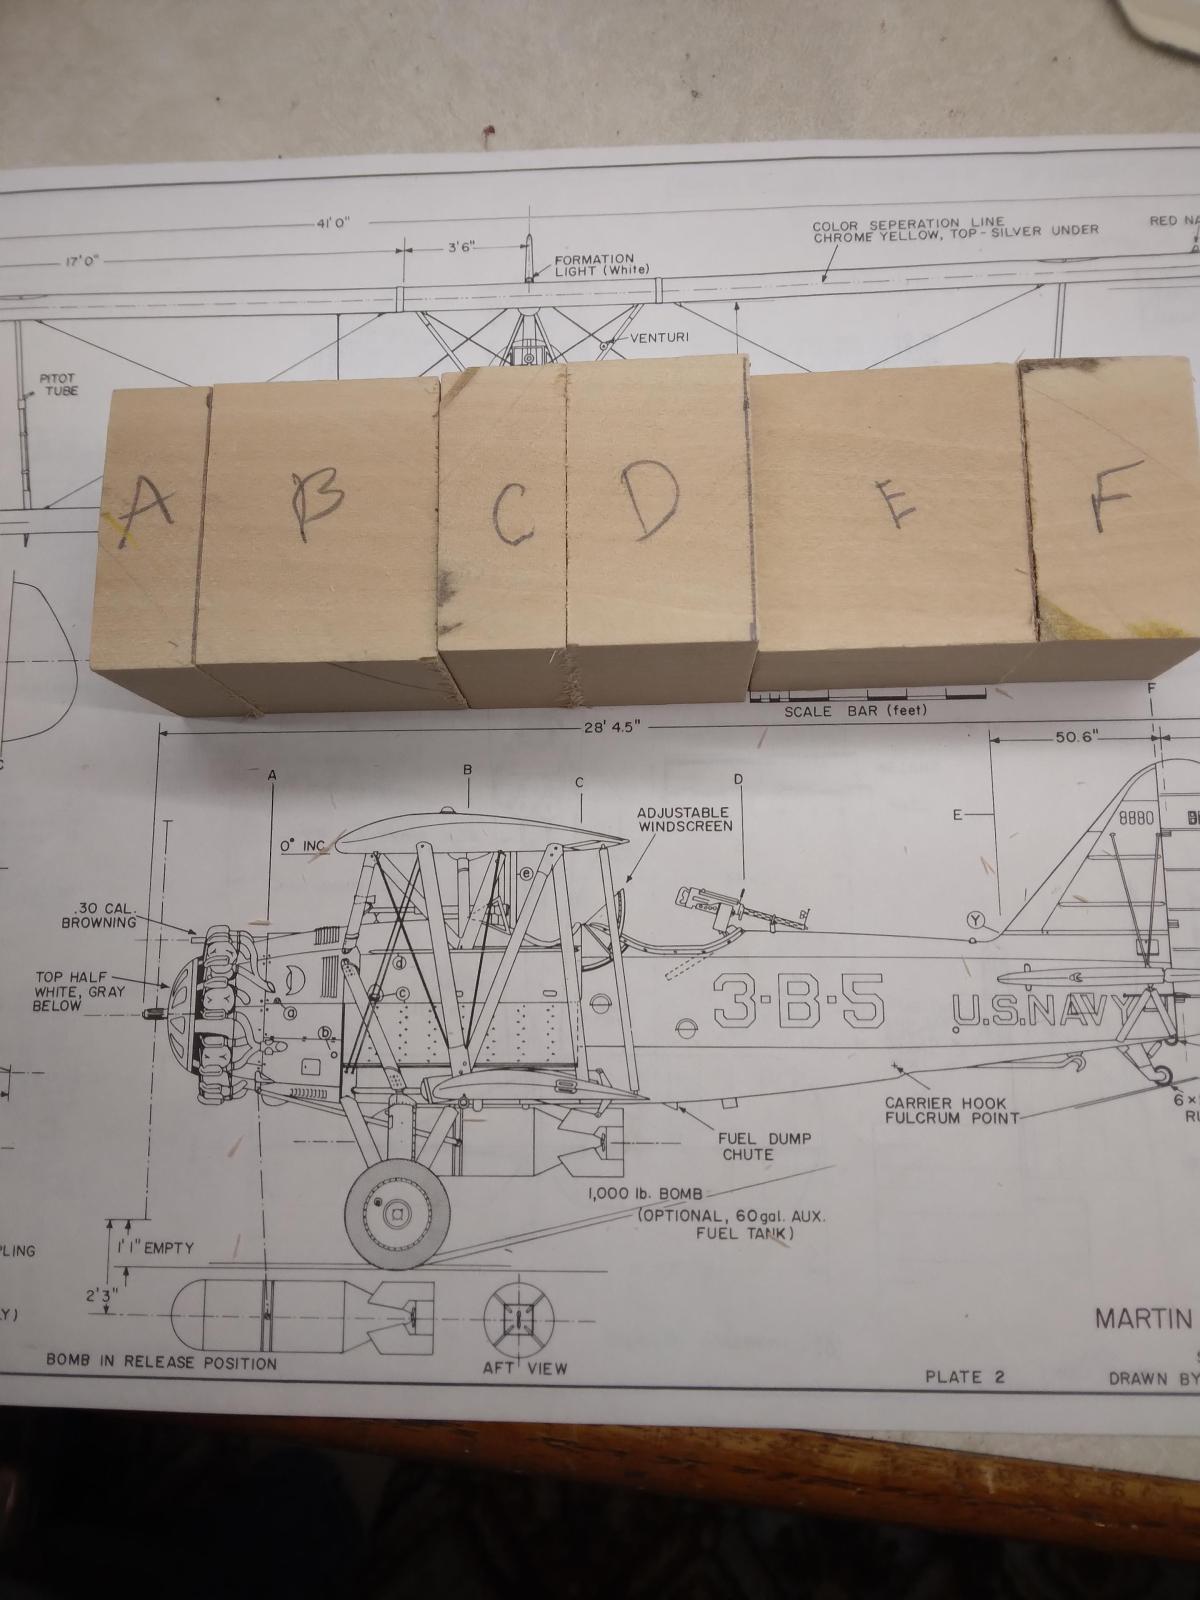
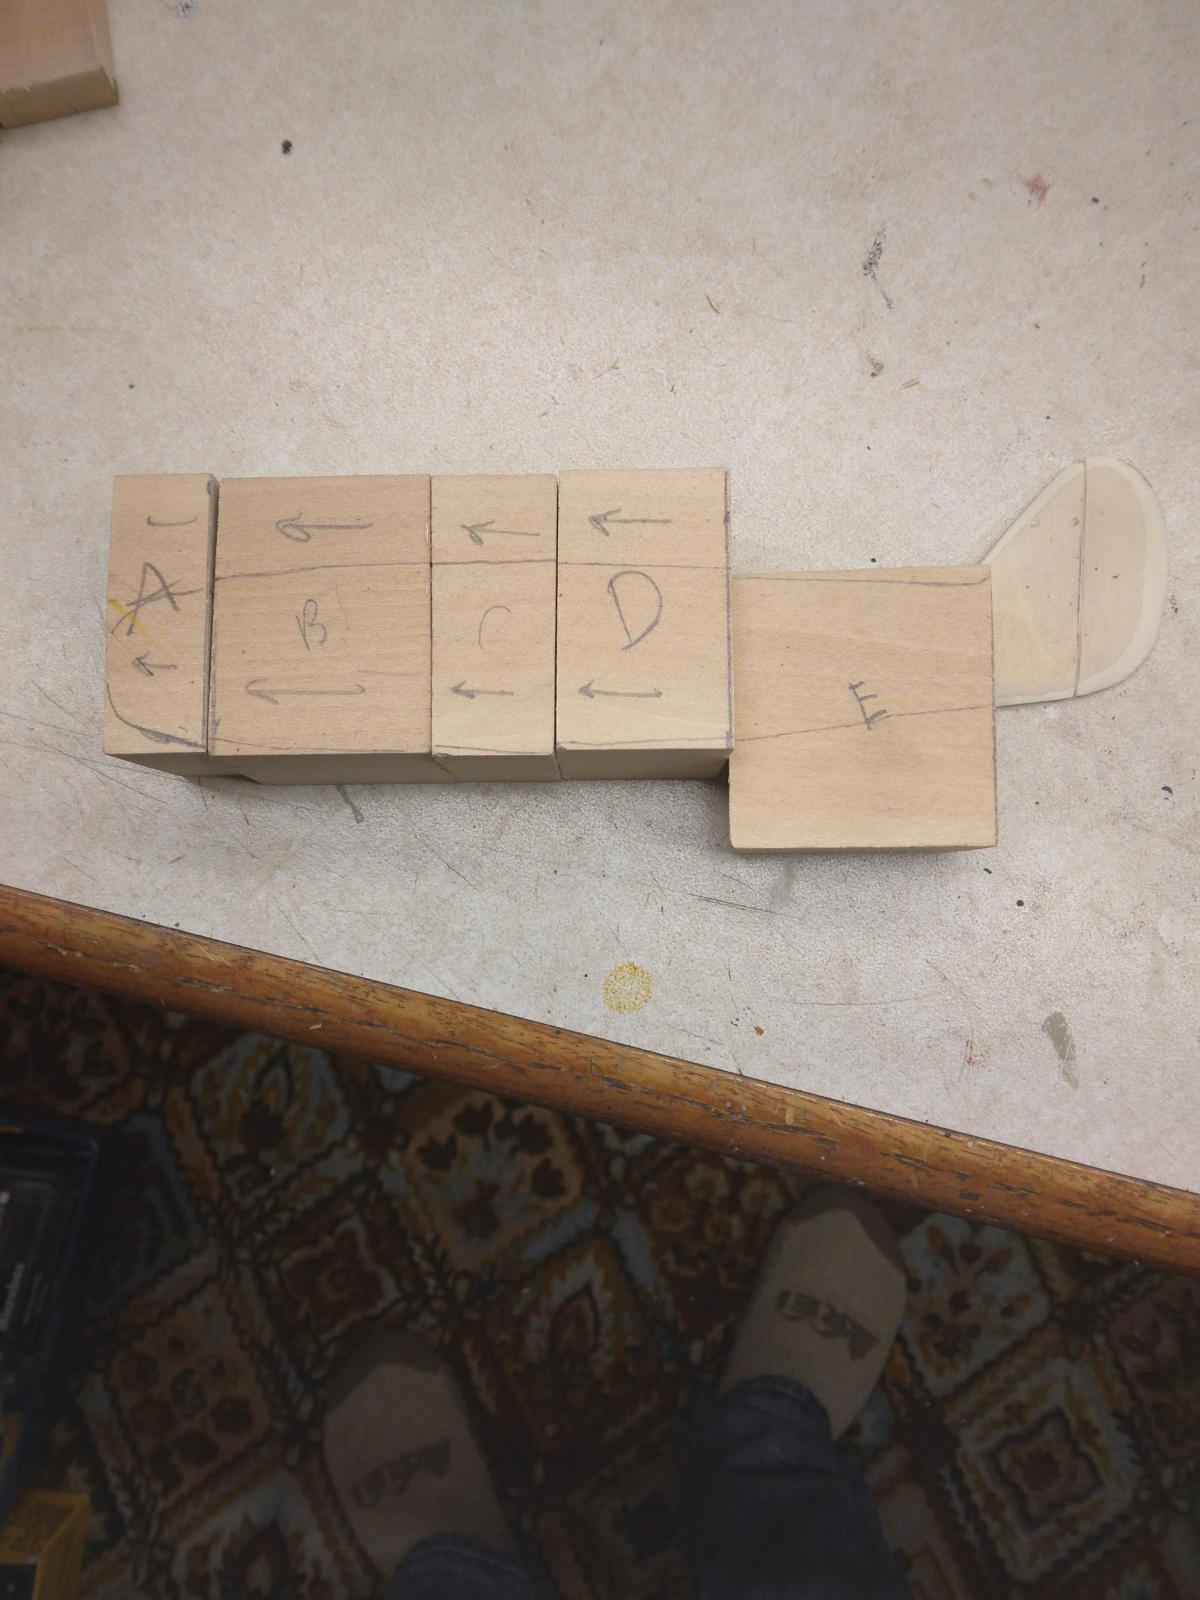
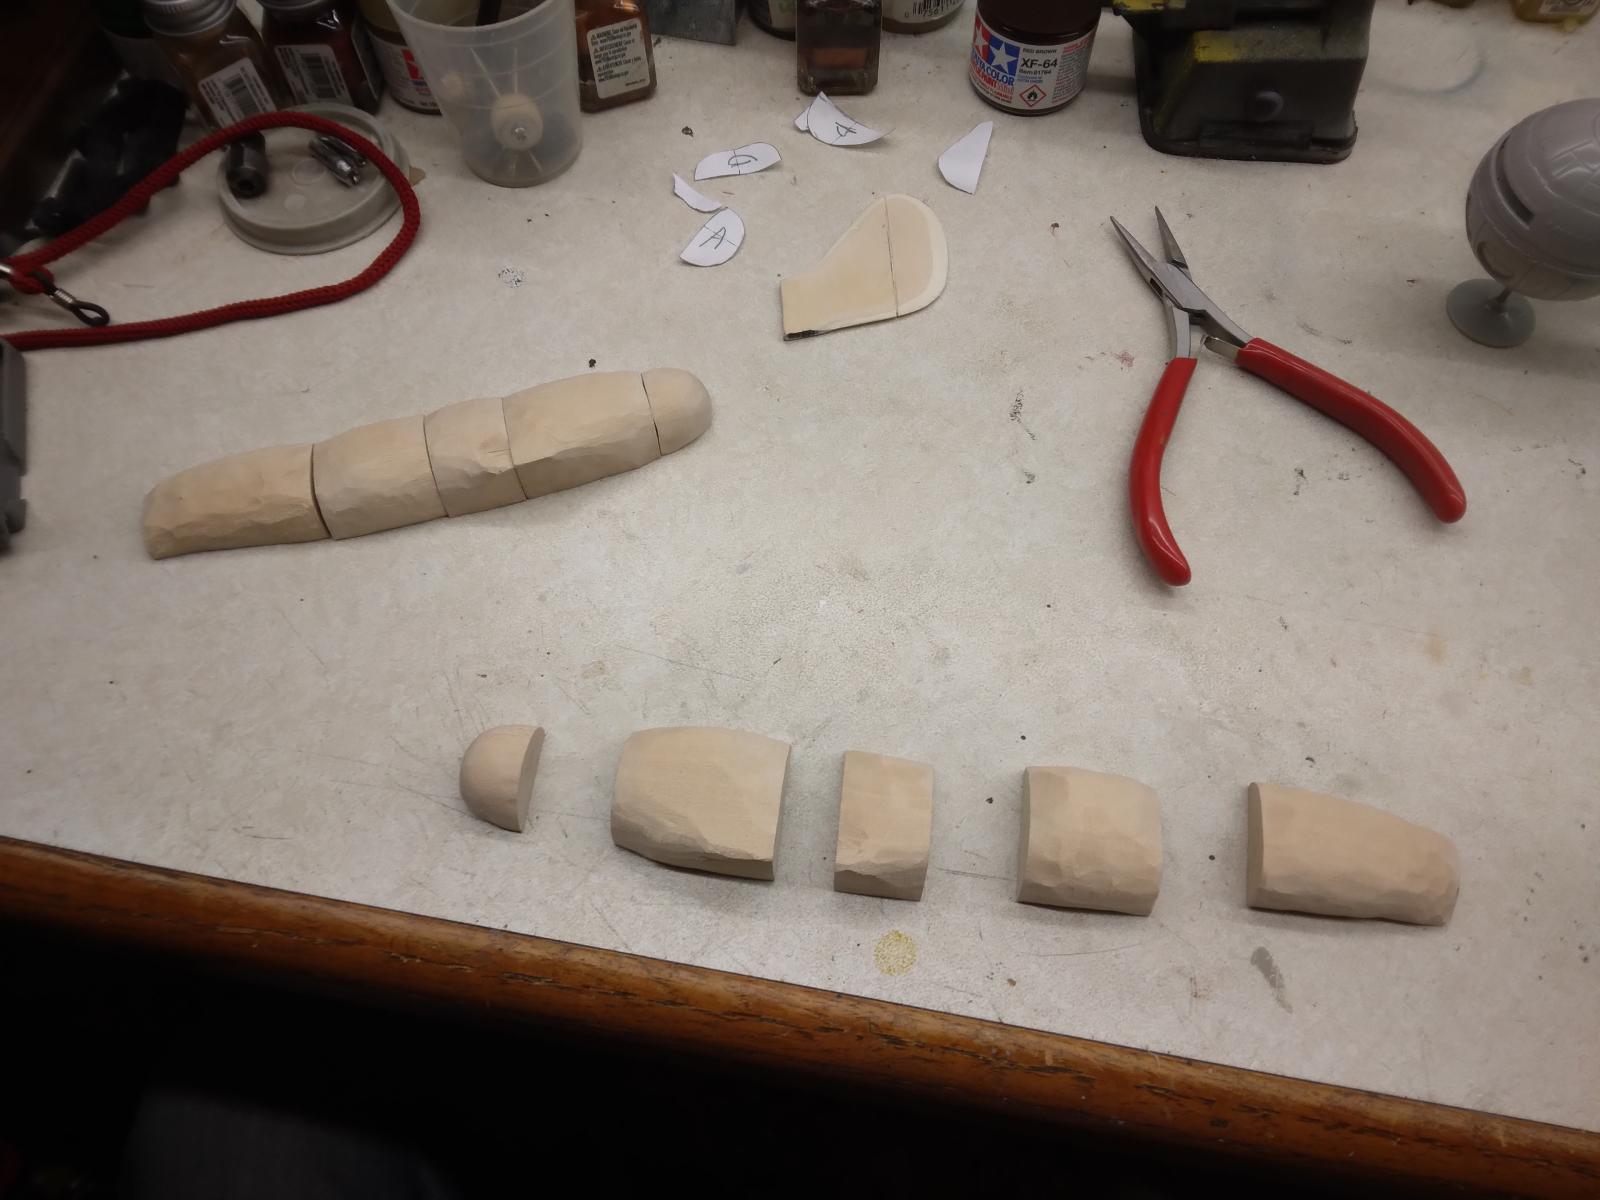
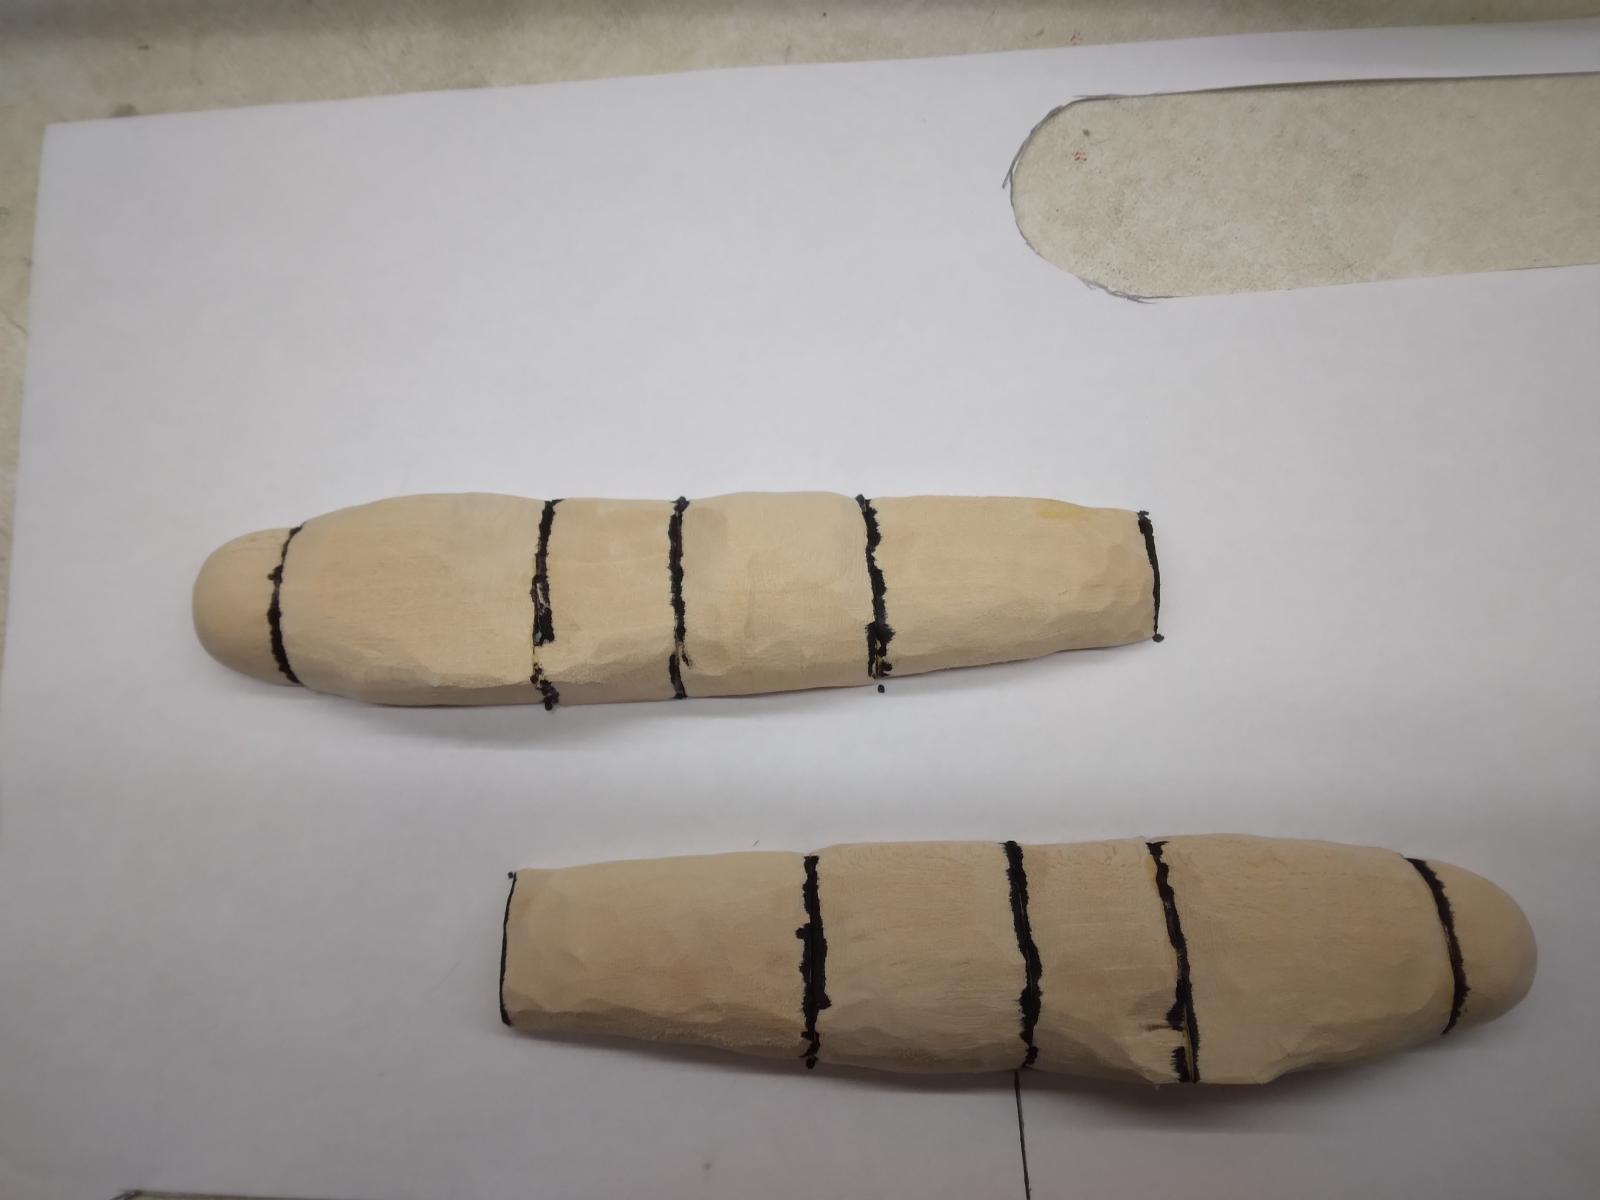
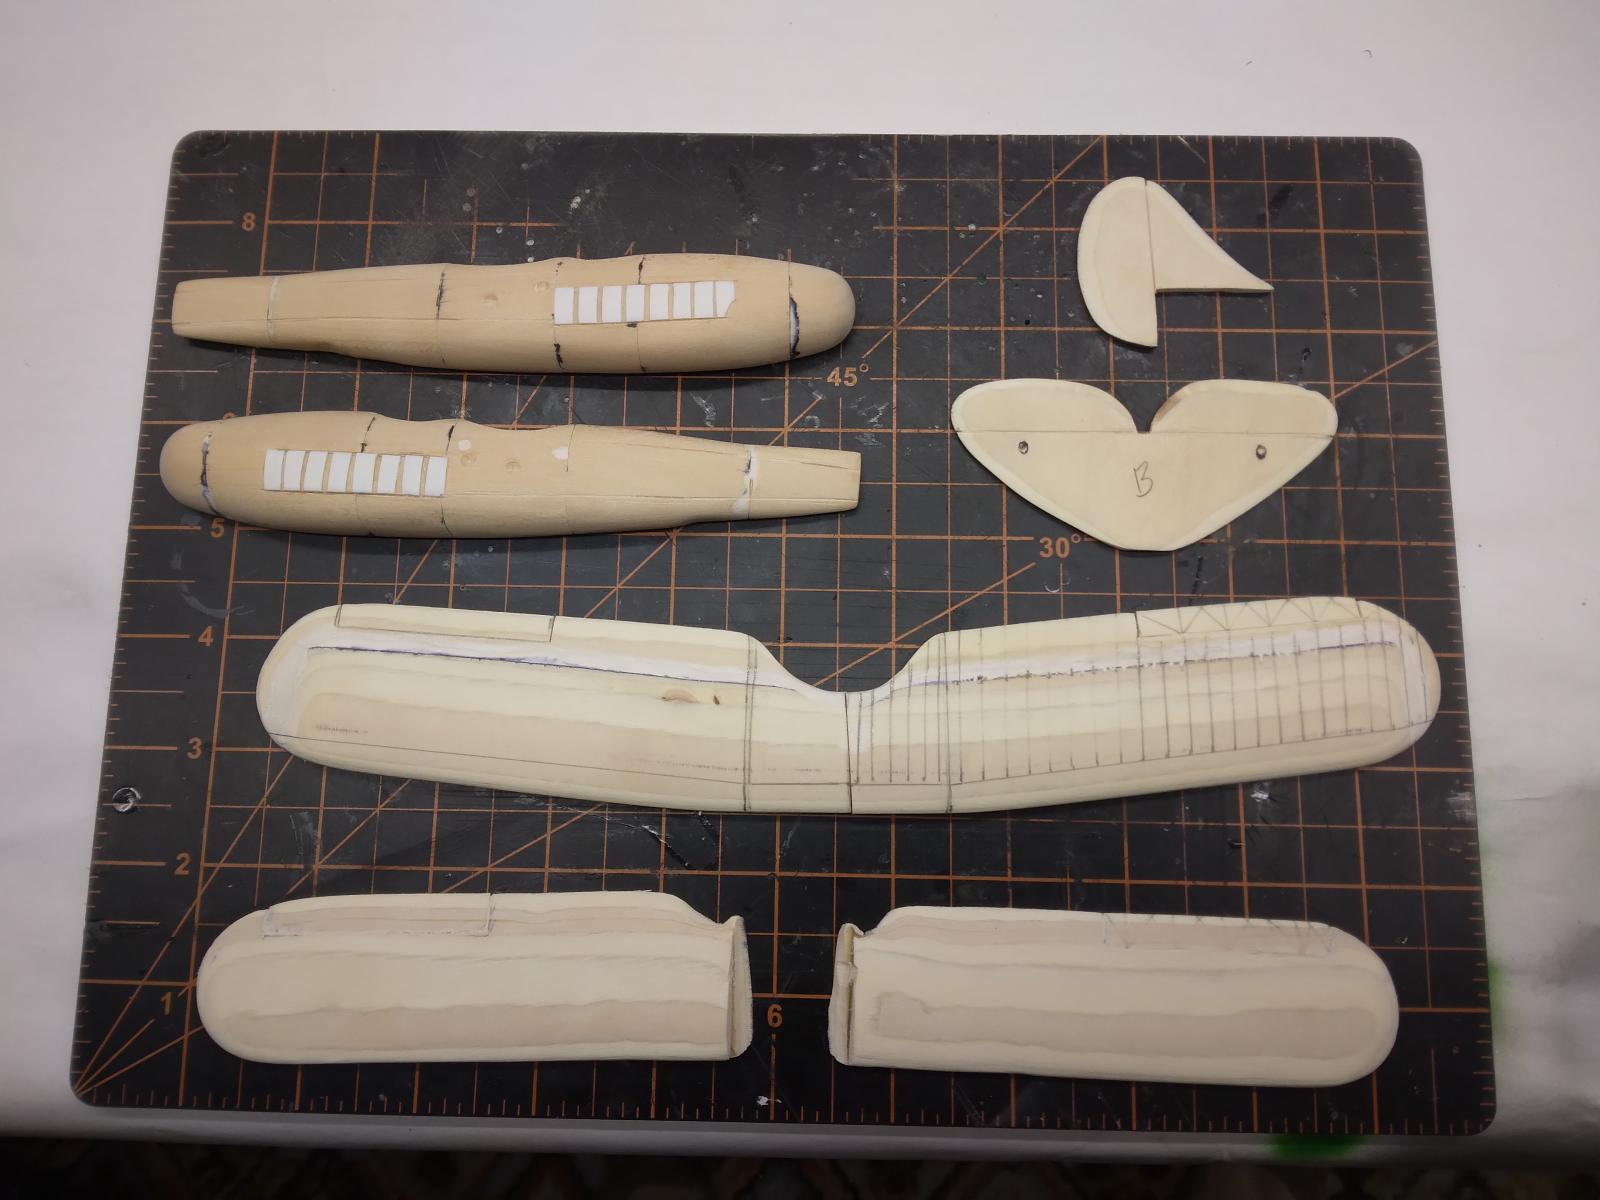
As you can see from the photos, I started with a solid block of basswood for the fuselage. This I cut into six separate pieces for the fuselage sections. I made a copy of the three-view drawings, then from the copy, cut out the fuselage and the cross-sections for patterns and traced them onto the sides and ends of the wood blocks. From there I used a dremel tool to do the rough shaping of each piece (filling the house with sawdust in the process), and then hand sanded each block close to the proper shape. At that point, I glued the pieces all together, and completed sanding each half of the fuselage down to the finish shape. I decided I would not try to do panel lines in the wood, but instead glued on some sheet styrene for the fuel tanks on the sides of the fuselage.
The rudder and elevators were done separately using basswood plywood, cut to shape and sanded. The wings were done in plywood as well. I couldn't think of a good way to do the contours on the fabric-covered wings in the wooden molds, so I left that issue to be addressed later.
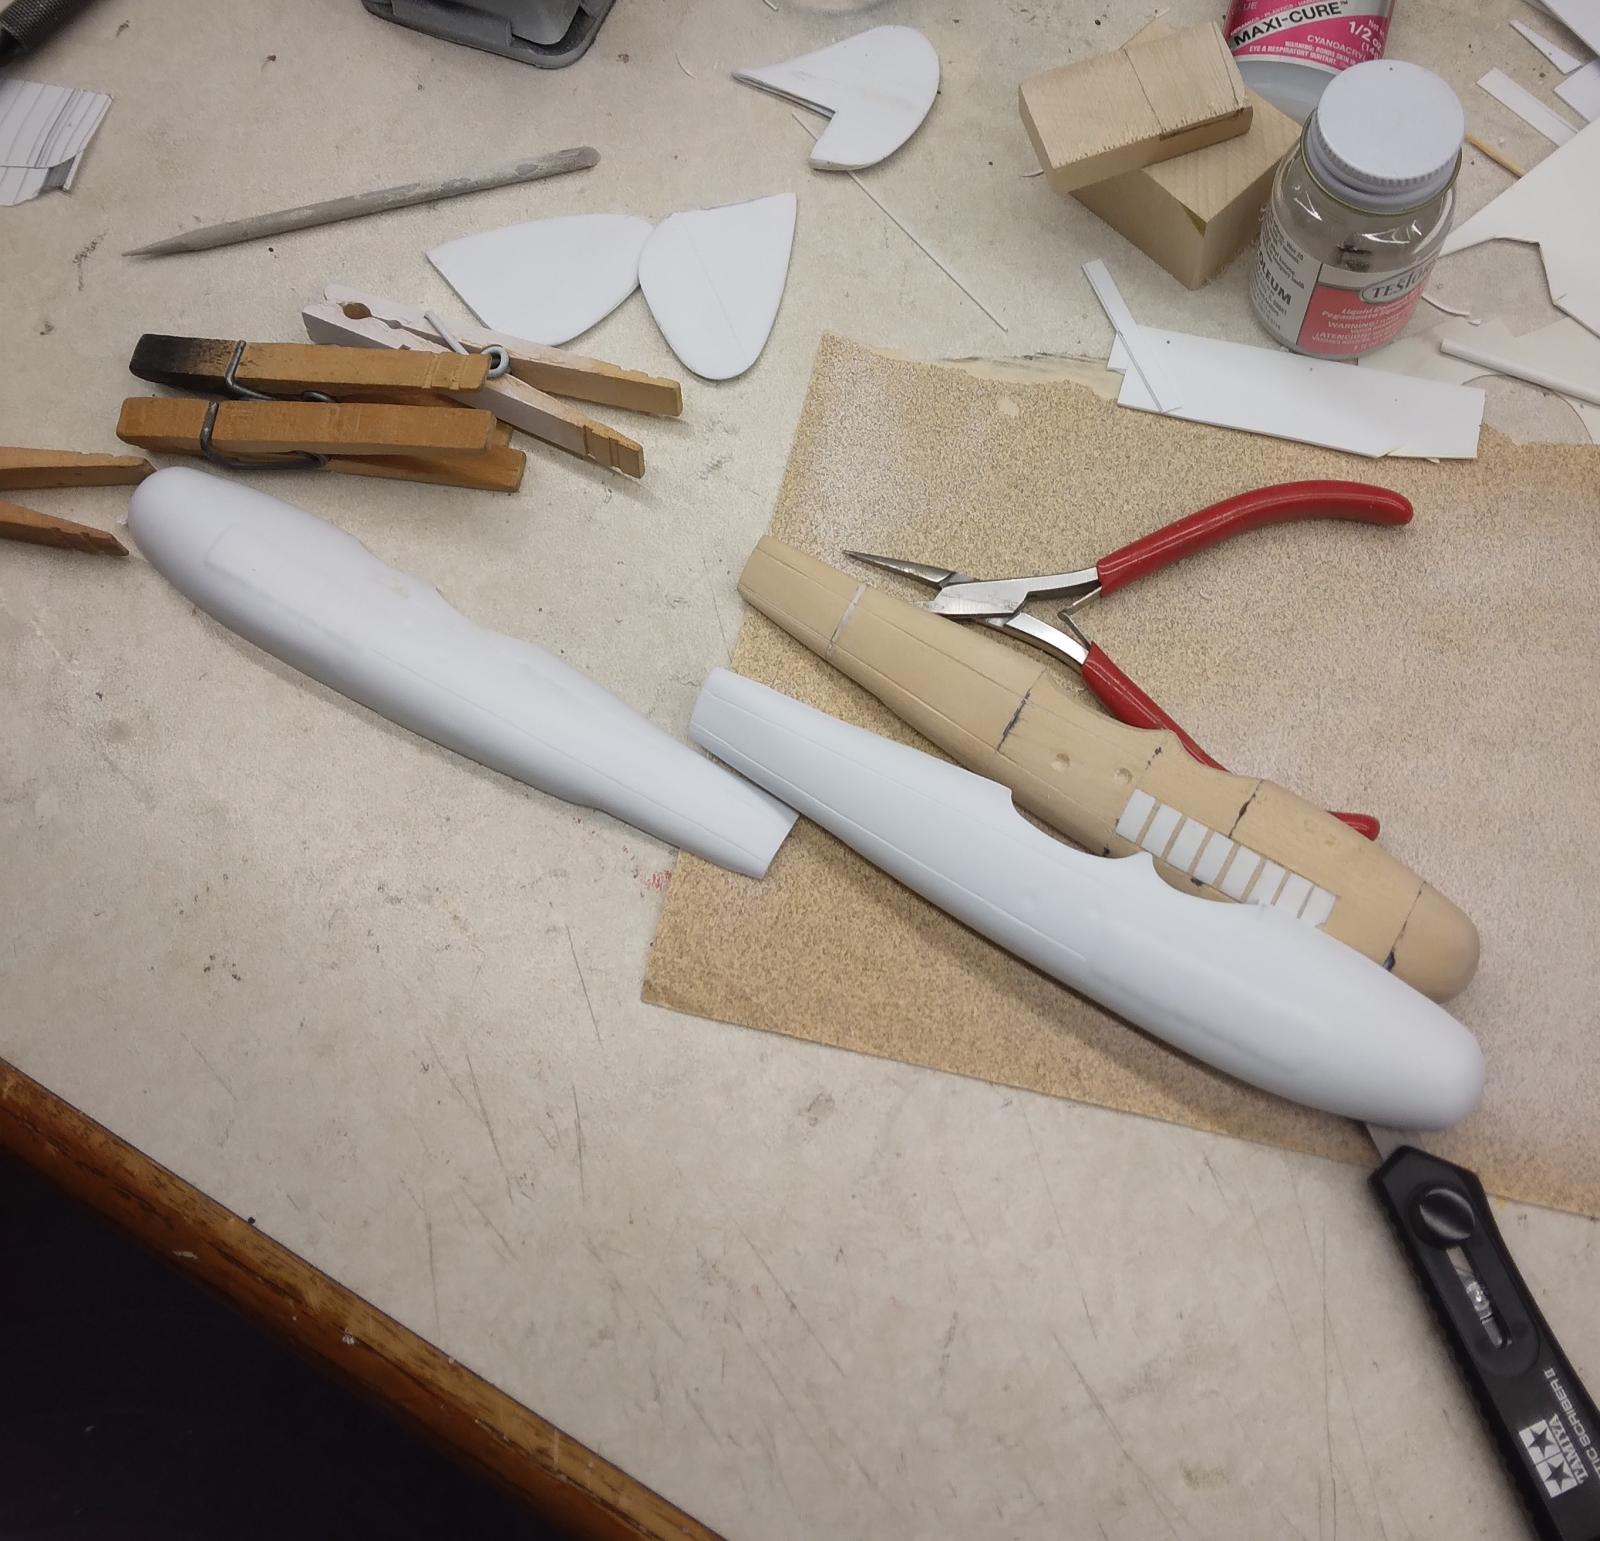
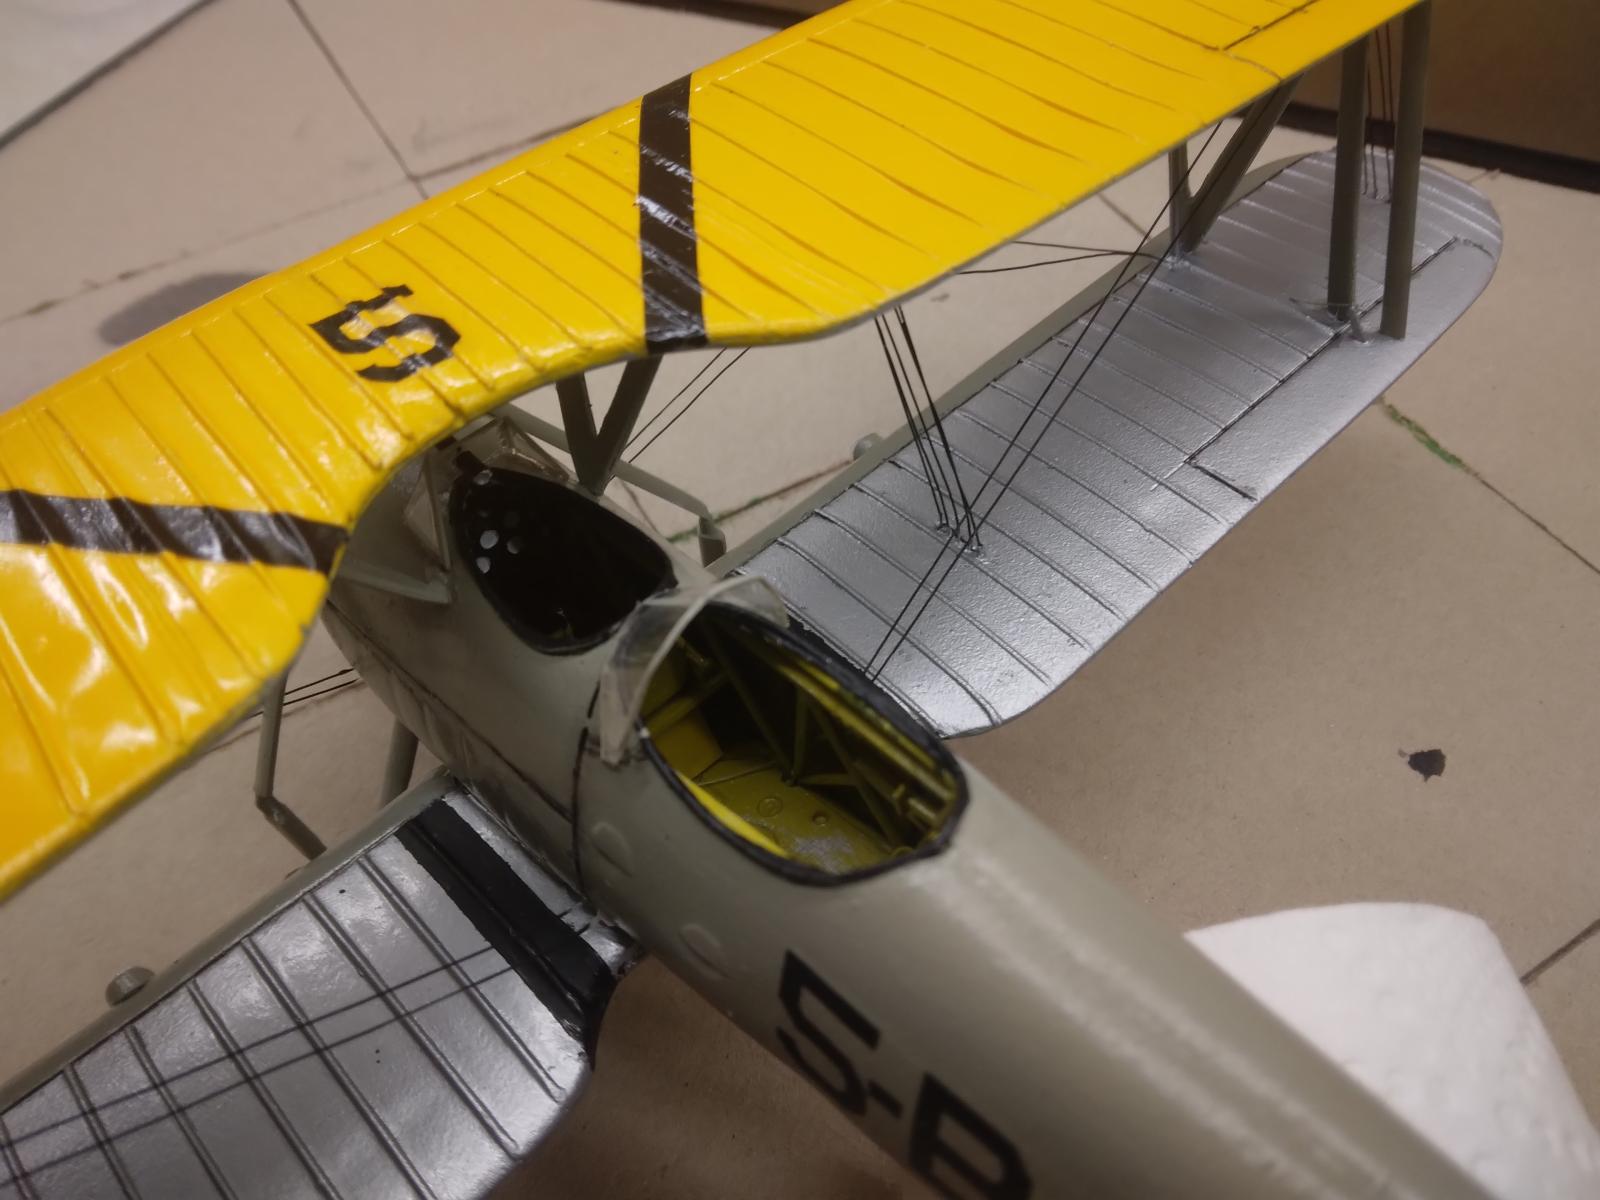
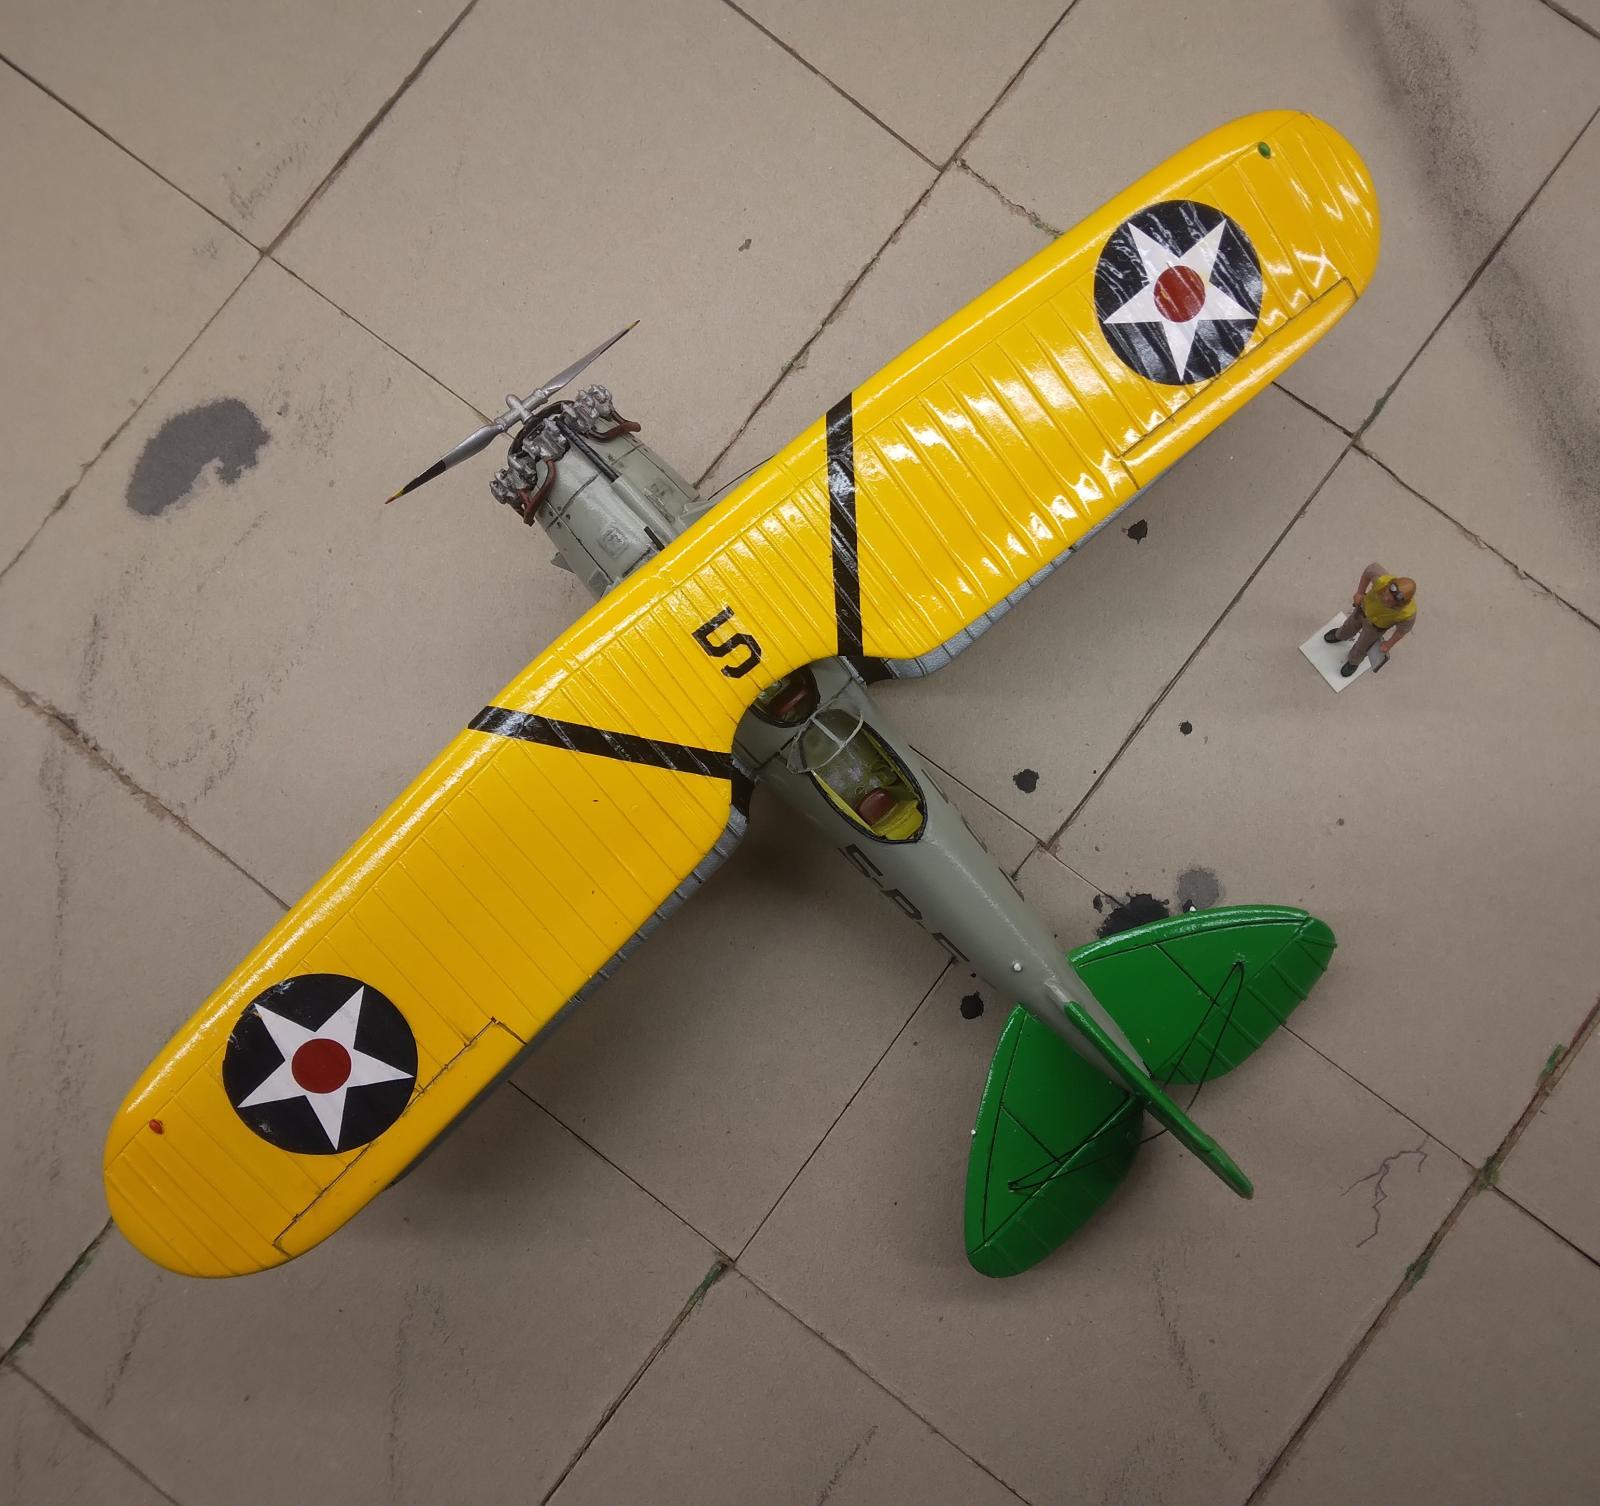
With the vacu-forming completed to my satisfaction, construction began. I was unable to find any cockpit photographs, so I engaged my “artistic license” to construct what I supposed was a reasonable cockpit for a military craft from 1930. Evergreen rod was glued to the inside of the fuselage in a lattice pattern, then the cockpit from a Tamiya Fairey Swordfish was modified and installed. The two halves of the fuselage were mated, then panel lines were scribed.
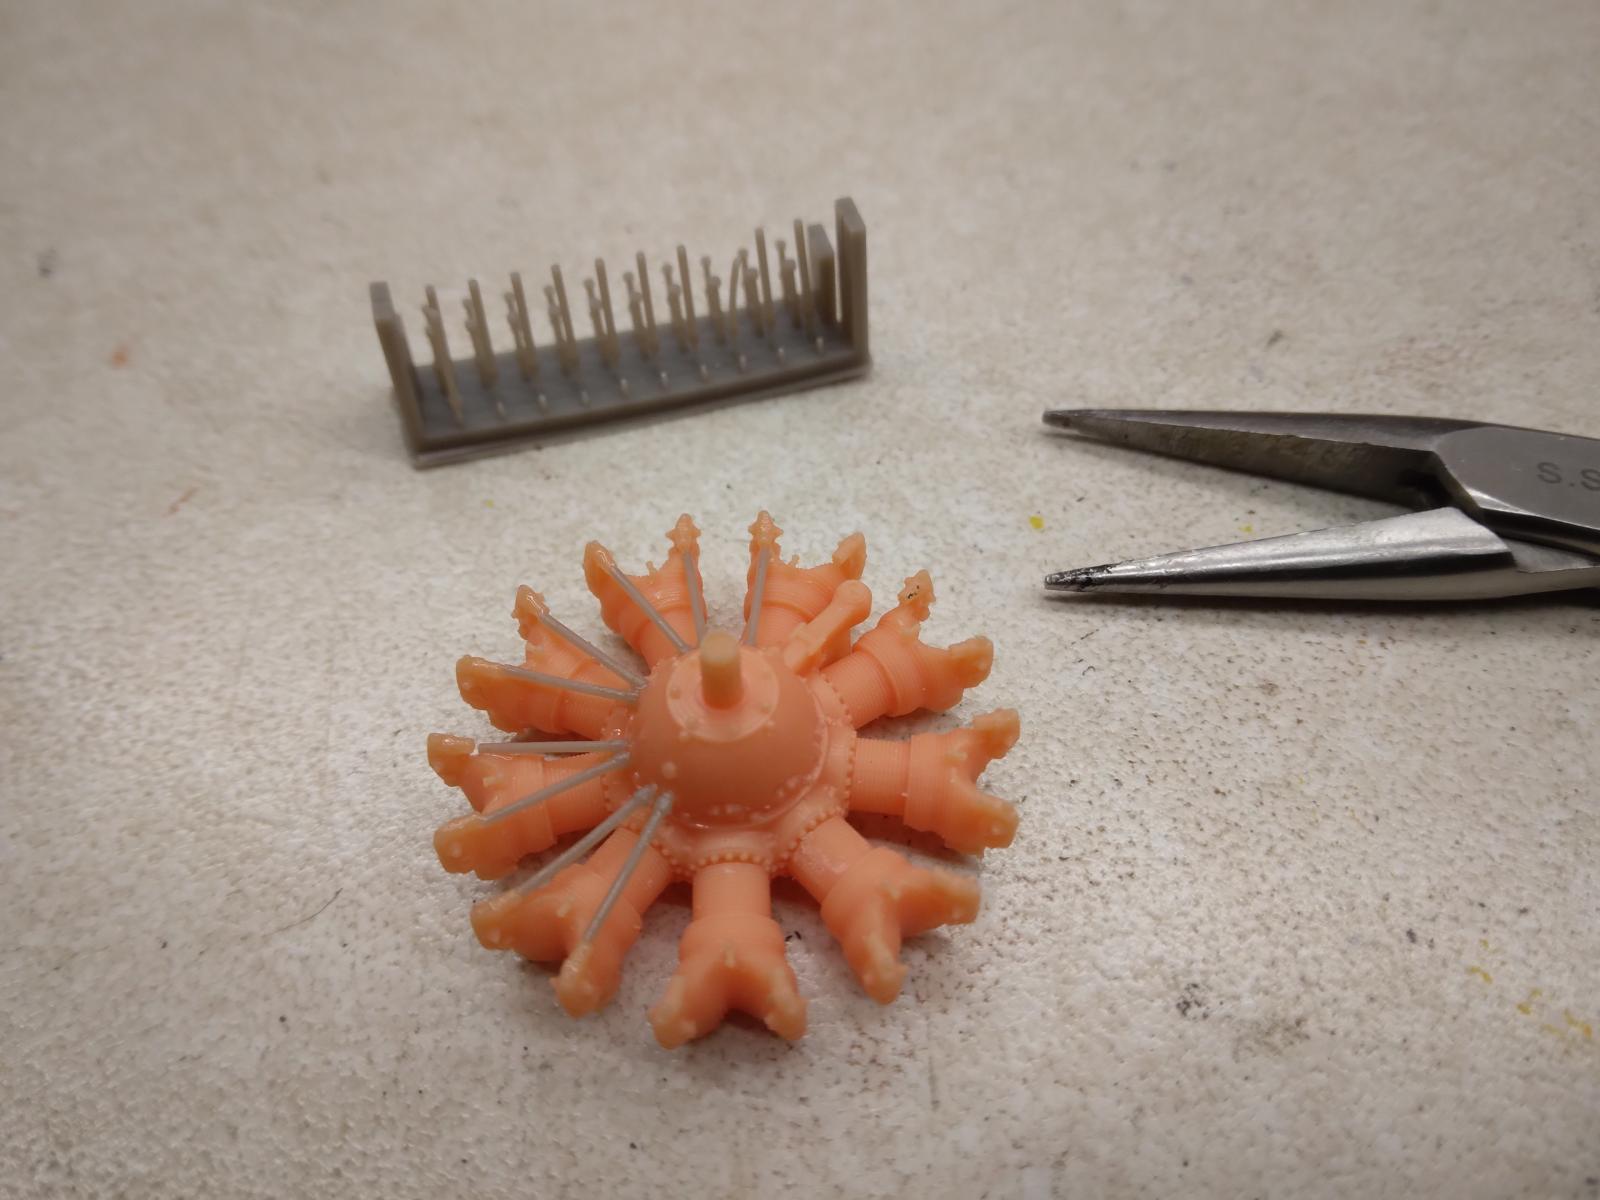
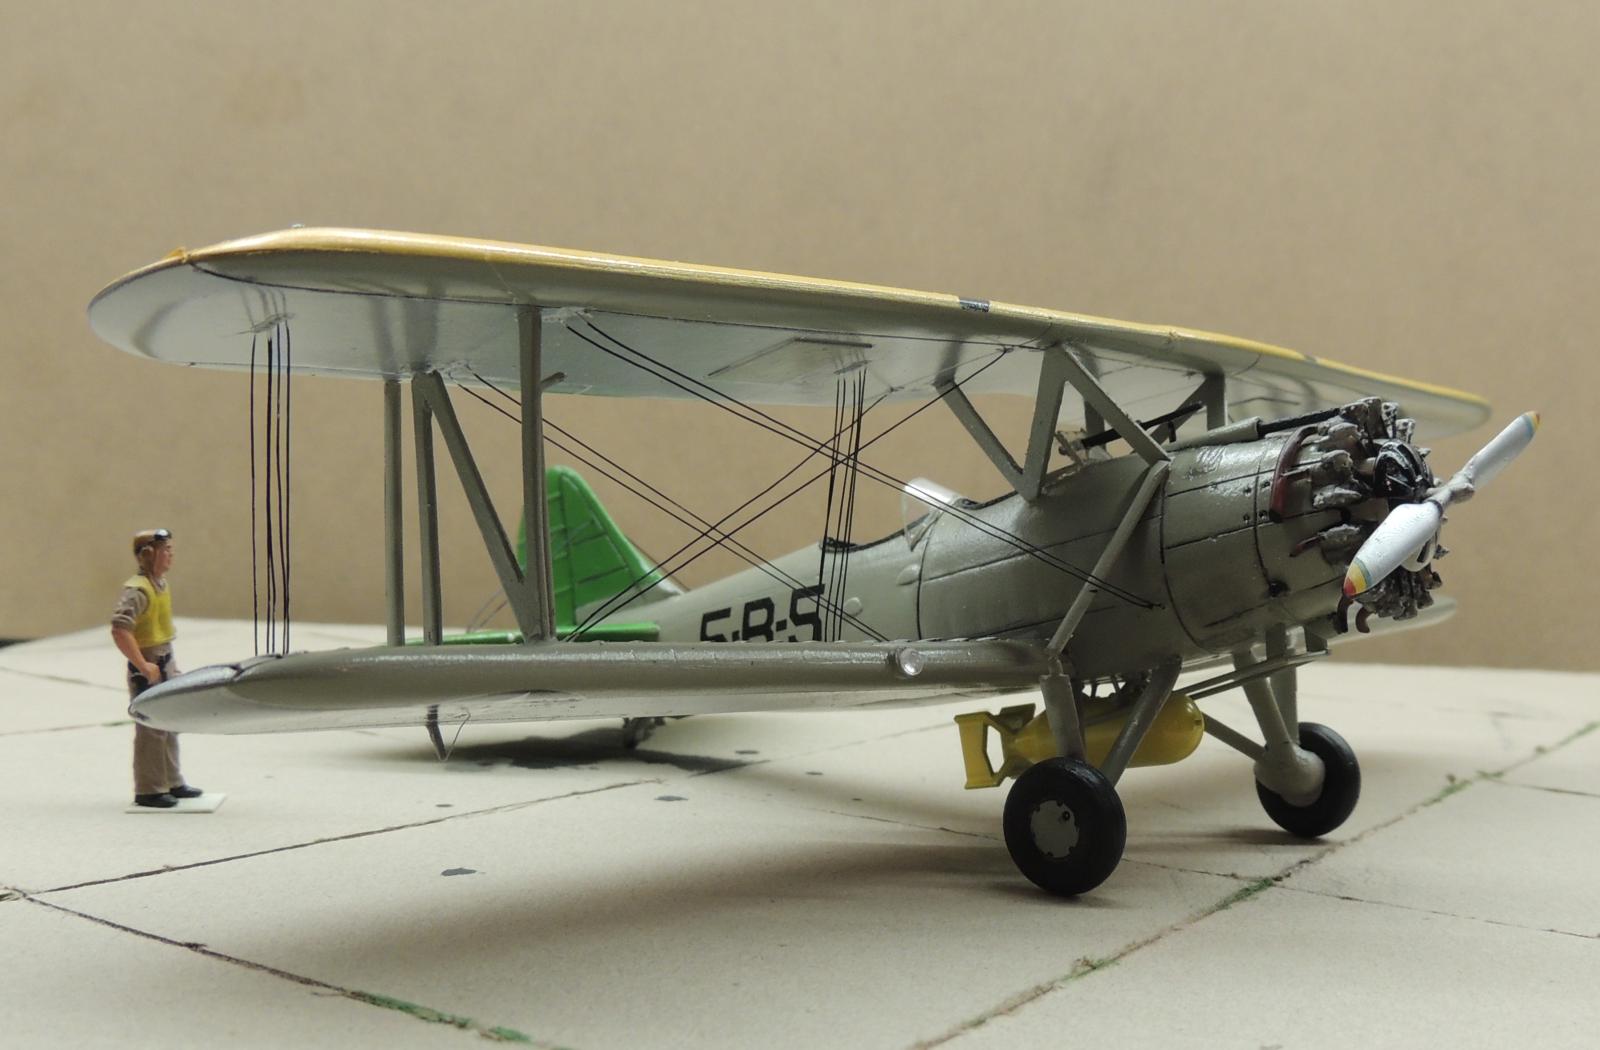
With the vacu-form empennage installed (with the drooping elevators), I then scratch-built the very unique and ungainly-looking main landing gear, also borrowing heavily from the Swordfish kit. The tailwheel came from a Brewster Buffalo, the tailhook from a Corsair kit. The Pratt & Whitney R1690 is an aftermarket resin kit from Metallic Details, intended for a Ju52. Attaching each of the tiny push rods to the engine was a challenge; I'm surprised none of them ended up in the carpet-of-no-returns. The kit supplied exhaust was modified to resemble the BM-1. I left off the rear seat machine gun, as I did not find a single contemporary photograph of an installed weapon.
To replicate the fabric-covered wings, I scribed lines in the tops of the wings with a scribing tool, then glued 020 styrene rod into the scribed channels. The ends of the rods were sanded down to blend in with the rest of the wing. The result isn't totally accurate, but reasonably passes for ribbed fabric (and had the benefit of being fairly easy, too!).
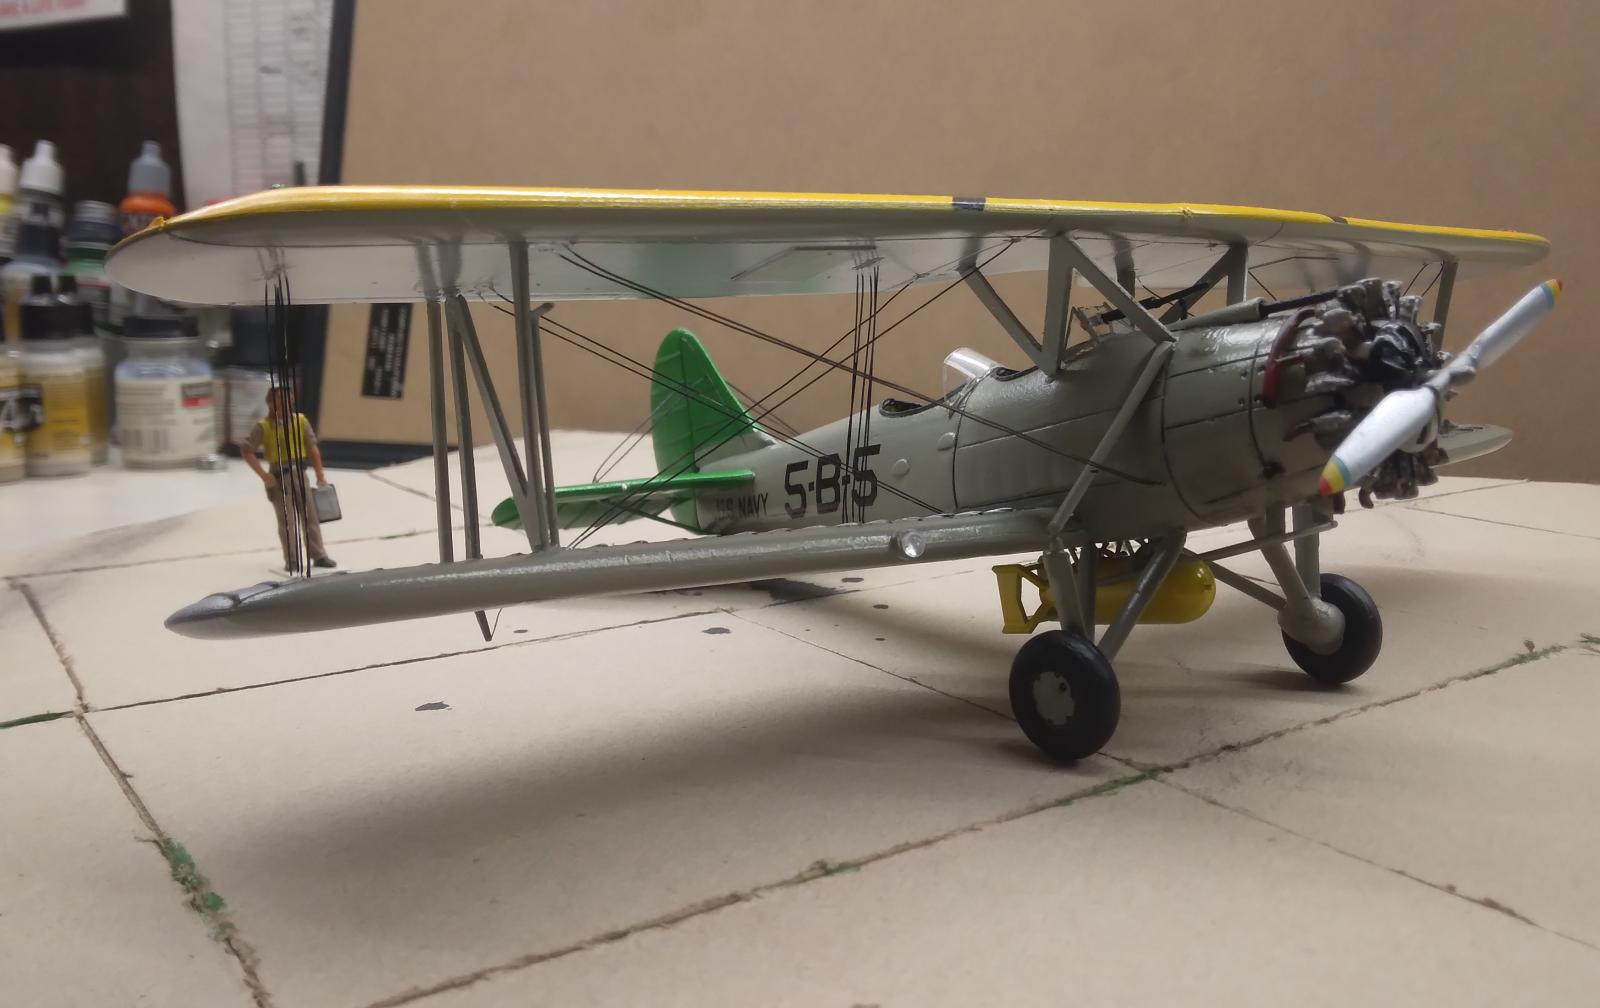
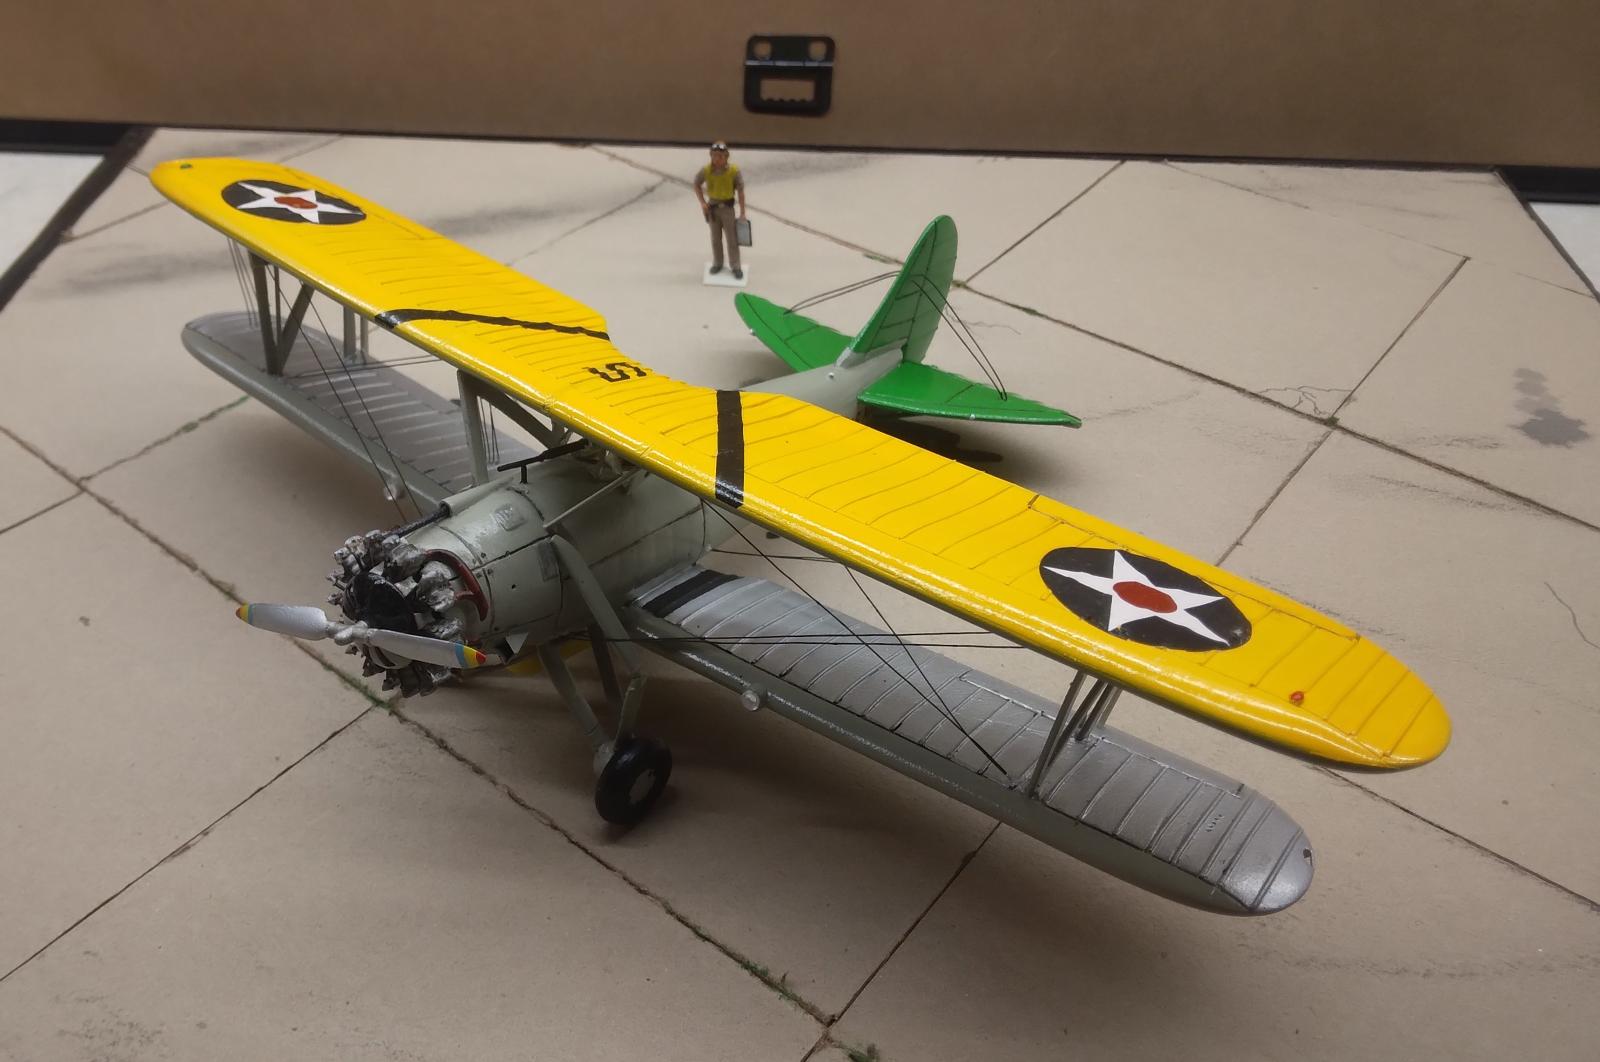
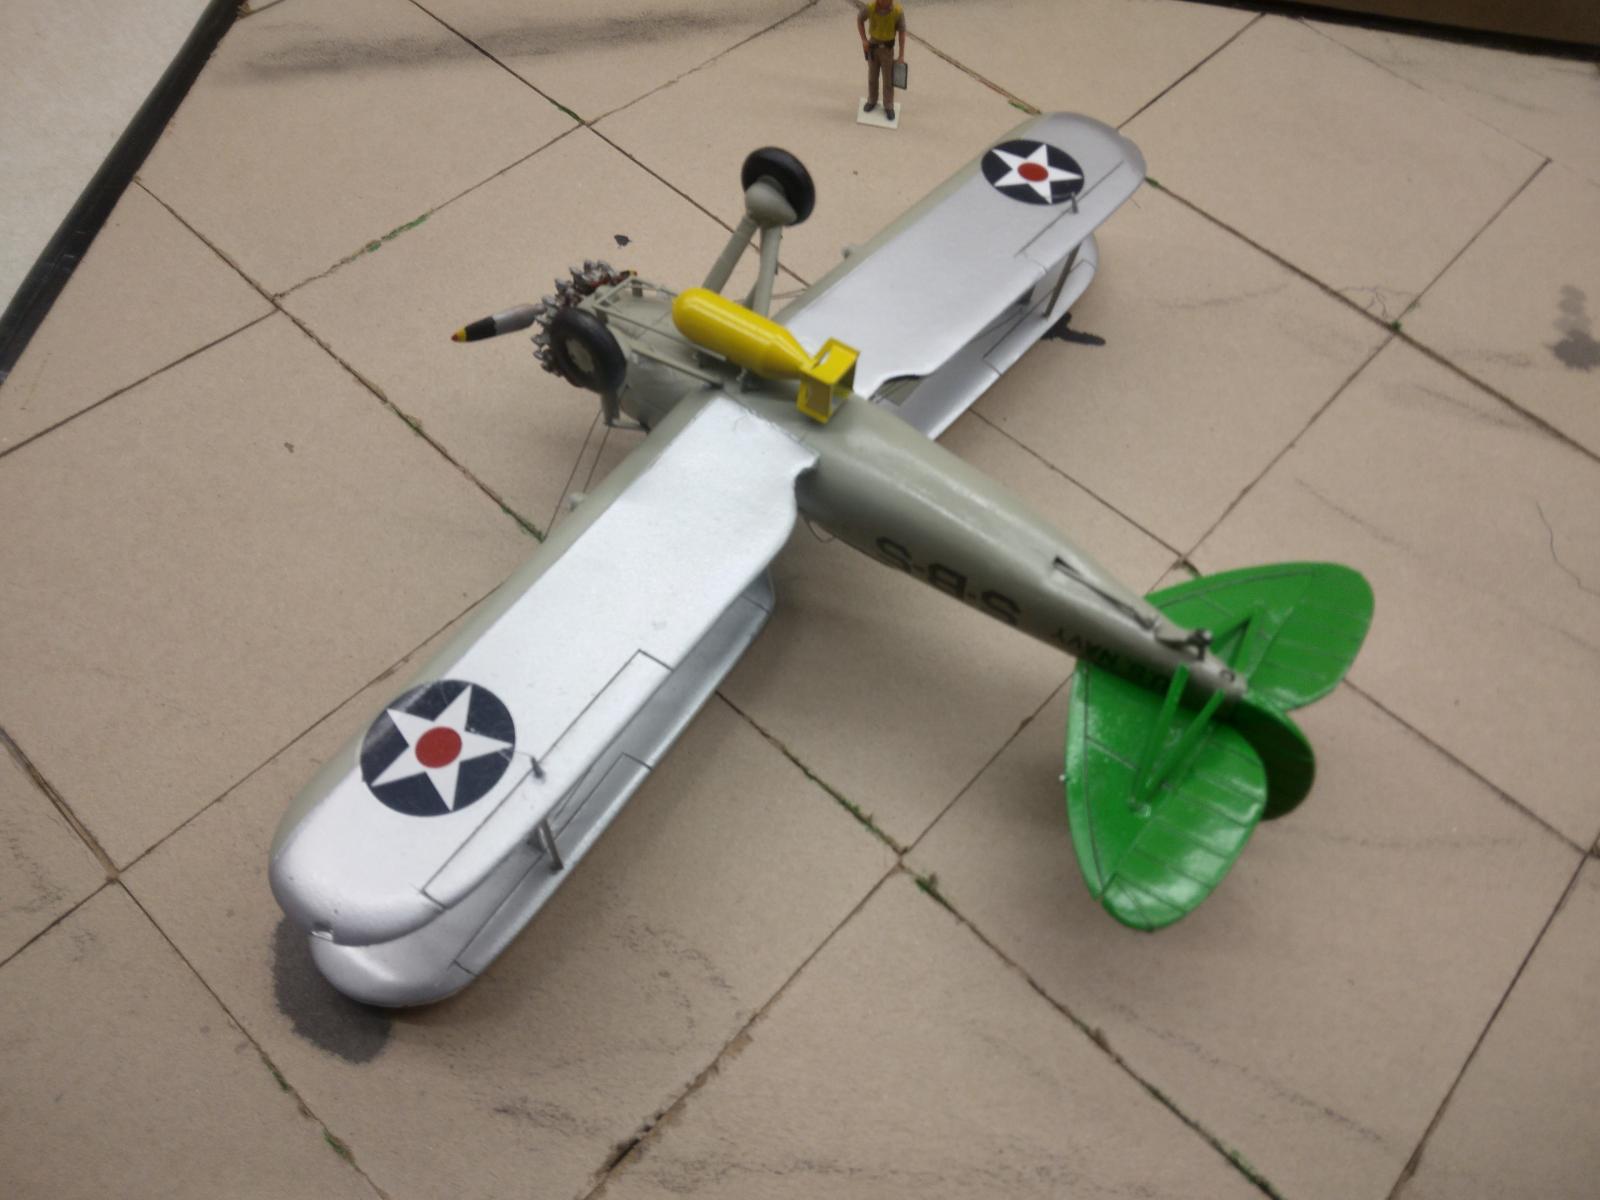
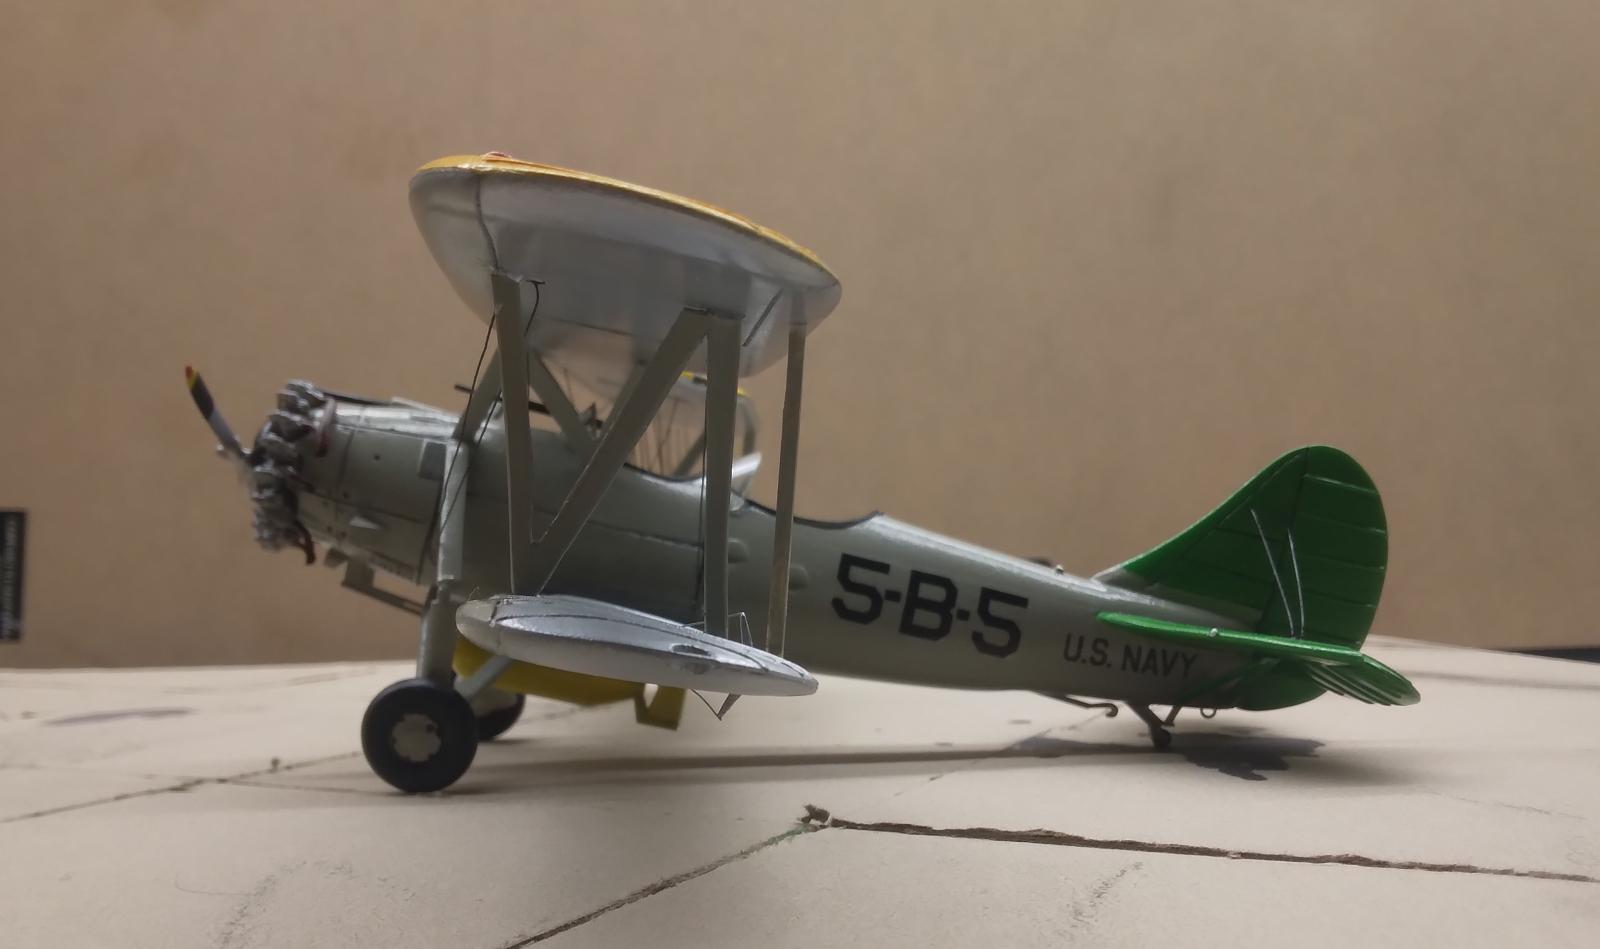
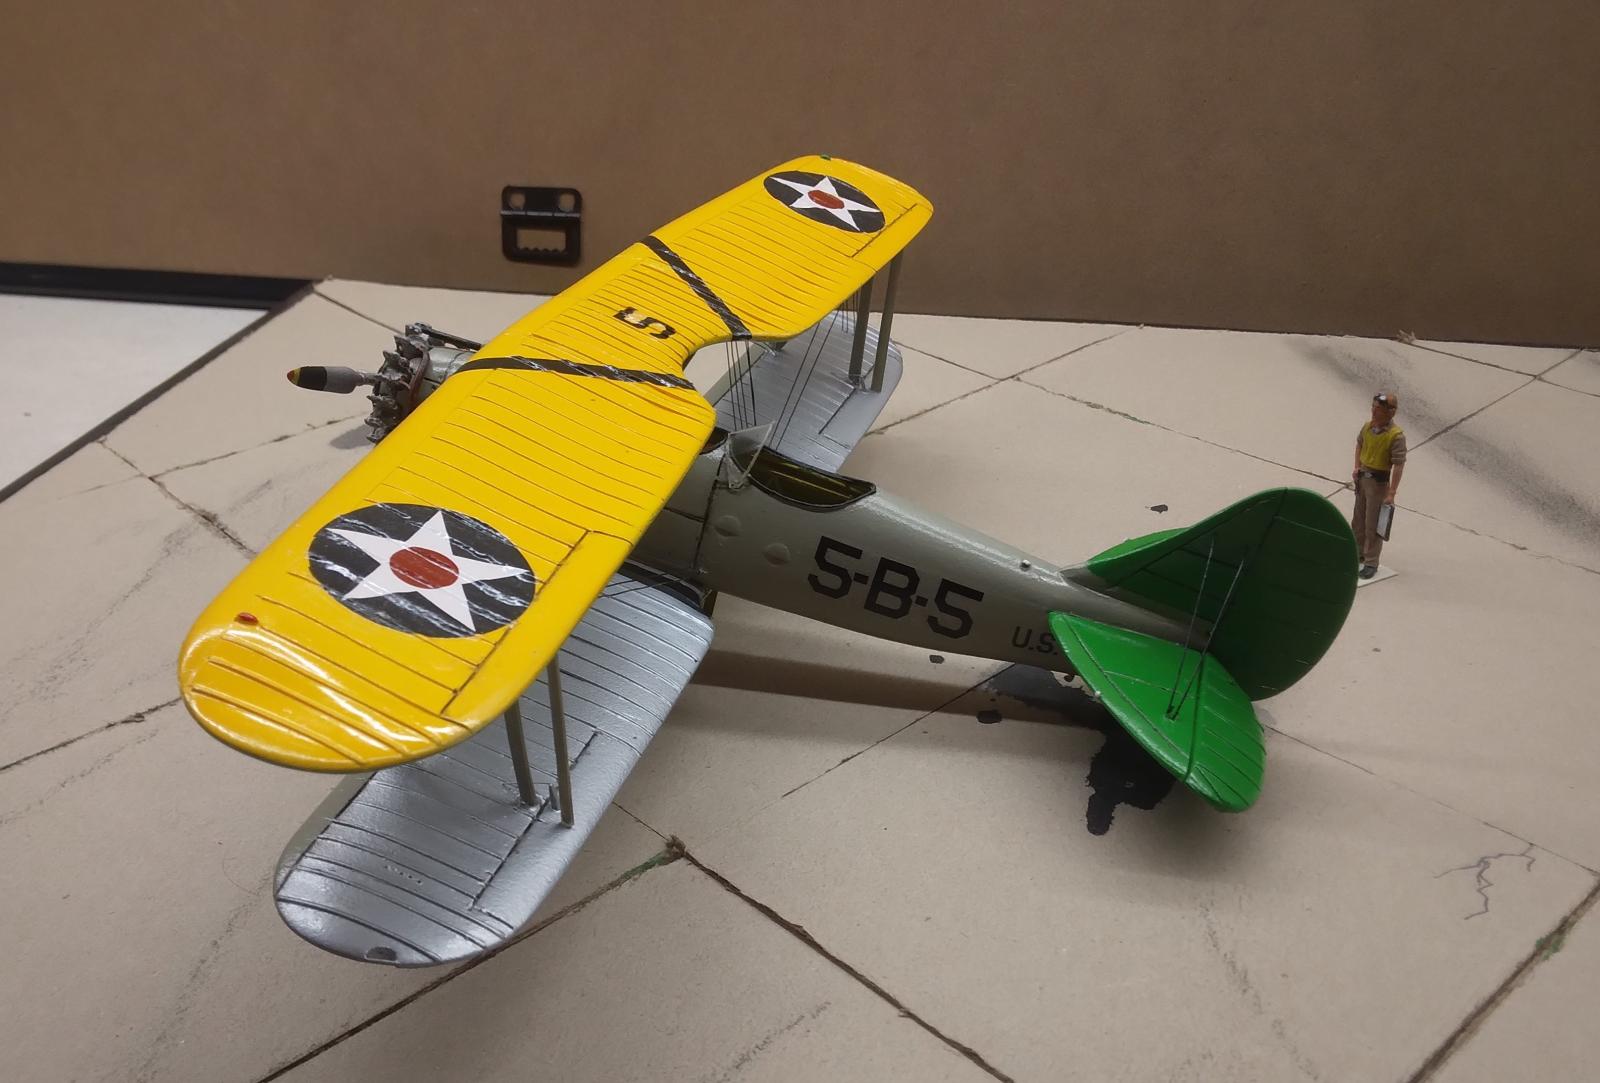
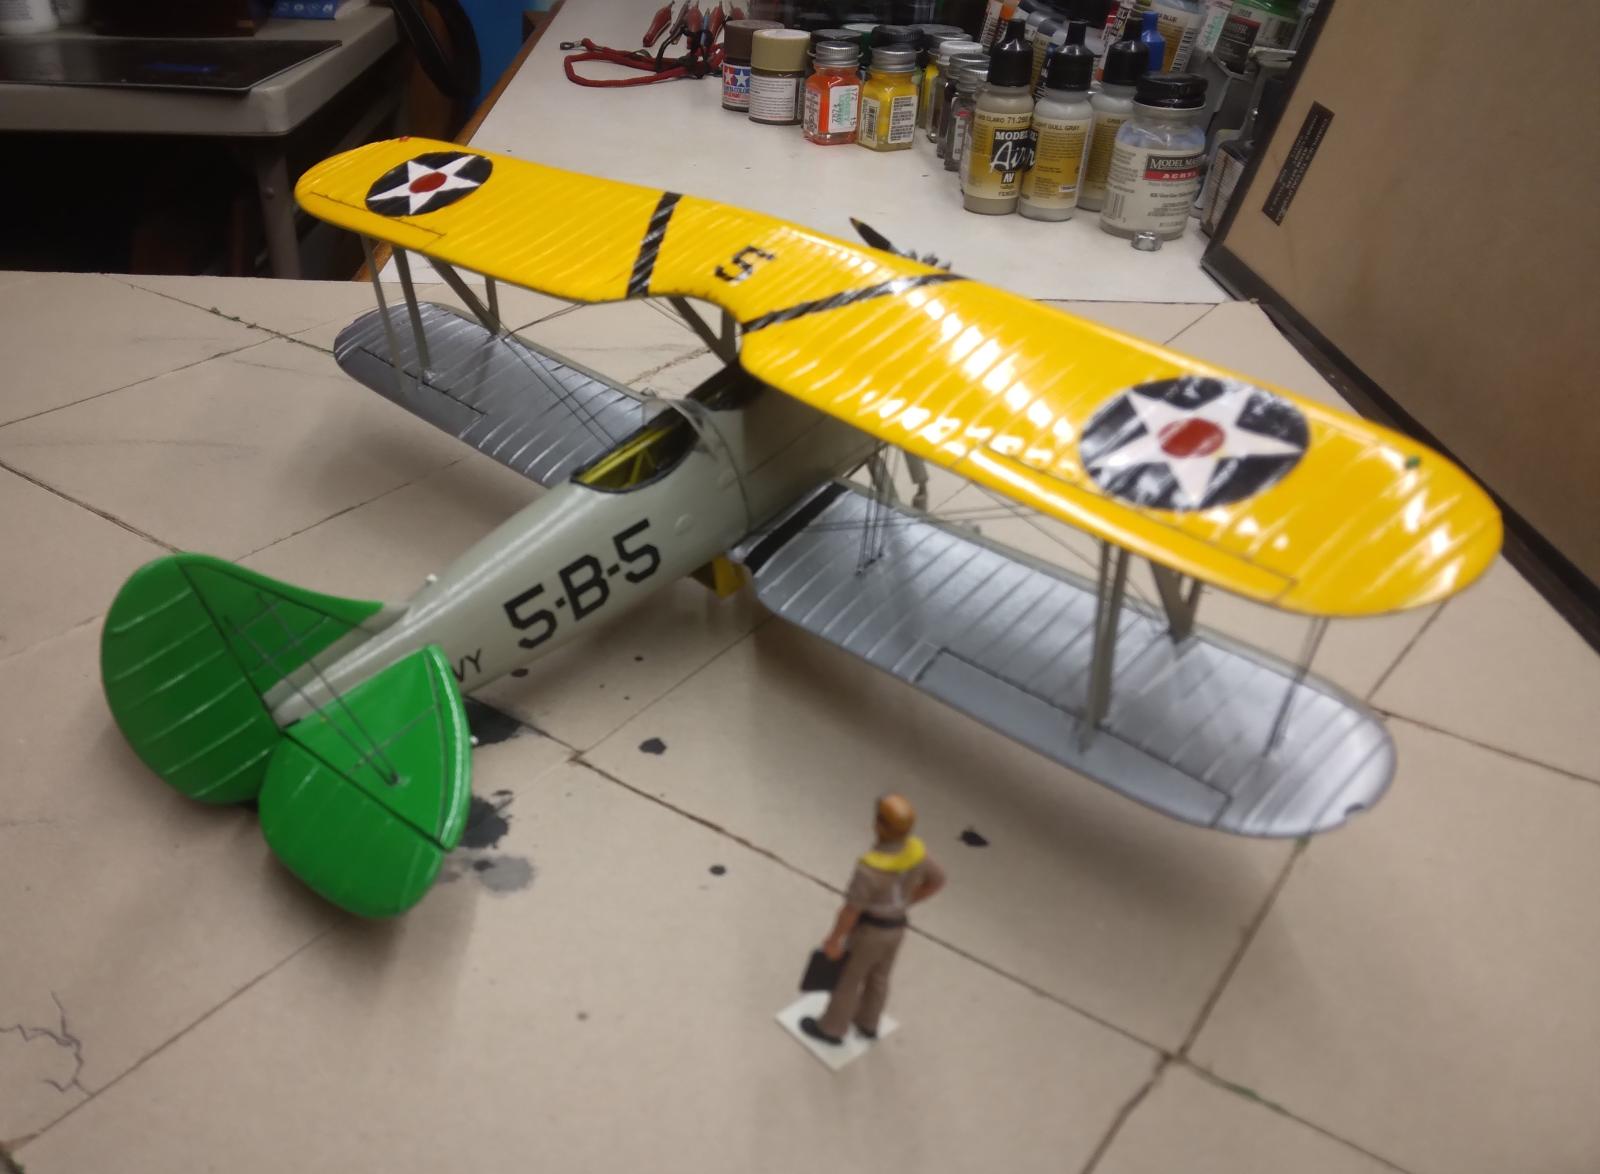
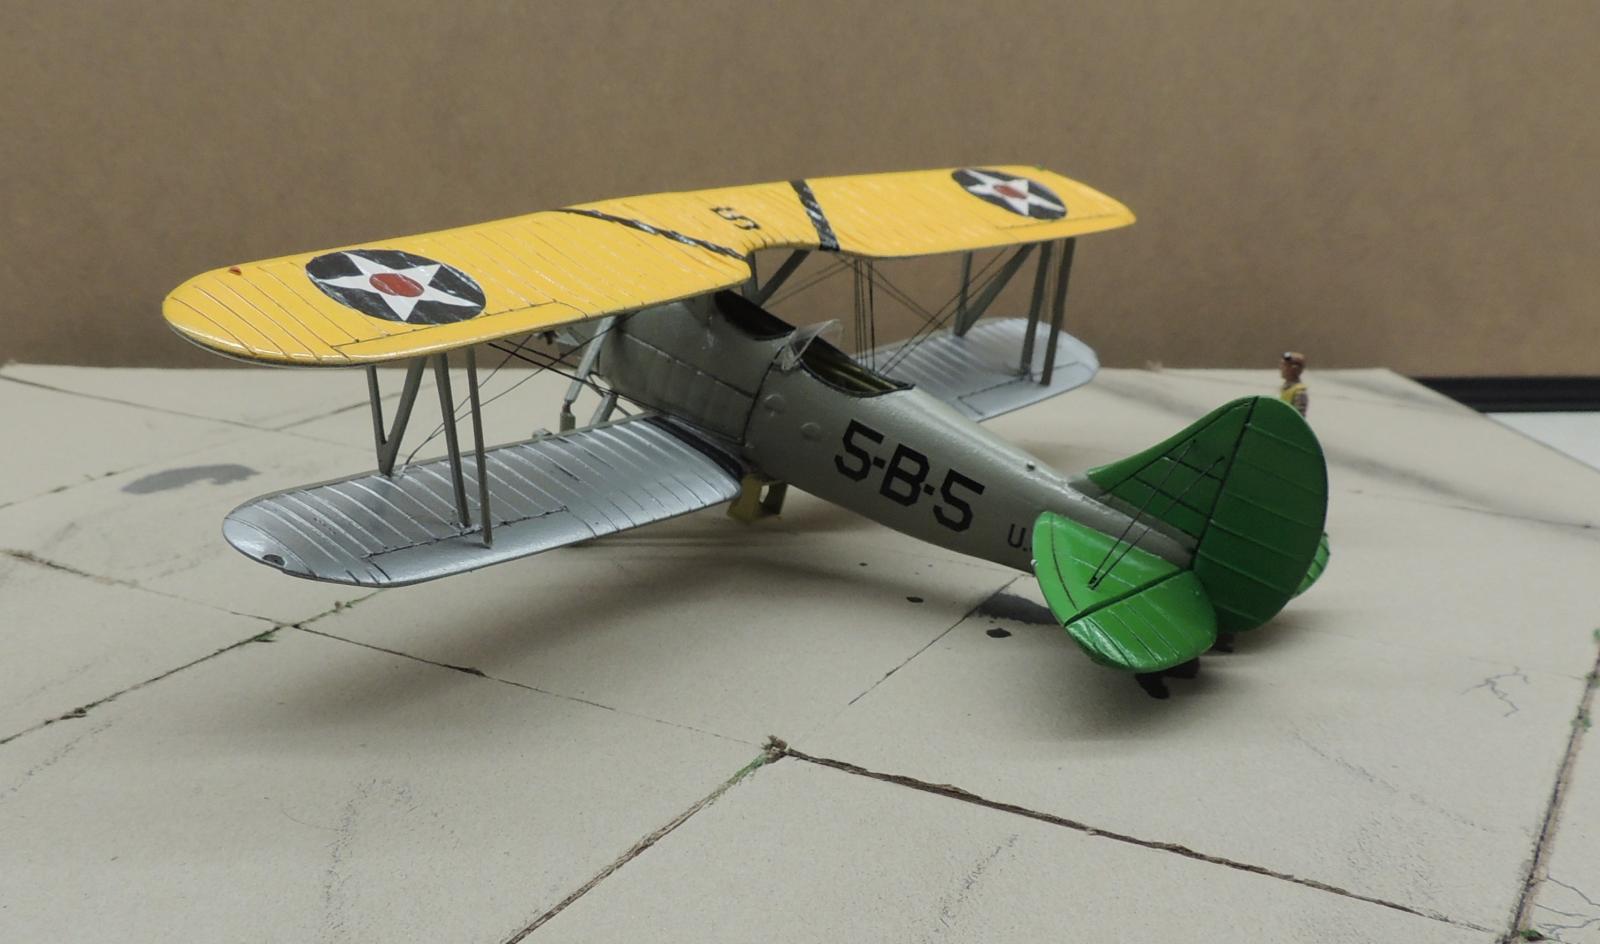
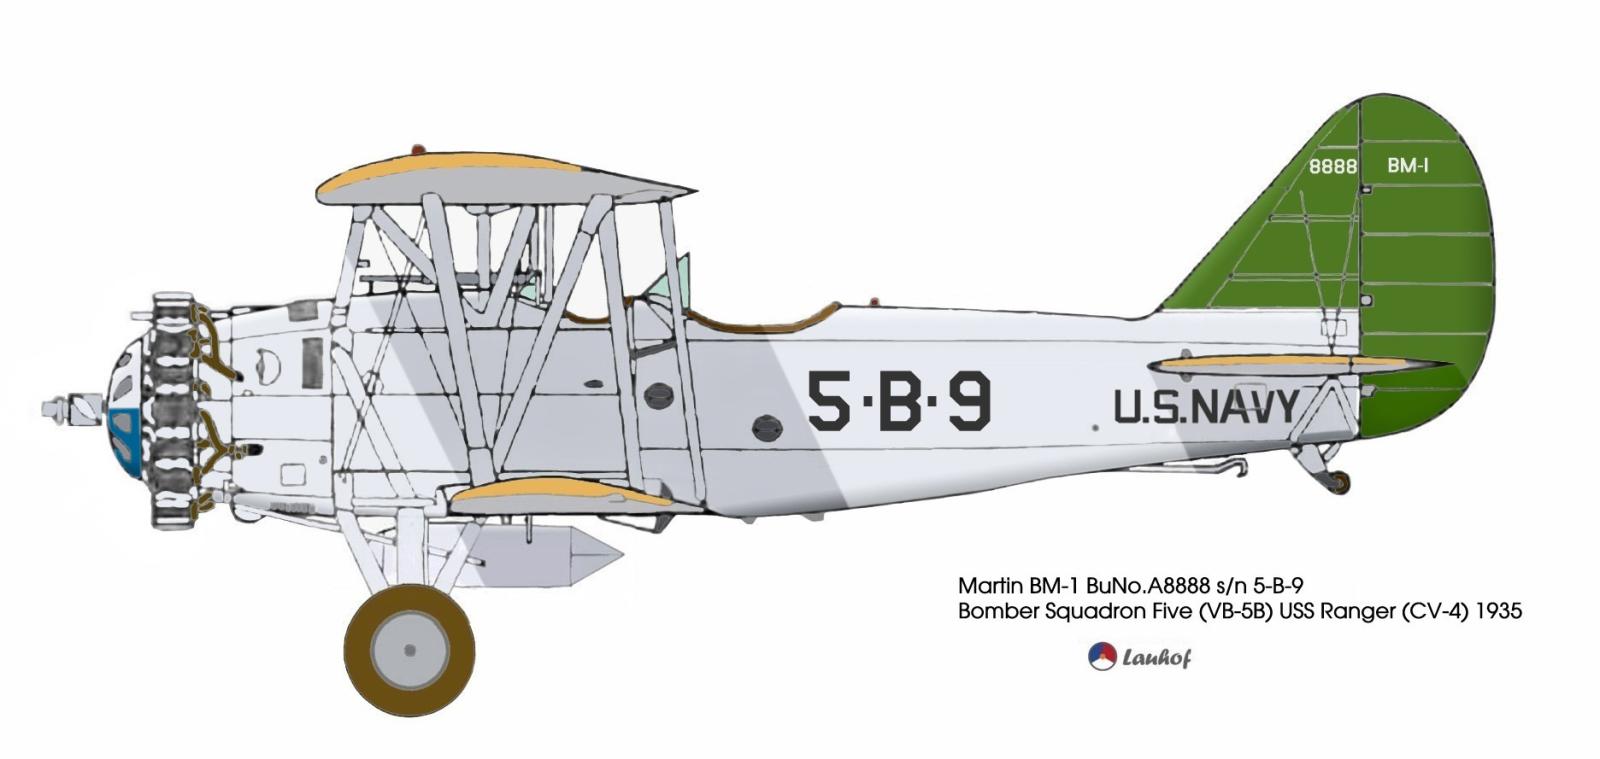
Lower wings were assembled and attached, struts made from one piece of sheet styrene were attached, and everything was painted - Tamiya Air Light Gray for metal areas, Tamiya Air Flat Aluminum for the fabric areas, Model Master Willow Green for the tail, Testor Yellow with two drops of Tester Orange for the top of the upper wing. Decals were all from the spares box. I was worried the decals would not sufficiently adhere to the contour of the upper wing, so I liberally spread watered-down white glue on the wing before applying the decals. They seem to have laid down quite well, to my pleasant surprise. Lastly, a coat of Model Master Gloss Clear acrylic was applied over the top and Tamiya black Panel Line Accent to bring out the panel lines. Canopies were scratch built from clear sheet polystyrene.
Before attaching the upper wing, I got smart and test-fitted all the struts, cutting and trimming where needed to get everything to make contact at the same time. Getting that upper wing attached was much less frustrating this time around, so that was a good thing.
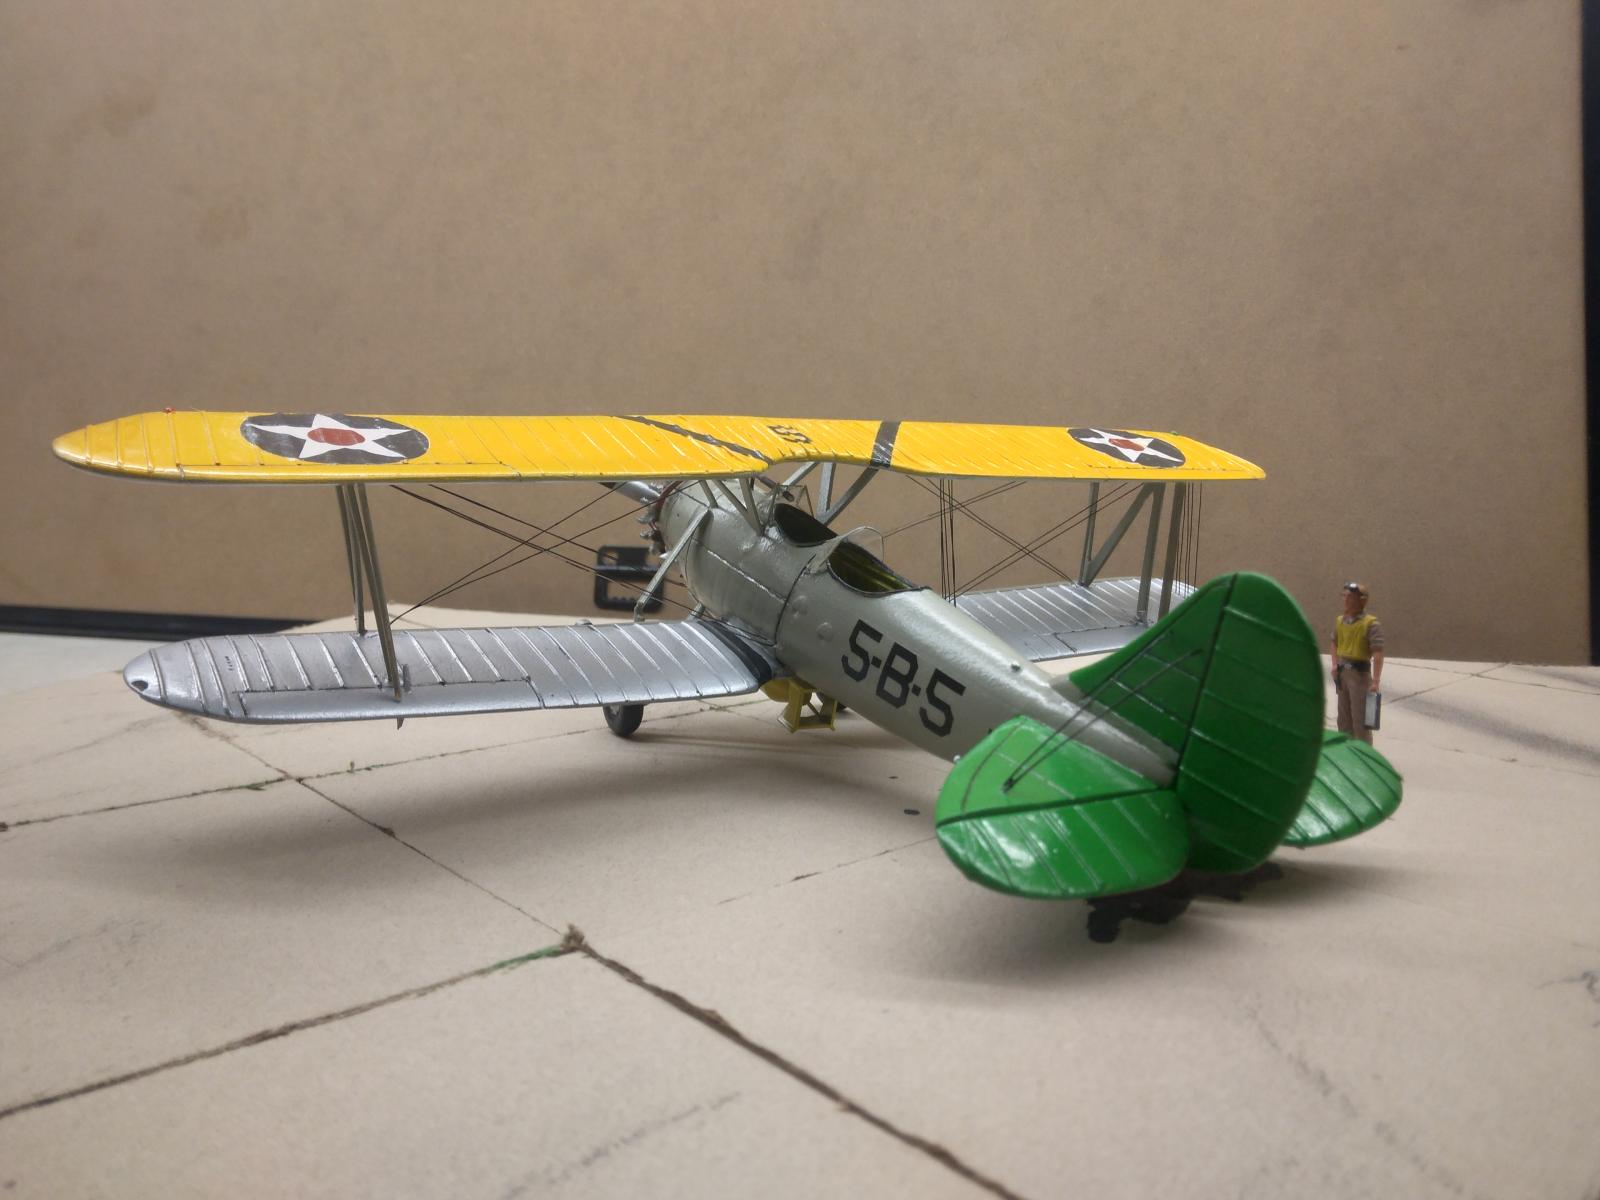
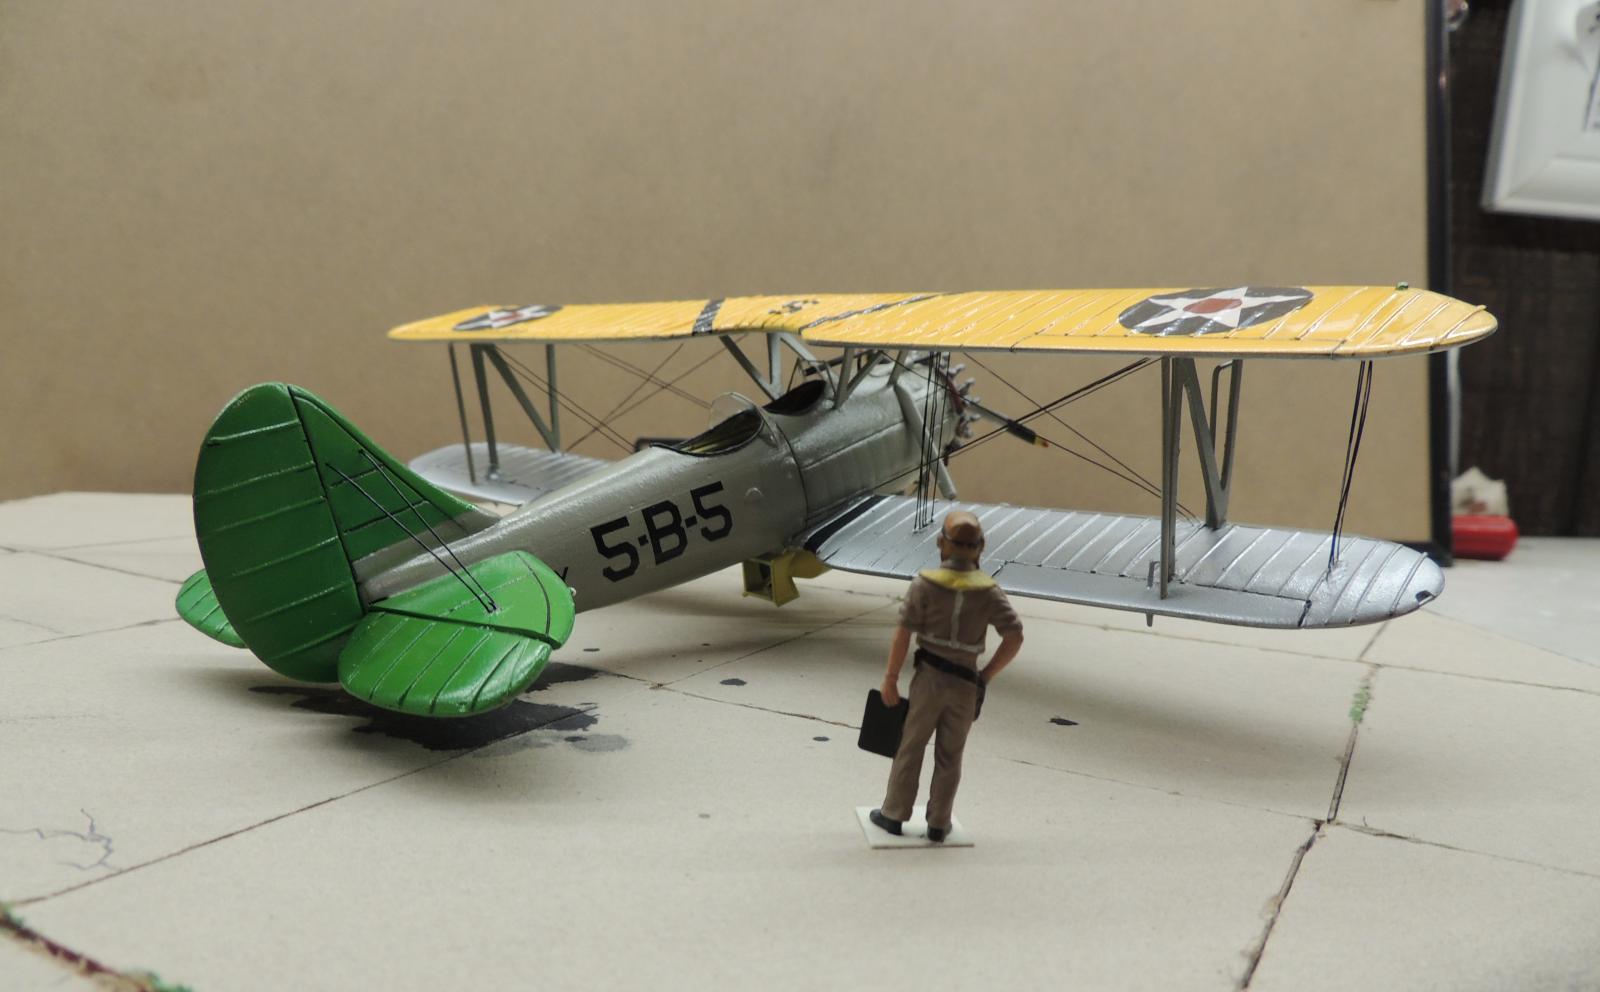
The last step was rigging with 6 lb. test fishing line. I glued the ends of the lines into pre-drilled holes in the wings and fuselage, then tightened everything up by heating the lines with a soldering iron. An interesting feature of this aircraft that I had not seen elsewhere, is the 10 antennae wires strung from top to bottom of the starboard wings, which I have attempted to recreate.
The Airplane
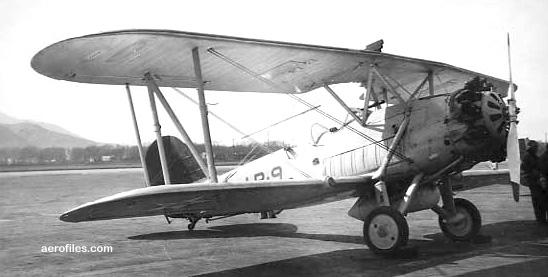
Martin's BM-1 started life as the XT5M, a torpedo bomber intended to replace the T4Ms then currently in service with the Navy. The Navy did not appear interested at the time, so the aircraft was reworked into a dive bomber. Up to that point, the Navy had been using converted fighters like the F4B and F8C, and observation craft like the O2U in the dive bombing role. Martin's new aircraft was renamed BM-1 (Bomber)(Martin), the first aircraft to come from the factory designed as a dive bomber, and it could deliver a 1000 lb. bomb up to a range of 400 miles. It was also the first aircraft to employ the bomb crutch, the tubular steel device under the fuselage which prevented a bomb released in a steep dive from impacting the propeller. This device became standard on all dive bombers going forward. The first 12 aircraft entered service in February of 1932. Thirty-two aircraft served in various squadrons until being replaced by Northrop BT-1s in 1938. While never being used in combat, the aircraft had a reputation as a stable dive bomber with good flying characteristics. Ironically, the aircraft could also carry a torpedo, and ended up replacing the Martin T4Ms!
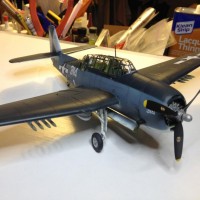
It is quite a large aircraft when placed next to its contemporaries, the O2U and the F4B. My model represents VB5 operating from U.S.S Ranger in 1935. It's a bit coarse and unsophisticated, and my airbrushing skills have much room for improvement, but I really enjoyed the creative process. I think this one turned out better than my previous attempt with Brewster SBN, due in large part with having better drawings to work from. It would be nice if someone would produce injection-molded kits of the Martin bombers in 1/48 scale. Until then,I hope you enjoy my Martin BM-1!


Robert...your remarkable skills combined with unyielding dedication resulted in a fine model. Build and finish look super. All great.
@bails Thank you, Bob!
That's really quite an accomplishment.
@tcinla Thank you, Tom!
Excellent work Robert, seeing a totally scratched built model always amazes me and being a unique subject makes it more interesting. Beautiful paint scheme and this looks great!
@v1pro Thank you for your kind words, Bob!
Wow, this is impressive scratch building, Robert @robgenev665
Fantastic result.
@johnb Thank you, John!
Absolutely wonderful job, Robert! What a fantastic scratch built model!
Congratulations my friend!
@fiveten Thank you for your kind words, Spiros!
Top shelf stuff there...
@gwskat Thanks, Gary!
Fantastic…nothing less but fantastic
@holzhamer Thank you, Pedro!
Very nice build. I had never seen one of these aircraft.
@jimmiesteve Thank you, Steve.
That is wonderful!
@robertandy Thank you, Rob!
A stunning piece of work! That is a really interesting project you've completed.
@christopher Thank you for your kind words, Christopher!
Excellent work, superb scratch building skills on display here. Nice to see subjects that are not likely to be offered by any kit manufacturer anytime soon!
@chasbunch Thank you for your kind words, Chas.
My hat is off to you, Robert (@robgenev665). Anyone who can build a vacuform kit is way up in the stratosphere, and anyone who can create a vacuform and then build it is clearly higher than that. Well done.
@gblair Thank you very much, George!
That’s amazing! Well done.
@j-healy Thank you, John!
@robgenev665 This is an incredible piece of scratch building. The engineering and craftsmanship are superb. It’s a head-turner for sure. It’s so nice people will have a hard time believing it’s not for a kit.
@coondog Thank you, Matt. I appreciate your comments.
In this day of great advances in plastic modeling, e.g. 3D printing, etc., I find that your model is a remarkable throw-back to a time when things were done by hand, and with modeling skills that are rarely seen these days.
Congratulations on your "old school cool" way of building. I love the result!
Thank you for posting the great pix, along with a superb narrative.
@marvin Thank you for your kind words, Marvin. "Old school cool", I like it!
Wow. That's some kind of serious work.
I join the chorus of Bravo's.
@dbdlee Thank you, Dan.
Fantastic project! I admire your skills at bringing something so well done out of a set of plans! Kudos!
@gkittinger Thanks, Greg!
!) Fabulous work. And I do mean WORK. @ I hear you about top wings, on ANY biplane. Resin and Vac are even more-challenging. 3) Is that the King-Kong killing biplane from '33? Looks familiar.
@billkoppos Thank you, Bill! The planes that attacked King Kong were Curtiss F8C Helldivers, which do look similar.
1 attached image. Click to enlarge.
Really amazing work. Congrats!
@russjurco Thank you, Russ!