1/48 Scale Monogram Spitfire Mk IX
The Monogram Spitfire Mk IX is an extremely simple kit, ala the Monogram Zero or BF-109. But not only is it a good-looking aircraft overall (who does not love the thoroughbred look of the Spitfire), it was for a long time, the only Spitfire that Monogram put out. For some reason, I was in a camouflage painting mood after my marathon session with the Monogram B-17G, and I wanted to see if I could duplicate my method I had come up with to paint my Mosquito MkIV FB. So, I looked in the stash, and there was the Mk IX Spit looking up at me.
In the Beginning
Opening the box on this kit, you will find, once again, not a lot of parts. This issue is from 1973, and the parts were shot in grey and silver plastic, with the main parts in grey (main fuselage, wings), and the auxiliary parts in silver (propeller, wheels). Most of the parts were flash free, and everything was still on the spure. What you will discover however are rivets, lots of raised rivets, everywhere on this aircraft, which is to be expected on a kit of this vintage. After inspection and cleaning, off I went.
Construction
Aircraft construction usually begins with the cockpit. But like the A6M5 Zero that I did a few years back, there is really no cockpit detail at all, only molded in side walls, with no instrument panel, and a pilot figure, which has the seat attached to him. I glued into the cockpit area the back plate that the pilot figure is supposed to attach to, then painted the interior cockpit area British Interior Green. I also painted the main wheel wells and the rear wheel well British Interior Green as well. After the paint, had dried, I assembled the main fuselage halves, did seam work, and put it aside.
While the fuselage was drying, I worked on the wing assemblies. The wing assemblies were pretty straight forward, with no real issues. The instructions called for putting the landing gear struts in first, but this was not a real issue, as the bottom half of the wing assembally is all one piece, and the upper half wings as two assemblies, with the main fuselage in the middle.
After the seam work on the wing assembly was done, I glued the main fuselage to the lower wing, and then did the seam work on that. And that was it. I was surprised at how little actually assembly work there was on this aircraft. After all this was done, it was off to the paint shop.
Painting
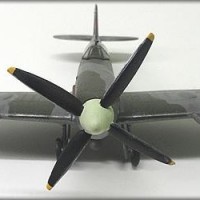
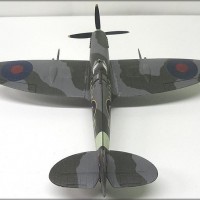
The painting began with the fuselage stripe, which on this aircraft was British Type S Sky. After the paint had dried, I masked off the stripe and laid down the base color of British Ocean Grey on the upper surfaces, and fuselage sides. Then I did a freehand camouflage pattern of British Dark Green, again, on the upper surfaces and fuselage sides. I had to go the web for the camouflage pattern, as the instructions from 1974 were very vague on the camouflage pattern was. As I did on the Mosquito, I laid down the Dark Green with a Qtip, and then I used a Point 0 Round Brush for the demarcation line between the two colors. This gave me the semi-hard edge I was looking for. This portion of the paint job went very nice and very trouble free. After the colors were dry, I masked off the lower surfaces and painted them British Sea Grey. I then painted the propeller nose area Type S, and the leading wing edges Yellow.
The only real issues I had painting were the yellow edges. I should have painted those first, then masked them off, but I had completely forgot about them until the last minute. The acrylic Yellow I used is quite thin, and it took a while. After very little touch up (I guess I am getting this British Camo scheme down), I laid down a coat of glosscote to prepare for decaling.
Decaling and Weathering
I decided to use the kit decals for this aircraft, which seem to be in good shape. There was no fading, but they looked somewhat glossy. The only issue that I was worried about was the serial number. The serial number was supposed to also be the rear fuselage strip, which is white on this decal. But the real stripe was Type S Sky, which has a greenish tint. So what I did was trim the decal as close to the black serial numbers as possible, in the hopes that what little of the white decal part that remained would not be to visible against the Sky color. As it turned out, I should have not used 30 plus year old decals.
Although the decals went down very good, the clear film was older and quite visible. Even after I washed off the excess glue, and applied Microset and Microsolve, and then dullcoted the model, the decals still looked horrible. Part of the problem was me. As these were quite older decals, I should have cut the clear carrier film closer to the decals, and I also should have cut the decals apart. For example, the squadron codes and the fuselage roundel were on one piece of clear film. I should have cut codes from the roundel, and then laid them down separately, but I laid it all down as one piece. After waiting a day to see how it would look, and deciding that it was not going to get any better, I decided to scrape the decals off. That was fun…well not really.
To get the decals off, I used toothpicks dipped in water, which did not work to bad. I really did not want to damage the paint job underneath if I could help it, and for the most part, it worked. But the Microset and Microsolve really do a good job on decals, and these ones really liked being “solved”. In some cases, I had no choice but to do some damage to the finish. The damaged areas were repainted, and after a pass with the glosscote, it all looked good.
The decals I went with were an aftermarket set I found from a company called Venture LTD. These were decals for Spitfire versions Mk VIII and Mk IX. I choose to do a Spitfire from a squadron of Polish pilots that escaped to England, and flew for the RAF. These decals pretty much were RAF style squadron codes and roundels. There was also a small Polish Air force insignia just below the exhaust on both sides of the nose.
I have had these decals for quite a while, in fact, I do not even remember where I even got them, that is how long I have had them, but they went down great. After the glue clean up and the Microsetting and Solving, I went with a different flat finishing. I went to my local Wal-Mart and bought an 11 oz. can of Krylon clear matte (Flat) finish, since I had run out of Testors Dullcote. Not only did it look great, it was a fine mist, and you get almost 4 times as much flat finish for a little bit cheaper price than a Testors can. You can't beat it!
After all the decals were sealed, the weathering began. I faded the upper parts of the aircraft with my usual method of a wash of flat white, then I did the paint chipping along the leading edges and high wear areas. During my research on weathering for Spitfires, I did notice that, like the Mosquito, most Spits seemed to be well maintained, so I again went with light weathering. The one area on Spits that did seem to have high wear was the wing root right where it meets the fuselage. I was also a bit surprised to see that this wear pattern was on both sides, and not just the left-hand pilot entry side. After the fading, I did a wash of Grimy Black to tone things down. I then added exhaust and gun powder stains, as well as fuel stains.
Final Assembly
After the final weathering, I did the painting of the evil canopy lines, which took all of 10 minutes to do. There are very little lines to paint on this version. Just the way I like it. Then there was some small touch up painting here and there, and I had to free hand paint the red square areas on the yellow part of the wing leading edge, which delineates where the machine guns were located. After all was judged to be in order, my Mk IX Spitfire too her place on the display shelf
Conclusions...
This build went quickly, as there is not much in the way of super details on any part of the kit, but it does look fast and mean, especially with the two cannons. The paint job went fairly trouble free, as I seem to be getting more comfortable at painting camouflage. As for the details, this kit was originally made in 1962, and there are so many rivets on it that you could use it as sandpaper. But for a very good price, even today, you can make a pretty good replica of this famous aircraft.
Until next time...
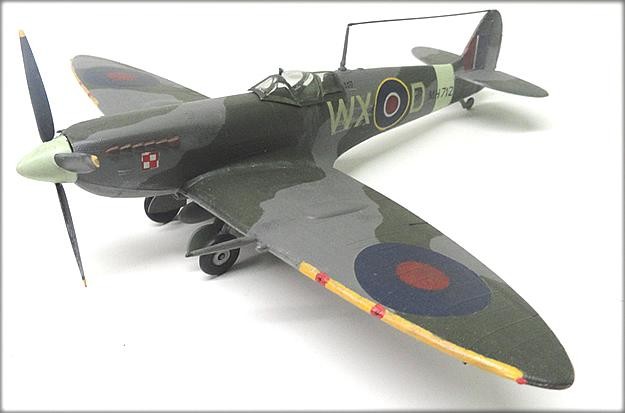
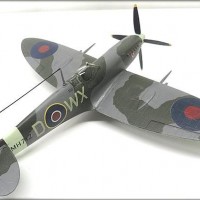
All the issues aside, I think for me the build is fine, but the radio wire is out of scale, and affects the final overview. Perhaps consider a finer EZ line or similar to settle things down.
Well done on pushing an older kit to a good standard.
It's a great looking model for an older kit. Rob's comments on the aerial wire are a good idea for earlier Spit Mk 1s but even later in the Mk 1 production run and for all (I think) later Spits, the antenna was either inside the aerial post (sometimes with sometimes wirhout the triangular attachment point) or elsewhere. The newer VHF radio sets didn't need the external wire.It shouldn't be too much bother just to cut off the aerial wire between the post and fin and it should be fine.
Good morning Rob and Paul,
Thanks for the info.
I was debating with myself about installing an aerial wire on this aircraft during final assembly, as I did see some earlier Mk. IX's with a wire during my research, but a lot without. Since this seemed to be an early version, I went with the wire. The wire is only glued on with Microscale White glue, so it is easy to remove.
As for the scale of the wire, I have a huge roll of that gauge size that was given to me by a friend in the print business. It was free (I like free stuff!), and it looks close enough for 1/48 scale aircraft. Also, it is pretty rigid, so it does not sag when attaching it to a small area on the model.
Kip
Well done, Kipling Mitchell Or is your name Mitchell Kipling?
Good morning Jeff,
My first Name is Kipling . A lot of people do ask me that! 😉
Kip
Nicely done! great to see it, This was one of the first kits that I built as a kid, a blue box issue.
Wow! I haven’t seen one of those in 40 years. I must’ve built 4-5 as a kid. Thanks for sharing.
...and the hits jus' keep on comin'...nice job, my friend. 🙂
The Spitfire was the first Monogram kit I ever built (back in 1964). I have one ready for paint if I ever get around to it.
Love yours! Great paint job on it! Inspiration!
Kip. great to see one again! I have the carcuss of mine, from about when it came out. My decals came off, at some point. One of the few early builds I still have. It was quite the model when it came out. Does the main gear retract?
Hey Bernard,
Yes, they do. They move really stiffly, but they can retract. I just leave them in the down position, since that is how I display all of my aircraft.
Kip
Another nice build.
Good work on another classic kit.