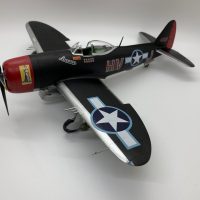
1/32 Revell F4F-4 Wildcat, Lt Cdr John Thatch, VF-3 USS Yorktown, Midway June 4, 1942
Tonight's article is about a 1/32 scale Wildcat model that I built just before the Ki-43 in my previous post. It's the Revell re-boxing of the old Monogram kit, (which I think in turn was originally a Revell release back in the late 60's / early 1970's), kit number 6876. The nice thing about this kit is that it came with a good book by Bert Kinzey on US Naval fighters of the era. It also had a great decal sheet with markings for seven planes. There were numerous Naval and USMC "Aces" represented on this decal sheet. Joe Foss, James Swett, Marion Carl, the one I used to depict this plane are for John Thatch, and three others.
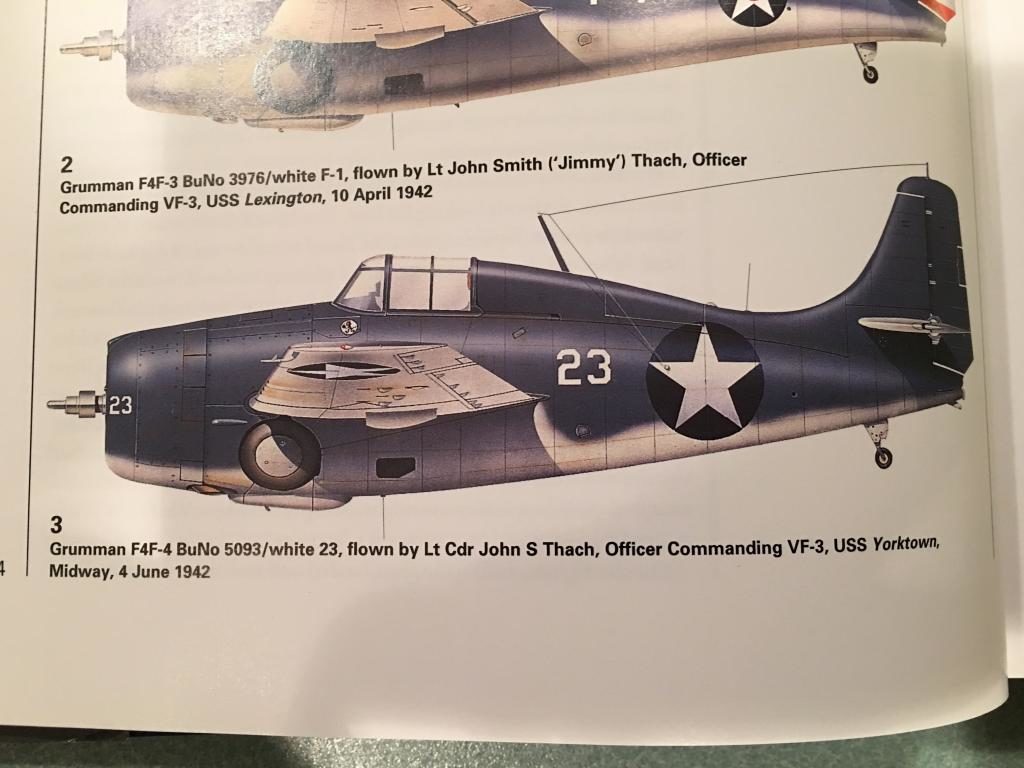
I was inspired for this build after purchasing the book called "The Blue Devils" by Mark Styling and Barrett Tillman. In this book there are numerous profile art works on F4F's, F6F's, and F4U's, with some in FAA markings. (It is a good read too and covers a lot of things about WW2 Naval aviation).
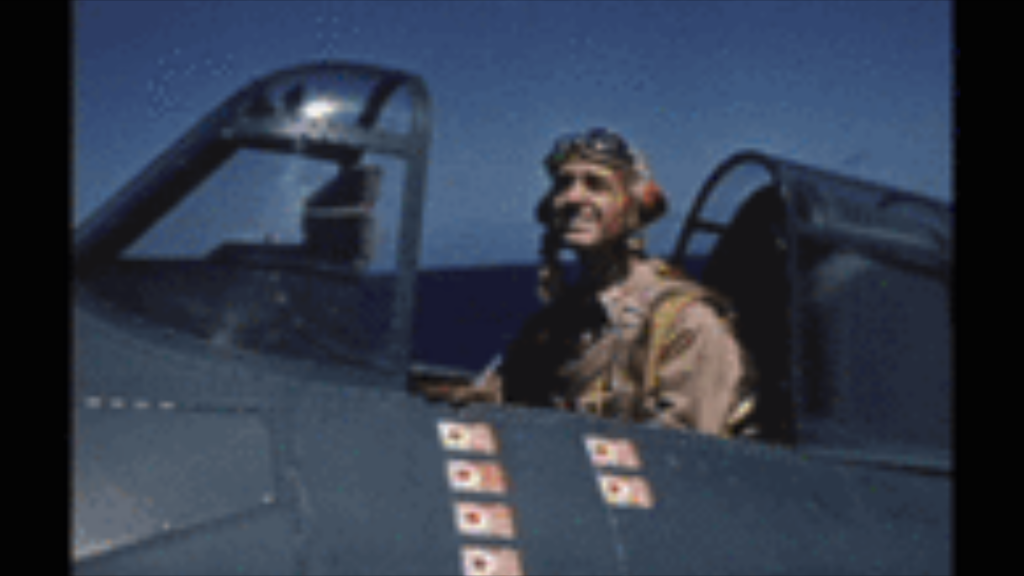
Lieutenant Commander John Thatch is well know for developing the "Thatch weave". (I'm pretty sure it's still taught today but it's called the "Beam defense maneuver"). This tactic was used to allow two fighters the capability of covering each other as they "scissored" back and forth crossing each others flight path. If an enemy plane was in pursuit it would become a nice target for the covering plane.
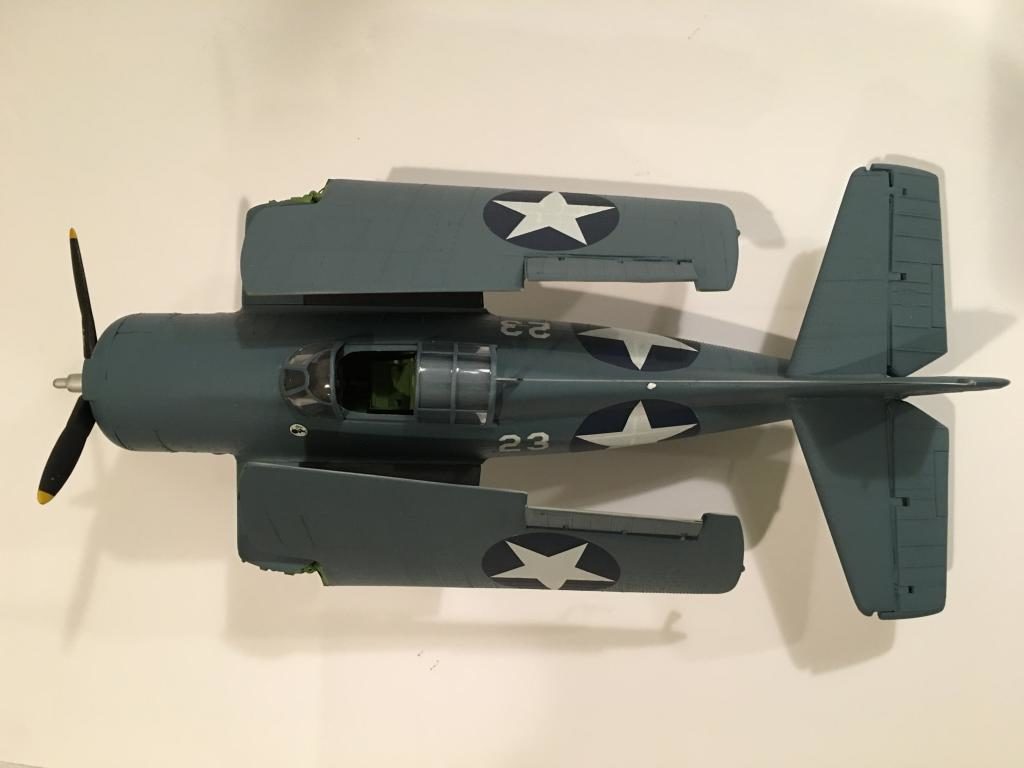
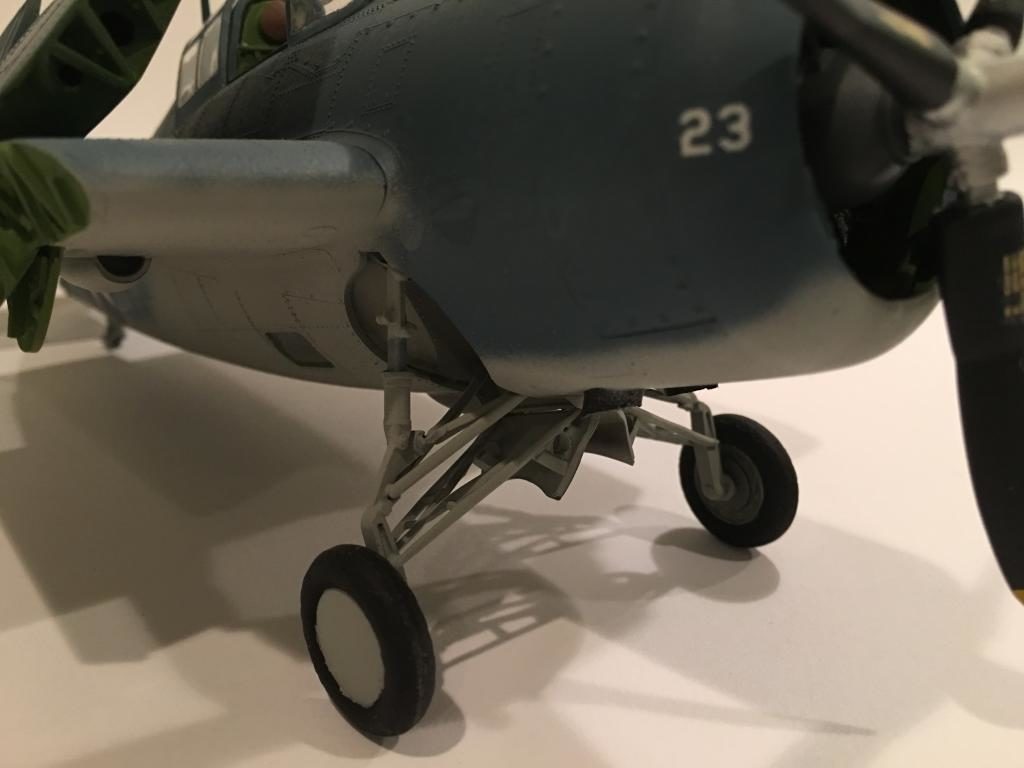
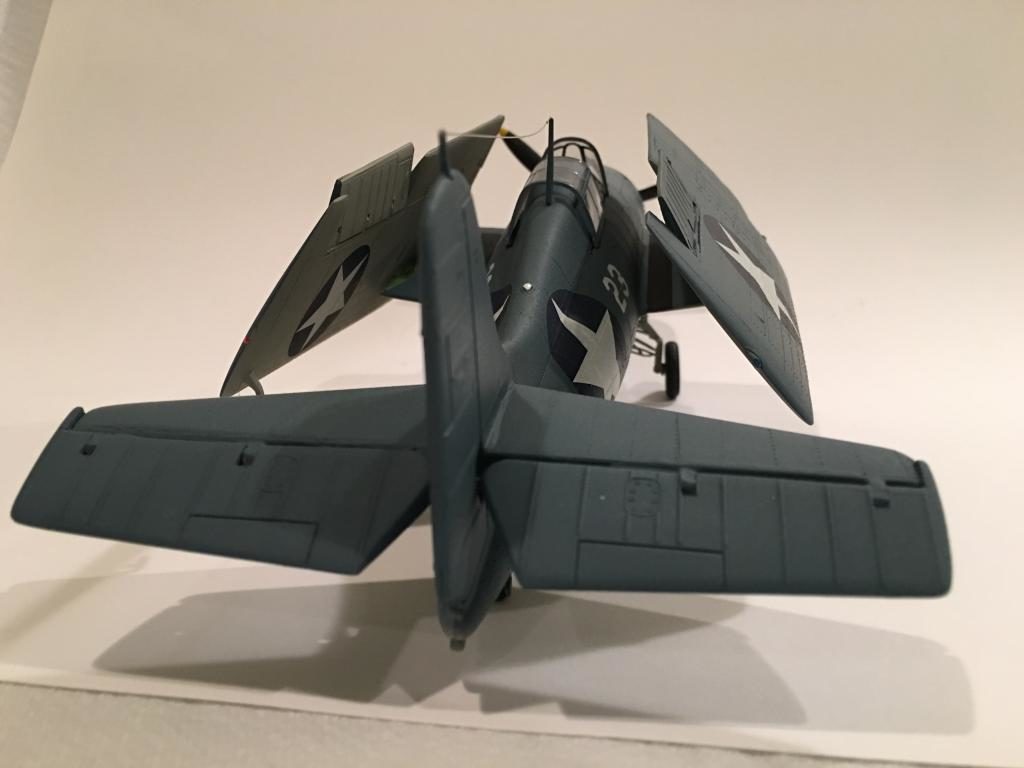
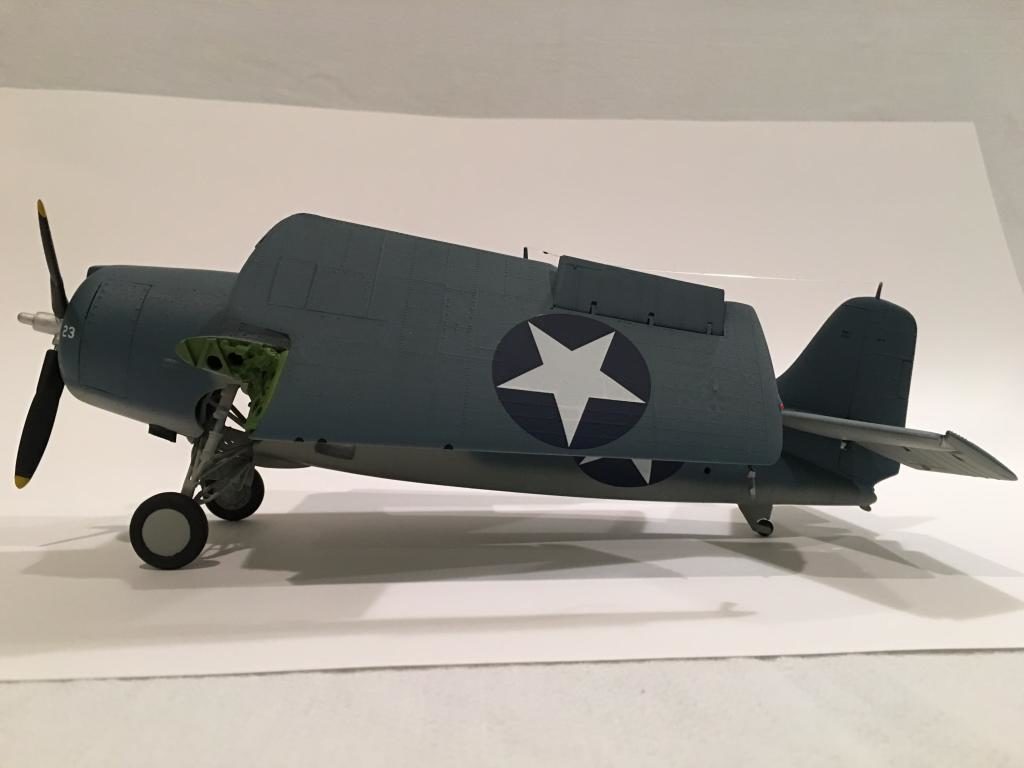
My Wildcat shows Lt. Cdr. Thatch's plane as it looked during the Battle of Midway on June 4th, 1942. It was bureau number 5093, "White 23". Thatch used this particular F4F to shoot down 3 A6M "Zero's" on this date. Later that afternoon he was flying another F4F "White F-1" and destroyed a torpedo bomber (probably a B5N Kate) and claimed another as a "Probable".
This brought his total kill tally to 6 plus the probable. Apparently he had another kill from a previous engagement.
This plane was lost only two days later when it was pushed overboard. The Yorktown was hit and listing badly. In an effort to save the ship the crew jettisoned this plane along with a lot of other stuff to reduce the topside weight to keep the carrier from capsizing.
Lt. Cmd. Thatch went on to become a tactics instructor and developed things like "The Big Blue Blanket" to combat Kamikaze attacks. He was also present on the USS Missouri during the Japanese surrender in Tokyo Bay. He commanded the aircraft carriers "USS Sicily" and the "Franklin D Roosevelt" during the Korean War, and was later promoted to Rear Admiral in 1955.
He earned TWO Navy Cross medals, which is only one step below the "Congressional Medal of Honor" as far as precedence goes.
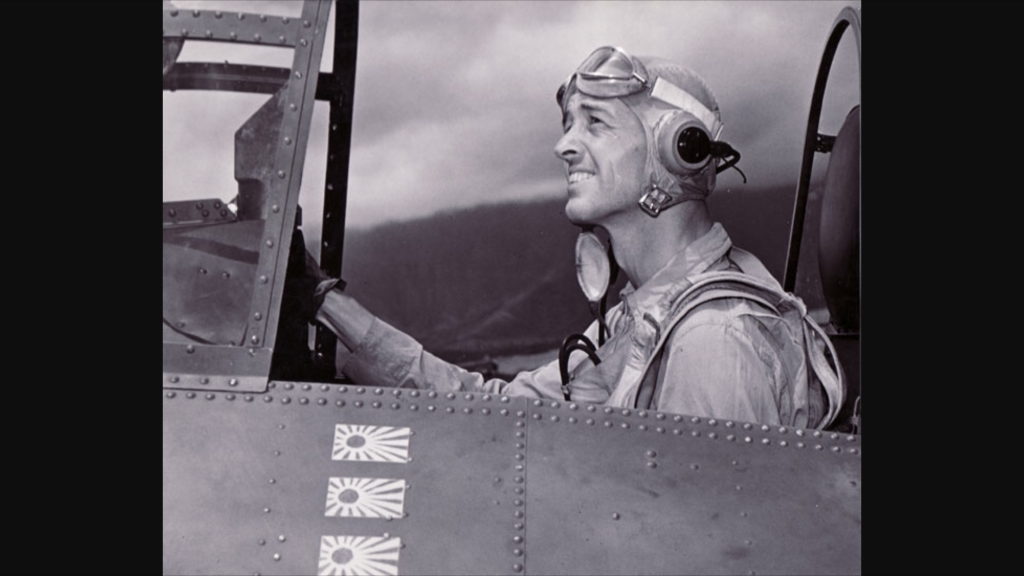
Sadly he passed away at the age of 75 on April 15th, 1981 in Coronado Ca. (just 4 days from his 76th birthday). Most of this information came from Wikipedia, and my book. I have included two photos of him in his "F4F office", with one in color. I also included one of the profile art works from "The Blue Devils", along with a cover photo of the actual book.
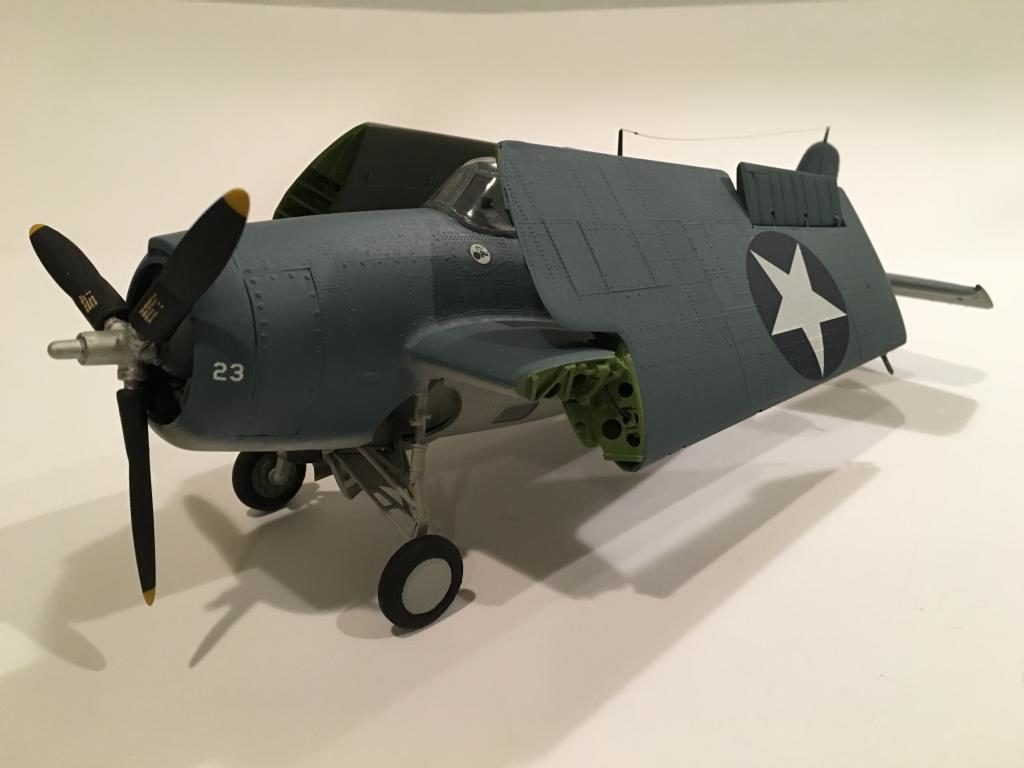
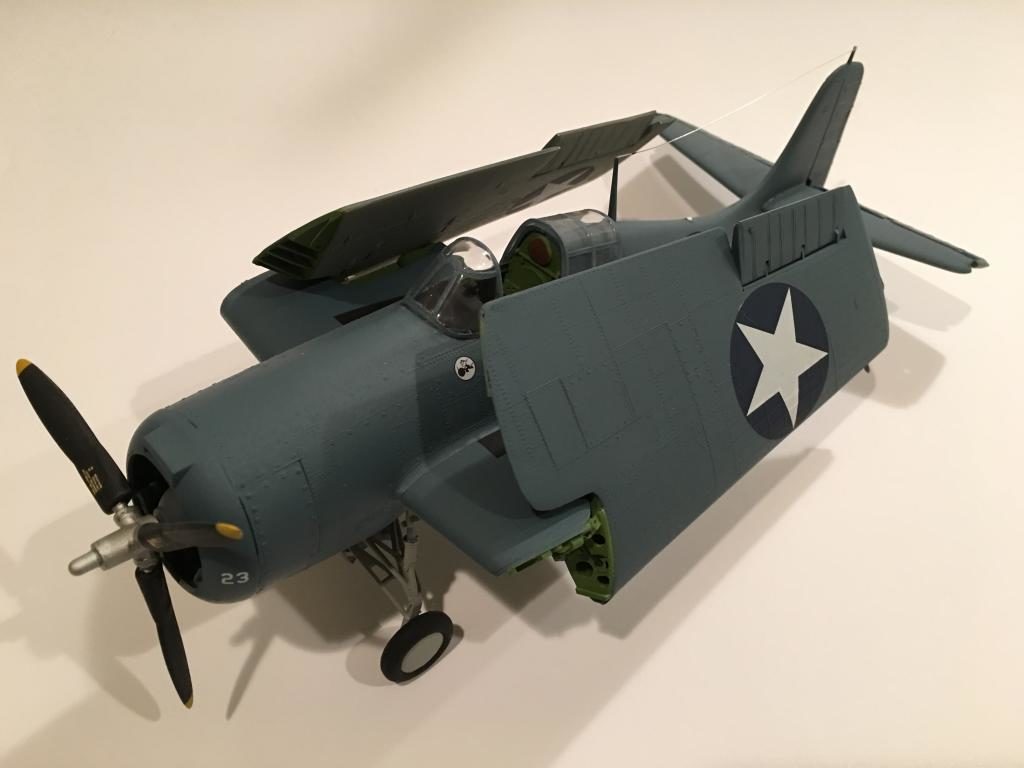
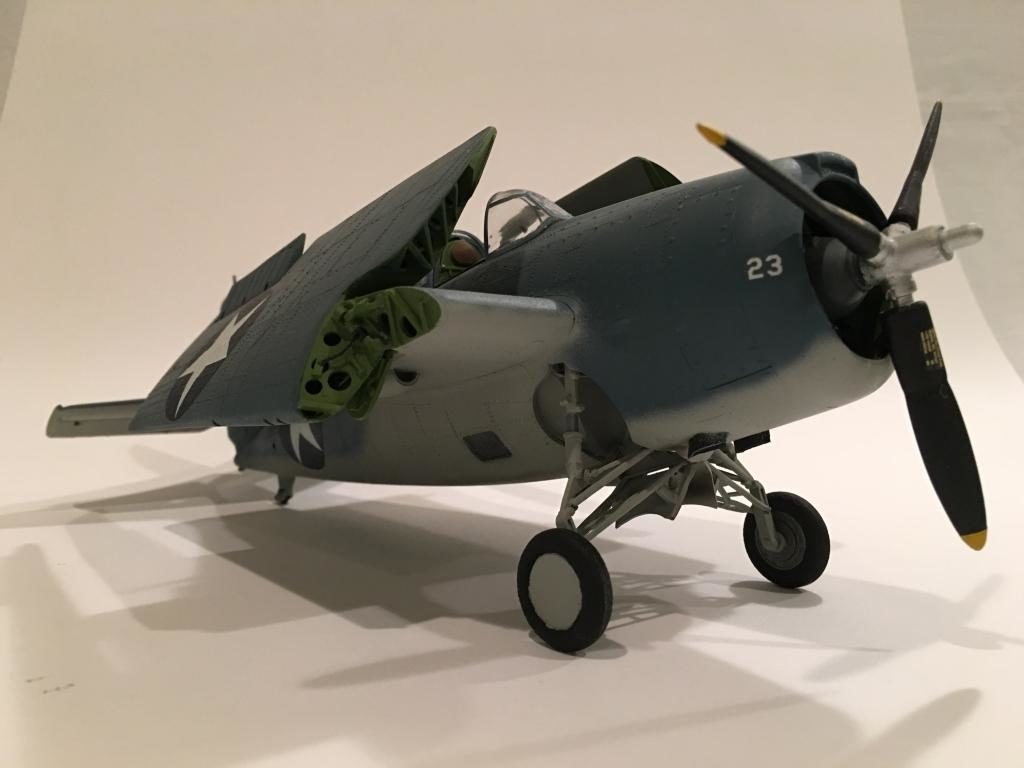
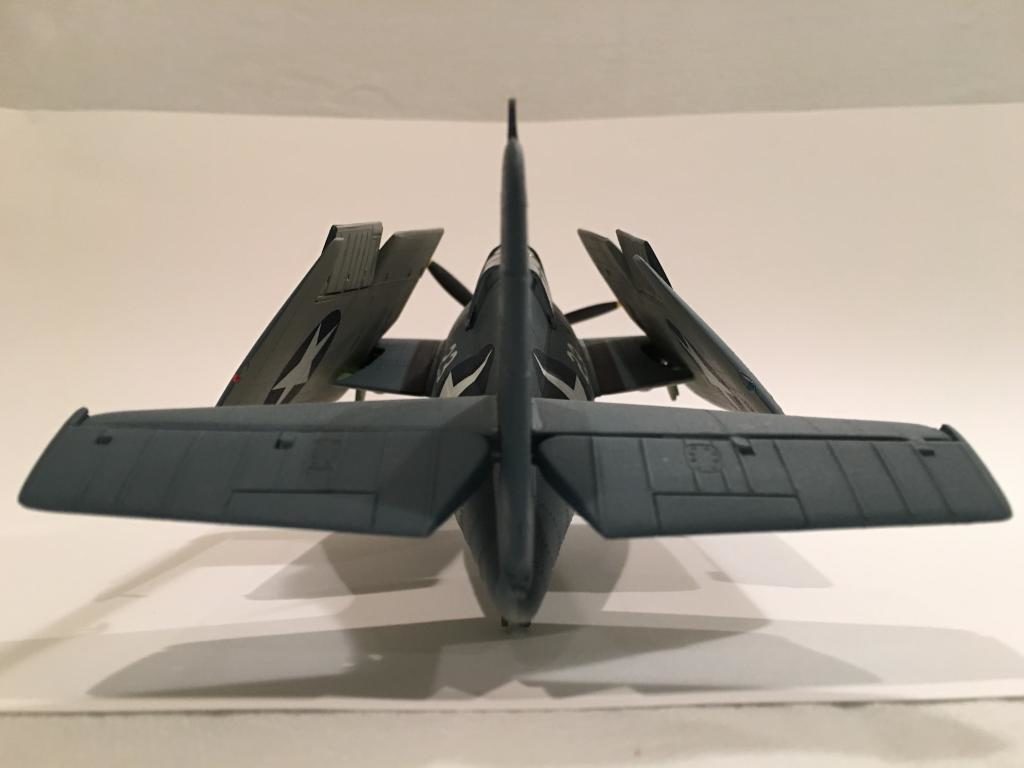
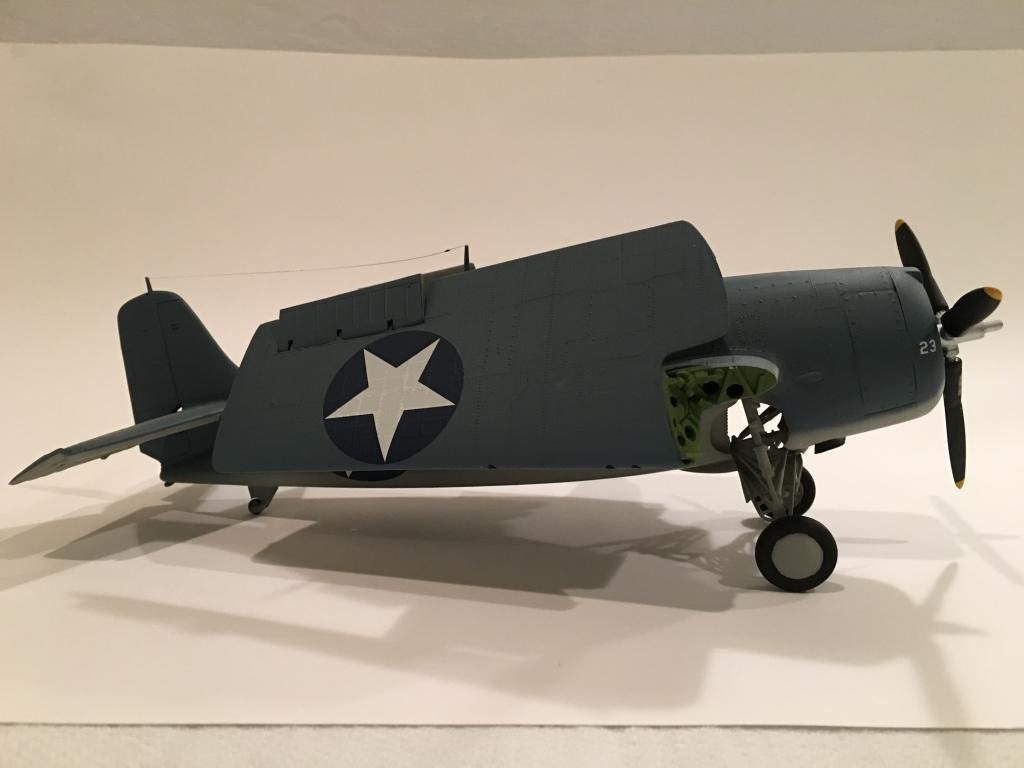
The molds are showing some wear in this release as my example had a little flash. But it's not anything that a few minutes of clean up couldn't handle. The wings are a multi piece arrangement, that allow you to build the plane with folded or fixed wings.
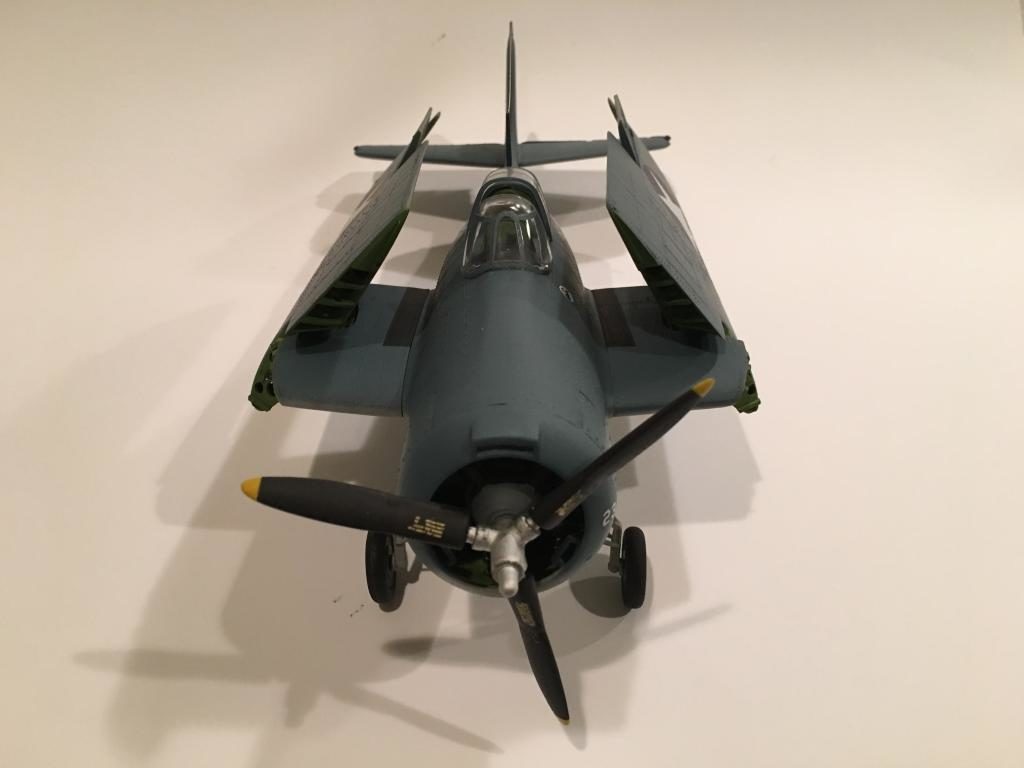
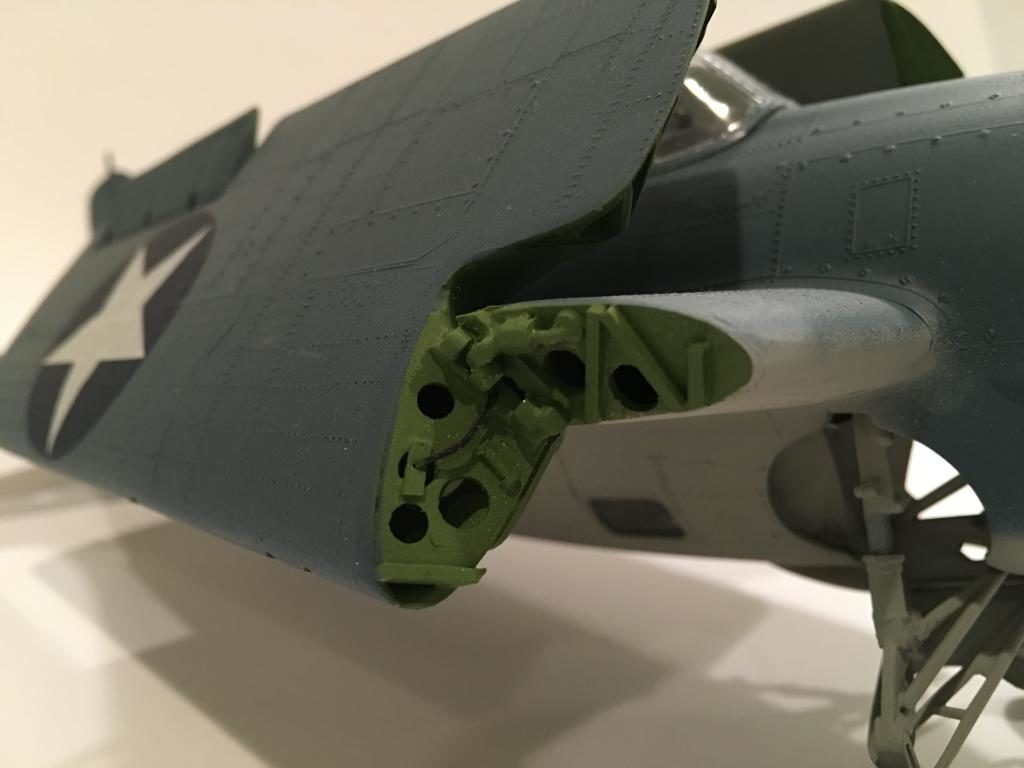
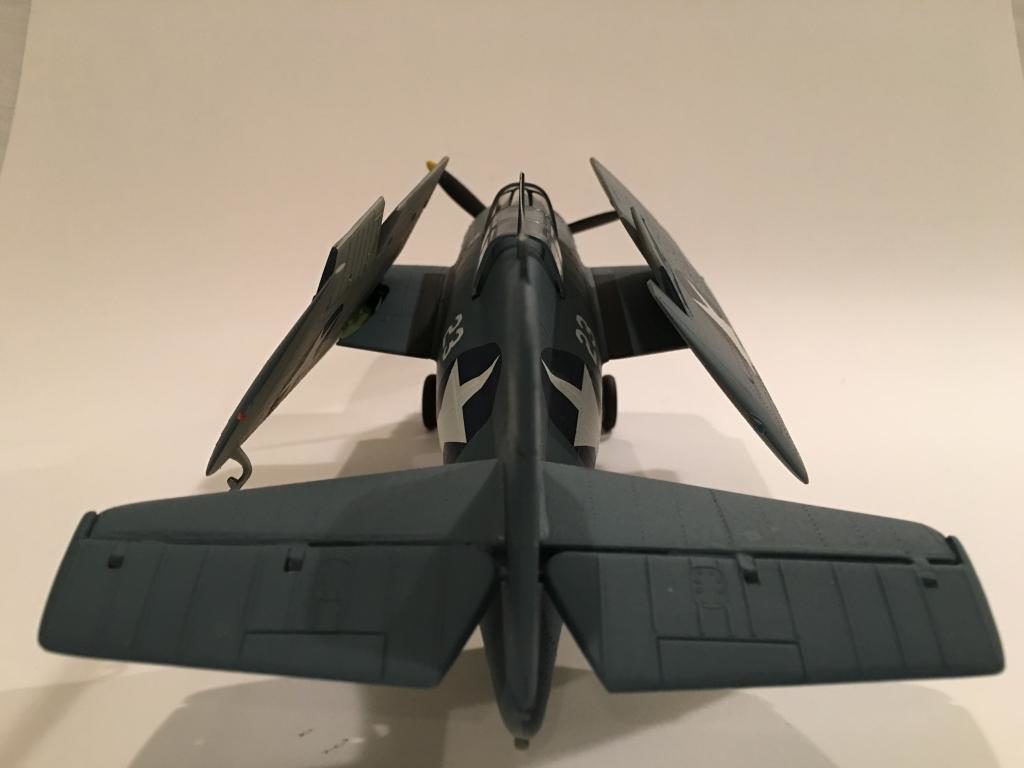
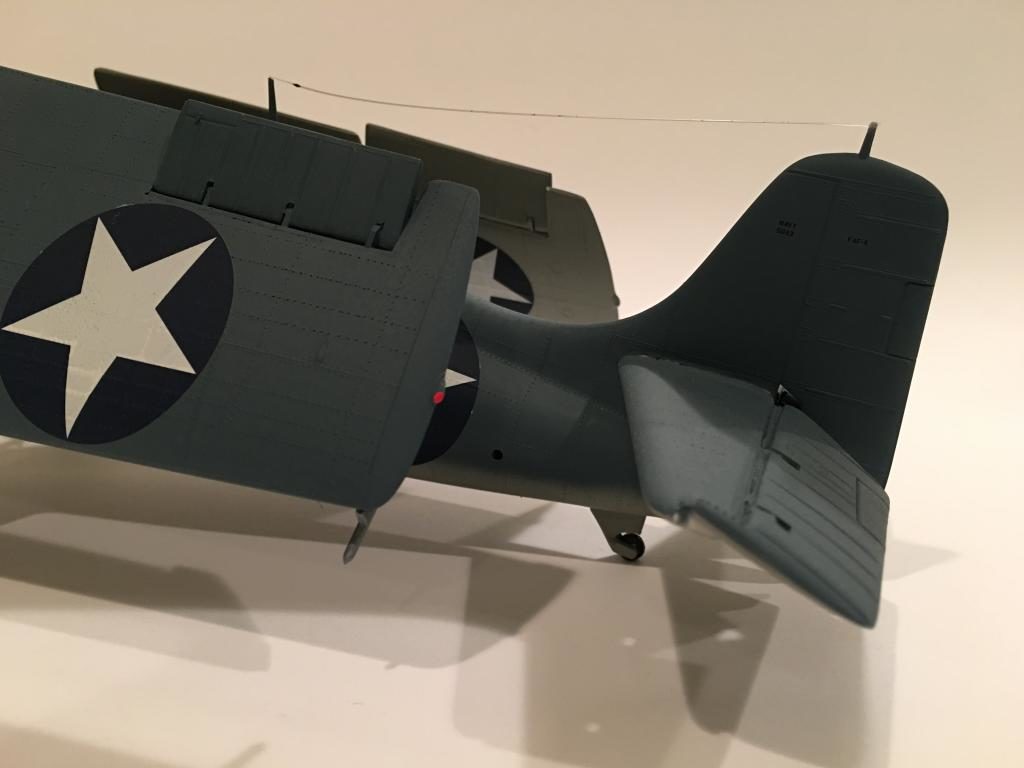
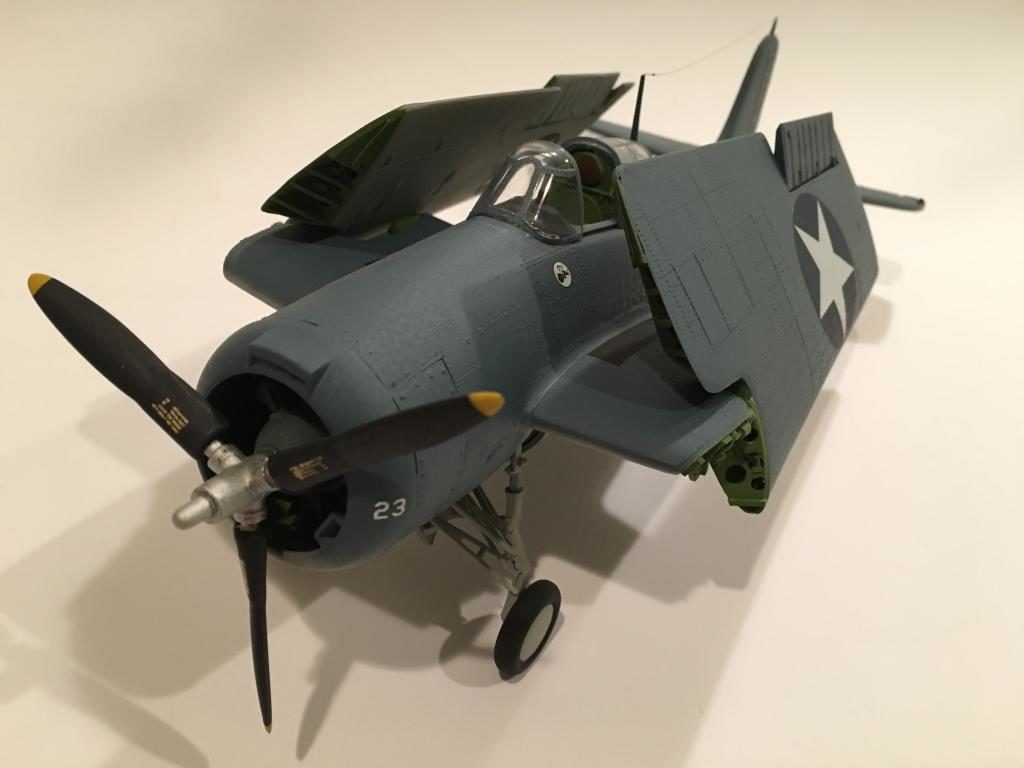
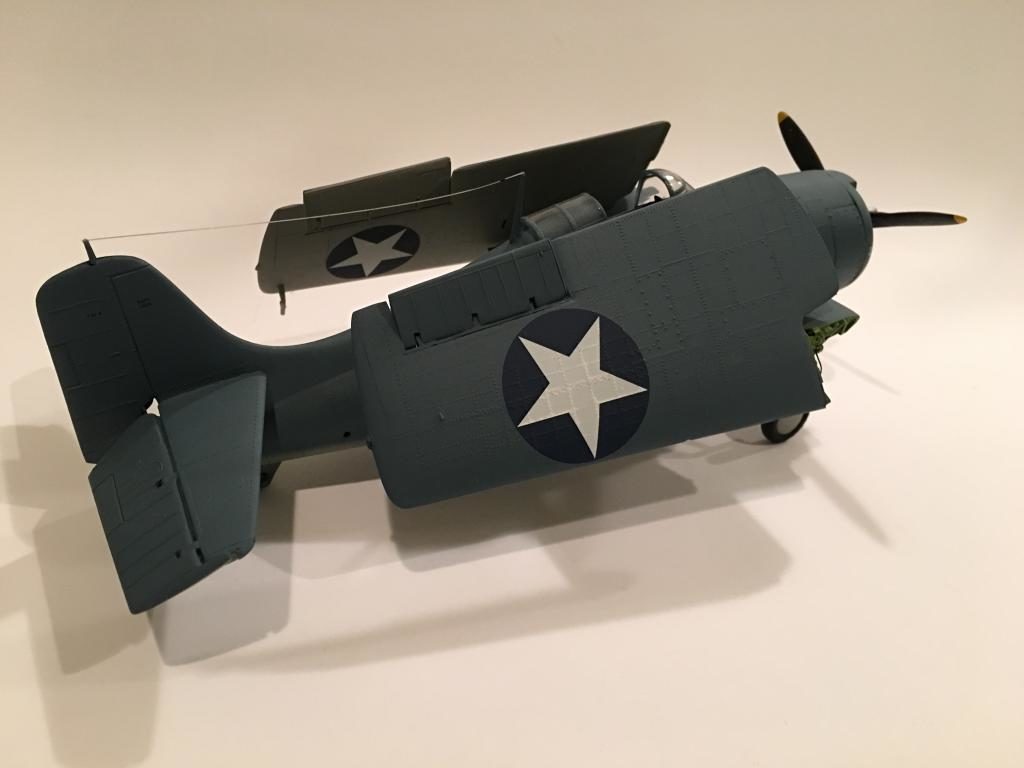
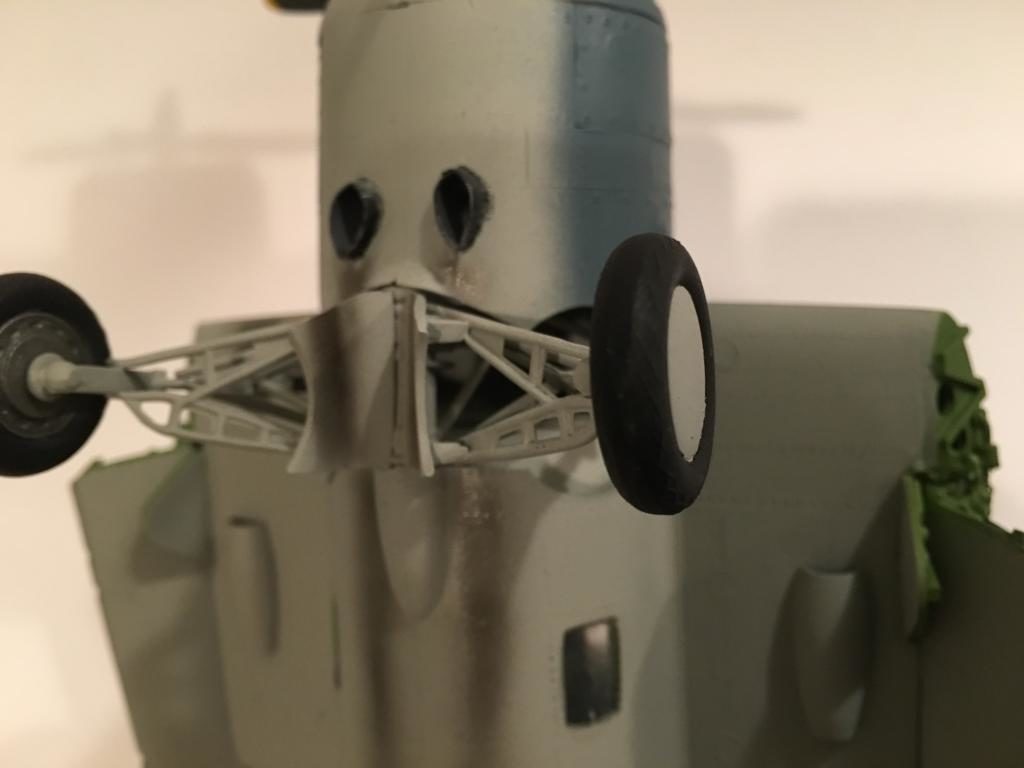
I chose the folded version and decided to give it a go at scratch building more details in this area. In doing so I went online and found that in almost every photo with the wings folded, the ailerons were not centered and both pointed outwards. I tried to replicate this as well. Then there were small "stay poles" that were about 3 feet long and were normally used to help secure the wings in the folded position. These poles held the wing tips securely by anchoring the front leading edge corner of the stabilizers to the wing tips. I chose not to attempt these since the attachments were very thin. (plus by now my patience was wearing thin and I simply wanted it done).
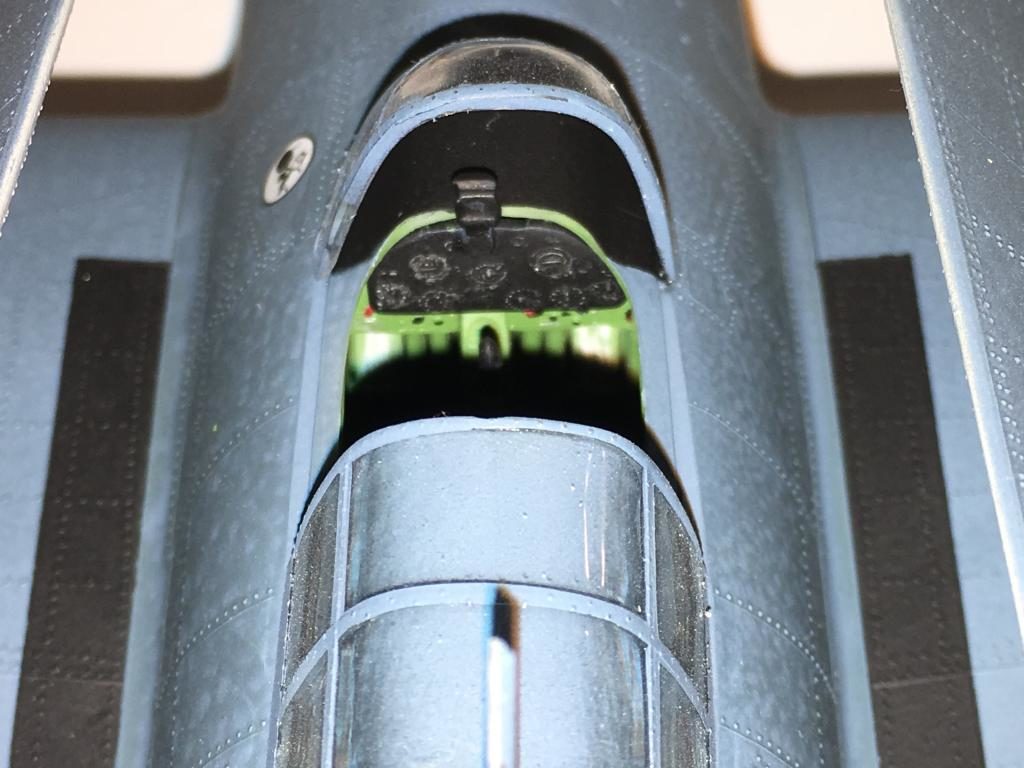
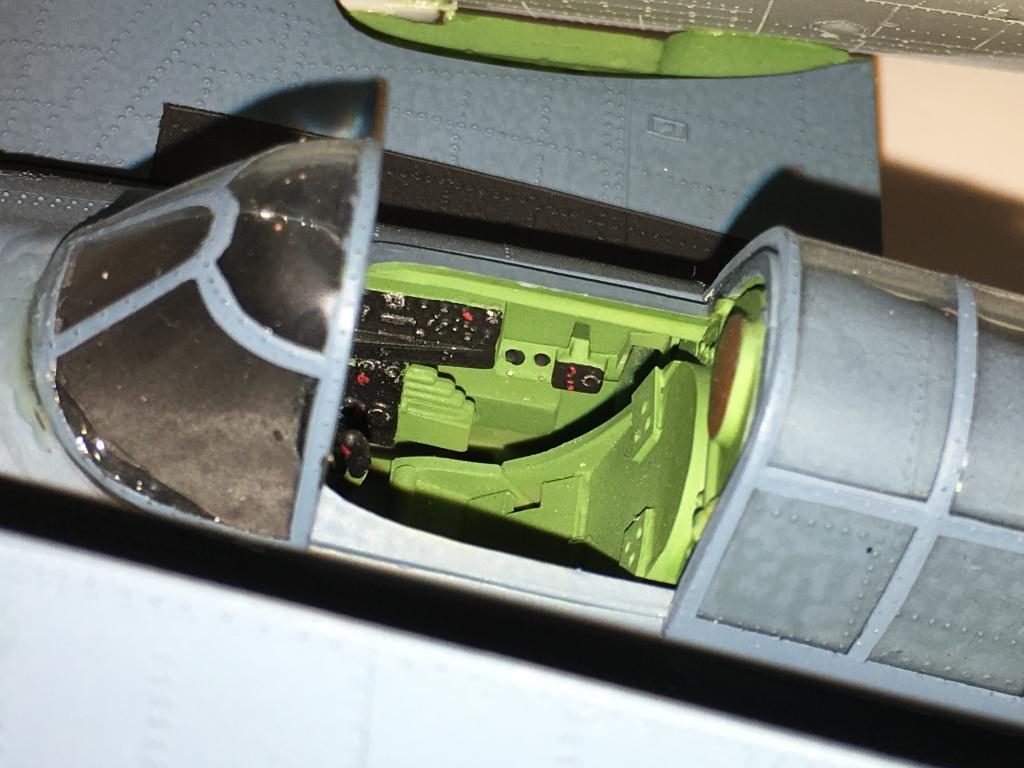
If memory serves me correctly, I added some details to the cockpit seat using my Waldron punch set and plastic card stock, to make it look more like the real one.
One other modification was the repositioning of the elevators. If you look closely you will see that the elevators on this plane are drooped.
Due to my changes with the wing folds, it made it very hard to get the wings to stay in alignment. I tried to duplicate the actual wing fold mechanism. In hind sight, the stay poles would have helped to secure the wings...
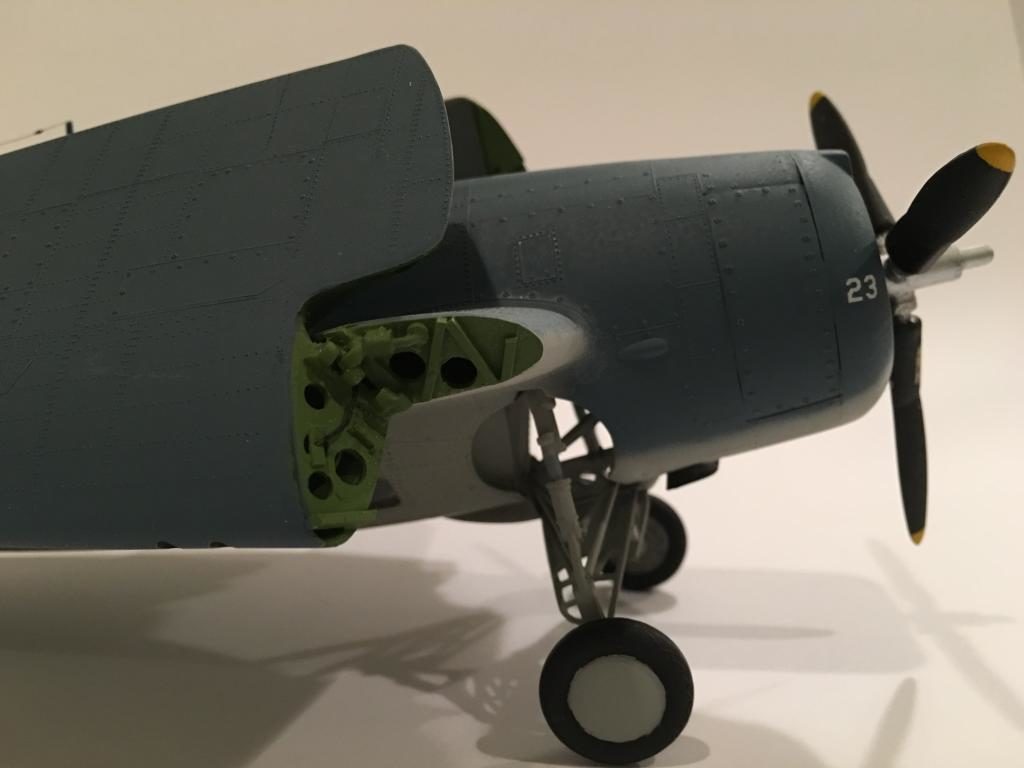
I replaced the kits exhaust pipes with two small pieces of aluminum tubing, which I cut and bent into approximate shape.
The model is finished using Model Master enamels. This one would have benefited from the Tamiya "smoke" in the cockpit to bring out details. After I applied the kit details I sprayed Dull coat from a rattle can. I noticed in these photos that there is a slight mottled effect, which isn't really all that noticeable in person.
I didn't weather this model very much because the real plane had a short life. VF-3 turned in their F4F-3's at Kaneohe Bay, Hawaii in May, 1942 when they were re-equipped. In reality this plane was probably in service for a little over two months when it went overboard.
As always, comments are welcomed... Enjoy.


Looks pretty good (from what I can see)...where's the rest of the photos?
Thanks Craig... More photos on the way and an article to follow.
Louis, those Revell 32nds were the first ones I ever saw. They generated a lot of excitement when they came out, though not so much nowadays. I like them, because of what they are. Also, they remind me of a simpler time, and they still look good.
Good looking build!
I remember as a kid when I saw one at a local hobby store. I didn't have the money to get it at the time. So I went out and mowed some of our neighbors yards with my trusty push mower. By the time I had collected enough money and went back to the store it was gone ! Man I was really bummed out... But then I ran across the Revell 1/32 "Gustav" and all was well again. The box art with a snow covered field and the 109 taking off really captured my imagination...So I went home with a 109G-6. (but I never forgot about the Wildcat that got away...)
Thanks my friend !
Aha...gave it a break and came back to see a plethora of information AND more pics. Never heard that story about the fate of this bird...sad end to a great warrior (both of 'em). Really nice job on this one, Louis. Love it.
Thanks buddy for the compliments ! I agree on how the story ended... for both the man and machine.
I remember building this as a kid. Never could get the fuselage closed around the landing gear bay bulkhead.
There were a few times when I almost wanted to stop building this one. But I thought that most of the problems were self inflicted. Eventually my stubbornness won...
Great work on the scratchbuilding! I too have had issues in the past with the mottled look of Dull coat sprayed from rattle can. The last couple of years I've been warming all paint cans (both dull and gloss coats, as well as other paint I'll sometimes spray, especially light colors like white or camo gray) in hot water before I spray. I haven't seen much of the mottling problem since I started doing that.
Thanks for the tip with warming the can before spraying. I'll give that a try the next time. I really appreciate that.
Looks great !
Thanks Bob !
In the times of AMS modellers who are complaining about fit and sometime loosing panel lines someone turns that old kit into a stunner !
Beautiful build, Louis !
Thanks for the compliments Bernd! At times it was trying. I had a problem with the cowling side panels not wanting to fit properly and I'm afraid that it shows in a few pictures. I like to build the older kits since I grew up building them. But once in awhile you need a trouble free build and that's when a Tamiya or Hasegawa (lately HB too) kit comes to the rescue.
Louis, Revells idea for open cowling panels was not their best in these days, they simply don t fit and their engines looked well at the time when these kits were new on the market.
I had troubles on my Revell builds as well. The only way to fix this perfectly is to fill, sand and rescribe the full airframe. Guess you made the best out of it.
Building older kits is the same fun as building newer ones for me, currently i am looking for a cheap Revell Hawker Typhoon in 1:32.
Very nice result with a kit that "takes some effort."
A bit of info for future reference: Grumman-built airplanes in WW2 had Bronze-Green cockpits. Tamiya "Deep Green" is a good match.
Thanks for the tip my friend. "Way back" when I built this model, I wasn't aware that there were numerous shades of green used by different manufacturers. Since this build was completed, I found out this information but unfortunately it was too late for this one and all of my other earlier builds.
I have made my own mix of Grumman "Bronze Green" by starting out with Model Master "Japanese Army / Navy Green" and adding in some dark blue to it and a smaller amount of white.
I used several photos I took inside the "Collings Foundation" B-24 (where there were areas that were still in the original unrestored color where light normally wouldn't have faded the original samples too much) to use as an approximate guide for my custom home brew Bronze Green mix.
You can see this shade I mixed up sprayed on the forward cockpit walls on my Accurate Miniatures Avenger build thread. I also posted a few photos of the B-24 reference pictures I mentioned there too.
Thanks again for the compliment and Tamiya color tips. Is the deep green you mentioned XF-26 ?
Thanks again.
Hi Louis, I like this Wildcat a lot, great work!
Thank you Michel. I'm glad you like it.
Excellent, Louis! I love Wildcats ... but I may favor them because Dad flew them off the USS Independence during WWII.
Cool build of a great little plane.