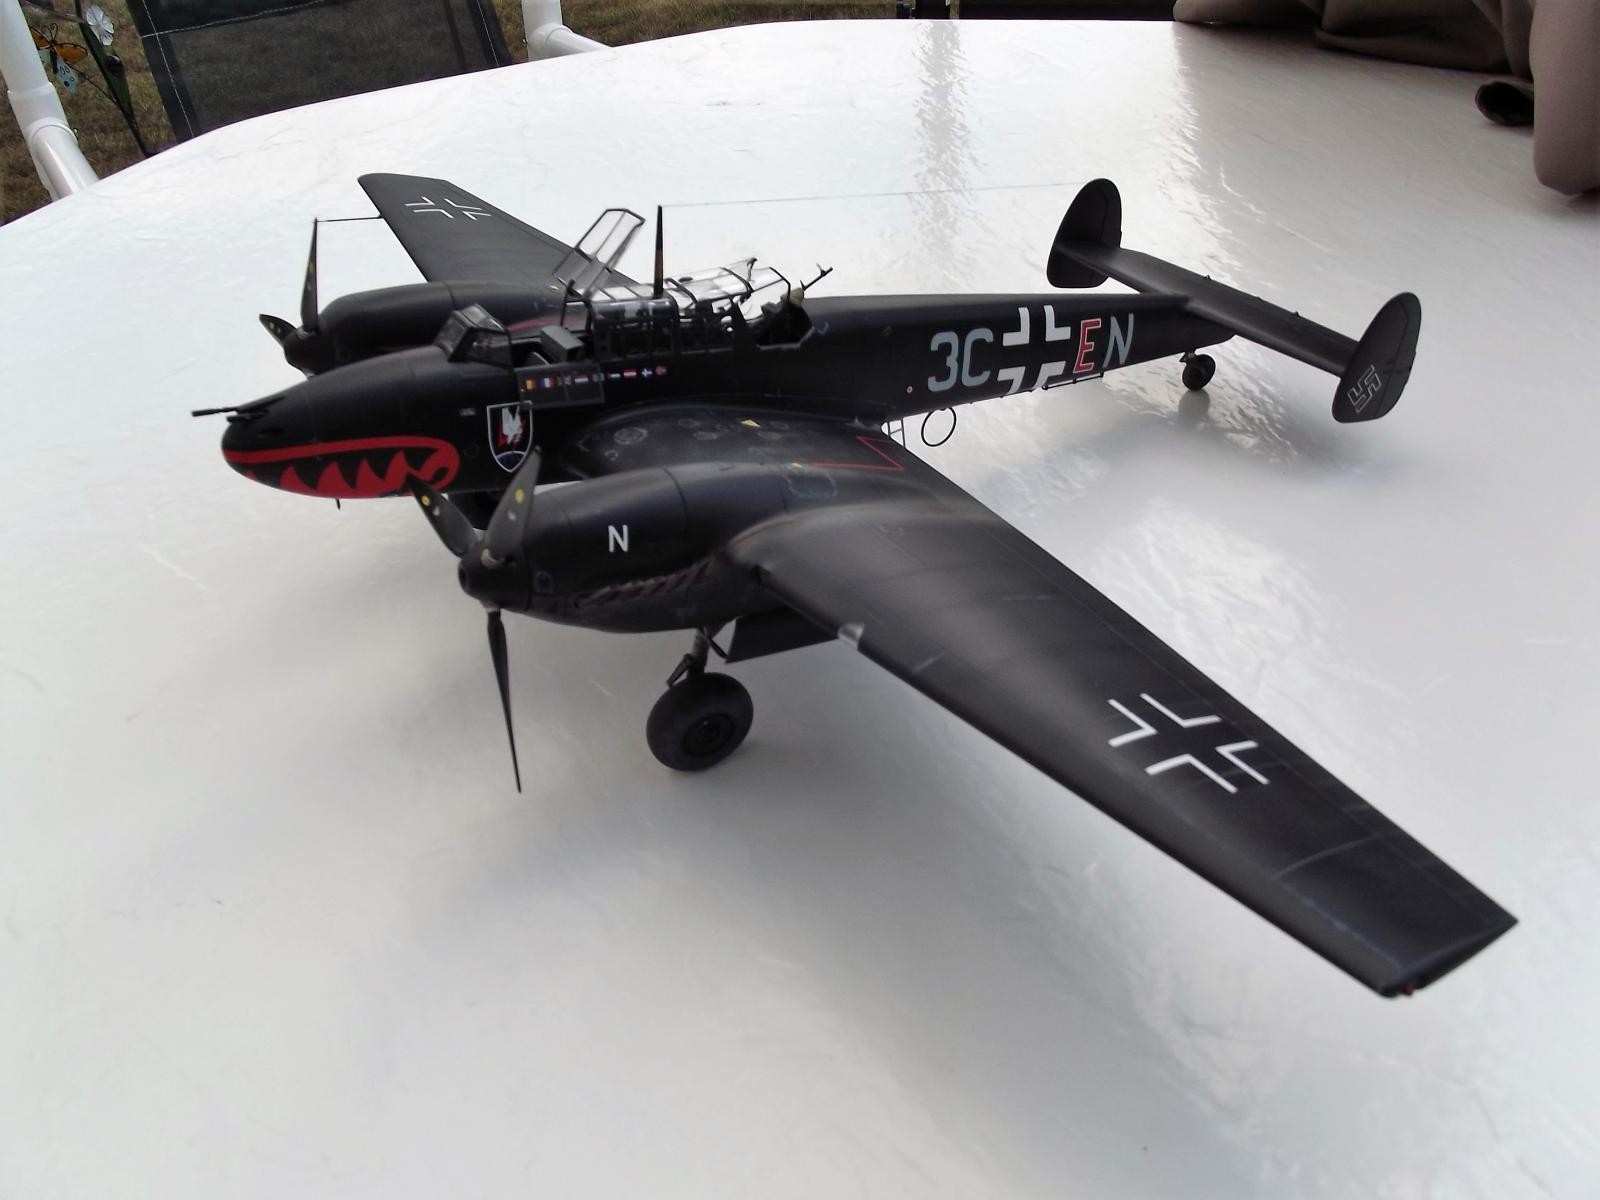
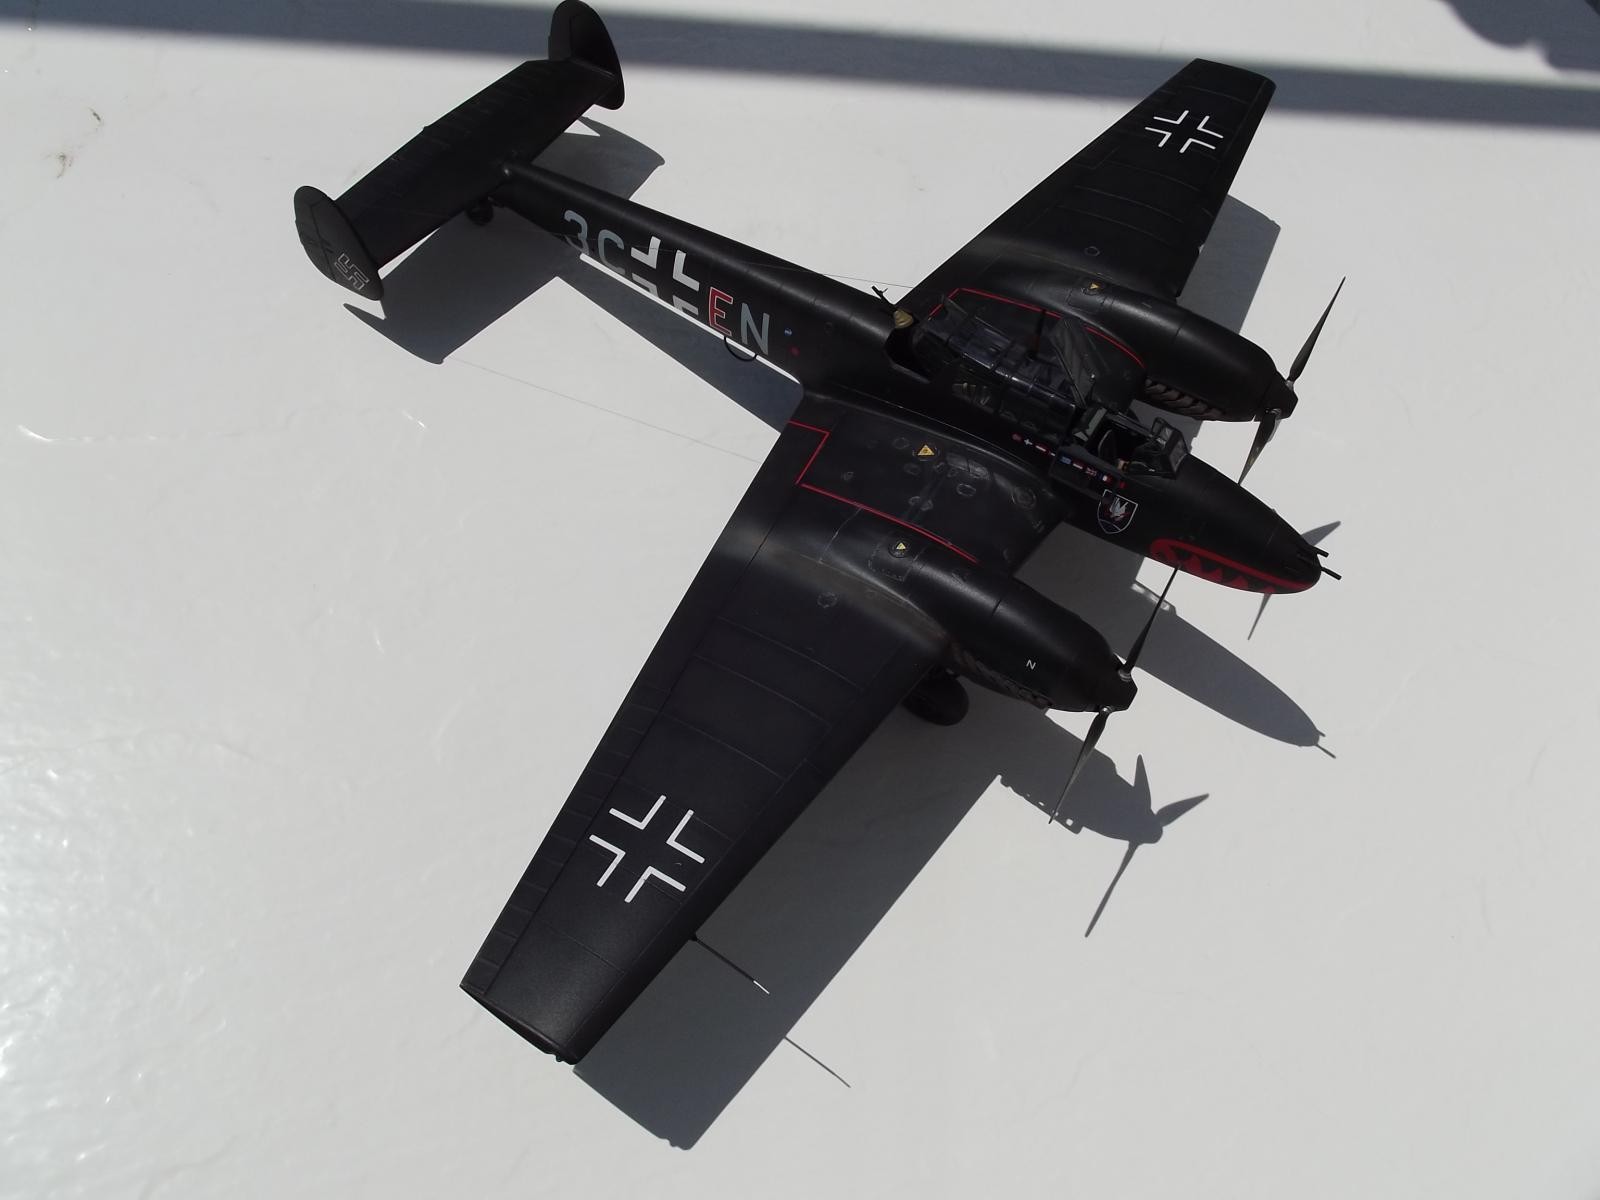
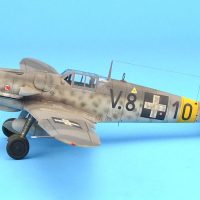
1/32 Dragon Bf110E of 5.NJG 4, 1942
The Me Bf110 needs no introduction for most modelers; the distinctive twin tail, twin engines and slender fuselage made for a very handsome looking airplane, albeit one that was a failure in its original intended role of Destroyer in the face of single engined opposition. It found a new purpose in the developing role of night fighter, a role in which it excelled at for the rest of the war.
I've had the Dragon Me Bf110 sitting in my "someday" stash for years, well someday finally came! I cleared my desk and began what I thought was going to be months of work...
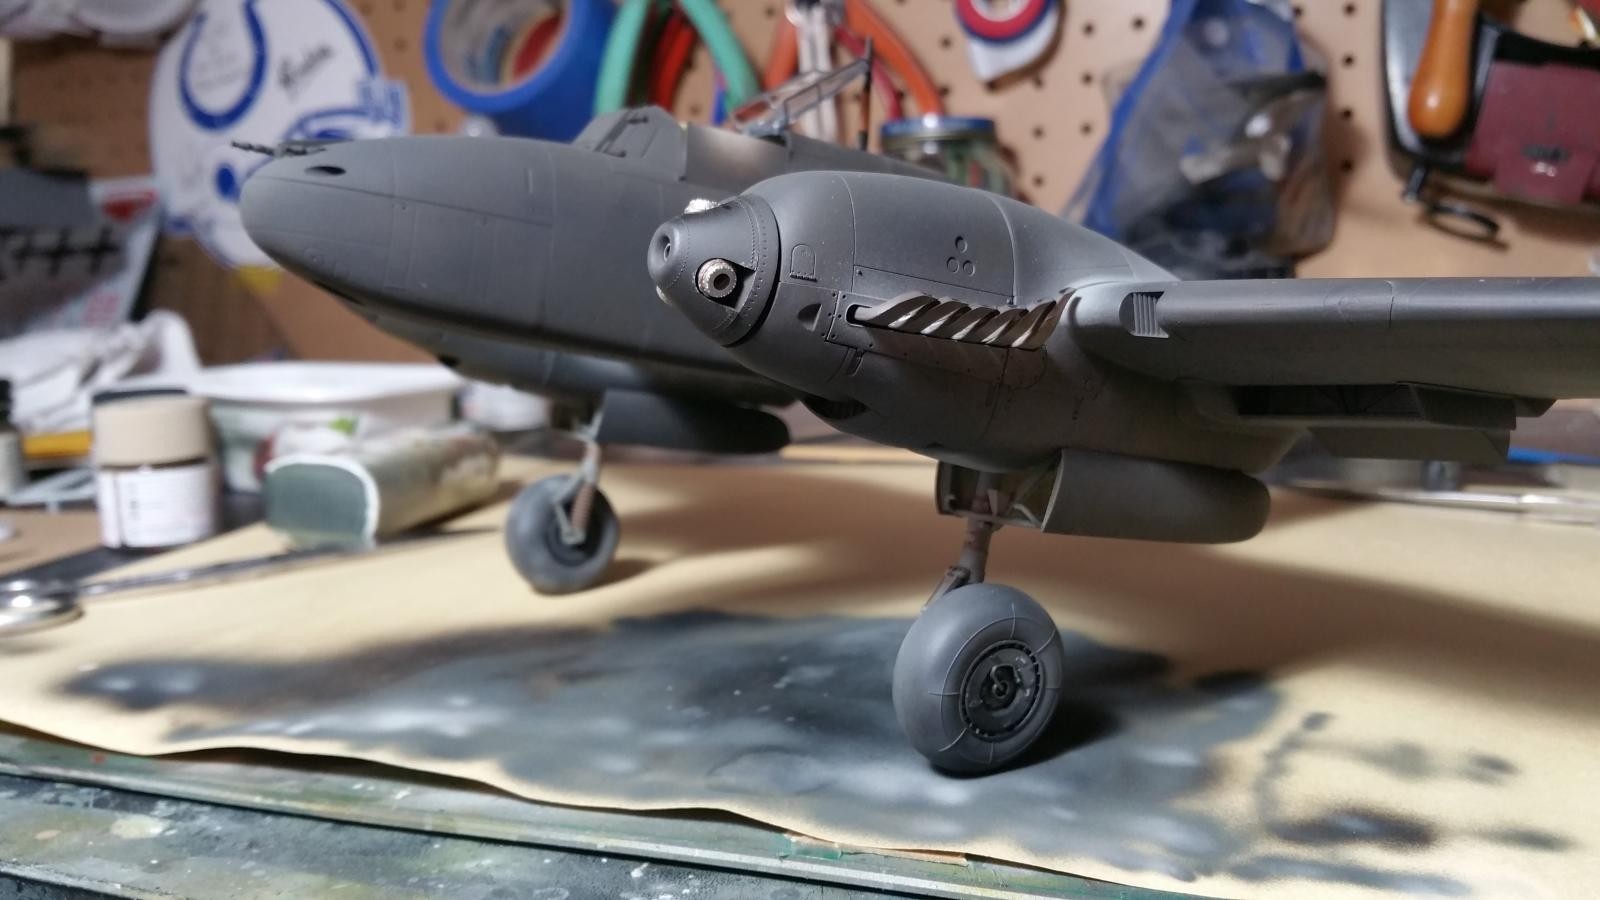
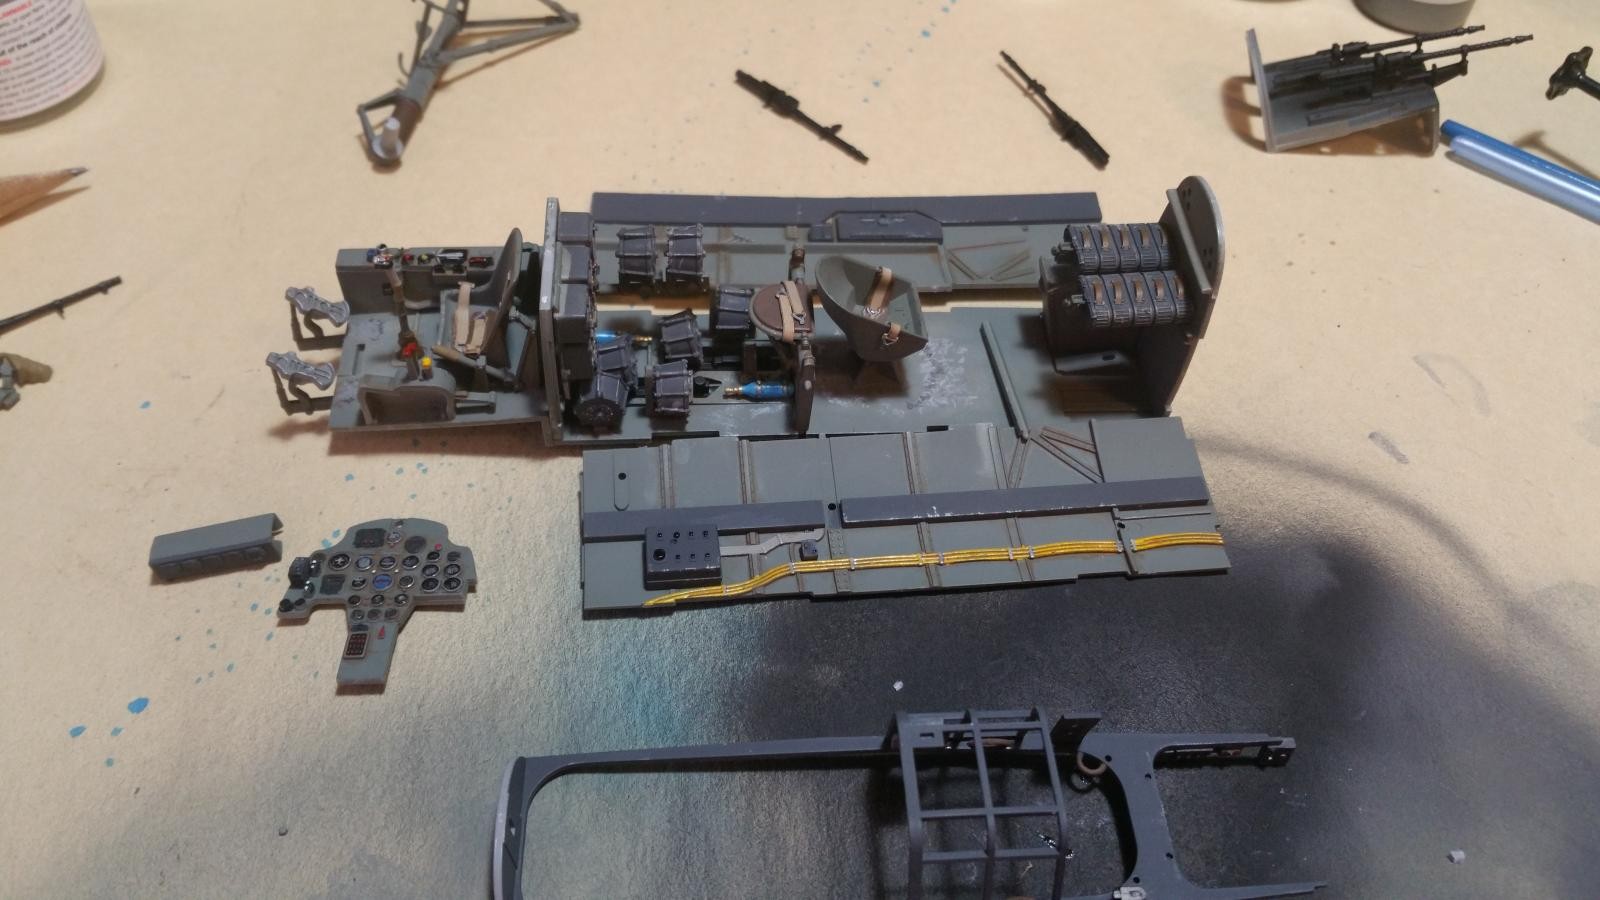
This kit was released not that long after Dragon's ill-fated P-51, but is leaps and bounds over that kit. Dragon learned a bitter lesson about doing it's research and it Really shows. Rowan Baylis, Jerry Crandall and Mark Proulx all had a hand in the developement of this kit and it is a beaut, the moldings and detail, especially the cockpit and landing gear and wheels, are first-rate and the inclusions of metal and pe only enhance the value you get out of this kit. The only (minor) complaint I would have about this kit is that they used slide molding to create the hollow ends to the machine guns and cannon, why not do the same for the exhaust? I wound up using a set from Quikboost.
On the other hand the instructions are typical Dragon; incomplete, confusing and needing better assembly diagrams. Be aware during assembly to look Very carefully at each diagram, the angles showing some of the parts are very confusing and waaaay tooooo busy, it's easy to miss a part or determine it's position. I used an article in Tamiya Modeling Magazine Jan 2009 issue by Brett Green to lift the veil from some of the more confusing aspects of the instructions and it really helped. The biggest issue I found was the placement of the main landing gear. The instructions have you install them attached to the firewall as a complete assembly, except the front reinforcing bulkheads (parts 1, 9, 6 and 4 get in the way...so I left those 4 pieces out until the LG assy was set up and rock solid and added them carefully later.
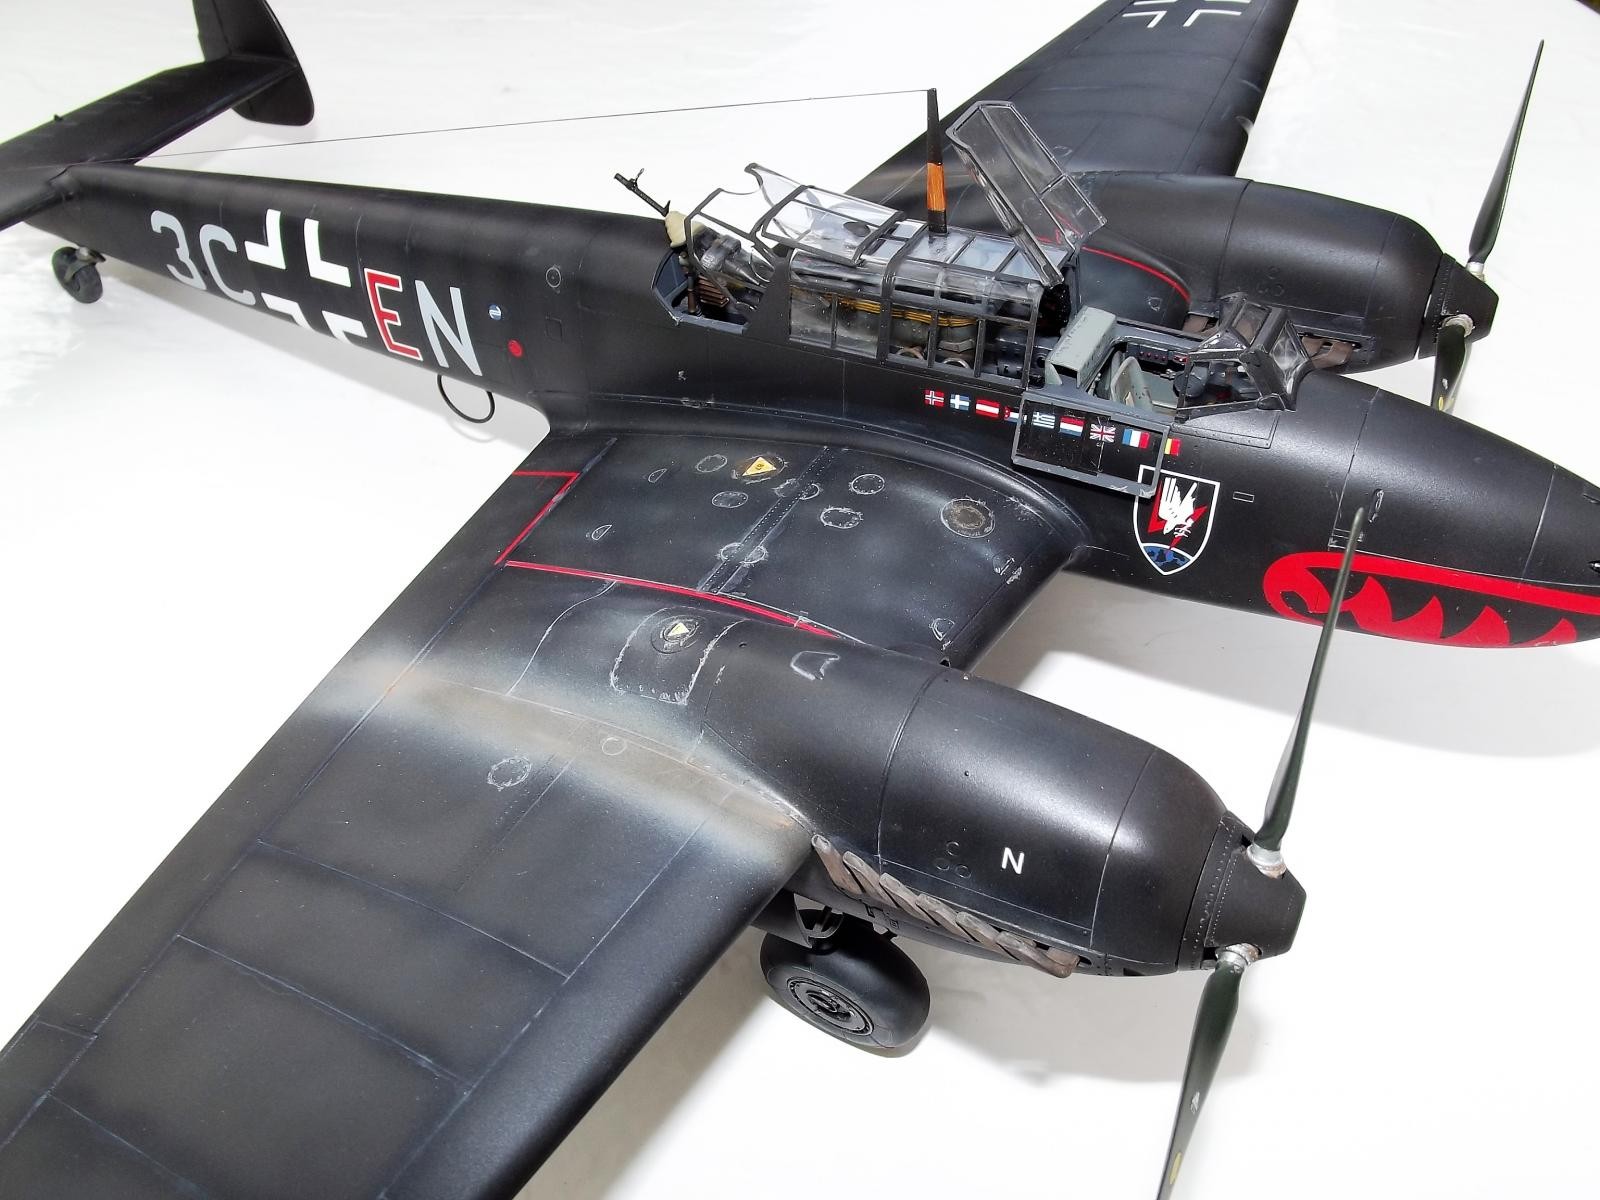
I built this kit pretty much oob, with the only aftermarket parts being the exhaust. I opted to not show an exposed engine, so the engine assembly fitting can be a bit fiddly but take your time and use some patience and it works out fine. I assembled the cockpit as a complete tub and it fit with no issues, again, just a matter of dry fitting and it all slotted into place! FYI...I looked all over to find a decent color pic of an actual 110 Instrument panel for detailing; in the end I had an excellent reference right in front of me! Eduard's Bf110 IP model! Instead of using decals for the instruments I just used a dry brushing tecnique and I'm pretty happy with the result.
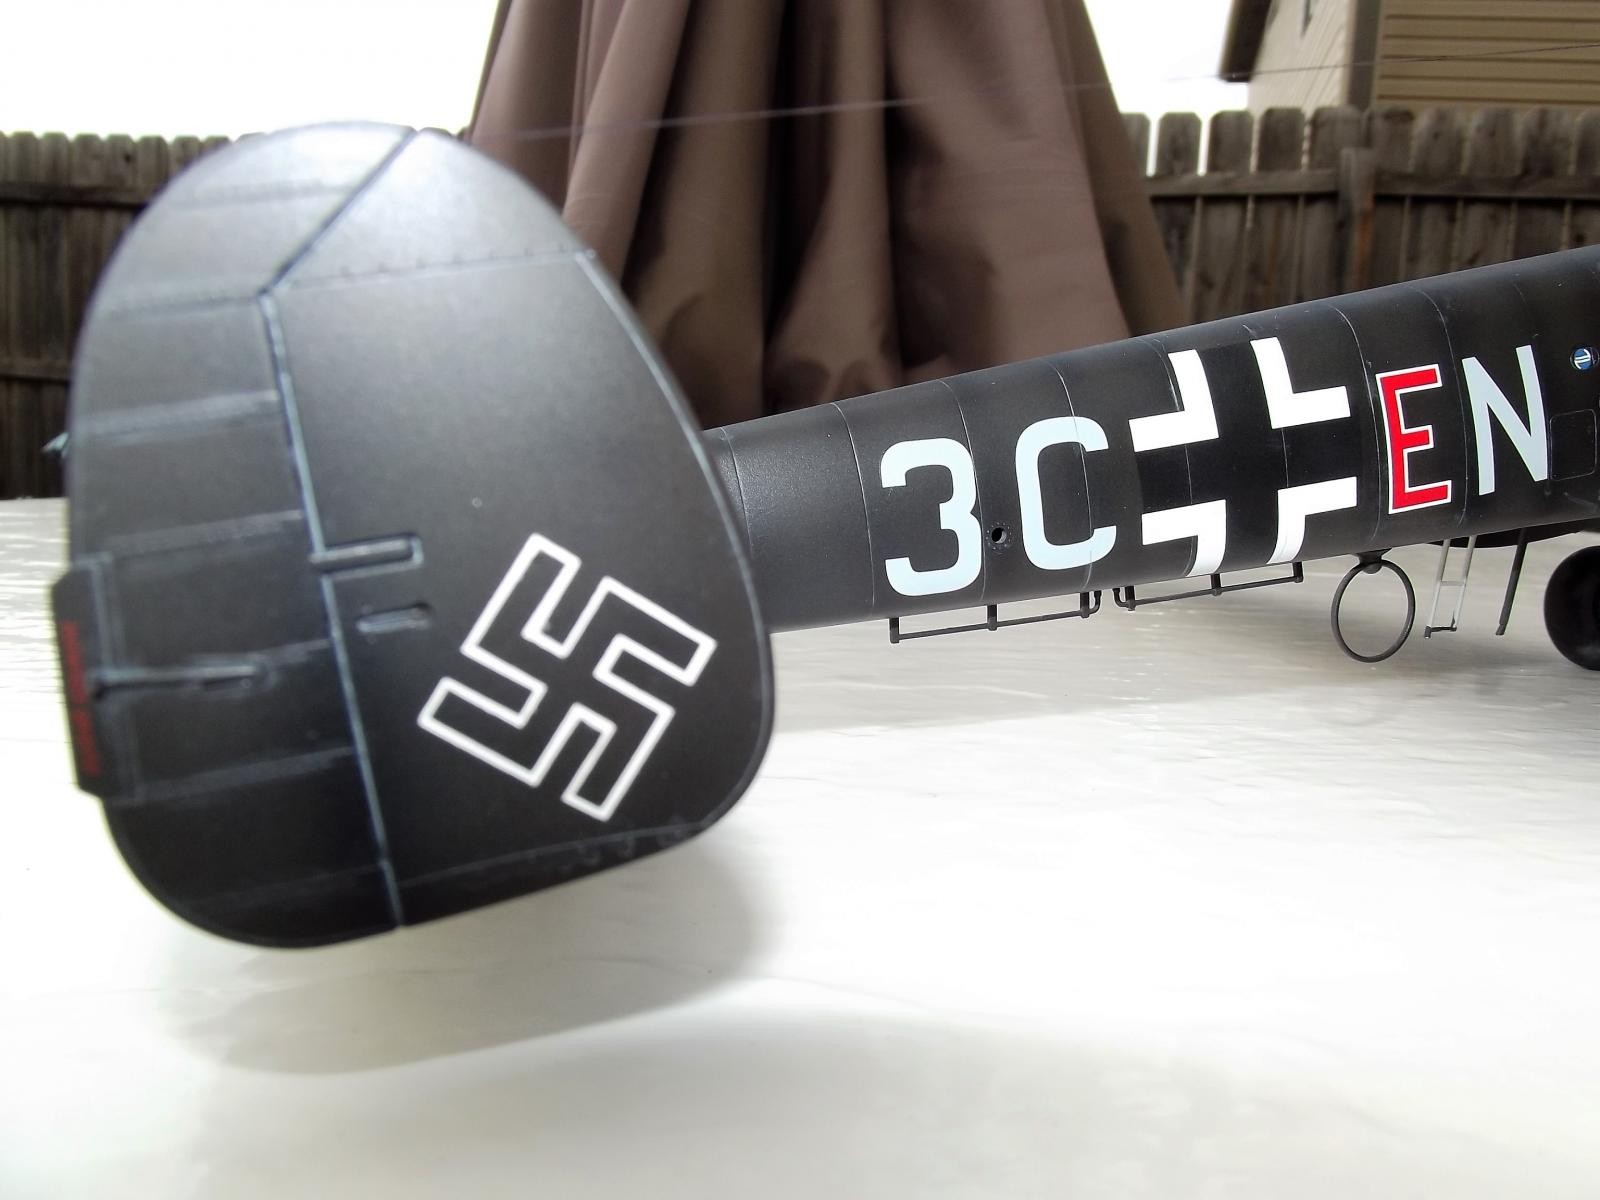
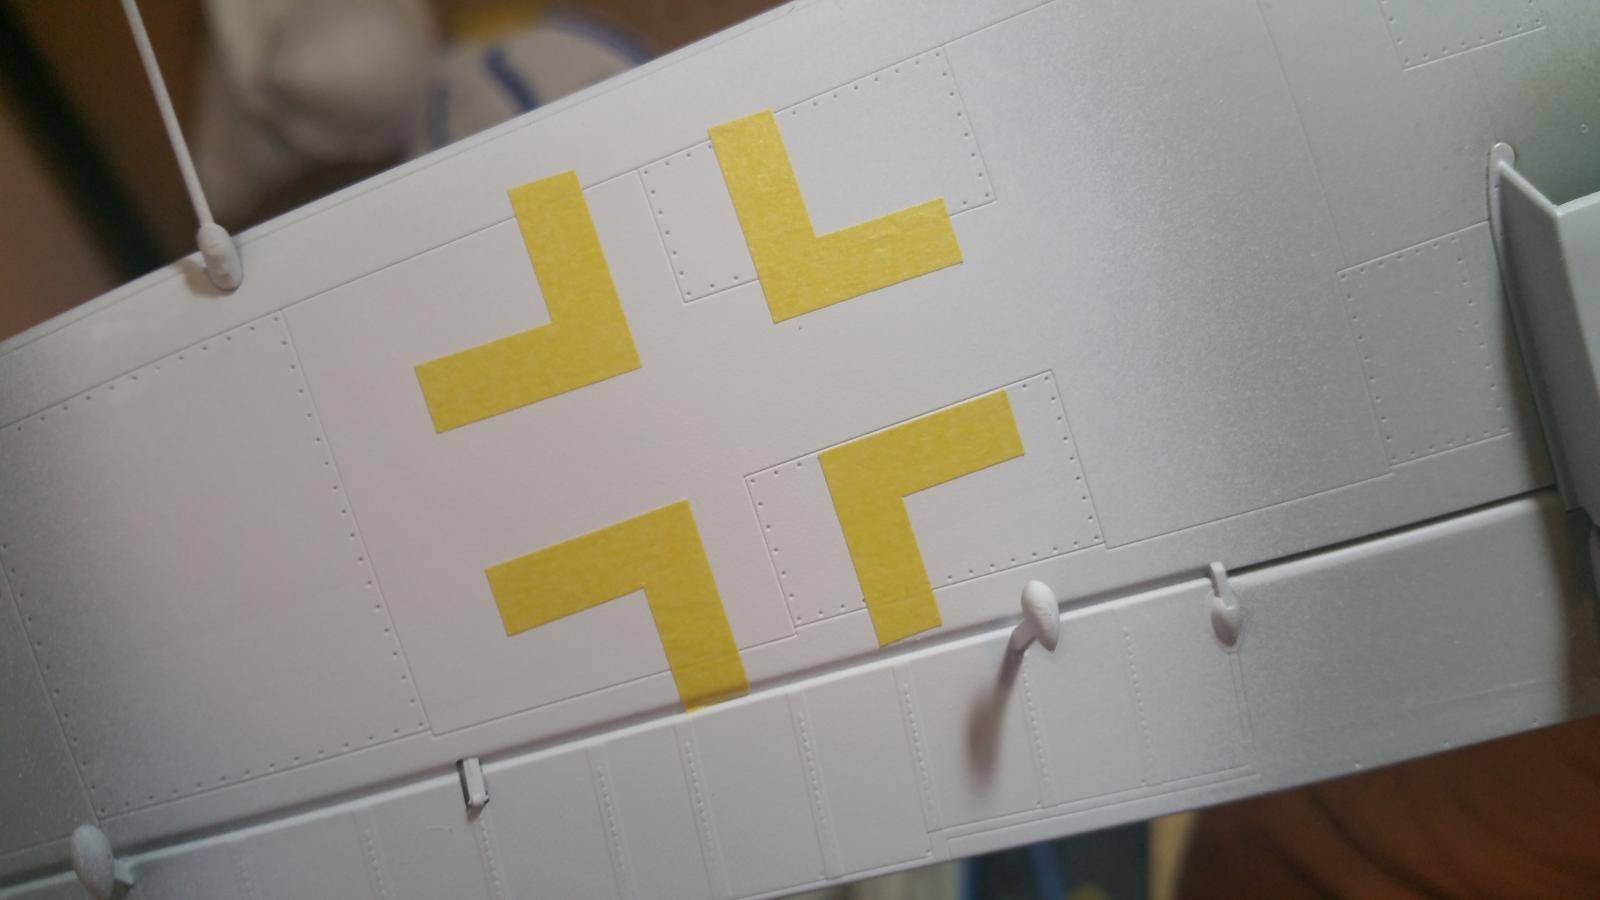
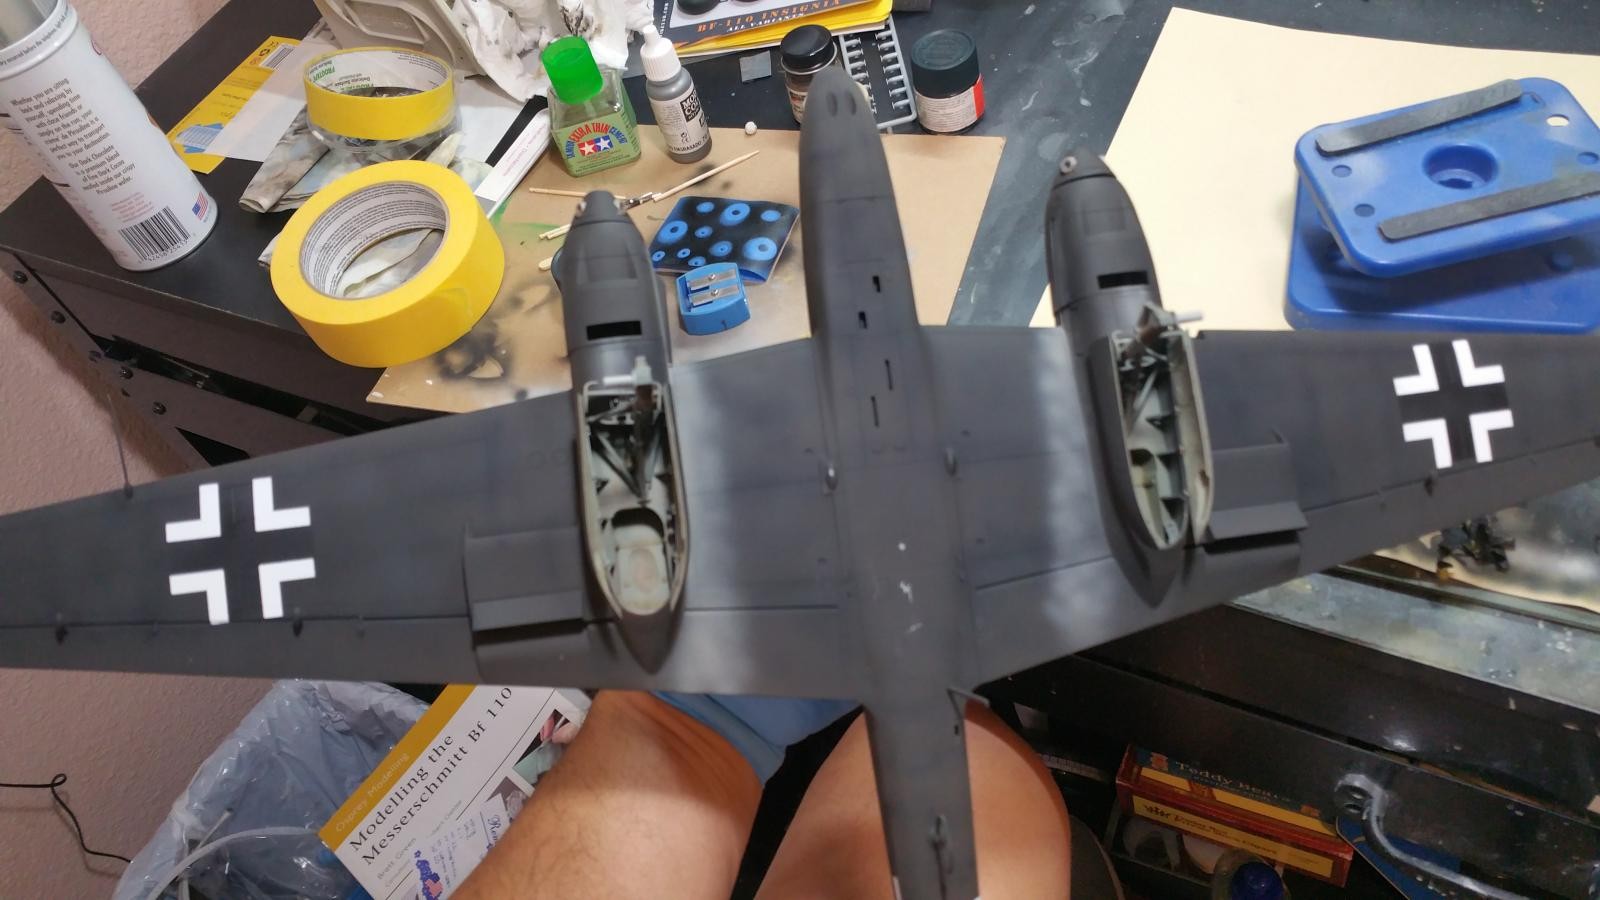
In almost no time I had the bulk of the assembly done. I used Eduard masks for the canopy, and I wanted to try masking and painting the basic marking. Maketar makes a comprehensive masking set for the Dragon 110 and I cannot recommend them highly enough! The kabuki tape masks work perfectly, including the masks for the tail swastika. If you haven't tried these masks yet, they are very easy to apply, just take your time and make sure the edges are sealed and you will be amazed at how well these masks work!
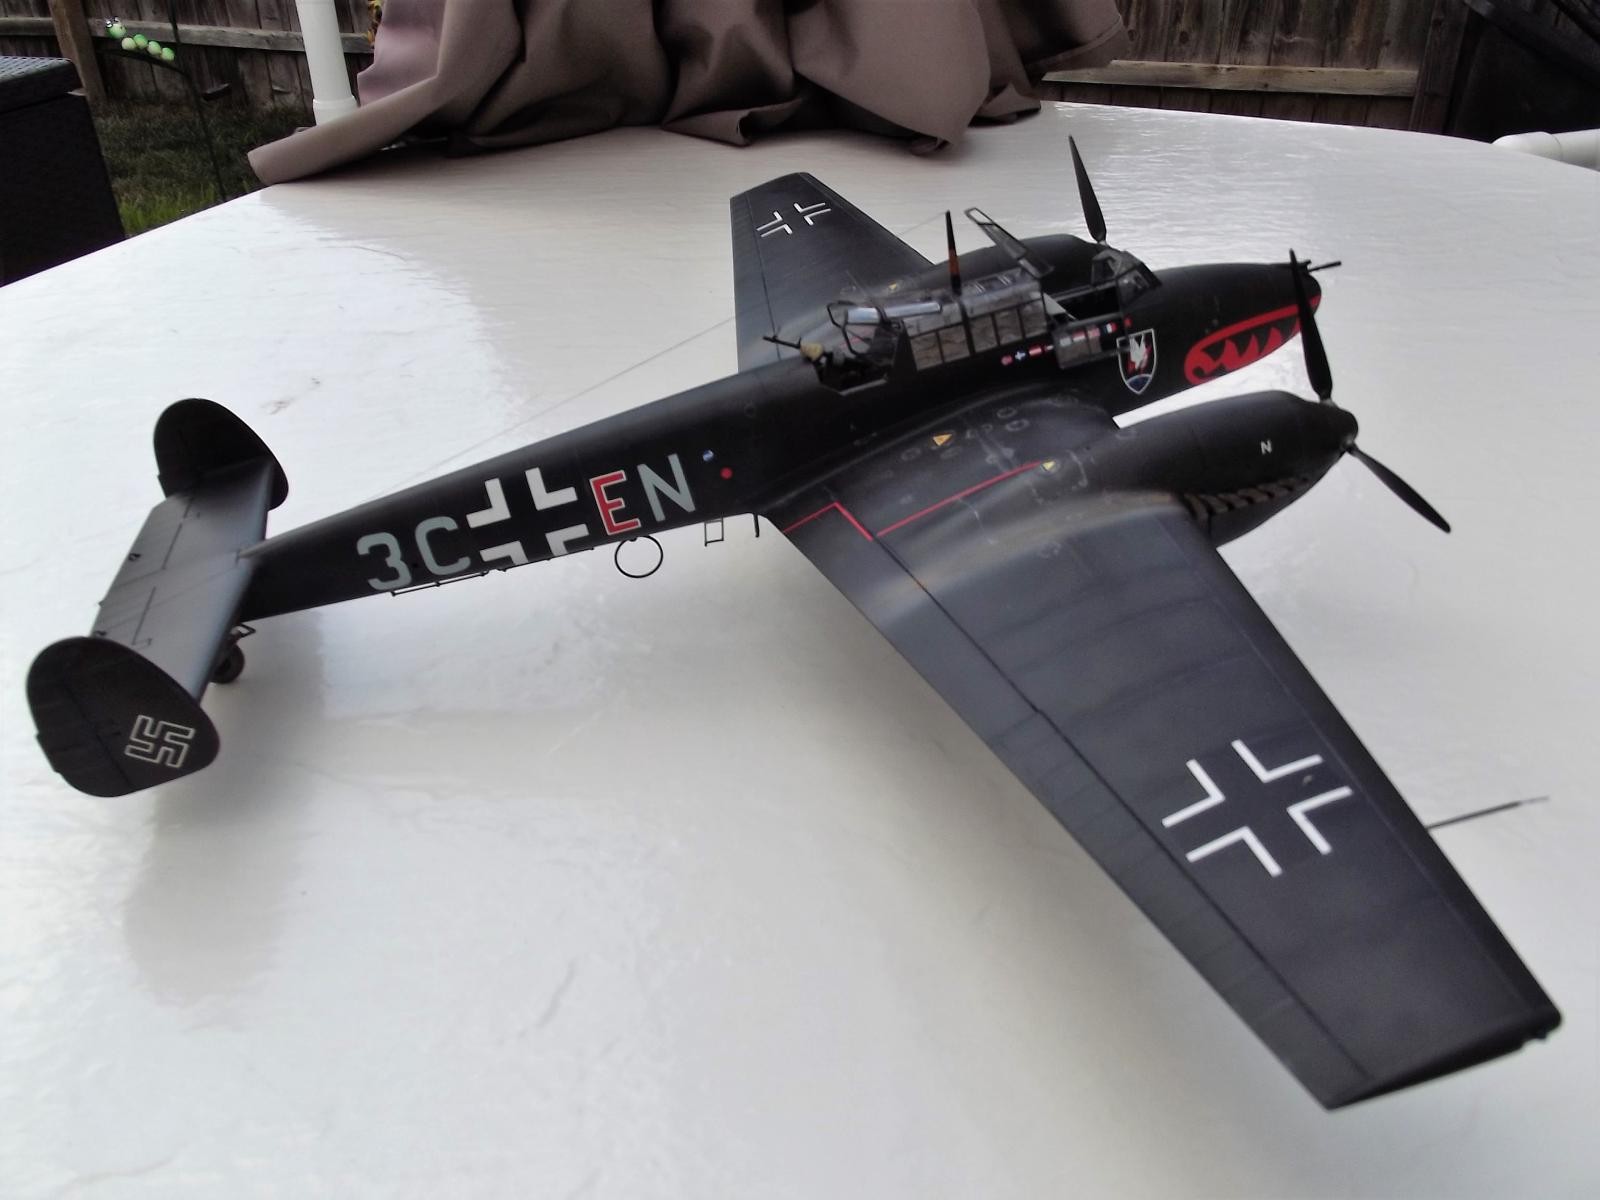
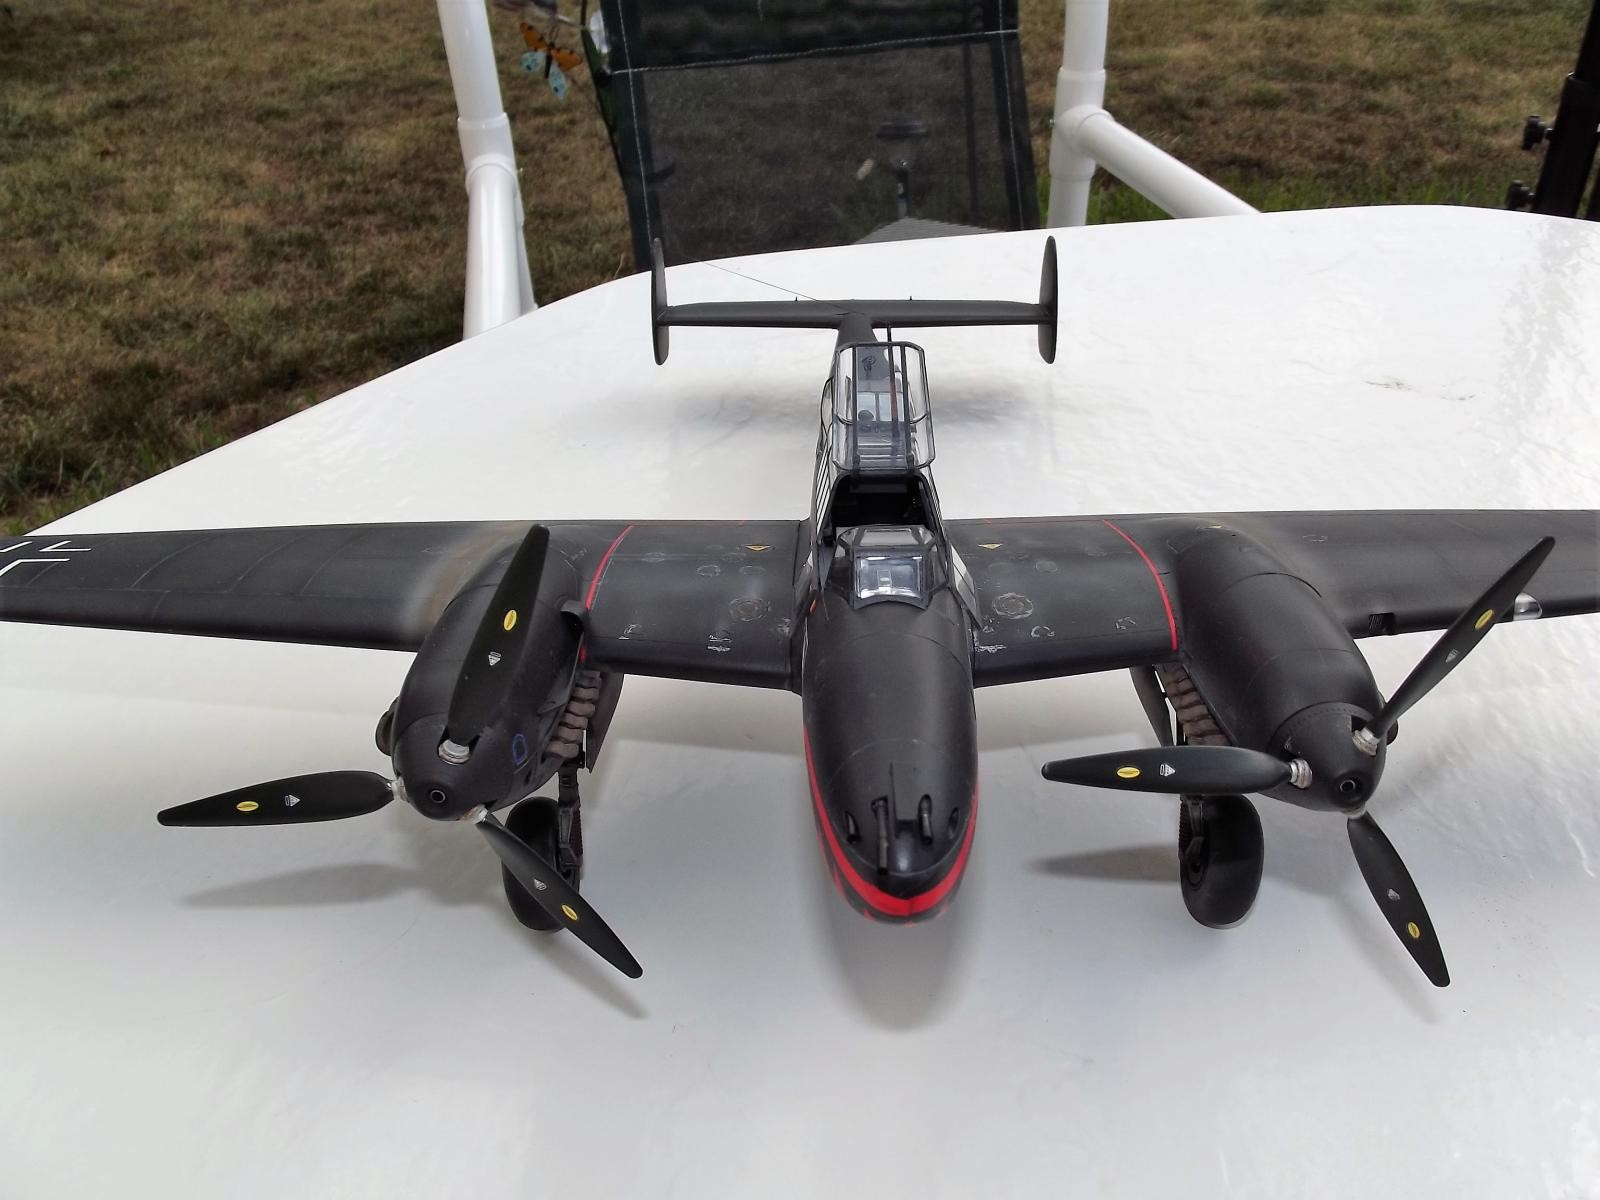
I use Tamiya paints almost exclusively on this build. The base "black" is a 50-50 mix of flat black and red-brown, which gives more of a scale effect than just plain flat black. I then weathered the finish with Nato black, Rubber black and a mix of Nato black and Buff to vary the shades, and mottled various shades of black over the airframe. After removing the marking masks, I was stunned at how well the masking worked, and I will use that technique from now on! After that, a couple of coats of Future and on to the detailing.
I used the kit decals for the remainder of the build, and I was very pleased with how well they performed. Done by Cartograf, they are very sharply printed with almost no excess carrier film. I opted for the garish shark mouth bird from 5.NJG4. As can be expected, adding each side of the mouth took careful placement, multiple applications of some Mr.Mark Softer decal solvent and judicious use of a sharp scalpel blade to make everything look right, then some touch up with some Testors enamel red. In order to highlight the panel lines, I used Tamiya's grey panel wash, going slowly on small sections at a time and wiping off the excess with a q-tip soaked in Turpenoid. After all is done I gave it a couple of coats of Tamiya Acrylic flat with a bit of flat base added, which gave me a nice satin finish. Overall I am very happy with how the finish came out...Dark and Sinister, like a hole in the darkness...
Overall I am very impressed with this kit and hopefully sometime in the future Dragon should grace us with a G-4 version! We can wish right!?


You can thank me for Dragon cleaning up their act and getting actual Subject Matter Experts to assist in the development of kits. It shows here, and in the development of their 109E series.
Why thank me? I was the one who reviewed their P-51D and said it wasn't even a good doorstop, that even if you made all the corrections it would still be wrong. Heavens! Cleaver's out to destroy the hobby! If we let him get away with it, the manufacturer's won't release any new kits for us! (You now know how it is I think the community of "muddlers" in modeling is higher than in the general population) One Large Slow Person, founder of that site, got Dragon to give him a kit to review. His review began: "I don't know anything about the P-51, but this sure looks like a nice model to me..." Dragon even had one of their bots attack me on their website, that I was ruining the hobby, because "modelers just want to be happy building models."
To this date, no one has built a Dragon P-51D that didn't look like something one scrapes off their shoe, no matter the amount of good work that's put into it (you can see my proof of that over at M2 in a second review).
What ticked me off about that kit is that a year before it was released, they showed it around as a "test shot" and were roundly criticized by everyone who knew anything about the P-51 for all the faults the kit has, to which they said "It's a test shot, we'll make changes." Which they then proceeded not to do.
It was frosting on the cake to write the review of this kit, and note the SMEs they had brought aboard, and to compliment them for having learned their lesson.
It's really not that hard to produce a good kit. You do your research and you fiddle the design in CAD where it's cheap, and take the advice of people who know what in hell they're talking about. Pretty much what everyone, including Dragon, now does more or less.
Oh yeah - very nice work on this model. A nice realistic conclusion.
Thank you...I actually built the Dragon P-51, I'll post that tommorrow. All the turds hurled at that kit are well-deserved.
Love to hear your thoughts about this, Tom...
http://www.ipmsusa.org/reviews/Kits/Aircraft/dragon_32_p51d/dragon_32_p51d.htm
Preach it, Brother Cleaver! Don't hold back! I'll take one of them T-shirts, also. Doorstop is a good one!
Outstanding build, Juan...really nice work!
Thank you. This is a fine kit, fun to build and accurate.
'Tom Cleaver is ruining our hobby'
Can we have that on an iModeler t-shirt? I remember your review on the Dragon Mustang and "I'm not that modeler" still makes me laugh.
Beautiful build, Juan - love everything about it!
t built that P-51, Tom, twice as a matter of fact. I didn't know what I was getting into and have since warned most of my modeling buddies off of that one for sure.
Juan this is an outstanding build and I have the Cyber Hobby kit in the partially built stages of getting done one day. I usually wind up hosing a good kit so it takes me a while to get something done. When I see builds such as yours then I think maybe there is hope for me yet and I buy another kit and avoid my mistakes. Thanks for sparking a fire that may turn out to be a completed build here soon.
Top shelf build for sure!
Is that the 1/48th version? I'd be curious to know how that one builds up. Thanx for your comment!
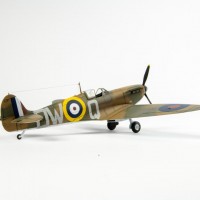
No sir, it is the 32 Cyber Hobby one.
Juan, I have the 48th 110E of theirs, and it looks really good in the box. The boxing I have has 2 engines with it. Bonus!
Beautiful, Juan!
Stunning build... I have the old Revell 1/32 110 built and sitting in the display case. It's a fairly large plane in this scale.
Yours looks fantastic... I really like it.
My first large scale kit was the Revell 1/32 Bf110G, it was a learning experience for sure!
Beautiful work. Just gorgeous.
Very nice work indeed Juan! Top notch painting and build.
It must be a big kit to store in the exhibit shelf.
Unlike your maketar experience, mine was very disappointing using a 1/48 markings. The glue wasn't very effective no matter how hard I tried paint kept creeping under the mask.
Thanx Pedro! When I was first applying the masks I thought I would need to spray a light seal coat of clear to seal in the masks. In this case I didn't and didn't have any issues, but if anything, try that and see if it helps. The effect is remarkable.
Brilliant Juan, painting things 'not quite black' is a real art and you have done a fine job! This looks brilliant!
Thanx!
🙂 ... Greetings ... 🙂 :
I do believe this is the first BF - 110 I see in this scale. Very good and nice model. In my opinion ... you did a very FINE work. The interior looks amazing . You state : "Overall I am very impressed with this kit ... "
Juan ... you should be. Thank you for sharing these images.
Thank you! I do need 110G-4 nightfighter to go with it...
Not a whole lot gets said about this kit, what with all the hoopla surrounding the Excellent Eduard offerings...I'm happy I have a forum to share this one with! Thanx!
Juan my friend, if you keep building models as nice as this, we might make a modeler out of you yet..;-).
Looking forward to seeing it in the flesh soon. Take care
I try, Rick, I try...still working on my armor skills...
I try, Rick, I try...still working up my armor weathering skills...
Juan, painting in black and making it look like it wasn't just covered in shoe polish is an art in itself. You've done a fine job here. Very convincing scheme and very eye catching. Well done !
Excellent - as others have already mentioned, you did an incredible job making "black" look interesting! Now, if I can only replicate in 1/72...!
Wow! really nice! Looks very menacing in this scheme.
Juan, you continue to put out builds at an astounding quality. Great job as usual. Maybe we'll see you at a "Southside Indy" meeting again in the near future.
Yea, looking forward to it, that darn "work" thing just kinda gets in the way...
Juan, outstanding build! The black paintwork is amazing.
Beautiful rendition of this iconic aircraft, it looks really menacing, just as a night fighter should.