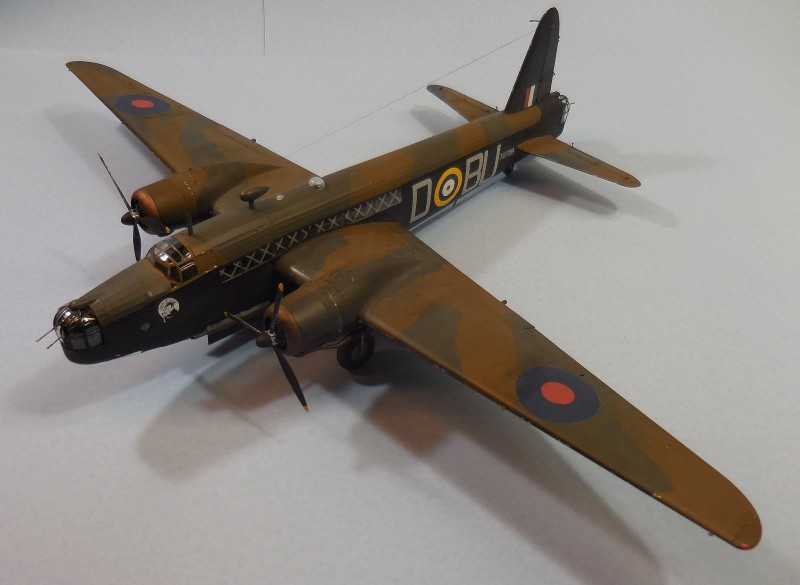
Trumpeter 1:48 Scale, Vickers ‘Wellington’ Mk.1c
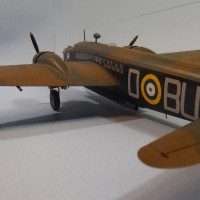
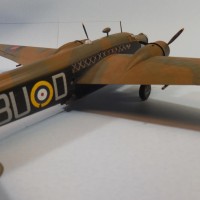
Finally calling this one done. Great model, lots of fun to build, and thoroughly enjoyed it.
I got the kit at a show up in Poughkeepsie, NY, off a table set up by the sponsoring clubs members. Wasn't to familiar with the 'Wellington', but the price was right, and I thought that, if nothing else, I'd resell it. How ever, I am a builder, so the reselling thing was just a small justification for buying another model... (Don't judge me, we all do that!)
I found the kit to very nicely detailed, and built straight from the box as I did here, builds into a very nice model. Large too. She's a big one, and MUCH bigger than I thought she would be.
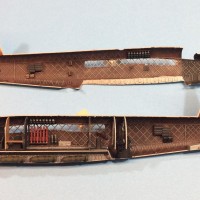
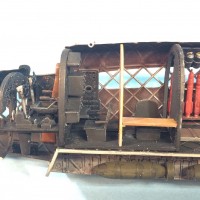
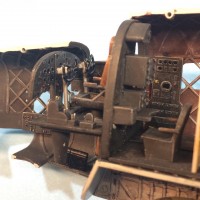
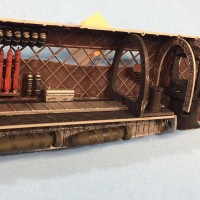
Interior detail is very nice. The cockpit and forward areas well represented. This will make the OOB guys and the super detail guys happy because it serves both well. OOB guys will like it because it has a lot of detail, and the detail folks will like it because it gives them a good place to start. Lots of room to work with.
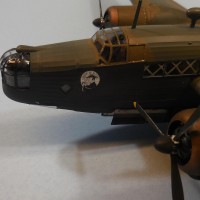
The biggest obstacle, was trying to keep all the various bulkheads and lower turret lined up and close the fuselage. That was a battle. Also, please note, that you can NOT add the forward and rear turrets after the fuselage has been joined. These must go in when the instructions say they do, or else... This will make for some rather creative masking later on. I fully constructed, and masked and painted both turrets, before I installed them. I got rid of the kits MG barrels as they were a shoddy representation to begin with, using a set of Quickboost barrels, which were installed after the kit was finished. They look MUCH better.
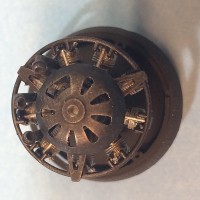
Engines are very well done, and it's a shame you can't see more of them. Moving to the wings and tail planes, options are given for posable flight control surfaces. I decided to go with locked, and installed them as such. You can pose them any way you desire. There were no issues with how the wings and tail planes aligned, and the use of putty on them was nil. They went on without a hitch. Biggest seam work was on the fuselage, but it was not horrific, inspite of the 'FUN I had getting the halves to close.
One thing I was not a fan of, are rubber tires. Ugh! Not a fan of the metal gear legs either. However I have to say they are very sturdy, and she is a pretty big, and hefty model, so I have to say I am happy with that. Landing gear must also be installed BEFORE closing the wing halves. Another bit of creative masking will take place there as well... 😉 plus there are eight (8) landing gear doors, and the little rear ones are easily broken. Don't ask...
Finally the bomb bay. Trumpeter gives you the option of either a closed or open bomb bay. they give a one piece cover that represents a closed up ship, OR thirty (30) count em' thirty separate bomb bay doors, with explicit instructions on their order of installation. I went with the open bomb bay, because, after all, 'Wimpy' was a bomber, so why not show her off as such, right? And by the way, I did follow instructions and put the doors on in the order that was recommended.
I used Mr Paint, (MRP) for the topside camo colors of Dark Earth and Dark Green. Tamiya Semi Gloss Black was for the lower parts. Interior was painted using Tamiya Flat Black, and detailed with Model Master Enamels.
Masking the camo was done using 'Silly Putty', and the were no adverse reactions from the paint. I had read, that sometimes 'Silly Putty' will react with some brands of paint. As a safety, I would test it first on a old junk kit to make sure it won't damage your model. Better safe than angry.
Marking were by Extracal, and were for a 'Wellington' from No 214 Squadron, based at RAF Stradishall. It was flown by Sgt. Geoffry Cole (DFC) on 7 November, 1940, for a raid against the Krupp Steel Works at Essen, Germany. Sgt Cole, would rise through the ranks, to become Wing Commander, and the nose art on his 'Wimpy' was cut from the aircraft, and hangs in his study.
Weathering was the usual, thinned oils and pastels. Added the stretched sprue antenne aerial, and the aforementioned Quickboost barrels and she is FINI!
Thanks for reading this loooong narrative, and a very Happy and Health New Year to everyone!

Really nice job on that one Freddy, she looks good. Nice write up about the plus and minus of this particular kit as well. And 30 bomb bay doors! You're a better modeler than me Fred, I'd would have closed her up.
Fun lesser-known Wellington fact: in fact, you can't close up the bomb bay unless the airplane is in flight (or taking off) because the bomb doors fall open and hang there while sitting on the ground.
I did NOT know that Tom. As a matter of fact I was close to closing it up, and decided to show the plane for what she was designed to do. Most builds I have researched online, show 'Wimpy' on the ground with the bomb bay closed up.
I did use that part for a giant masking plate, so it was useful. 😉
Thanks again for the info! Happy New Year!
Thanks Tom,
I would like to say I planned that open bomb bay because I knew what TC had mentioned...(I did not)... I just wanted to show her for what she was designed for. Thanks for the "Atta Boy", and have a Happy New Year!
stunning work
Great narrative, it's written in a chronological format that any modeler can easily follow and understand while giving some good tips on construction. With a little history. These planes always seemed interesting with their fabric covered surfaces and their frame work. I believe some of the fuselage being used in a museum example was taken from the back yard of some chap who was using it as a chicken coop a rather sad ending made good by its preservation.
Two thumbs up.
A great job!
Excellent posting Freddy... a great model with tons of internal details on this one. I liked reading the article too.
This would have been a great one to post in the 100 Years of the RAF Group Build...
"liked"
Thank you, Lewis
It can always be moved if the mods want to move it, I have no issue with that. I already have two in the group build as it is so I didn't want to post too much. Thanks for the kind words, and have a Happy New Year!
What a wonderful build description you present us here Frederick! I must say the model does look very good OOB, and that puzzled me because I recall reading some less than good reviews about Trumpeters Wellington... judging by the photos and your narrative I can’t see why!
Great model indeed, a solid build and a very nice paint work overall. The only thing that seems odd are the bombs, because those darker blotches look like some unfinished weathering, Thanks for sharing and have a happy new year
Thank you Pedro, for your observation. At first I wasn't sure what you meant, and after looking over the pictures, you are correct. Those blotches are thinned paint in the panel lines. before I buttoned her up, i drybrushed all the ordnance with OD, and then a lightened version of OD , to enhance all the raised spots. Sufice to say, you don't see those blotches any more! 😉 Happy New Year, Pedro!
Un trabajo excepcional ! muy bien pintado y acabado.Bonita forma de cerrar un año.Feliz año nuevo.
A great-looking build. I have this same kit, so nice to see someone tread the ground I face sometime soon!