1:48 Meng P-51D “Da Quake”
This is Meng's most excellent 1:48 P-51D. I'm sure most of you have read how it is possible (but not quite) to build this kit without glue. It's true, but believe me, this is no beginner's model. Nor is it a bang it out build. Fun? Absolutely! The precise fit and level of wing and fuselage detail is truly amazing. Meng has upped the ante here for sure.
Some folks are upset about this kit having an over abundance of rivets. In reality, all Mustangs had a zillion but these were usually puttied over and the entire plane sprayed with aluminum paint right out of the factory. It's up to you if you want to break out the filler and sandpaper. Too much trouble says I, and let the rivets be. I toned them down a tad by spraying this steed with a couple of coats of Alclad II grey primer followed by Alclad's RAF speed silver, and aluminum101 and Tamiya RAF dark green. “Da Quake” decals came from EagleCals sheet #141. I sealed everything with a few mists of Alclad Klear Kote flat and matte.
Despite all the effort Meng put into this kit's impressive detail finesse, they dropped the ball on the wheels and tires. The tires are molded as single piece treaded donuts but there's a raised seam right down the middle that is impossible to remove without considerable detail loss. I intended to replace them with Barracuda's more accurate diamond tread and wheel detail resin set. After I got them cleaned up, painted and ready to go, I realized these guys don't fit this kit's landing gear without more modification then I cared to do. I ended up using Meng's so-so looking wheels after all. Next time around, I will go back to the Barracuda set and either drill out the resin inner hubs to fit or carefully cut off the hubs on the kit's main gears and super glue the resin wheels in place.
This kit has other irritating but minor issues caused by Meng's over engineering as already noted by many online reviews. The worst being the installation of the rear tail wheel and front landing gear prior to painting, as the instructions would have you do. Guaranteed to break off. Your choice is to cut the tail strut off and attempt to re-attach it later, or you can walk the plank as I did and follow Meng's instructions. Much to my surprise and thanks to loads of caution, I managed to make it all the way to the finish line without snapping it off. An all time first! I didn't follow the instructions and left the main gear off until the end.
Final installation of the landing gear was easier than I expected thanks to Brett Green's build tips over at Hyperscale.com. Note that the main wing flaps can only be installed in the down position, unless you want to deal with more minor surgery. The antenna is another breakable item because Meng has you install it from underneath, through a hole in the fuselage piece prior to painting and lots more handling. Just cut it off at the base and attach topside at the end of the build. Don't forget to get rid of that no longer used navigation light between the antenna base and the tail.
I made my own rear view mirror and attached it to the front windshield and pronounced it finished.
Take particular care removing all parts from the finicky sprue attachments or you will have to a lot of extra sanding and cleanup to do. Read up on this kit and do some homework before starting construction and you'll have a headache free, fun build.
Meng hit the bullseye with this great fitting and very accurate looking 1:48 P-51D. I really enjoyed building this.
Meanwhile… that new tool Airfix Mustang is chomping at the bit on the shelf next to my workspace. Looks superb in the box. Stay tuned.
Thanks for looking.
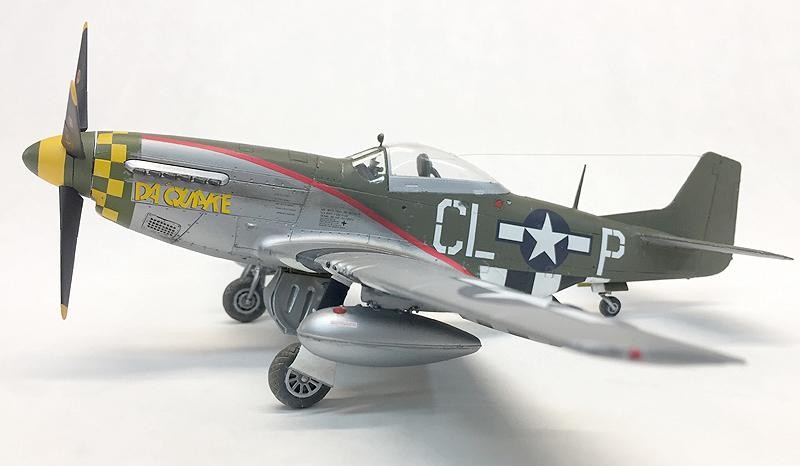
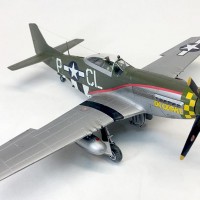
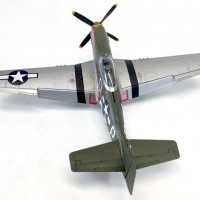
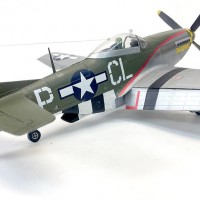


Nice work on this.
A minor point of contention: when the factory stopped painting P-51s with camouflage paint, the only part of the airframe that was painted silver was the puttied wing. P-51s were not painted overall aluminum lacquer until some ANG airplanes were in need of corrosion control just before the outbreak of the Korean War. Even then, not all airframes were painted. Check photos before you decide what you're going to do.
I think you'll find the Airfix kit won't have the hassles you pointed out with this one.
Thanks Tom for the corrected info.
really beautiful...always loved miss marilyn too...fine fine work
Beautiful build! I'll be honest, the 'snap together' feature turned me off to this kit, still jaded by the 80's renditions. They really hit the mark...and a great build helps as well. Interesting to note that this airframe still survives and was listed as under restoration in 2006 as G-QUAKE. It was "crashed" on the beach near Bordeaux and recovered in 1980. Great work! The photo was taken from Mustangsmustangs.com
1 attached image. Click to enlarge.
Thanks for the compliment. Check this site out for more photos of Da Quake wreckage on the beach right after it happened. Looks like it was quite the hit with the locals who are swarming all over it. Check this site out and scroll down a bit to find them:
http://www.sim-outhouse.com/sohforums/showthread.php/58164-History-and-Details-of-the-P-51D-5-NA-(A-Flight-Sim-Project)/page2
I used to be a real nerd about following Mustang restorations and I always tried to follow this one. The sim-outhouse photos are the most I've seen of this in years. What an incredible recovery, thank you for the link.
Nice build Eric.
I really enjoyed this article, Eric. Nicely written from the heart and informative and funny. The Mustang herself is a joy to look at. Excellent work in my opinion.
'liked'
thanks!
Great looking finish. And a great scheme I hadn't seen before - mostly OD fuse with silver wings - very attractive.
glad you liked it.
One of the prettiest P-51D's I've seen. Really nice.
Great work, Eric, and many thanks for the construction and reference tips. Did the decal sheet come with a template for the complex trim line, or how did you get it to match the decal so neatly? Congratulations on this outstanding build of a different but very good Mustang kit!
Sorry for the delay getting back to you Chris @brummbaer. Yes, the EagleCals decal sheet included the red trim line but once I got it in place I had to touch it up with some matching paint. Eduard also produces a decal sheet with these very markings. Much as I liked this Meng kit, Eduard Mustangs are the only way to go. Thanks for the compliments.