MPM’s 1/48 He177 – Heinkel’s ‘Griffon’
Well, another plus side to having time on my hands at present is being able to post (perhaps too many!) more of my builds. This one was completed about a year and a half ago and I certainly made a better job of it this time round than the first attempt, about 16/17 years ago. When I think back, it was a rather large model with decent detail, but rather difficult to get things to line up; the MGs were (and still are) basically lengths of plastic that bear little resemblance to any weapon known to man, and the titanic struggle with the fit of the canopies was a major let down in the way the model looked on completion. I remember still having it in my collection when I moved house and I think it was one of the first casualties in my first cull, despite buying four display cabinets to properly house my collection for the first time ever - I had little time for large models that took up space and didn't really look good.
More recently, when I bought this kit, I got it for a bargain along with four other kits in a small toy shop that was a veritable walk down memory lane for me... they had rather good quality survivors from the 1960s die cast cars and trucks I had as a young boy, and great train sets which reminded me of my then neighbour, who was fascinated with railways and had an extremely impressive layout that was so large, he could only accommodate it in the cellar of his house. Needless to say, and quite understandably, I was allowed to go and marvel at the set, but not to touch or operate it... he was wise beyond his years, my neighbour... :-).
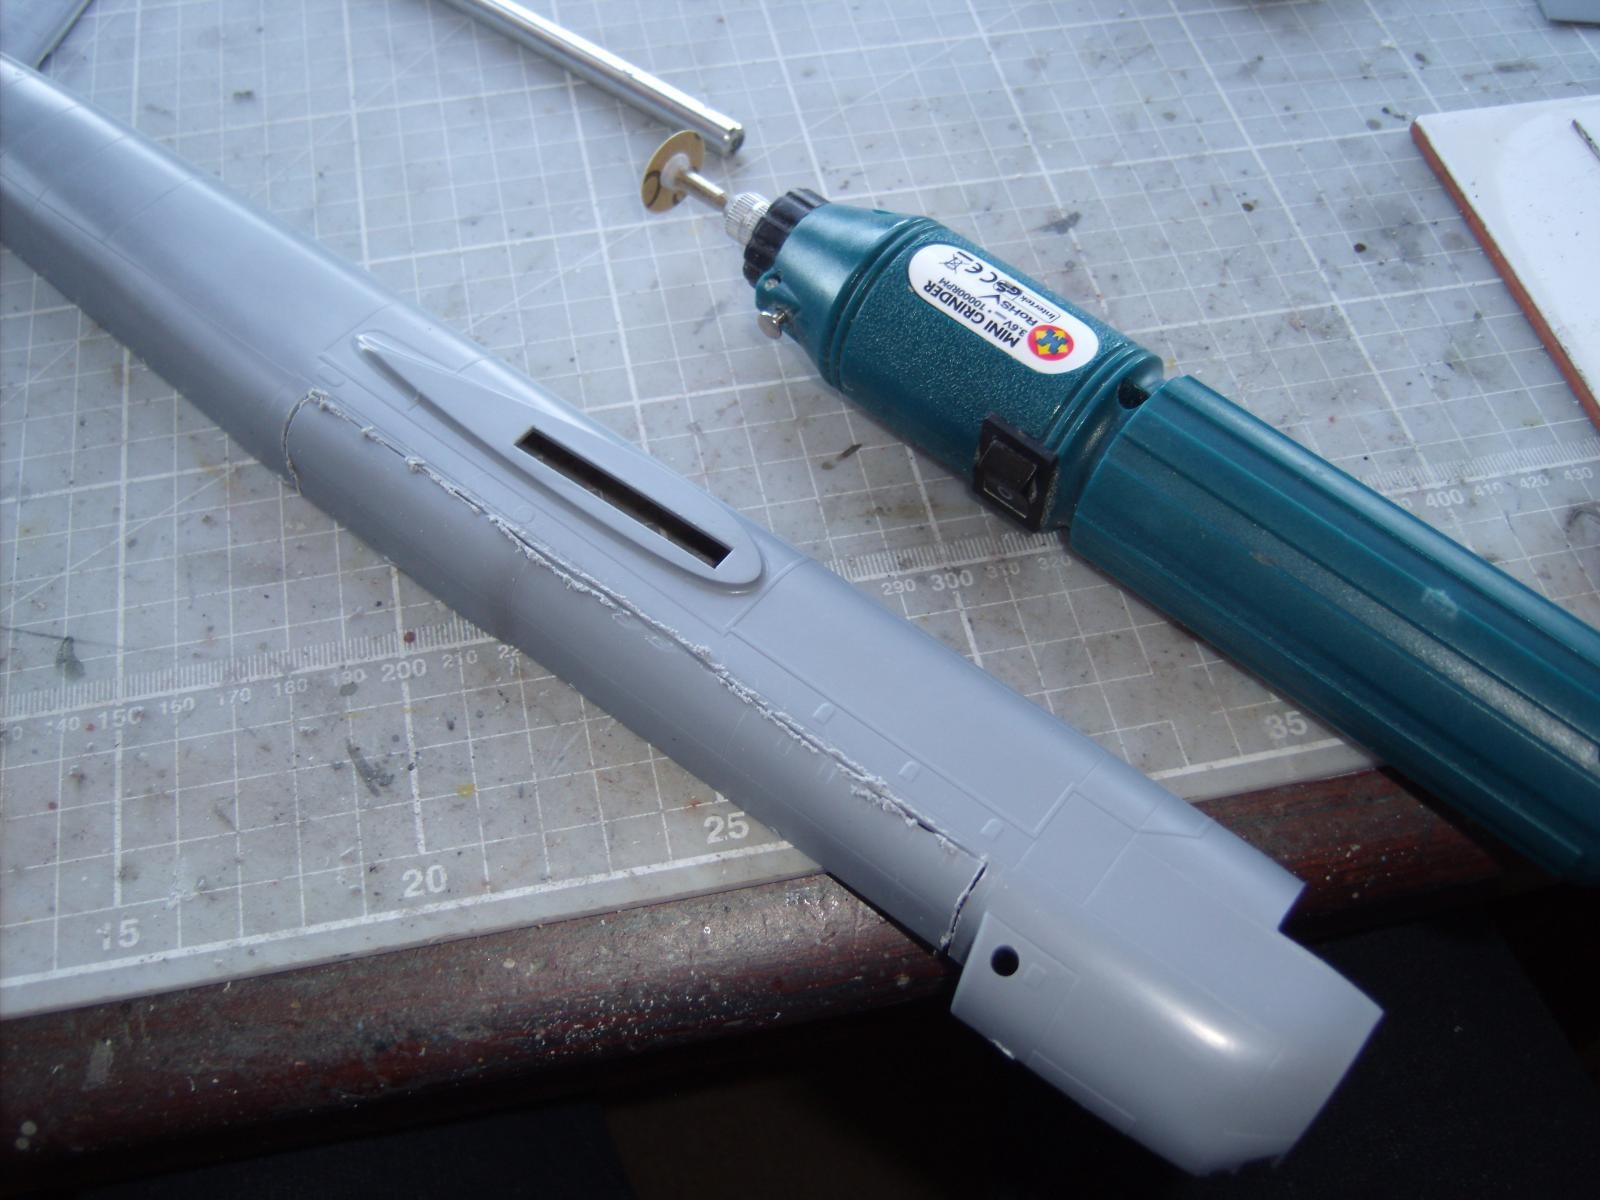
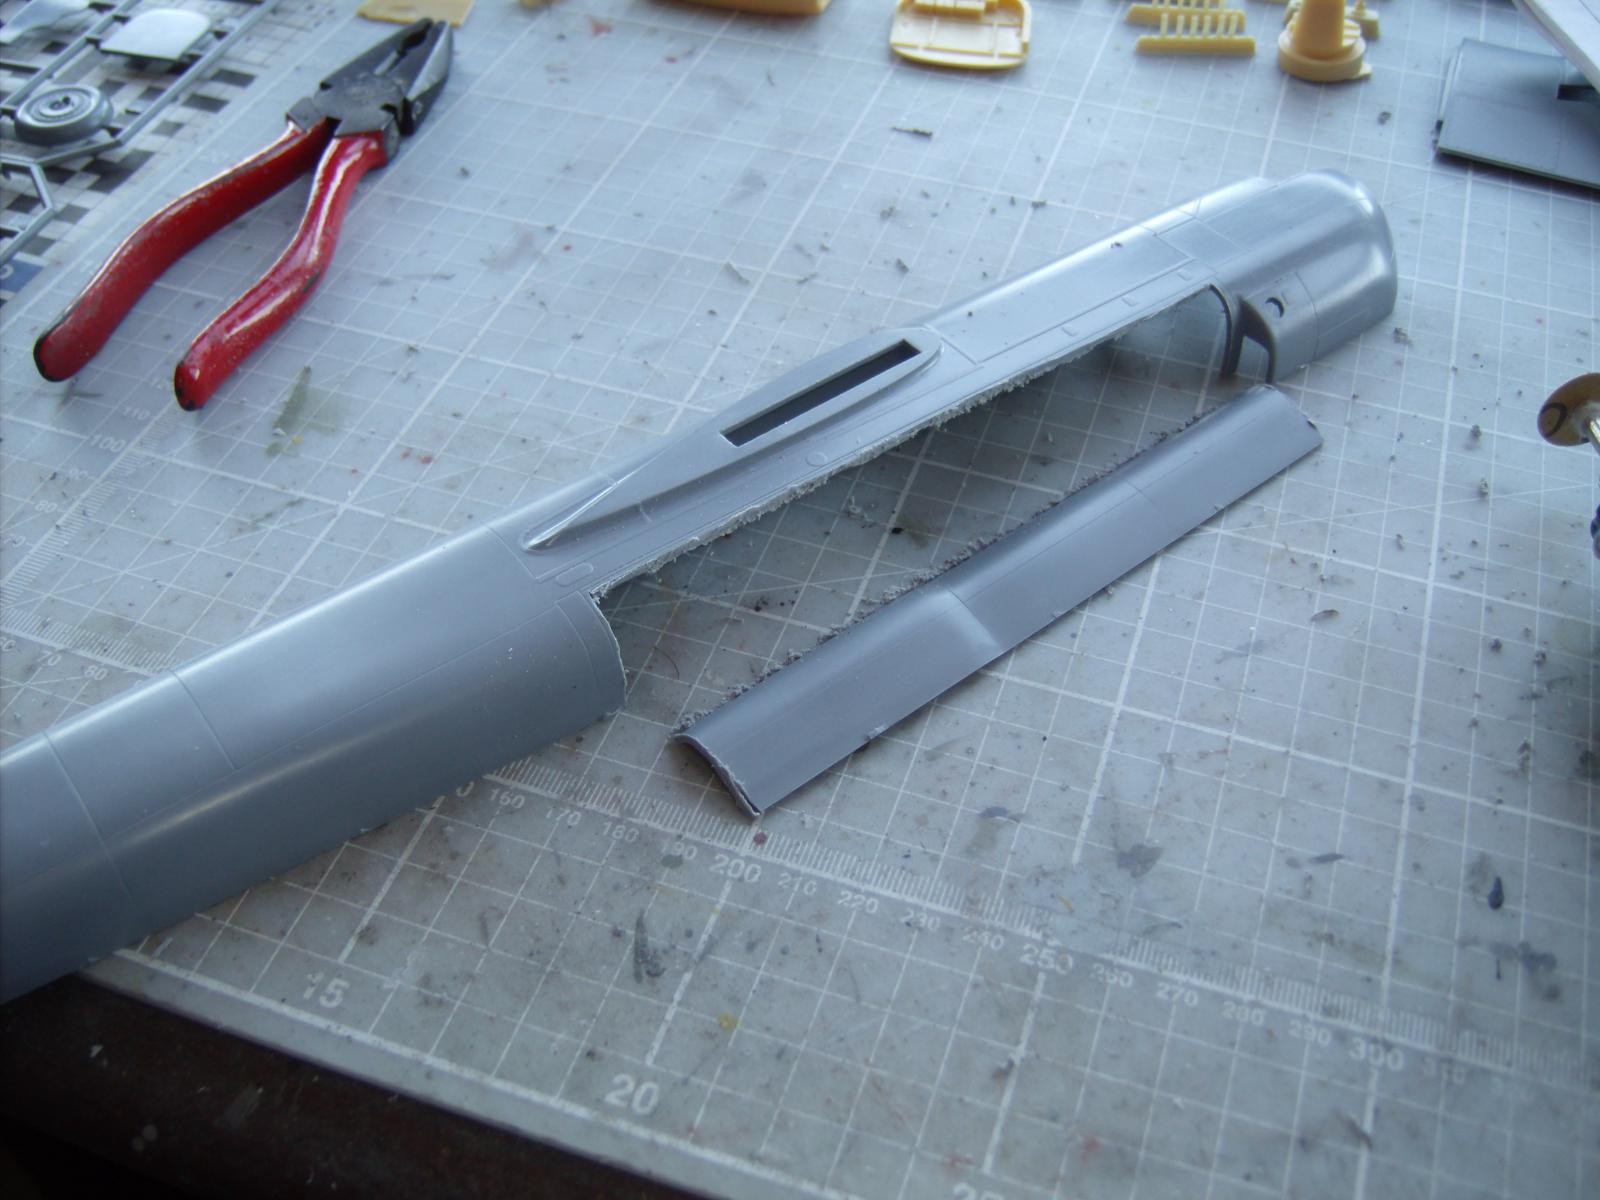
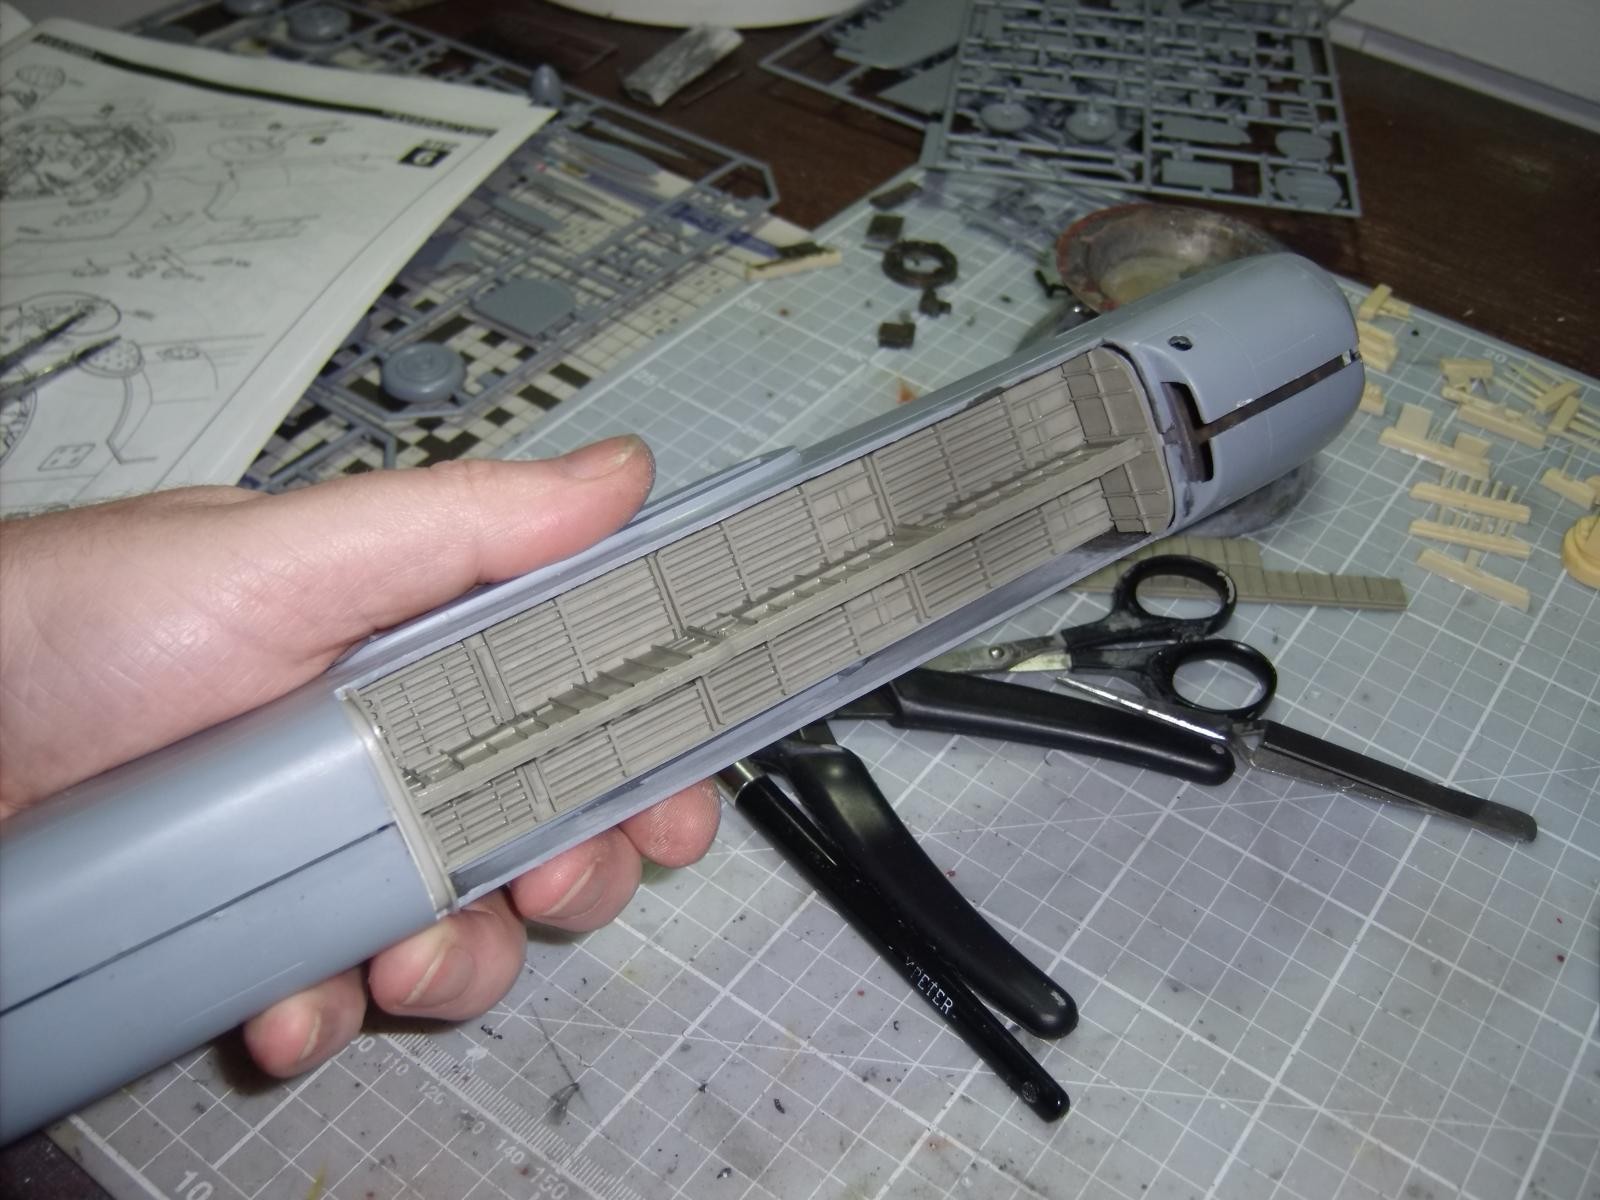
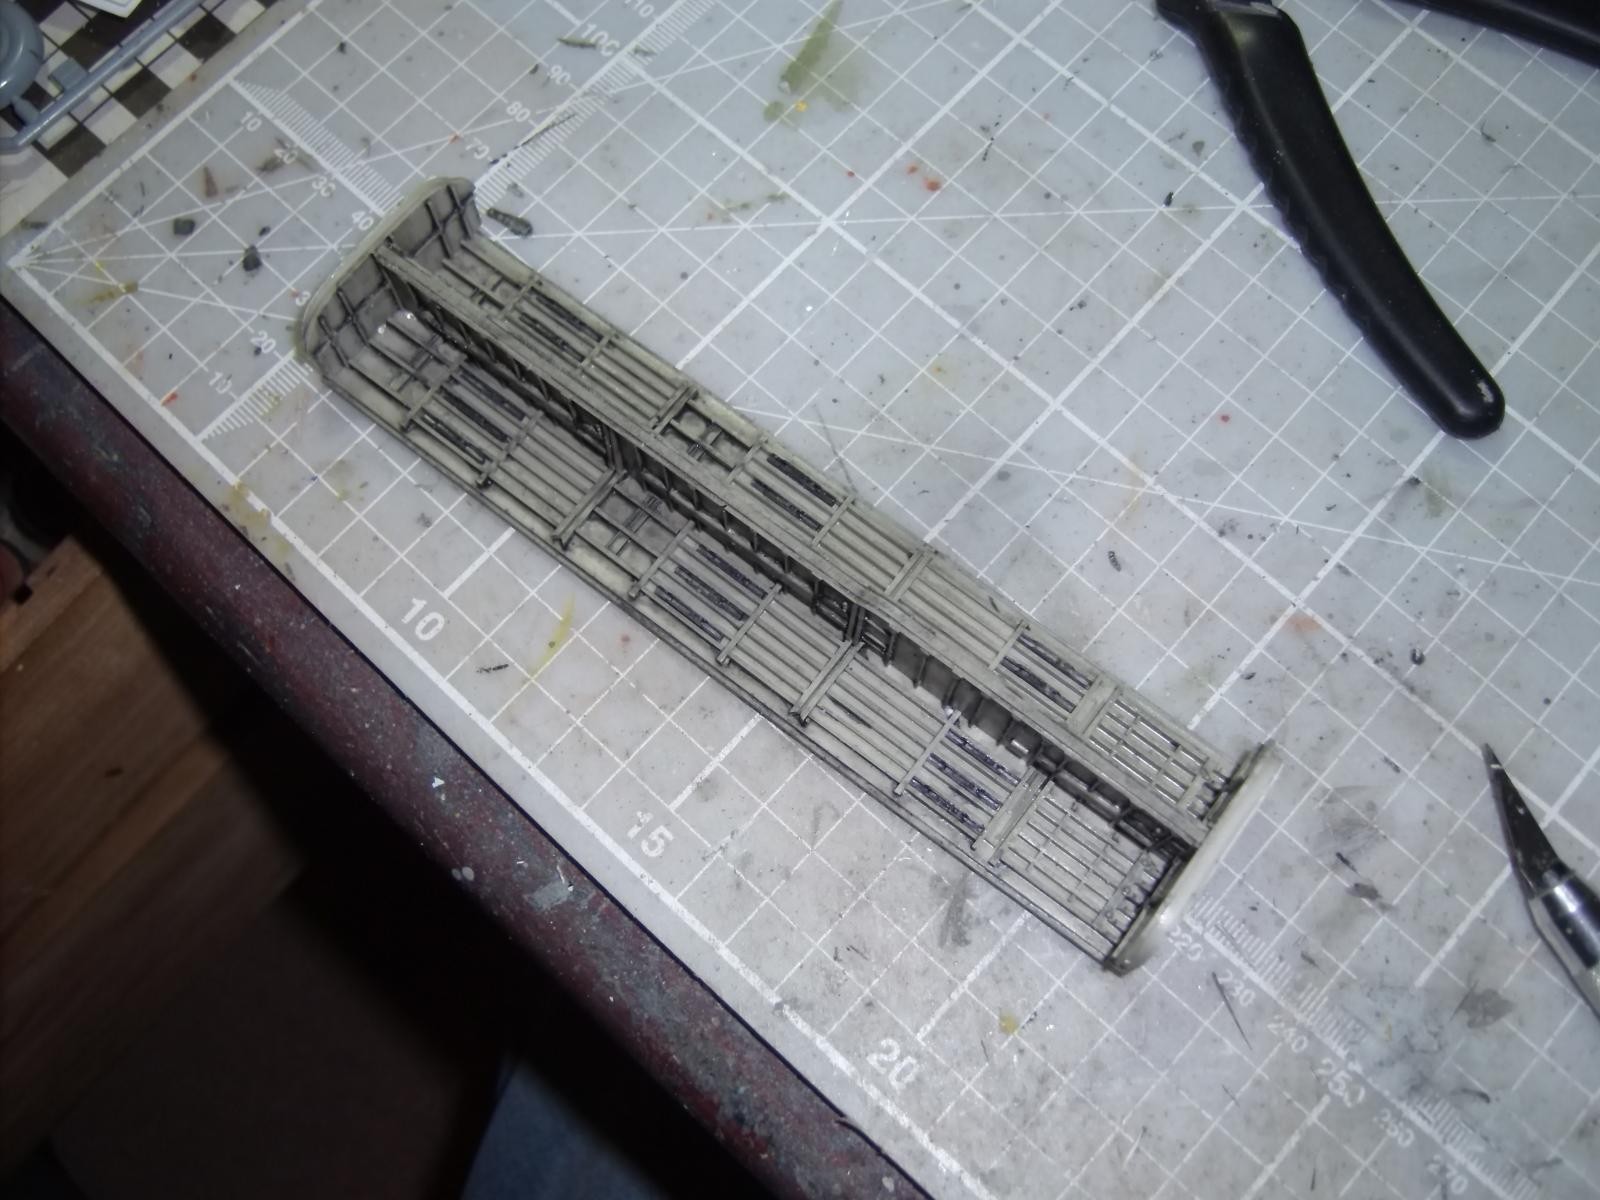
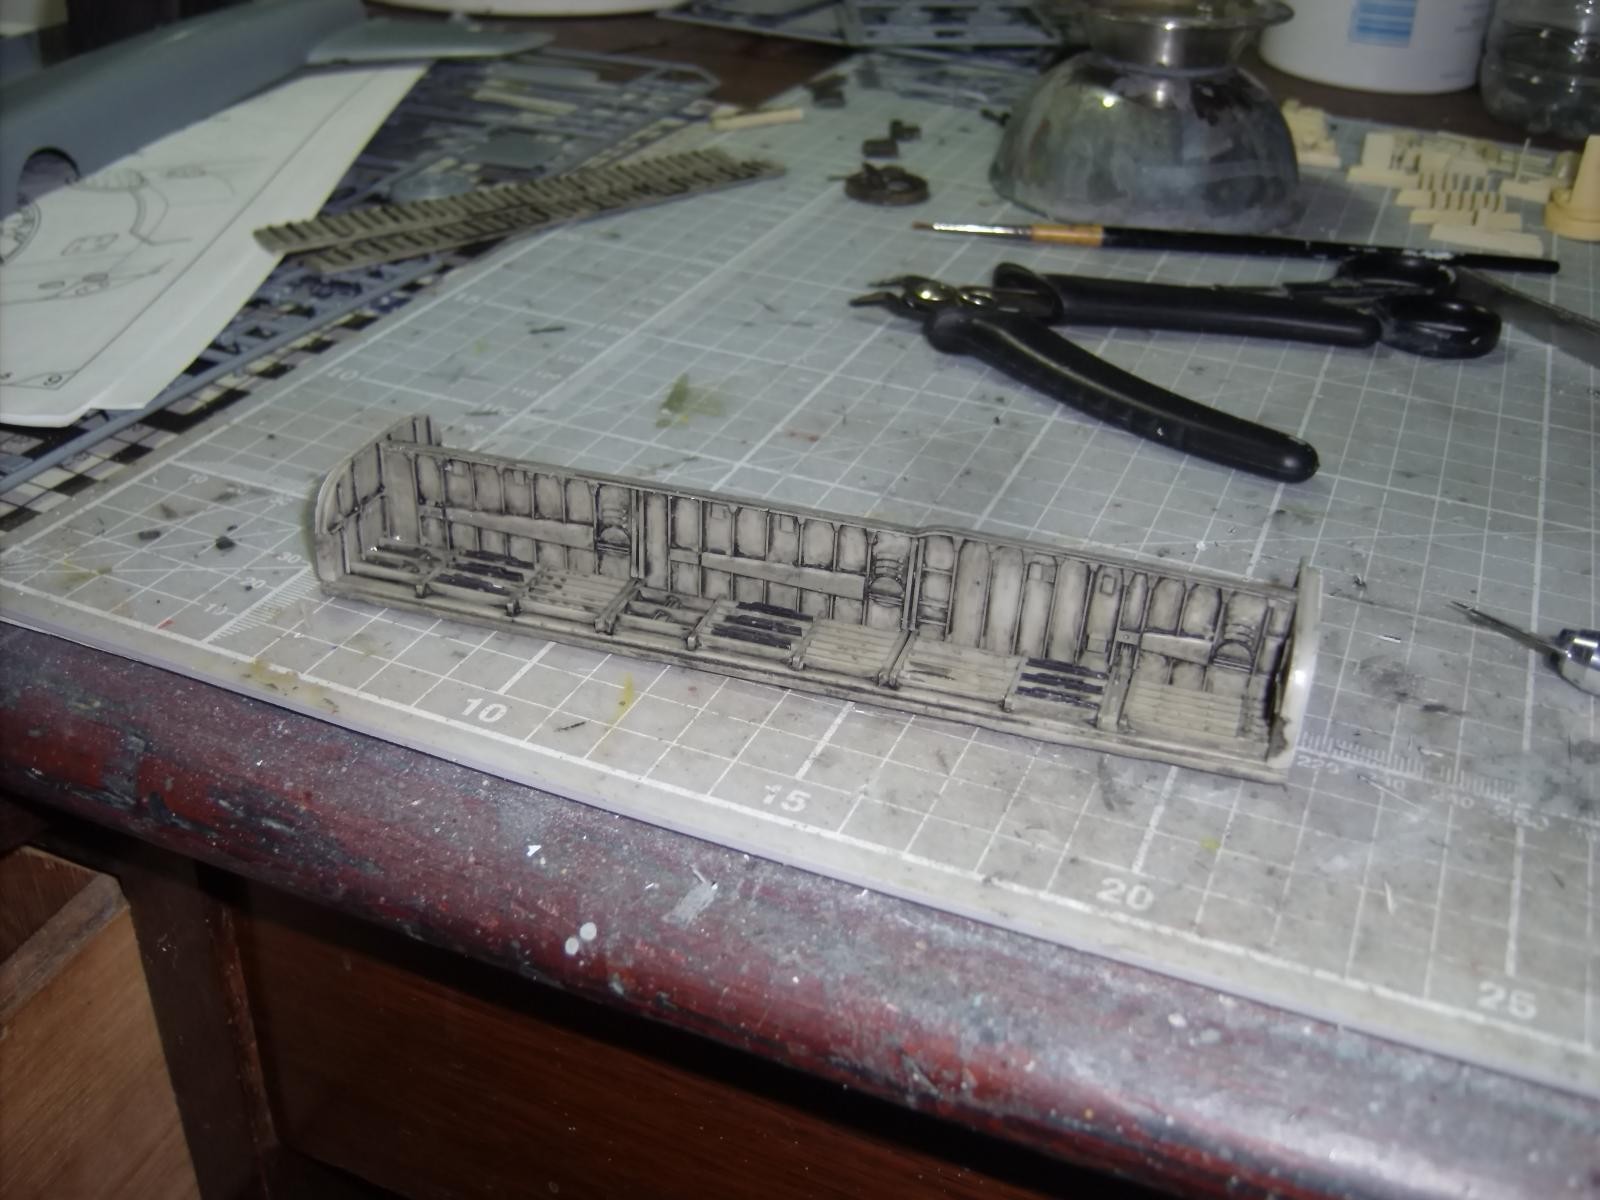
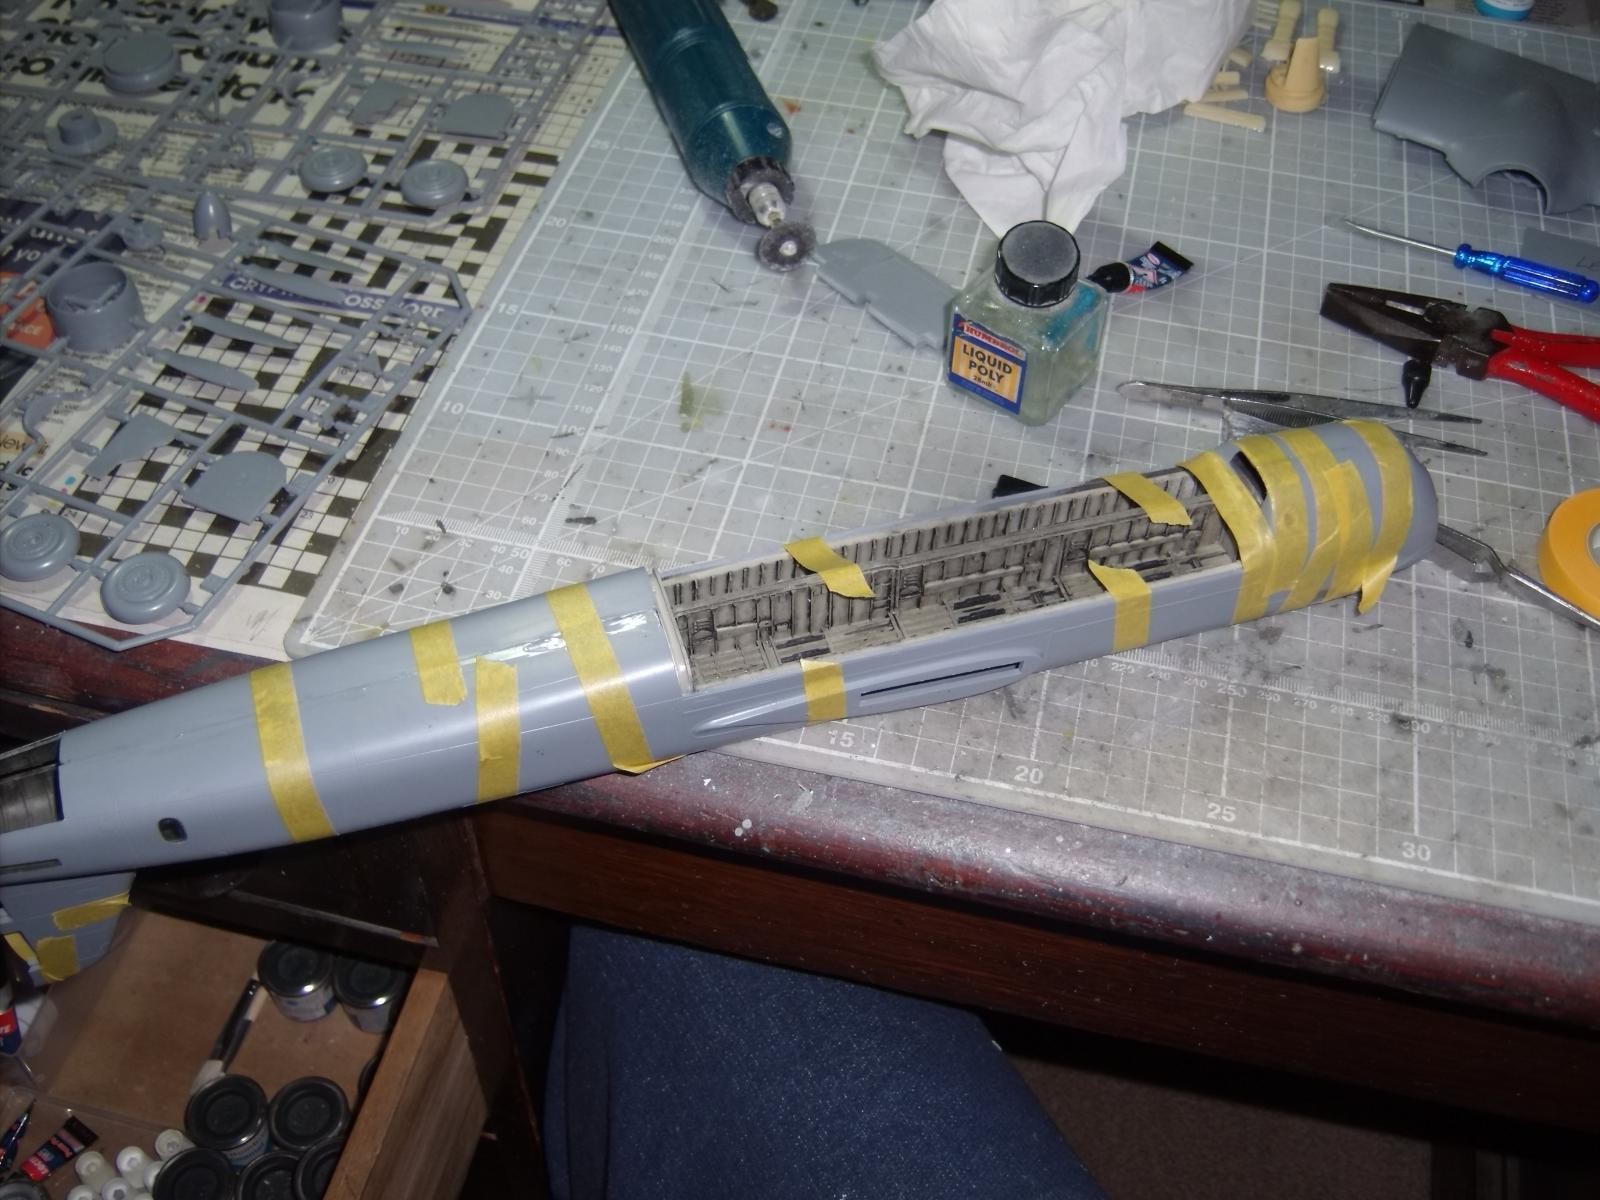
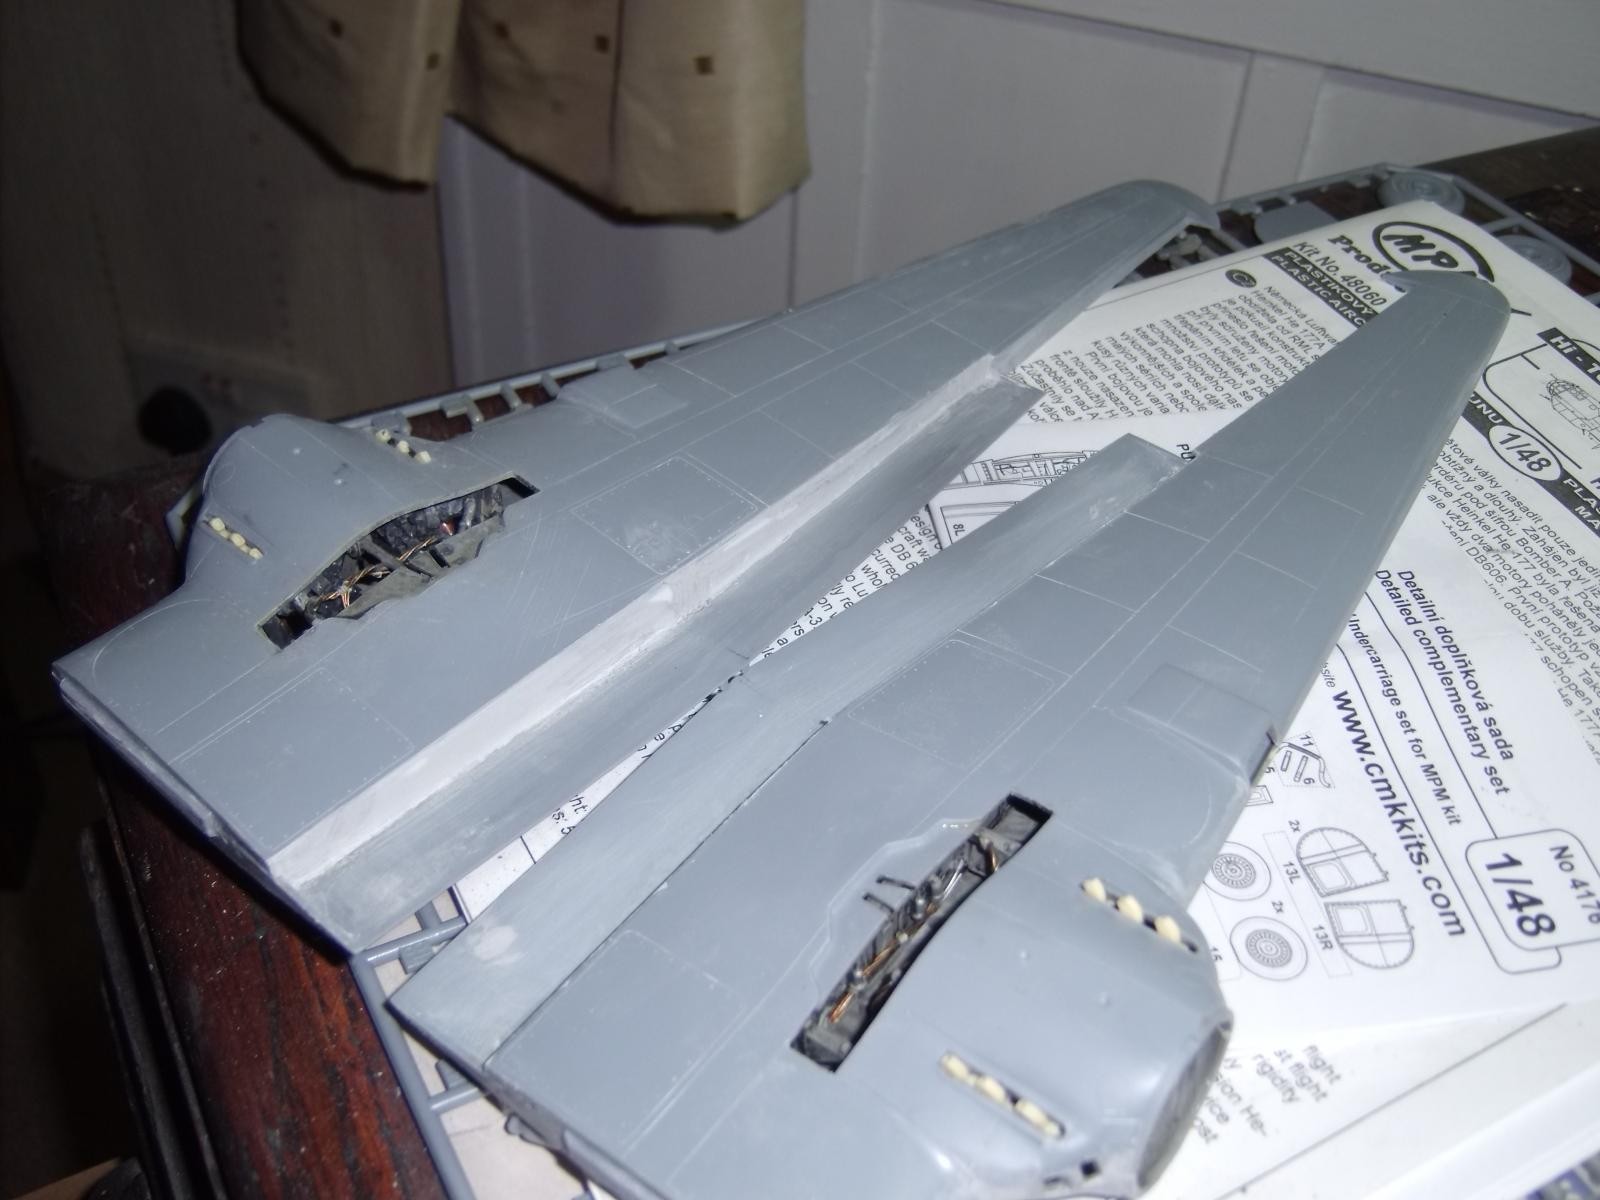
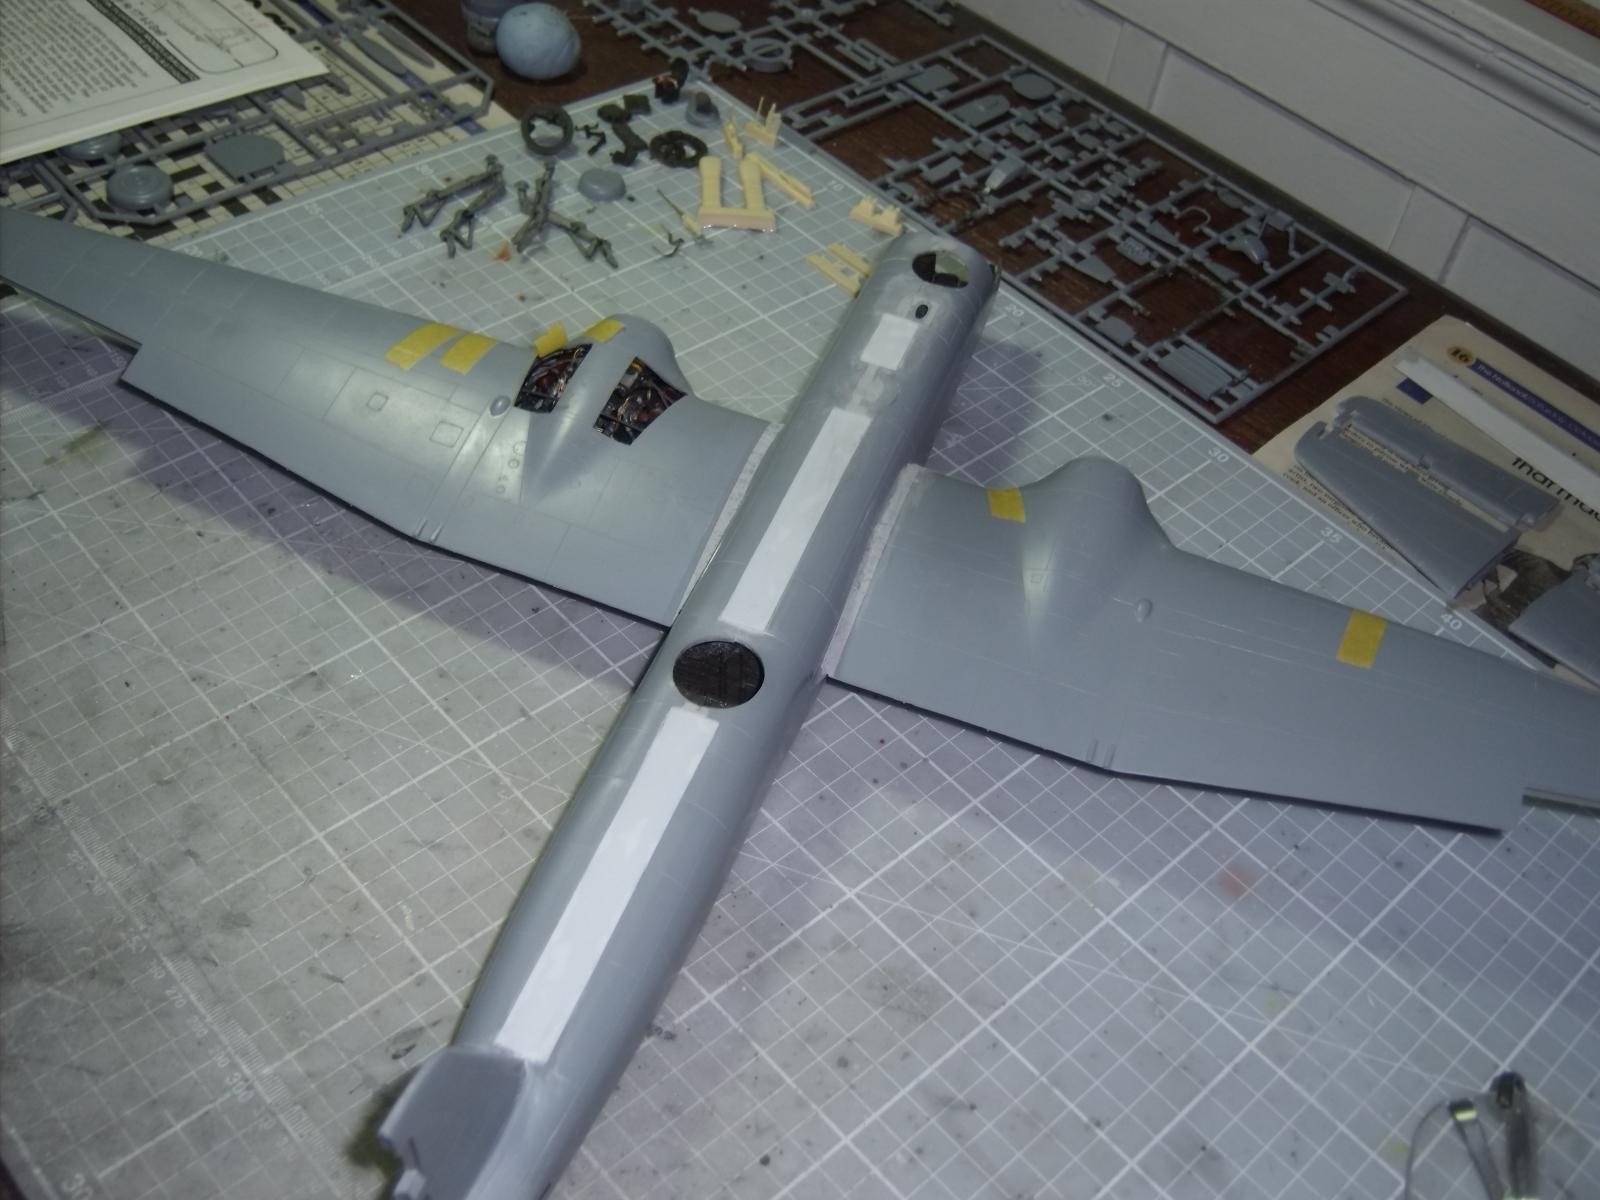
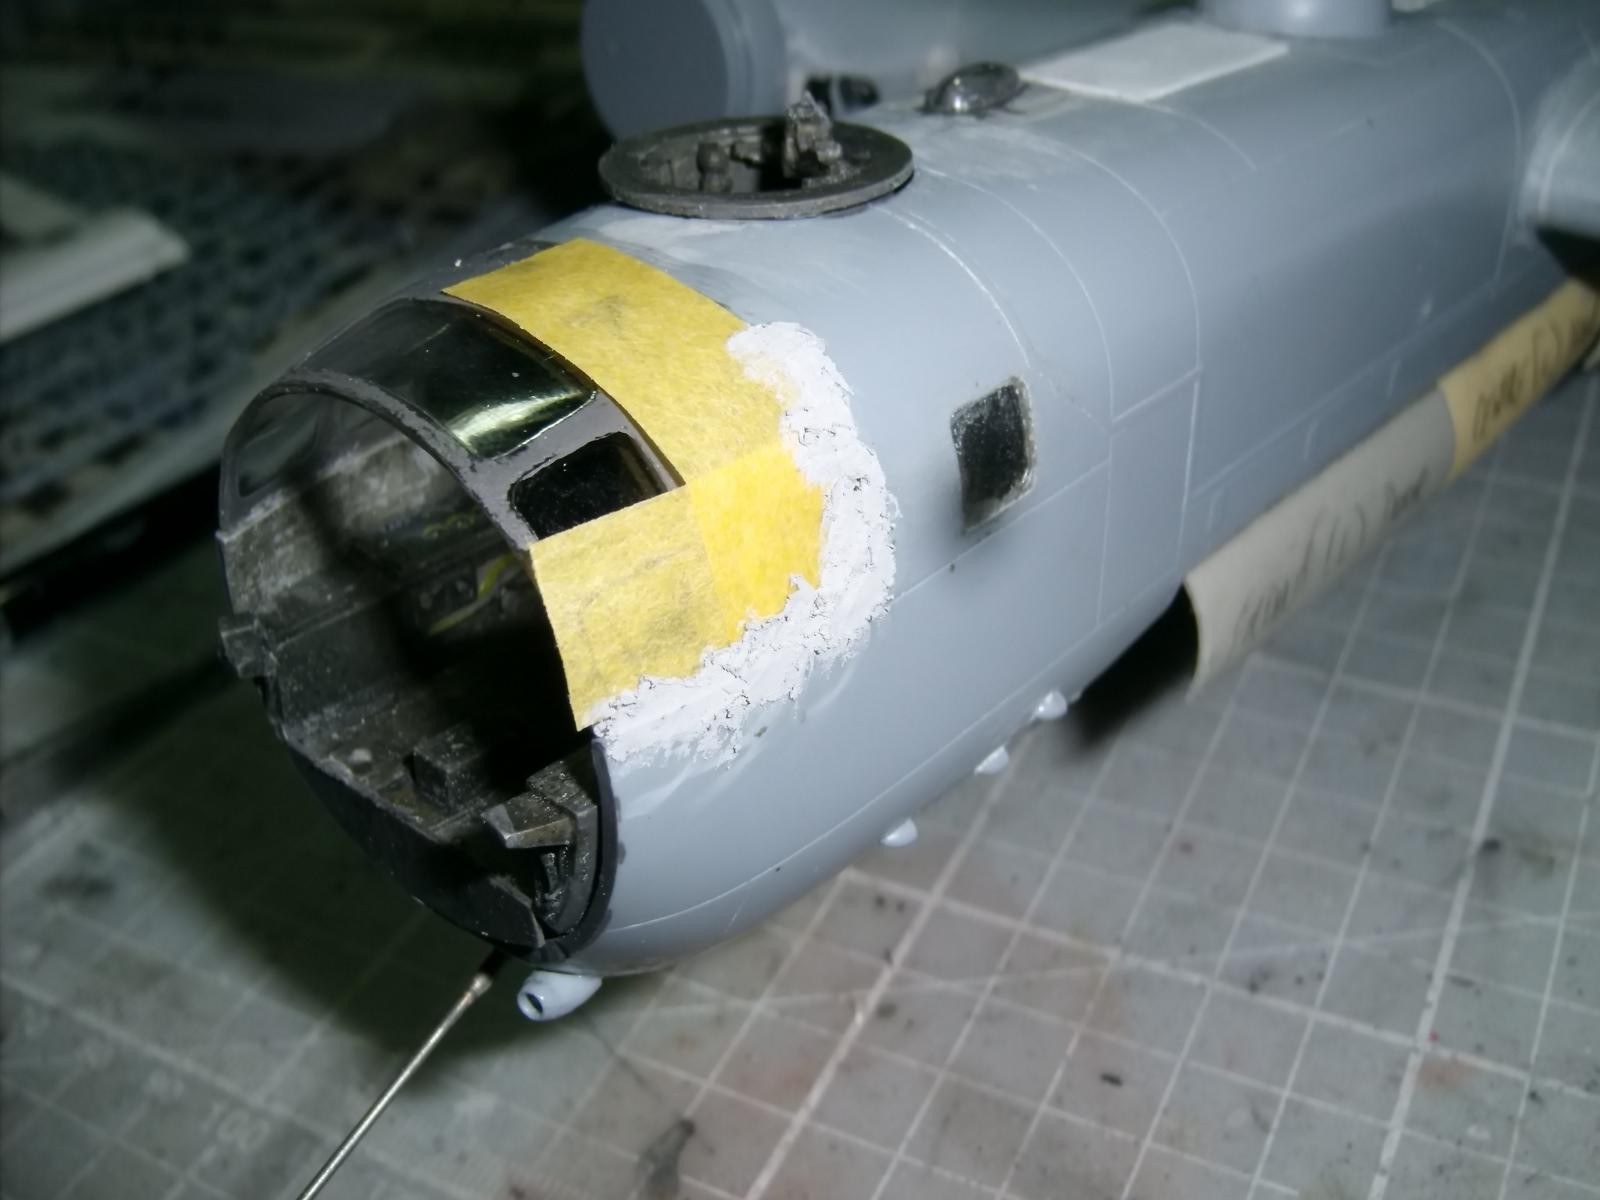
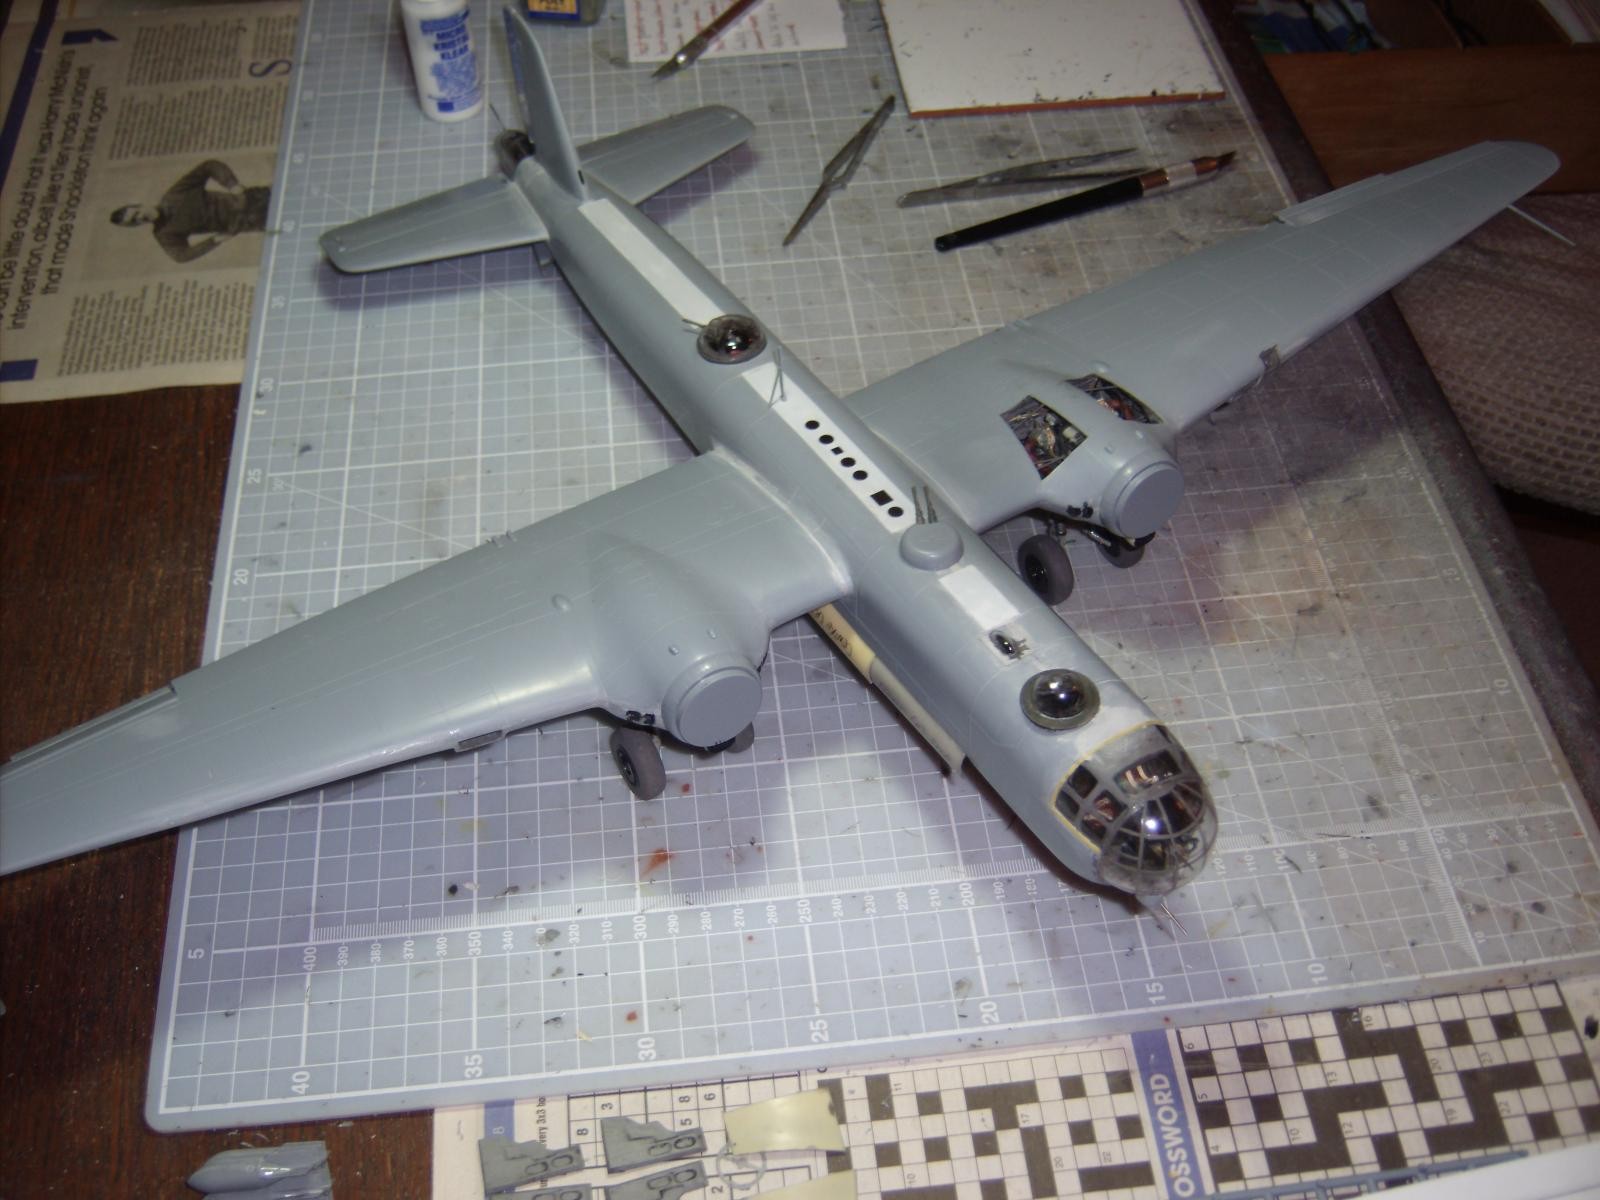
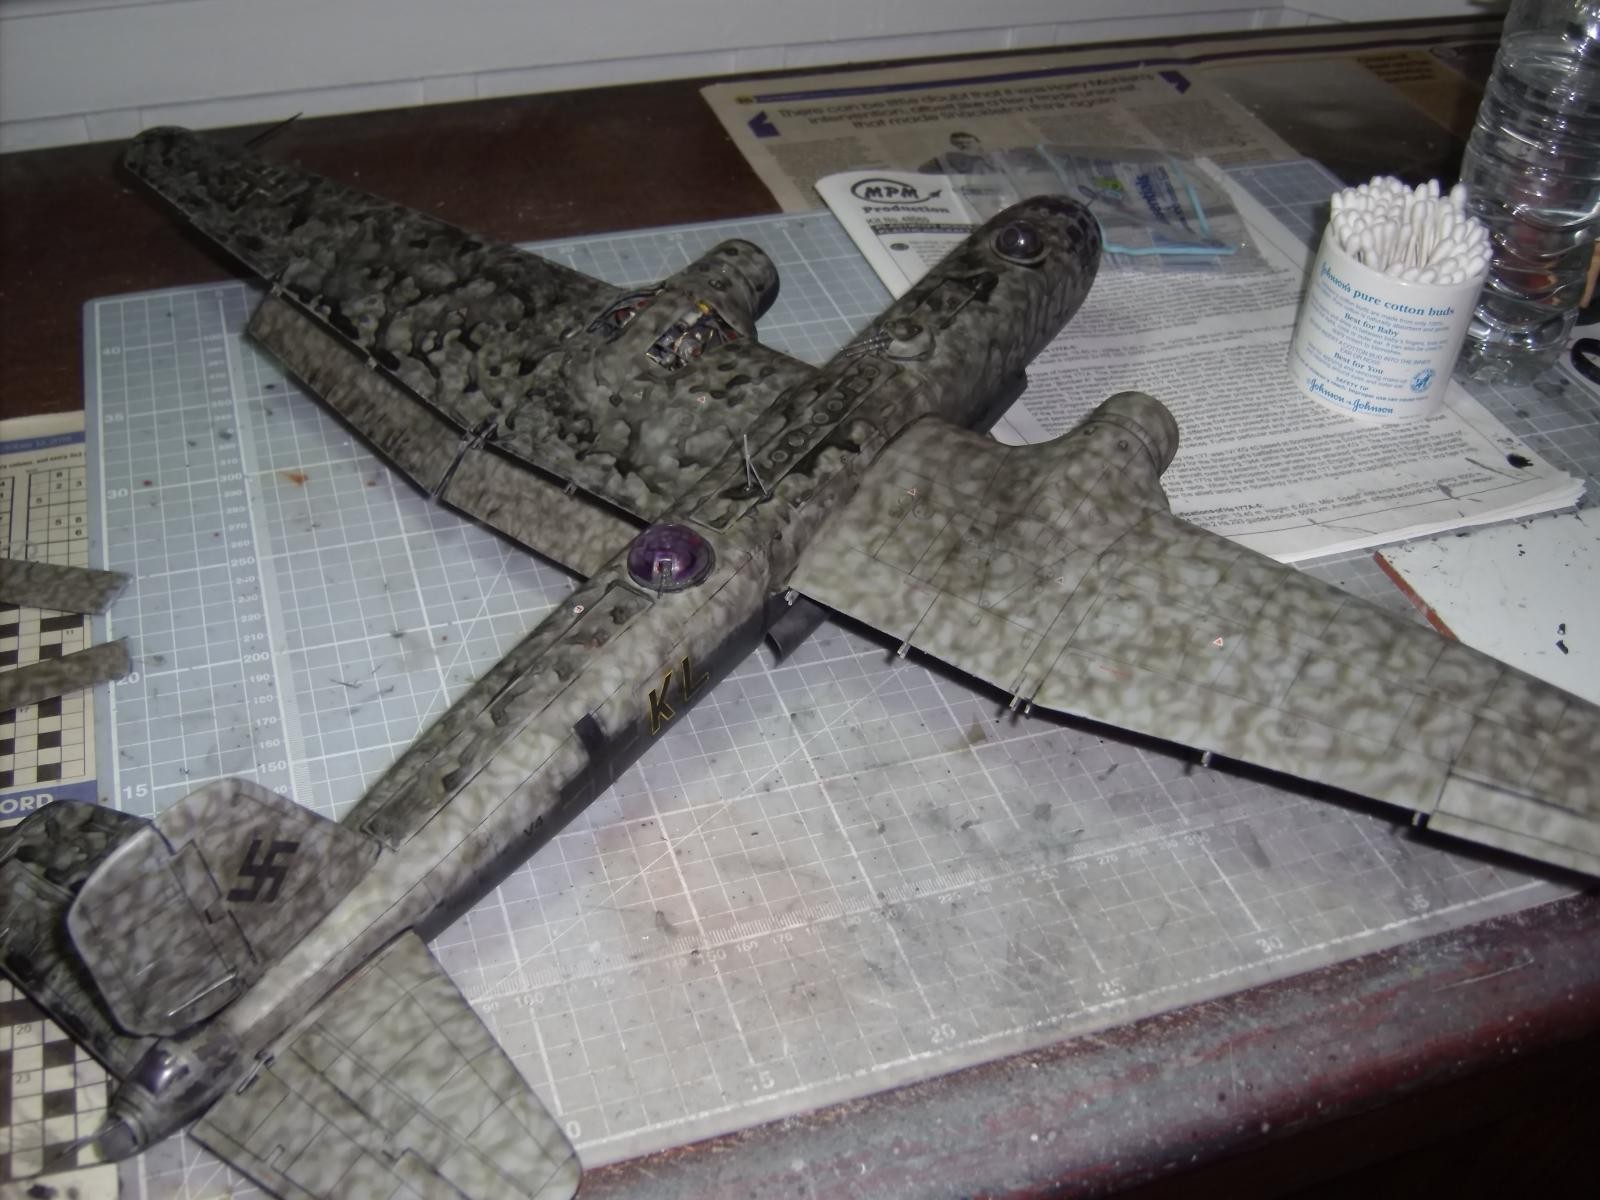
Sadly, the toy shop is no longer, its owners opting for well-earned retirement. But that was just the start of my adventure with this particular griffon. I decided early on I was going to win this tussle. And I was going to pull out all the stops and make a good effort at making it look the part. Accessories from seat belts to weaponry were ordered up, and the made-available-since-initial-release accessory sets - the bomb bay, undercarriage and engine packs, were also obtained. As the photos show, the bomb bay was first to be attended to, with the removal of the kit doors, after which the not unsubstantial internal resin bomb bay was fitted for size much like trying on a smart suit. Dry runs all round ensued to determine the ease - or otherwise - with which the fuselage would close up and generally speaking, results were promising. Lengths of plastic card were also fitted and this would help with the reintroduction of the upper fuselage detail in due course. I used Crystal Clear water based adhesive for this instead of normal polystyrene cement, therefore eliminating any opportunity to warp the card if there had been even a slight excess anywhere with polystrene glue under the card.
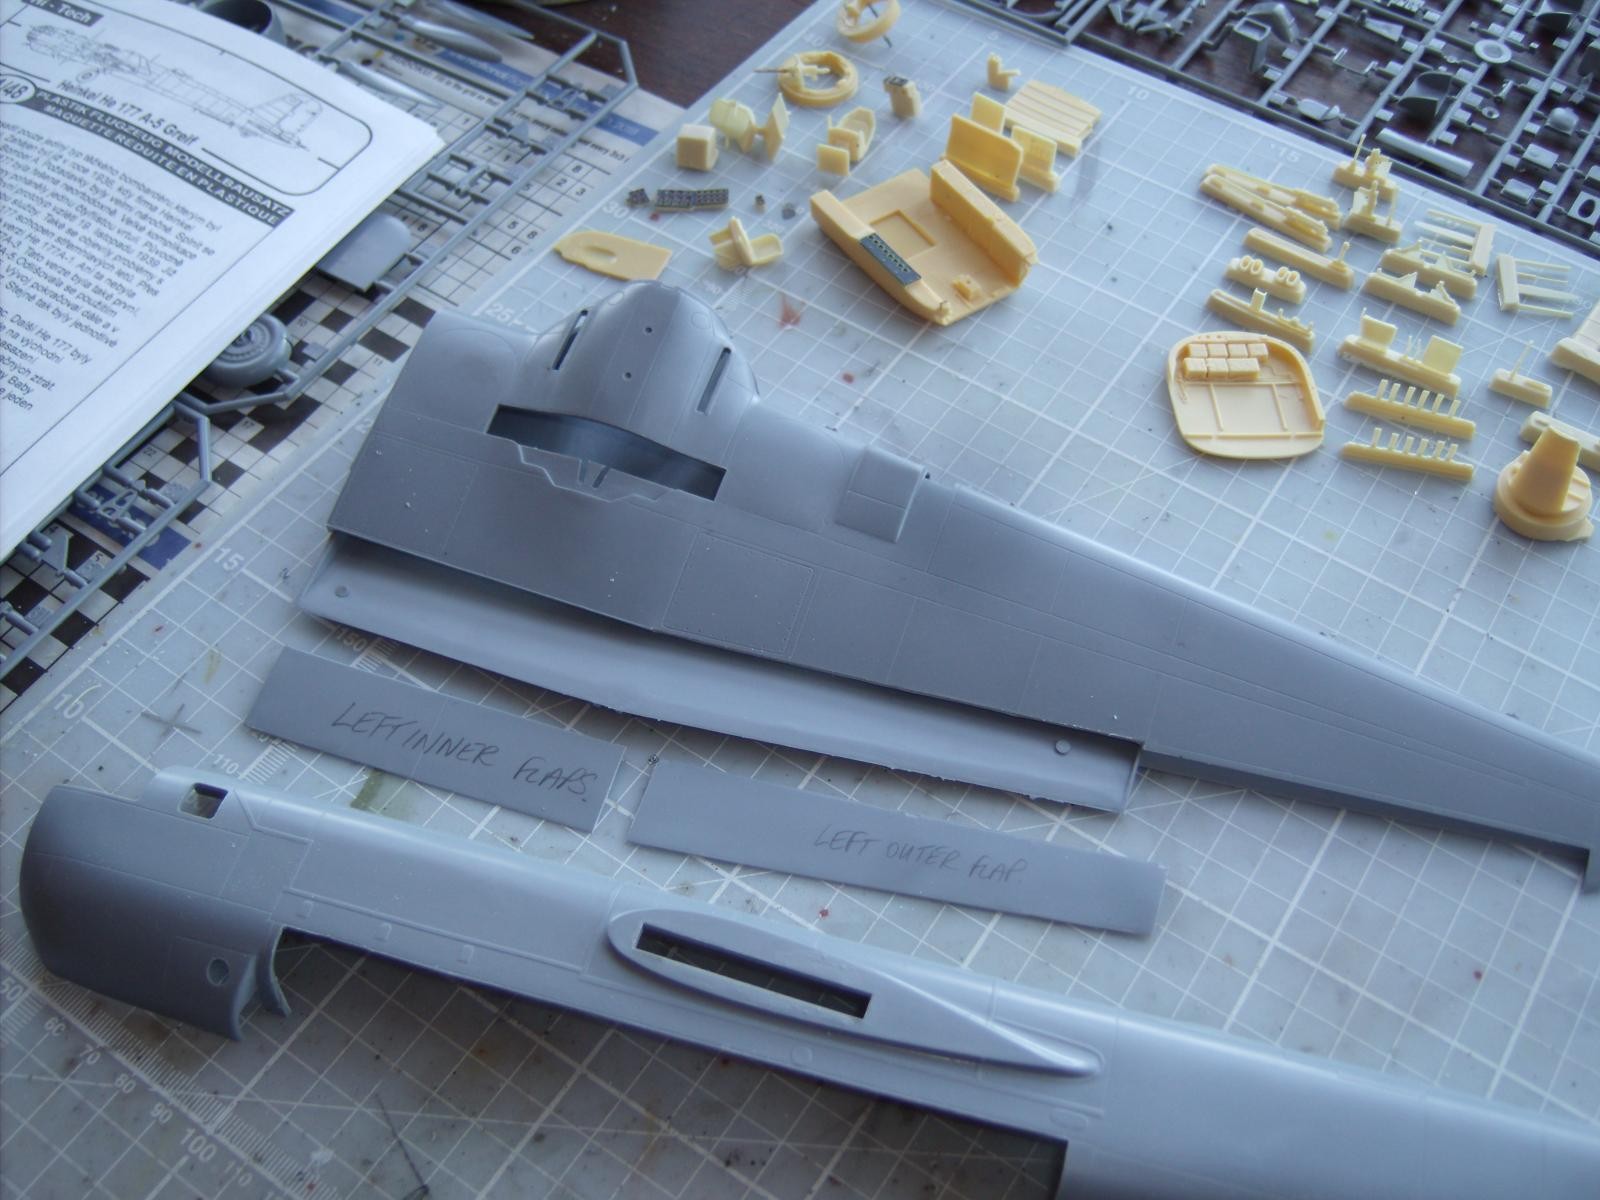
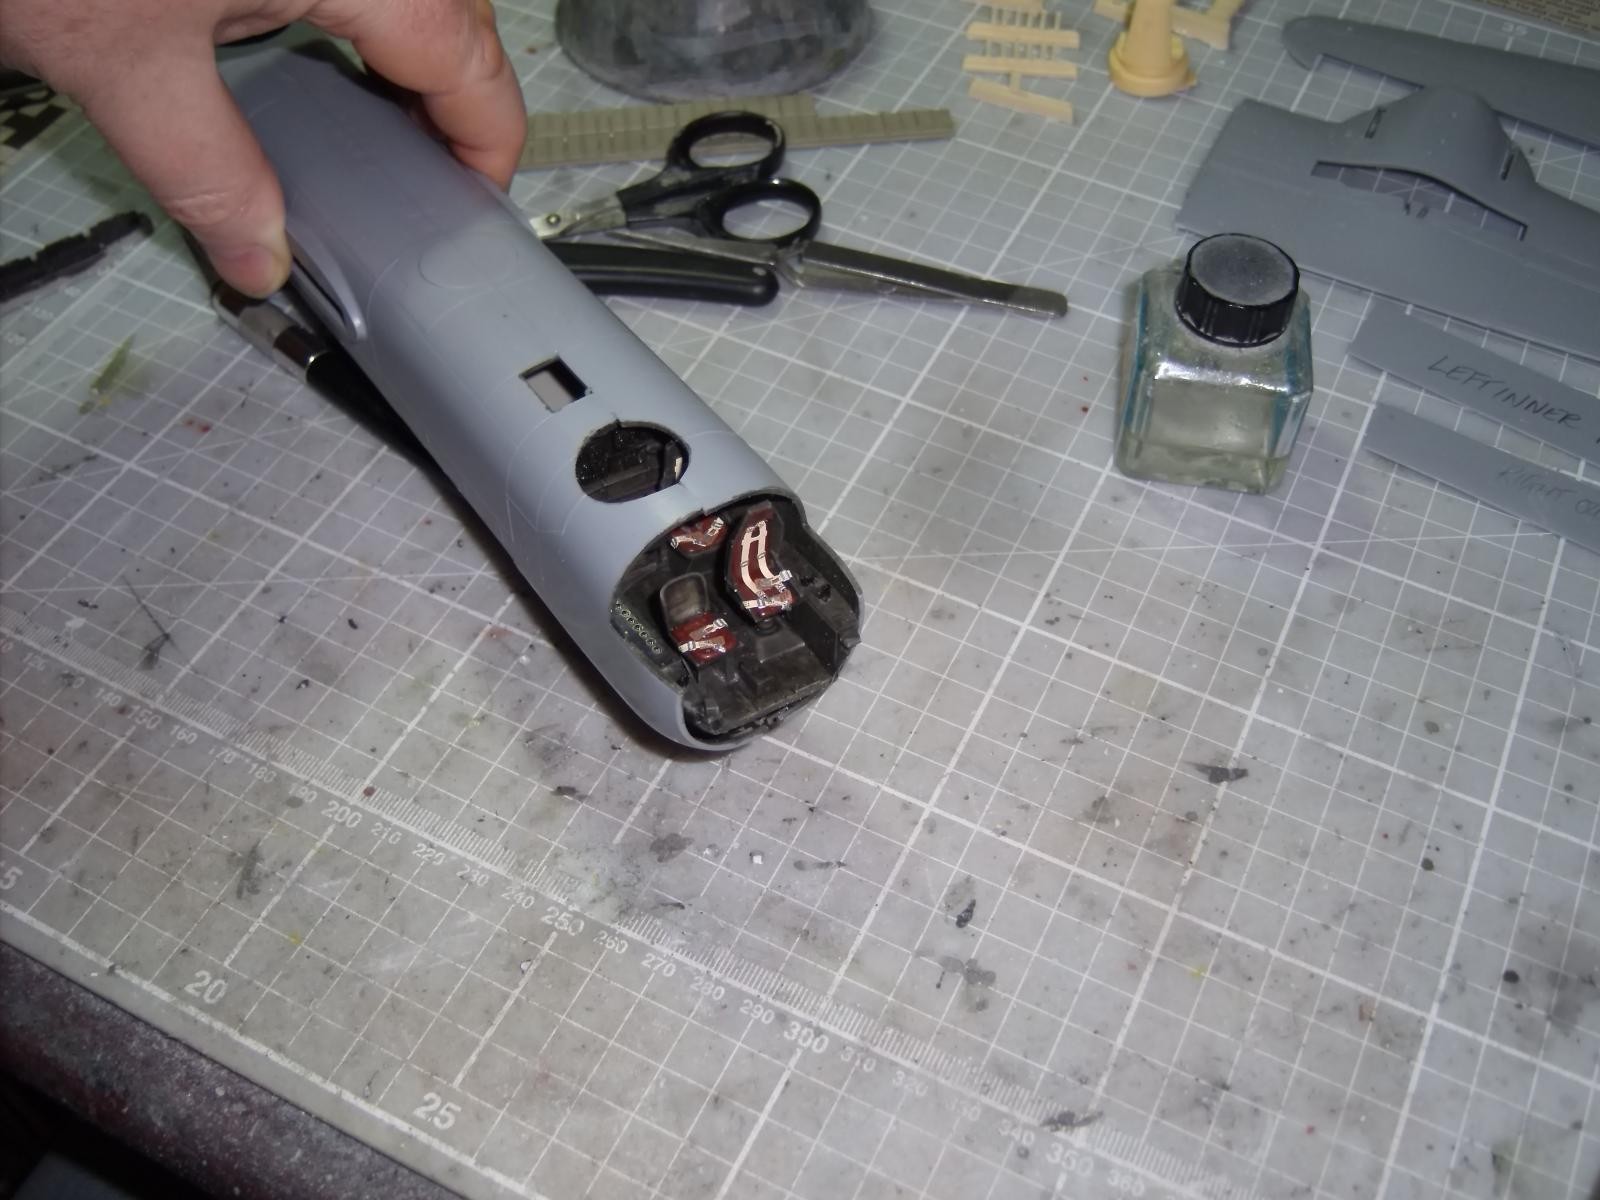
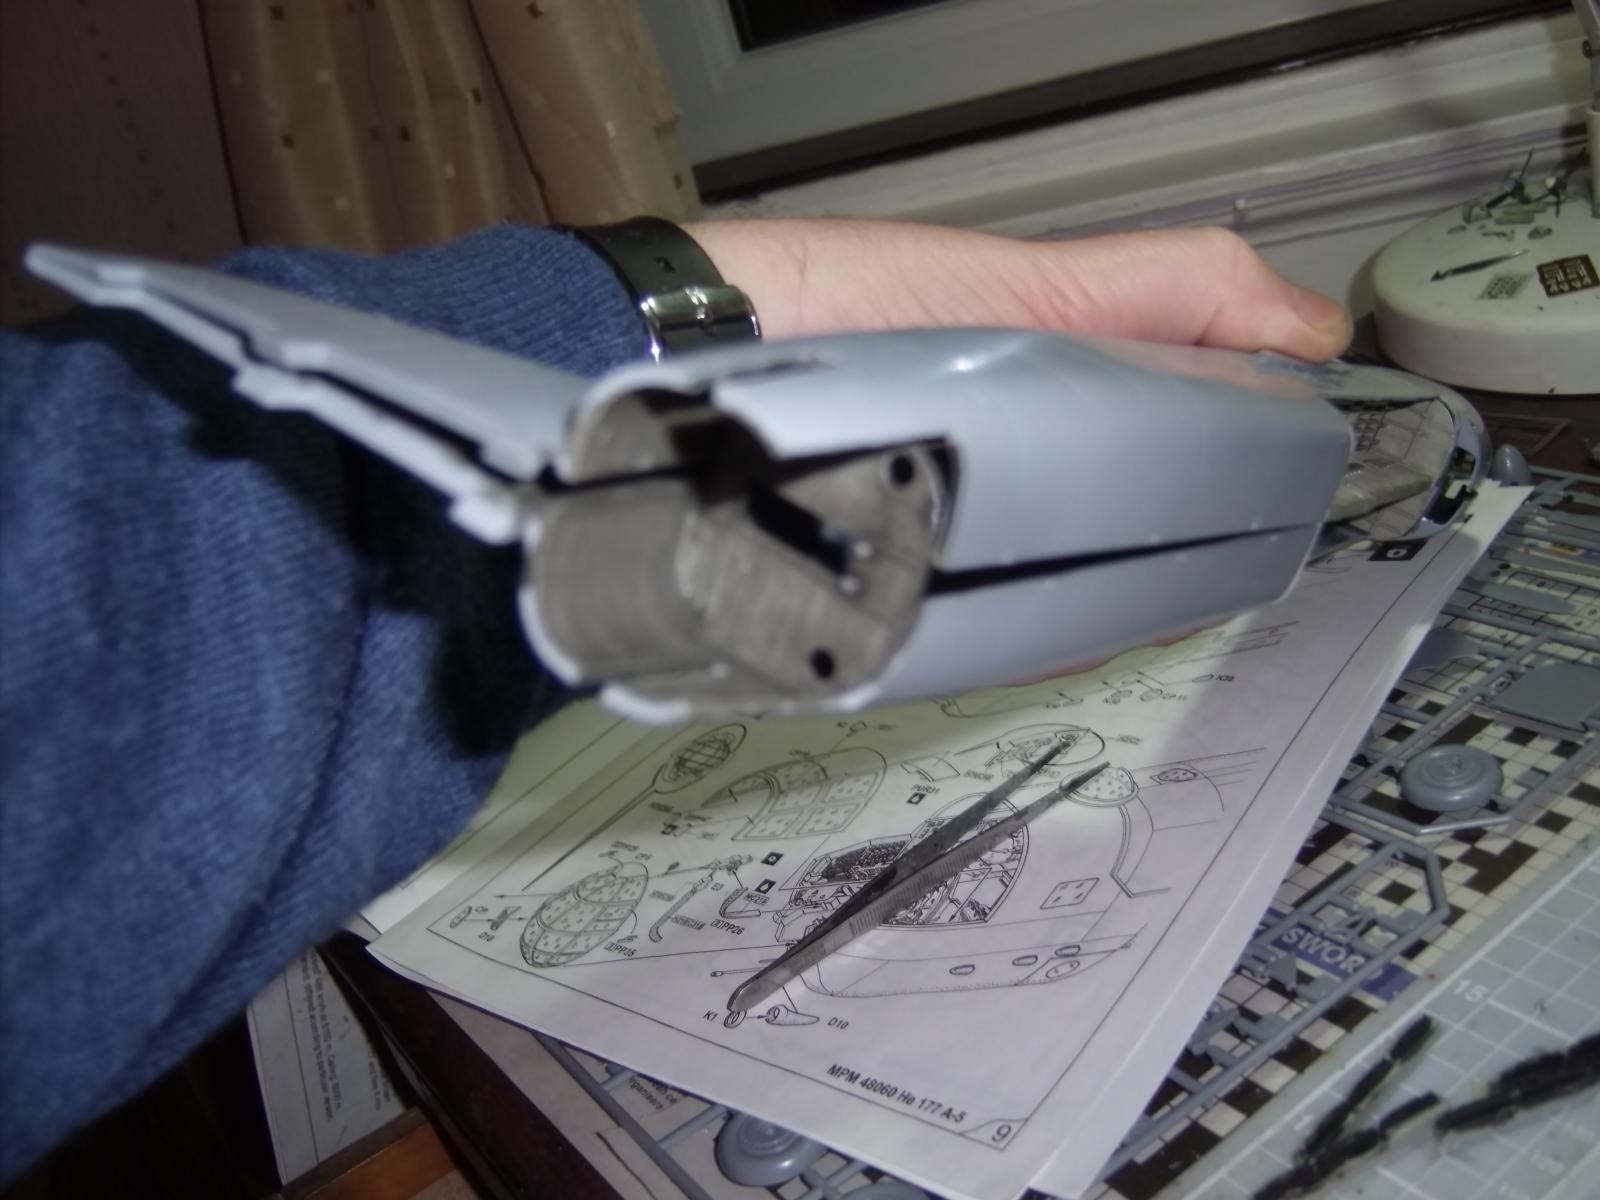
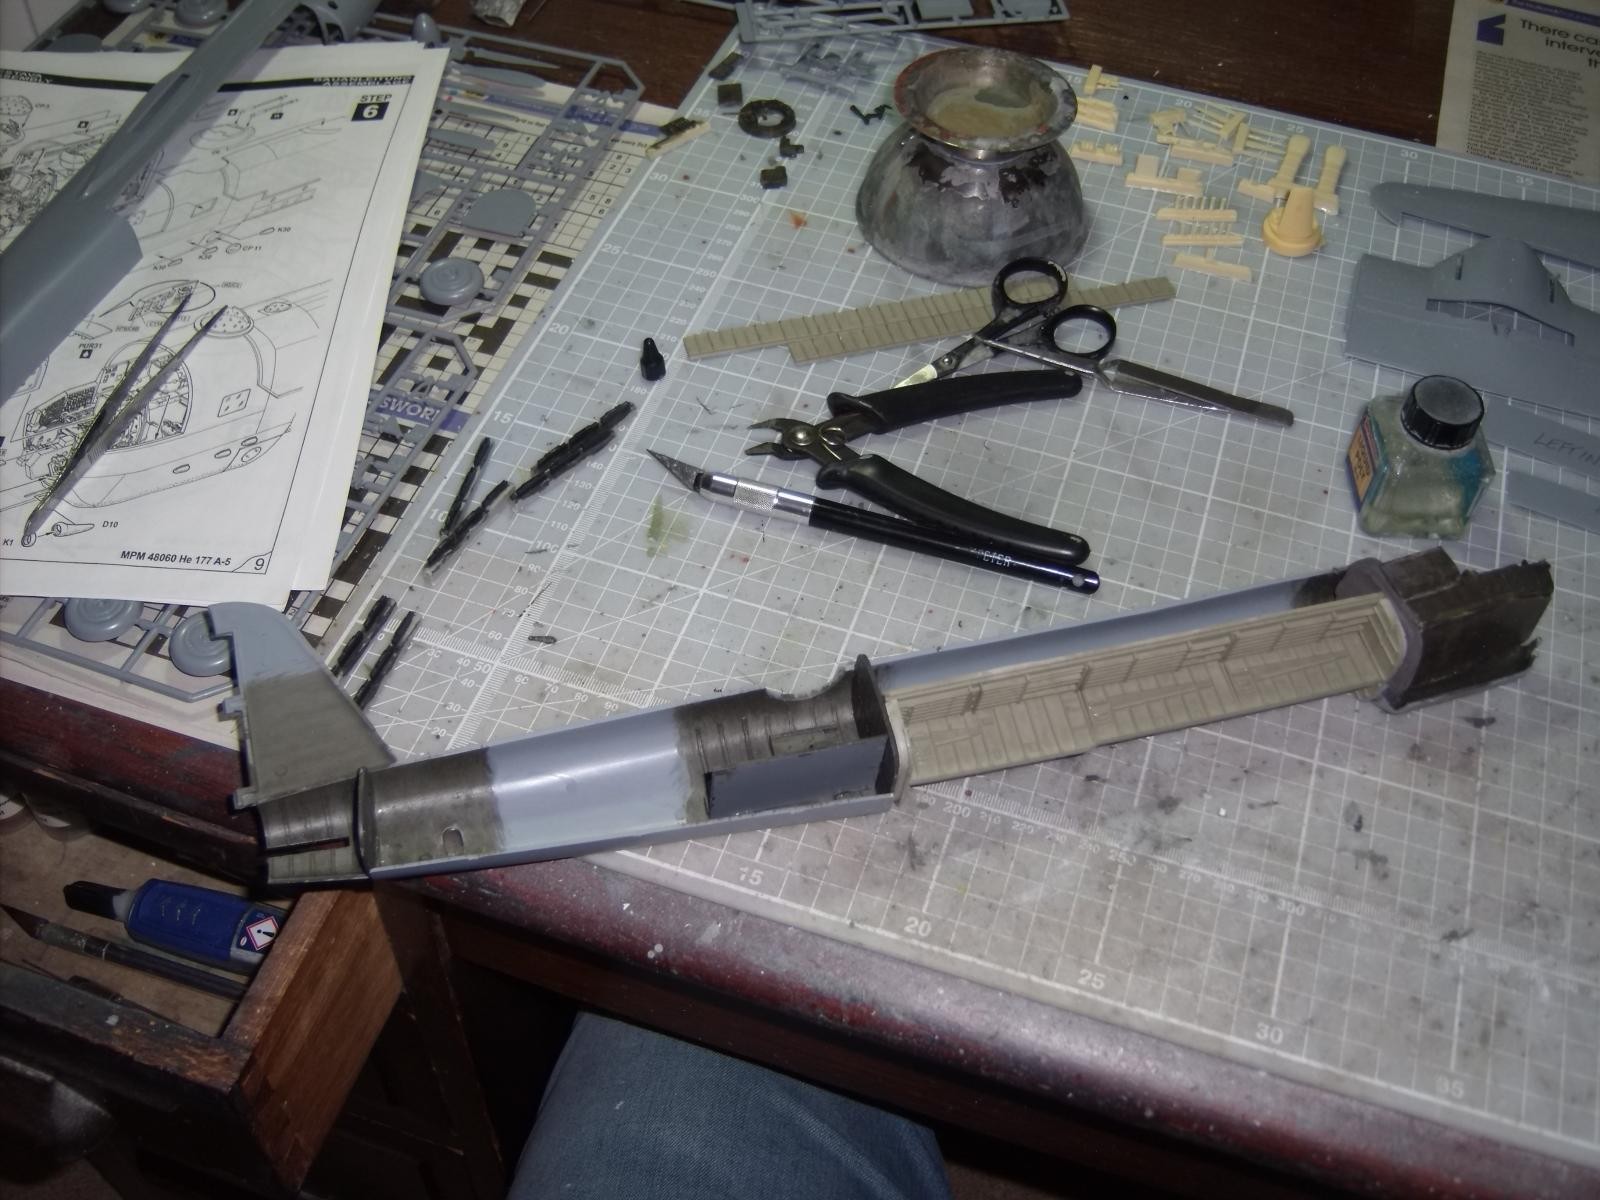
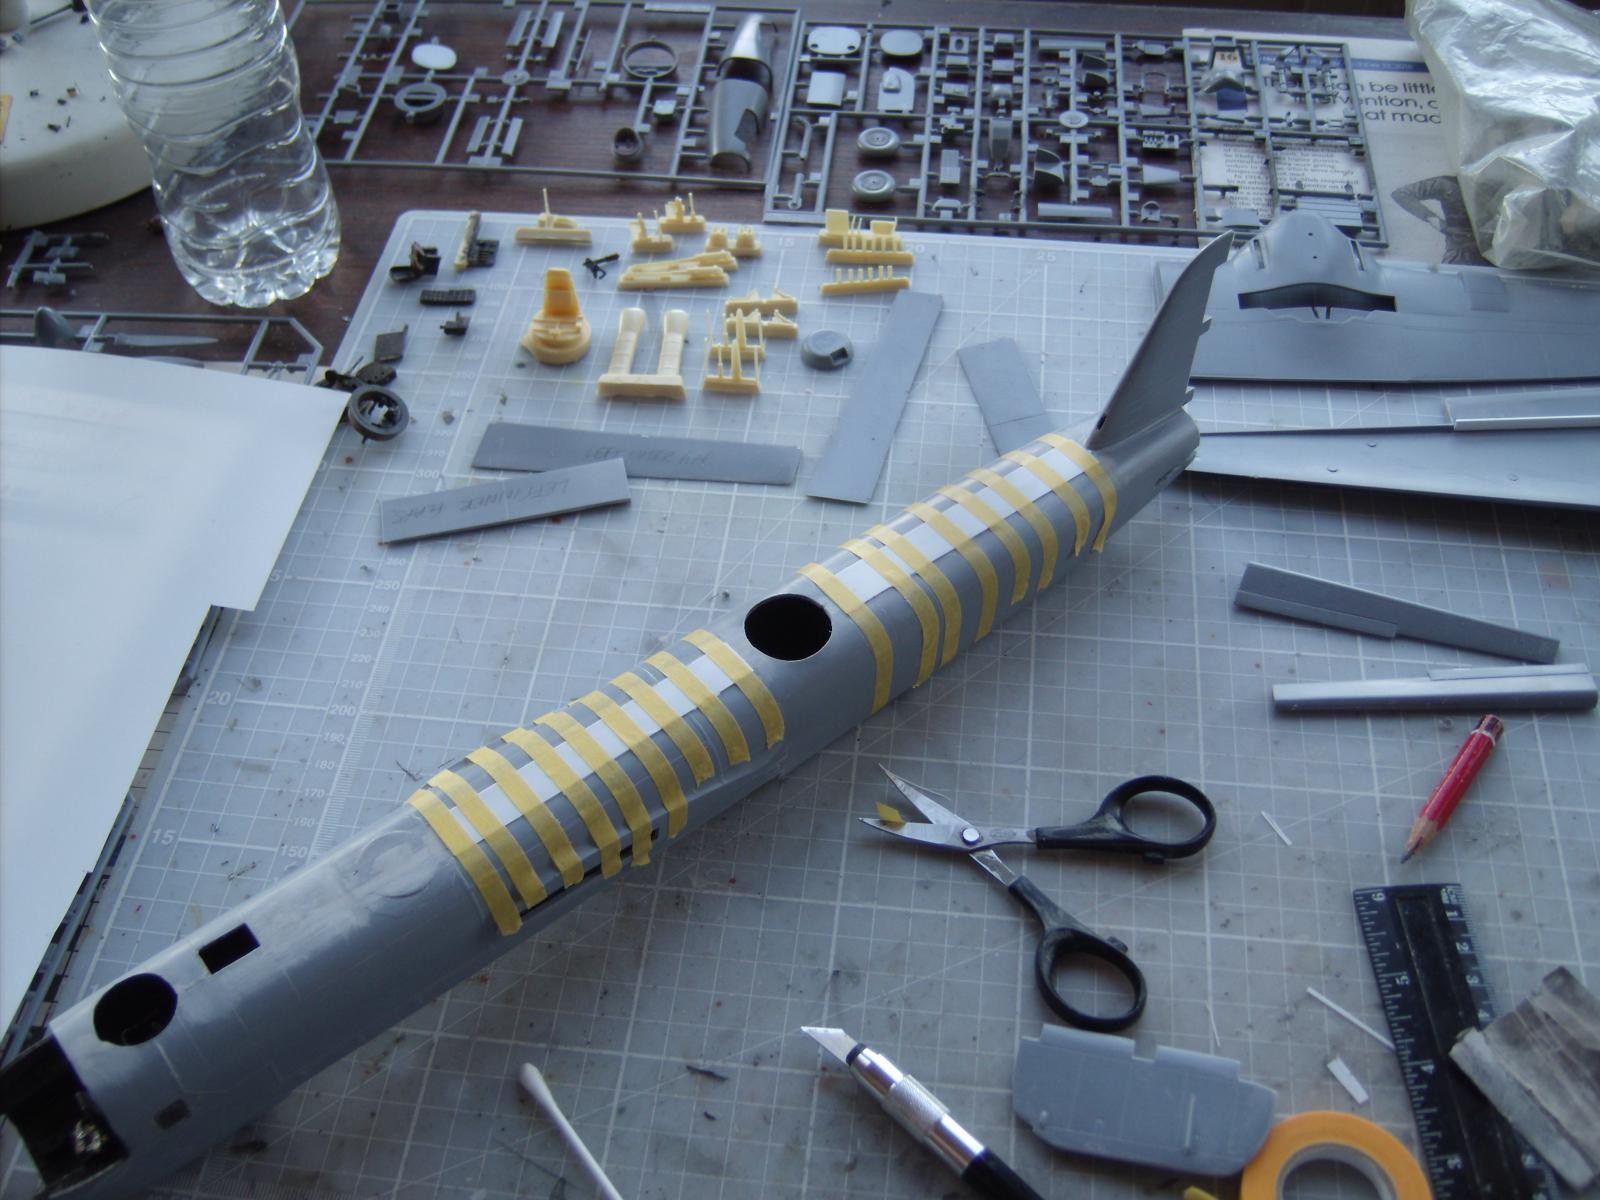
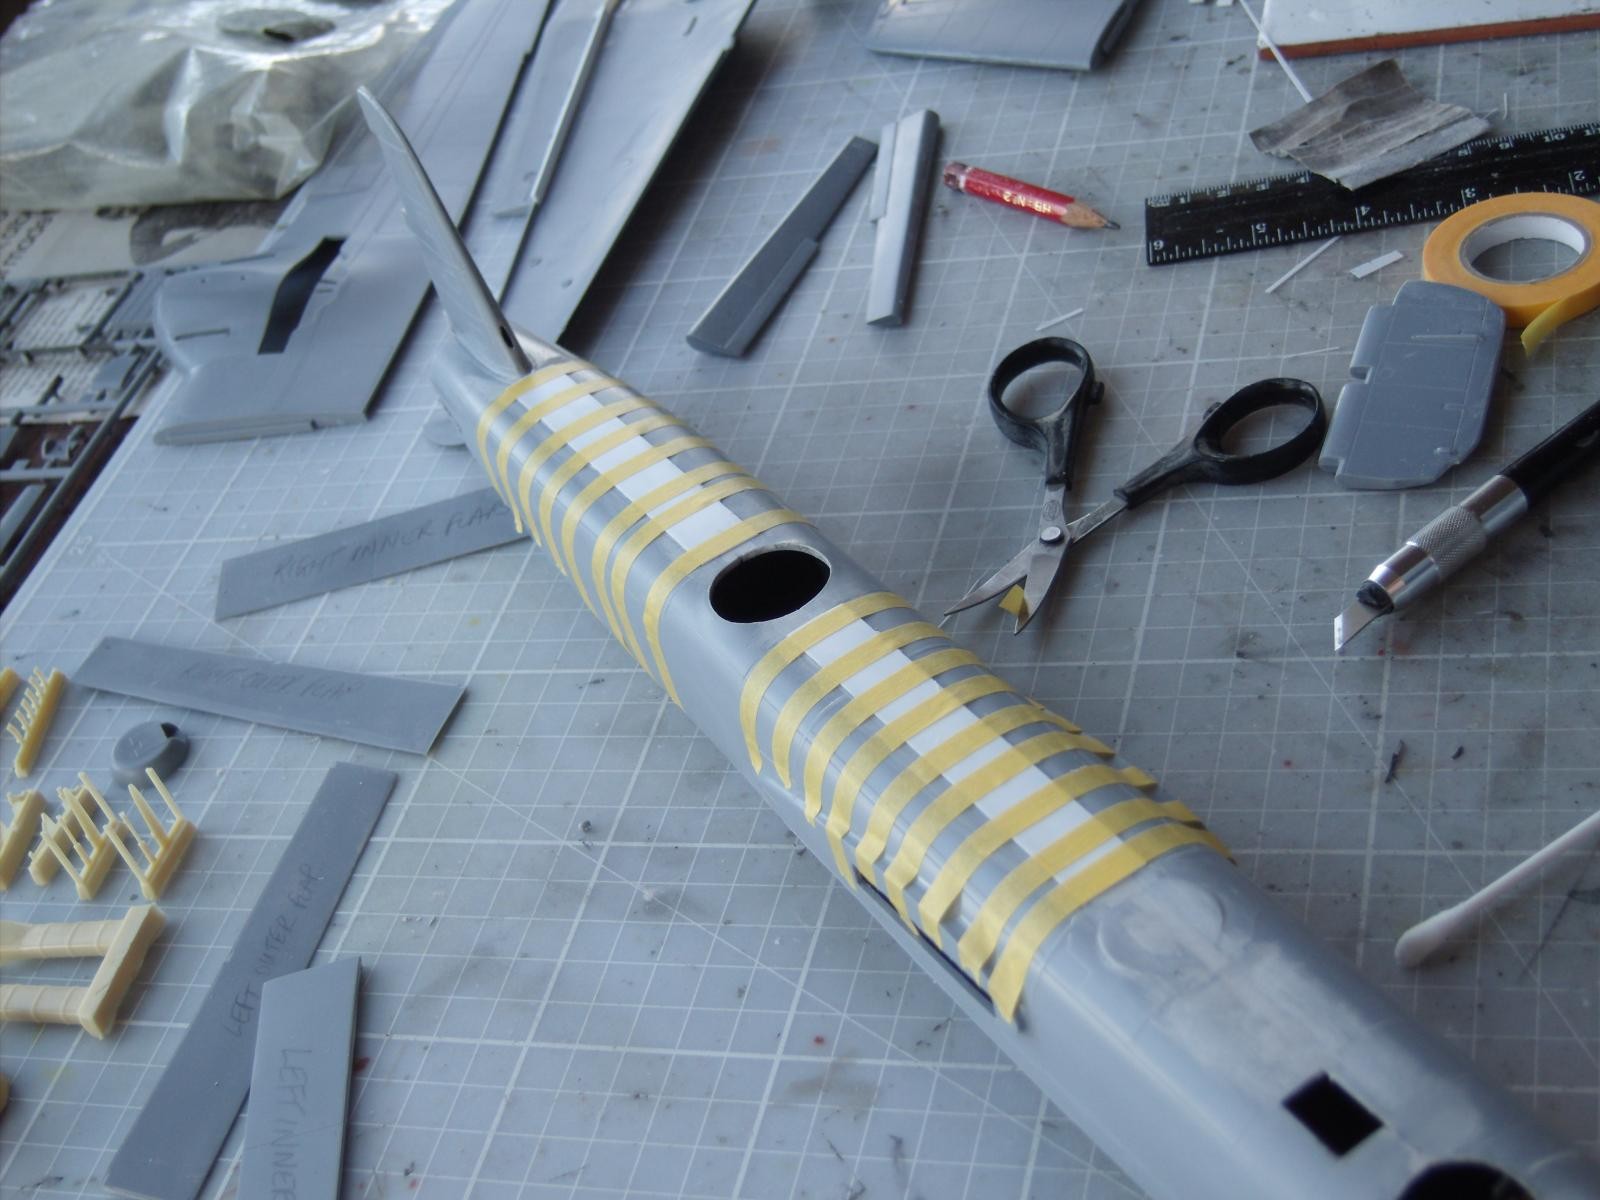
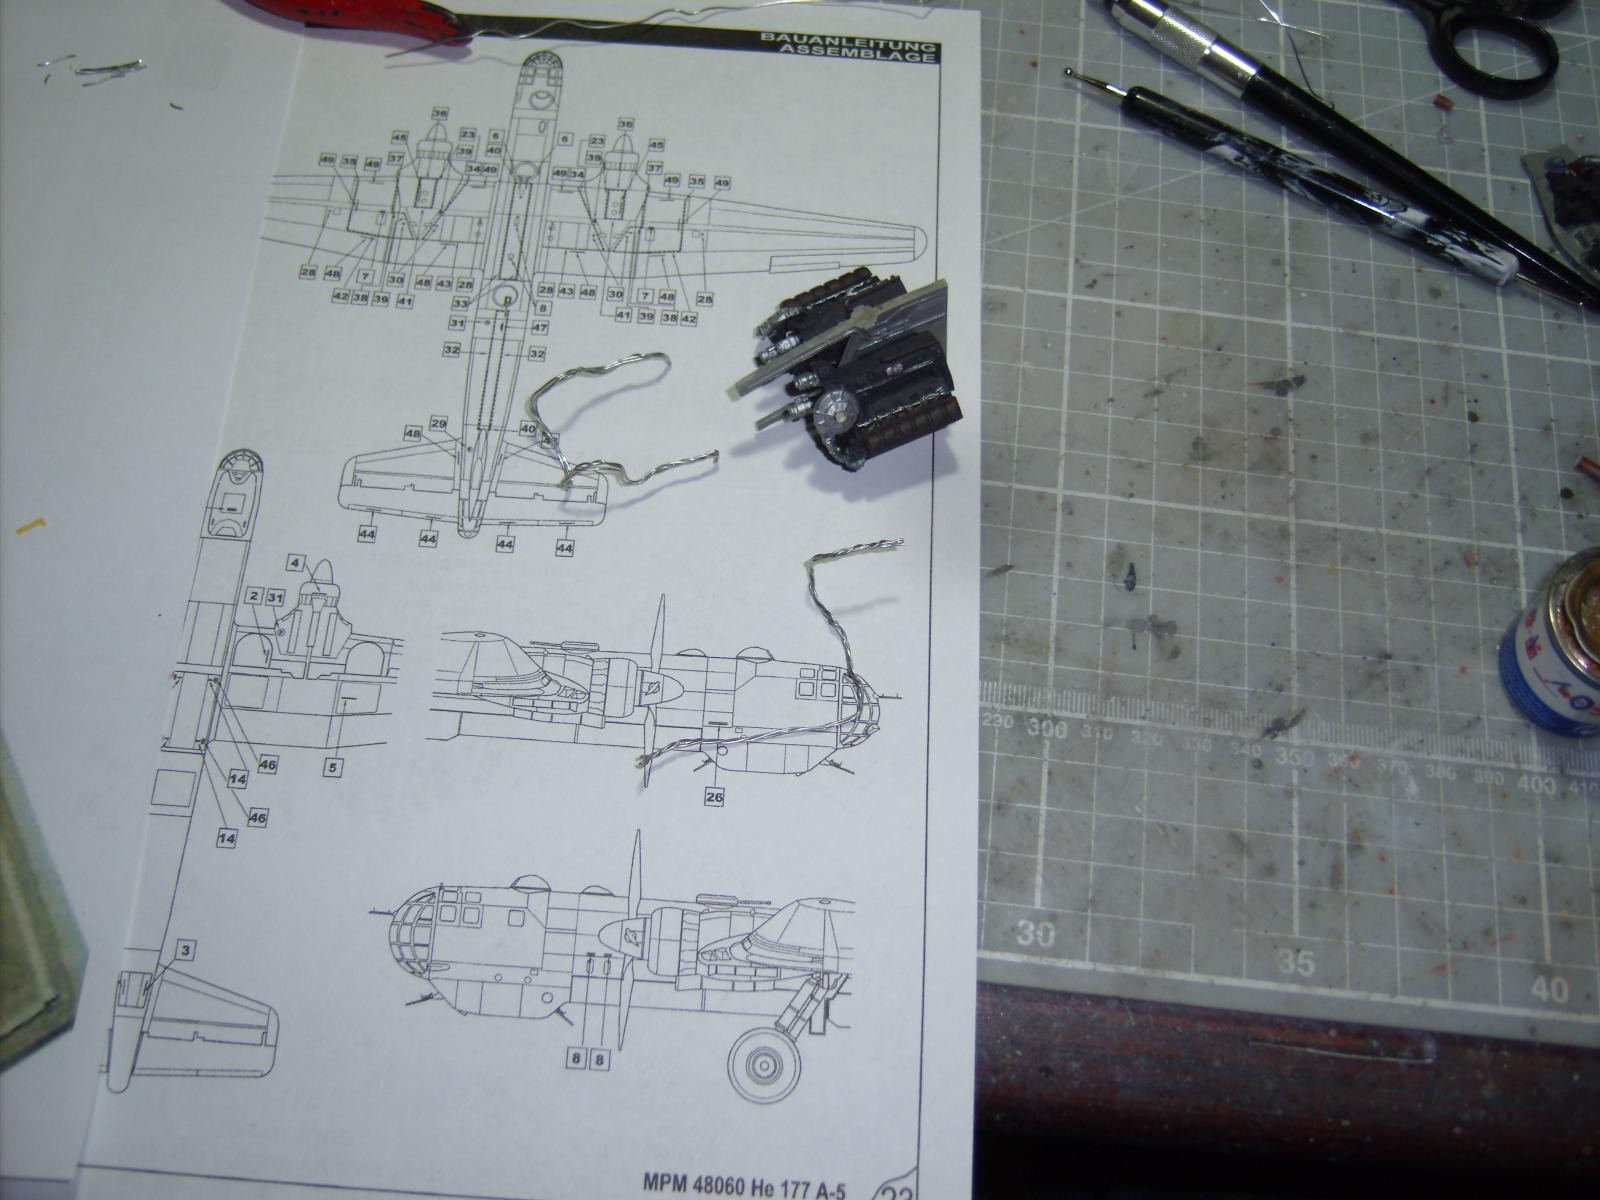
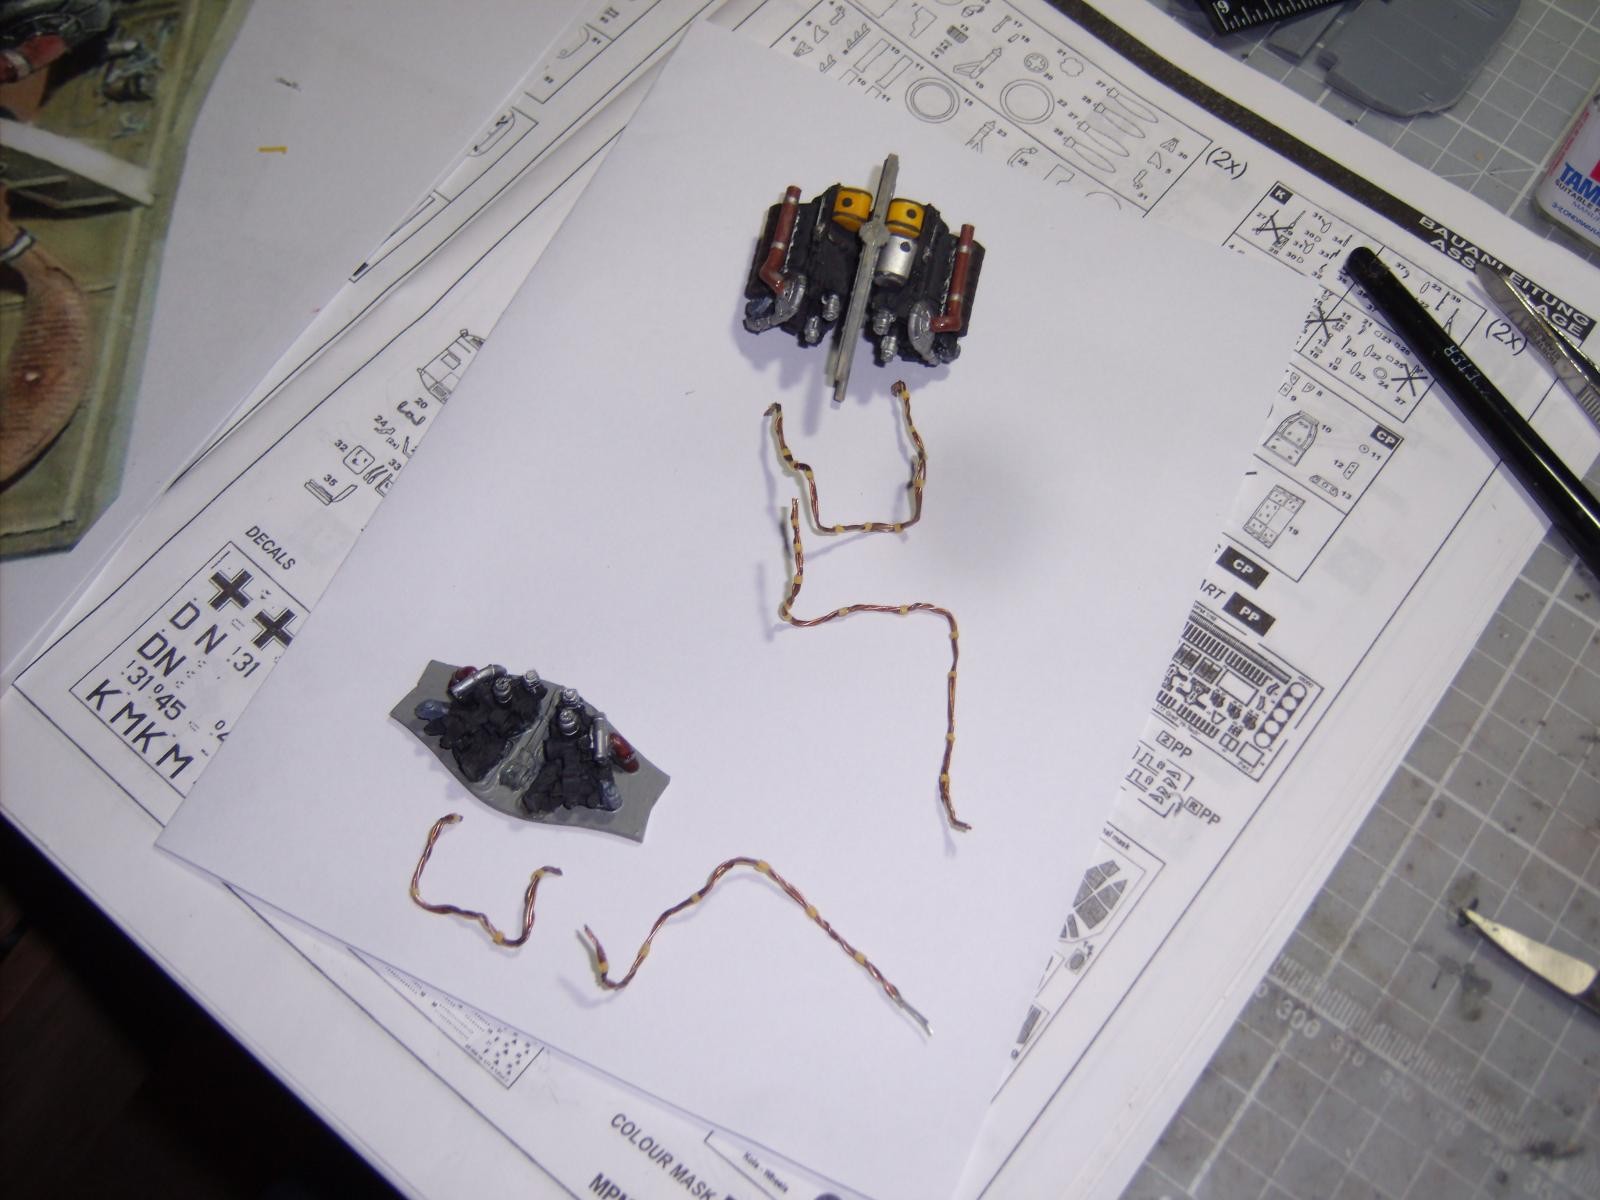
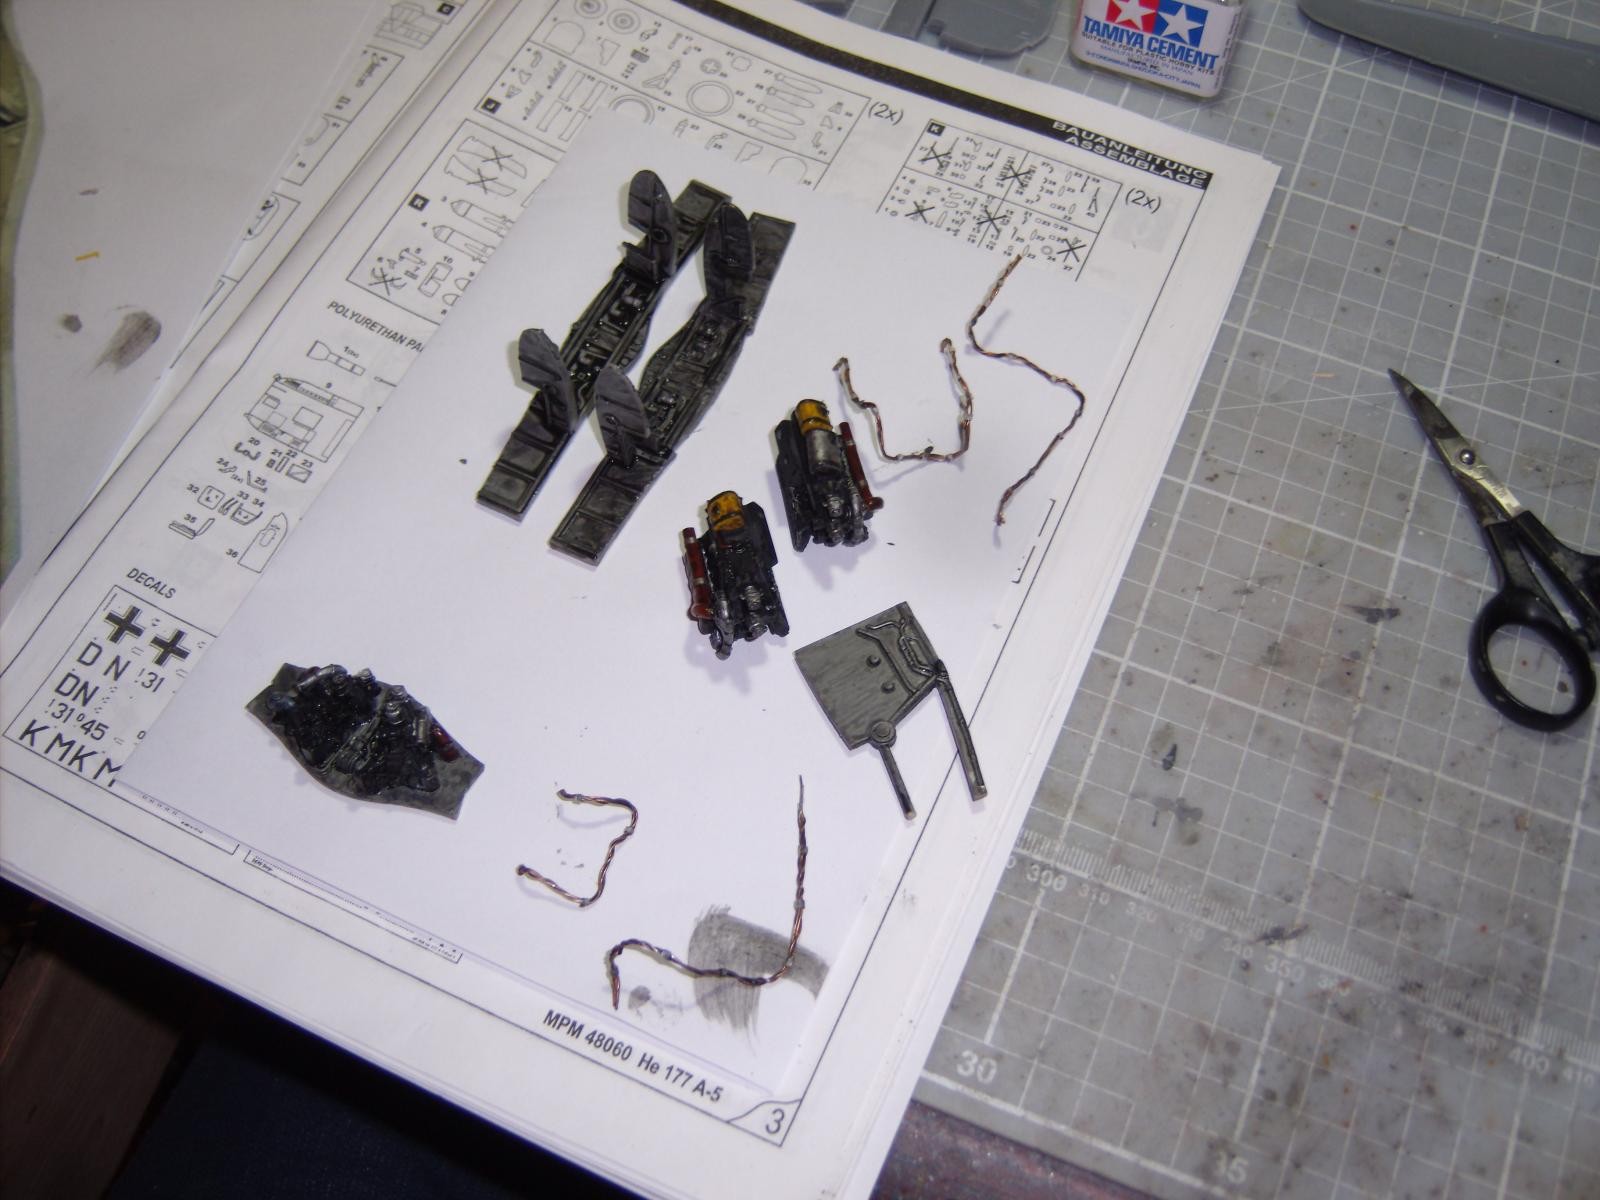
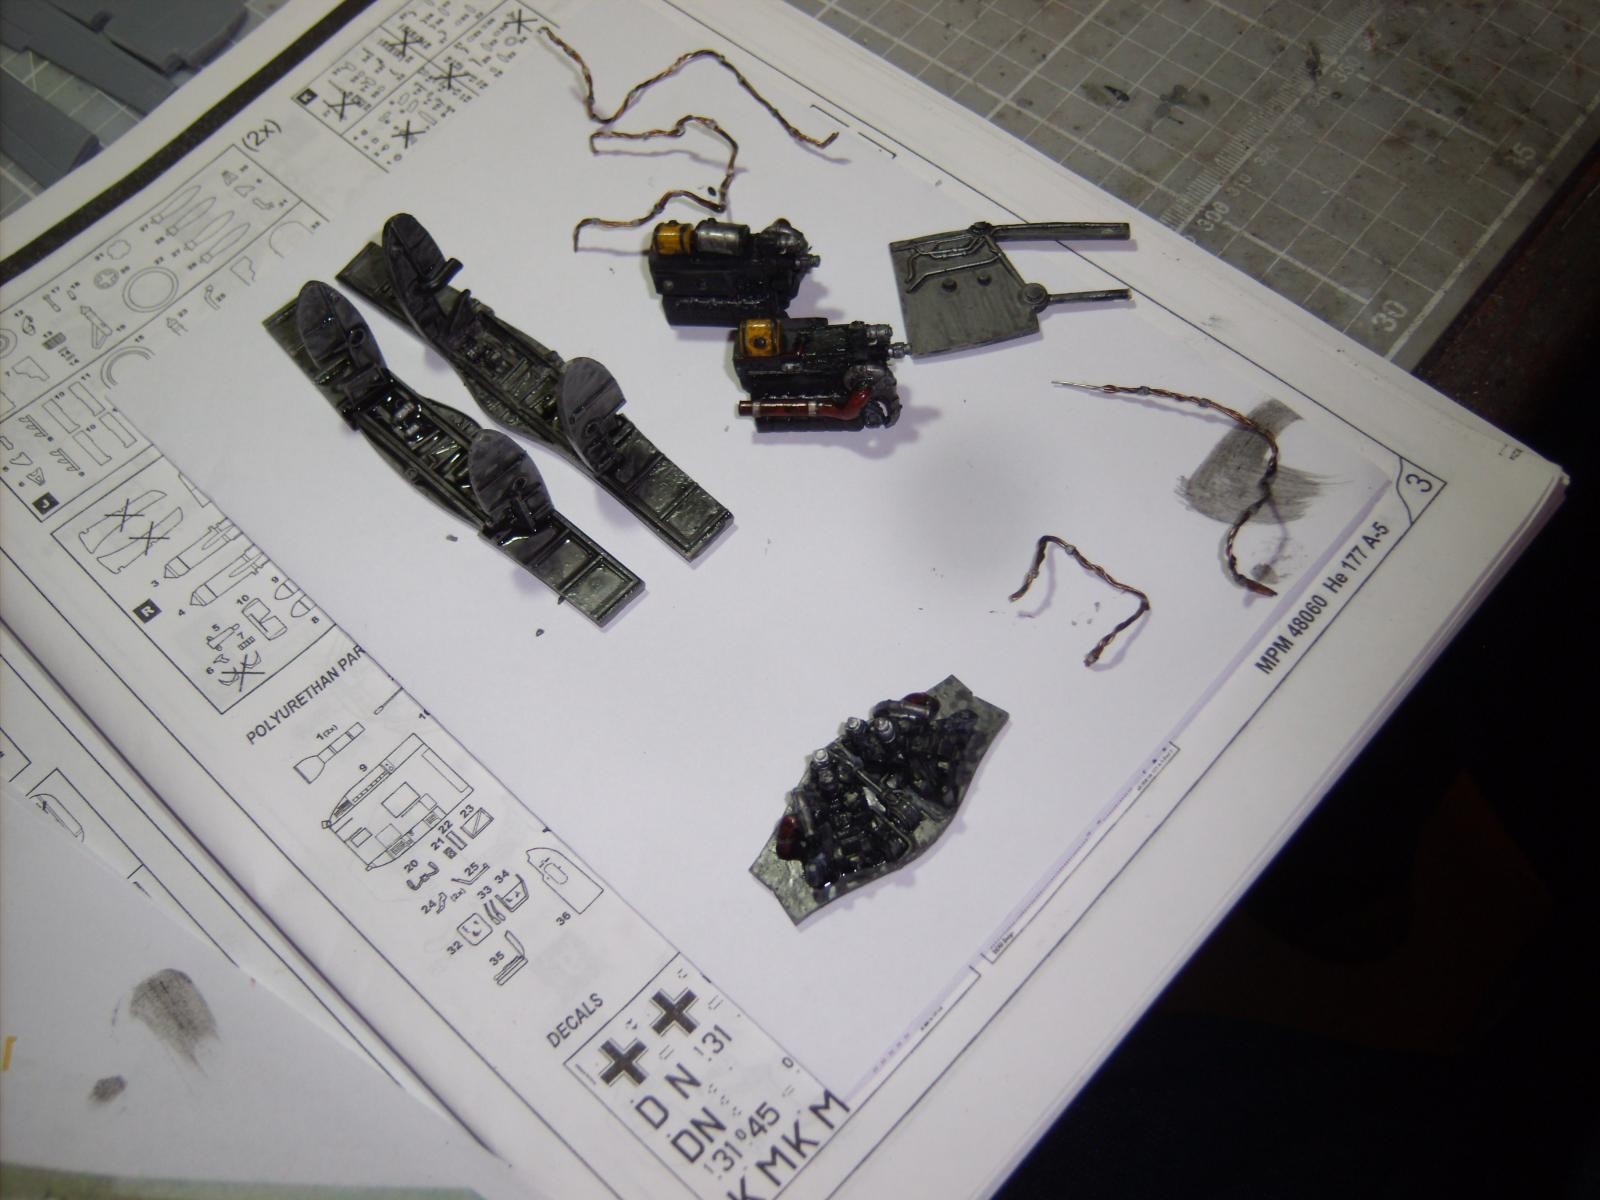
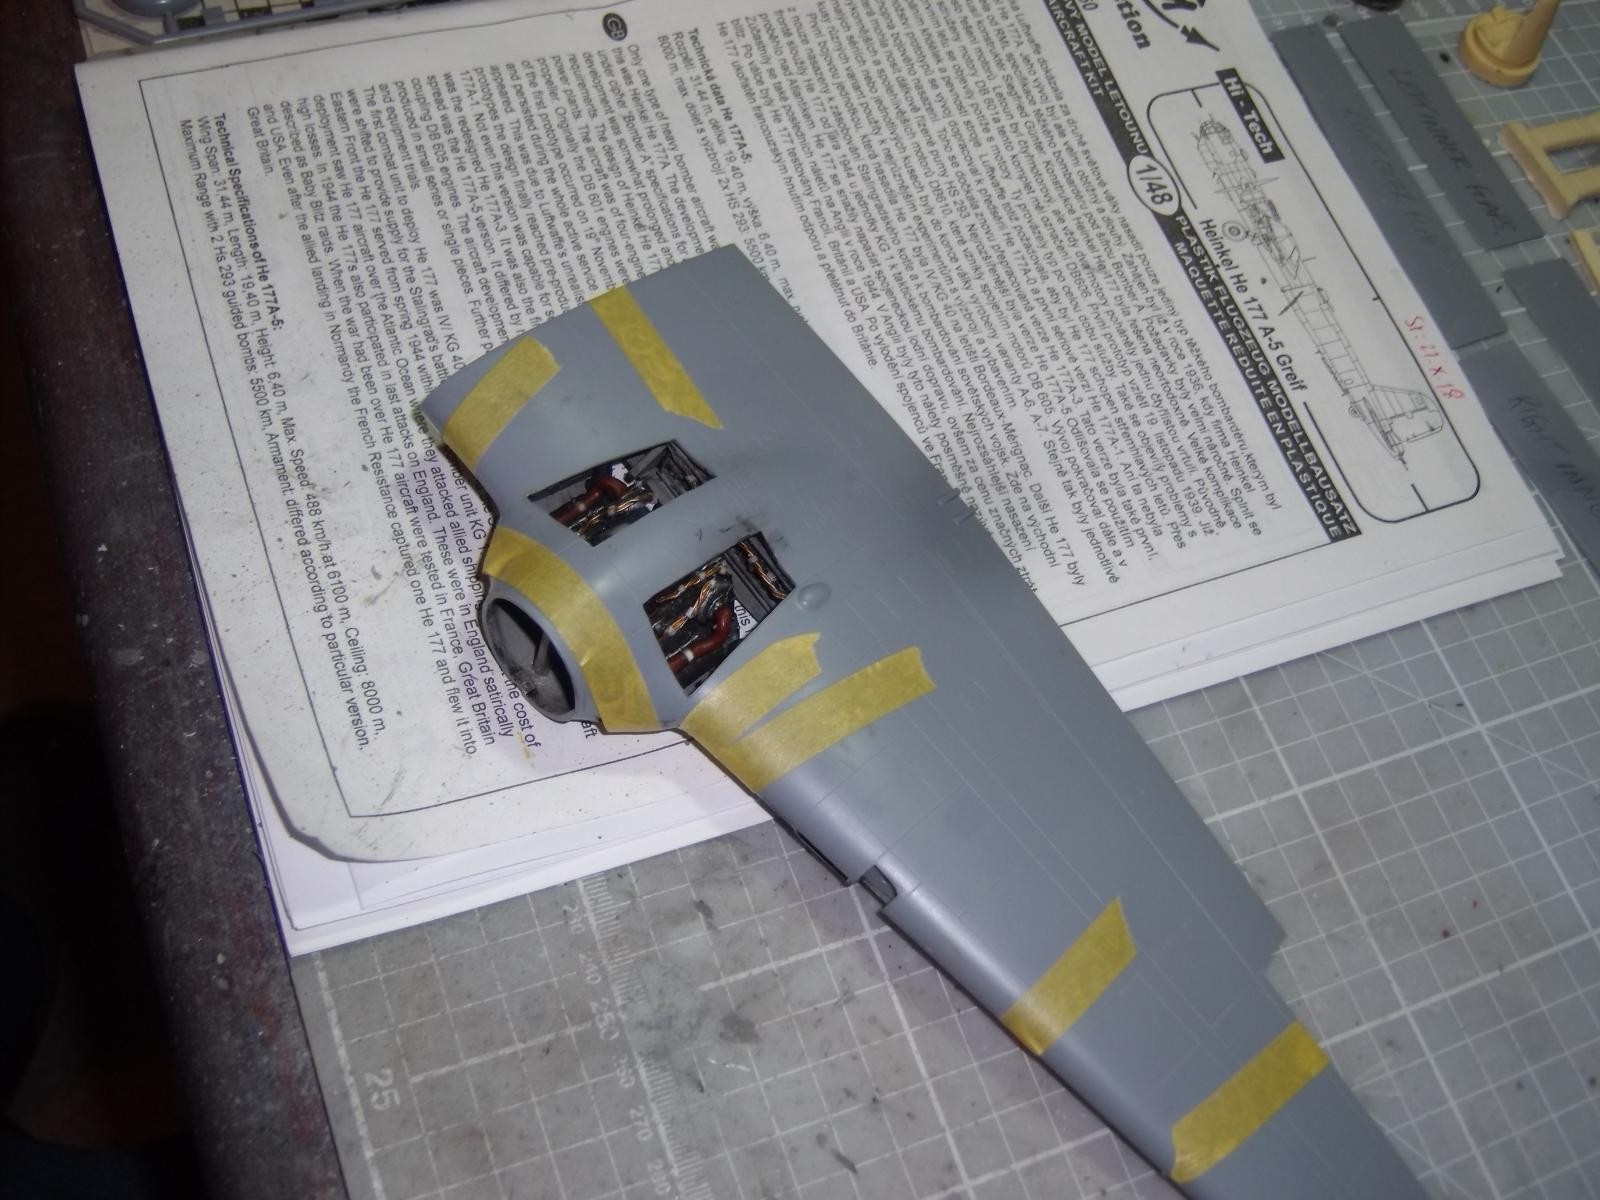
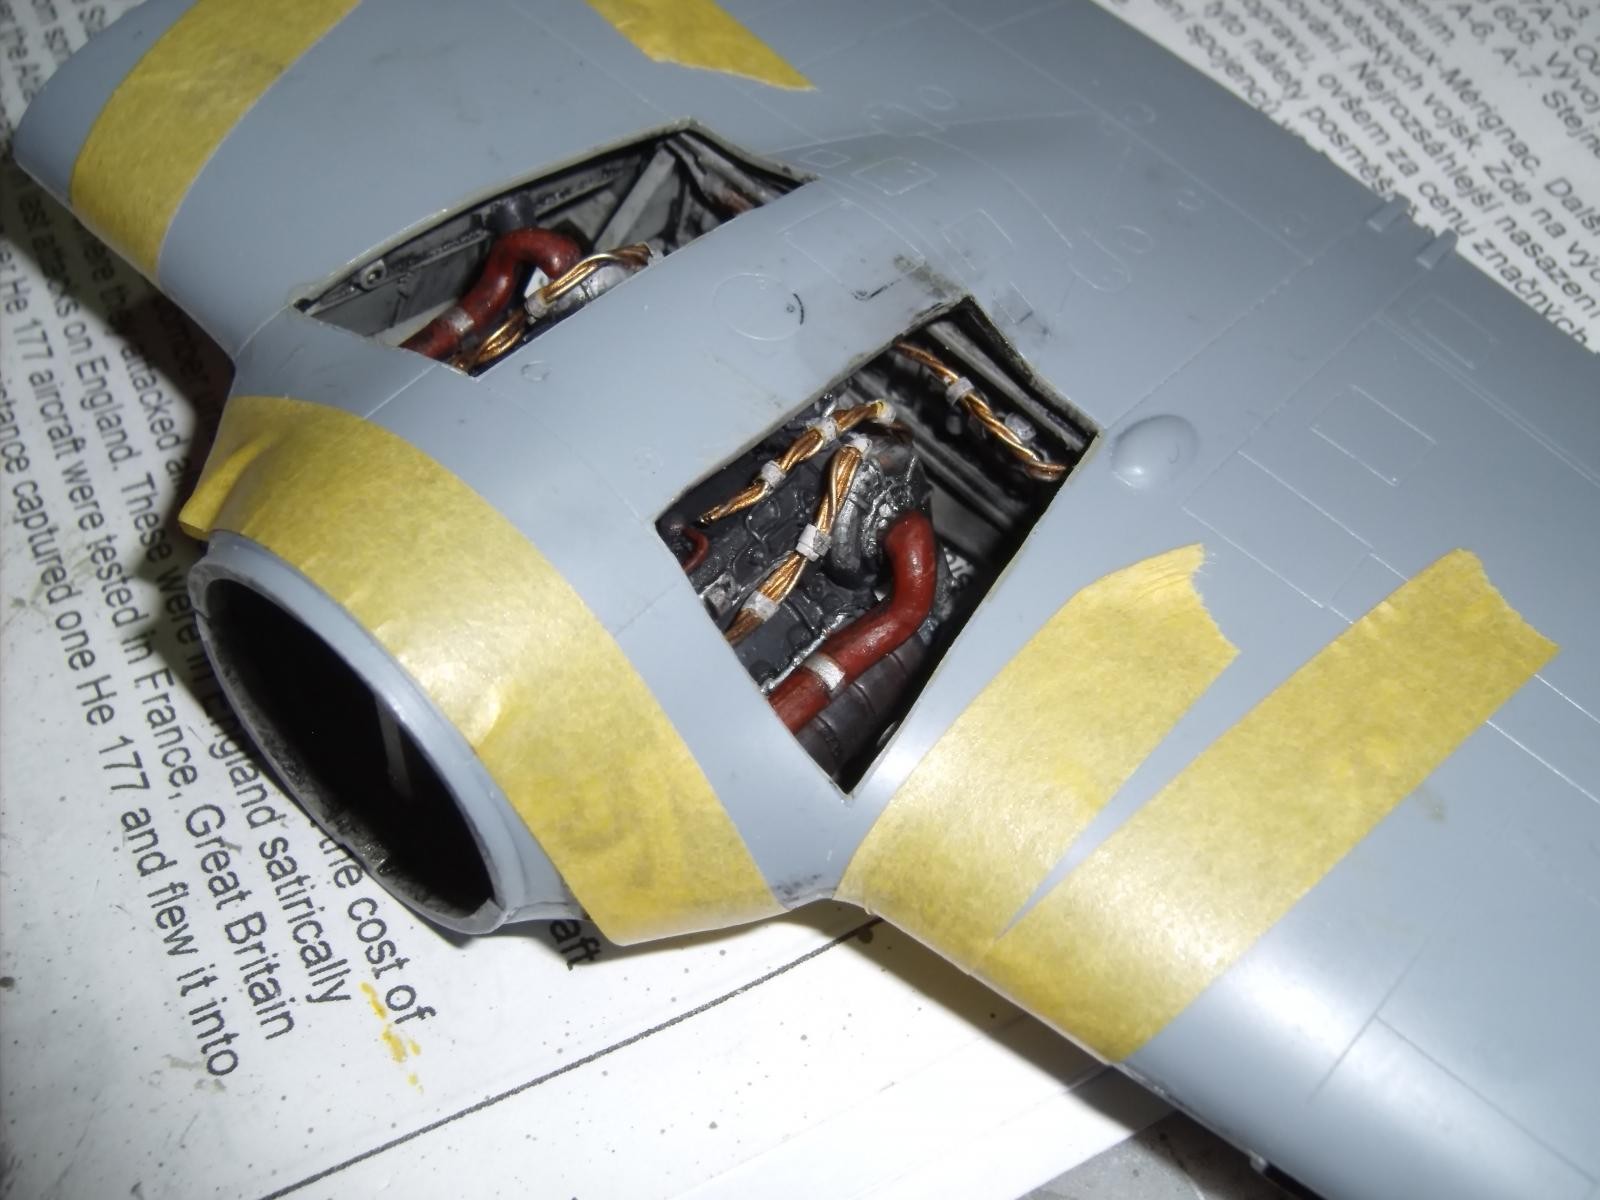
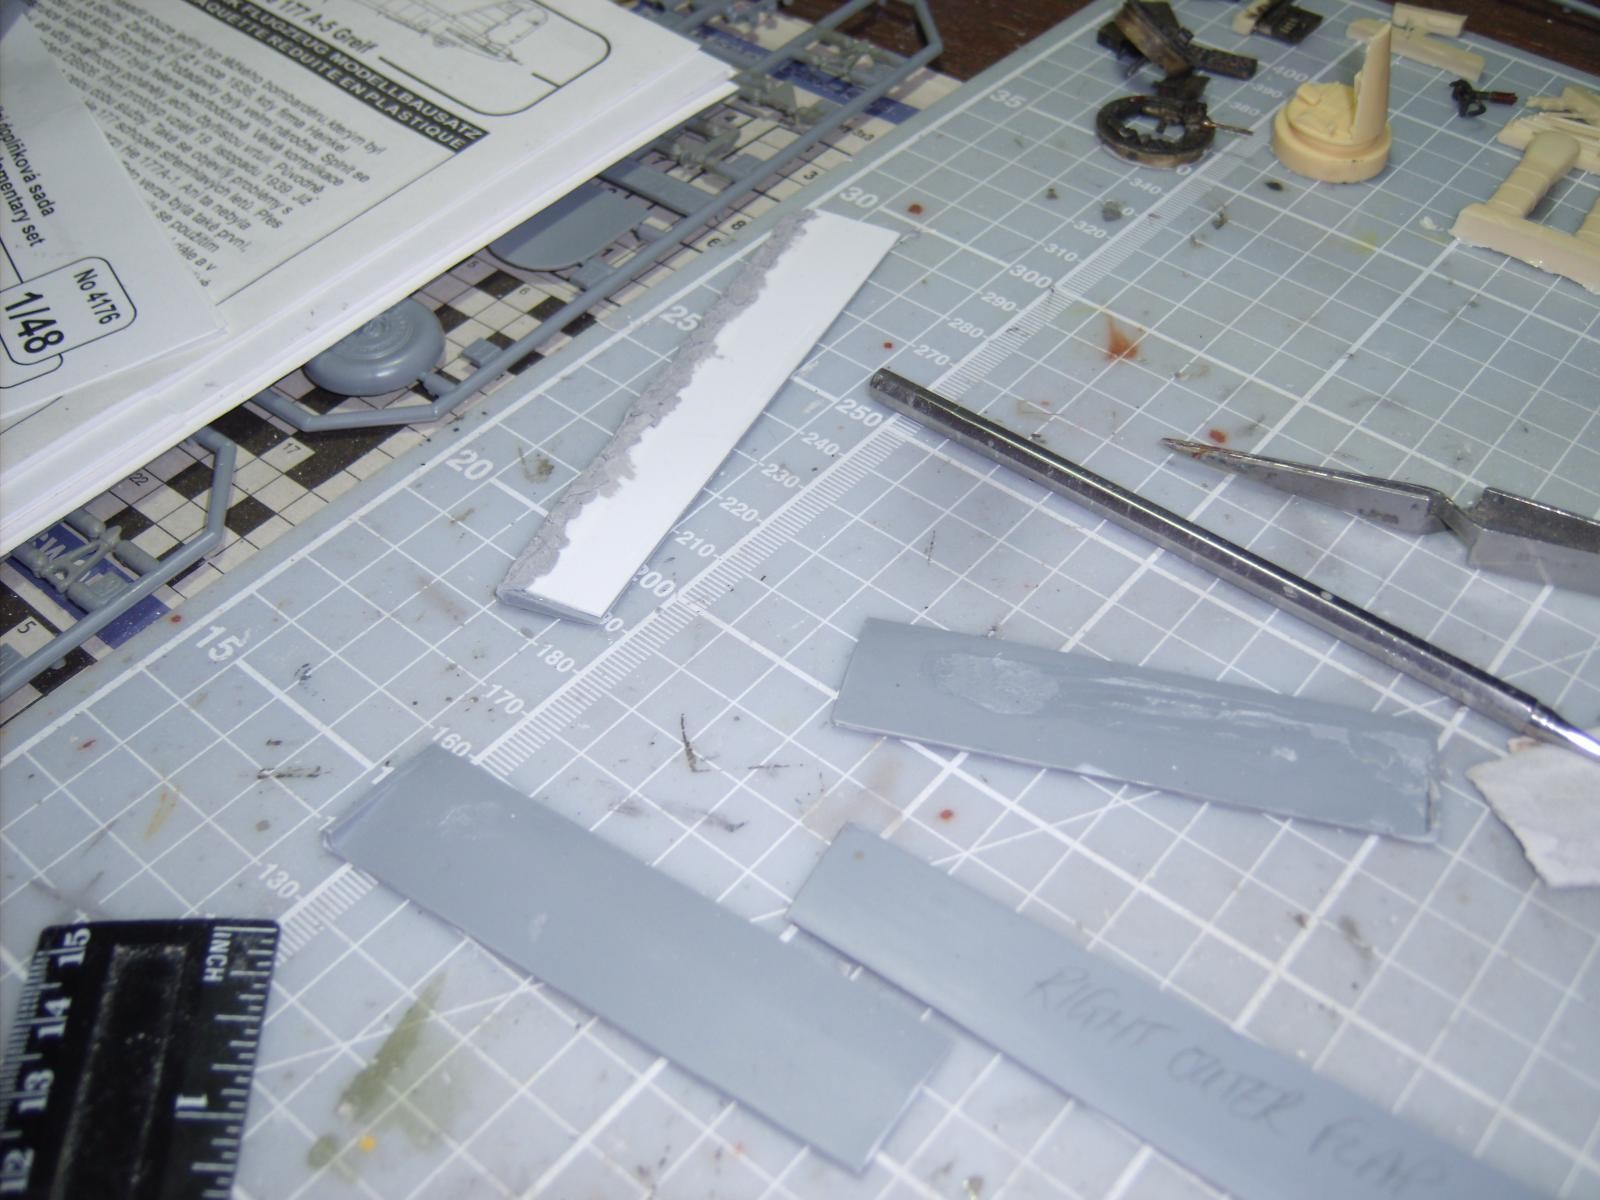
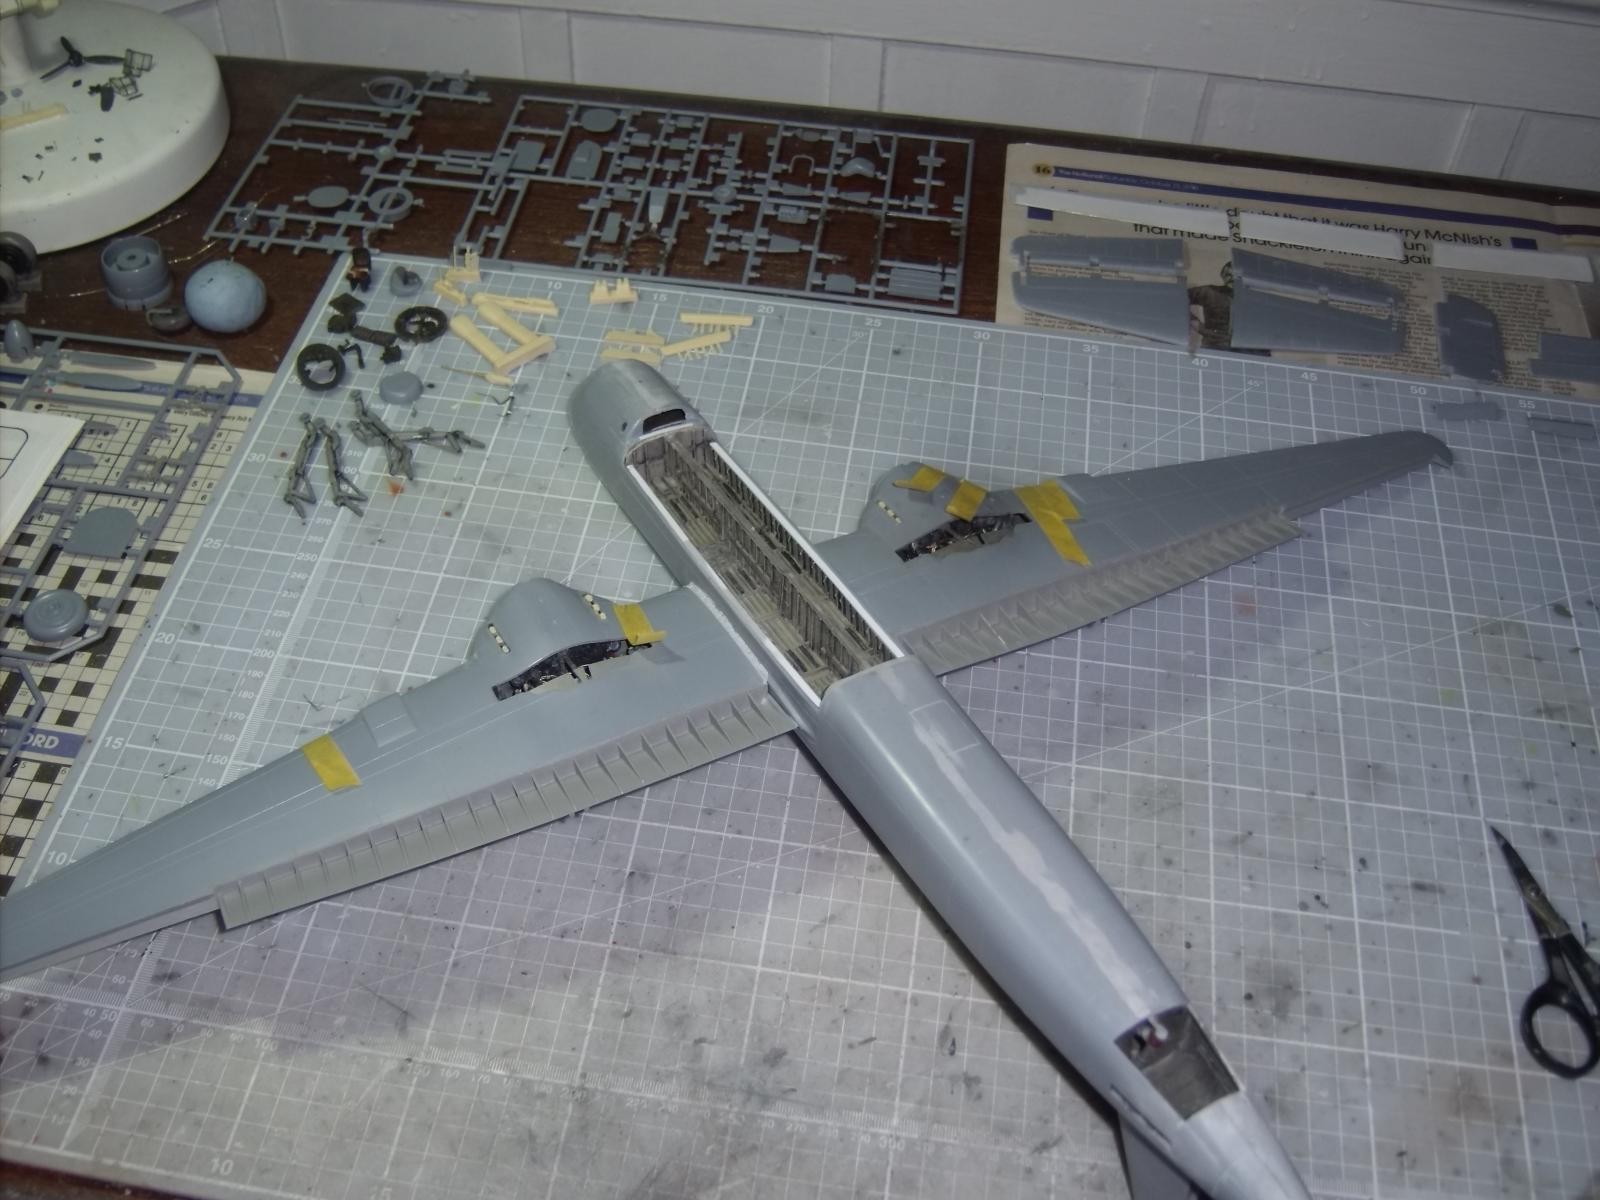
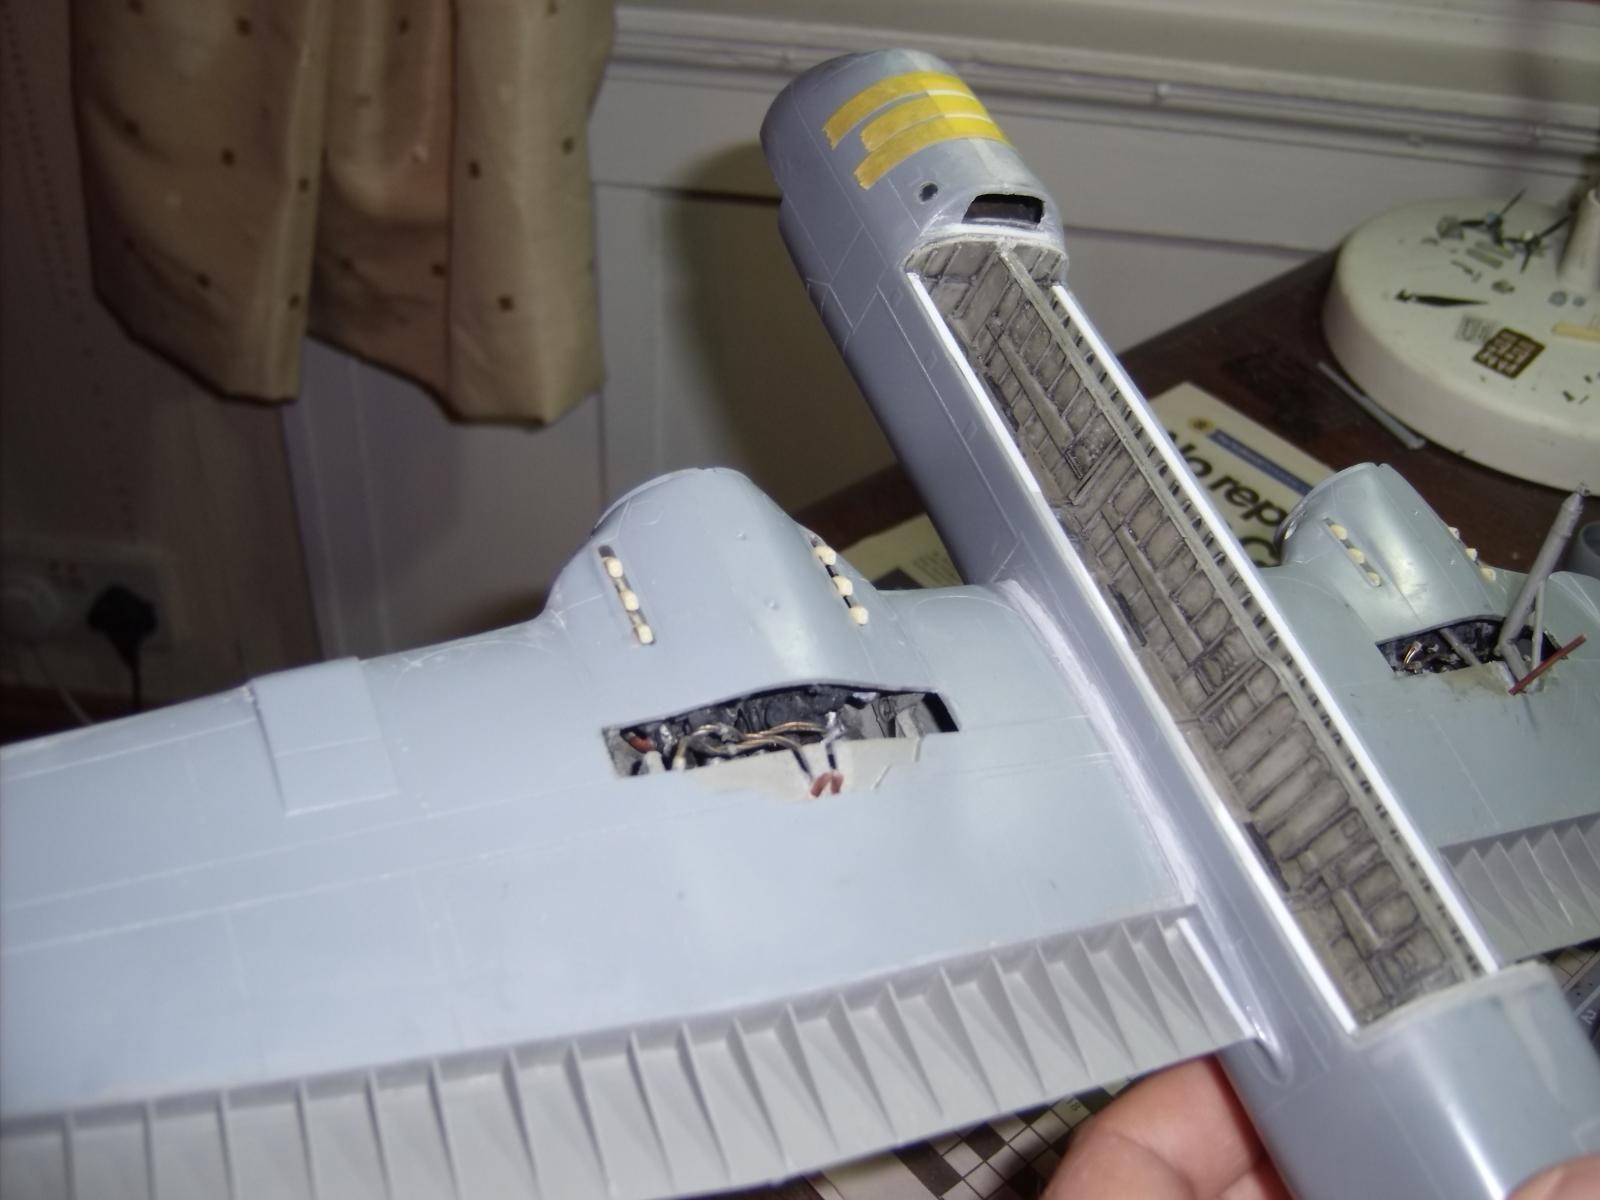
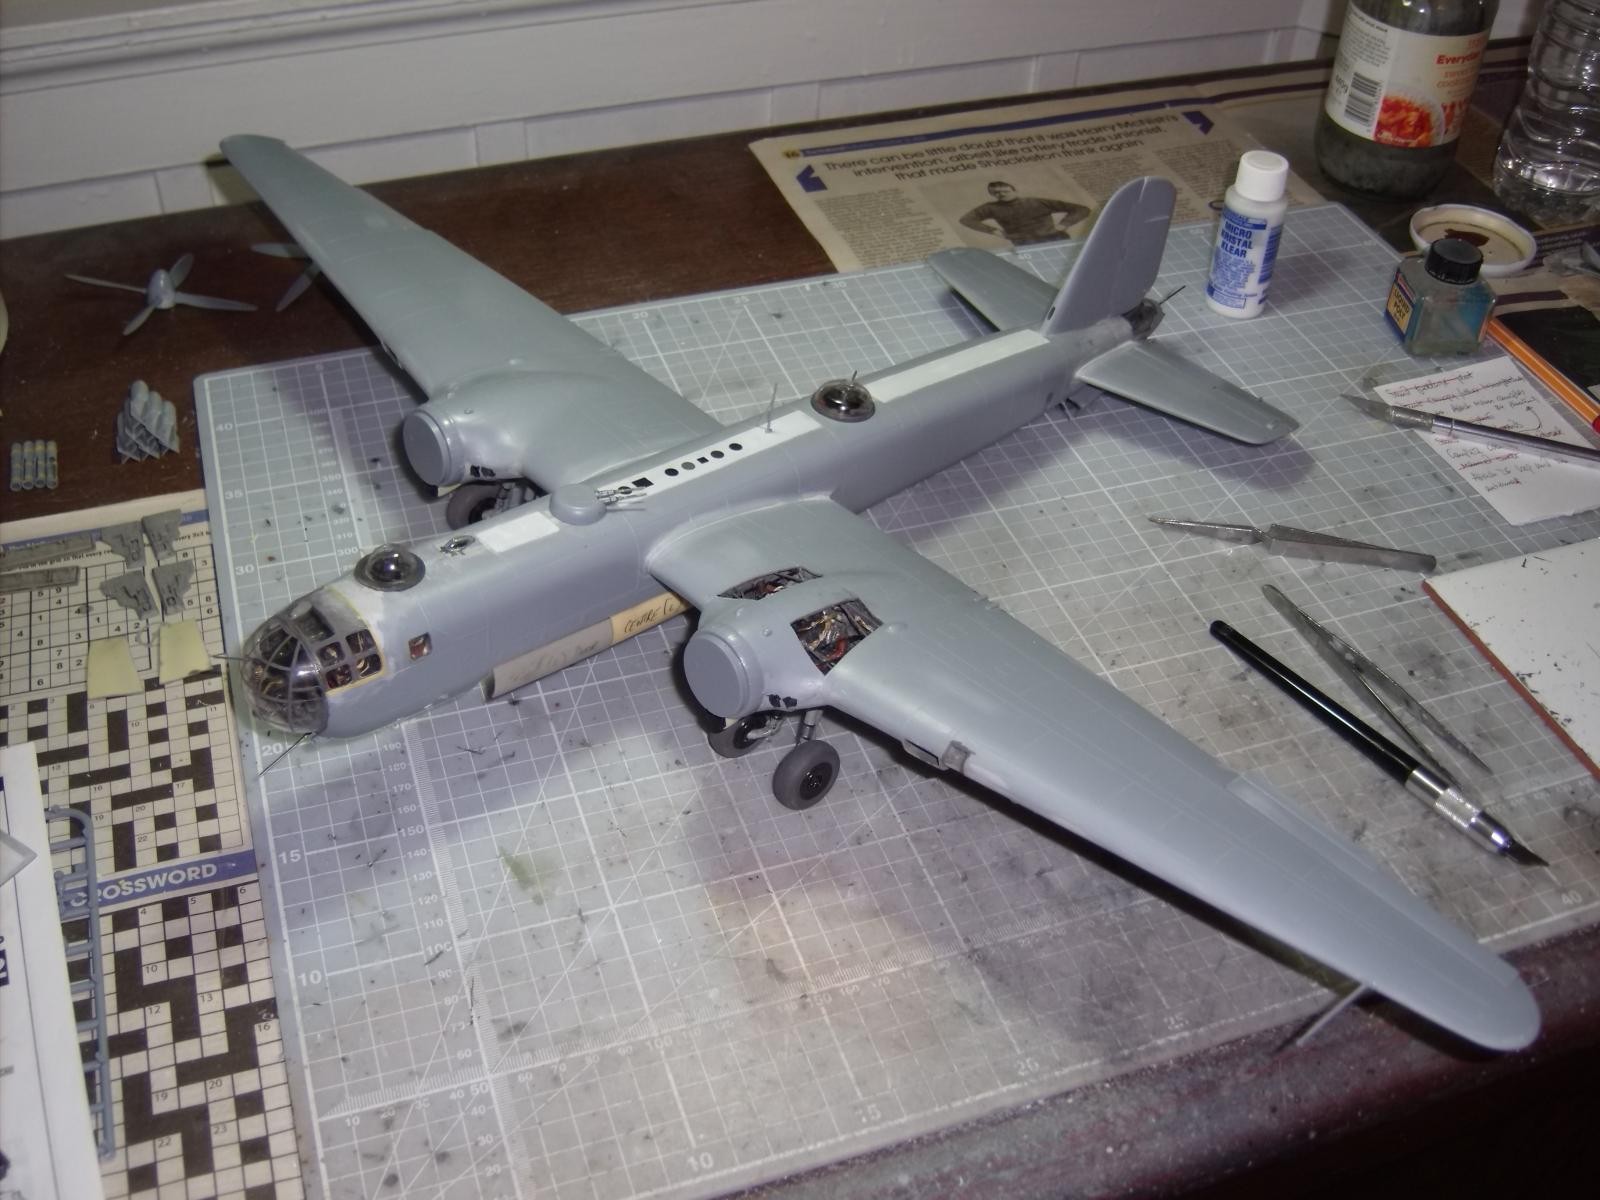
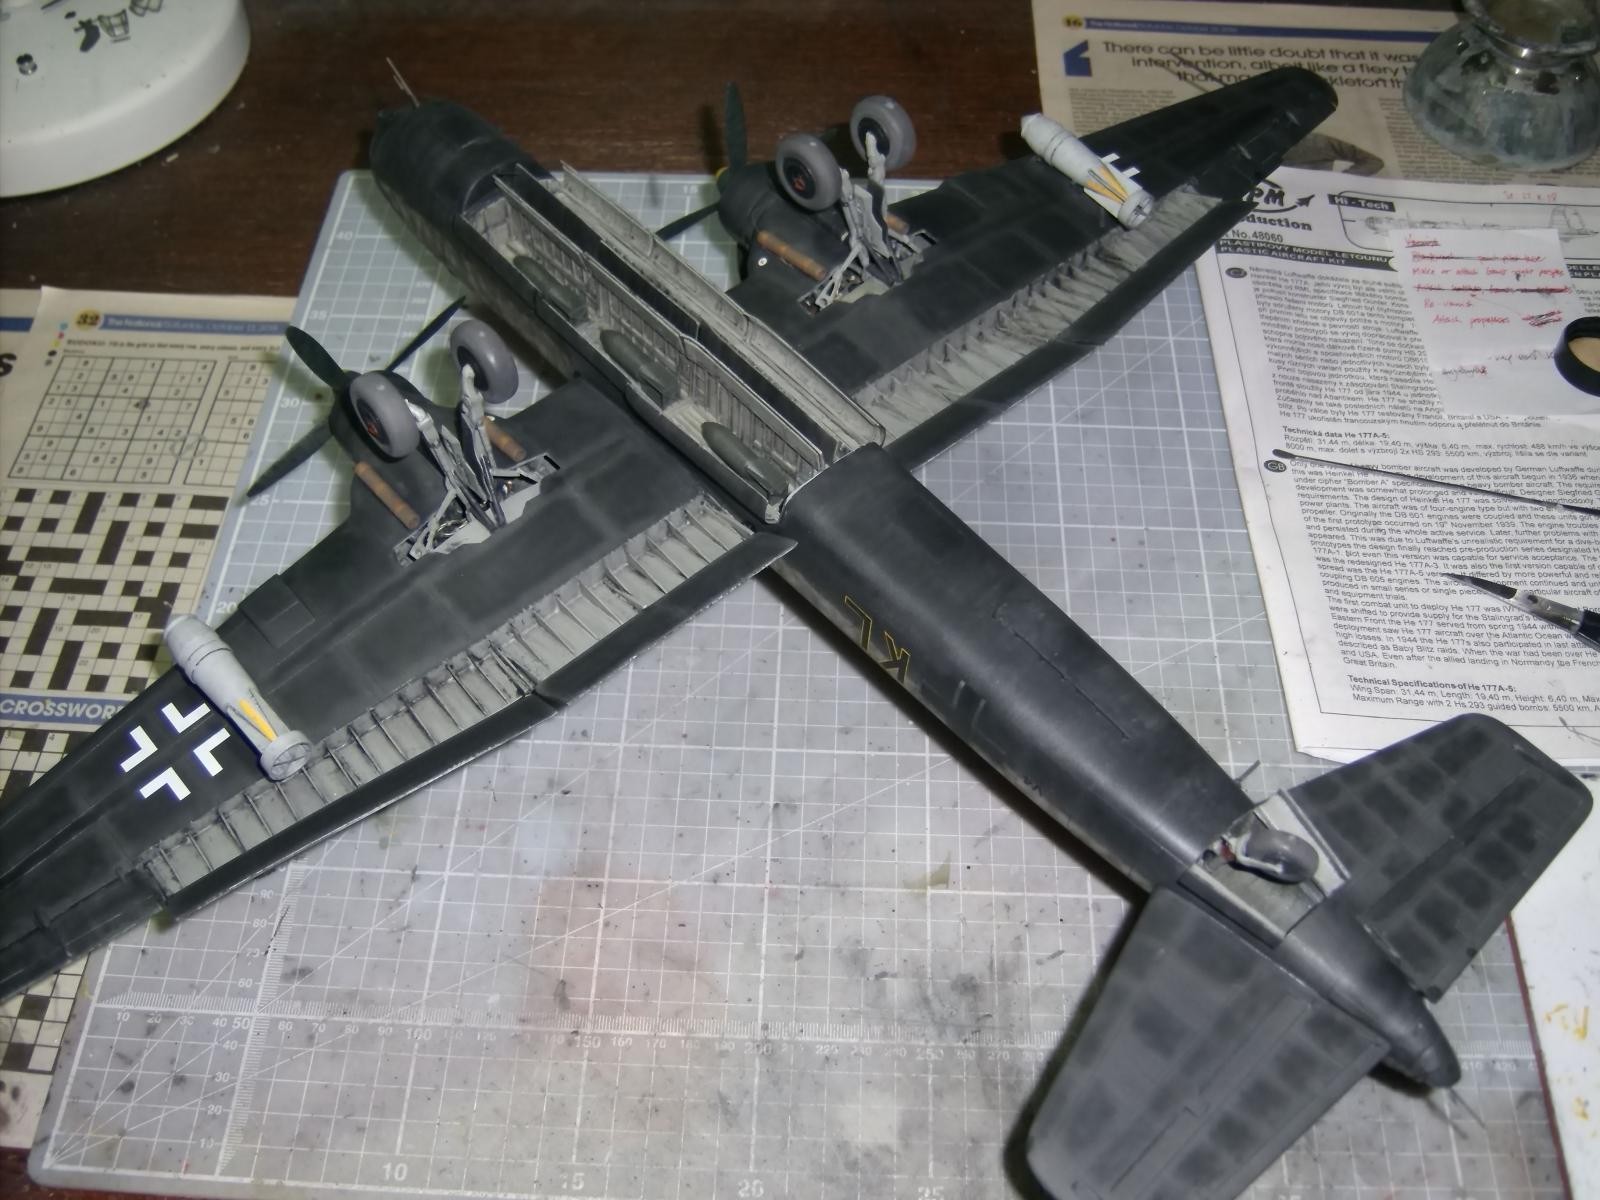
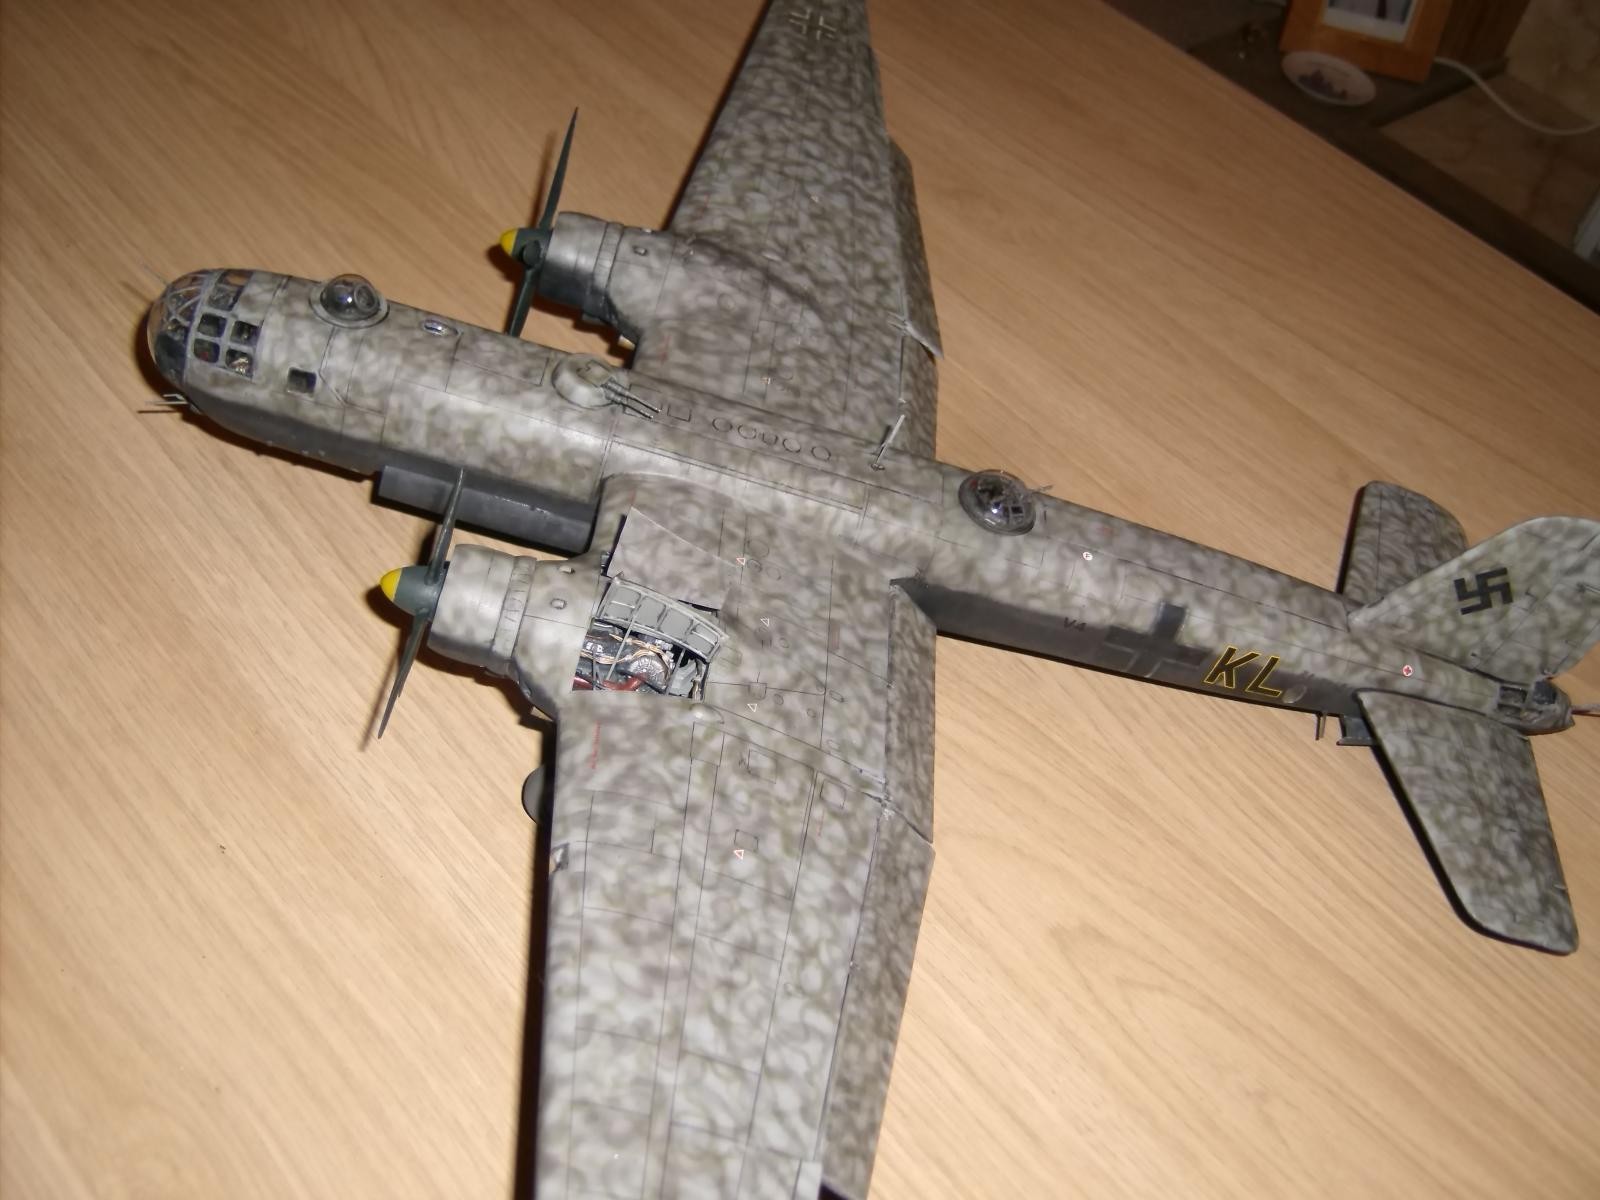
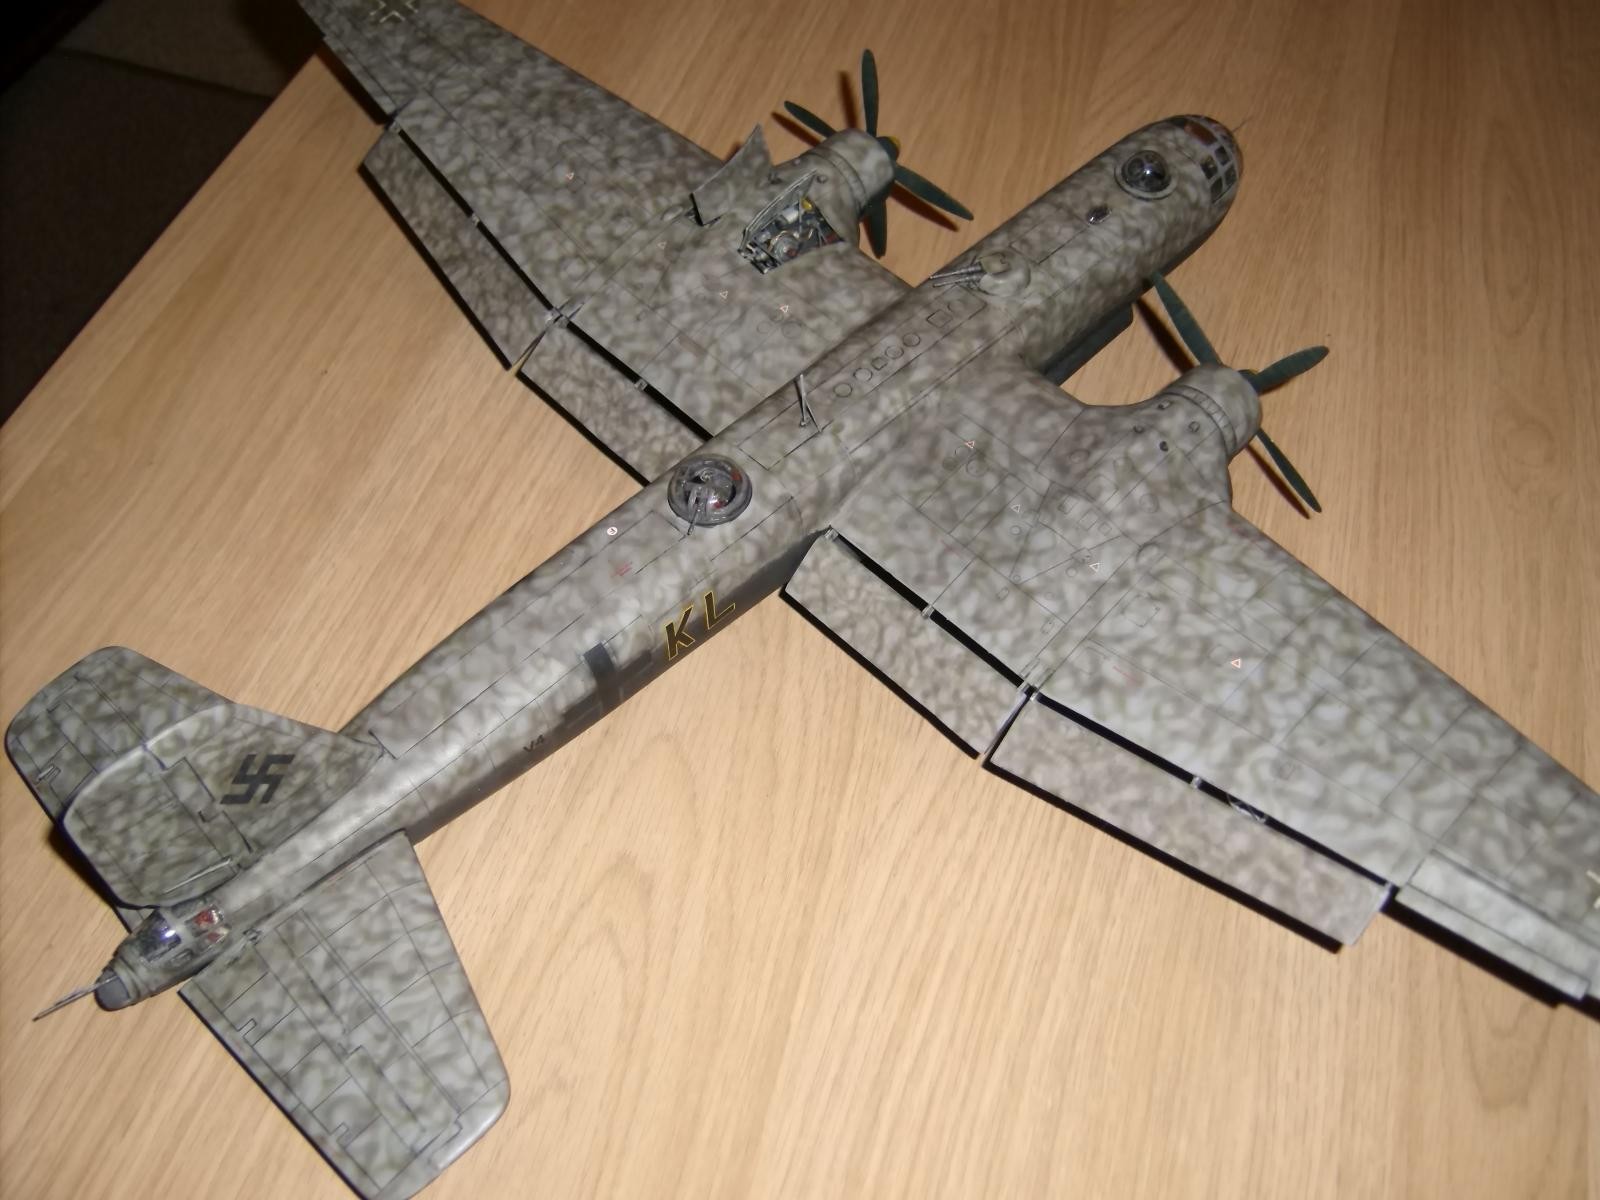
The He177 had Fowler-style flaps, and these sat sheltered under the overhang of the wing uppersurface. This meant that if I wanted to show them deployed, I would have to cut off the underside portion of the flaps, blank off the resultant space, build up the top surfaces of the flaps from scratch, and put all the small wing supports into the area left by the removal of the lower flap surfaces. i should add that in reality, these would have been much more detailed, but I decided not to add this in, preferring instead to accept the supports as you see them on the kit. Nonetheless, I think they look decent. The internal fuselage fittings were painted and blackwashed, the halves closed up and then my attention moved to the engine nacelles in preparation for the coupled DB610s. The engine set provides parts for one engine only, but the undercarriage set provides a 'rear section' of an engine as this was apparently visible when the undercarriage doors were open. The engines are resin and go together well; three lengths of fuse wire were entwined together, with thin strips of Tamiya tape wrapped round at random intervals as cables stays, then painted after being manipulated to conform to the relevant contours of the engines. These too were then blackwashed before insertion into the nacelle and the wings closed up thereafter. Then, the gaps at the back of the wings were closed off with plastic card, and the wing supports added. The flaps themselves were then built up - the inside leading edges of the lower surface had a thin card strip attached, a further section of card glued into position which effectively was the new uppersurface, and the slight gap along the length of the leading edge was filled with filler (not surprisingly 🙂 ) and sanded smooth when dry... job done.
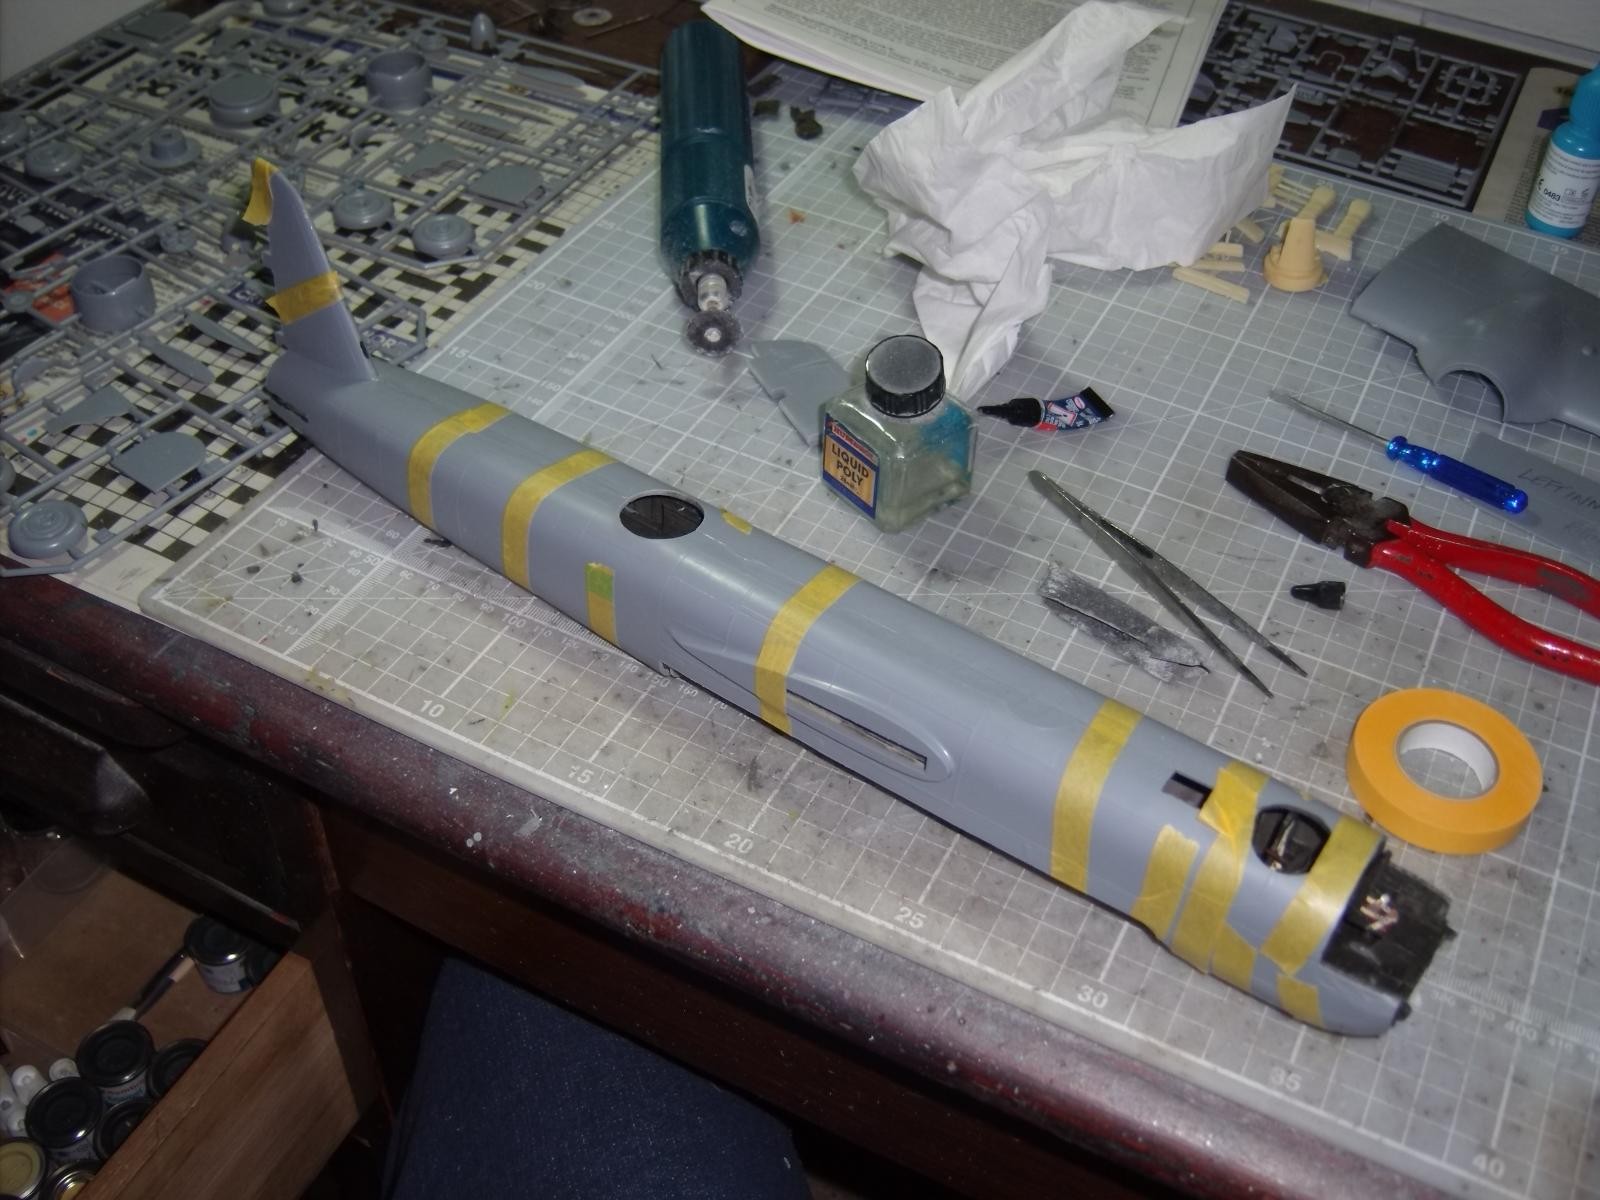
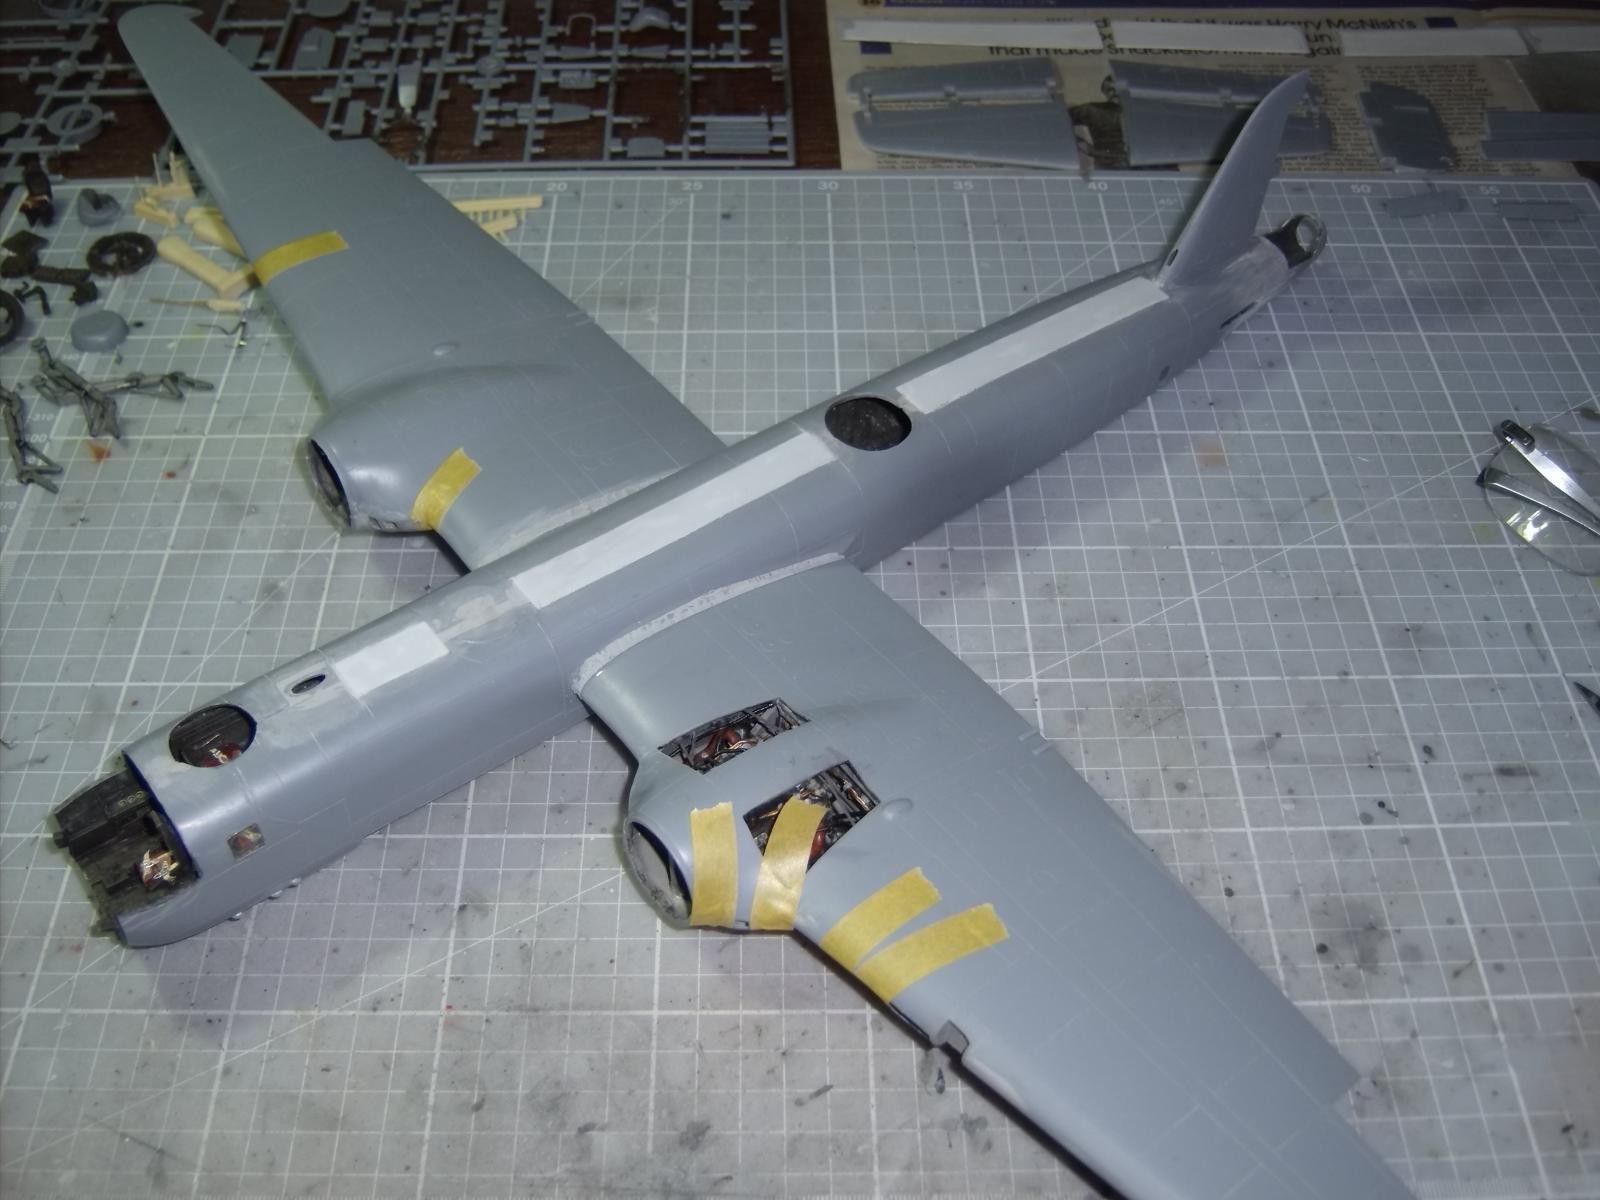
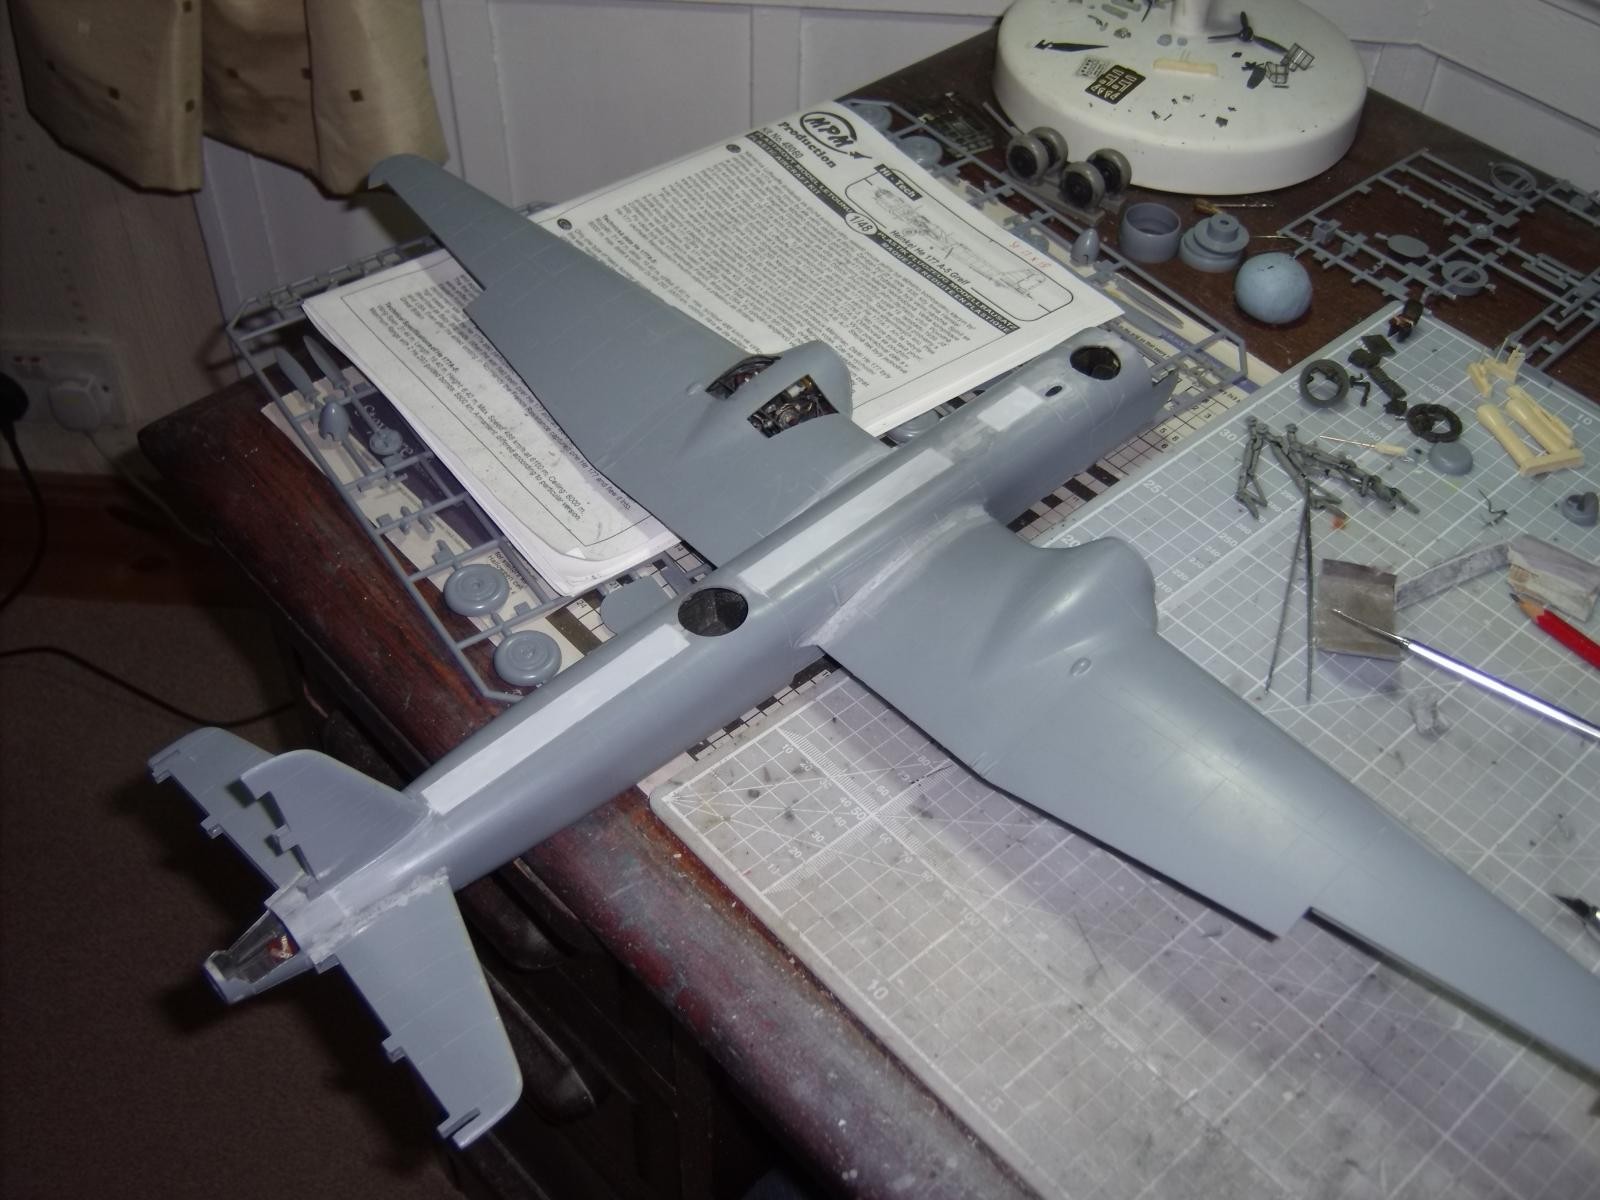
Eventually, the wings were mated with the fuselage and then all joints - wings, fuselage and tailplane, were filled where necessary and smoothed out when dry; a slight misalignment around the edge of the bomb bay insert, but this was easily corrected with strips of plastic card. Next... the undercarriage :-(.
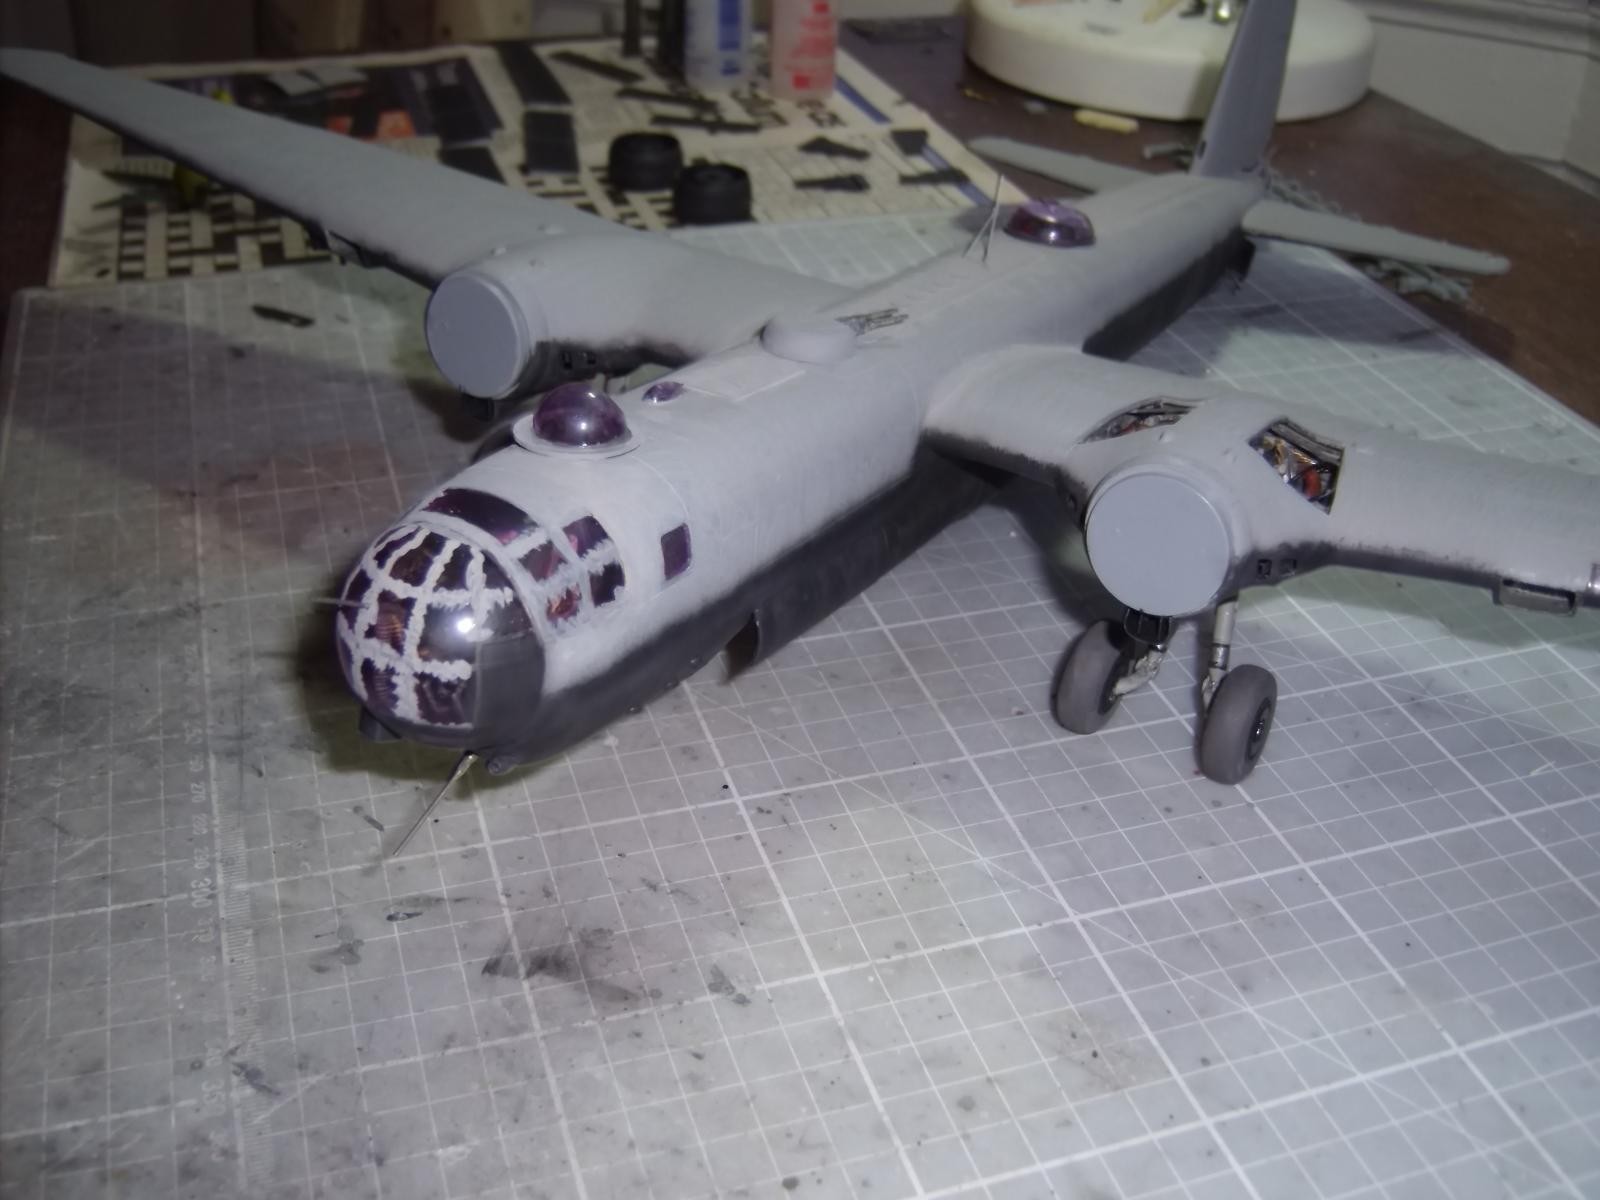
With such a large model, and quite a few resin accessories, this griffon was certainly piling on the weight. Each of the four undercarriage legs has a tab at the top to fit it in under the wing, but the opening into which it should go was way too narrow. Despite my best efforts to remedy this, nothing was resolving the fit issue. Also, the added weight caused the wheels to splay outwards at the bottom and inwards at the top towards the undercarriage leg, to the point they were touching the leg - not good. And... at the bottom of each leg, what I call the 'heel' attachments, going on at the back of each leg and twisting forward to accept the wheel, just couldn't handle the weight being placed on them; all of these issues were compounded by the fact that the legs actually sat at a forward angle, increasing the propensity for the weight load to cause them to fail. I solved these issues by inserting thick copper fuse wire into the nacelles, supergluing them in position, then removing the attachment tabs on the legs and boring a hole to accept the length of wire, thus giving the main legs more strength. I also bored holes through the heels and inserted stems of unused brass cannon barrels which gave the wheels strength, too. The wheels were then superglued at the correct angle. The whole model was then supported the correct way up, with the wheels just touching the top of the desk, therefore keeping them at the correct angle while the glue dried, but not carrying any excessive load until the assemblies were completely set - 36 hours later, I nervously removed the support... my griffon stood proud on it own and the undercarriage easily carried the weight of the model... yeehah! 🙂
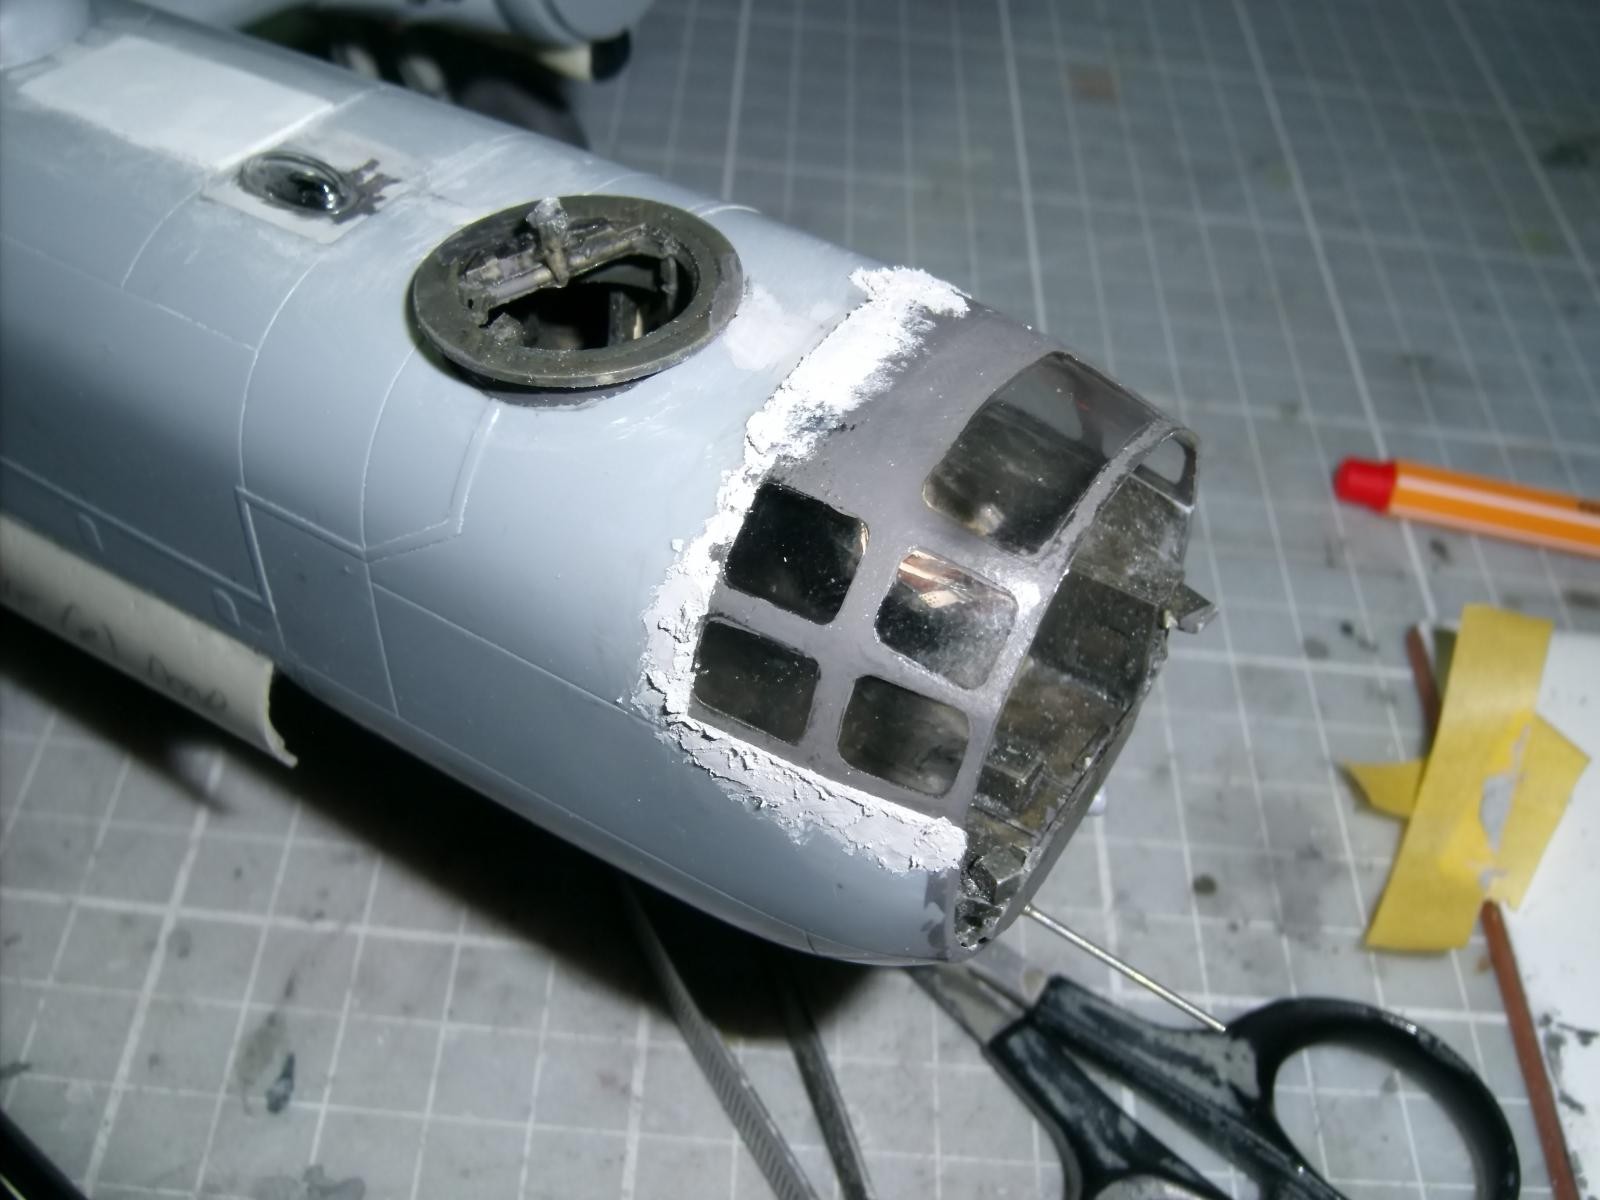
Drawing to a close now, everything else seemed much easier; there was still an issue with an ill-fitting canopy but careful application of filler and recreation of frame lines with thin strips of Tamiya tape helped a lot - it's not necessarily genuine, but you wouldn't have necessarily known that if I hadn't told you... :-).
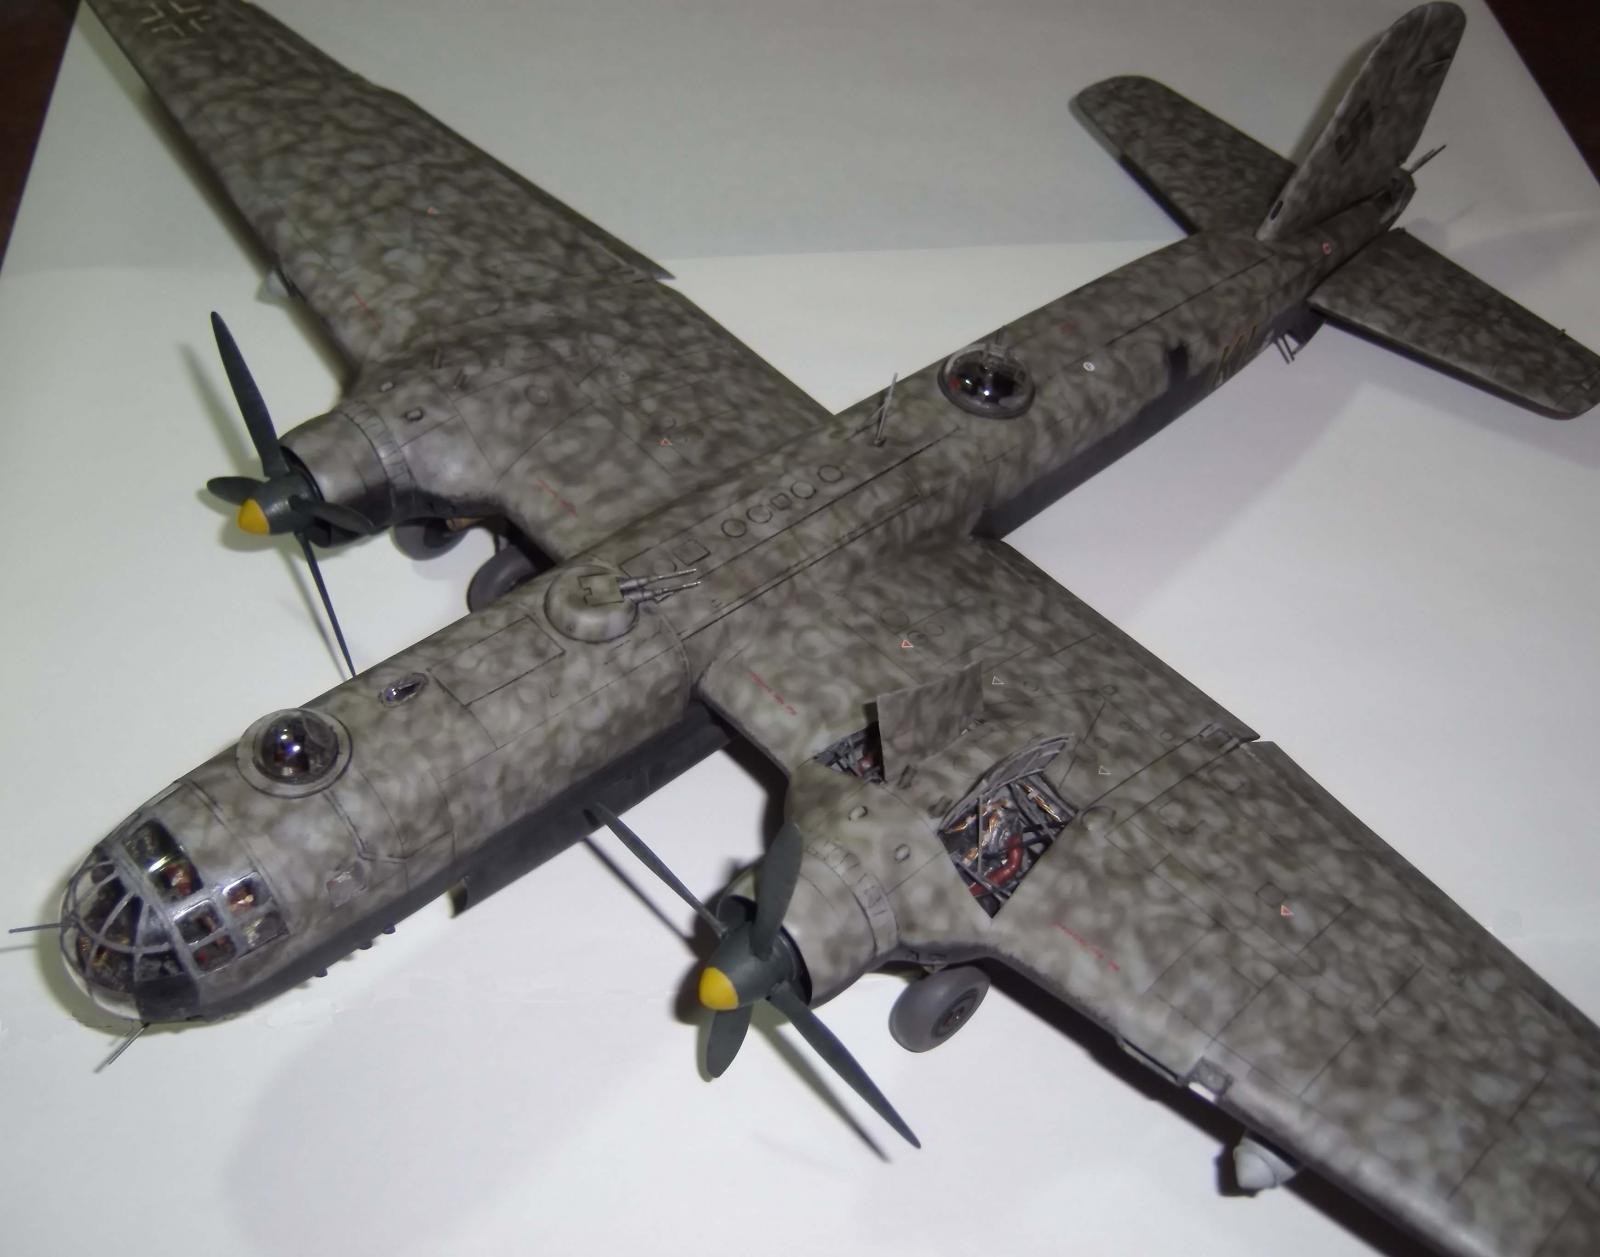
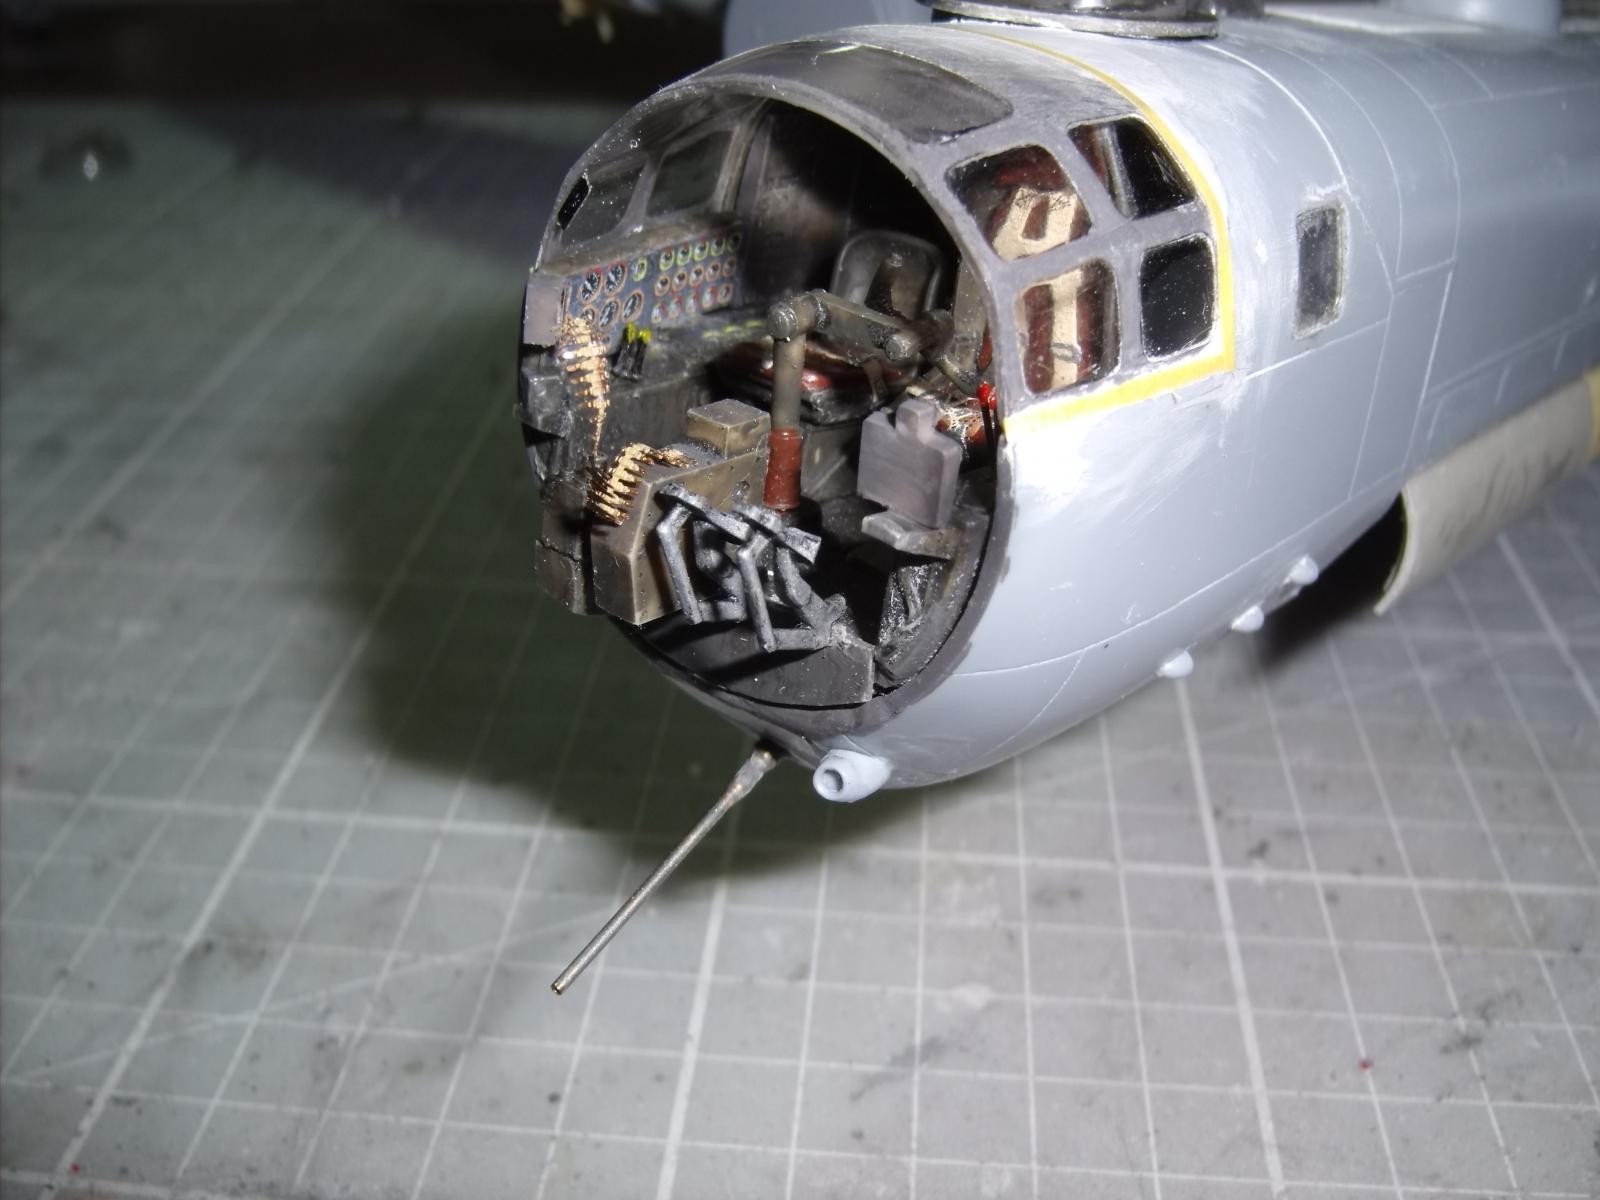
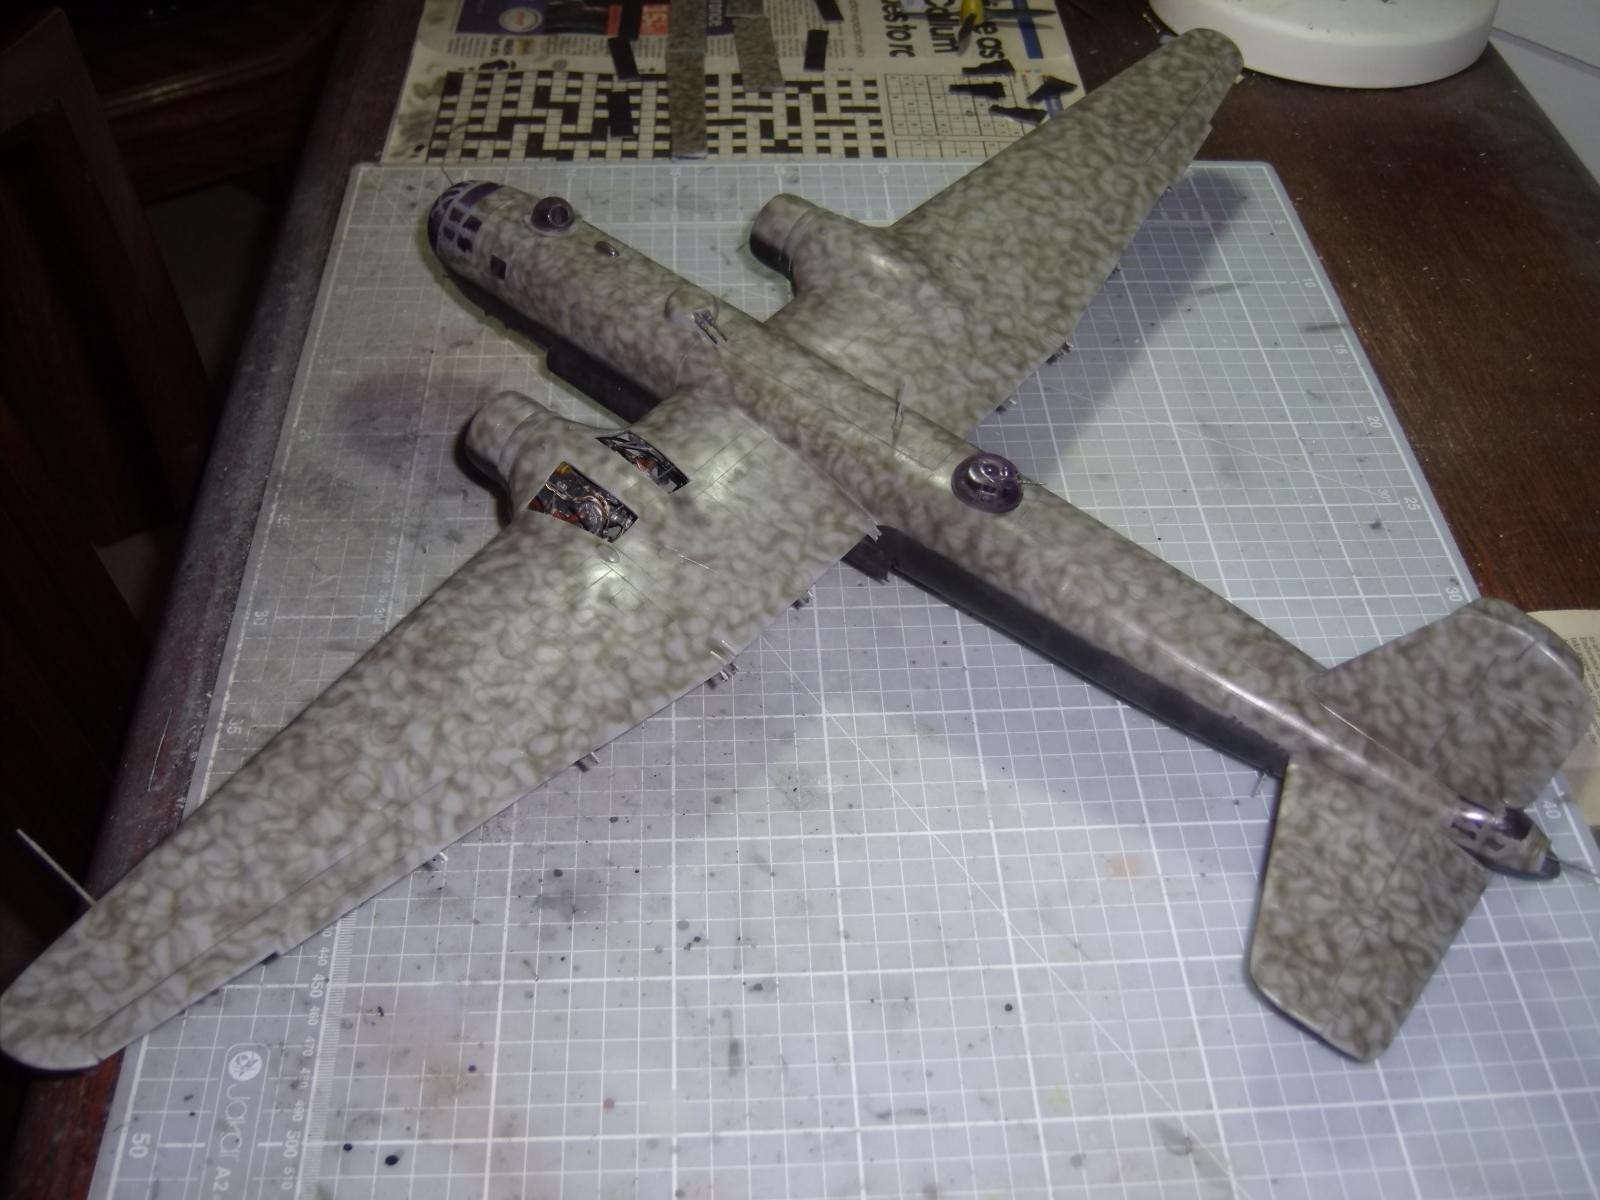
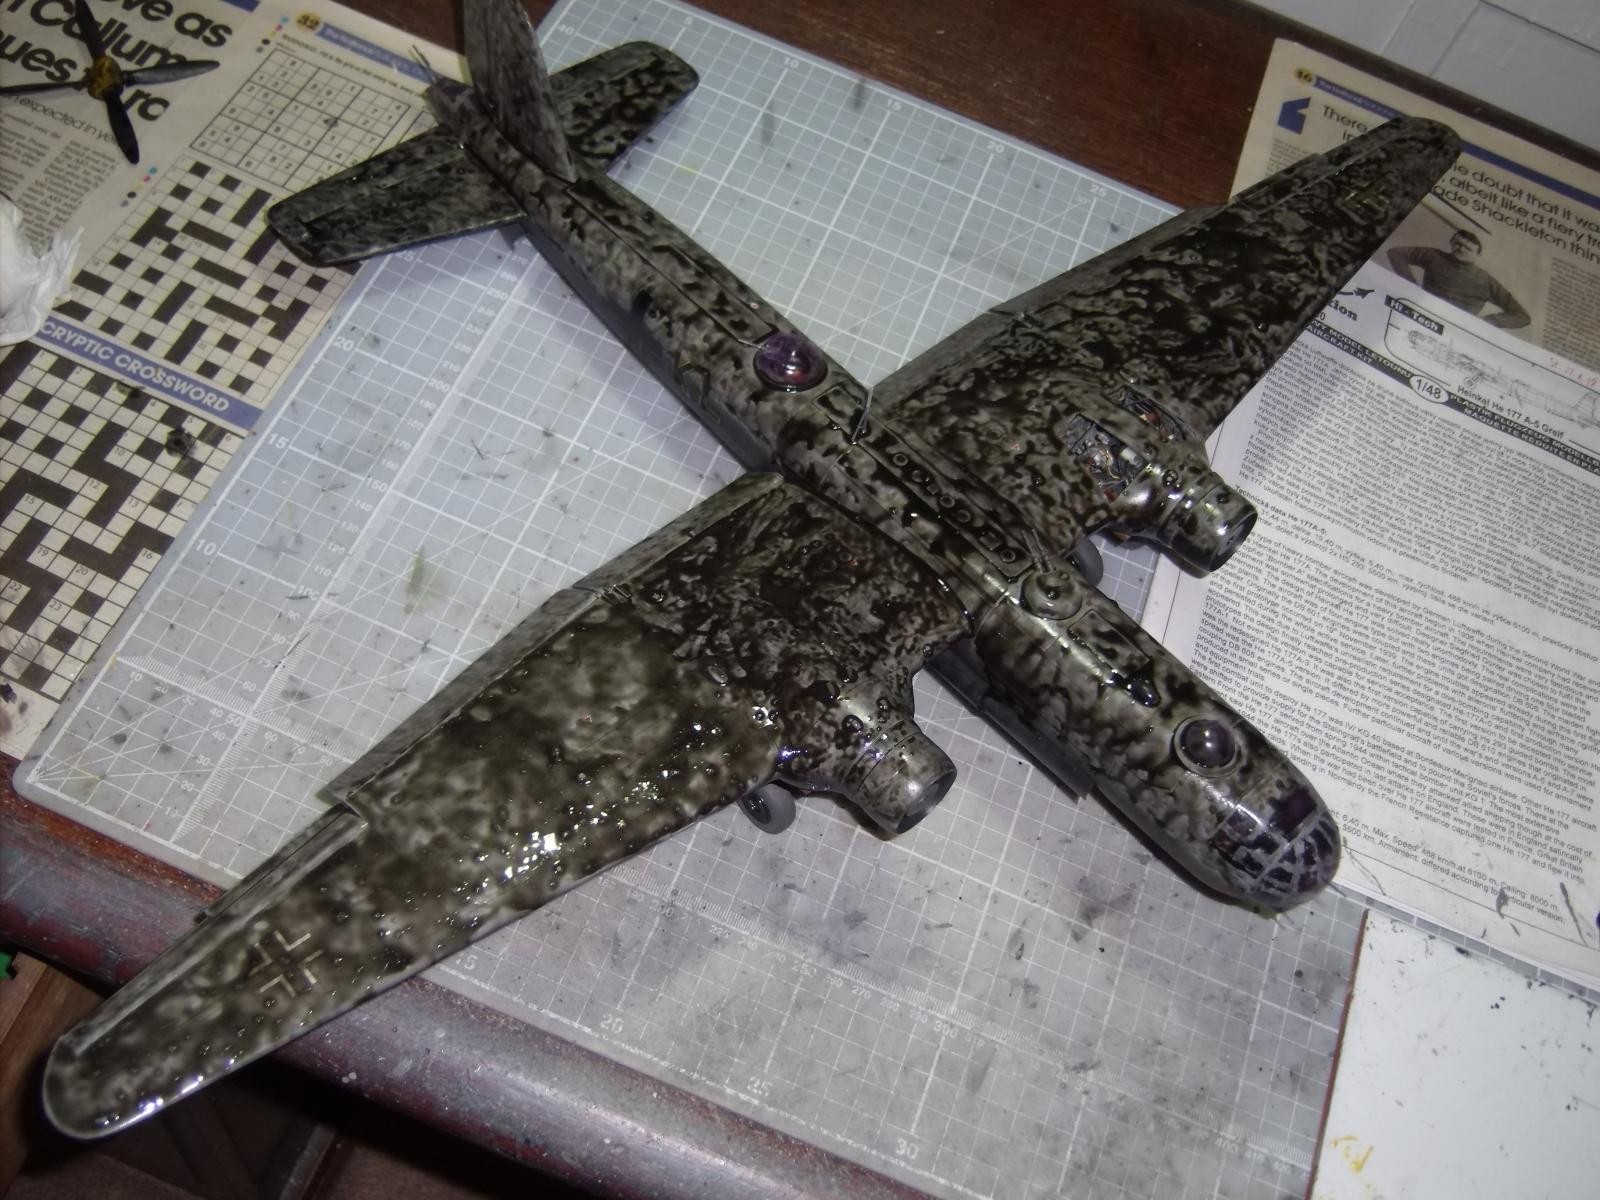
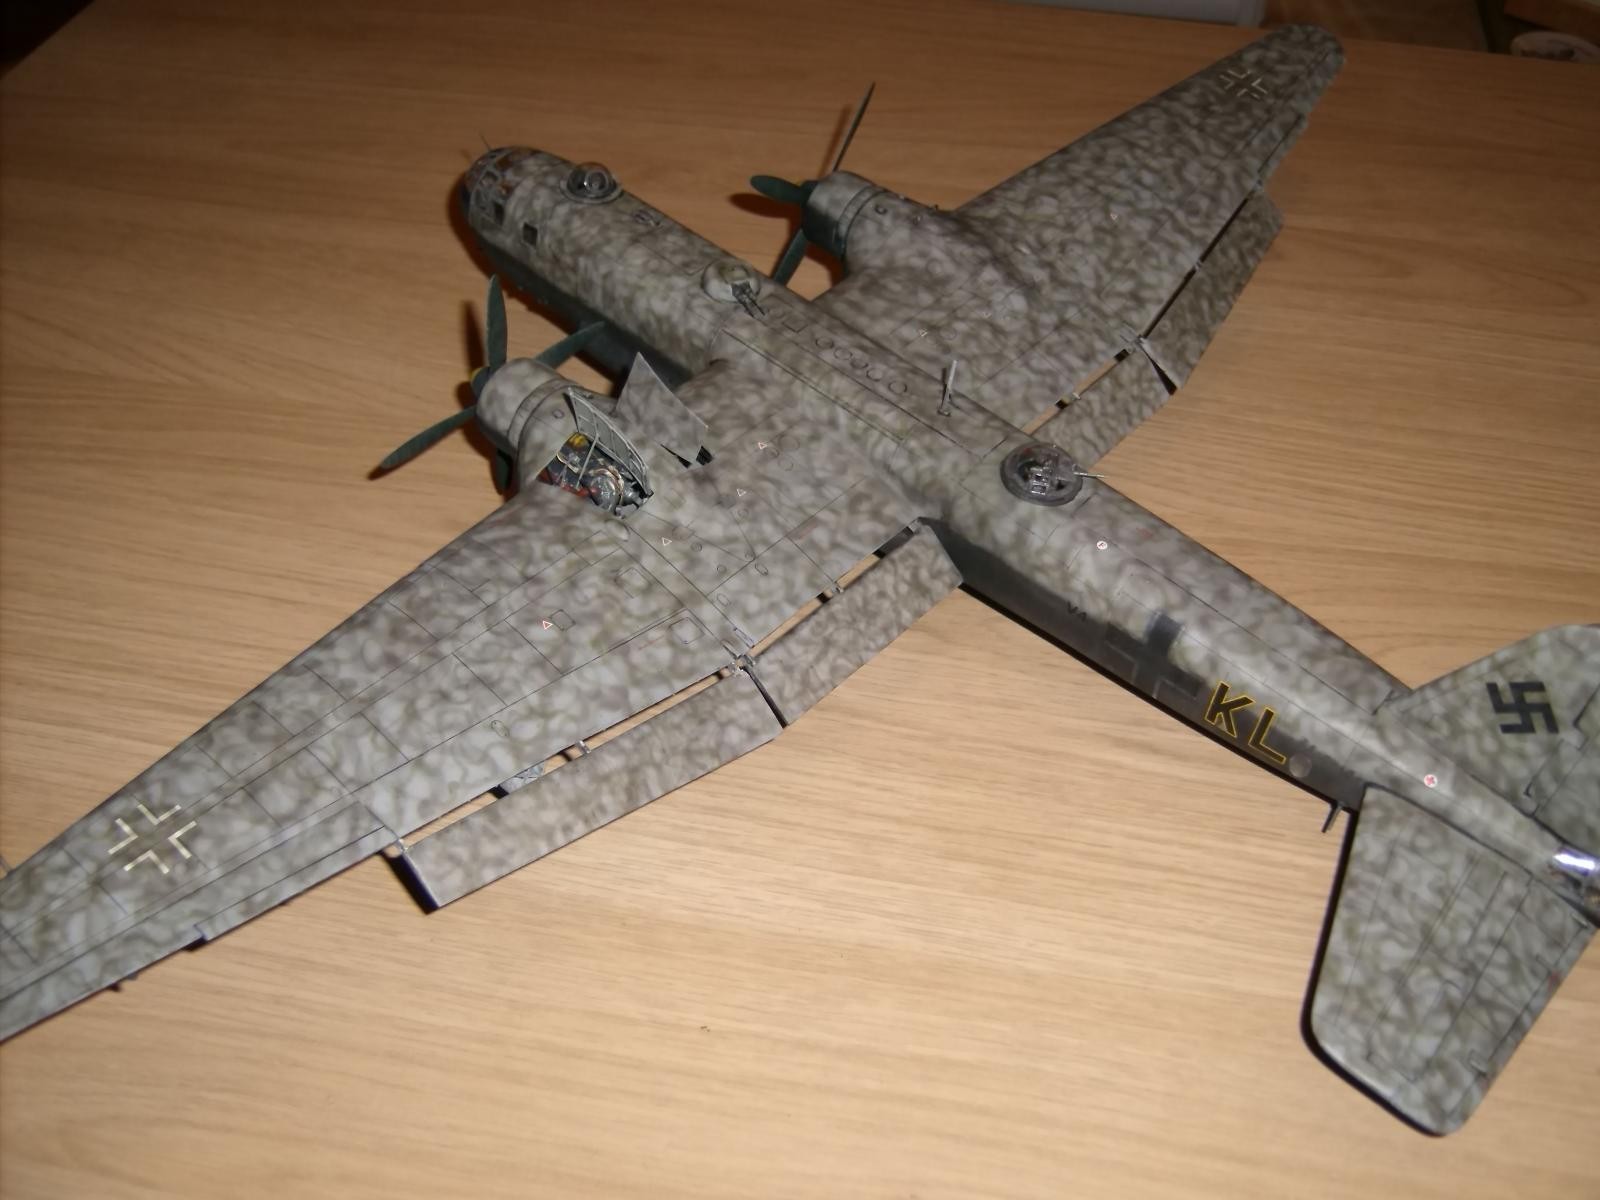
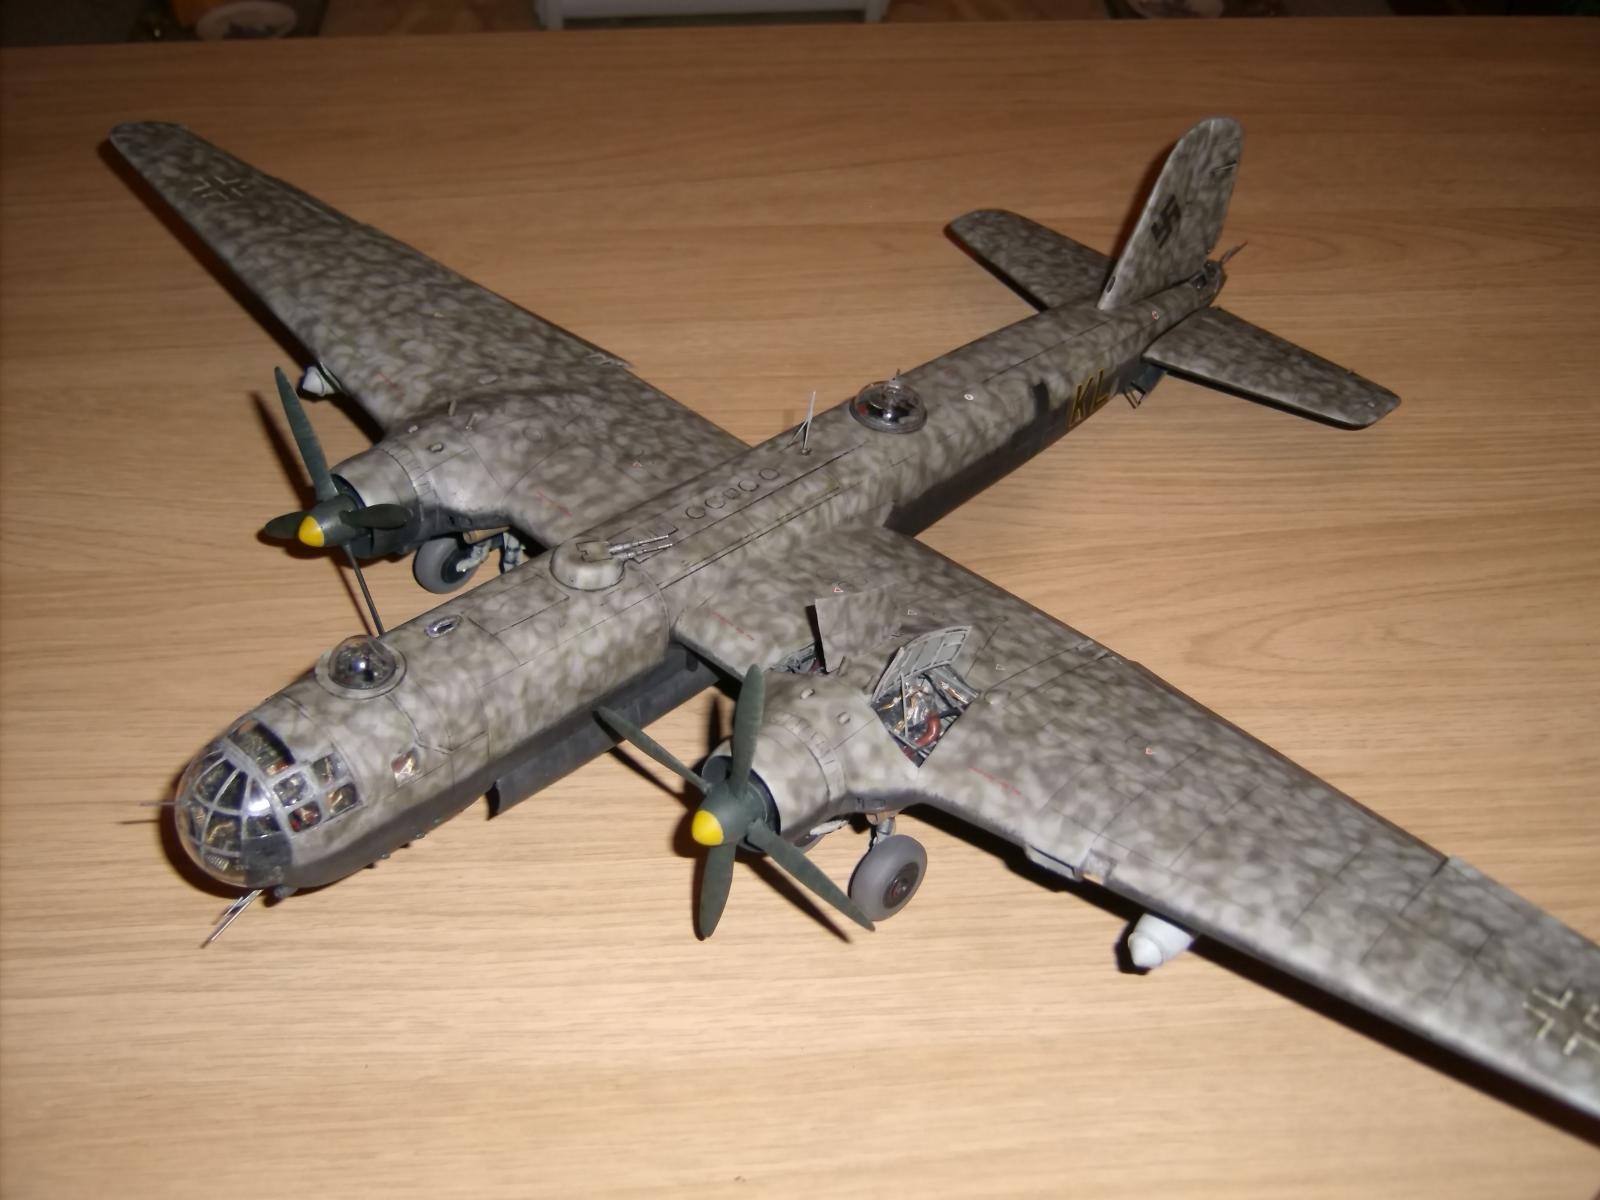
The access panels on the upper fuselage were attached, then the aircraft got an undercoat of pale blue grey, then black on the undersides and that in turn was shaded freehand over most - but deliberately not all - of the panels - a first using this technique for me. The wave pattern on the top was a fluke... honest, it was. I was pleased with the first application of medium green, but I knew it was too thin, so I applied a darker late-war greenish/brown in a slightly wider breadth and got lucky, but boy... how lucky I was! Even I was impressed with my efforts... :-). After that, the kit was varnished, markings applied and then blackwashed, with the propellors, guns, aerials, bomb load and flaps added on at the end. The bomb load is not indicative of what may have been carried on a raid, but more what could have been carried and in what location. The overpainting of some canopy transparencies in black is deliberate.
There are two photos of this aircraft available on the internet, and it is also the subject of a colour profile in Claes Sundin's 'Luftwaffe Bombers Profile Book No7', profile number 103. My kit is not exactly representative of either source, but is a good halfway house between them both. The aircraft was operational with 3./KG1 based at Prowehren/East Prussia, on 20 July, 1944, co-incidentally the same day as the attempt on Hitler's life at Rastenburg by Graf Claus von Stauffenberg.
Thanks for looking in - hope you like the end result.
Regards,
Paul


That's a cool looking plane.
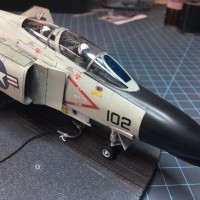
Great job on this beast. I bought one of these when it was first released but it was too damn big for me and I sold it. I pushed the envelope when I did the Special hobby He 115.
3 attached images. Click to enlarge.
That's a smart He115, Dale... you certainly tamed the kit very well, and I especially like the neat fit of the nose transparencies. I do wish Special Hobby would release some after-market accessories, such as a bomb bay or some additional engine parts. I have one done from a few years back, and another to start. With patience, it's a lovely model when done.
Mine looks okay, but I had three attempts at the colour scheme within a few months of completion! This is the best of those attempts but I may yet refurbish it. I changed the rear MG mount, as I have photographic evident of this arrangement fitted to an He115, albeit not from the unit my kit depicts. I opened the nose hatches and scratch-built the beaching trolley, which has now metaphorically 'sunk without trace', and made up the new unit emblem transfer myself. I've been thinking about doing something with this kit recently, so you may see something in due course... ;-).
4 attached images. Click to enlarge.
Thanks Paul. I found the kit to be a ok but those supporting struts from fuselage to floats were a real PIA. That beaching trolley looks great!
Amari/Dale...
Thanks for your comments. They are much appreciated... ;-).
Regards,
Paul
Hello Paul, @paulh
Man you guys are really pushing all the right buttons today here with this one ! It's a huge model and you did a fantastic job with it... Looks great my friend. I had the old Airfix 1/72 scale He-177 and the Italeri 1/72 He-115 many years ago. I built the "Greif' but not the 115. Sadly these models were part of my childhood collection, of which only a few still exist today...
All of the extra details you added definitely were worthwhile and added not only weight, but an added sense of realism. I have a 1/48 scale B-25 that I expect to find the landing gear snapped any day now... In hind sight I should have reinforced the gear as you did with yours. This is a spectacular model, and the landing gear bays remind me of looking up into the belly of a Fw-190... which has a very similar layout with the rear of the engine and plumbing visible from the landing gear bay.
This is a spectacular model, and with the flaps displayed in the lower position, shows that you really spent some serious time building it. I have a 1/48 scale Monogram B-24J that I started super detailing the landing gear bays after being inspired by Marc Barris, so I know what you have endured... Well done my friend, and a great big "liked".
I liked everything about this one, from the super details to the marvelous camouflage paint job... You should be very proud of it... I would be.
Having some extra time on your hands isn't all that bad once in a while... Stay healthy and safe.
Great article - really enjoyed reading. Great looking plane, too.
What an incredible build Paul.
The scheme is fantastic. You must have spent quite some hours on it.
Hi Paul!
This is a fantastic model, after a lot of work.
It is amazing that you took the quality road and replicated all those details.
I love your reinforcement techniques too.
Thanks for all the step by step pics - great!
Congratulations, your Greif is a joy to watch!
Incredible build and painting, that camo scheme is so nicely done!
Guys, a big thank you to all of you for your comments. This was certainly a challenging kit. I have only recently started doing blackwashing in the last few years, and this was one of the first kits I applied this technique to. In a way, it was one of the 'pioneer' kits in my collection, leading the way as it did to my applying a bit more time to the detail of things, better problem-solving and more of a challenge with some extra detailing. Larger kits allow better opportunities like these, but naturally, the pay off is finding space for them. Maybe - no promises! - the next kit will be a smaller one!
Thanks again for your kind words.
Regards,
Paul
Wow Paul, that’s an amazing build...a mammoth sized Greif!
There are not a lot of MPM Heinkel 177 builds around and I suspect their sheer size isn’t the only reason for it.
I know I would love to build that plane but the challenge the kit demands would made me tossing it aside eventually (I know because I started Trumpies Condor when it came out and got lost among a forest of evergreen strips and pieces to enhance the insides).
Kudos to you sir, for the fact of completing the beast and for such a great work overall...did I mention I love that wullenmuster work?
Thank you, Pedro... yes, the griffon is a large kit, but well worth the effort... ;-).
Regards,
Paul
Excellent work Paul, your additional efforts of adding more detail to this kit really paid off.
Thank you, Tom... ;-).
Now this is a build for the ages. Building a rare model in this scale, and knowing the time and patience required to build it. And that alone if you don't add any modifications. I can imagine the time and frustration during the process when some of the bits didn't cooperate. Those moments just put it up for a while and work on something else. I know though I have never build anything this elaborate as yet. Closest would be the Tamiya Lancaster. Your patience and passion of the hobby shows. Well done. And thanks for sharing.
This is a remarkable build of a daunting kit. Very well done.
I have this kit in my stash and one of my MUST builds. Based on what I have read it is a beast of a kit to build and requires patience and just the right amount of alcohol to get through it. You did an EXCELLENT job with yours, especially with all the additional detail. It really makes it stand out along with your perfect paint scheme! One thing about this site is that it inspires me to want to do more! Good Job also on the Cockpit Glazing's, I have test fit them and they just to seem to have any chance of lining up, but you made it work.
Love the paint work! Looks fantastic.
Guys, thanks to all of you once again. This kit seems to have hit the mark with many of you and you do me a great courtesy in expressing your appreciation so fully; I am pleased you think so highly of my efforts and all of your comments are very much appreciated. 'Thank you' sometimes seems a little insignificant, but it is a genuine comment from me to you and others, who in your own ways, all bring something unique to this wonderful hobby of ours with you own skills and techniques... ;-).
Kindest regards,
Paul
Wow!
I've had a soft spot for this aircraft ever since I built the 1/72 Airfix kit back in the '70s and it was big enough in that scale.
You have done a fantastic job on both the build and the paint work.
I'm not a huge fan of opening up engine panels, etc. as I like the 'pure' lines of aircraft, but this is one aircraft that deserves it, just to see the unique coupled engine pairs.
The dropped add that bit of magic.
I wish I could see it in person.
Liked*10
My favorite bomber .
Excellent build and paint job.
1 attached image. Click to enlarge.
Michael/Maarten... nice of you to comment. Thanks.
Paul
A superb result, Paul. You've gone to endless trouble here & you must be proud of the result. I'm particularly impressed by your wave pattern camouflage & all your build progress photos. Well done!
Thanks, Tony... I appreciate your comments. It's a good end result with what can be a difficult kit, but I am very happy with the outcome.
Regards,
Paul