Vac Wings Northrop BT-1 in 1/48
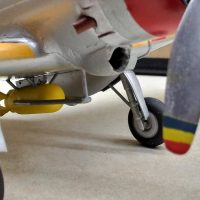
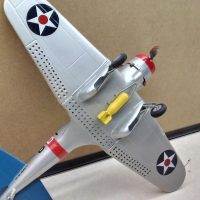
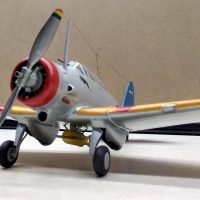
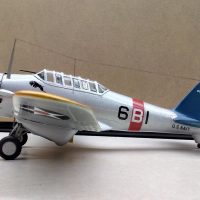
The Northrop BT-1's claim to fame is being the proof-of-concept aircraft that led to the development of the famous Douglas SBD Dauntless. Entering US Navy service in 1938, the BT-1 introduced the hydraulically actuated perforated dive flaps which provided excellent stability in a dive. It also had landing gear which retracted rearward into underwing “pants”, partially protruding to enable wheels-up landings in case of hydraulic failure. The pants design contributed to the aircraft having poor handling characteristics at low speed - not a good feature in a carrier aircraft! Only 54 aircraft were produced for the Navy, serving on the USS Yorktown and USS Enterprise. Redesign of the BT-1 led to the development of the XBT-2, and the name was changed to SBD after Northrop was bought out by the Douglas company in 1939.
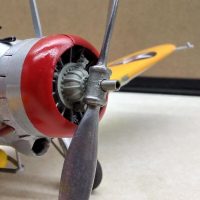
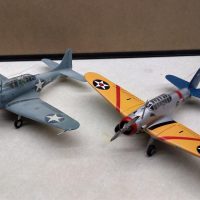
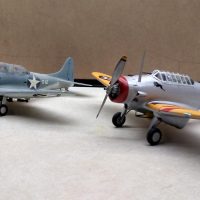
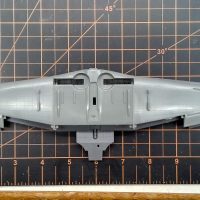
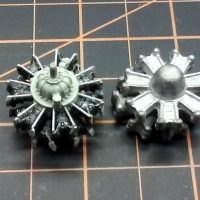
The kit is from Vac Wings, the only BT-1 kit in 1/48 scale that I'm aware of. To flesh out the details of this sparse kit, I initially ordered an Accurate Miniatures SBD-1, but once I received the kit, I decided it was much too nice to be used for parts (my only SBD to date is a Revell/Monogram kit). Plan B was the purchase of another Revell SBD kit instead. I used the cockpit and bulkhead, machine gun, bomb, arresting gear, antenna and pitot tube. The cockpit was upgraded with some details and a scratch-built gun ring for the rear machine gun. I was considering using the outer wing panels and dive brakes from the kit, but as you can see in the photograph, the Revell wing is severely undersized! Once again I replaced the supplied white metal engine with Vector's R-1535 resin engine, and substituted Aires resin wheels for the vac-form wheels.
Construction involved cutting out the molded in oil cooler and substituting a resin copy of the oil cooler out of a Great Wall Hobbies TBD kit. The wing-to-fuselage joint came out pretty wonky, so lots of filler and sanding was needed there. I kept the flaps closed for simplicity, but drilled out all the holes by hand. As with the Buccaneer kit, the molded holes on the top flaps didn't match the holes on the bottom flaps, so I drilled all the way through from the top, and then went back and puttied in the remaining indentations.
For ease in matching up top wing halves to the bottom, I cut away the outer wing panels so I could work with flat surfaces. Later, when I re-assembled the out panels to the center panel, there was a noticeable gap between the panels. To overcome this, I sanded off the raised rib at the attachment point, glued the wing panels on, then glued on .035 plastic rod over top of the joint. The rod covered the gap at the joint, and reproduced the appearance of the raised rib. I was quite pleased with the outcome of that little operation!
Opening up the wheel wells in the “pants” was a challenge since the plastic was very thin. I had to reinforce the inside with thin plastic strips, and putty the outside to fill in dents in the plastic. I carefully cut away the landing gear doors, to be attached to the white metal landing struts with short pieces of plastic rod.
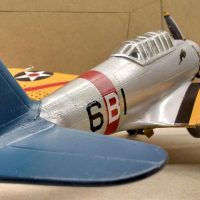
Painting was a nightmare! I had issues with overspray getting on other surfaces, poor quality masking jobs, and I ended up repainting the wing 4 times! I initially tried using Vallejo Air chrome yellow, but the masking tape kept pulling it loose when I was doing the stripes. I finally went back to my yellow-with-a-drop-of-orange enamel solution, which stuck to the surface better - and I prefer the look of the color anyway. All colors are Testors enamel - even the “true blue” tail, which is just sea blue with some white mixed in.
The original decals worked just fine, but I substituted Yellow Wings stars, because the supplied stars had too light of a blue color. The wing walk decals are from the Revell kit. Two coats of Testor gloss spray over the top to finish it off. Lastly, I took the advice from the kit instructions to sand and polish the white metal propellor instead of painting it - and it turned out really nice!
At this point, I have one example of every model that exists in 1/48 scale to document the development of dive-bombing, from 1919 to 1945. I feel lucky to have been able to collect the Sierra and Vac Wings kits in so short a time. Eventually I will replace my Revell SBD with the Accurate Miniatures kit, but I've pretty much built everything that I want to build as far as airplanes go(I still want to do a couple more tractors!). I hope you enjoy my BT-1!
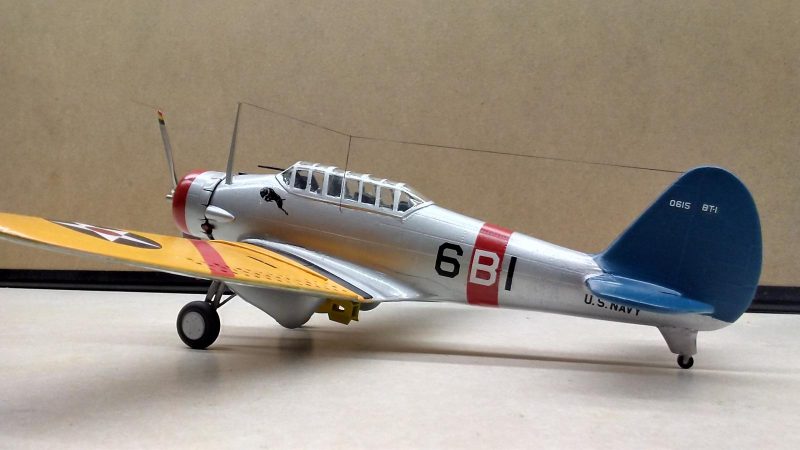
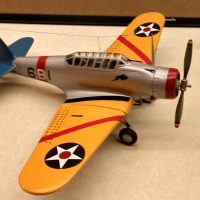
Great work on this. Very colorful scheme and unique model!
Wow, Robert, what an amazing job!
You make very difficult things look easy!
Your finished BT looks wonderful!
I liked your article a lot, very informative and comprehensive.
It was very interesting to see the difference between the white metal and the beautiful resin engine.
Well done, my friend, this build is truly amazing!
@fiveten Thank you for your kind words, Spiros!
A fantastic build, Robert.
No signs of that gap you are referring to.
Excellent work Robert, and nice historical information concerning a relatively unknown A/C.
@tom-bebout Thank you, Tom!
Truly amazing, Robert (@robgenev665). All of the extra work you did on the paint was certainly worth the effort. Nice job using parts from other kits to flesh out this build.
@gblair Thanks, George! I was definitely having some issues with quality control, and maybe just a bit of impatience on my part...red stripe decals for the wings would have solved a lot of problems!
Beautiful BT-1 Robert. Glad you were able to find one to complete your collection.
@fuzzmann Thanks Rick, I really enjoyed learning the history of dive-bombing, finding the kits that were available, and building the collection. Last but not least was the pleasure I gained sharing them with iModeler!
Hello Robert,
No expirience with vacu-form. To me it looks colorful and due to the diffulcuty, to work with Vacu, I give you a big thumbs up for the end result.
Regards, Dirk
Thanks, Dirk!
Well done! It's great to see lesser known kits that aren't often built, especially when done so well. I really like these early monoplanes, the likes of TBDs, etc, I wish someone would inj mold this BT-1, for now I'll have to admire your handy work.
@pb_legend Thanks, Andrew! I wish someone would make a kit (of any kind) of a Curtiss F8C Helldiver so I could have all three (F8C, SBC, SB2C).
Very nice work indeed on this old chestnut. Good work on the painting despite the problems.
Dick Best, who arrived in VB-6 just before they got rid of the BTs in favor of the SBD-2 told me "that was the worst-flying airplane I ever flew!" It was so underpowered he thought of getting out and pushing. He made two carrier landings in it and considered the success of each to be "a miracle."
@tcinla Thanks, Tom for the compliments, and your many historical insights you've shared about my various dive bomber models!
Nicely done!
LOVE this airplane. The best profile going, whoever designed the slanting-forward canopy frames HAD to do it for looks only. You did a nice job on this, and a really sweet paint job.
My kid has this in his stash, feel like stealing it. I have a Valom 1/72 somewhere, that should get built.
@billkoppos Thanks, Bill! I think Northrop like to build planes that "looked" fast...
Beautifully done! I have this same Vac Wings kit in my stash, so I read your build article with interest. I've never attempted a vacuum-formed kit before, and fear of the unknown has prevented me from starting it. Like your original plan, I have an extra Accurate Miniatures SBD kit was going to use for donor parts, but after seeing your kit, I might just go the Revell SBD route.
@navairfan Thanks, Drew! I received some inspiration from iModeler friend Rick Wilkes, you can see his work here:
https://imodeler.com/groups/work-in-progress-aircraft/forum/topic/northrop-bt-1-dive-bomber-148-wings48-vacuform-1/
That's a real looker! Fun to see the heritage of famous planes in their predecessors, and yellow-wing birds always make for interesting schemes. Well done.
@gkittinger Thanks, Greg!
Beautiful work on your build, looks great!