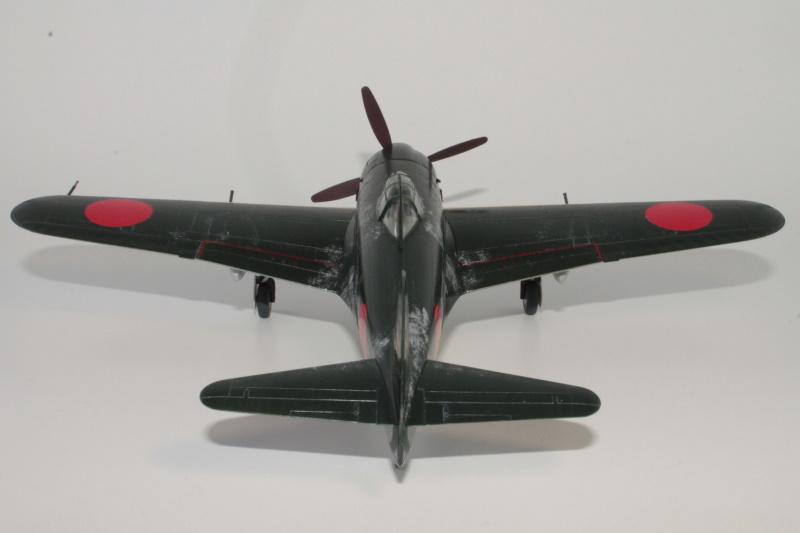
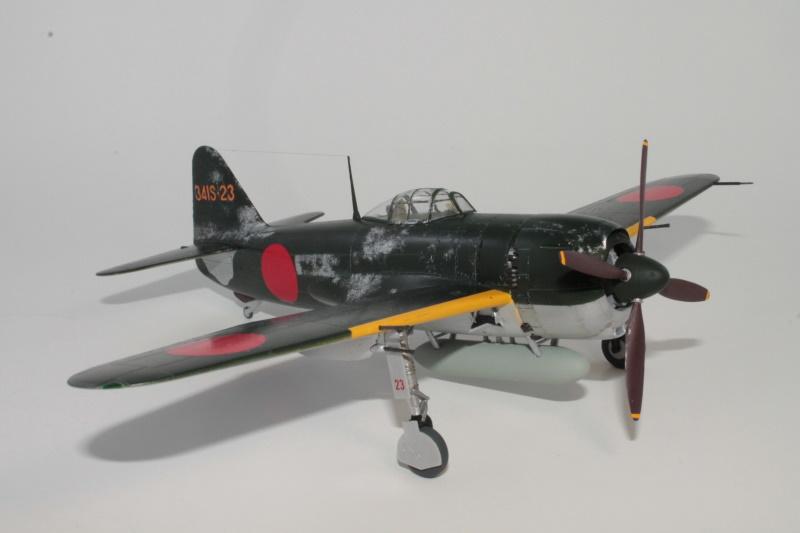
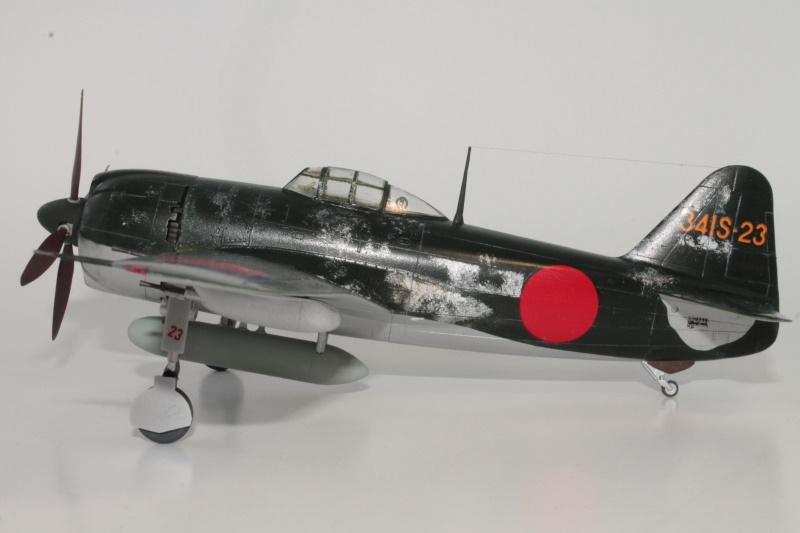
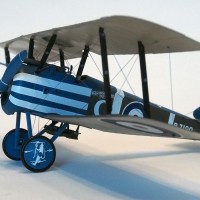
Tamiya 1:48 KAWANISHI N1K1-Ja SHIDEN TYPE 11 (George)
N1K1 from the 402nd Fighter Squadron, 341st Fighter Group. This is a very nice kit with great fit and low parts count. When I opened the kit I set myself a challenge; finish a kit in under a month. If you discount the 10 minutes it took me to attach the aerial this morning, the build took 15 days. Why oh why does it take me 3 - 4 months to do others?
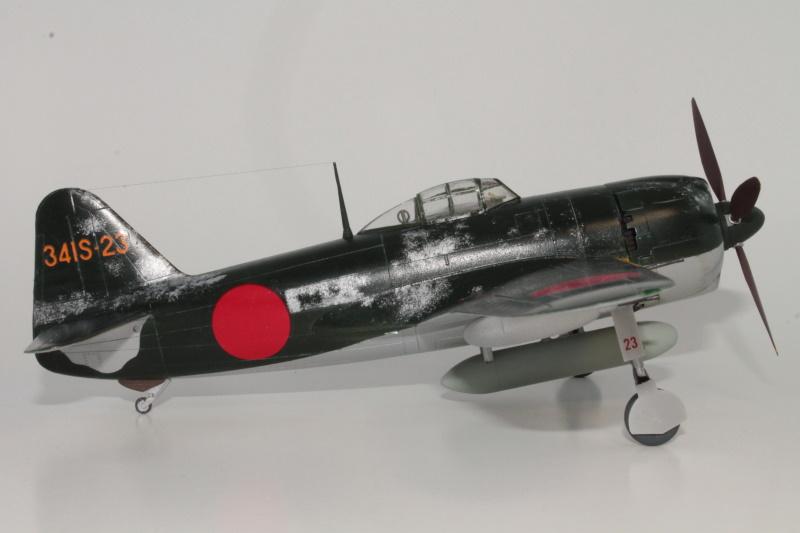
Innards painted with Tamiya XF-58 Olive Green lightened with XF-4 Yellow Green and an Eduard pre-painted seat harness set was added. While the paint was drying I joined up the wing parts and drilled out the wing guns. There were minor gaps along the wing roots which, to be honest, were thinner than the engraved panel lines beside them so I left them. There was a fine gap on the lower wing/fuselage join. This was only on one half which is odd as the rest of the fuselage lined up. Thin plastic card was used to fill. I sprayed the wing I.D. bands with Vallejo Model Air White and then their Gold Yellow. A Google search doesn't seem to show the later available anymore in the Model Air group of paints. This was left to set-up for at least 24 hours before masking. Bottom done with Vallejo Metal Color 77.706 White Aluminum and again I let it set for 24 hours before masking. There is a small pattern under the stabilizers and to mask this off, I enlarged the instructions, laid a piece off Oramask 810 over the instruction area I wanted to use as a mask, cut it out, removed it from the paper and stuck it to the model. This stuff is pretty low tack but I removed a bit more. I sprayed the top coat done using Tamiya XF-11 J.N. Green and as is my wont, started to immediately remove the masking. Not one bit of Vallejo was harmed in the process. I noticed a bit later than I didn't have full coverage on the left side so the next day I remasked and reshot. Once again no paint lift from Vallejo. I've read builds where people have used Liquitex Gloss for a clear coat so I bought some and figured I was use it for my first time of spraying clears. My biggest fear of spraying clear coat is "when do I know when the airbrush is cleaned out" so I triple cleaned it. A few observations here about Liquitex. It sprays great when cut with 25% water and dries fast. I noticed I had pebbling so I'll put this down to fast drying and the fact that I was spraying about 6-8" away. Next time I'll get closer and go slower. The decals...those freakin' Tamiya decals. I used everything in my arsenal including Walther's Solvaset to try and get them to lay down in the panel lines and nada. The last attempt was to pool Walther's on the wing decals and walk away. I went down the next morning and the decals stood proud. Finally I got some paper towel, soaked it in scalding water and pressed firmly into the decals...success. The next day I went down to put some more decals on on noticed that the previous decals, for the most part, had raised out of the panels lines and I raised the white flag. I clear coated the decals and then weathered with Tamiya XF-16. When dry I ran some Tamiya Grey Panel Liner along the panel lines. Watching videos about this technique shows various wait times up to half an hour before removing the excess but I remove it almost immediately with good results, about a half a wing or fuselage at a time. I let this dry overnight and then flat coated with Microscale Flat. The aerial was done using Uschi van der Rosten Super-fine thread


'Two Thumbs Up' for this15 day build George, amazing turn around!
Too bad about the decals making you work so hard, but glad to hear the Vallejo paint was safe & sound.
Thank you George. I expected the decals to be difficult but wasn't expecting impossible
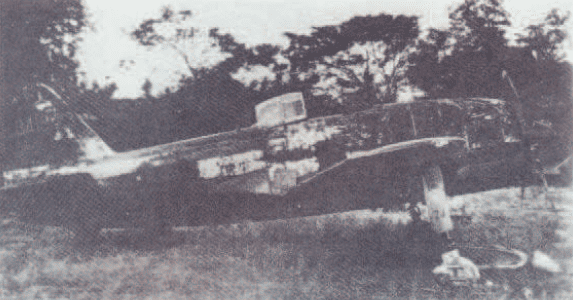
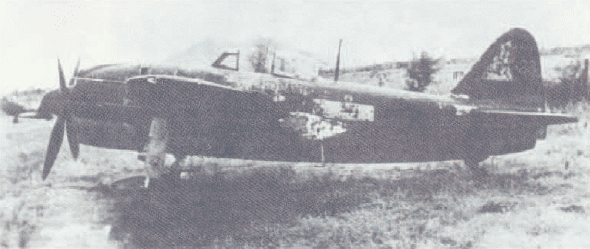
When I first saw this I noticed the paint wear and said to myself "ah that's kinda overdone." Then I looked at the pictures of the real thing. Shut me up. Very well reproduced.
Sometimes you got to "babysit" the decals, prodding them into the panel lines with a sharpened toothpick, VERY carefully, and reapplying the solvaset. Some guys cut along the panel lines with a # 11 blade. Either way takes patience I do not have. I am a He-man decal hater.
Anyways, your Shiden came out great.
Thank you Bill. Someone just sent me a clearer larger photo of the left side and I never weathered it up enough
15 days?! damn, 2 months is my goal, wish I could get it to under one month. George turned out great, I like the look of those Philippines (?) based weathered planes. I have the this and the Hasegawa version, and I have had thoughts about building them together to compare/contrast the 2 kits.
Thank you sir. I've build a few side by sides and one three-fer. Gets confusing at times
You did a wonderful job in just two weeks, George.
This aircraft is still on my wishlist and when you told that this is a kit with great fit, it moved up in the list.
Thanks John. This is my fourth and last George
Great job on the paint work replicating the finish in the photo George.
Much appreciated Dale
Very nice build
Thank you
George, @blackadder57
This looks great ! It's even better that you have pictures of the real plane to go from. I have this Tamiya kit, along with the mid wing version and the float plane that Tamiya did of the type. Once I clear a few projects up, I just might start building them up as part of the Empire of Japan group build, which is still going on. It is very nice to hear about how nicely these build up. I have one or to of the Hasegawa kits also, but I'll likely build the Tamiya kits in my usual assembly line fashion, saving the Hasegawa kits for later.
I think you did a great job replicating the original photos with your model. I pressed the "liked" button too... I really like everything about it, but what is the most amazing is how little time it took for you to complete it.
Thanks for sharing this with us.
Thanks Louis @lgardner. I actually surprised myself at the time frame. I actually gave myself a month but everything just clicked together. It could have probably been finished sooner as even though I've been using an airbrush now for 3 years, I still get paranoid about using it and waste a few days building up courage to fire it up and start spraying
Nicely done ,George! Positive waves baby!
Appreciated Robert
Nice build George! Looks just like the reference photos chipping and all. I have the Hasegawa version of this which I’ll build at some point.
Thank you Jeremy. I've also built two Hasegawa and one Arii versions
You did your usual excellent job, George!
I too like a lot the Tamiya kit. Yes, the decals are hard to snuggle!
Love your chipping/weathering!
Great that you finished it in 15 days!
Thanks Spiros. I do have aftermarkets but I also like a challenge
Nice job on this one. These Japanese subjects are a modelllers dream; you can't over do them.
regards
Brian
Thank you Brian
Geesh, I wish could do a model in 15 days. George that photo really brings home the idea of what is needed to make your build. Not a simple matter of spraying on paint. Had the Japanese developed the George sooner and had done a better job of quality control and better fuel things may have turned out different.
Two thumbs up.
Thanks Stephen
George, this is beautiful work on a fine kit. When fighting the decals, did you try the Tamiya decal liquids? I'd be interested to learn if those proprietary sloshes work any better than Solvaset. The alternative, of course, is after-market decals, of which there are a few markings sets and lots of hinomaru, the challenge there being to get diverse manufacturers' reds and yellows to match decently or to paints we modelers use!
Vallejo paints work the best for my limited airbrush skills, and I have my favorite yellows for Mitsubishi and Nakajima wing i.d. panels. A lot of the early Model Air colors seem to owe more to whatever pigments Vallejo had available than to any "official" colors, so making a selection from more recent releases is safer and maybe even more accurate, as several of the older colors have been dropped and superseded by "new and improved" colors.
Thank you Christopher. For decal solutions I have Mr. Mark, Microscale, my sadly dwindling supply of Polly Scale and Solvaset and I use them in that order. I do have spare Hinomarus but this time I was just plain lazy and that probably added a day to my build as well
Great looking George, George (@blackadder57). Tamiya kits really build up into nice models. If you haven't tried them yet, you might try doing panel lines and weathering using artist oil colors. They dry really slowly, so I use a stiff brush to push the paint into panel lines. You can do large portions of the plane at one time. I first use a paper towel to wipe off some of the excess paint, and then I use odorless mineral spirits to remove the last of the excess paint and blend in the oils. You can get some great effects with the oils. You can also use Abteilung 502 oils, which are designed for modelers, but I have had great luck with artist oils in tubes.
I really like that you've used pictures of the real thing to base your weathering on. Two weeks sounds like a good time to finish the build in. I keep meaning to keep a log of the time spent on a project but I usually forget halfway through. Definitely liked.
Appreciated George
Nice work, George. If you ever get the chance, check out the one at the museum in Pensacola.
Thank you John. The way this world is going, I'll be lucky to get out of my basement anytime soon
I can't even finish a 1/72 single-engine fighter in 2 weeks! Kudos! Turned out great despite the decals (and as I'm finishing up a Tamiya 109, thanks for the warning - aftermarket here we come!)
Thanks Greg