Special Hobby 1/48 Hawker Tempest II
The Airplane:
The Tempest, which was first called the Typhoon II, was Sydney Camm's response to the shortcomings of the original Typhoon fighter, most particularly the Typhoon's unexpected deterioration in performance at high altitude due to its too-thick wing, by replacing that with a thinner laminar flow design. As the design began to significantly diverge from the Typhoon, it was renamed Tempest; it became one of the most powerful fighters of World War II and was the fastest single-engine piston-engine aircraft of the war at low altitude.
Sydney Camm always had his next design in mind when developing his current project, and the Hawker design team had already planned out a series of design improvements by the time the Typhoon prototype first flew. The result was the Hawker P. 1012, otherwise known as the Typhoon II or Thin-Wing Typhoon. In March 1940, Hawker engineers investigated the new laminar flow wing developed by NACA in the United States. Using this data, the maximum thickness of the Tempest wing was set at 37.5% of chord versus 30% for the Typhoon's wing, reducing wing root thickness by five inches on the new design. The wing planform was changed to near-elliptical to accommodate 800 rounds of ammunition for the four 20 mm Hispano cannon.
As with the Typhoon and Tornado, different powerplants were proposed for the design. Six prototypes were built: a single Mk.I, HM599, powered by a Sabre IV; two Mk.IIs with the Centaurus IV radial; a single Mk.III with a Griffon IIB and a Mk.IV with a Griffon 61; and a Mk.V with the Sabre II in an installation similar to that of the Typhoon. Ultimately, the Mk.V prototype flew first The Tempest II was subject to repeated delays due to its Centaurus engine, but was persisted with, while continued problems with the Sabre IV ended the Tempest I, while the decision to use the Griffon in the Spitfire stopped further development of the Tempest III and IV. The Mk. V, which had the least difficulty with its engine due to the work on the Typhoon, became the main type produced.
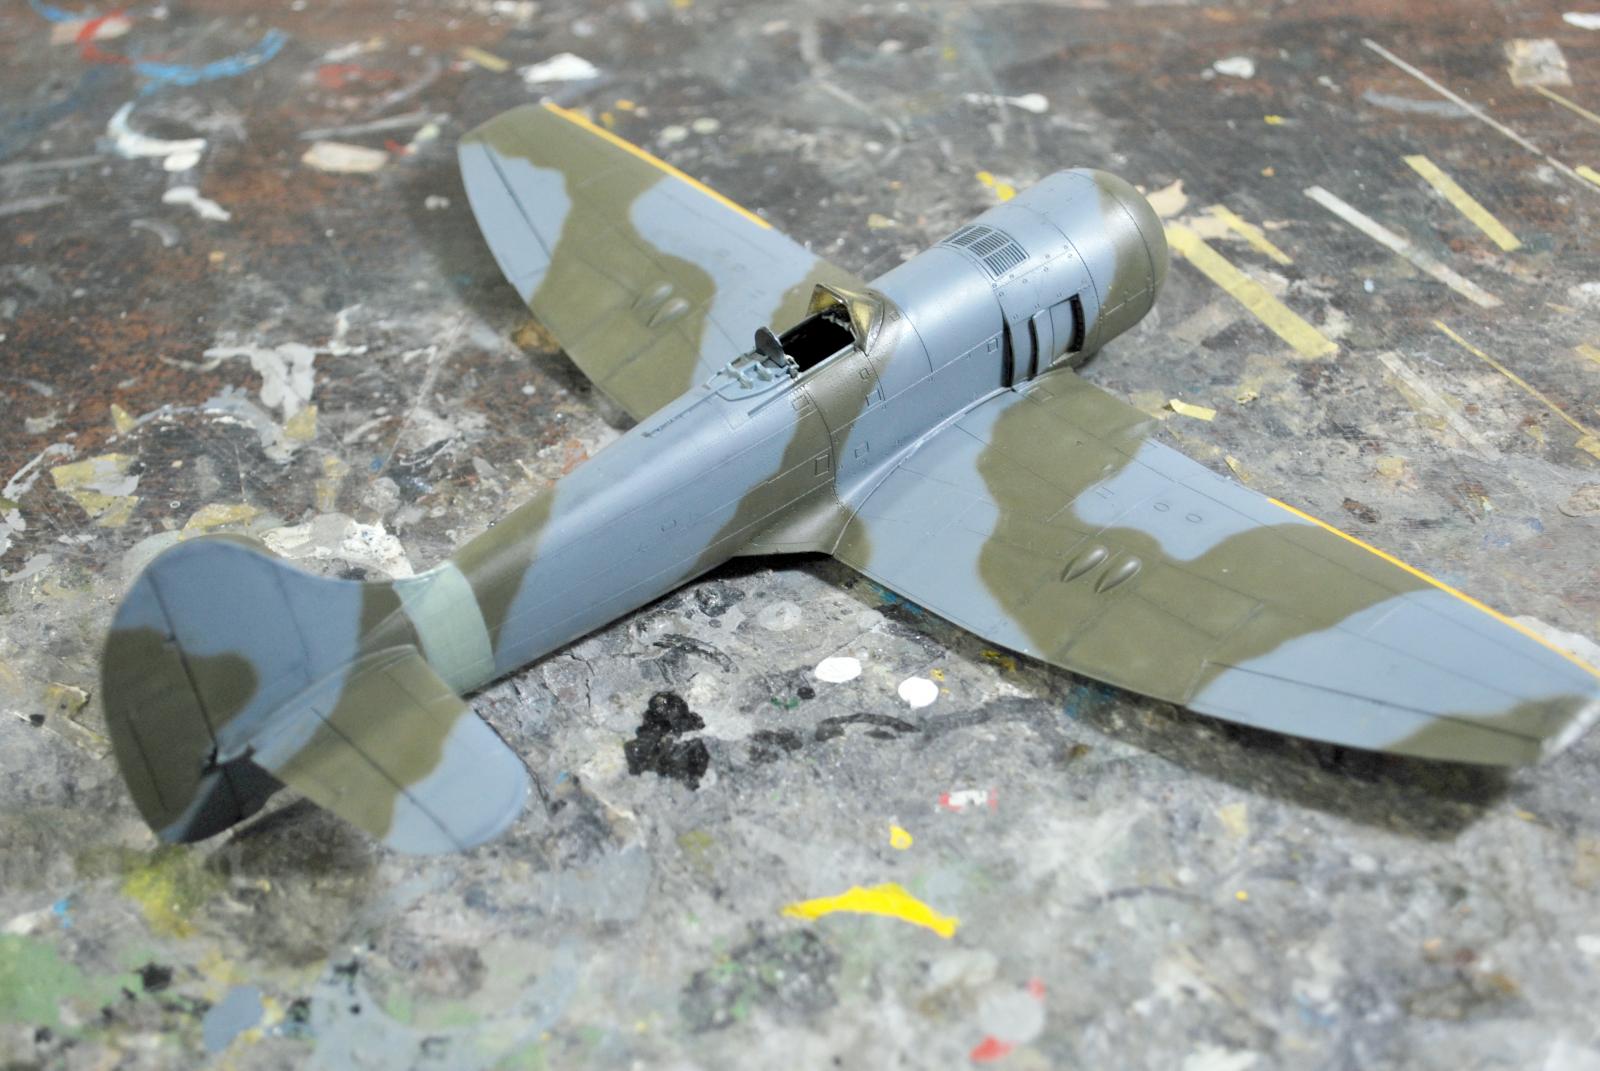
The Tempest II benefited from examination of captured Fw-190s, which led to it and the Grumman F8F having the most closely-cowled radials of any Allied fighters. The Centaurus engine was closely cowled and the exhaust stacks grouped behind and to either side of the engine; air outlets with automatic sliding "gills" behind that with the carburetor air intakes in the inner leading edges of both wings with an additional oil cooler in the inner starboard wing.
The first Tempest II, LA602, flew June 28, 1943, powered by a Centaurus IV with a four-blade propeller. The second, LA607,had the enlarged dorsal fin associated with the Tempest and flew on September 18. The first major problem experienced was serious engine vibration, which were cured by replacing the rigid, eight-point engine mountings with six-point rubber-packed shock mounts. The four blade propeller was replaced with a five blade unit before a more finely-balanced four bladed unit was adopted. Problems with engine overheating, poor crankshaft lubrication, exhaust malfunctions and reduction-gear seizures delayed production. The eventual solution was the “tropicalized” modification with the installation of an air filter and intake in the upper forward fuselage, just behind the engine cowling, using a louvered outlet just ahead of the fuselage gas tank; this was retroactively fitted to earlier Tempests in F.B. II production and was original after the first 50.
In September 1942 contracts were signed for 500 Tempest IIs to be built by Gloster but because of priority being given to the Typhoon, a contract of 330 Tempest IIs was allocated instead to Bristol, while Hawker were to build 1,800, a switch that further delayed production. The first Tempest II came off the Hawker line on October 4, 1944; the first six production aircraft joined the prototypes for extensive trials and tests.With the end of the war in sight, orders for the Tempest II were cut or cancelled: Bristol production stopped after 50, and Hawker eventually built 402 in two production batches: 100 built as pure fighters, and 302 F.B. II fighter-bombers with reinforced wings and wing racks capable of carrying bombs of up to 1,000 lb or eight RPs.
The Tempest II had the best performance of the series, with a maximum speed of 442 mph at 15,200 ft, climb rate to the same altitude of 4.5 minutes compared with 5 minutes for the Tempest V, and service ceiling of 37,500 ft. All production aircraft were powered by a 2,590 hp Centaurus V driving a 12 ft 9 inch Rotol propeller. The Tempest II would have formed the fighter component of Tiger Force, a proposed British Commonwealth long-range bomber force based on Okinawa, however the Pacific War ended before they could be deployed.
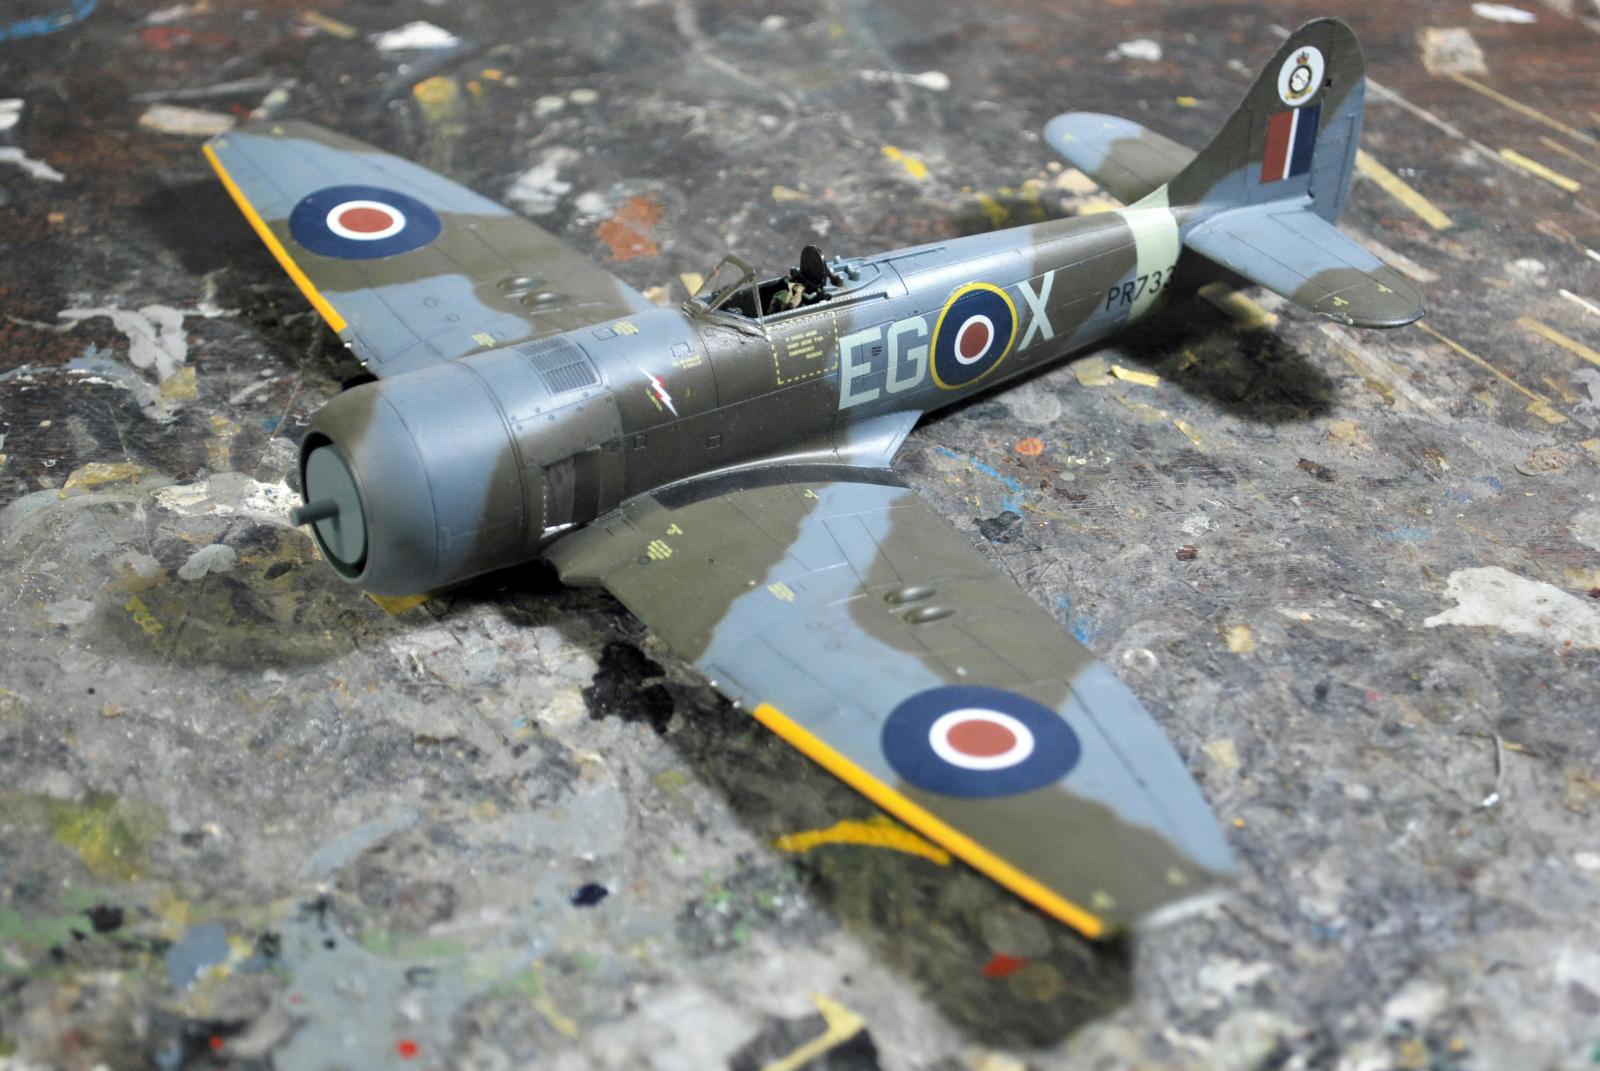
By October 1945, a total of 320 Tempest IIs had been delivered. The aircraft were sent to squadrons in Germany and India. A Tempest II flown by Roland Beamont, led the flypast at the London Victory Celebrations of June 8,1946. The sole combat use of RAF Tempest IIs was against guerrillas of the Malayan Races Liberation Army during the early stages of the Malayan Emergency.
The Kit:
The Special Hobby 1/48 Tempest II was released this past May. Other than subject matter and markings options, it has nothing to do design-wise with their larger 1/32 kit. This is a modification of the Eduard Tempest V kit, with a different sprue for the fuselage with radial engine and wing with leading edge intakes integral to the part; this use of sub-type-specific wings and fuselage parts makes the kit far less problematic than is the case with the larger model.
Construction:
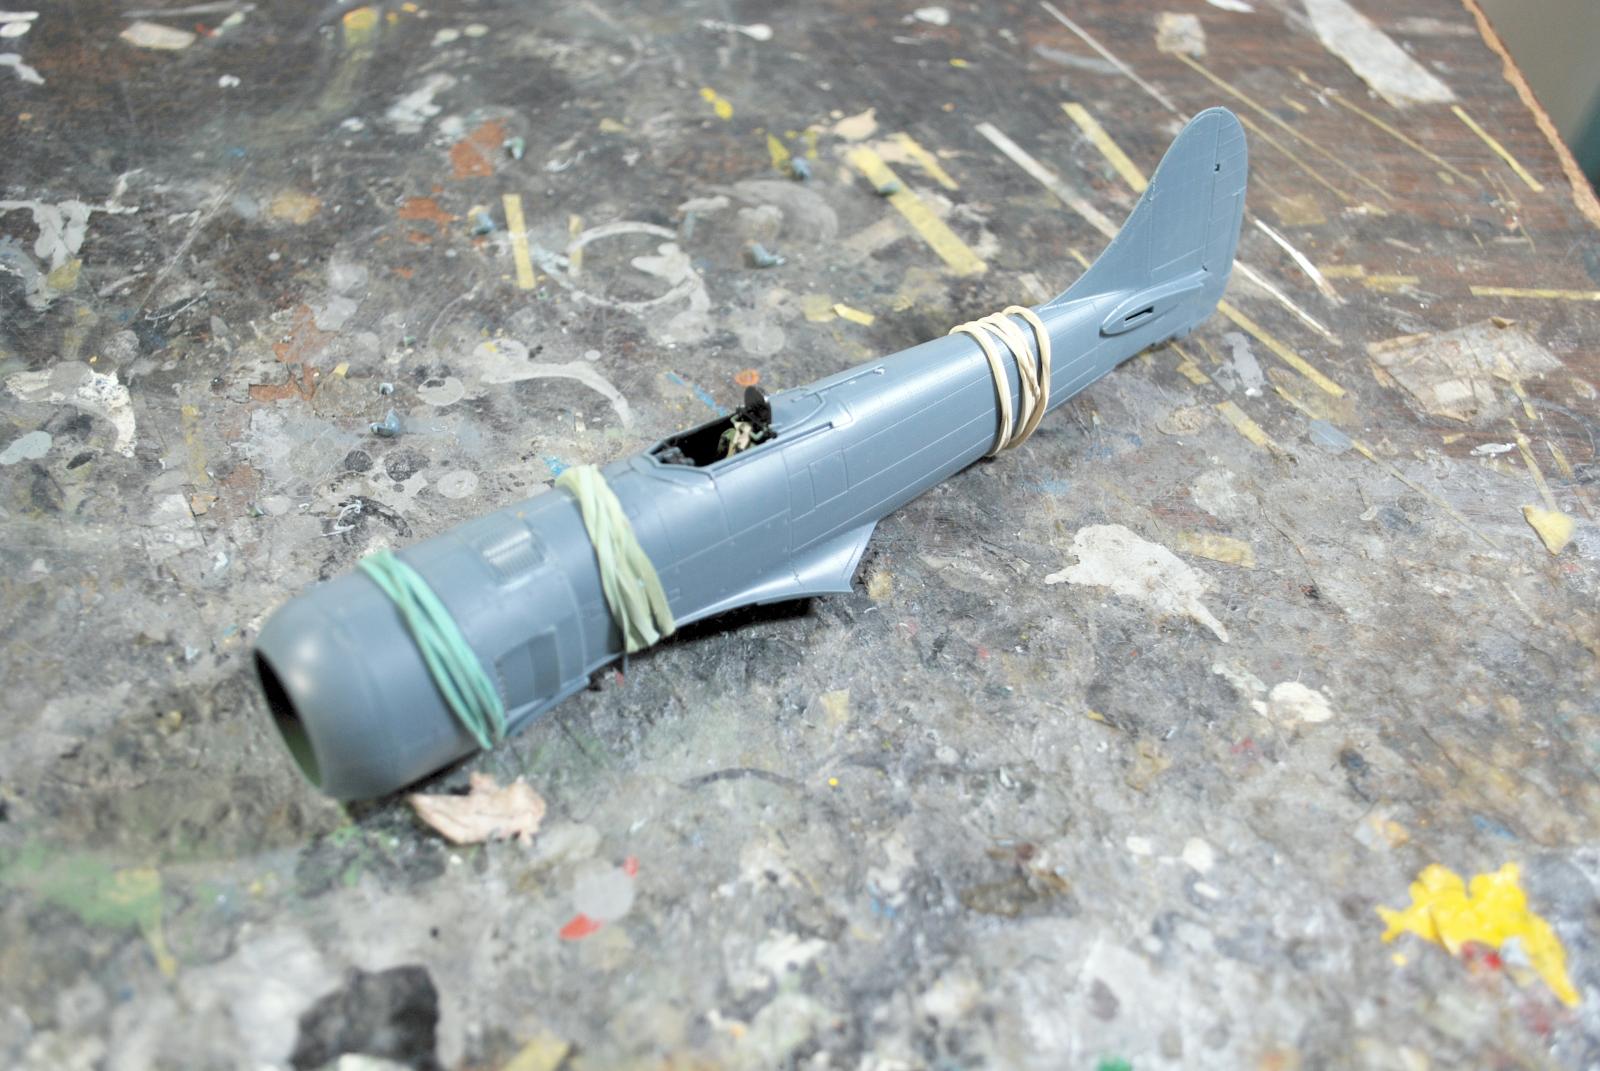
This kit assembles in a manner similar to the Eduard Tempest V kit. The kit maintains the Eduard reputation for being “fiddly,” and care must be taken throughout the construction to insure all sprue nibs and any minor flash are cleaned off the parts, since they fit very precisely. That said, the end result is worth the extra effort taken during construction.
The fit of parts is really tight. Also, there are a lot of small parts on the sprues, and they have really delicate sprue gates attaching them to the sprue. It is very easy to knock one off unnoticed while cutting another part off the sprue, with that small part disappearing forever, to drive you nuts when you come to the point in the instructions where you are directed to attach it. “Where the @#$##@! is it?!” you will be crying. HANDLE THESE SPRUES WITH EXTREME CARE.
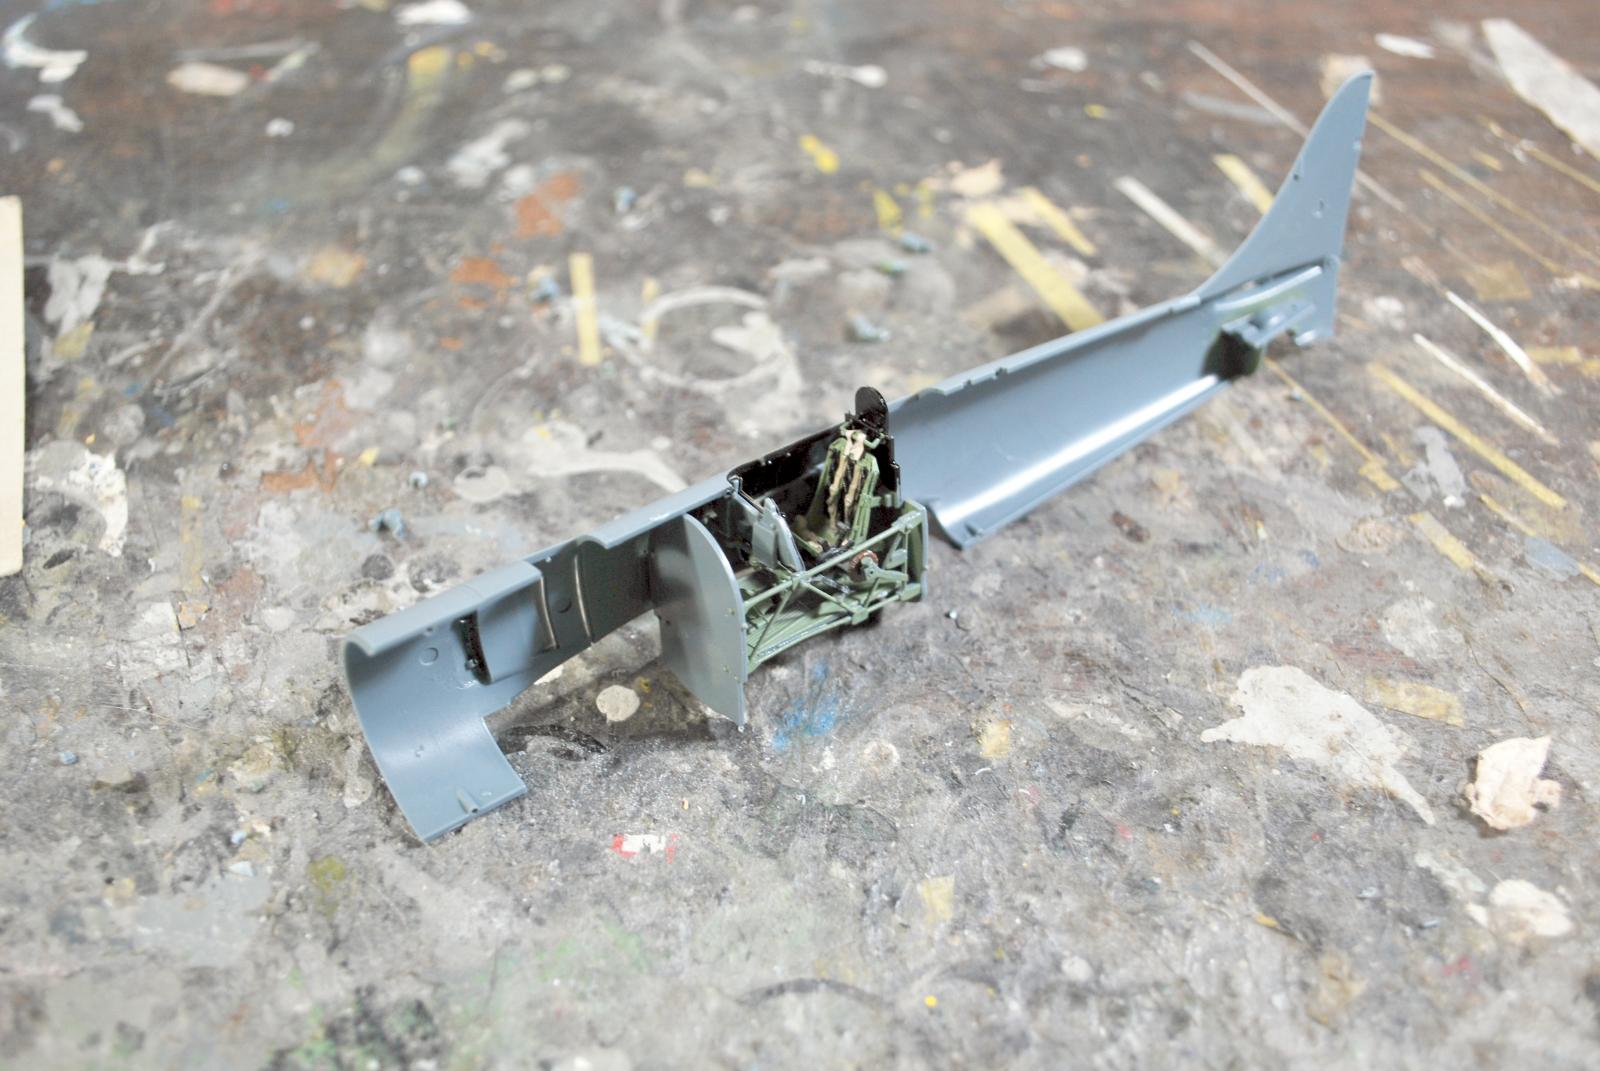
I used a resin seat from Barracuda in this project, mostly just because I had it. Otherwise, the cockpit assembles in the same way as the Eduard Tempest V. I found that a good way to get the side frames off the sprue without breaking anything was to cut them off the sprue tree leaving the sprue attachment to the part (i.e., cut it off at the tree, rather than the part), then cut the part free of the remaining sprue where it can rest againt the work table, allowing you to use pressure on the knife to cut it free without pressuring the delicate part as happens cutting the part free from the sprue while still on the tree. If you opt to use the photoetch instrument panel, attach the side panels first, and get them perfectly aligned with the plastic part they're glued to, then attach the central panel. This way you get perfect fit into the fuselage - if you do this otherwise, you can end up with poor alignment that will lead to difficulty bringing the fuselage halves together if you put the cockpit into the unassembled fuselage half, or sliding it in if you assemble the fuselage first. Also, don't worry about the small details inside the cockpit - you can't see any of that once it's in place.
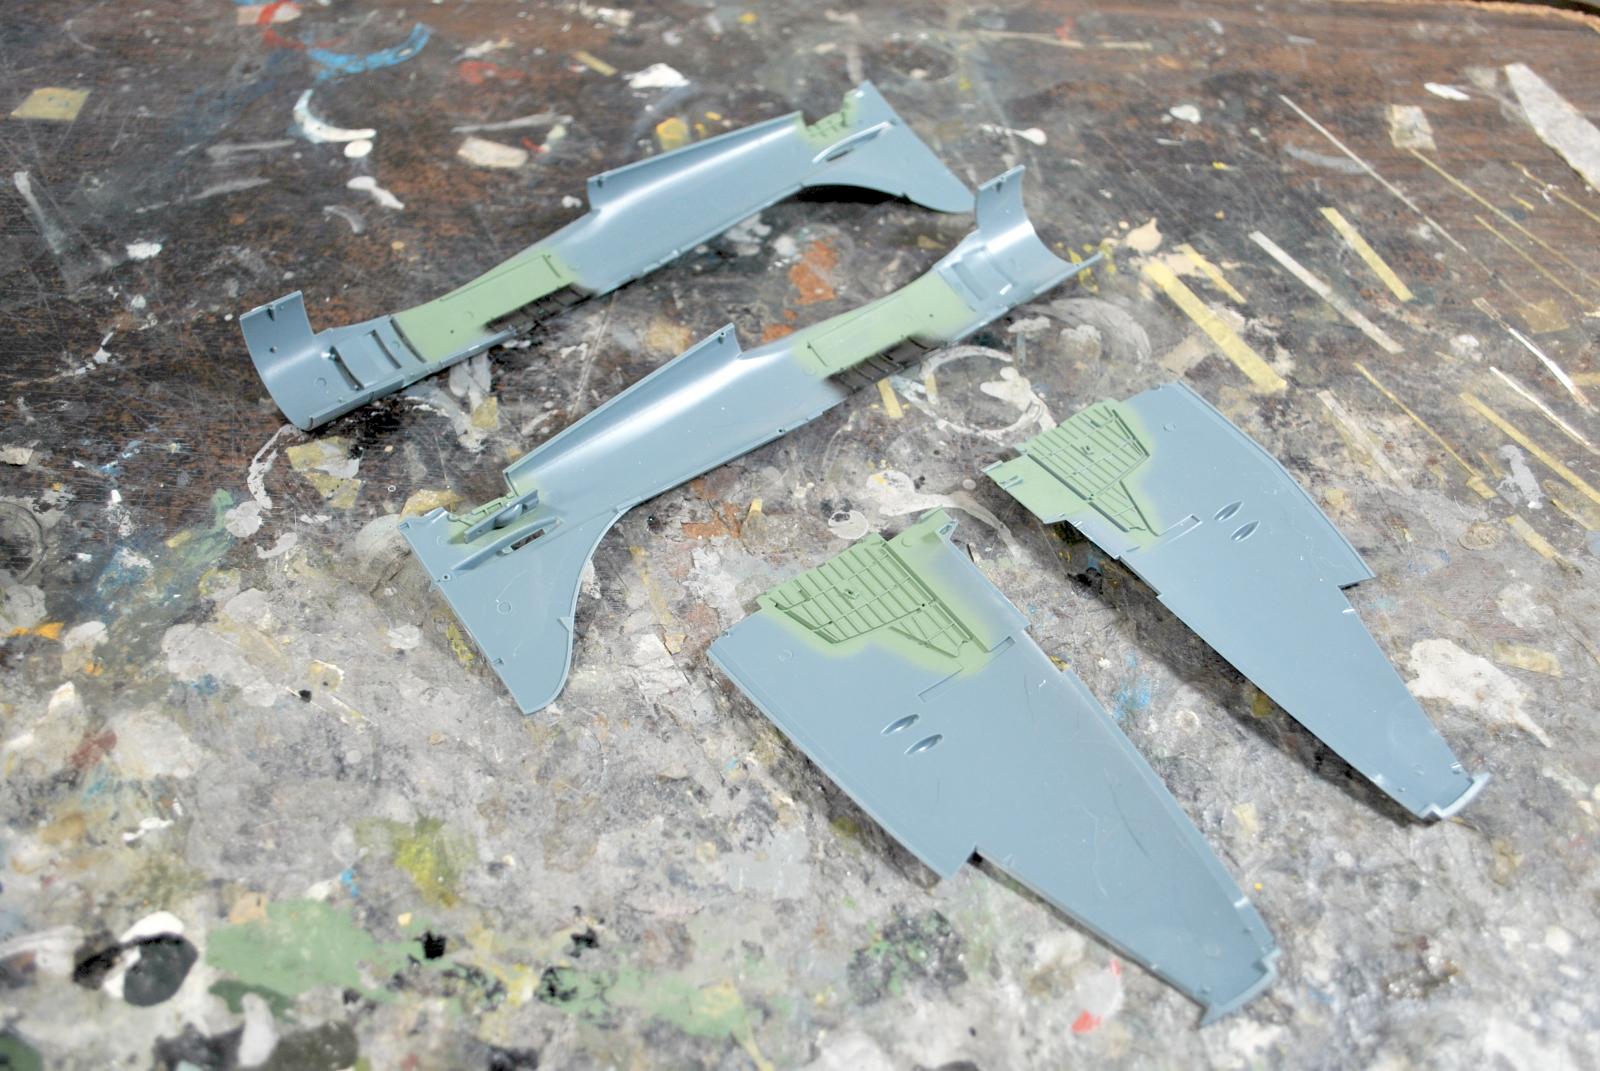
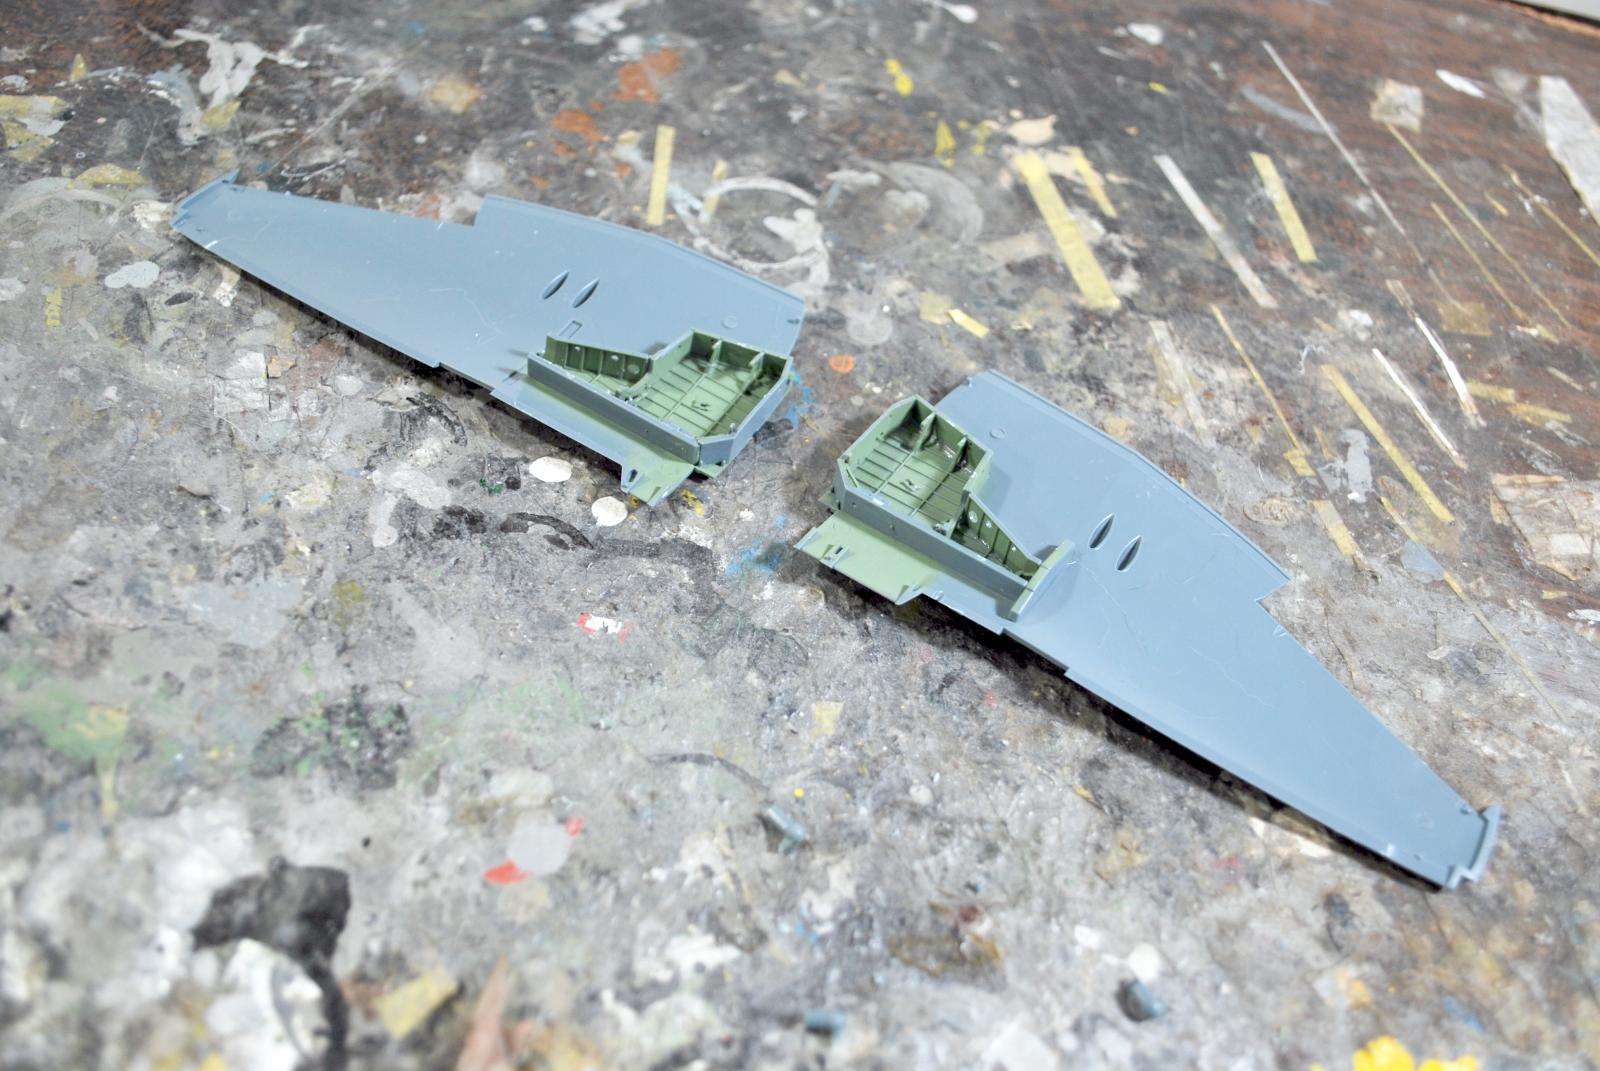
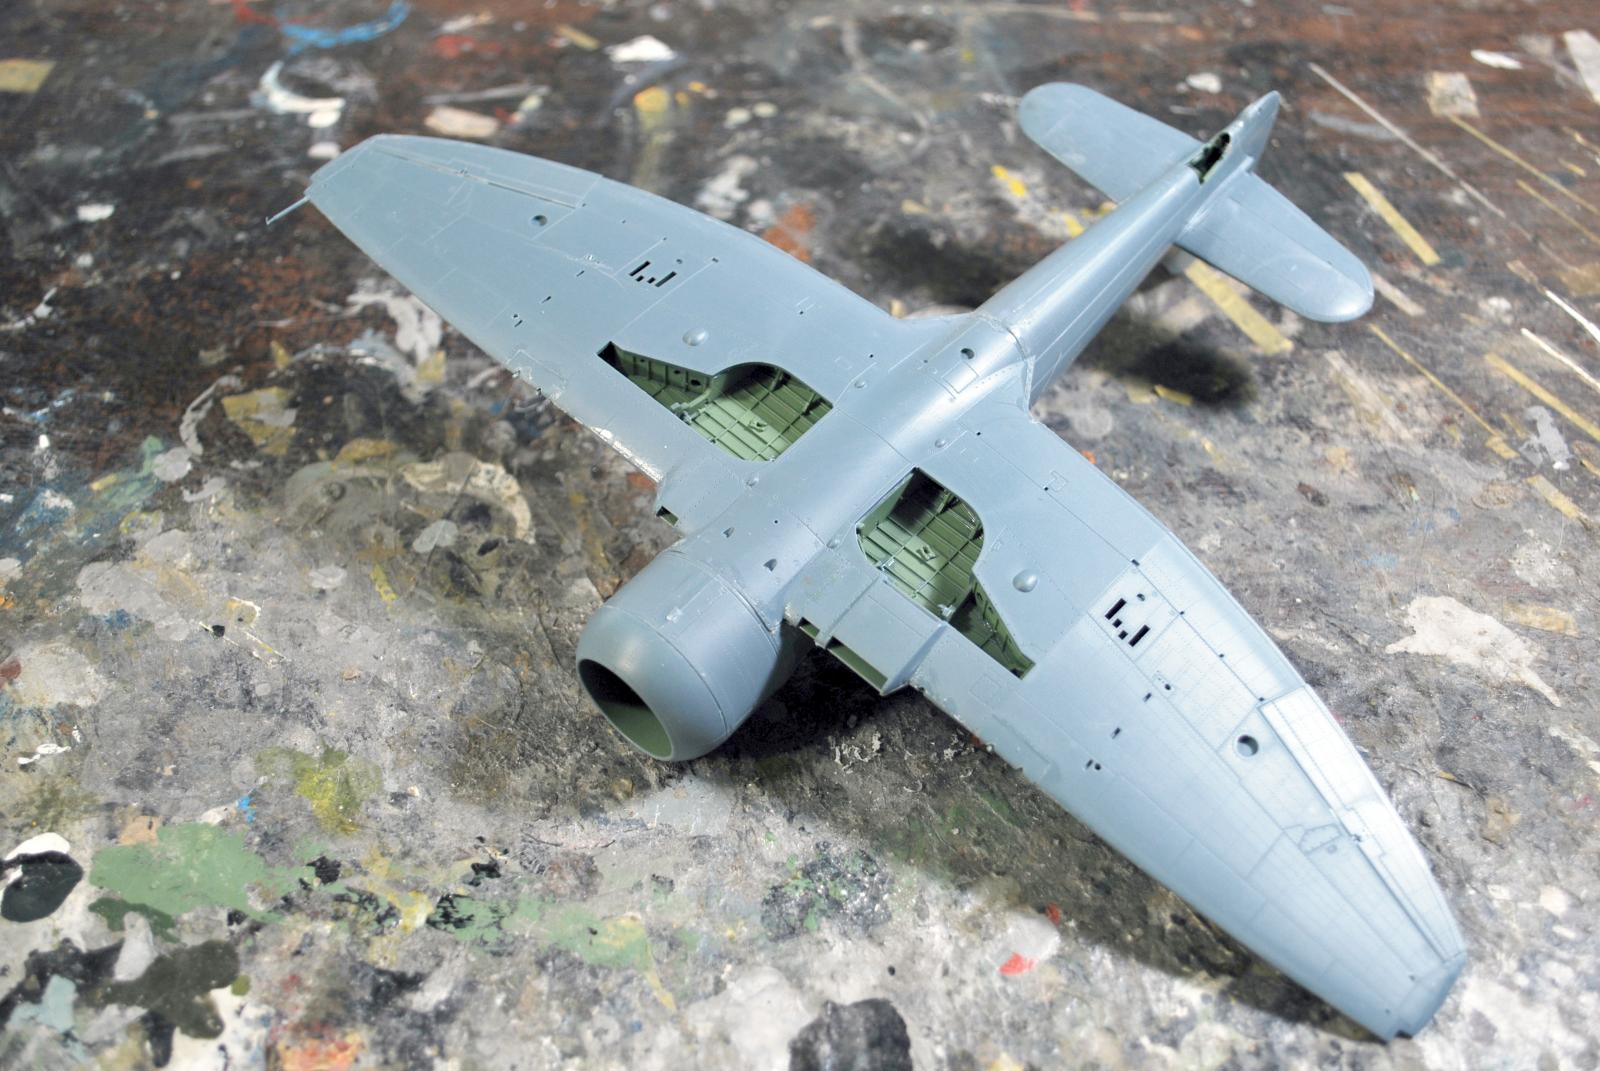
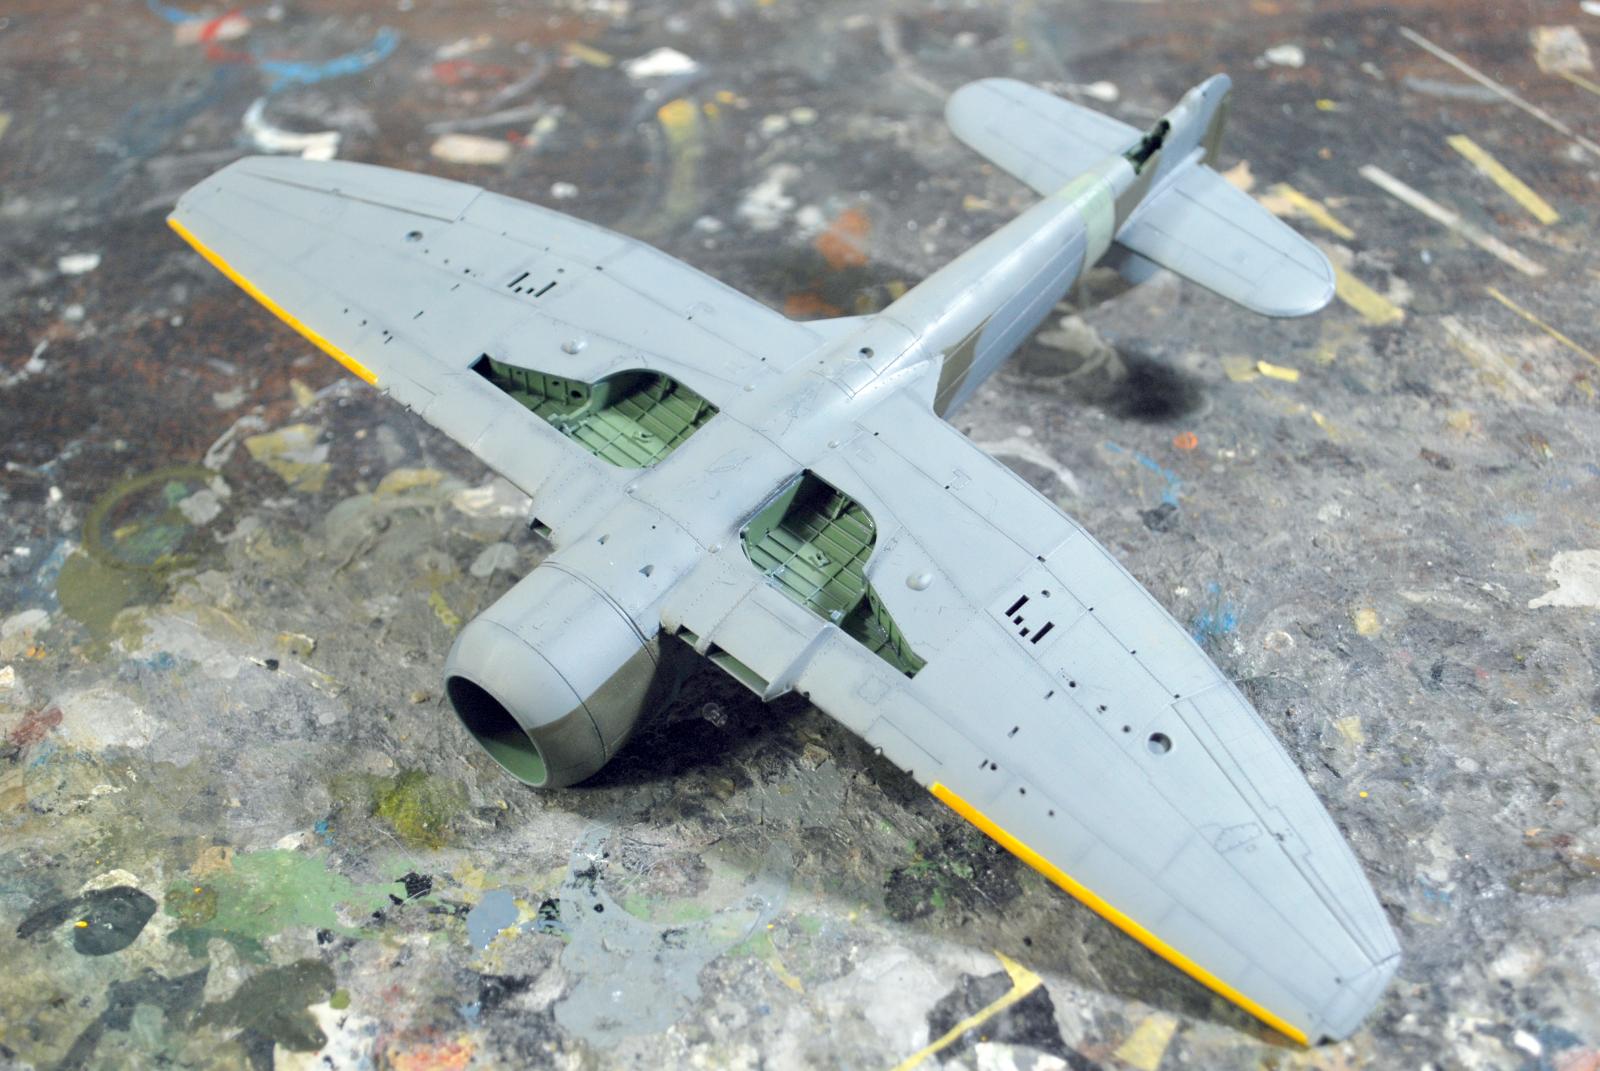
The final difficult bit is the wing sub-assembly. When you assemble the parts of the wheel well into the upper wing, DO NOT attach part E79 (the inner gear door retraction mechanism) to Part E48 (the inner gear well bulkhead) as the instructions would have you do. Save that part and attach it with tweezers (it's easy) once you are at final assembly and putting the landing gear and doors into position. Otherwise, you are guaranteed to knock off the retraction mechanism. Also, go through the instructions and find all the parts that should be attached inside the wells and do them now. DO NOT WAIT till you come across that instruction later - you'll likely have knocked the part off the sprue by then.
Unlike the Tempest V, the wing assembles easily. The trailing edge joint runs right along the trailing edge of the flap, rather than through it, so there is no joint filling, sanding and rescribing necessary. The wing fits to the fuselage easily. If you are careful with the fuselage and wing sub-assemblies, you won't have to use any gap filler, and you won't lose any of that beautiful surface detail.
The horizontal stabilizers and the control surfaces are easy. Assemble as they fit.
The kit includes a resin engine half that cane be seen with the cowling panels opened. I opted not to use it, but am thinking of using it on an Airfix Sea Fury (same engine). The kit came with resin mainwheels, which I used instead of the plastic wheels in the kit that are more appropriate for the Tempest V.
Painting and decals:
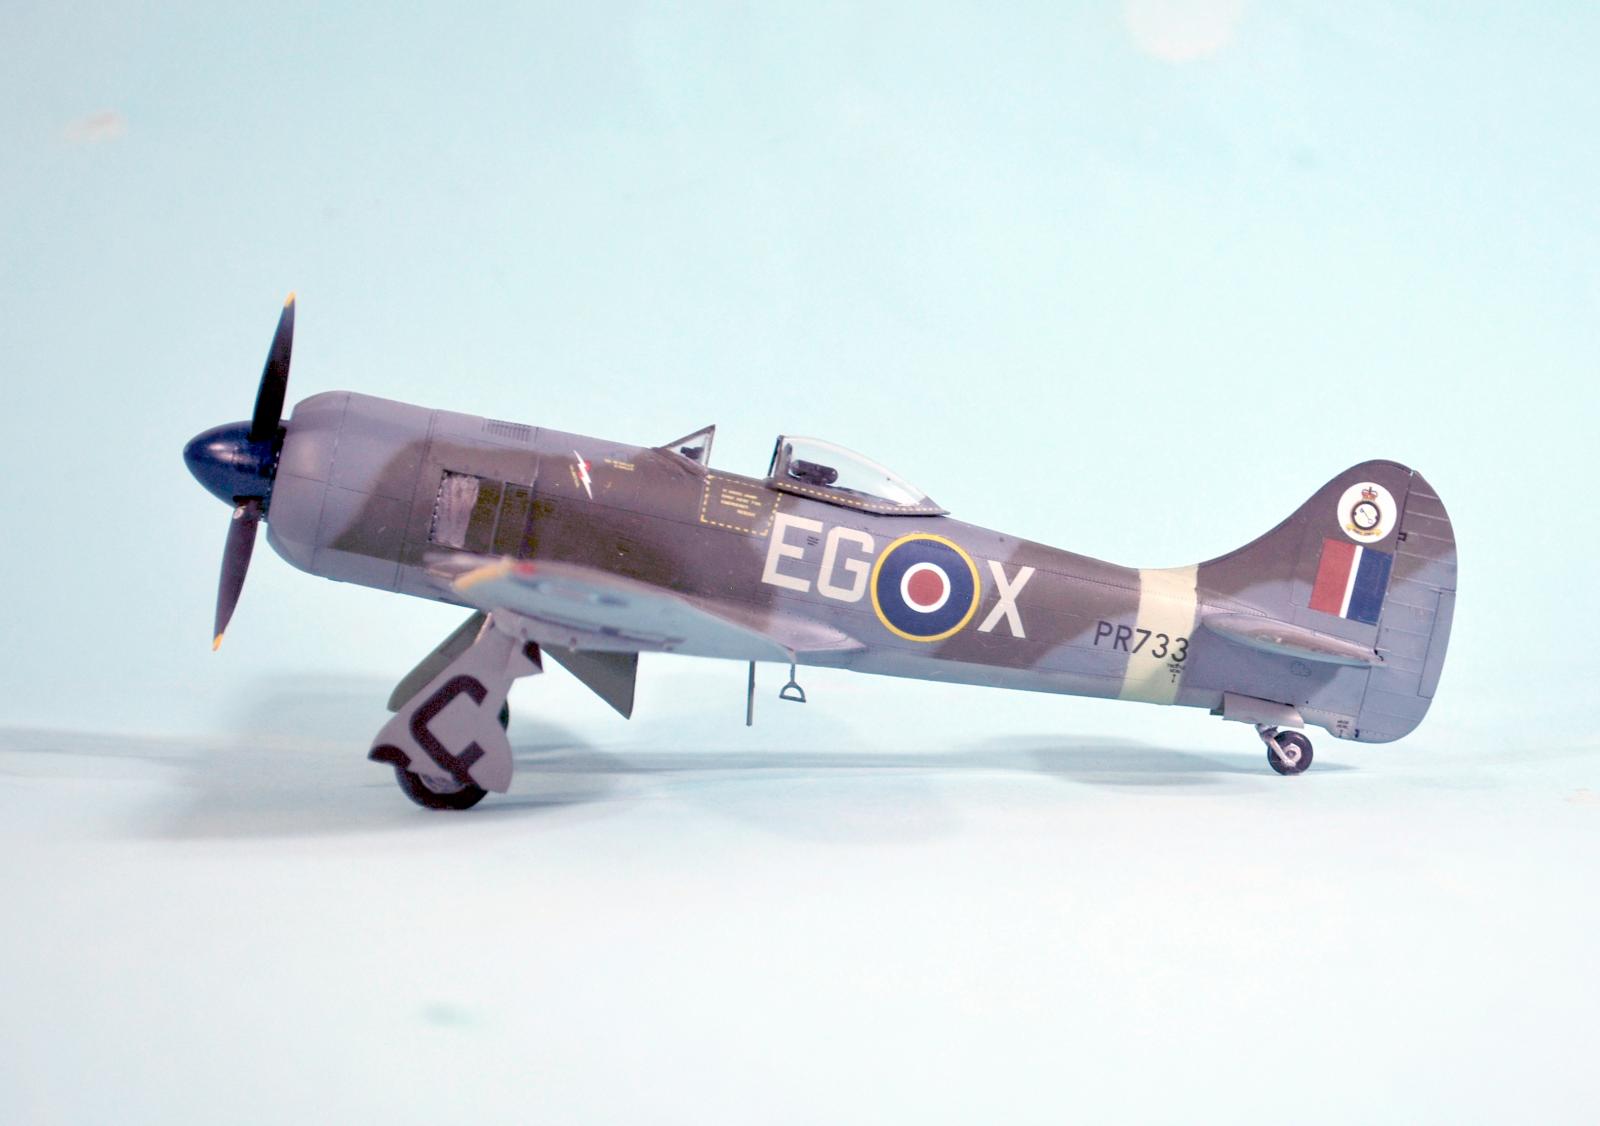
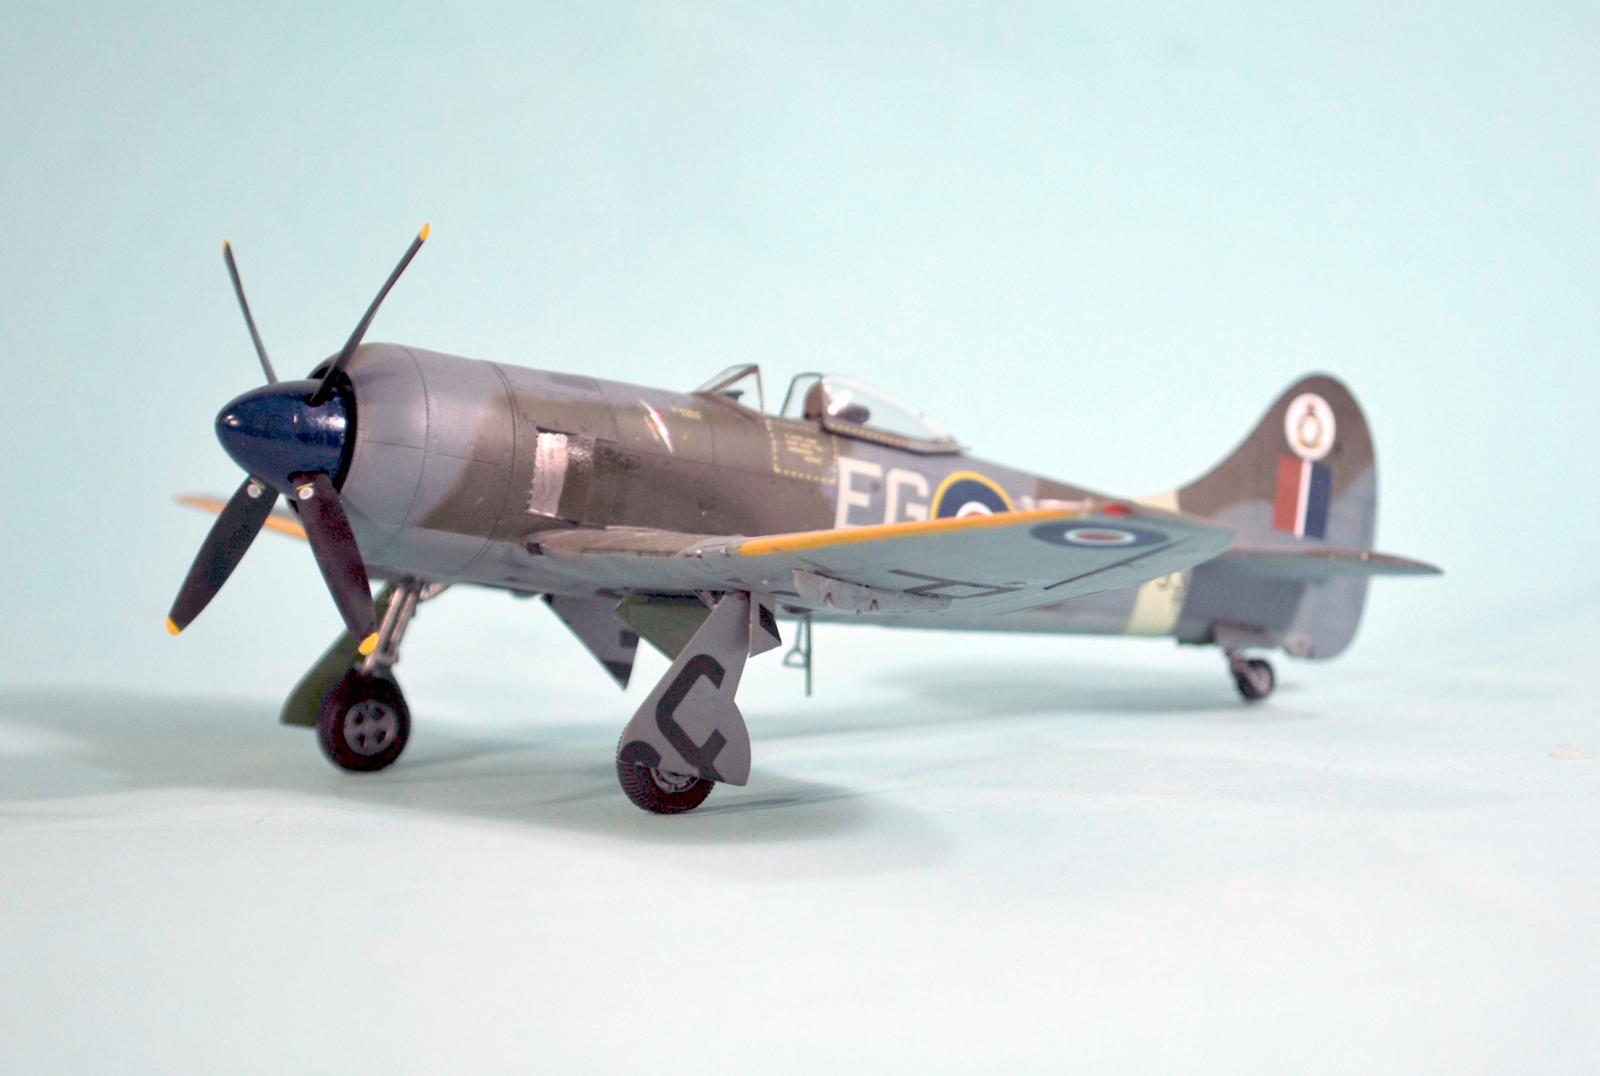
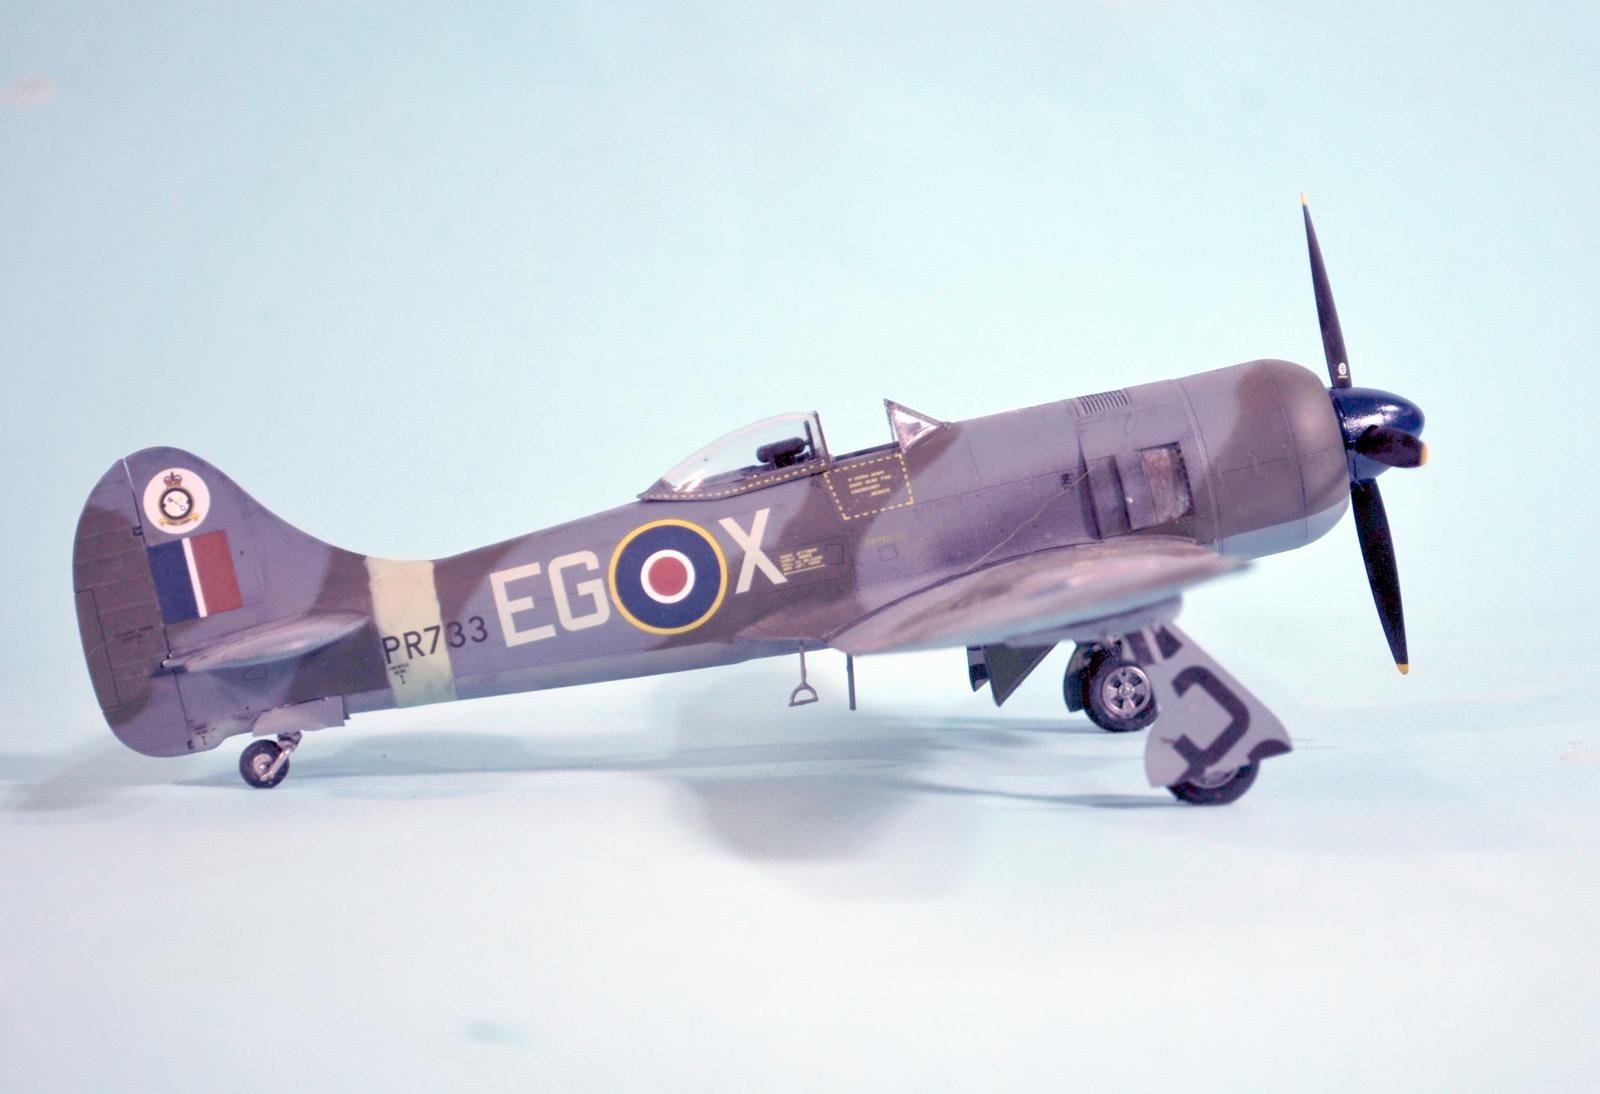
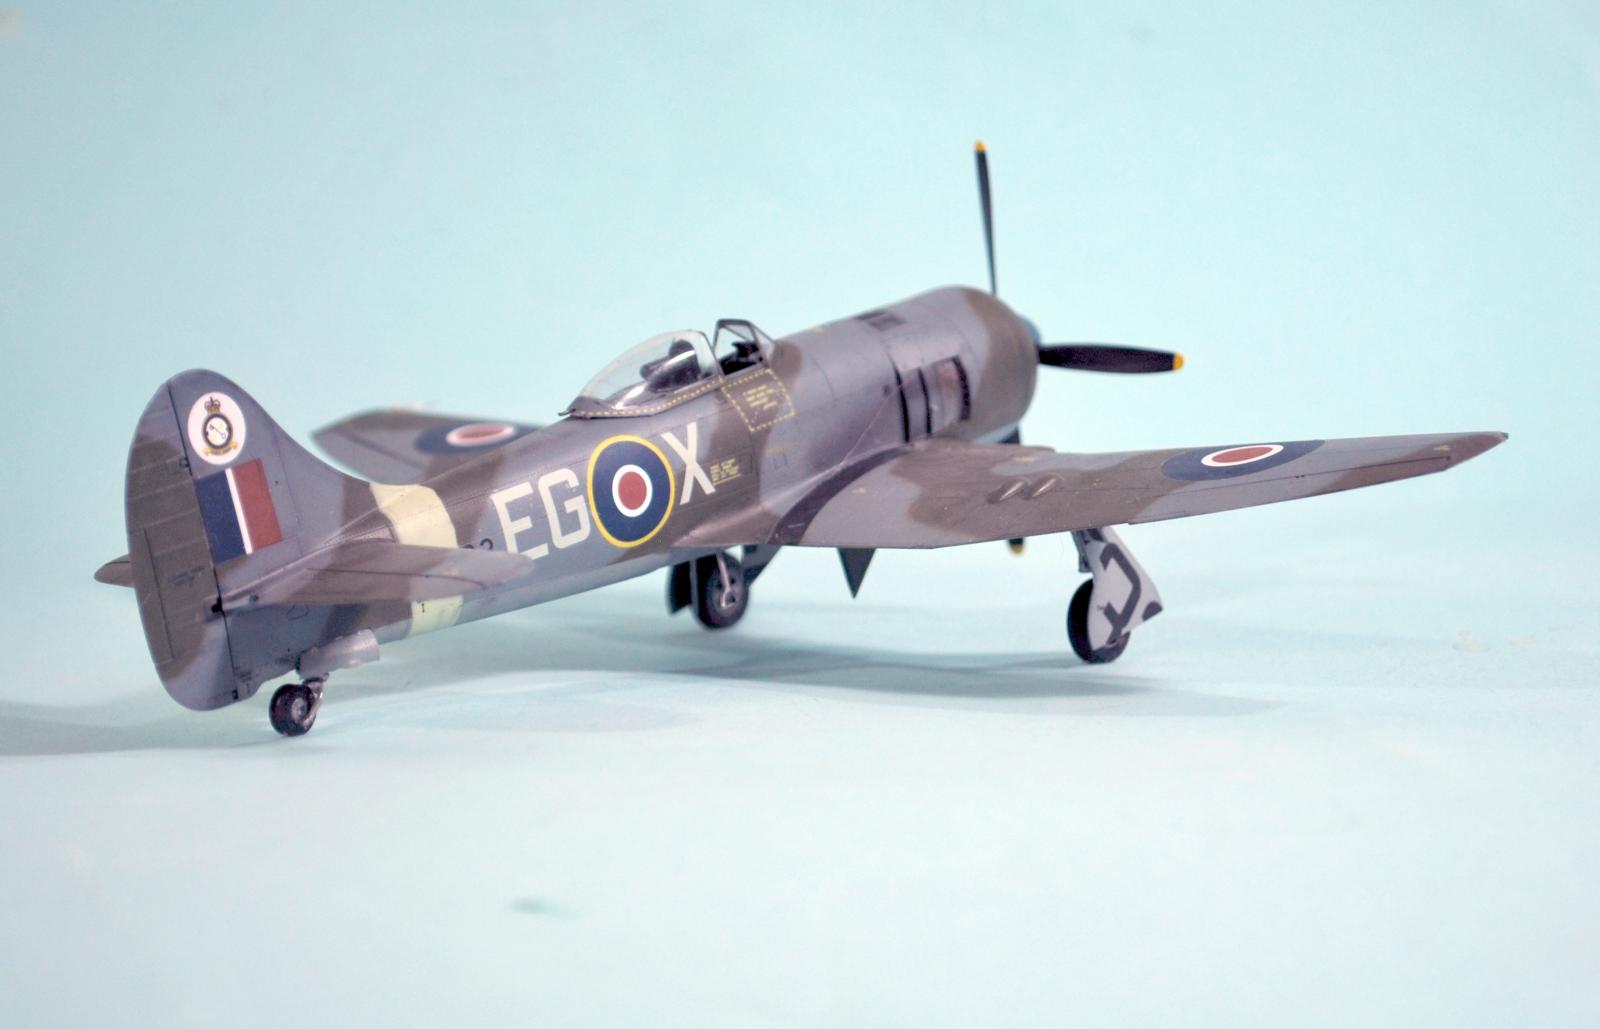
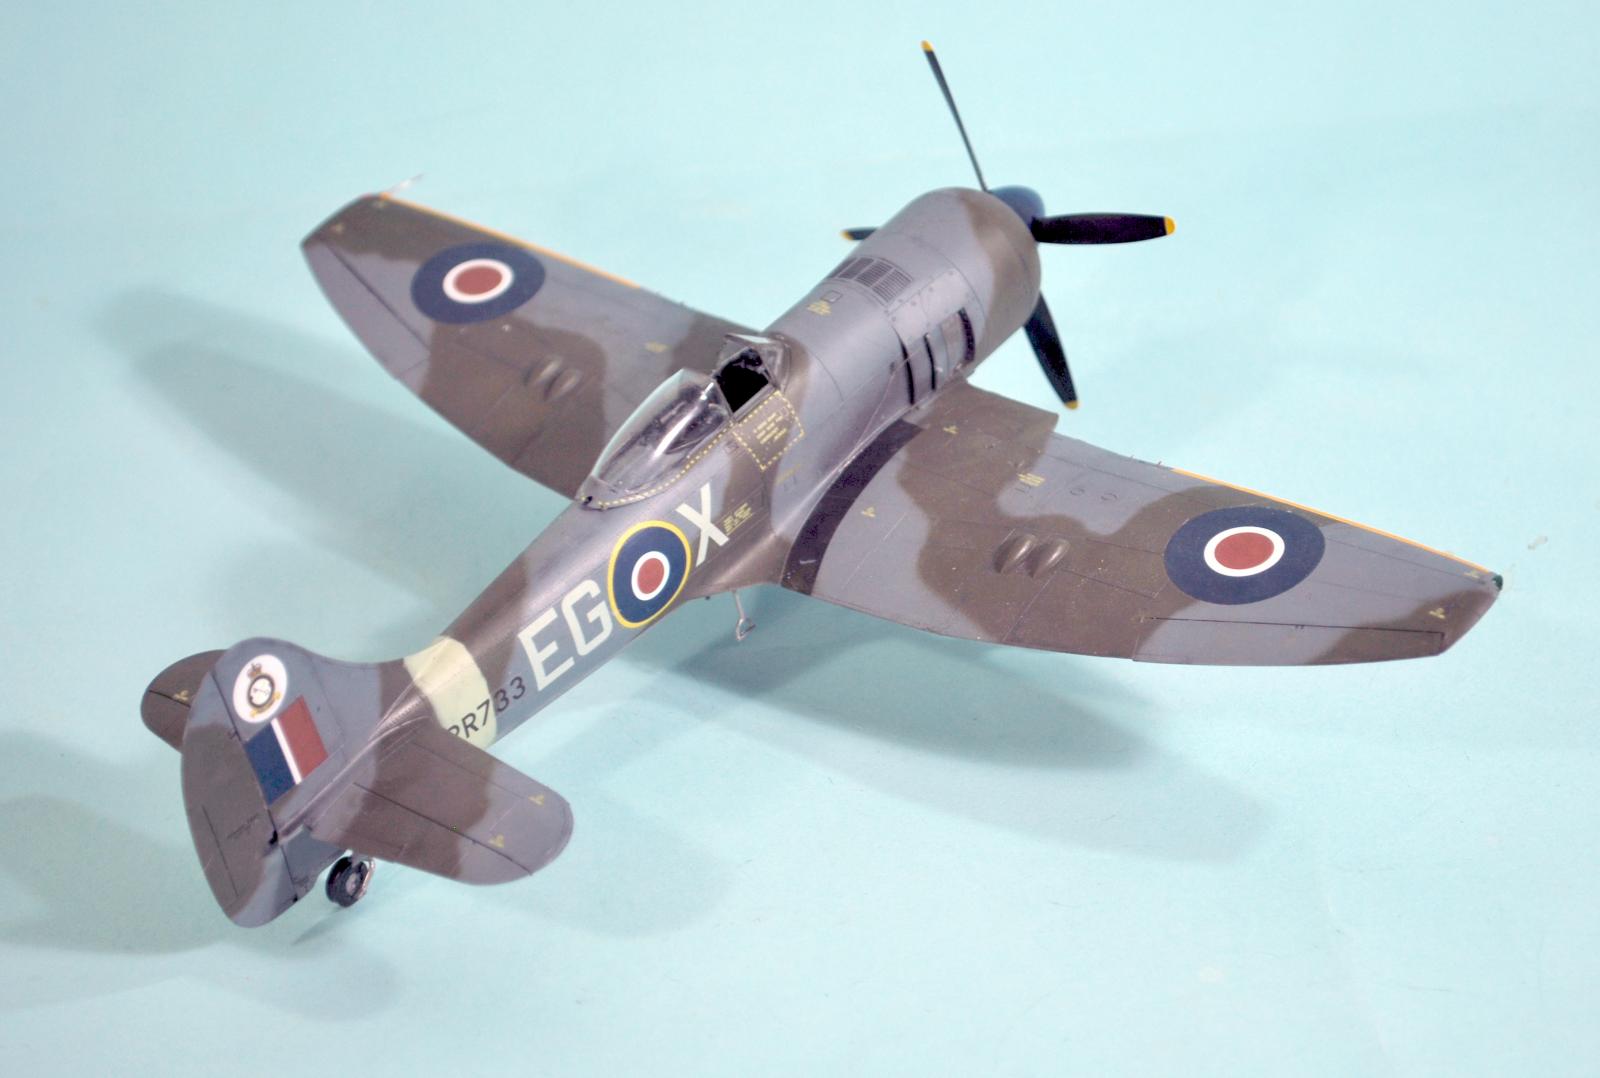
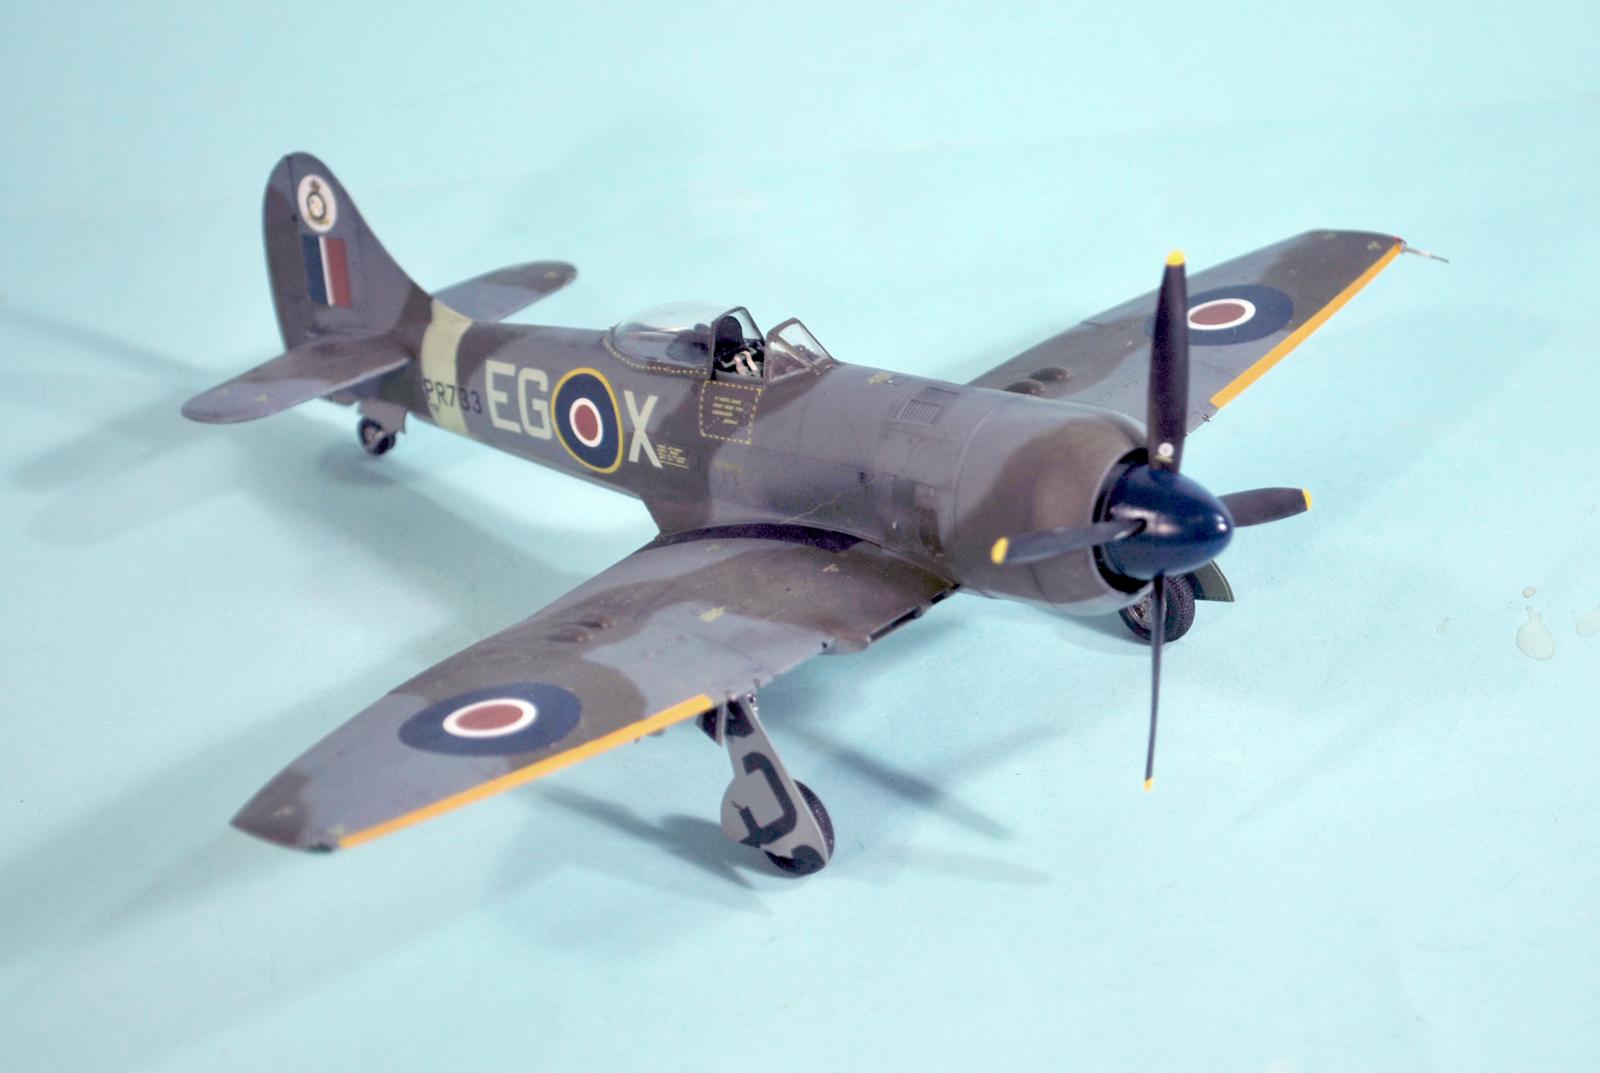
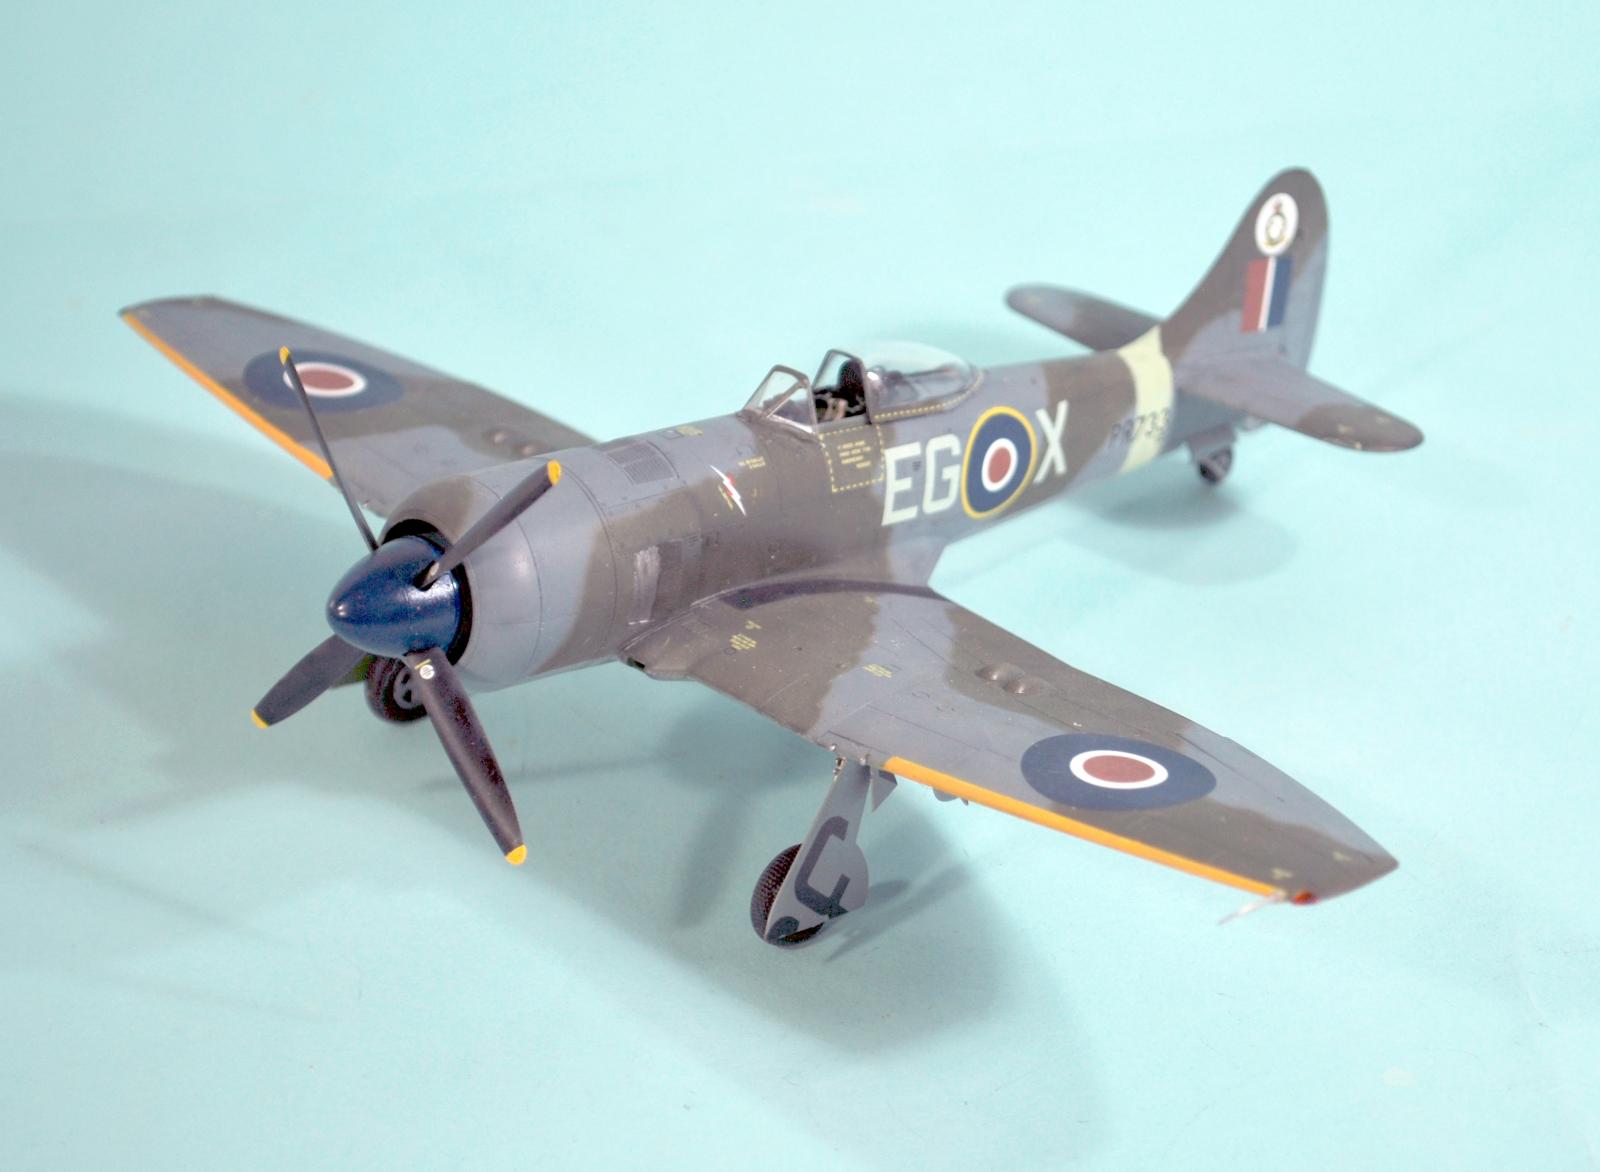
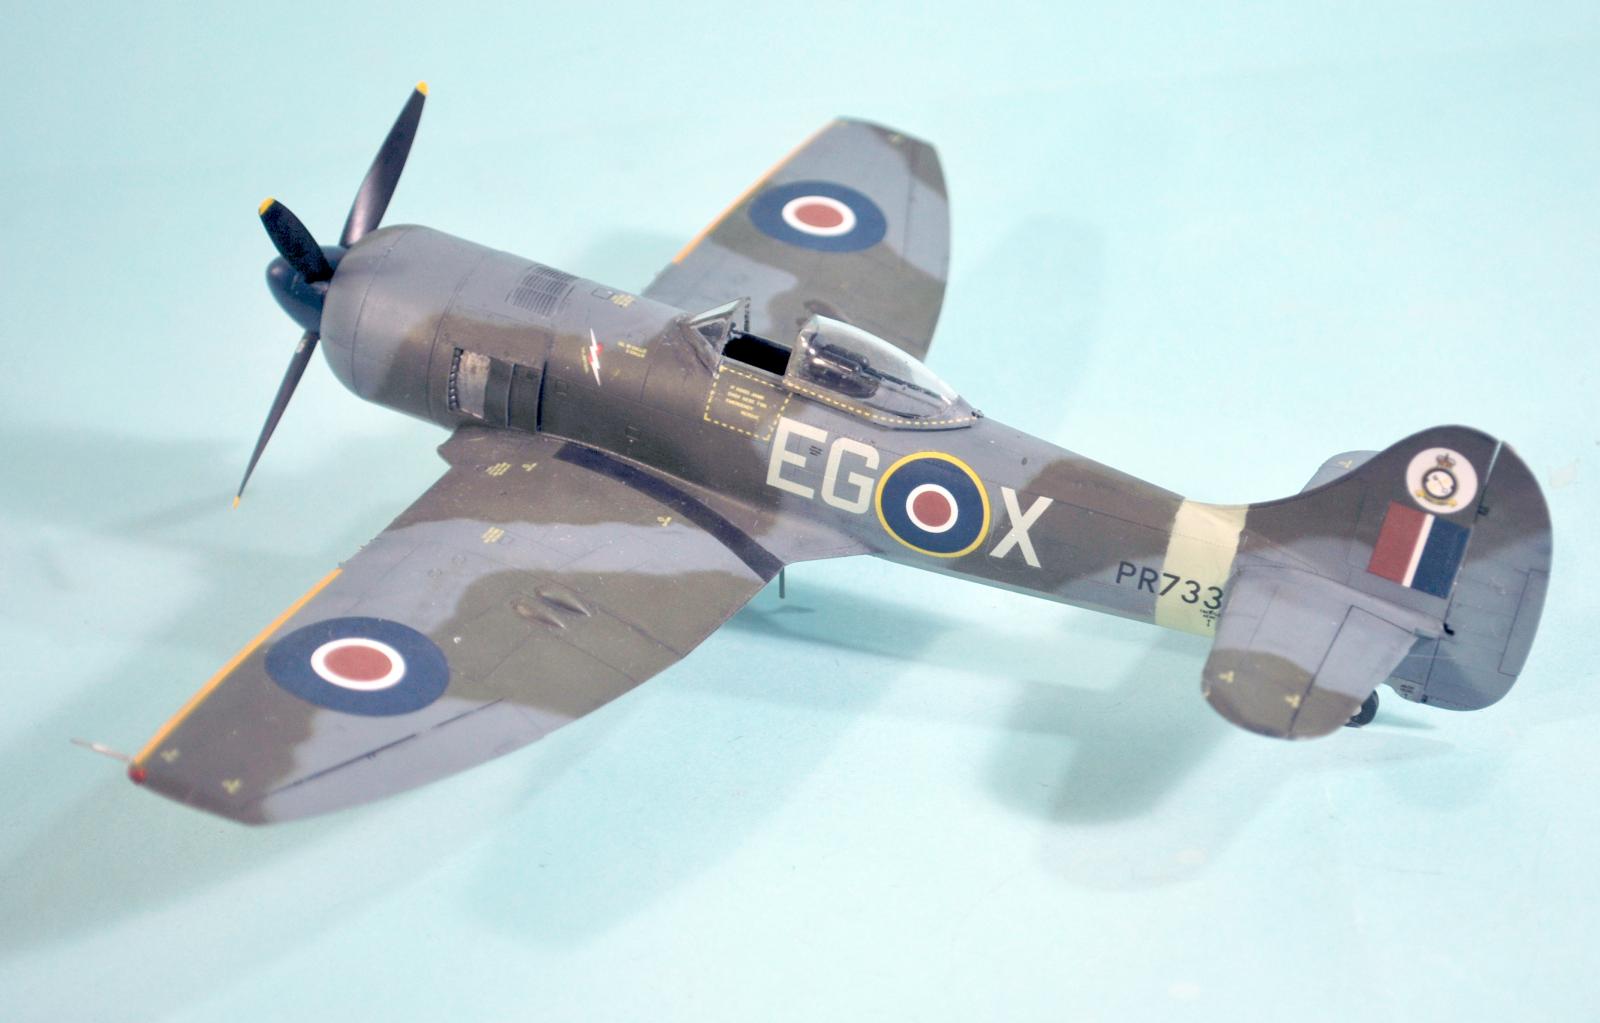
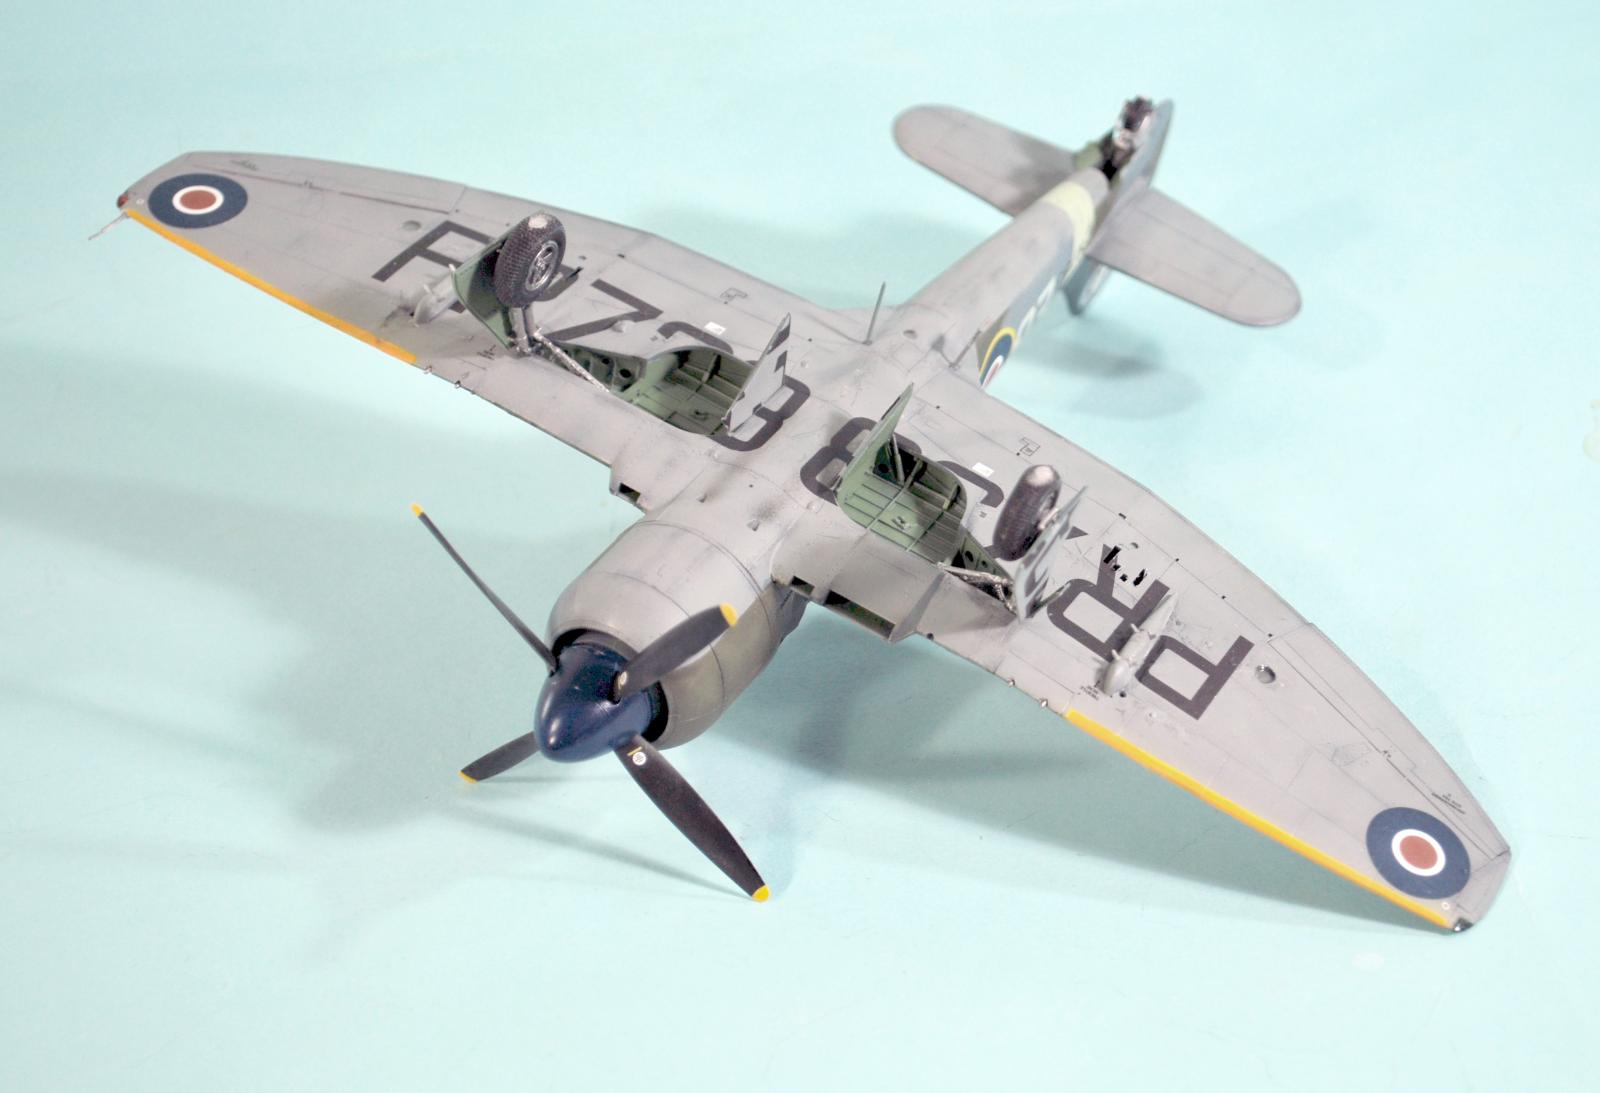
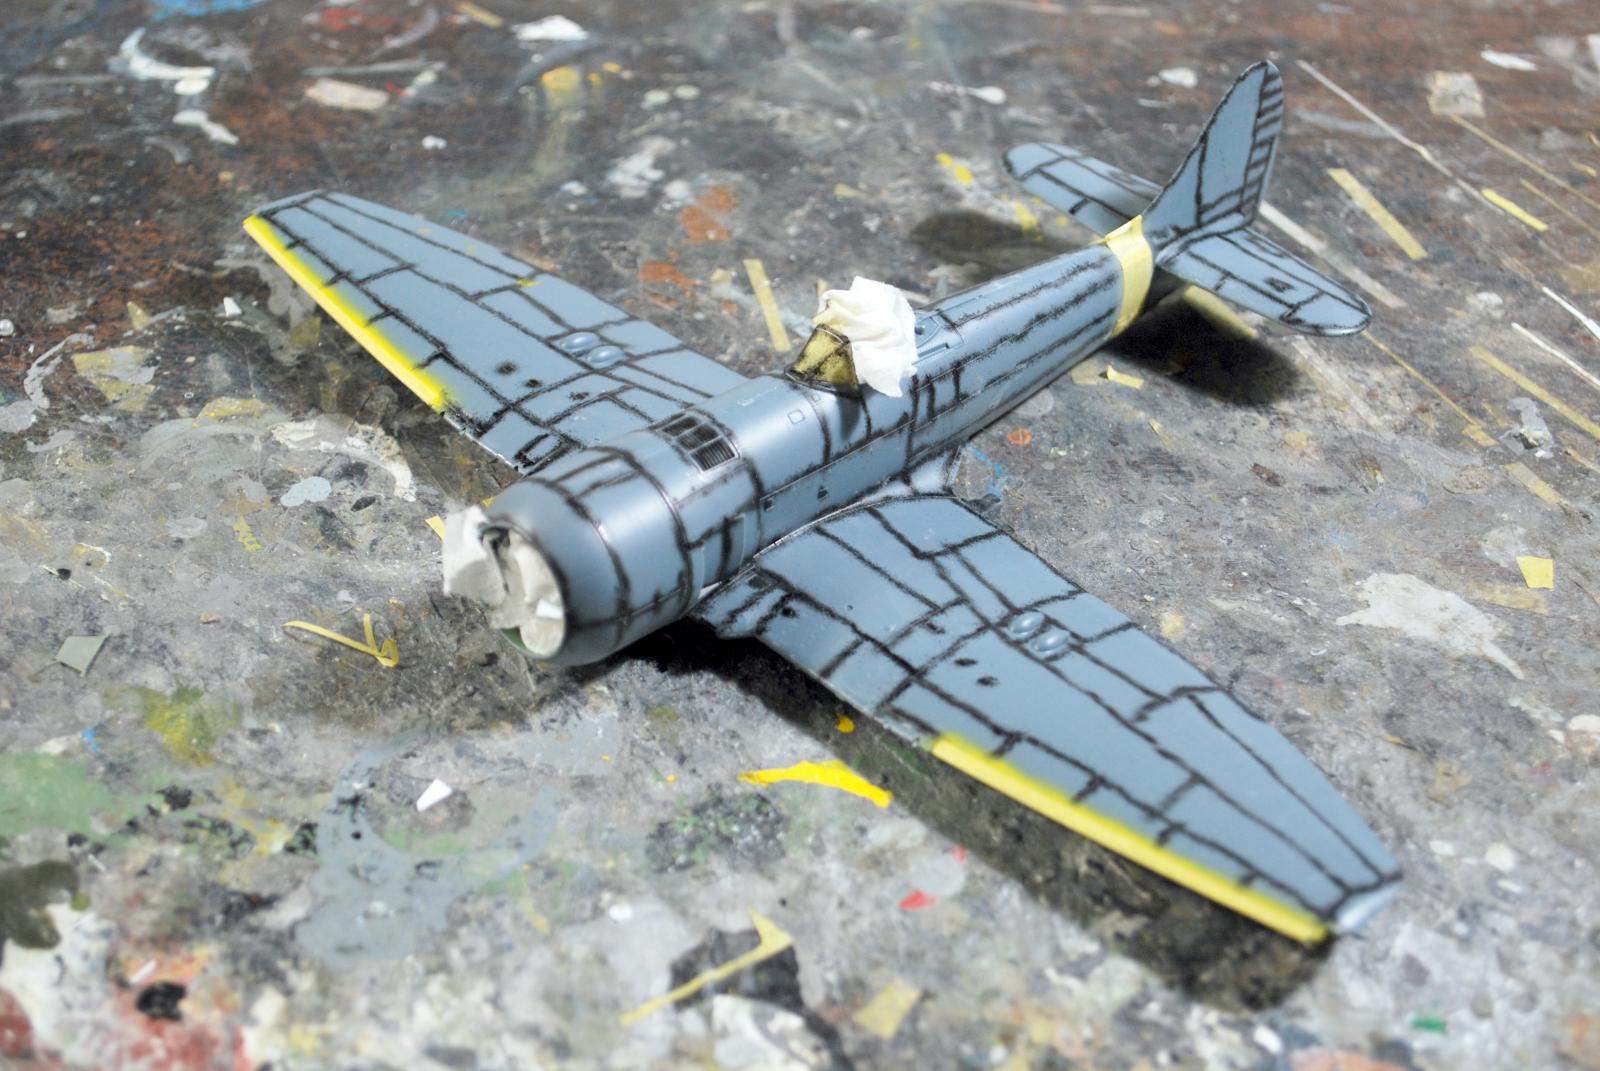
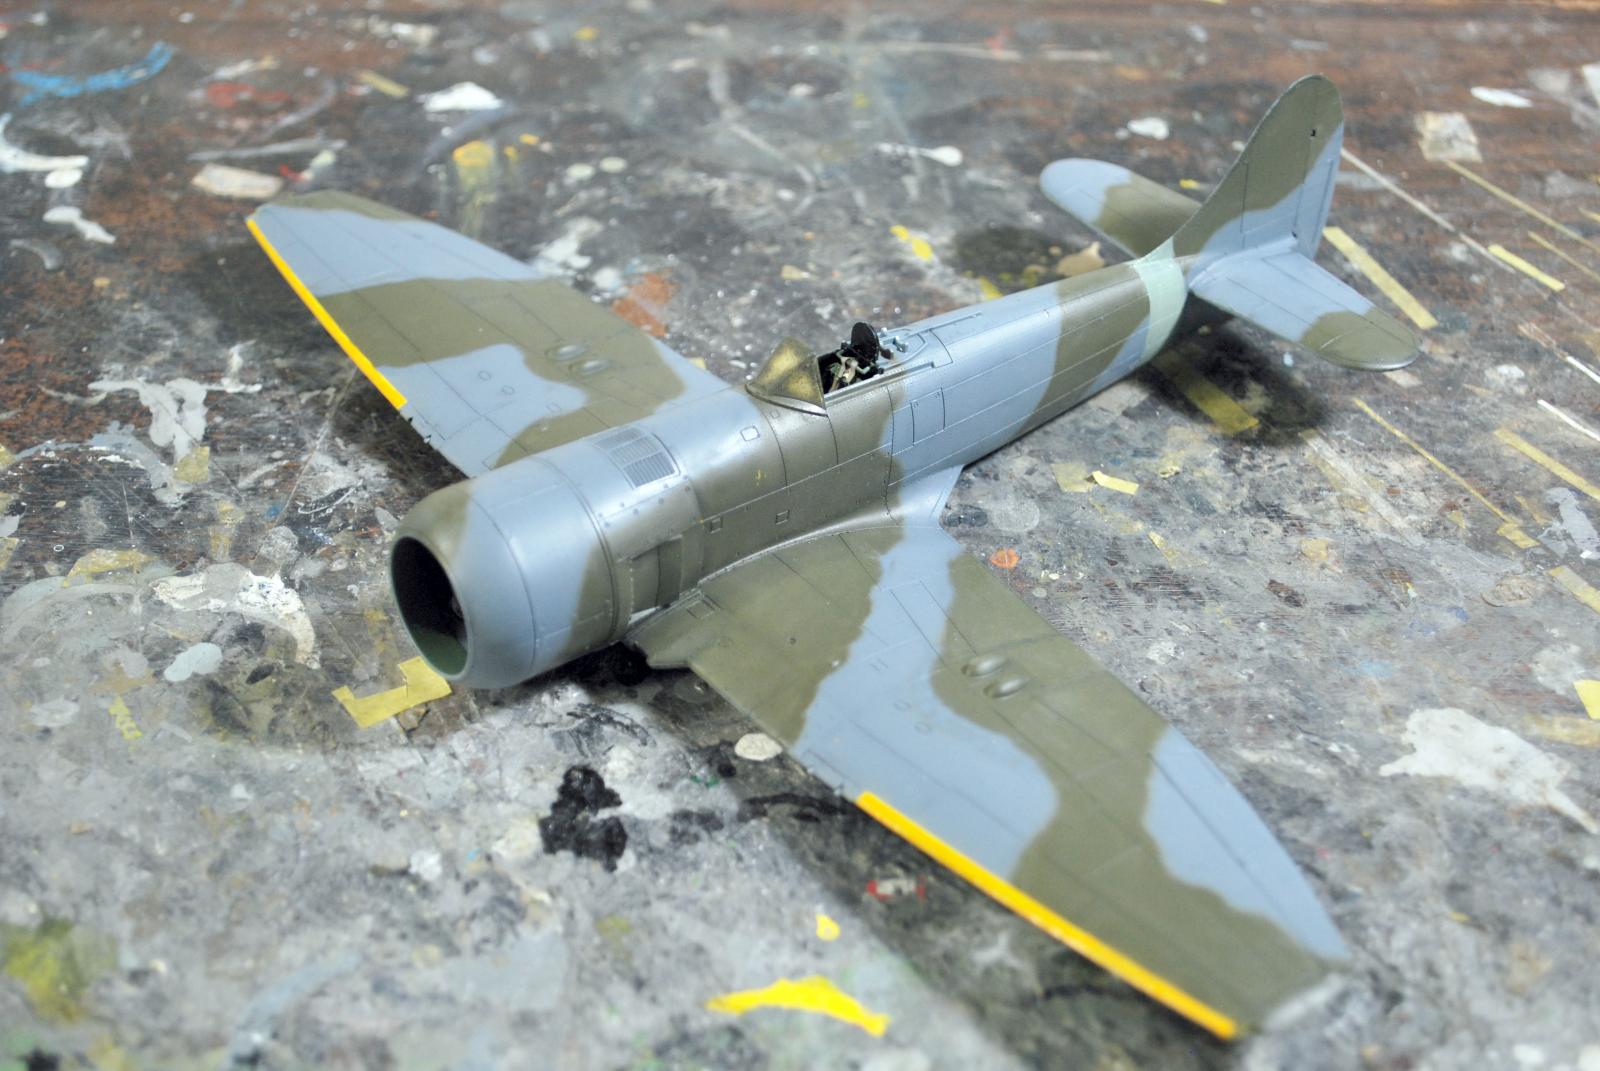
I painted and masked the yellow wing leading edges and the Sky fuselage band, then pre-shaded the model with black, then did the standard Temperate Land Scheme with Tamiya XF81 Ocean Grey, XF-82 RAF Dark Green and XF-83 Sea Grey Medium.
The decals are thin, but opaque, and went down under an application of Solvaset, melting into the surface detail without problem.
Final finish and assembly:
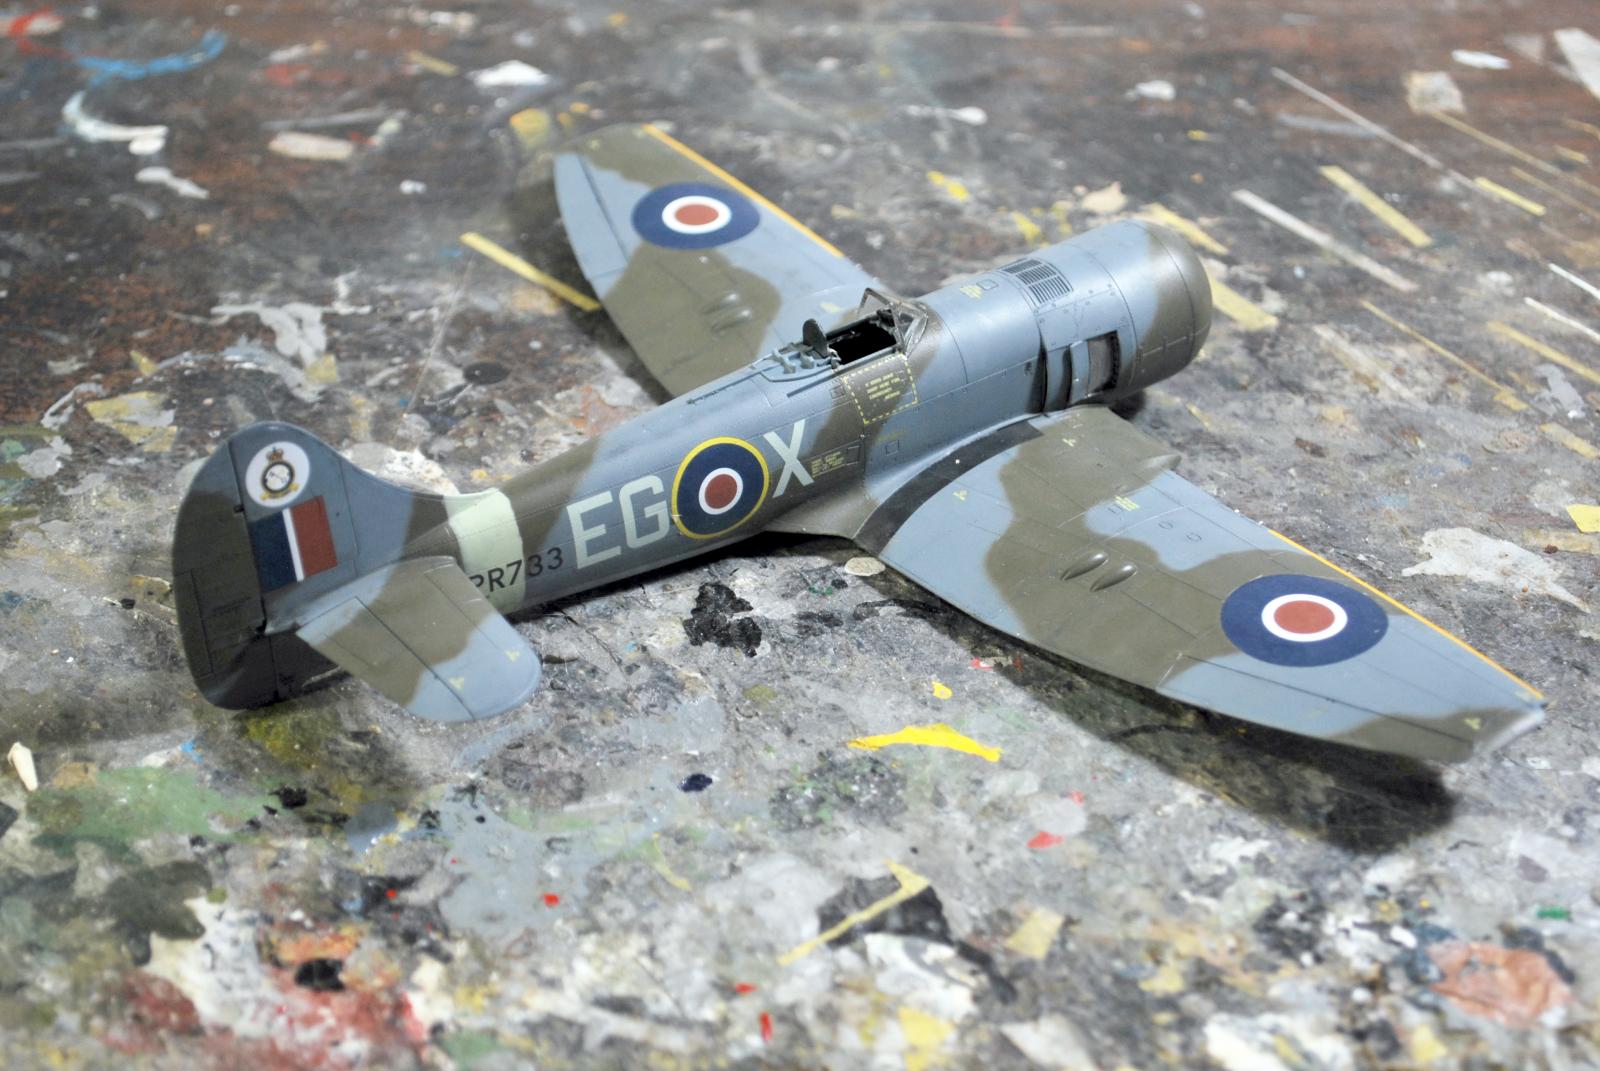
I gave the model an overall coat of clear “flat,” then attached the landing gear and posed the canopy open and attached the prop. The kit does not include a set of bomb racks, so I used the bomb racks from a Hasegawa Typhoon (since they were the same for both) and called it finished.
Overall:
This is a really nice kit. It is currently sold out, but I am told Special Hobby will do a second release. Also, Eduard is releasing the kit as the “early” Tempest II with different decals next month to coincide with the IPMS-USA Nationals. Other than decals, it is the same kit.
Review Kit courtesy of Special Hobby
PS: the tail wheel finally came loose after the photo session and was eaten by the floor monster, subsequently replaced with the plastic tail wheel.


Great build and article, Tom!
Thanks for all tips.
Really came out nicely, Tom (@tcinla). Well done.
A very inspirational build Tom. I may end up trying my luck with one of these Tempest II sooner than later
This Tempest came out very nicely, Tom @tcinla.
Thanks for all the background information and tips to get this one build correctly.
Fine looking Tempest Tom.
Excellent build. Good heads up on avoiding possible issues.
Great job on the build, this came out really looking nice. Thank you on the build up report, there is a lot going on in this kit.
Very helpful @tcinla! Good looking model as well! 🙂
Great and very valuable construction notes TC. Any idea when Special Hobby will issue the second release? This one is #1 on my must have list.
@eb801 - Likely after Eduard releases theirs. The Eduard release is the same kit with different decals.
Beautiful work Tom, and a great article also. ‘Like’ button punched!
Great job on this Tom.
Another fine build.
Very nice Tom - I think that's one of my favorite builds of yours - the paint and finishing work just looks great.
Big engine, small wings - looks fast! Very nice paint job, and an informative article!