Tamiya 1/48 Brewster Buffalo
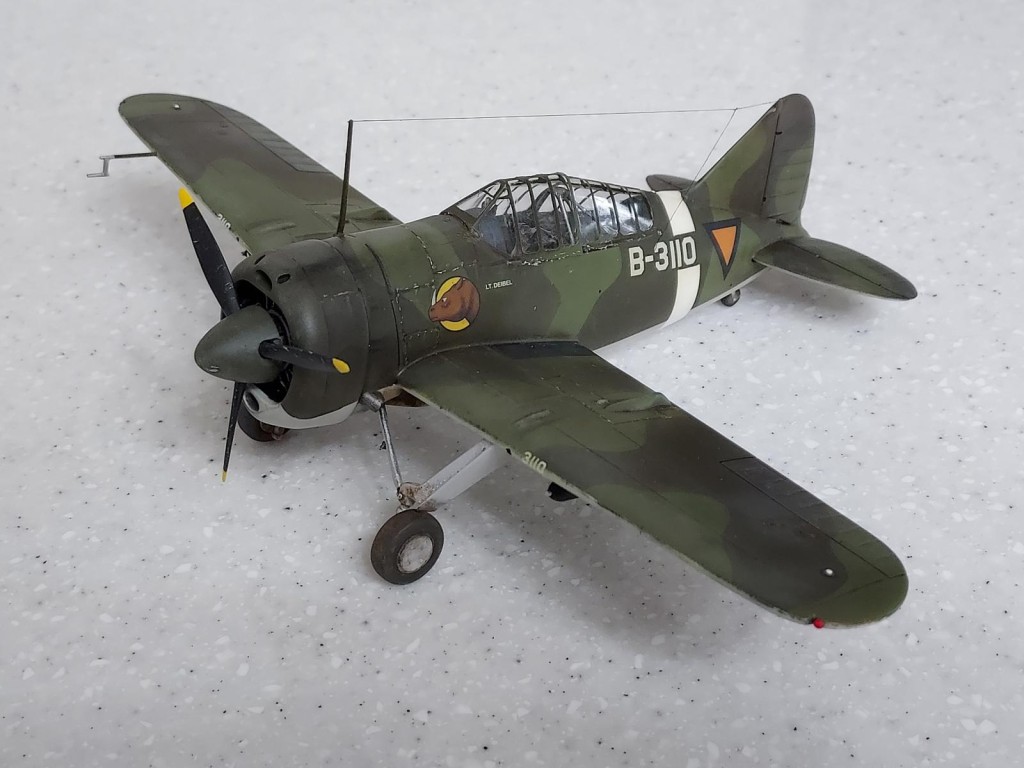
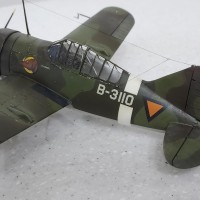
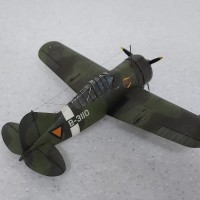
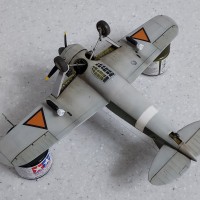
This is my fifth model so I'm still learning quite a bit. This kit in particular is very simple and easy to build, all the parts fit together perfectly, and the decals seemed to be less thick than the ones from my Tamiya Wildcat. Due to the small number of parts and simplicity of design, this is a quick build overall and I would definitely recommend this kit.
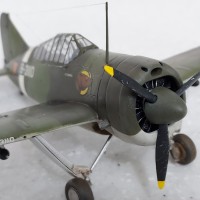
The main weaknesses of this kit are the wheel well is completely empty and devoid of any details, there is no option for an open canopy (Plasmo stated on his Buffalo video that he didn't want to risk cutting it apart so I definitely am not going to try at my novice level), and the exterior skin is rather plain due to a lack of rivets. For the wheel well, I attempted my first OOB build. I built the gun mount and guns, the back side of the engine and engine mount and some of the wiring inside the wheel well. Unfortunately, these details didn't show up well on my cell phone camera pics.
This model was also my first attempt at making rivets. It looked really nice after I riveted the plane but the rivets have all essentially disappeared after layers of primer, paint, and clear coat. Any suggestions on how to keep rivets visible and not disappear under the layers of paint?
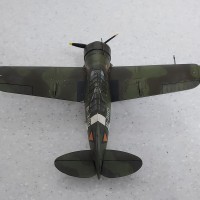
Another problem I had with this kit is the three exterior paint colors listed by Tamiya do not match at all the plane in the museum. I didn't realize this until after I painted the model per Tamiya and compared it to the museum plane. I gave two more attempts at trying to match the paint scheme in the museum photos but I still couldn't figure it out. I would say the two tone green camouflage I have on my plane is 80% accurate compared to the museum photos.
As I researched this plane, I learned that there is a dispute as to the color of the cockpit and bulkhead of the Buffalos that were sold to the Dutch. Thus, I painted it in a standard USAAF color palette.
This was also my first attempt at doing color modulation on the camo pattern using oil paints. It looks fairly well but you can hardly tell I did it from these pics. The kitchen lighting and cell phone camera apparently aren't good enough to capture those details.
Another question I have for the group is that the white stripe at the rear of the fuselage left an visible raised edge where I had the tape. This was obviously due to the layers of white paint needed to make it opaque over the dark camouflage colors. How do you prevent these raised edges on taped paint seams in this scenario?

Nice work, Derek! Buffalos are always fun subjects. Your greens look close to me. NEIAF veterans described the two greens as being very much like the two greens in the USAF Southeast Asia scheme.
I never thought about looking up NEIAF sources. And now I know.
The Dutch museum Buffalo is supposed to be pretty accurate as far as the exterior colors go. The greens were called “new leaf” and “old leaf”.
Very good looking model! I like Buffalo!
Superb model, Derek!
Congratulations!
Your riveting technique is great, since the rivets disappear, maybe try making them deeper. Also, you might try spraying thinner layers of paint. This might partially explain the build-up of paint adjacent to the masking tape: it is just to much paint built-up onto the border, so try spraying thinner, especially at the tape border, but it is not too easy. I also spray thick, facing the same paint build-up problem 🙂 A number of modelers would VERY CAREFULLY sand down the ridge with 2000grit and a lot of patience (whenever I try such a technique, though, I always end up with some unwanted nearby paint sanded away...)
Spiros,
To make the rivets deeper, is it simply a matter of applying more pressure to the riveting tool or are there other techniques you need to do to make a quality rivet?
I thought about using sandpaper too to sand down the edges along the seam lines but I was afraid of ruining the paint job because that white stripe came out perfectly (other than the raised edges).
That’s a nice Buffalo ! It turned out great.
Maybe if you paint the white stripe first and than after it’s dry mask over it and then apply the main colors?
Good idea. I actually just thought about that on my current build which is a P-51 with invasion stripes. I'm thinking that painting the white part of the invasion stripes first will work best followed by the main body color and then the black invasion stripes.
Yeah, your paint is probably too thick. If you're gonna make a mistake, make it on this thin side. Like the ever- popular consistency of milk. Go for several thin coats instead of covering all at once.
At any rate, your model looks fine, that's a nice job. Also, don't depend totally on museum colors, more often than not, they are wrong anyway.
I never thought about the museum colors being wrong. The Tamiya recommended colors made the plane look like a Skyraider with Vietnam-era camouflage and it just looked out-of-place.
Looks great Derek! Congrats on a very well done project. Your progress from models 1 to 5 is impressive! Keep up the good work!
Thanks David. I actually felt like the quality on this model went backwards compared to my previous model but I definitely learned a lot on this build so I guess that is what is most important.
Your Buffalo looks great, Derek @mrocs2000
Like mentioned by Jay ssgt, painting the white band at first would have helped to prevent the edge.
Nevertheless, this Dutch Buffalo is a pleasure to look at.
I thought about doing that as I'm working on my current build- a Mustang with invasion stripes. I'm going to paint the white invasion stripes first followed by the main body color and then the black stripes. That should resolve the issue.
Being green/brown colour blind I can’t help much with your colours, the only thing I would recommend is trying to take your pictures outside, natural light works wonders. If this is only your fifth kit then I think you’re doing really well.
Good idea. I noticed that the two-tone green camo scheme in the pictures I posted appear much darker than the actual plane. It probably doesn't help that I have different kind of lighting in each room in my house.
This is quite nice and a real achievement for only a fifth kit. That 40-year old Tamiya Buffalo is still good.
Thanks Tom. Appreciate the kudos. I definitely want to build this kit again in the future but in the pre-war paint scheme with yellow wings.
Great job, Derek (@mrocs2000). It is always cool to see a Buffalo, especially one in an unusual camo. Finding the right color for different camo schemes is always a problem, because you get into sources like black and white photos, or old color photos. Paint in museums could be faded, or if the plane is restored, the paint might be inaccurate. Whether the paint used was from a US source or not is a whole different problem. So basically, you do the best you can and run with it. As far as your paint buildup, if your are using an airbrush, simply paint the white stripe first and then mask it off. It takes a lot of paint to get it to look white when applied over darker colors. It is a much more difficult problem if you are using spray cans because the paint is much thicker already. I can tell you from many attempts to get rid of a paint ridge that sanding the edge will frustrate you and give very mixed results. I think your paint came out great, so well done on a cool model. Looking forward to your P-51.
I especially like the main landing gear and subtle rust stains.
Fifth model?
My fifth went in the bin. Along with my sixth, seventh, eigth and so on ...
Now on about 100, but still not confident enough to post anything to date on here, so - well done you!
Thanks Tim. That was actually supposed to be dirt and dust kicked up from the tires, not rust stains which means I need to make my dirt & dust look more convincing. I haven't thrown any models in the garbage yet but I'm sure that will have to happen sooner or later as I start to run out of space to store the finished builds.
Great job on a classic kit.
A beauty, especially as #5! All my advice ideas have already been stated, so I'll just say - keep building!
Hi Derek and welcome to the iModeler site. I love posting work to this site and seeing the great kits that modelers display.
With regard to your models, all your kits have come out above average, and the average is pretty good here. Don't be hard on yourself because some advanced modeling technique did not meet all your expectations. Just keep moving forward.
And your selections of models are already quite advanced. Speaking as a modeler who is not advanced in weathering and wear on models, I recommend you try a factory fresh model just for the heck of it. If you notice the aircraft displayed in museums, you will see that 9 out of 10 look like the just came off the production line. Give that a try and then just relax and enjoy, and please keep posting to this site.
Happy modeling!
Great job on your Buffalo, I think it looks great. Jay is spot on about painting the white stripes. I always agonize this part of painting and always paint it on after everything else was painted. I try to give it light coats and after a few coats, wait a bit for another few light coats.