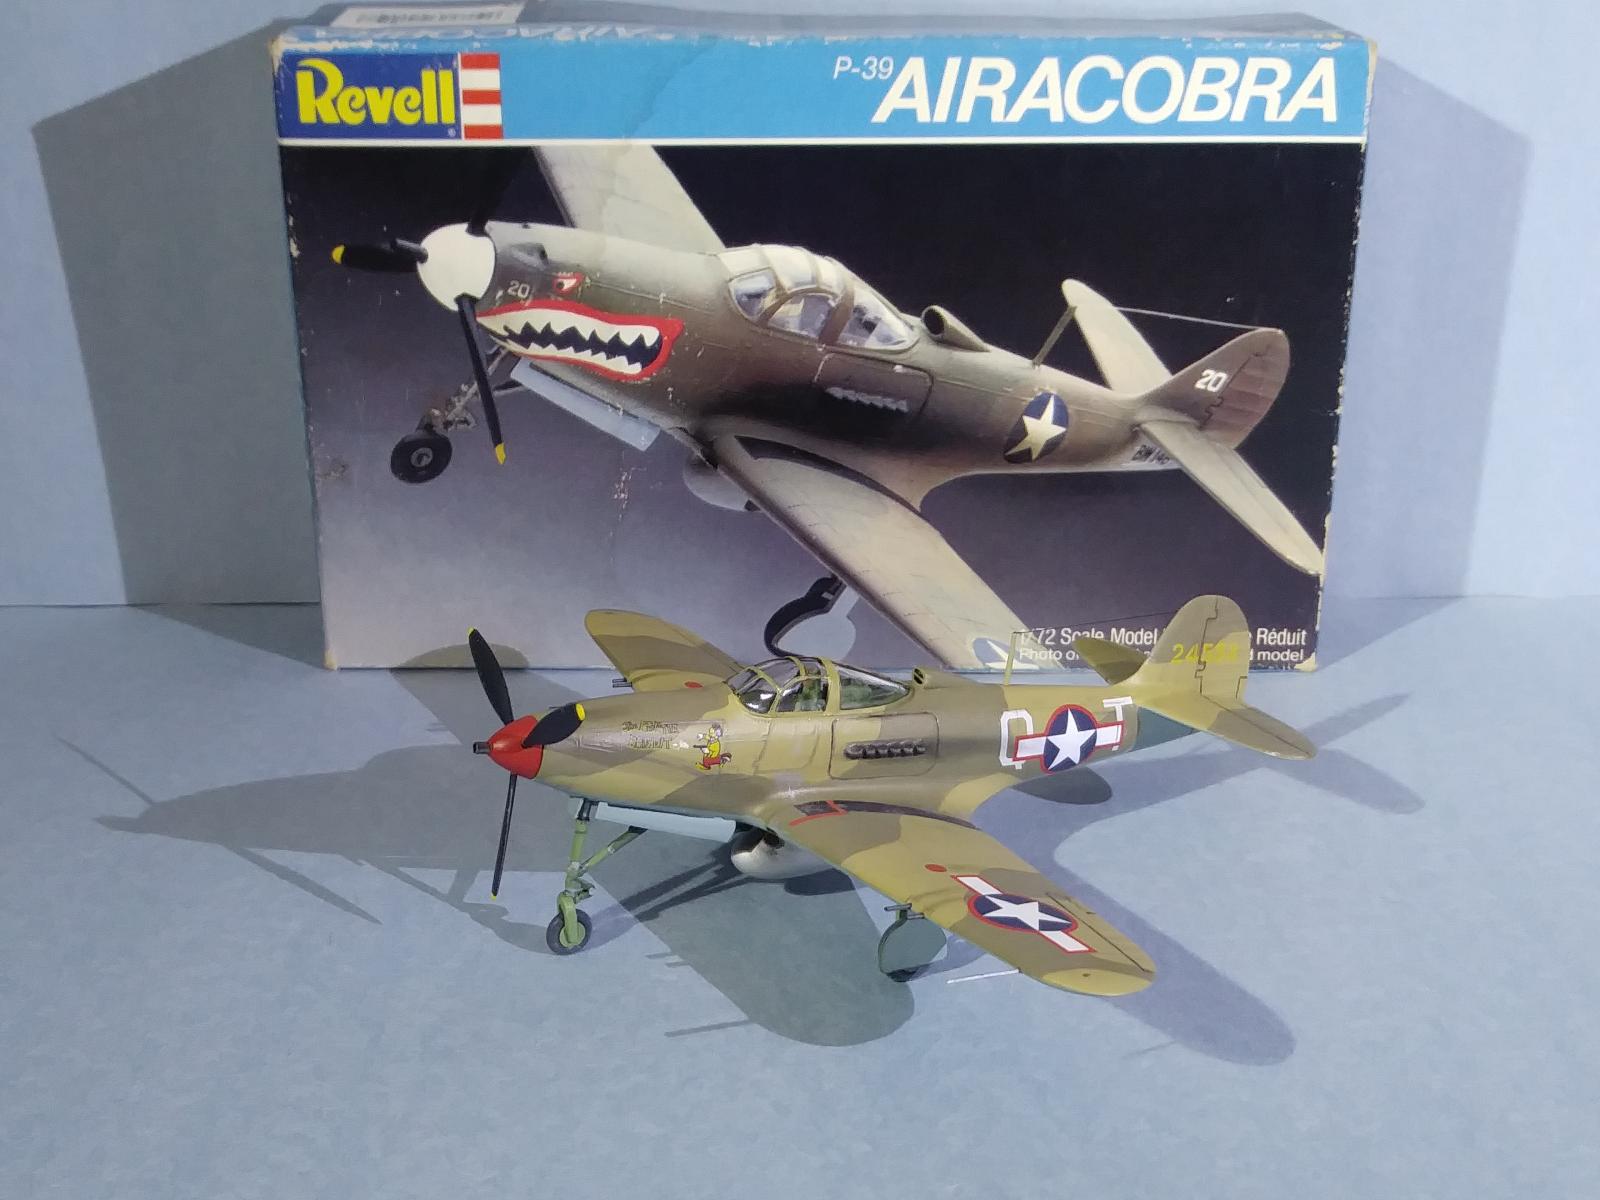
Revell 1/72 Bell P-39 Airacobra

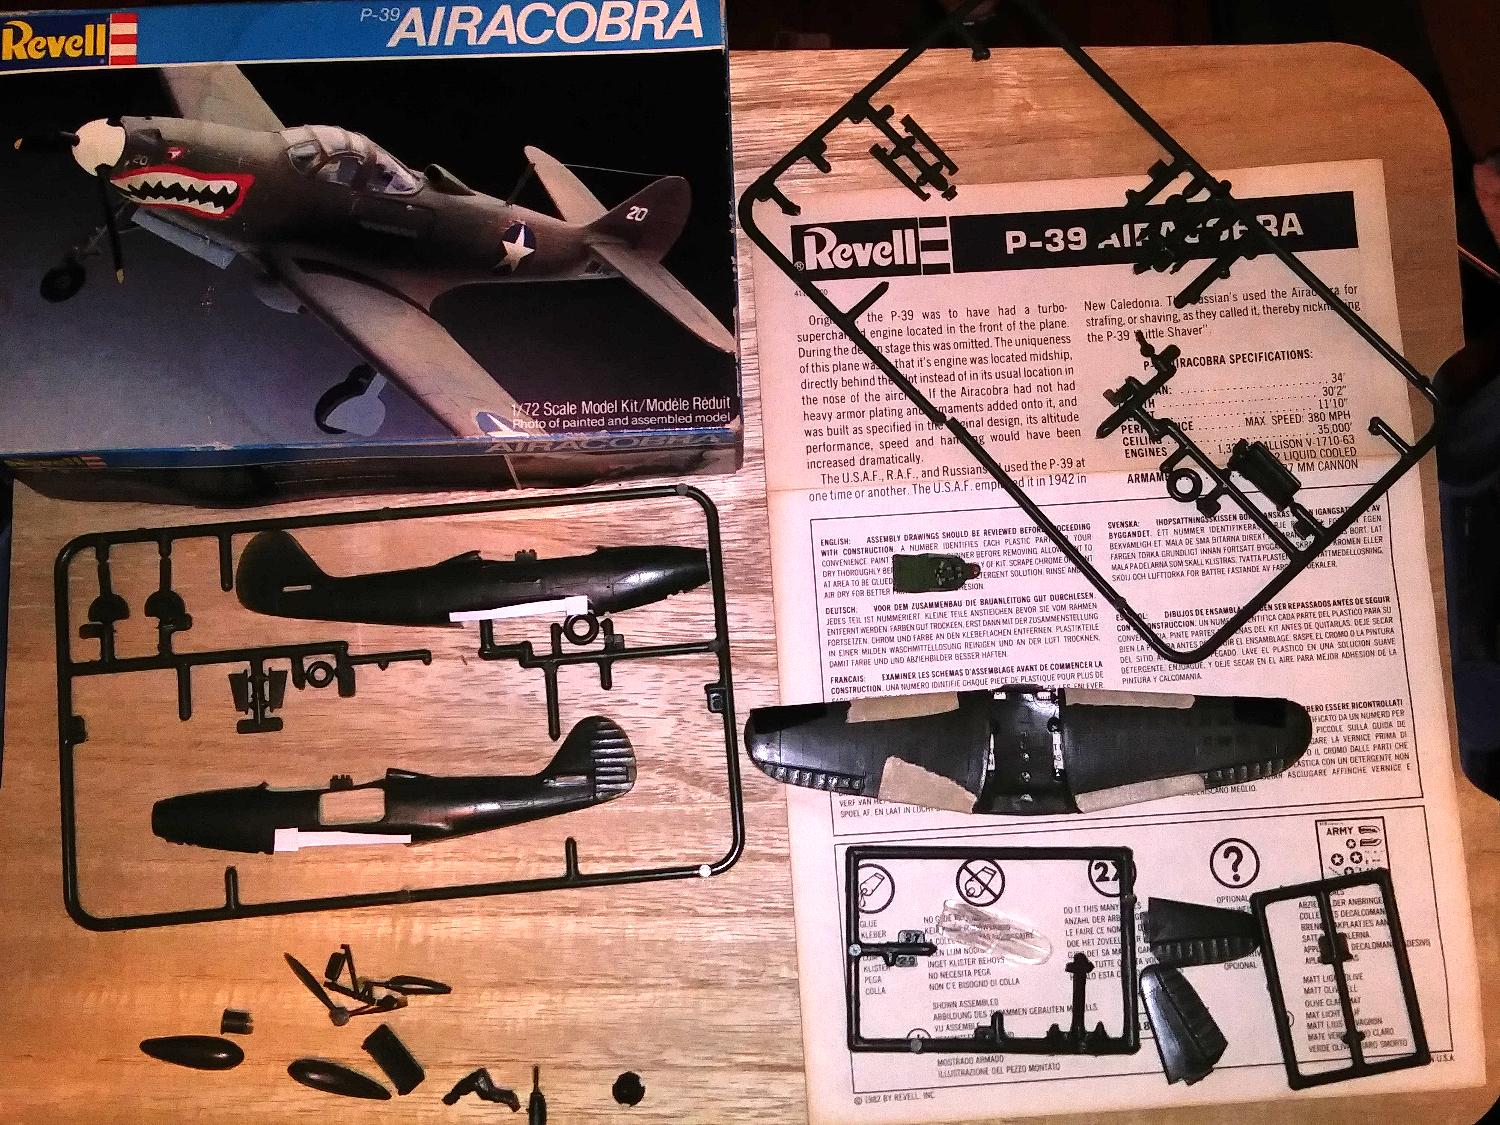
Not too long ago I really enjoyed the build of Revell's old 1/72 F4F-4 Wildcat. The Wildcat did need a little work to bring it up a bit but I just loved the whole build. So after building a few Matchbox kits in a row, I decided to give another old Revell kit a try. I had this P-39 in my stash for a while, it was picked up from one of our club meetings many years ago. For a while I've been planning on making a P-39 so this one was it!
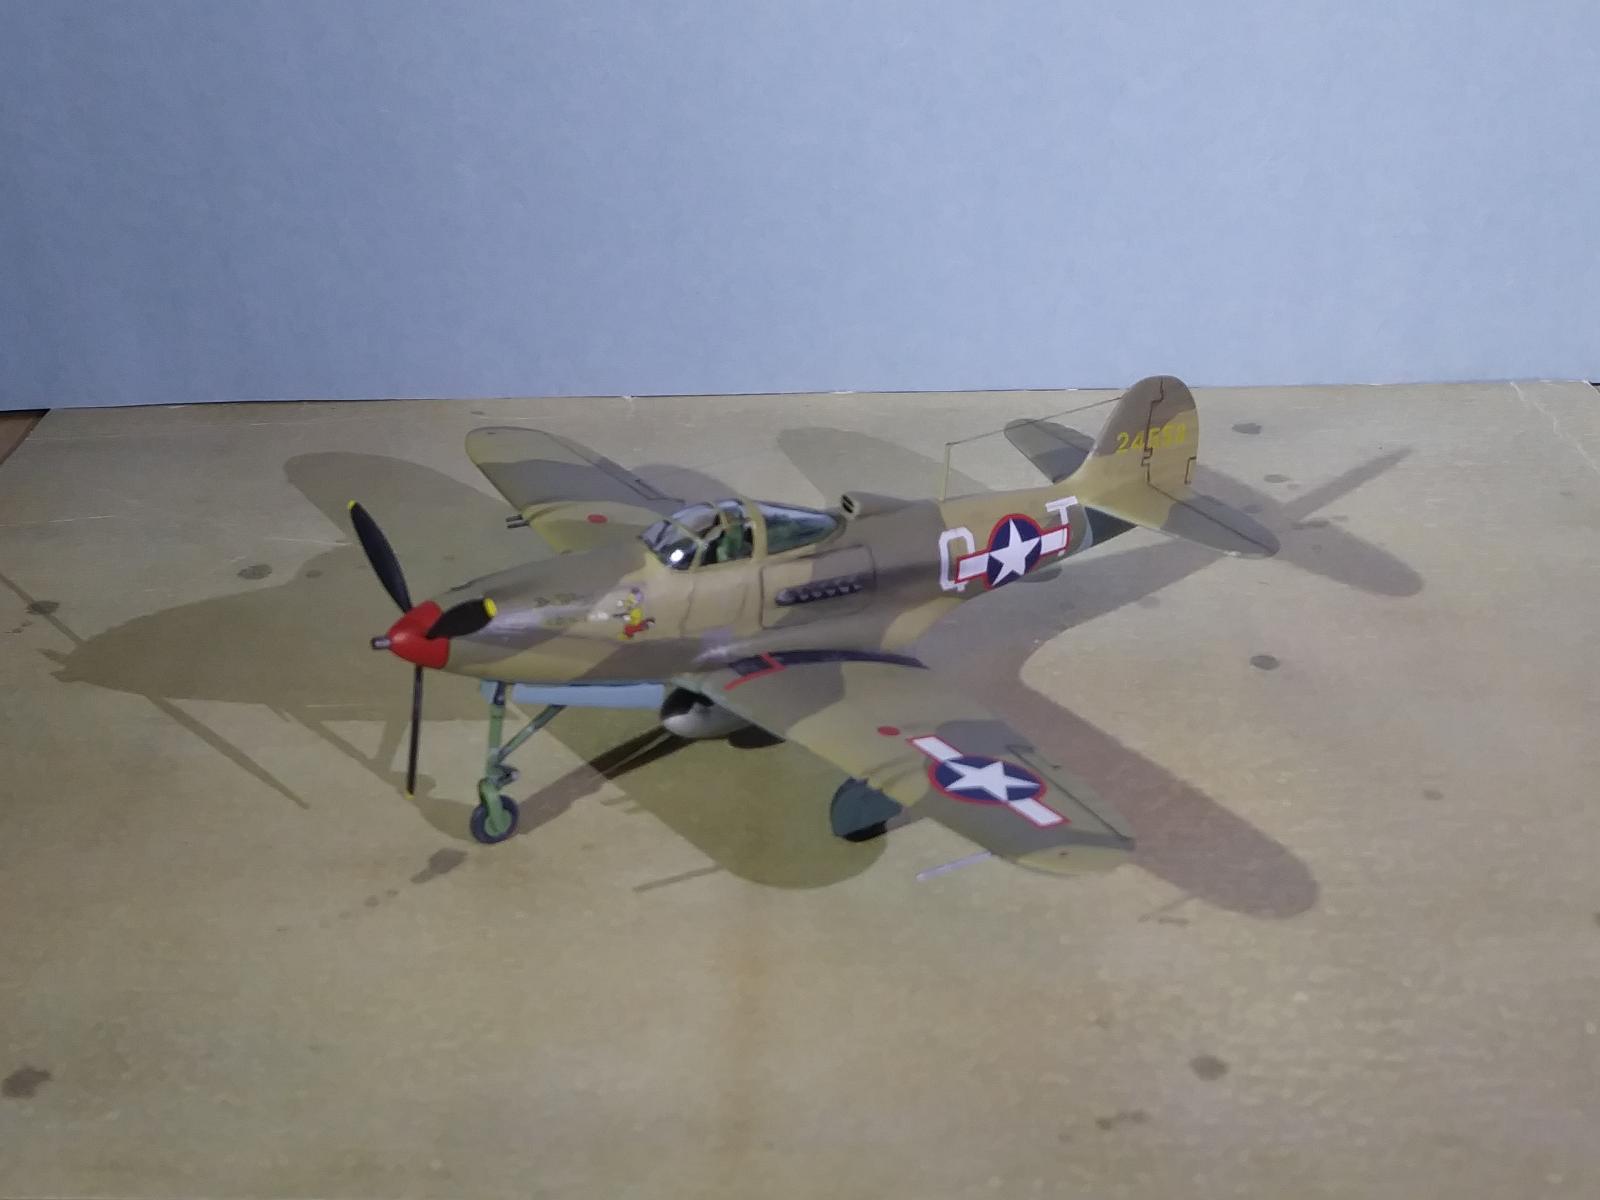
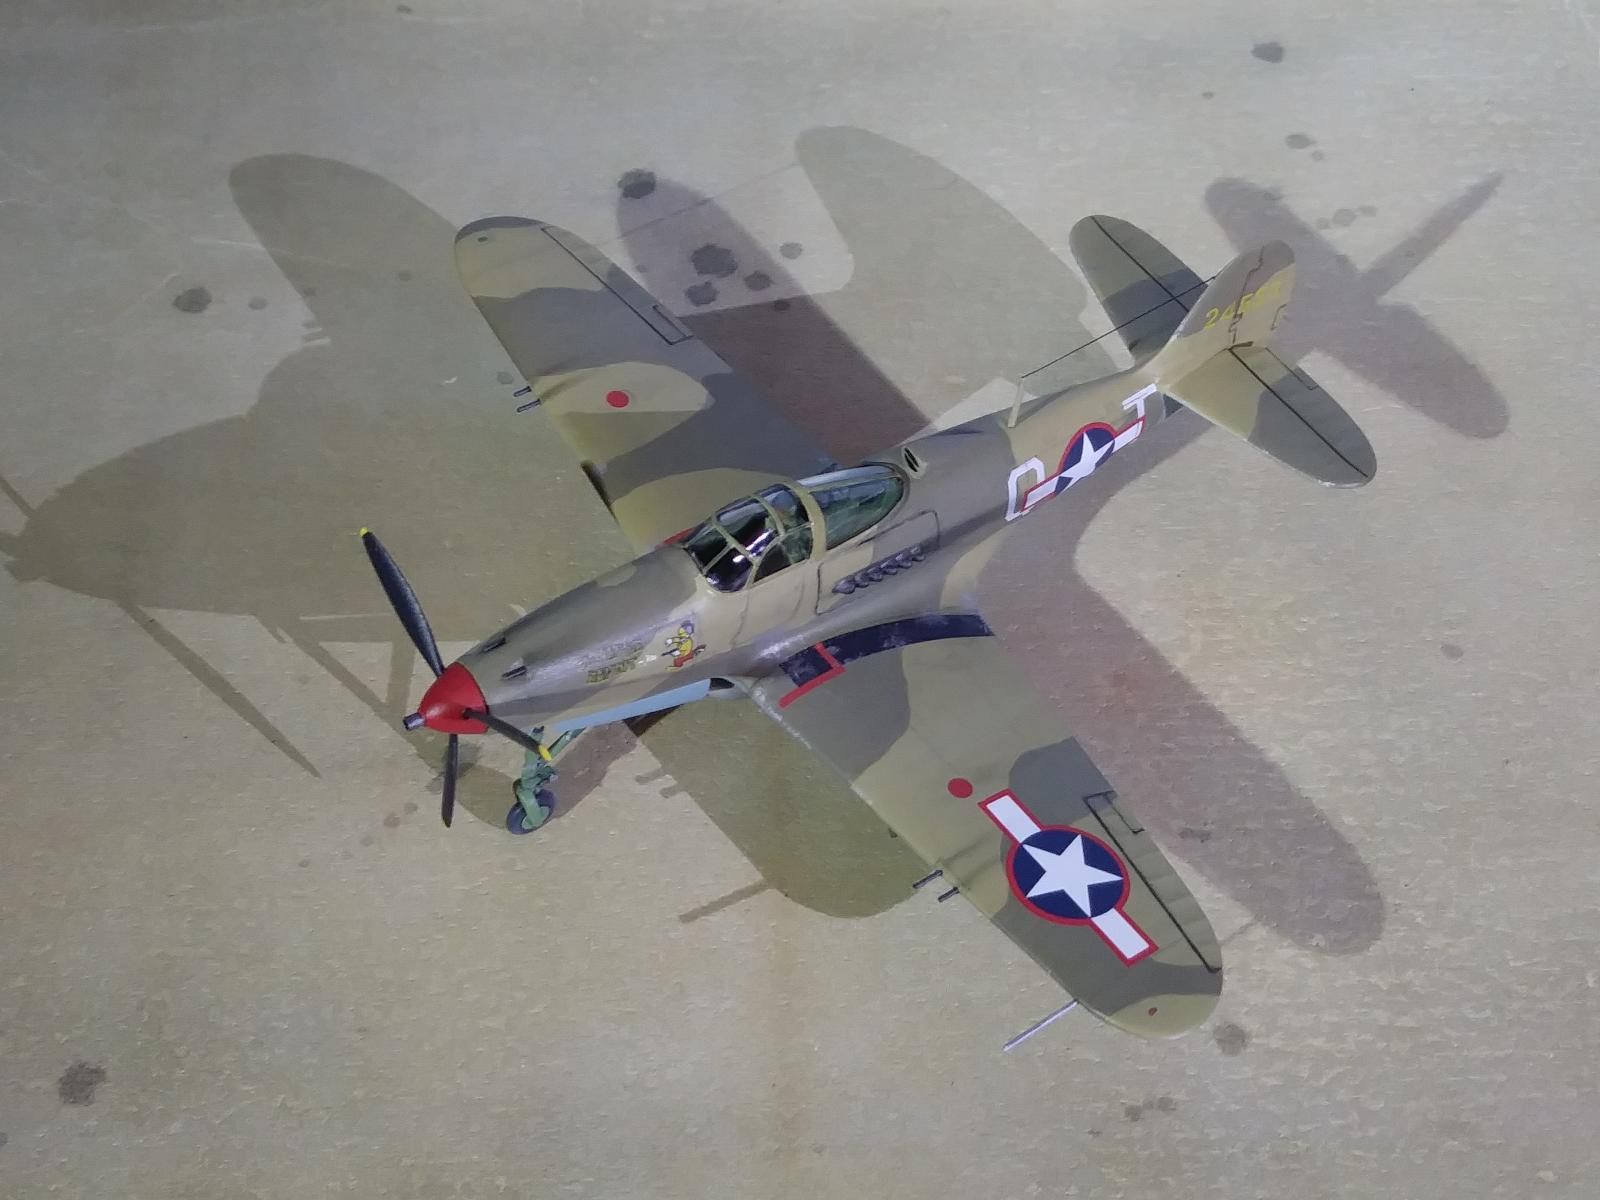
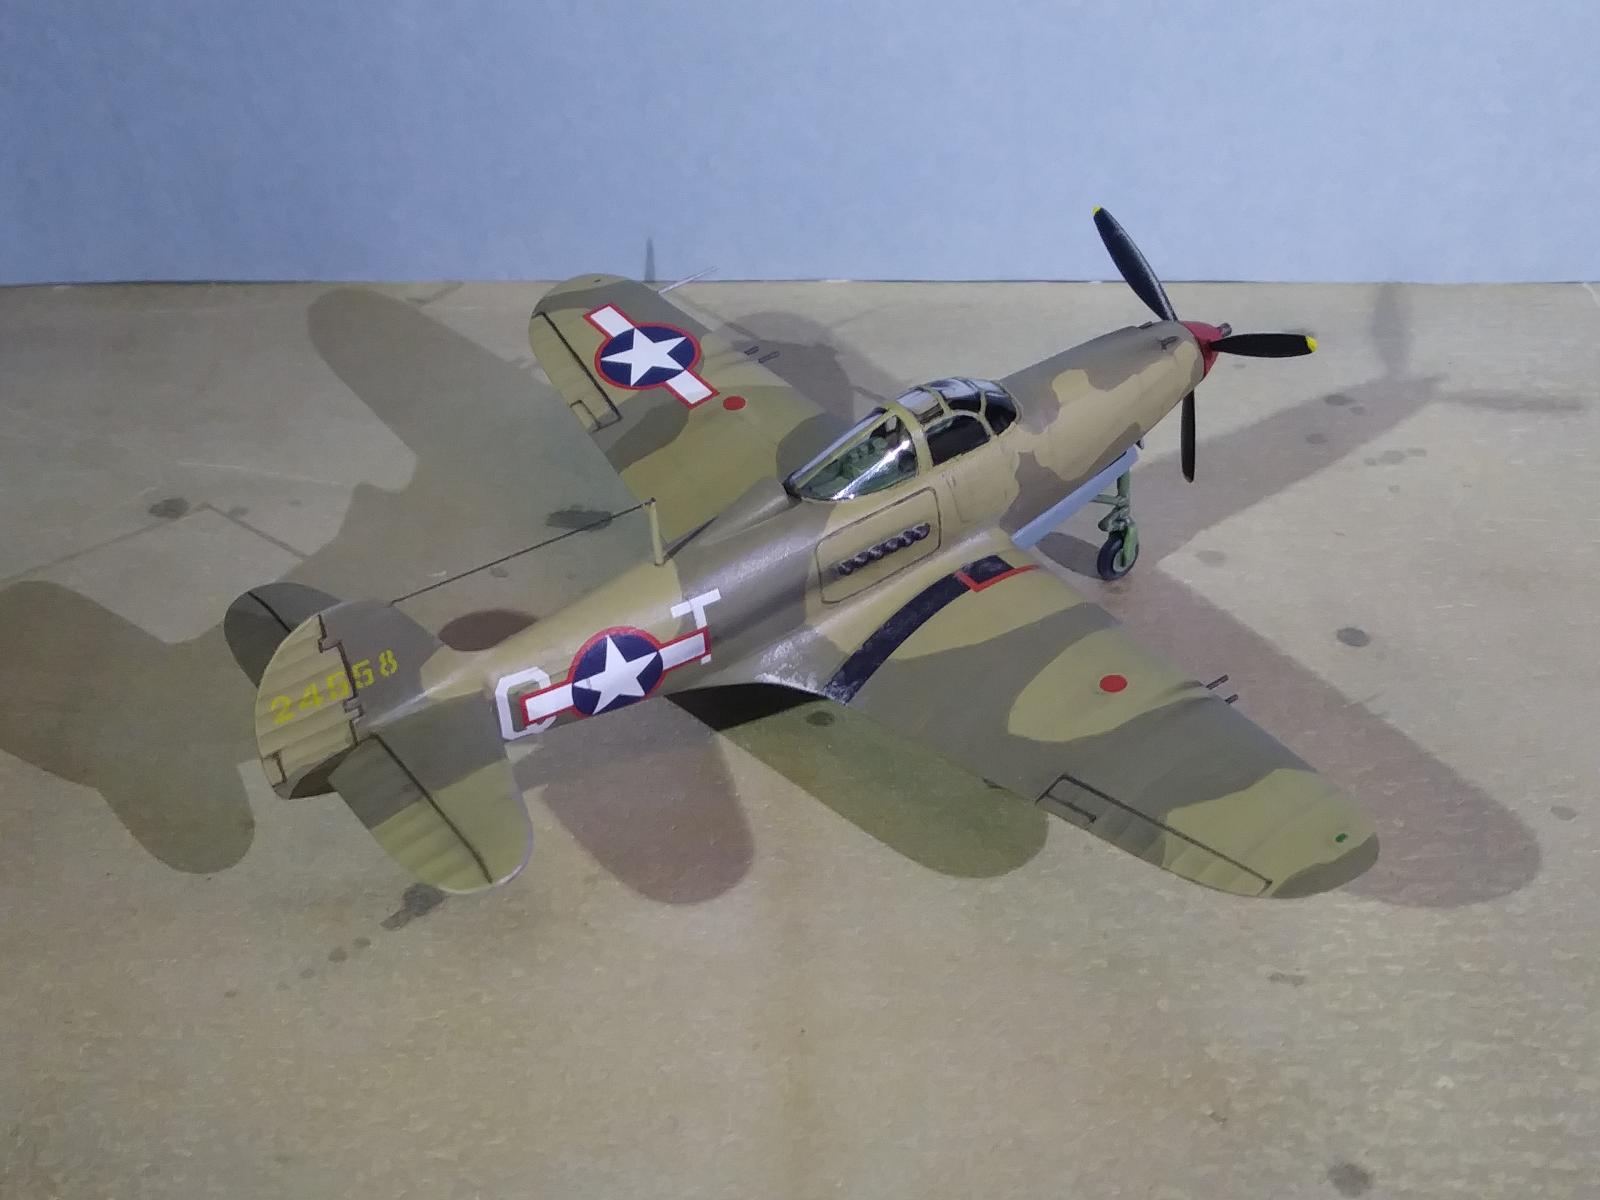
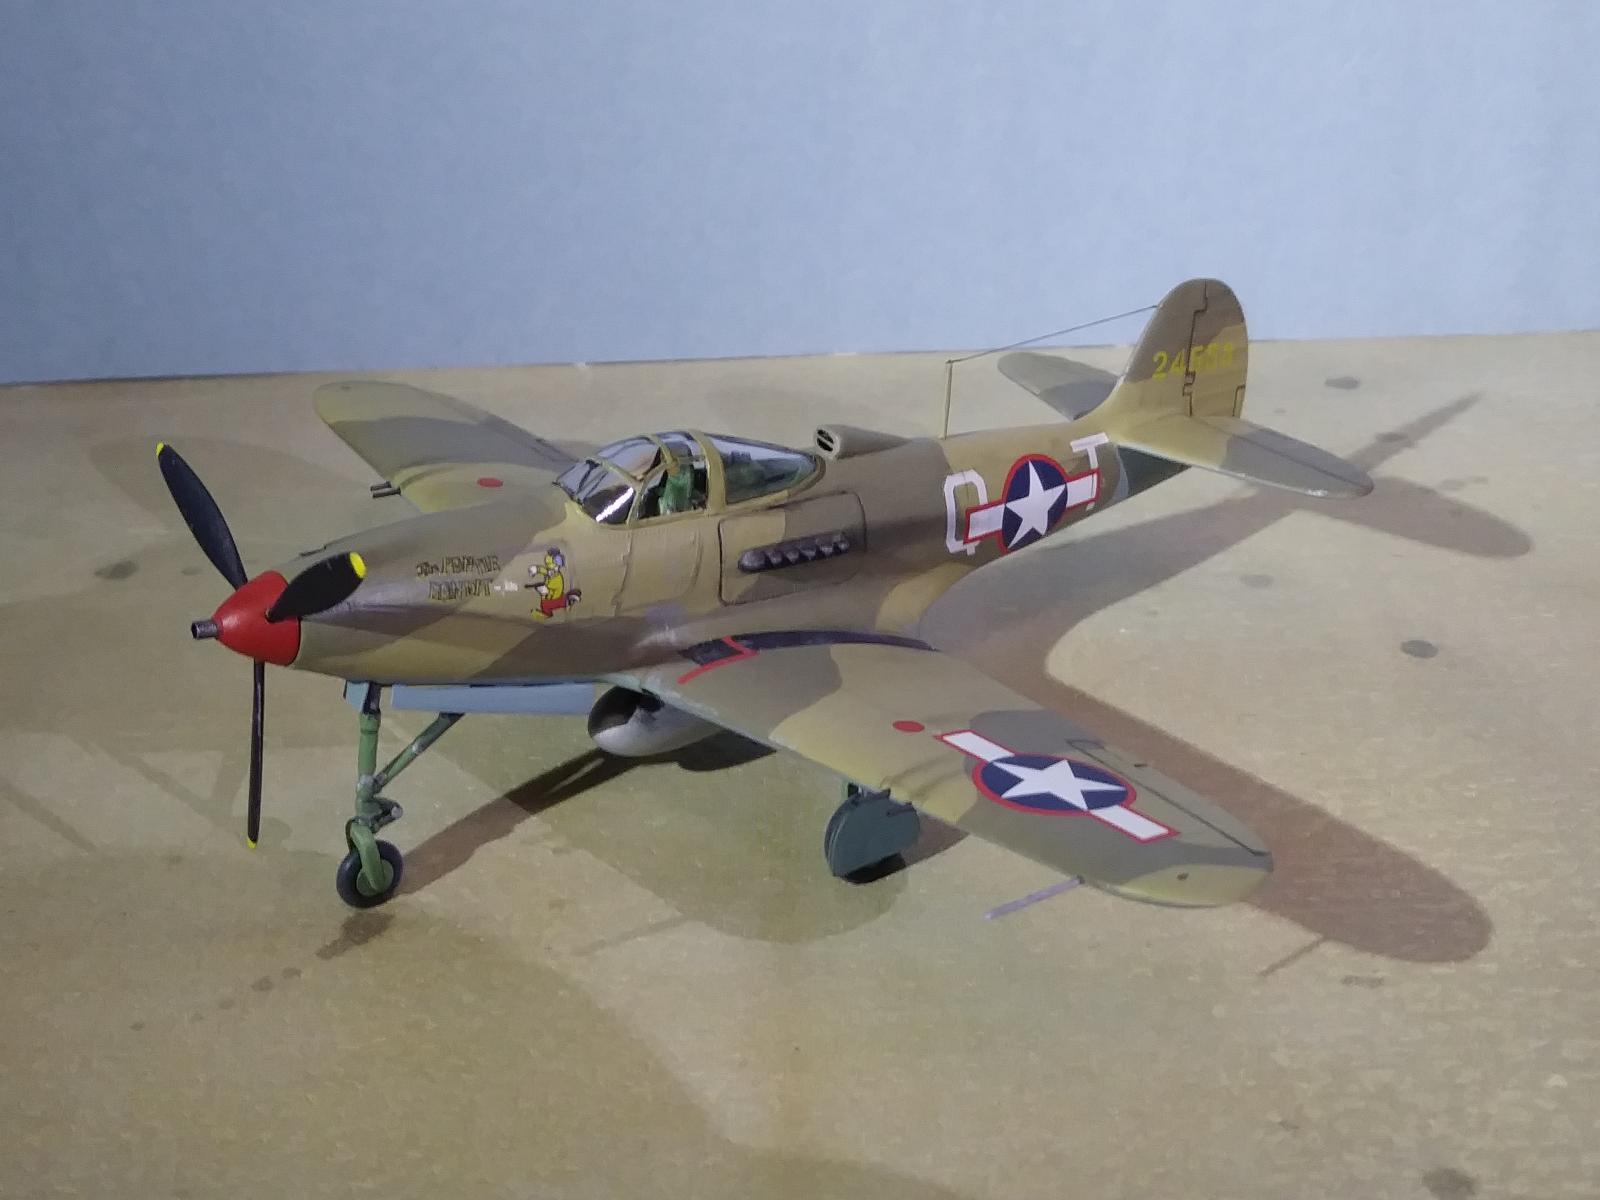
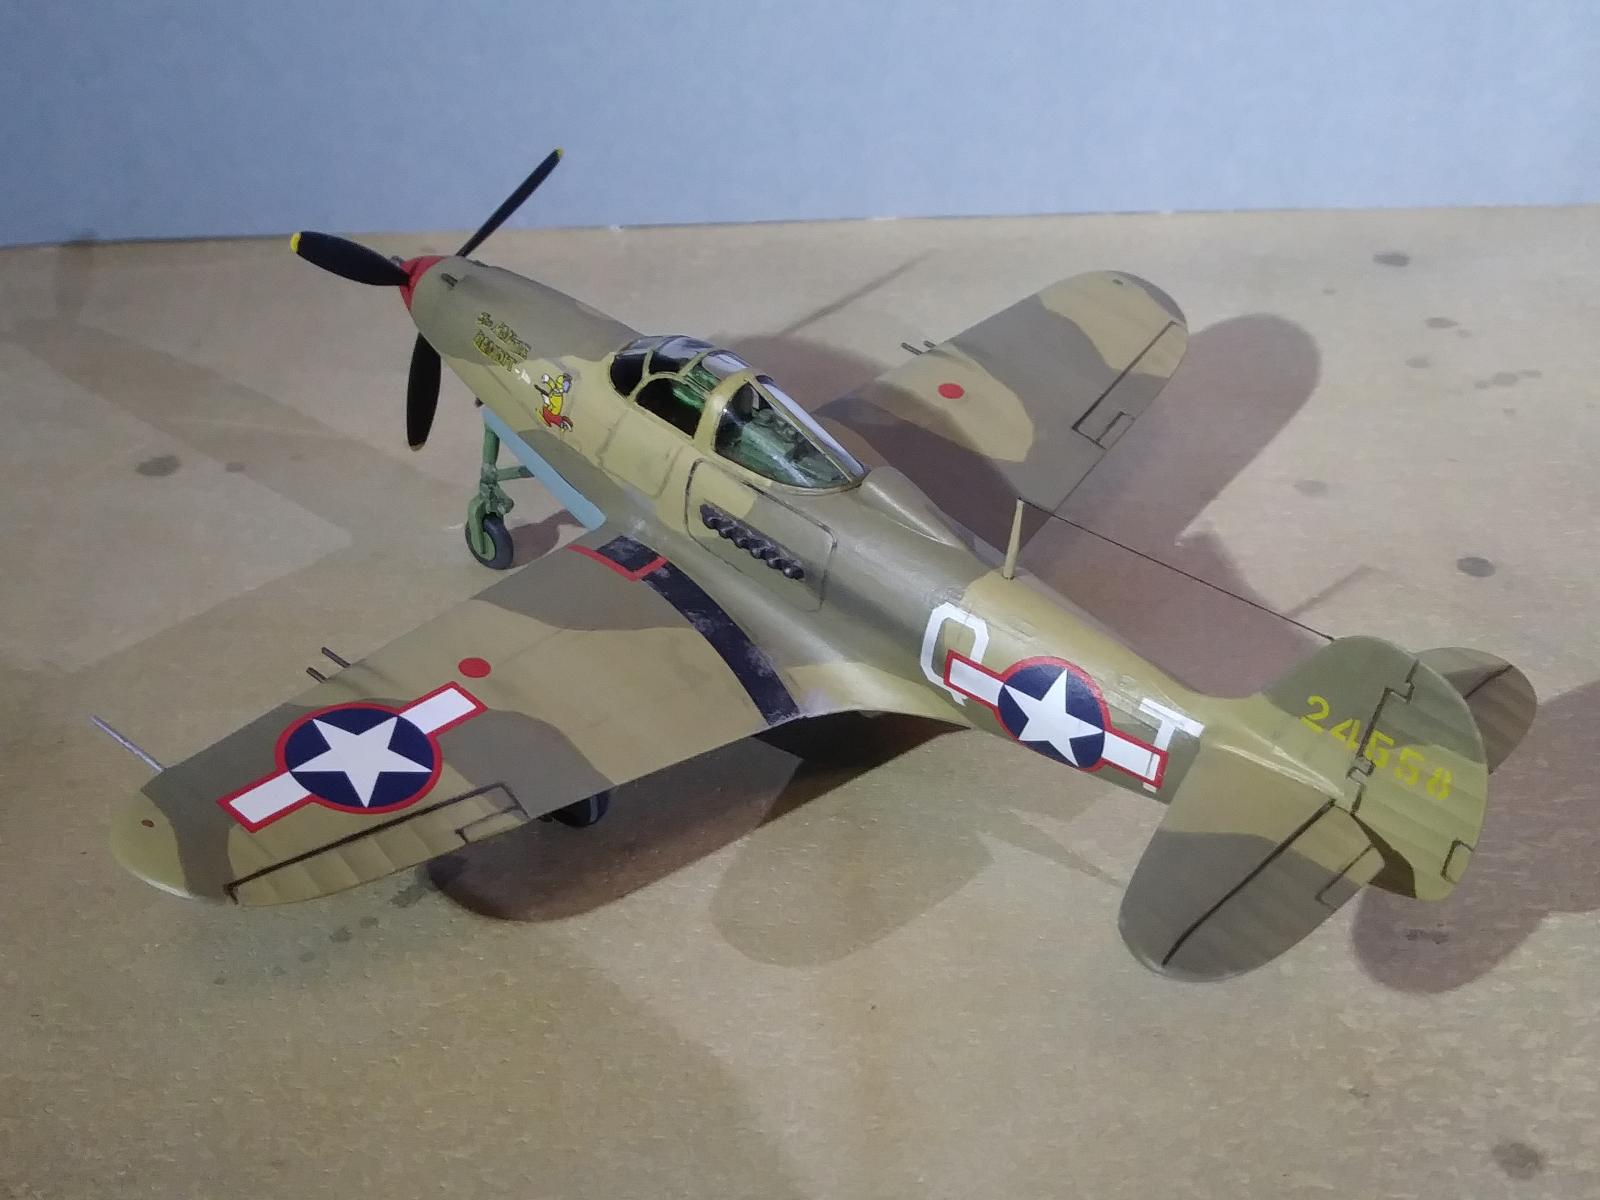
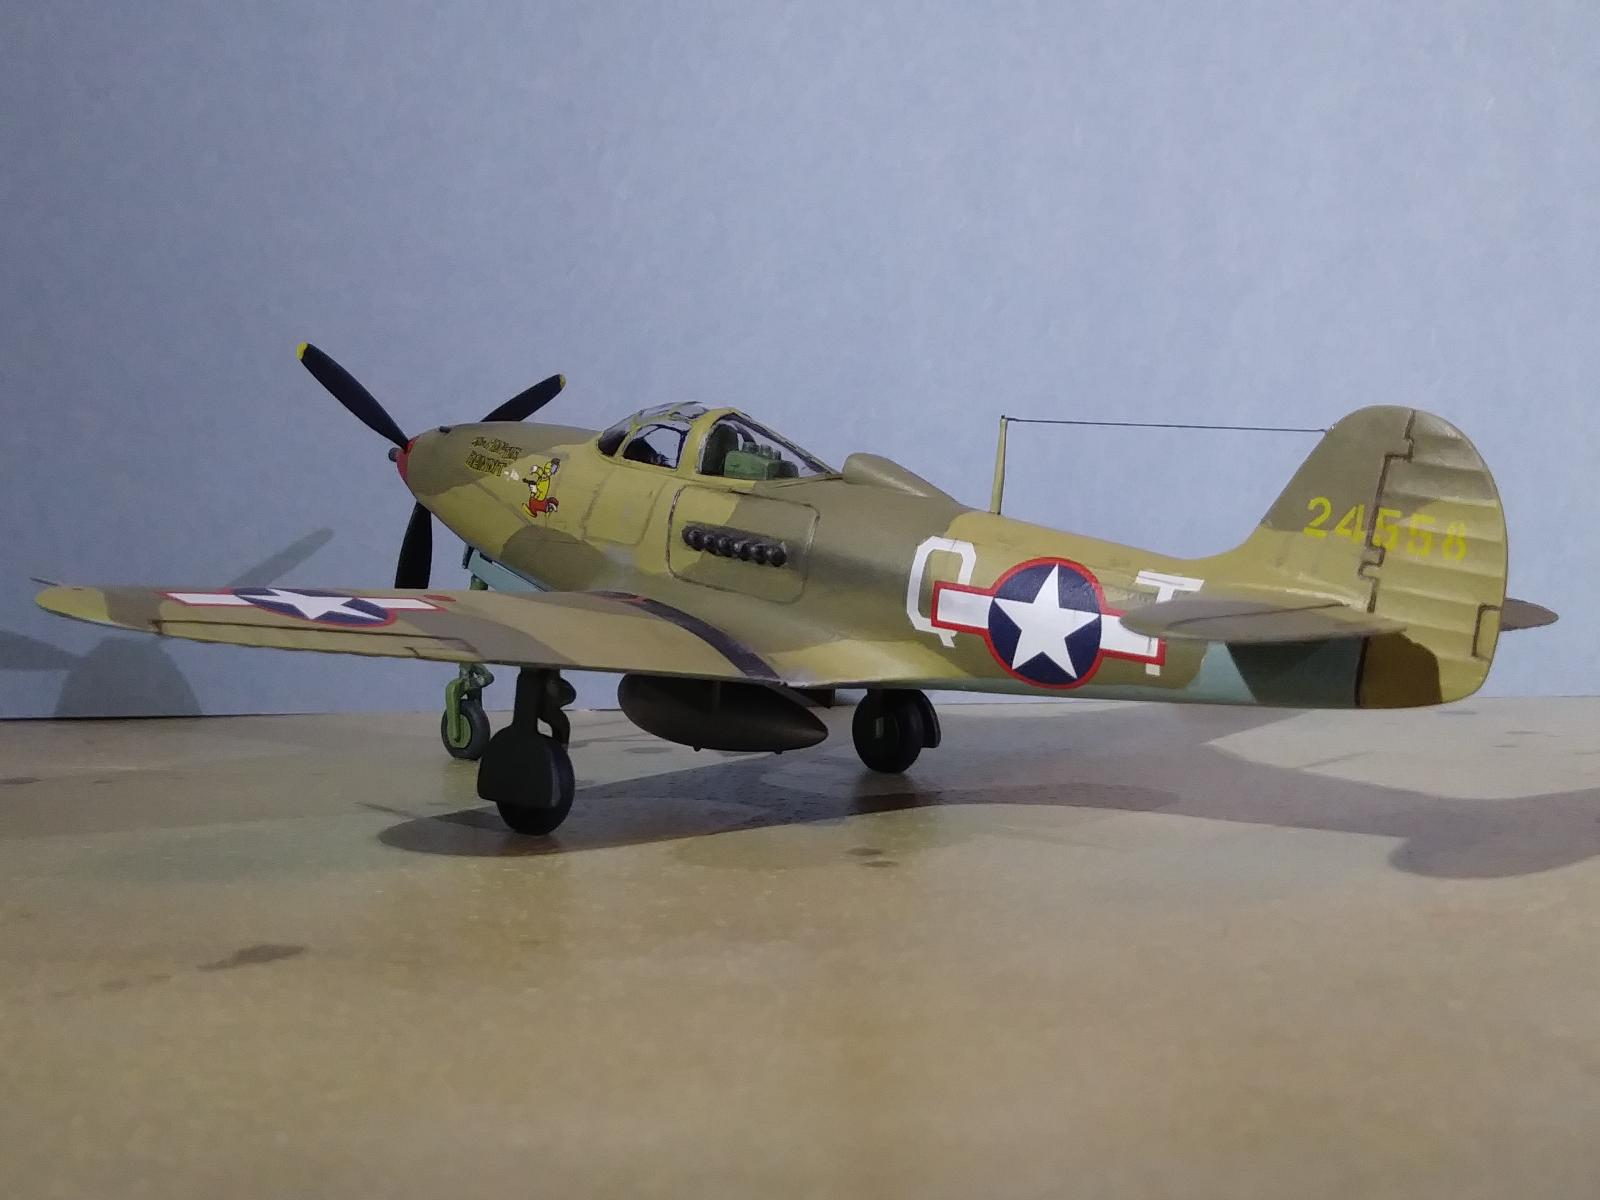
Revell first released this in 1965, re-boxed many times over the years but it is no longer produced. This build comes from their 1982 boxing with the decals for the P-400 export model which were operating in New Guinea, 1942. When I first started this build I was thinking of doing this scheme and wanted to use the original kit's decals but I changed my mind. Instead wanted to make a P-39 with a desert scheme. I had an old set of ESCI decals which had 4 different P-39's to choose from. I went for the markings of a P-39L "The Pantie Bandit" from the 93rd Fighter Squadron, 81st Fighter Group, Tunisia, mid-1943.
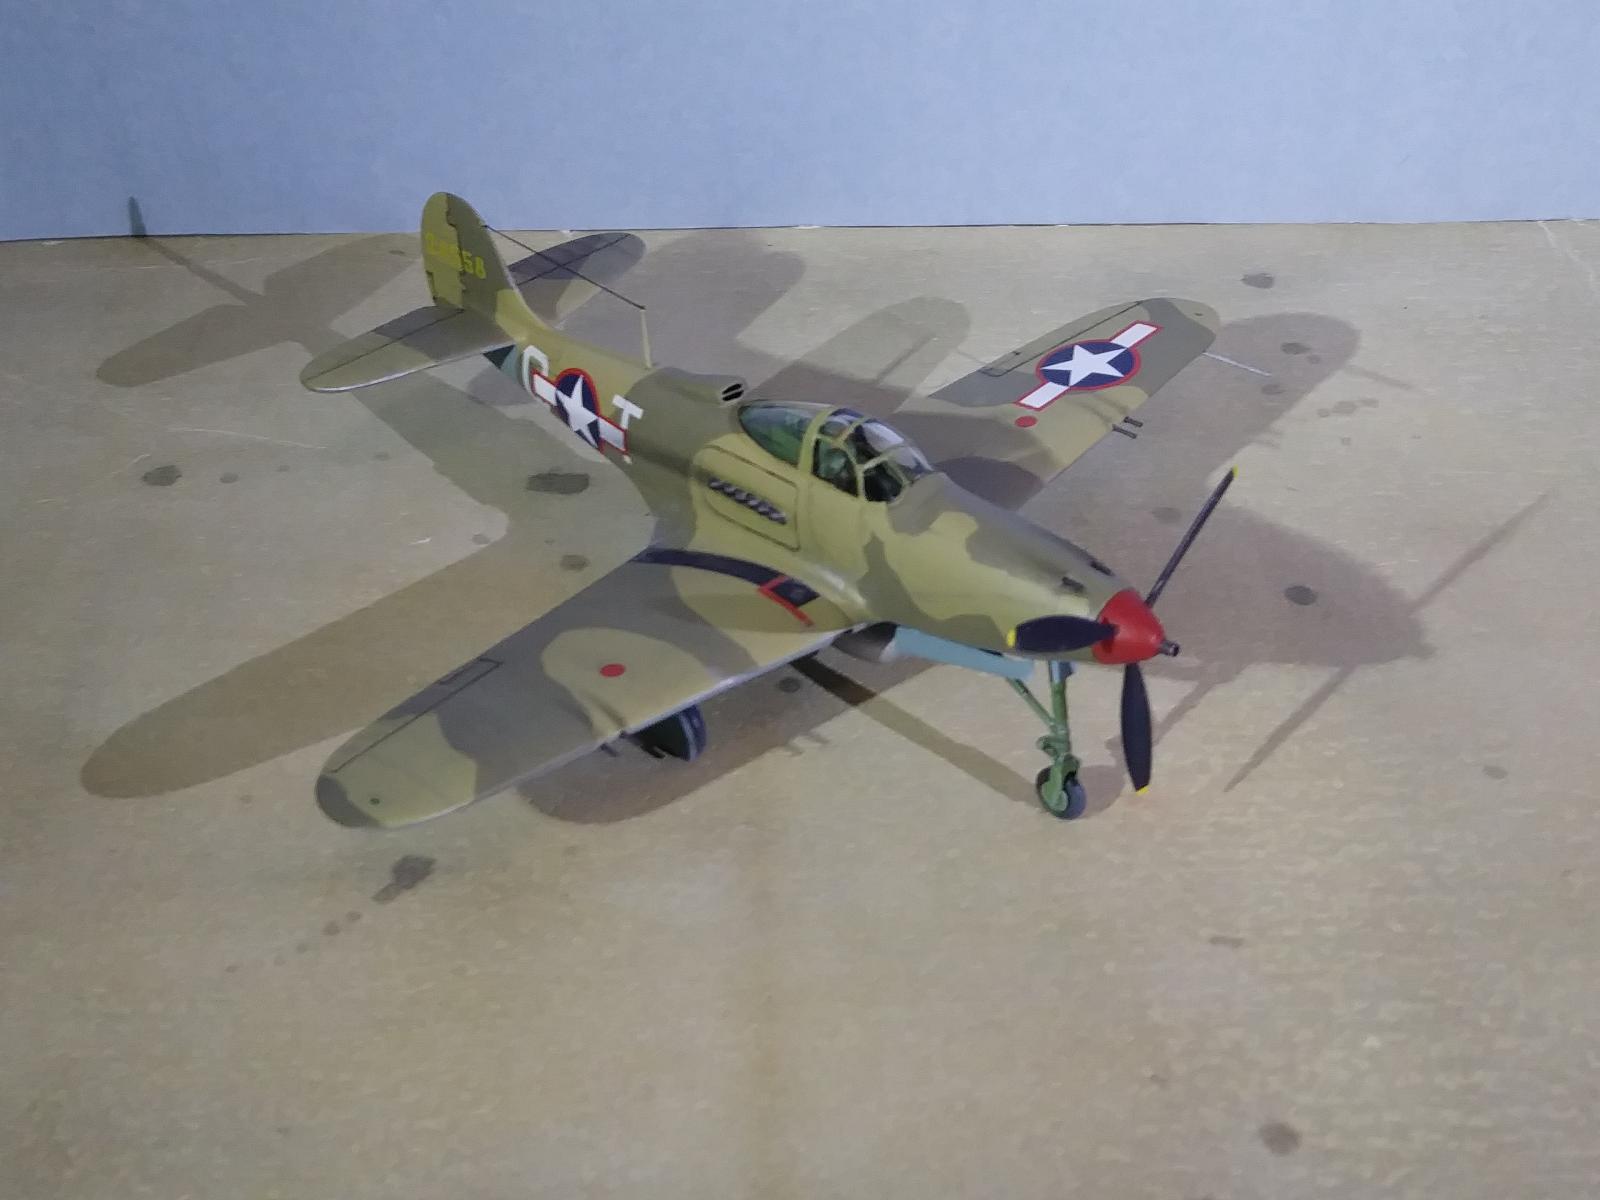
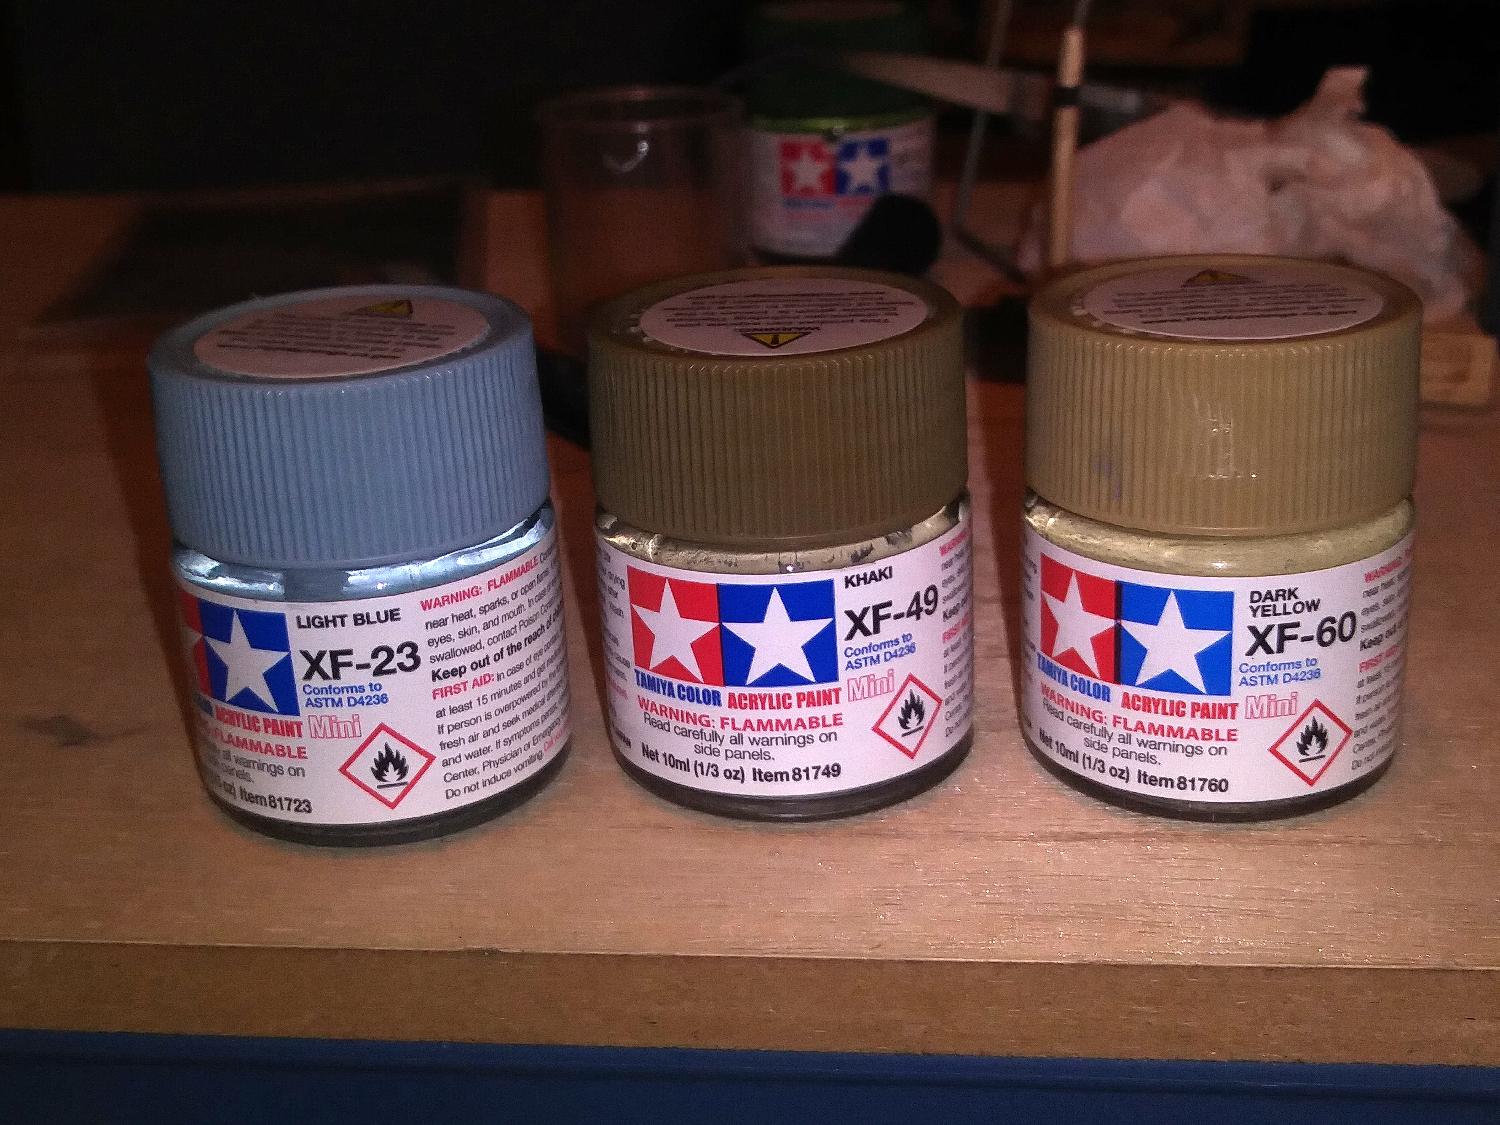
On all of the older drawings of Pantie Bandit this aircraft would have been olive drab on top, neutral grey on the bottom. But around 2010 and after a more desert like scheme was preferred. I have seen it with sand/spinach, sand/brown or an RAF desert scheme. So for this build, I chose dark yellow to replace mid-stone or sand , khaki as a faded olive drab and light blue instead of neutral grey. I used the painting instructions from a later 1/48 Eduard P-39 kit with the Pantie Bandit as one of its options. I did not apply the yellow stripes on the wings and tail because I could not see them on the actual shots of the real plane.
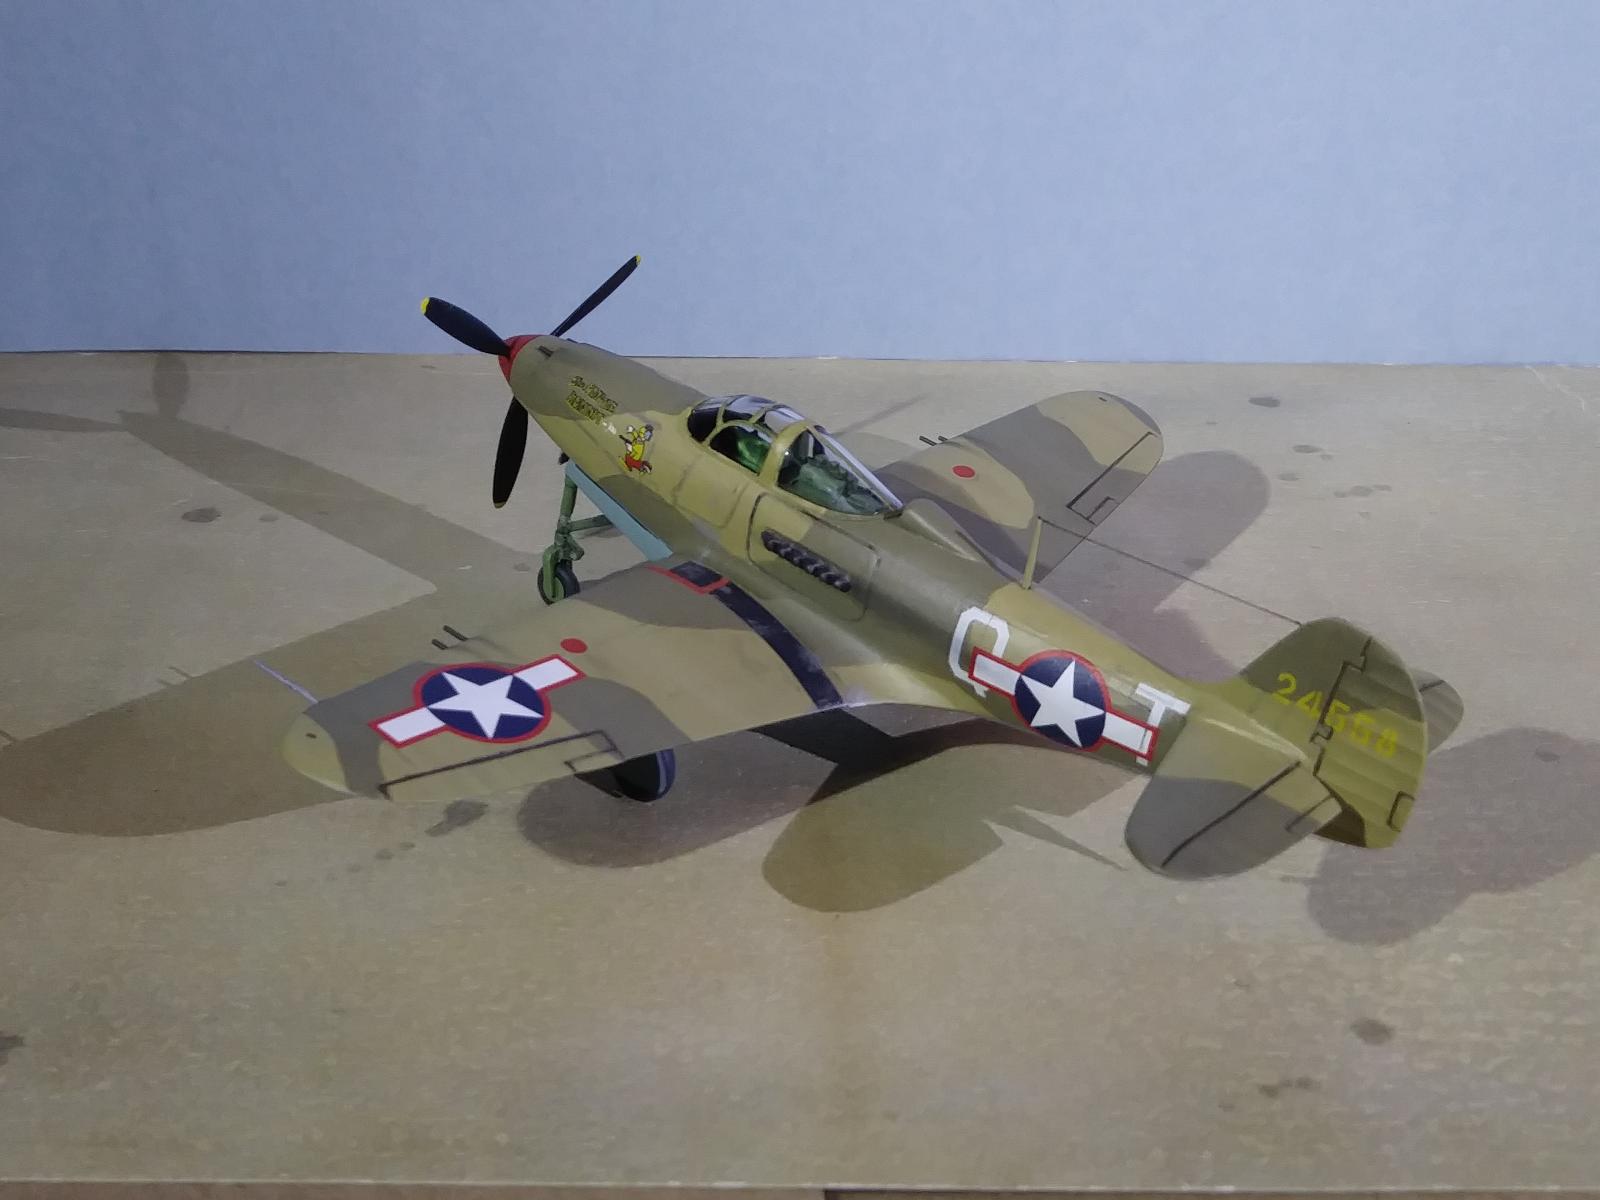
This was my third time building this kit so I had a good idea on what I wanted to do with it. My first two were made in 1974 and in 1976. Not a bad kit to put together but there were some areas that I wanted to correct. I made some corrections to the tail area, wing tip, nose gear area (lengthen the struts) and replaced the spinner/propeller.
The plastic on this kit was very brittle, so while building I had to deal with cracks on the tail, wing, one main landing gear, cockpit floor and propeller. With the propeller I was not planning on using them, they were replaced with a very nice P-39 spinner/propeller resin replacement set from S.D.S. Models. The rest I just brushed on the area liquid glue or super glue to keep things together and it worked.
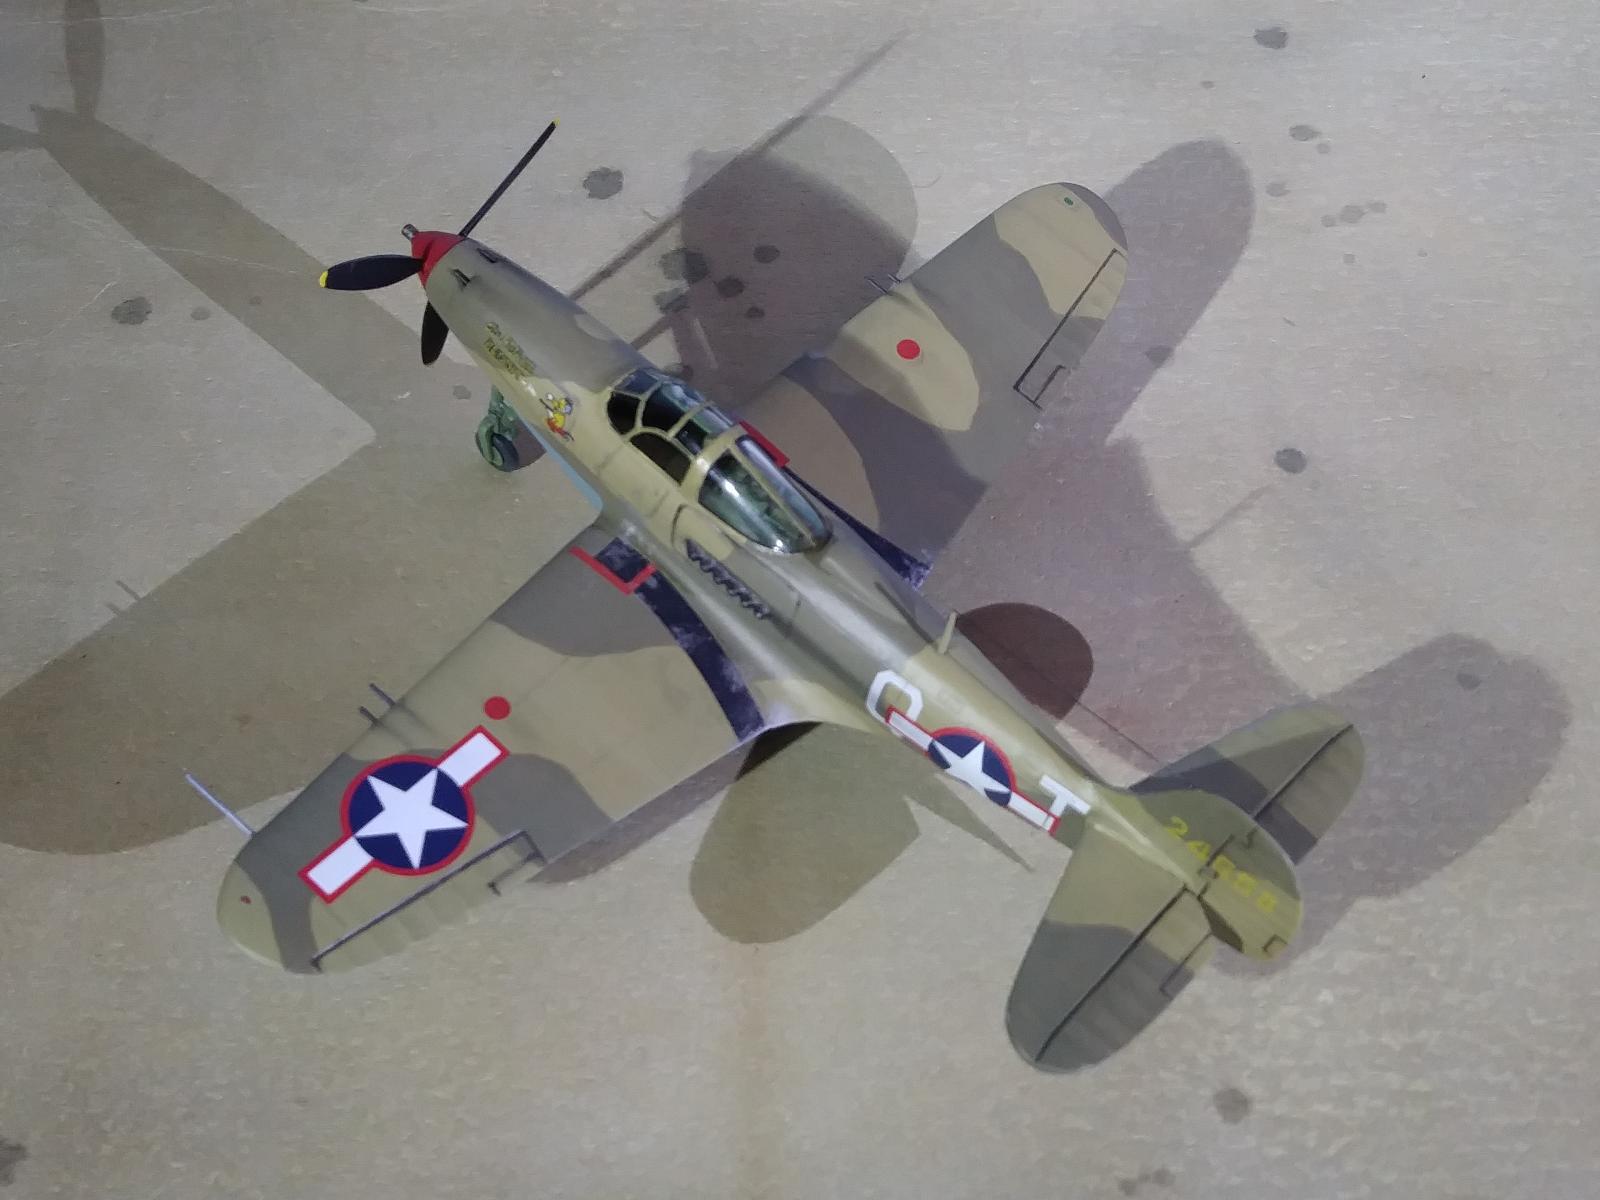
All and all, an enjoyable build, I like the way on how the corrections done to the tail area, lengthening the nose gear and using the resin spinner/propeller improved the overall look. Stretch sprue was used to add guns to the wings, nose, pitot-tude and antenna mast. EZ line for the aeral.
The red border insignias and black wing walk strips came from an old set of Microscale decals. The ESCI decals worked fine and Microsol made them settle down nicely.
Yes I could have bought and built the new Arma Hobby kit but this is how I like to enjoy this hobby.


-

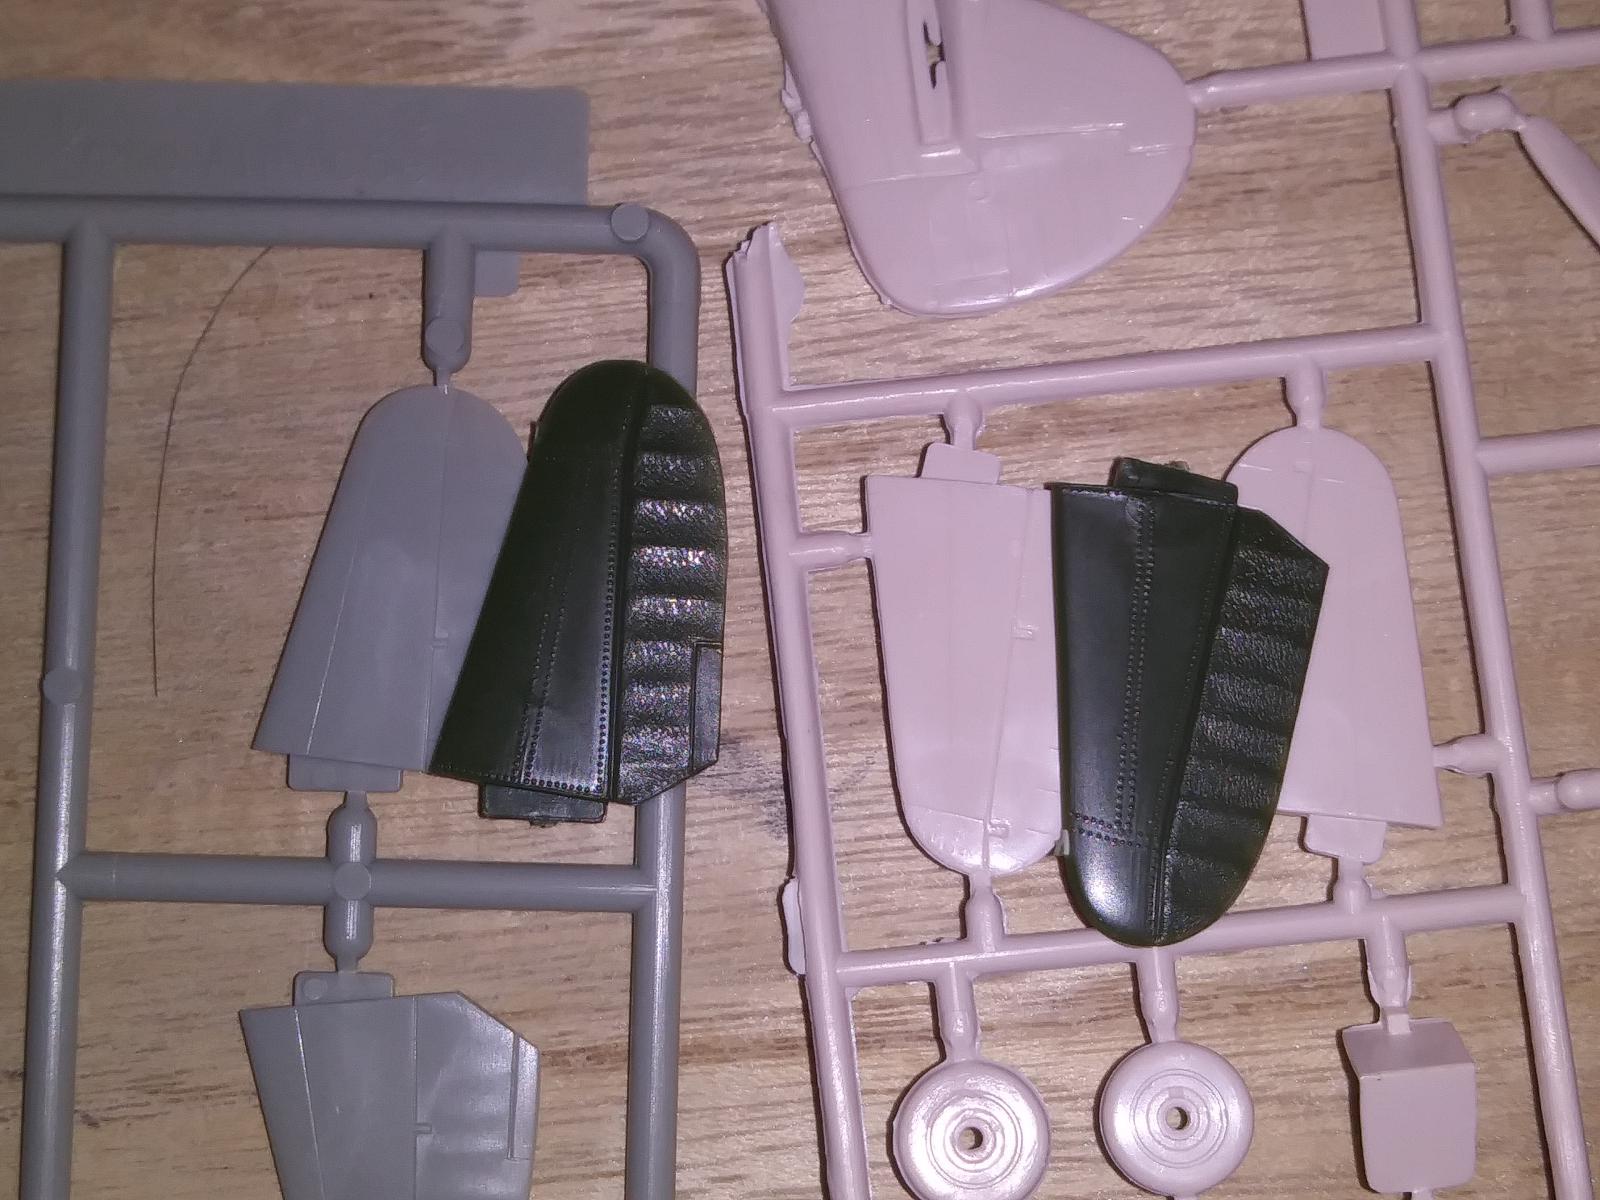
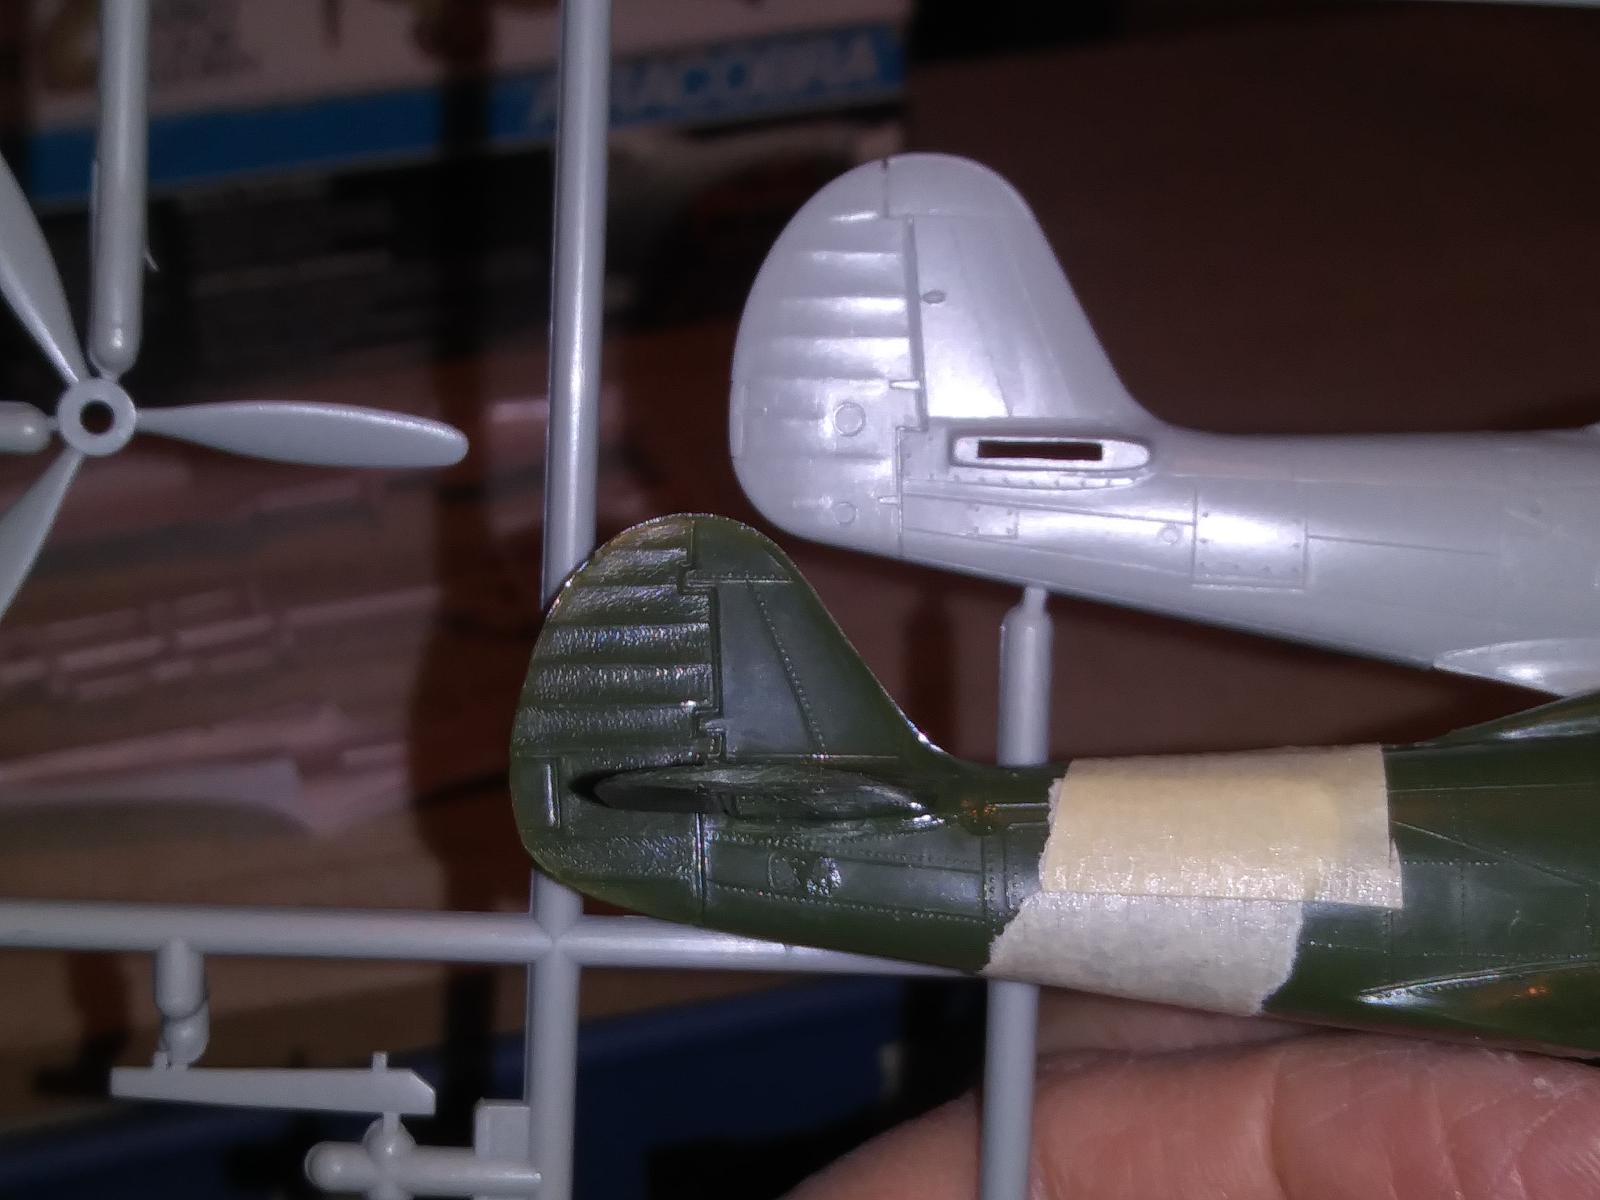
- 1. The kits tail plane was a bit too long, had to trim both sides down.
I am comparing with the Heller and Frog tail assemblies in this shot. I also compared them to my RS Models and Academy kits with the same results.
-
- 1. Comparing the tail to Academy's P-39. The Heller and RS Models all showed the same differences.
Need to increase the vertical stabilizer area.
-
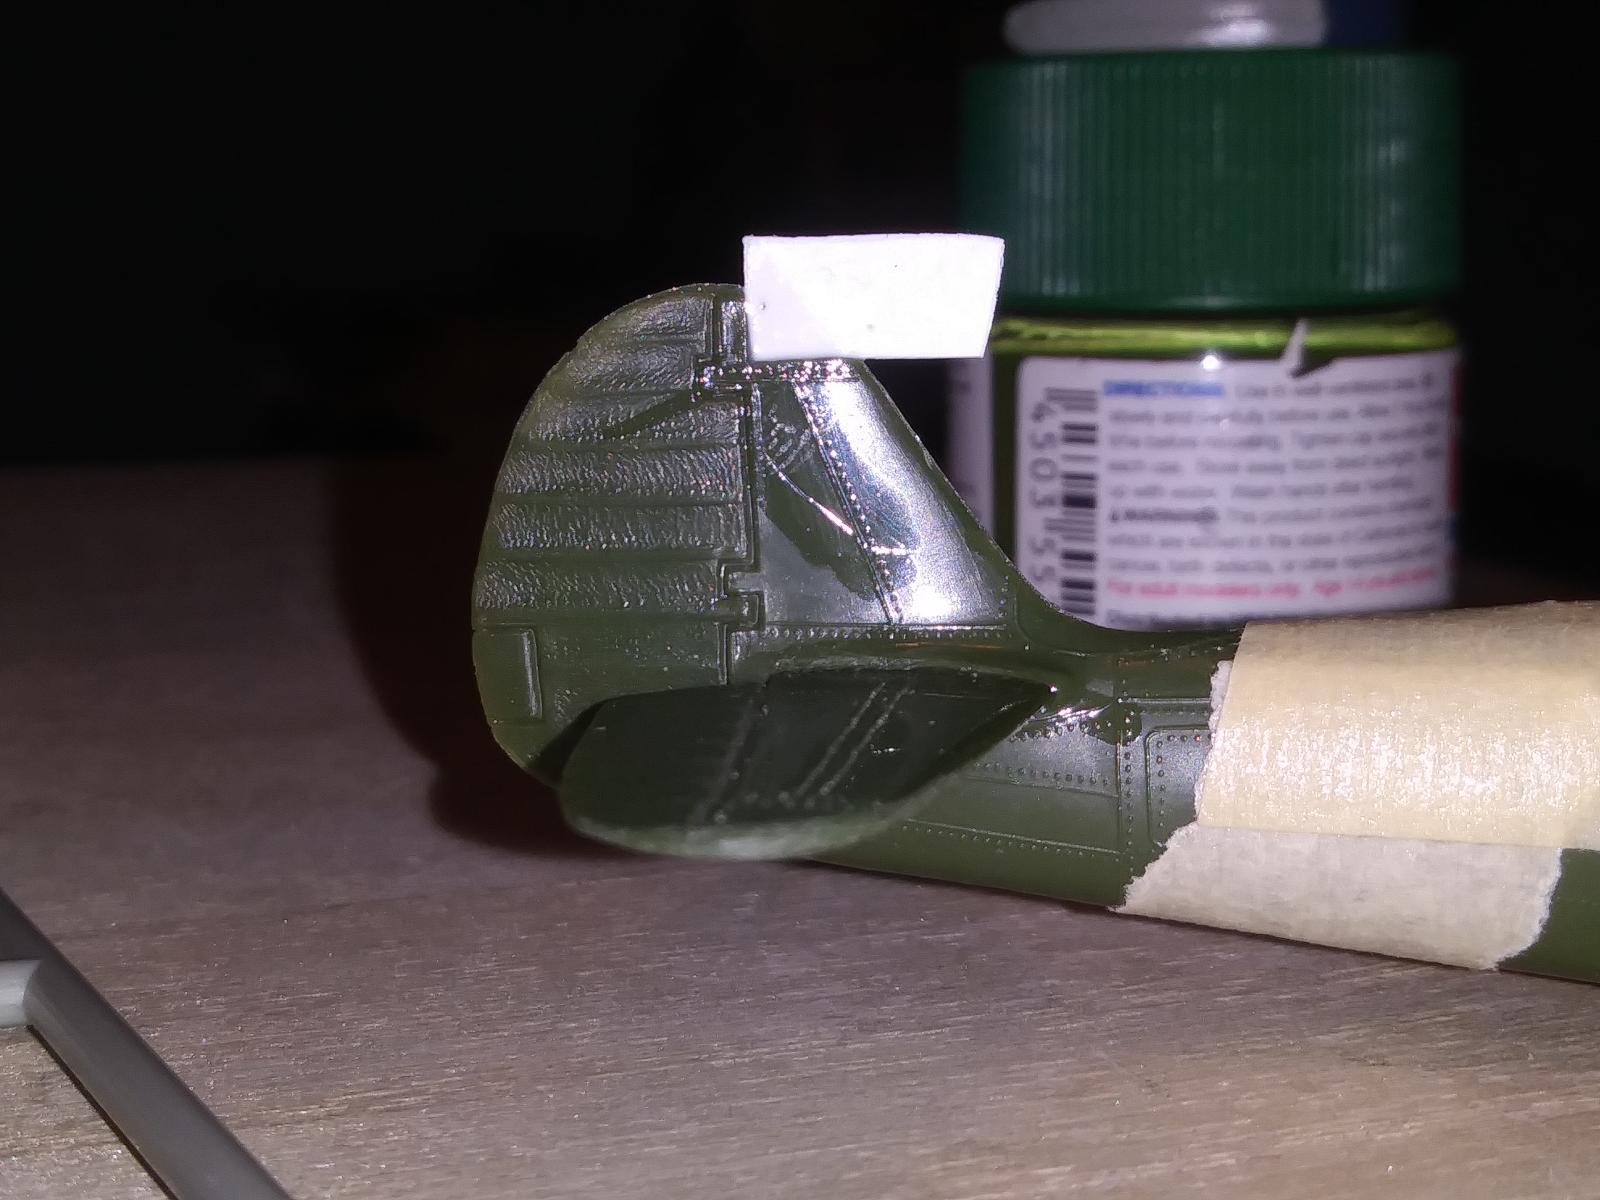
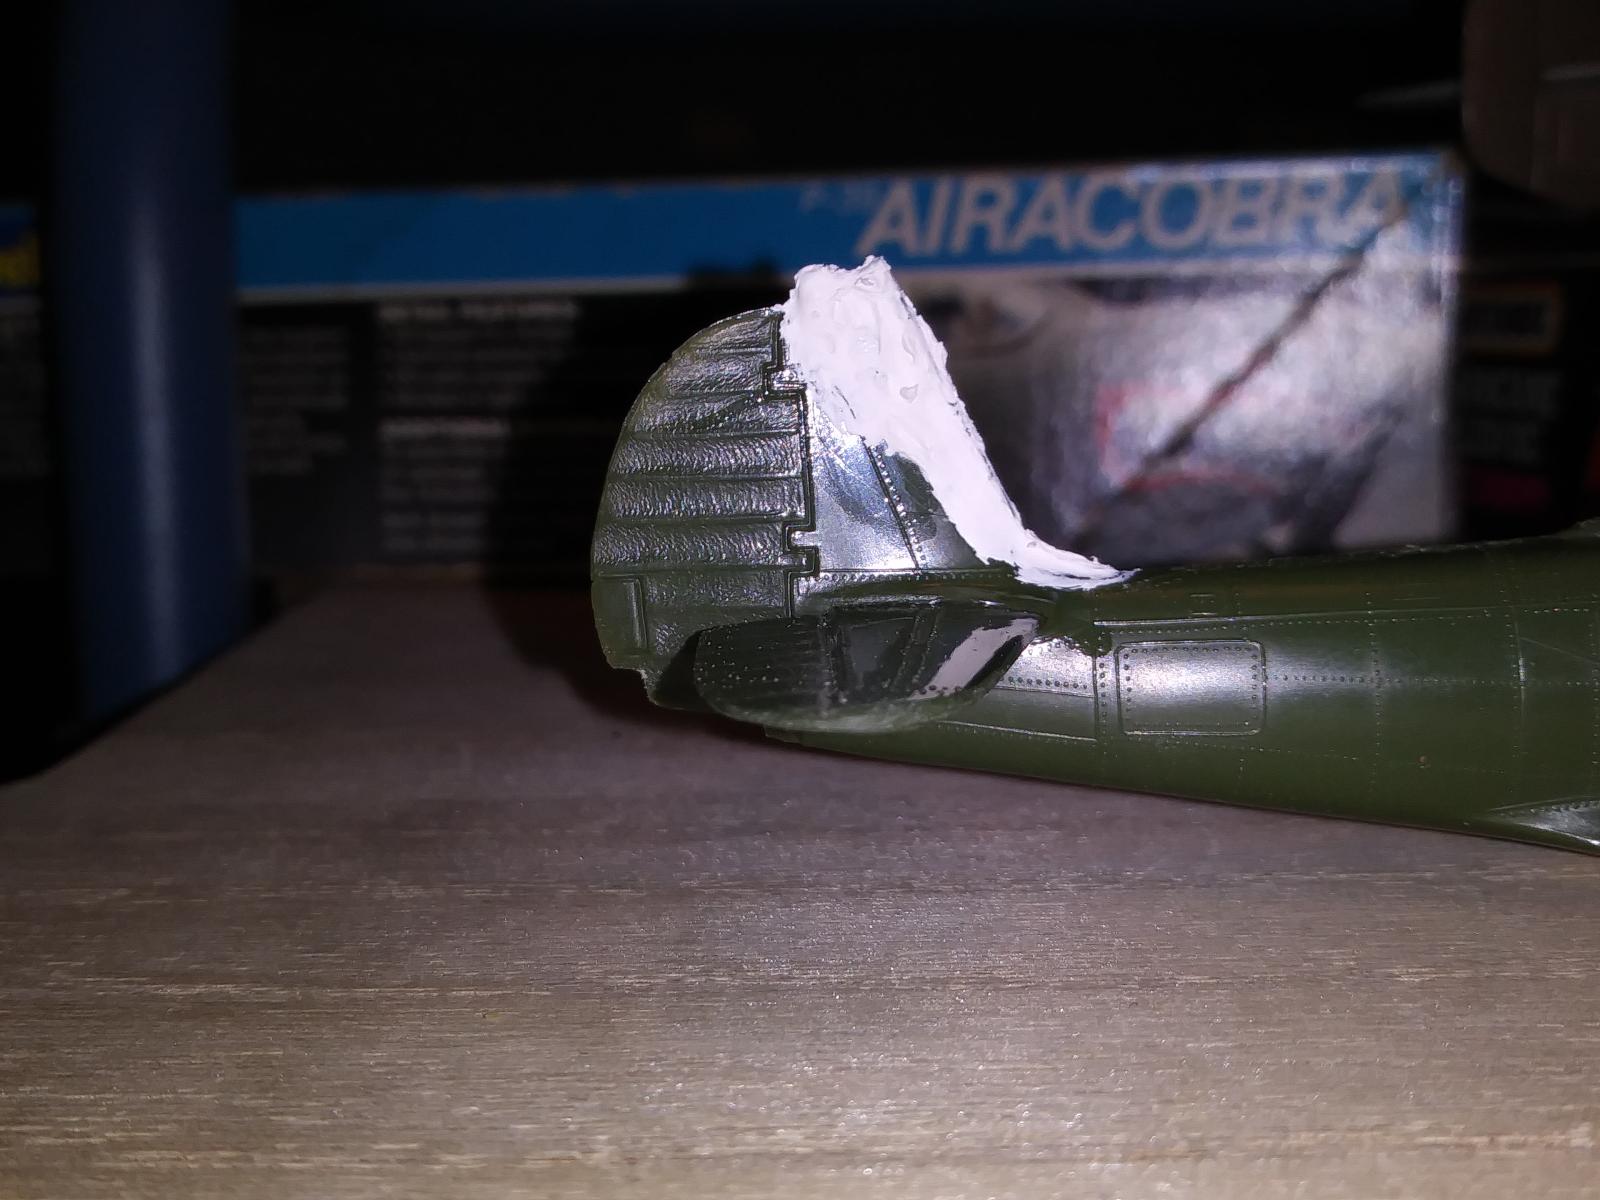
- 1. I started by cutting the upper forward tip and added a cut piece of sheet styrene. Note the crack that I created. This will not be the last.
-
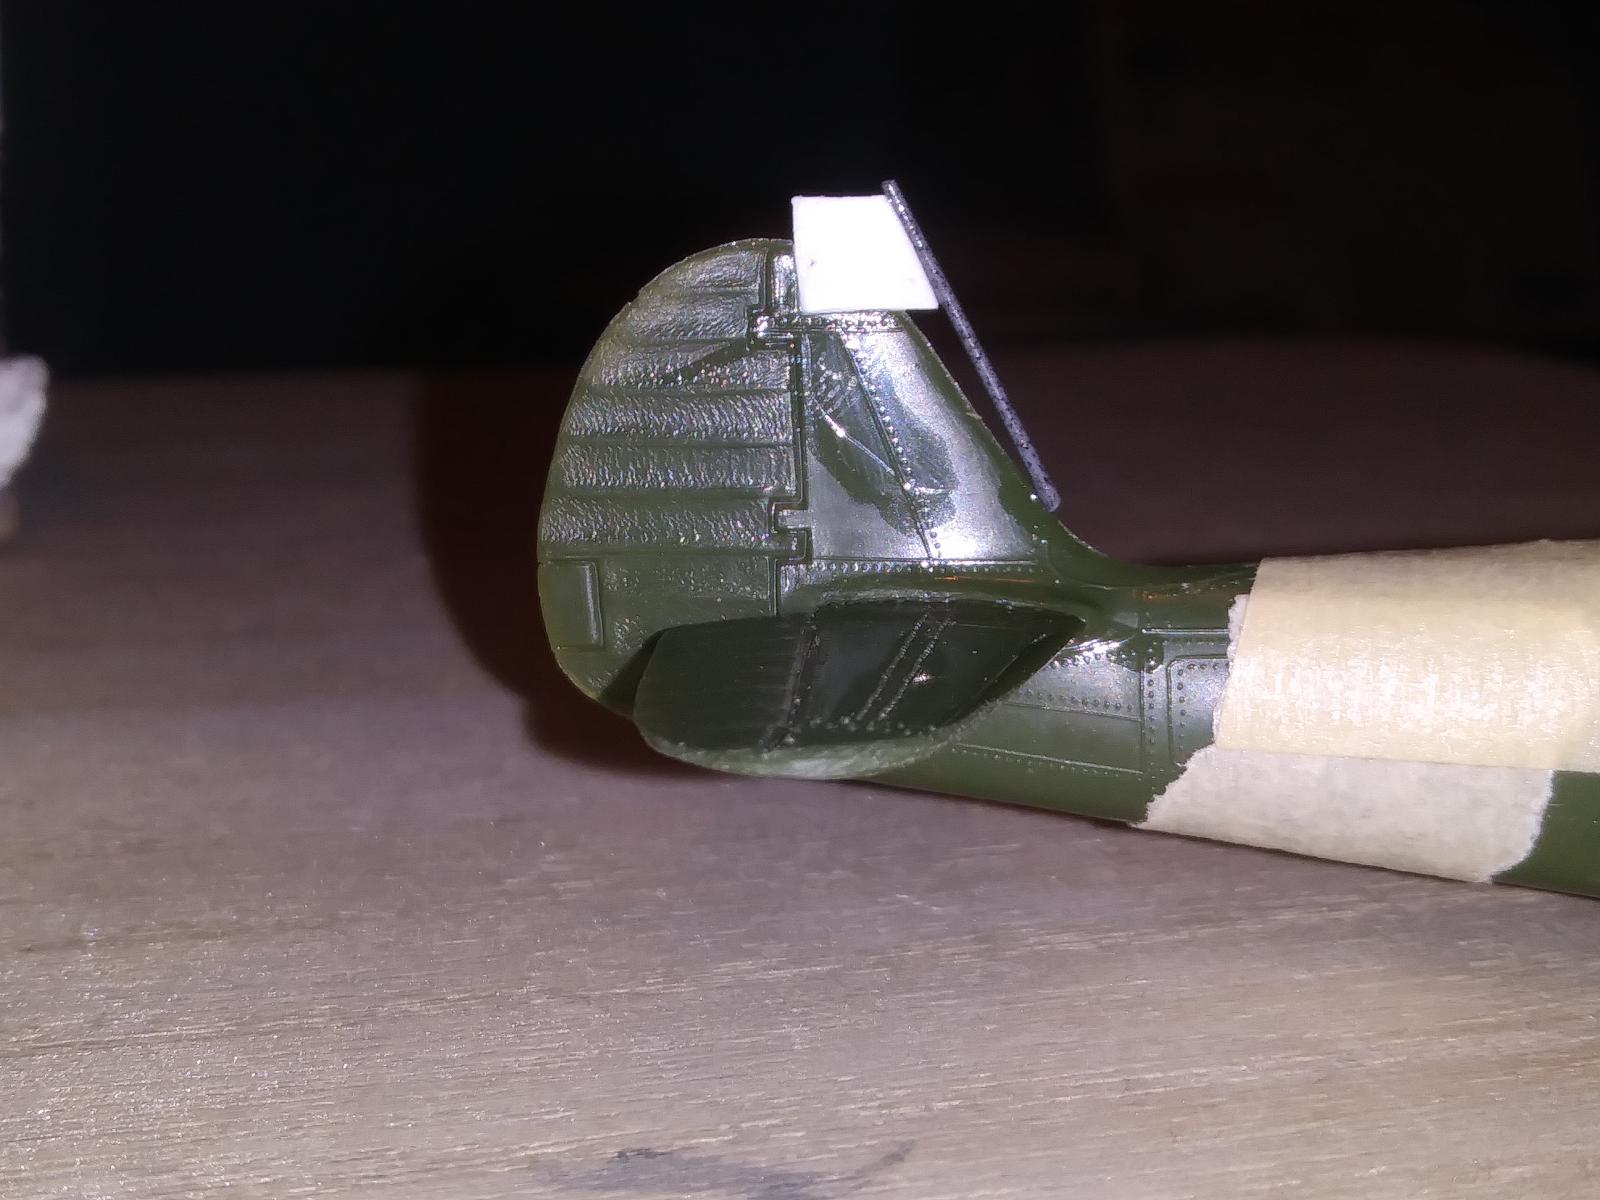
- 1. Added stretched sprue to correct the leading edge angle.
-
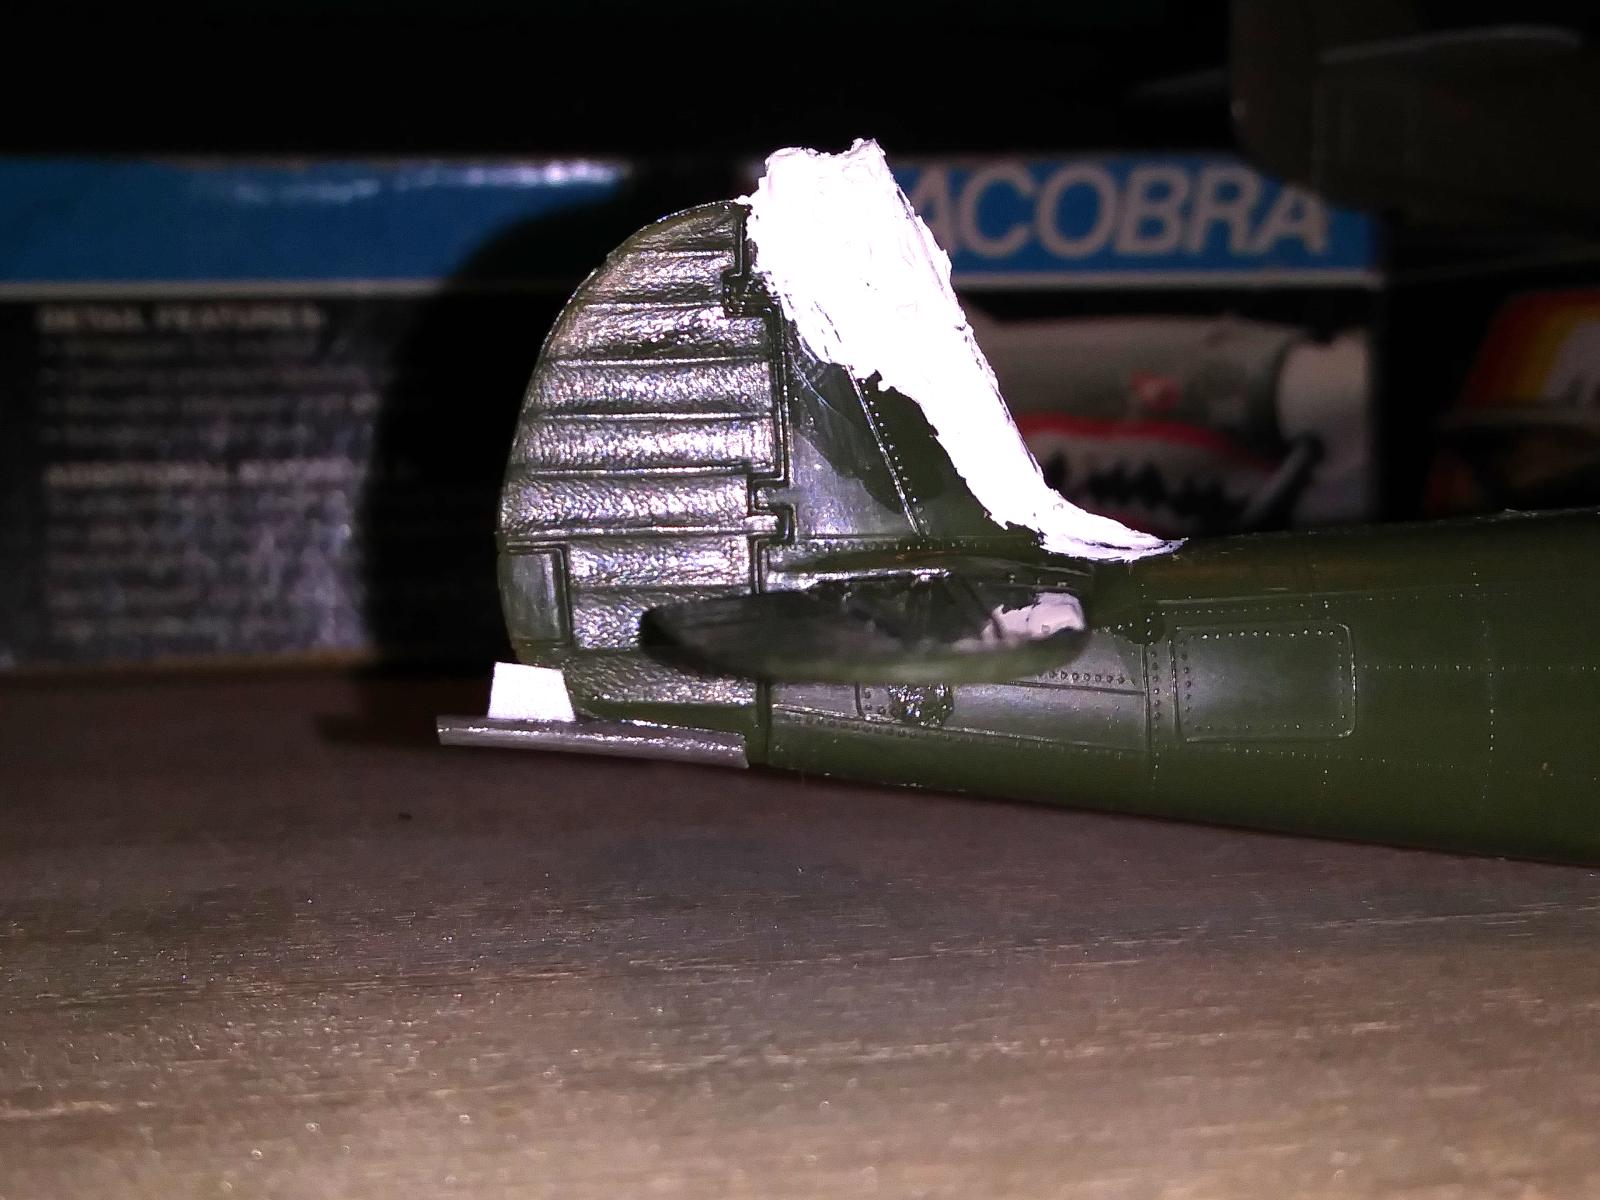
- 1. Filled in the gap with another cut piece of sheet styrene, I also added a thin cut strip on the leading edge small dorsal fairing.
-
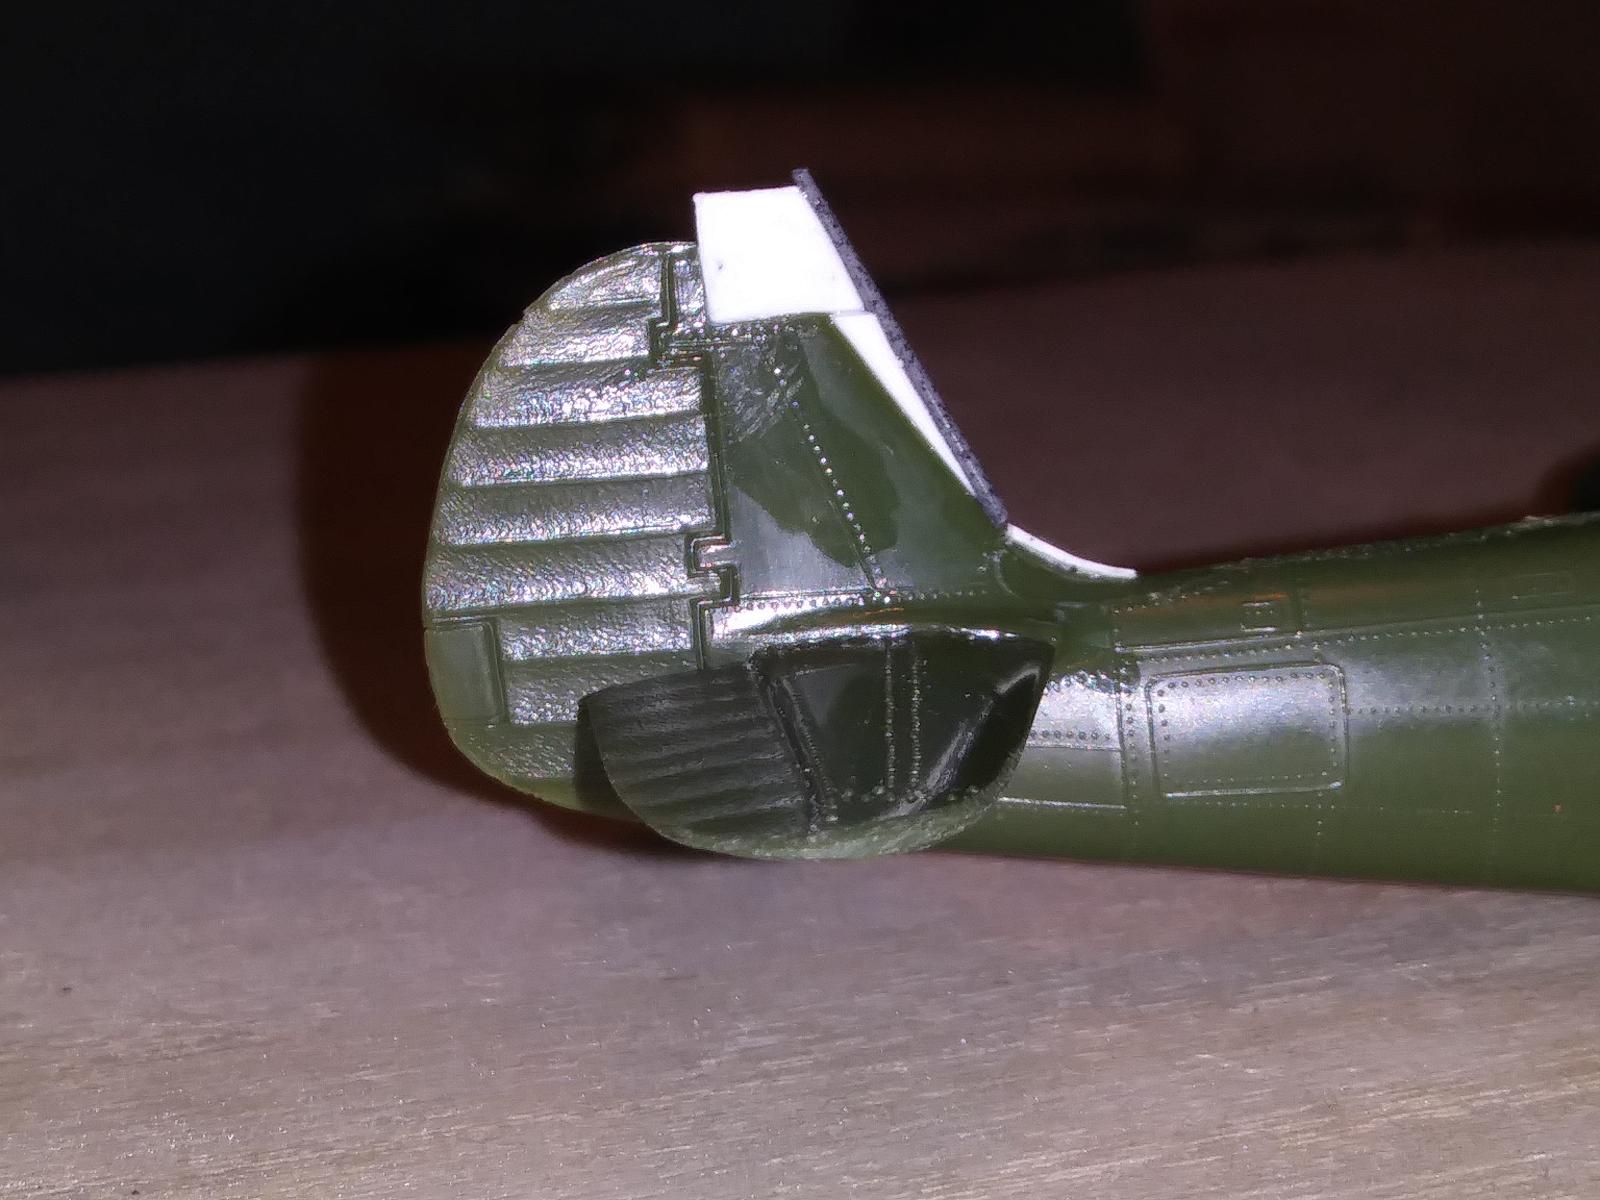
- 1. Applied a thin coat of putty, I also started trimming the lower rear rudder to increase that area too.
-
- 1. Added pieces to the lower rear part of the Rudder.
-
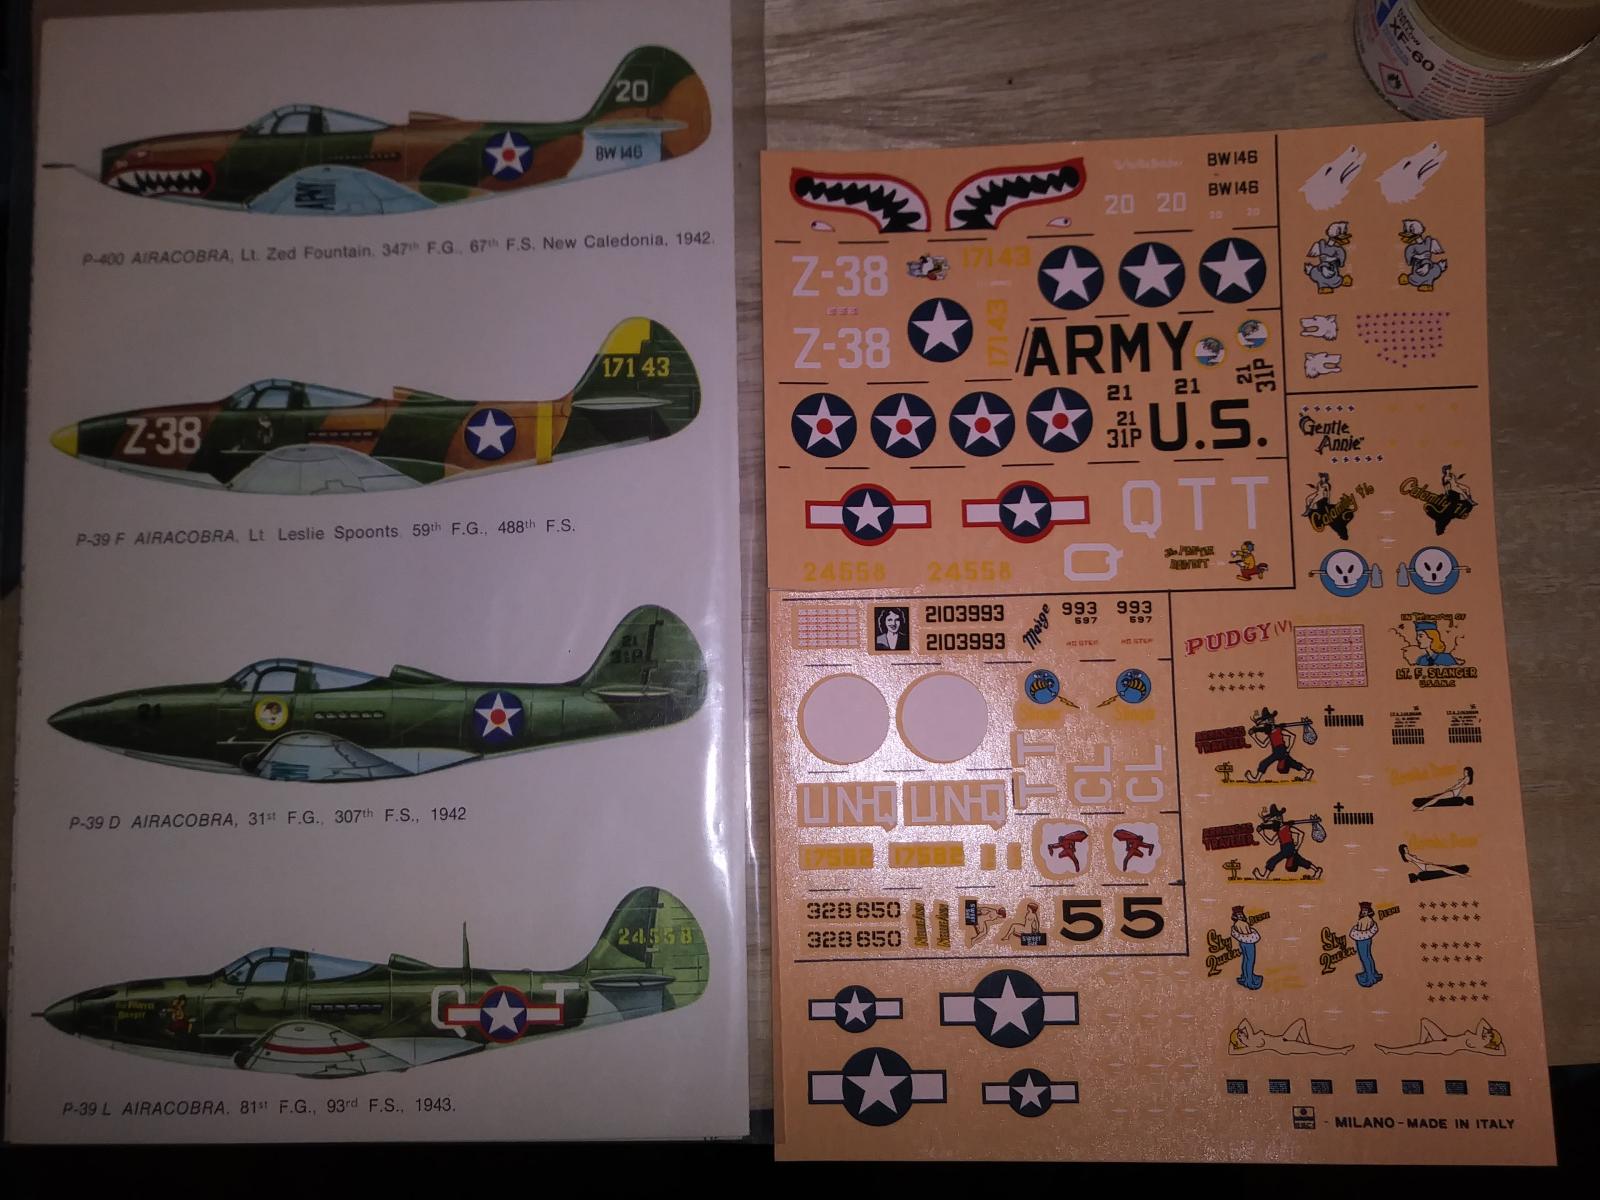
- 1. For decals, the letters, serial # and nose art came from an old ESCI sheet. The insignias came from an old Microscale sheet.
I chose Pantie Bandit and had to do a lot of research on how this aircraft was supposed to look like.
-
- 1. These are the colours I chose. It was tough, it seems like no one has a clue on how this aircraft was painted. If I built this kit in 1967, this aircraft would have been olive drab on top, neutral grey on the bottom. Now it's a desert scheme.
-
- 1. I used S.B.S. Models' resin parts, in this case the spinner/propeller blades were used.

-
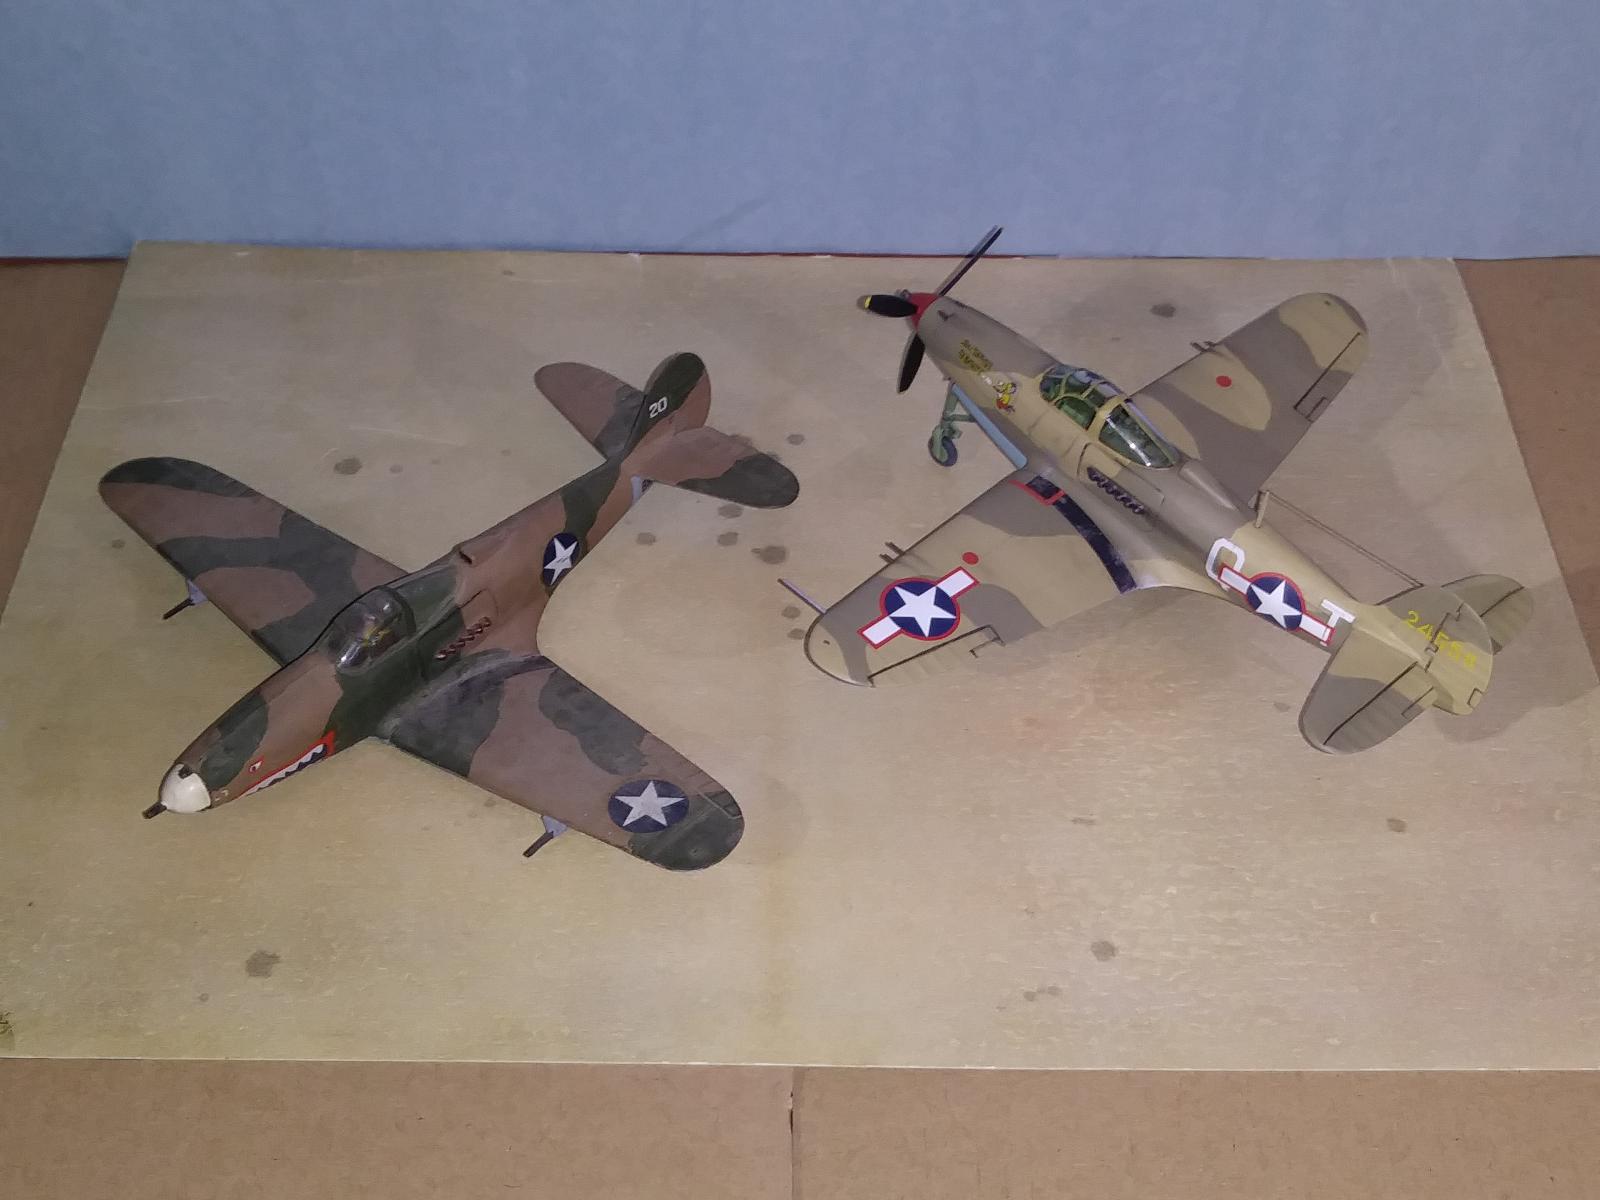
- 1. My current build next to the one I made in 1974.
-
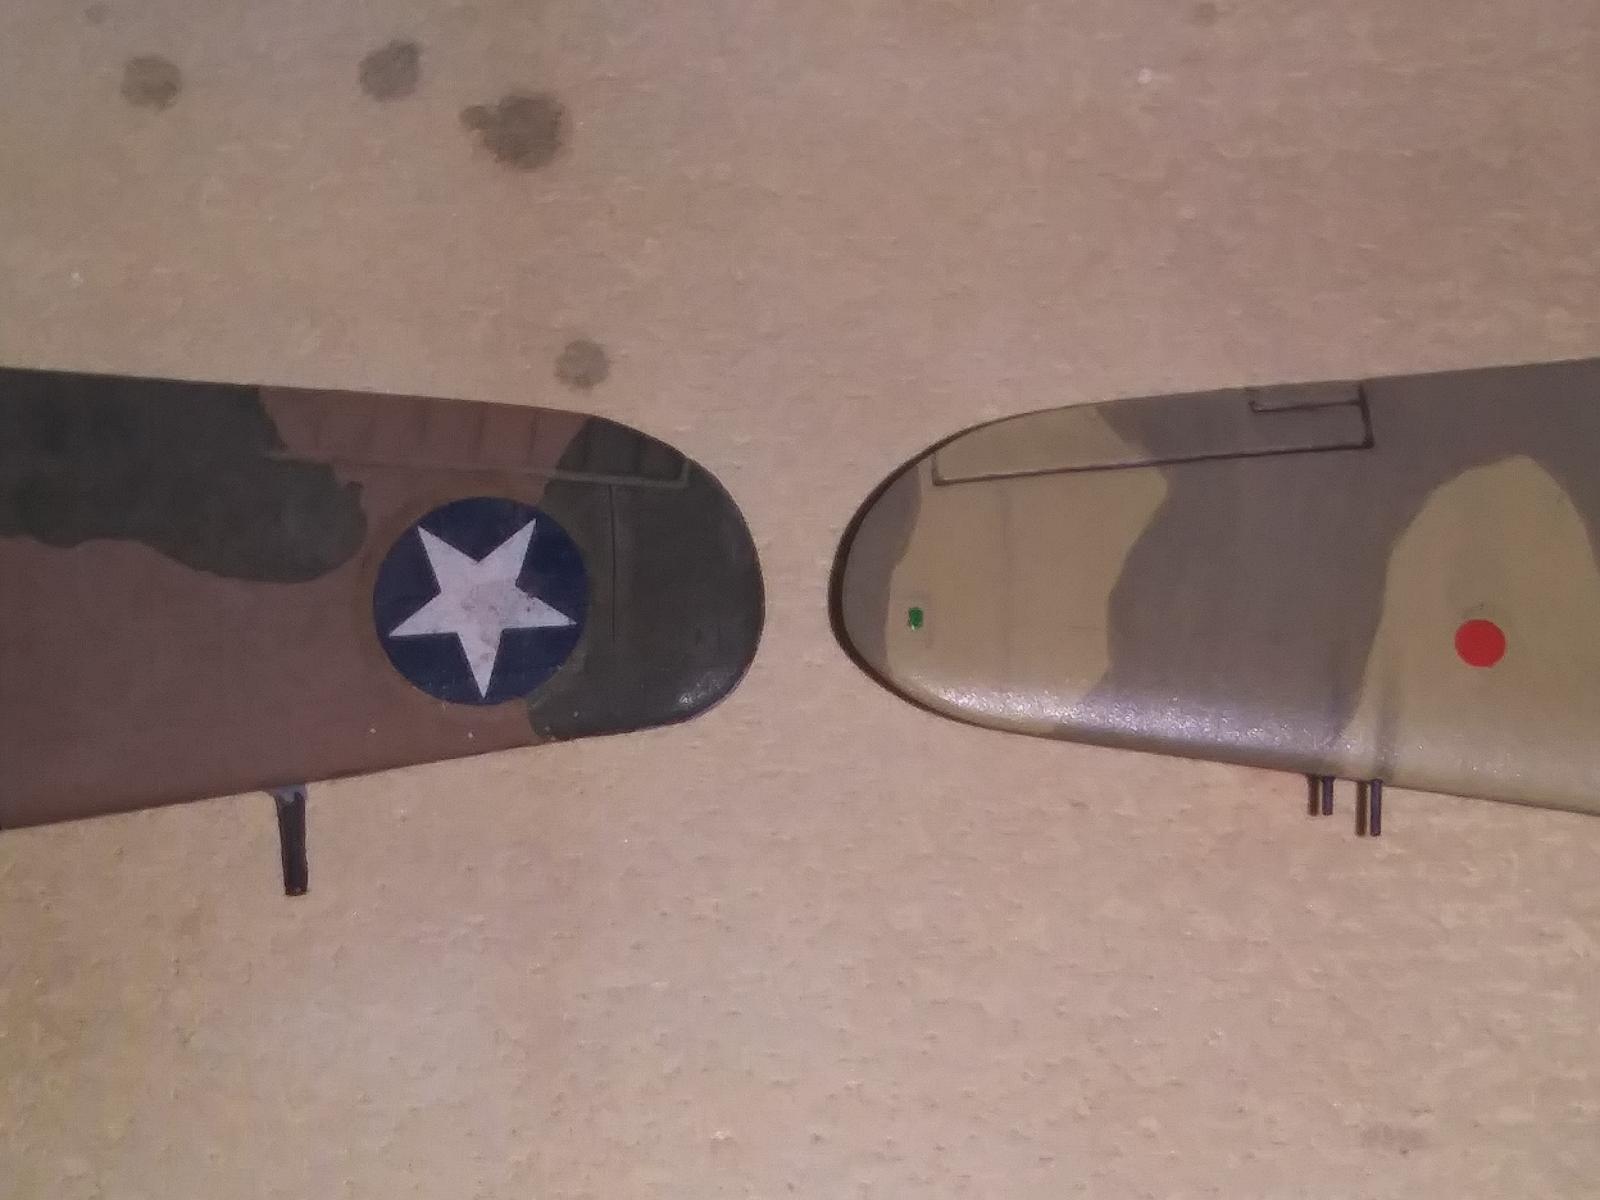
- 1. Wing tips comparison.


Nice work on this old bird.
The scheme was most likely Desert Tan over Olive Drab, and since that would at that time have been green-base OD-41, a color the same as RAF Dark Green, that's how it got credited by the hex-spurtz as being "sand and spinach." But all the P-39s came out of the factor in OD/NG - only the P-400s were done in RAF camo, since they were RAF airplanes.
Thank you Tom @tcinla, totally agree on the out of the factory as OD/NG and desert scheme as desert sand and OD. Too bad there are no real color photos to show this. I attached a b/w photo of the real aircraft. And I screen shot Eduards paint instructions which show brown but can also be olive drab. After looking at other builds, and reading a couple of build forums of this individual aircraft I decided on Khaki to represent a faded olive drab and the dark yellow as a faded desert sand.
3 attached images. Click to enlarge.
Khaki worked for fading. Your model is much better than the kit.
Thank you Tom. 🍻😊
Another winner, Bob!
The classic Revell 1/72 Airacobra never looked better!
Thank you Spiros @fiveten.
Great work on this P-39 , Bob @v1pro ! The extra effort you put in to it really paid off.
Thank you Jay @ssgt, I enjoyed this one, the tail build up was my favorite part of this build.
Bob, this is an excellent looking P-39, especially in that scale. Old kits need love too, and your time invested to this kit shows well.
Thank you Andrew, the P'39 is a neat looking plane. Yes, old kits do need love. 👍
Excellent looking Airacobra, Bob @v1pro
Love the looks of it in this scheme.
And the quality of the build could easily go for a bigger scale.
John, thank you. I am glad I chose this scheme instead on what I first planned to do. 😊
That looks really good Bob. The surgery and progress photos are very informative.
The North African Campaign scheme looks very good. I personally like, or am thinking about applying paint in slightly different tones for each aircraft or armour so that it individuates one from the other. Drab line ups of same in 1/72 get to be vanilla very quickly.
Thanks for sharing. I love the old Kits too.
Thank you Bernard. This is a nice old kit.
Bob, you don't even have to bring up the Arma kit. Good work is good work. Old school is nothing to shy away from. Its another tool in the tool box of modeling. The kit turned out great.
Stephen, thank you and cheers! 👍🍻😁
Nice work, Bob! I built a few of those with red stars way back when.
Thank you John, way back I built their P-400 and the dual racing set with the Mustang. That P-39 was pretty slick, came with the 4 bladed racing propellers with wider blades and great looking decals.
1 attached image. Click to enlarge.
Fantastic job Bob! I remember doing the old Airfix P-39, but not Revells. You were in luck that ESCI decals were usable. Someone told me that one color decal sheet [ pink, white, yellow] will survive longer, I don't recall what color that was. I think it depends how they were stored over the centuries.
Thank you Robert @roofrat, I also have the Airfix P-39 kit and after 40 years I have yet to build it. i should give that kit a try one day.
I have a lot of the old ESCI decals stashed away. Some I bought in the 70's which are all yellowed. In the mid to later 80's I bought more with better qualities. On this build I used a set that was bought from the 80's. They are thinner and followed the contours nicely.
A couple of years ago I used two of the older sets from the 70's and they worked but they are thicker and yellowed. I taped them on my window to bleach out the yellow and it worked out. They are thicker and did not like to follow the contours but brushing on Future floor wax helped out on gluing and holding them into place. But I do have a few that look like they were left in an oven too long.
Great result on this, Bob, could easily pass for 1/48.
Thank you George, cheers! 🍻
Nicely done Bob.
Thank you Allan.
Very nice work. Great scale, too!
Thank you Emberson Fedders (@embersonfedders), yes 1/72 is my favorite scale. 👍
Looks great! I too probably get the most satisfaction out of "vintage" kit restoration projects!
Greg thank you. These old kits are a blast to make! 👍😊
You certainly proved some of the "ancient" kits deserve another look, Bob (@v1pro). Very nice build!
Thank you, Matt @matthewfdyer. Yes, these old kits still have something in them that can make it work. For me, I get a lot of joy tweaking the build to help out these old kits, even if it is not 100% correct I enjoy them more than the newer kits. At the moment I am working on an old KP 1/72 MiG-17. It's a rough kit but I think it will look fine when it's done.
To paraphrase Duke Ellington, Bob (@v1pro), if it looks good, it is good.