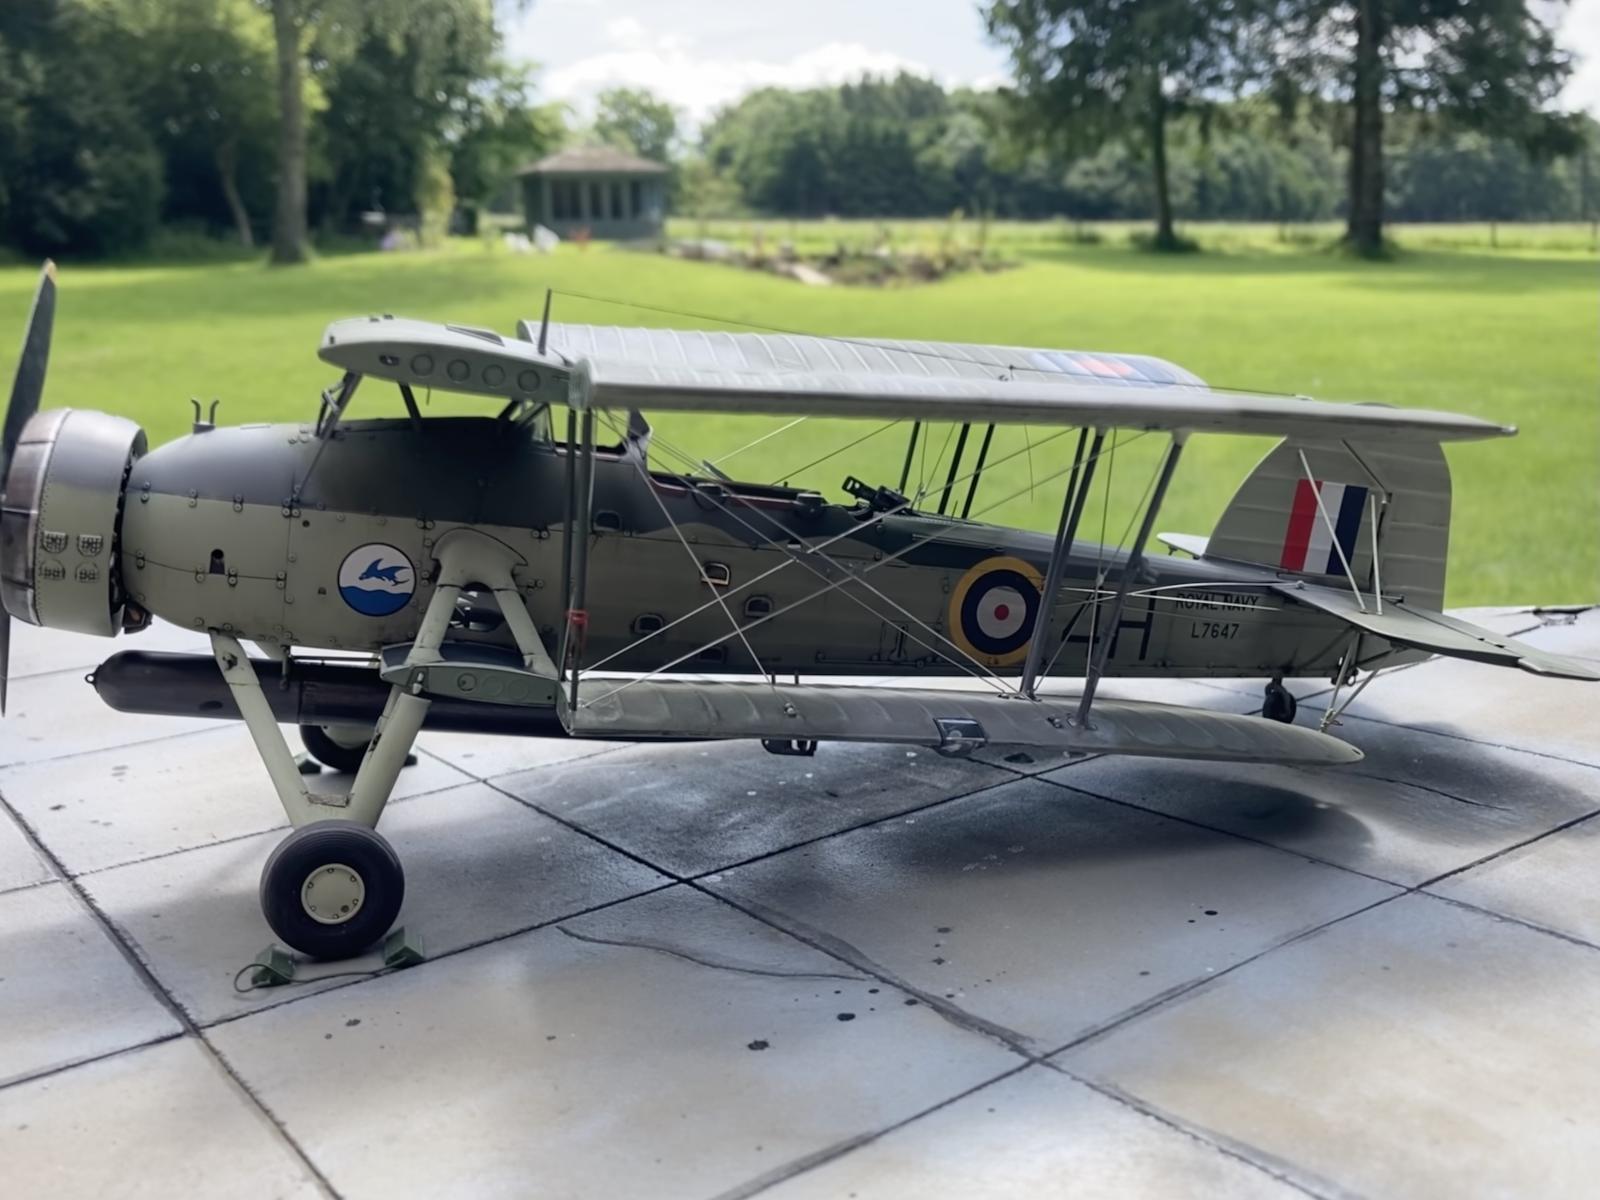
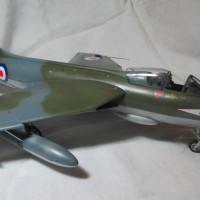
Trumpeter 1/32 Fairey Swordfish
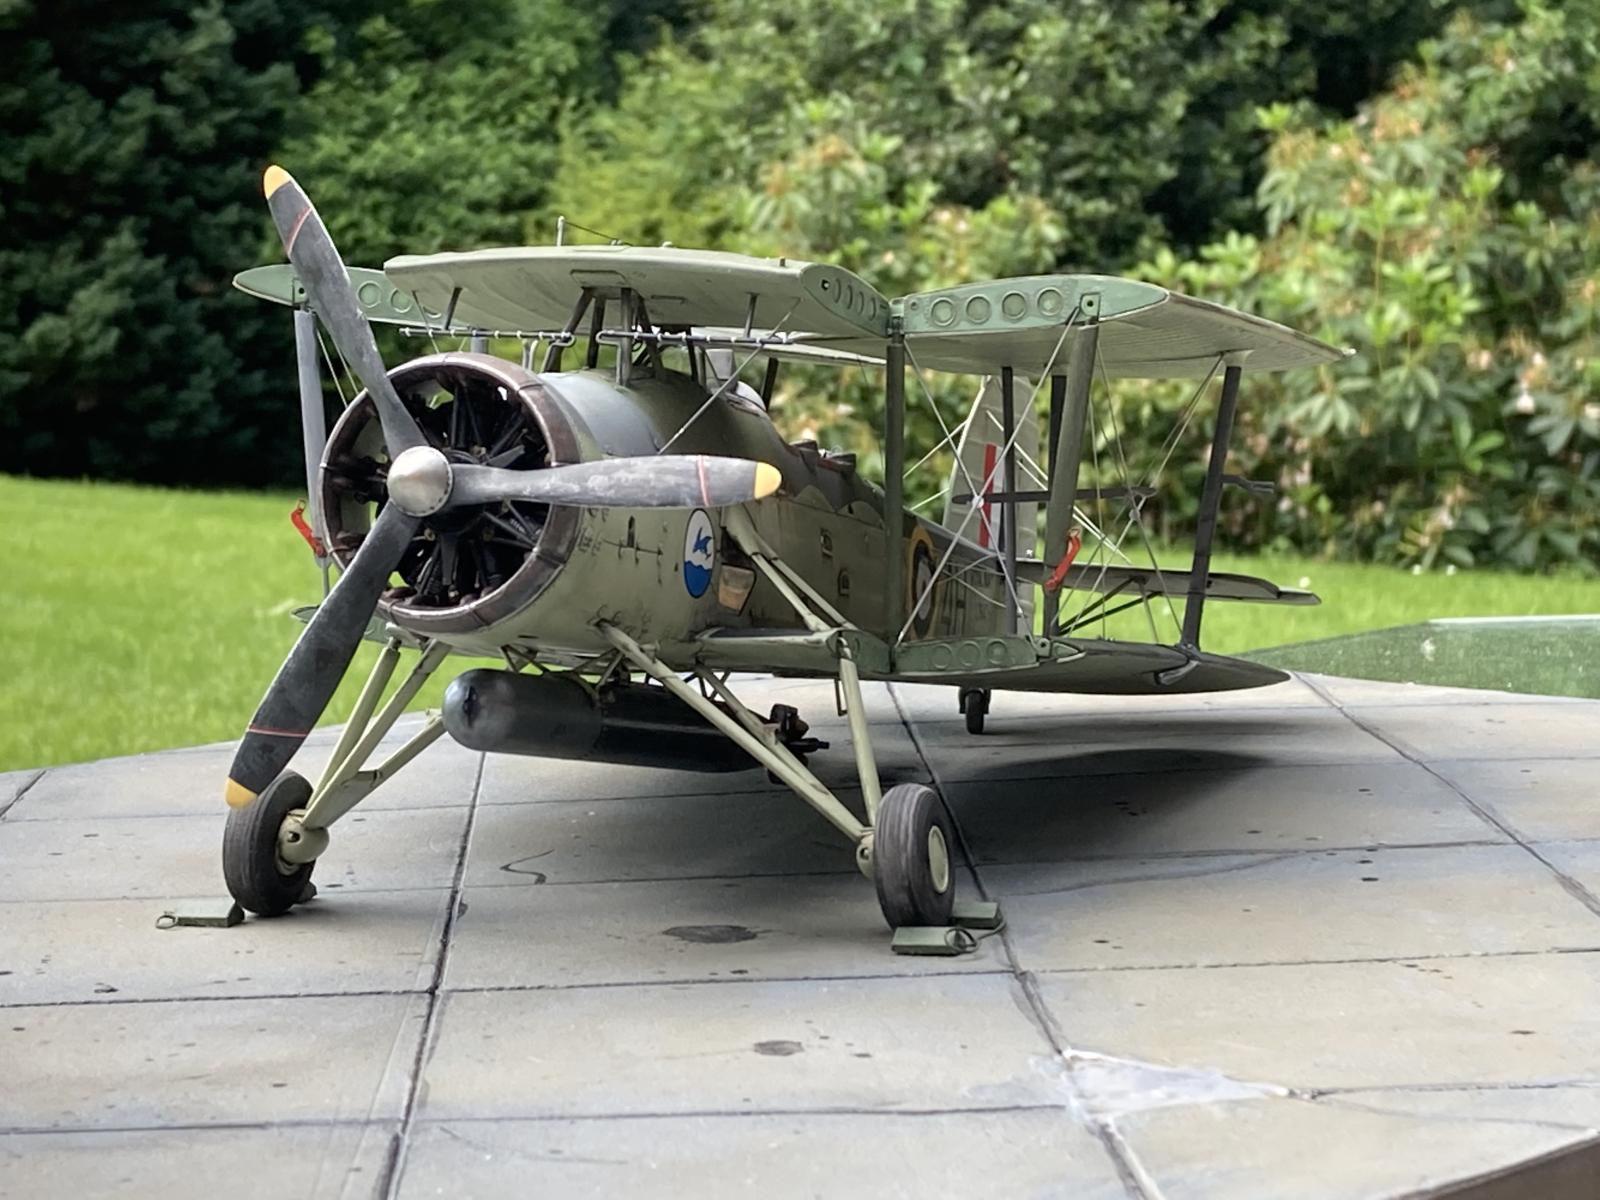
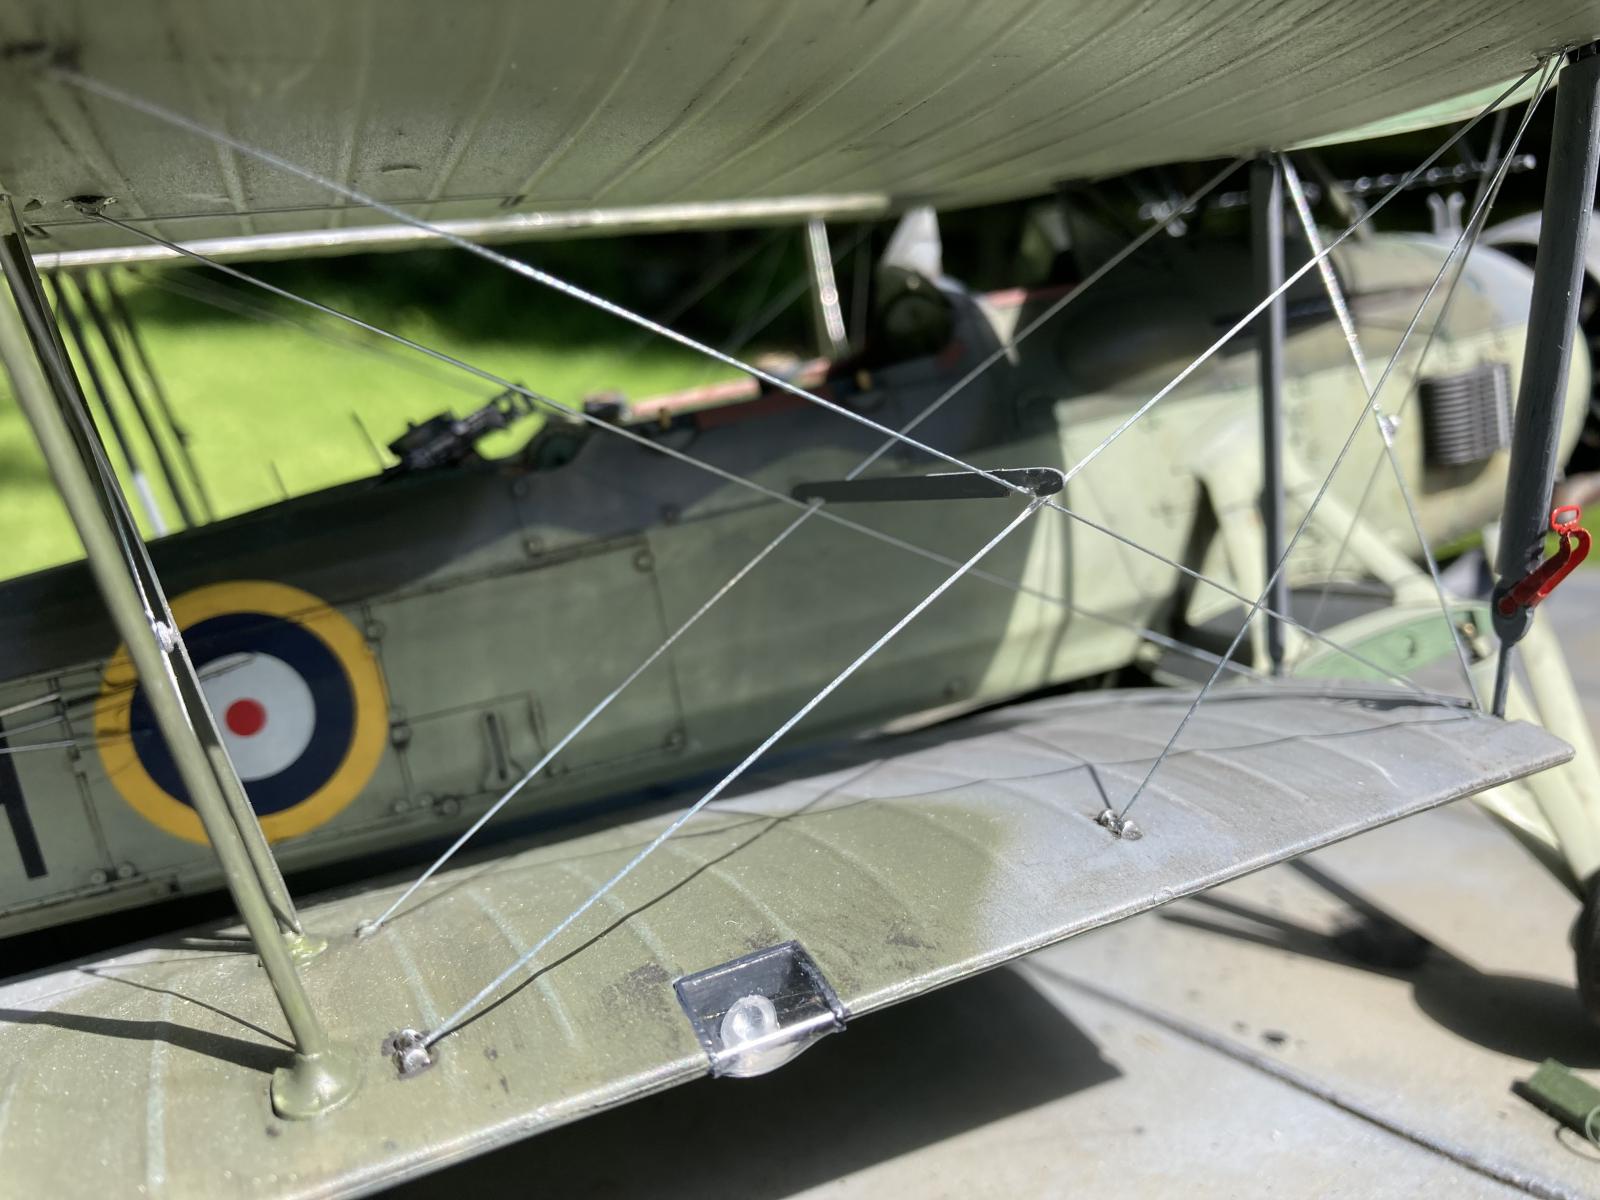
The kit was painted with Tamiya XF's and weathered with pastels and enhanced with an Eduard pe set. I couldn't get the kits rigging to work and so I used stainless steel wire instead...
You must be logged in to post a comment.
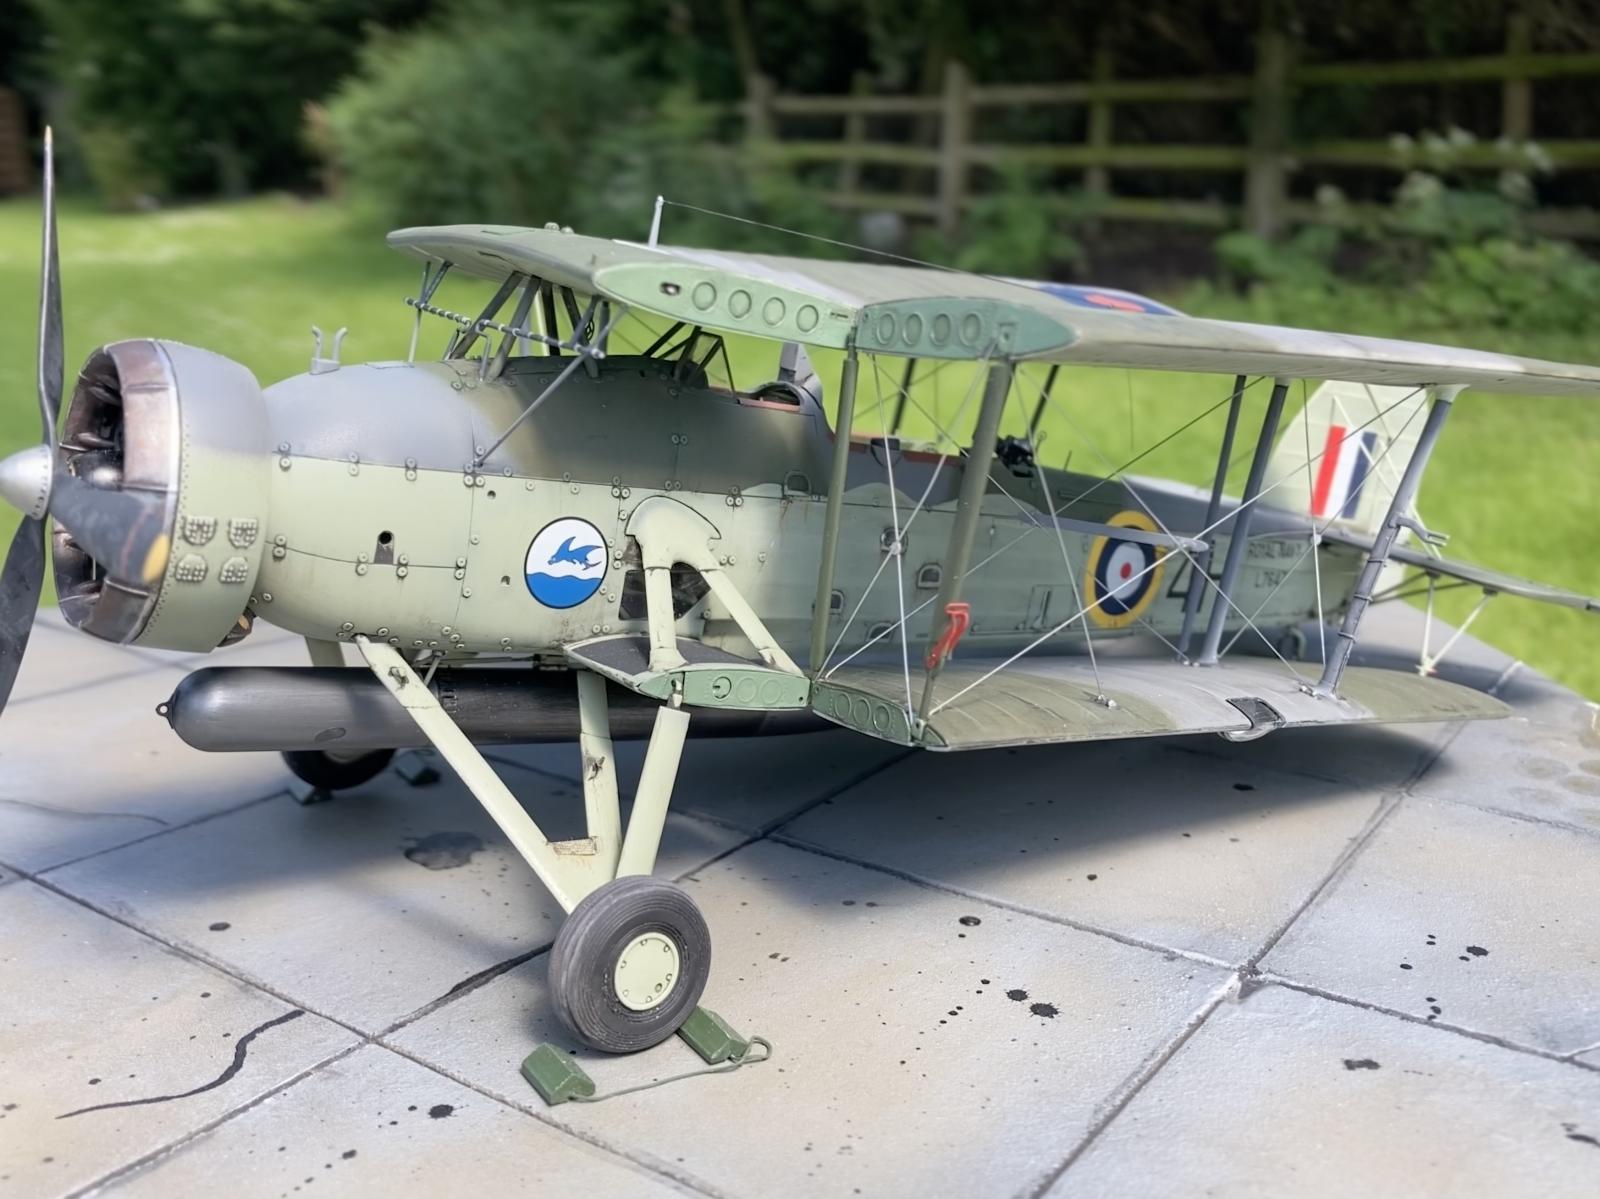


Wow, this looks marvelous, Kevin, loving the wheel chocks.
Many thanks George, much appreciated. I can't vouch for the authenticity of the wheel chocks as I've used them on several models!
Indeed, a wonderful result, Kevin! Utterly realistic!
Very kind Spiros thank you! Looks very nice in black and white which adds to the 'vintage' look?
1 attached image. Click to enlarge.
@kevinrowbotham - Fantastic build Kevin! Amazing finish. The paint and weathering are truly superb.
Thanks very much Brian, much appreciated!
Looks fantastic, must be pretty large in this scale!
Thanks very much Michel!
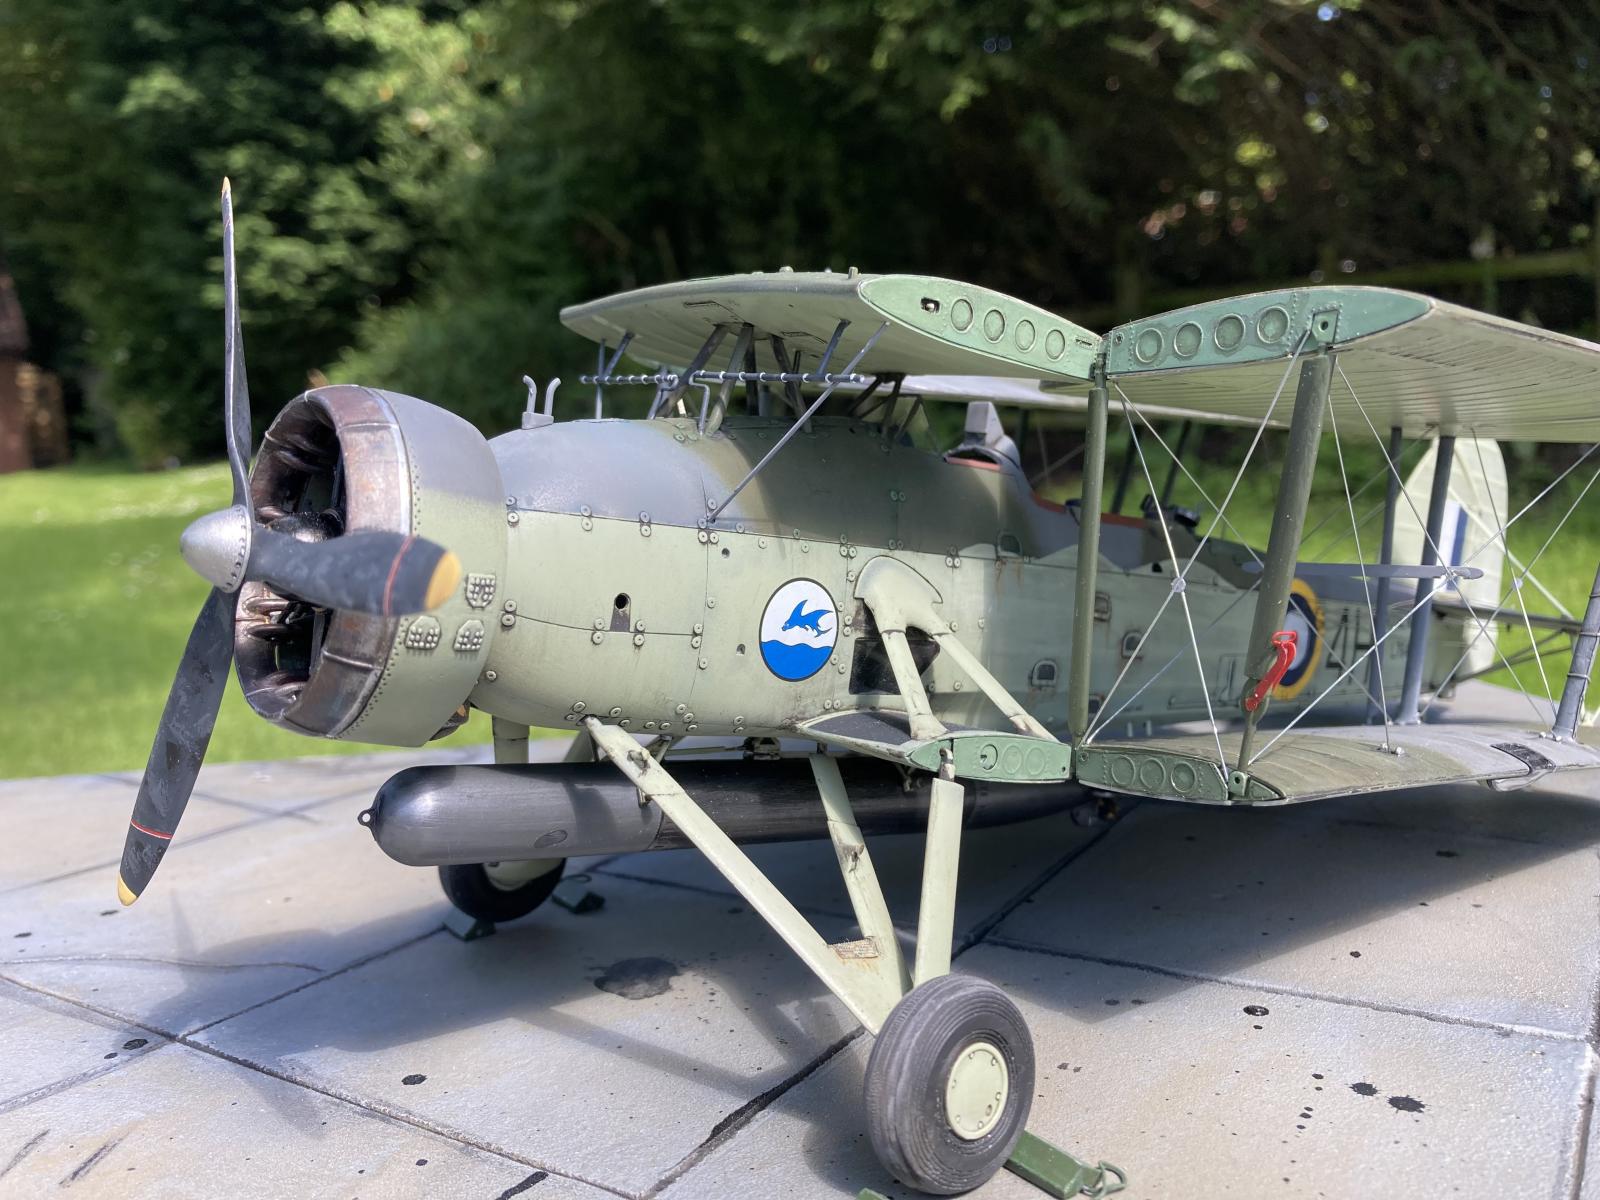
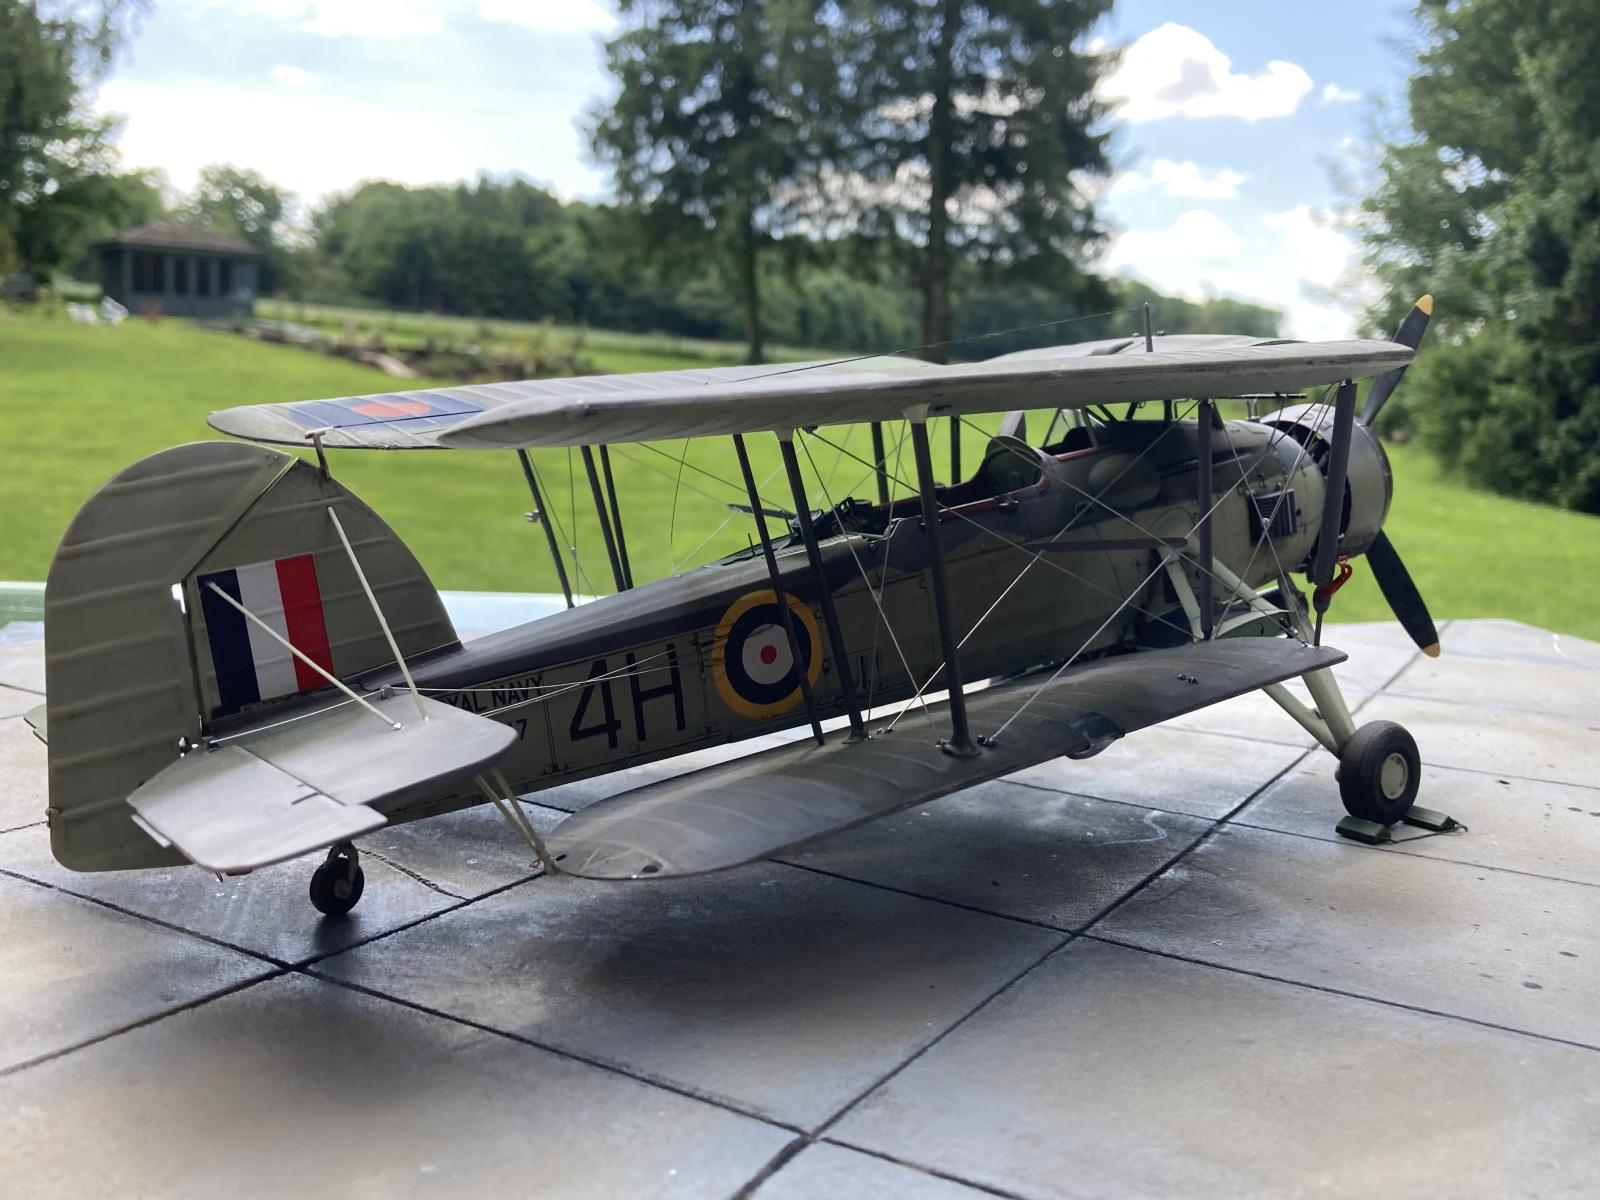
It is indeed quite a large kit which is partly the reason for displaying with the wings folded but in addition, I think the folded wings give real interest to the subject?
That's fantastic Kevin. Great subtle weathering on the navy bird. Other than the rigging was the build quite painless ? As this kit is on my to do list for Telford 23 👍
It's a pantograph up to 1/32 of the Tamiya Swordfish. Having done one, it's as painless as the Tamiya kit.
Trumpeter pantographing good kits - as they also did with their SBDs, which are the Accurate Miniatures kits scaled up - is the only way they have (other than hiring a non-Trump employee to design a kit) of not making their usual hash of things.
Thanks for the heads up Tom I am looking forward to doing this kit and I may be wrong but you seem to praise accurate miniatures. I always make a bee line to the second hand kit dealers to pick up a a kits 😊
Hi Guy, thanks very much for your kind comments! The kit was a delight to build. I struggled with the kits rigging but I think that may have been attributable to me. If you choose the use the kits rigging, I would recommend ensuring that the location holes are opened sufficiently in order to fit the rigging in place.
The only other area I would recommend that you spend time with is the wing attachment points which are a very tight fit. I rigged the wings prior to joining the wings to fuselage and this proved to be a problem as when I was fitting the wings it caused them to flex and the rigging parted company which necessitated refitting the rigging but no great task. I think it would be very difficult to rig the wings with them in position?
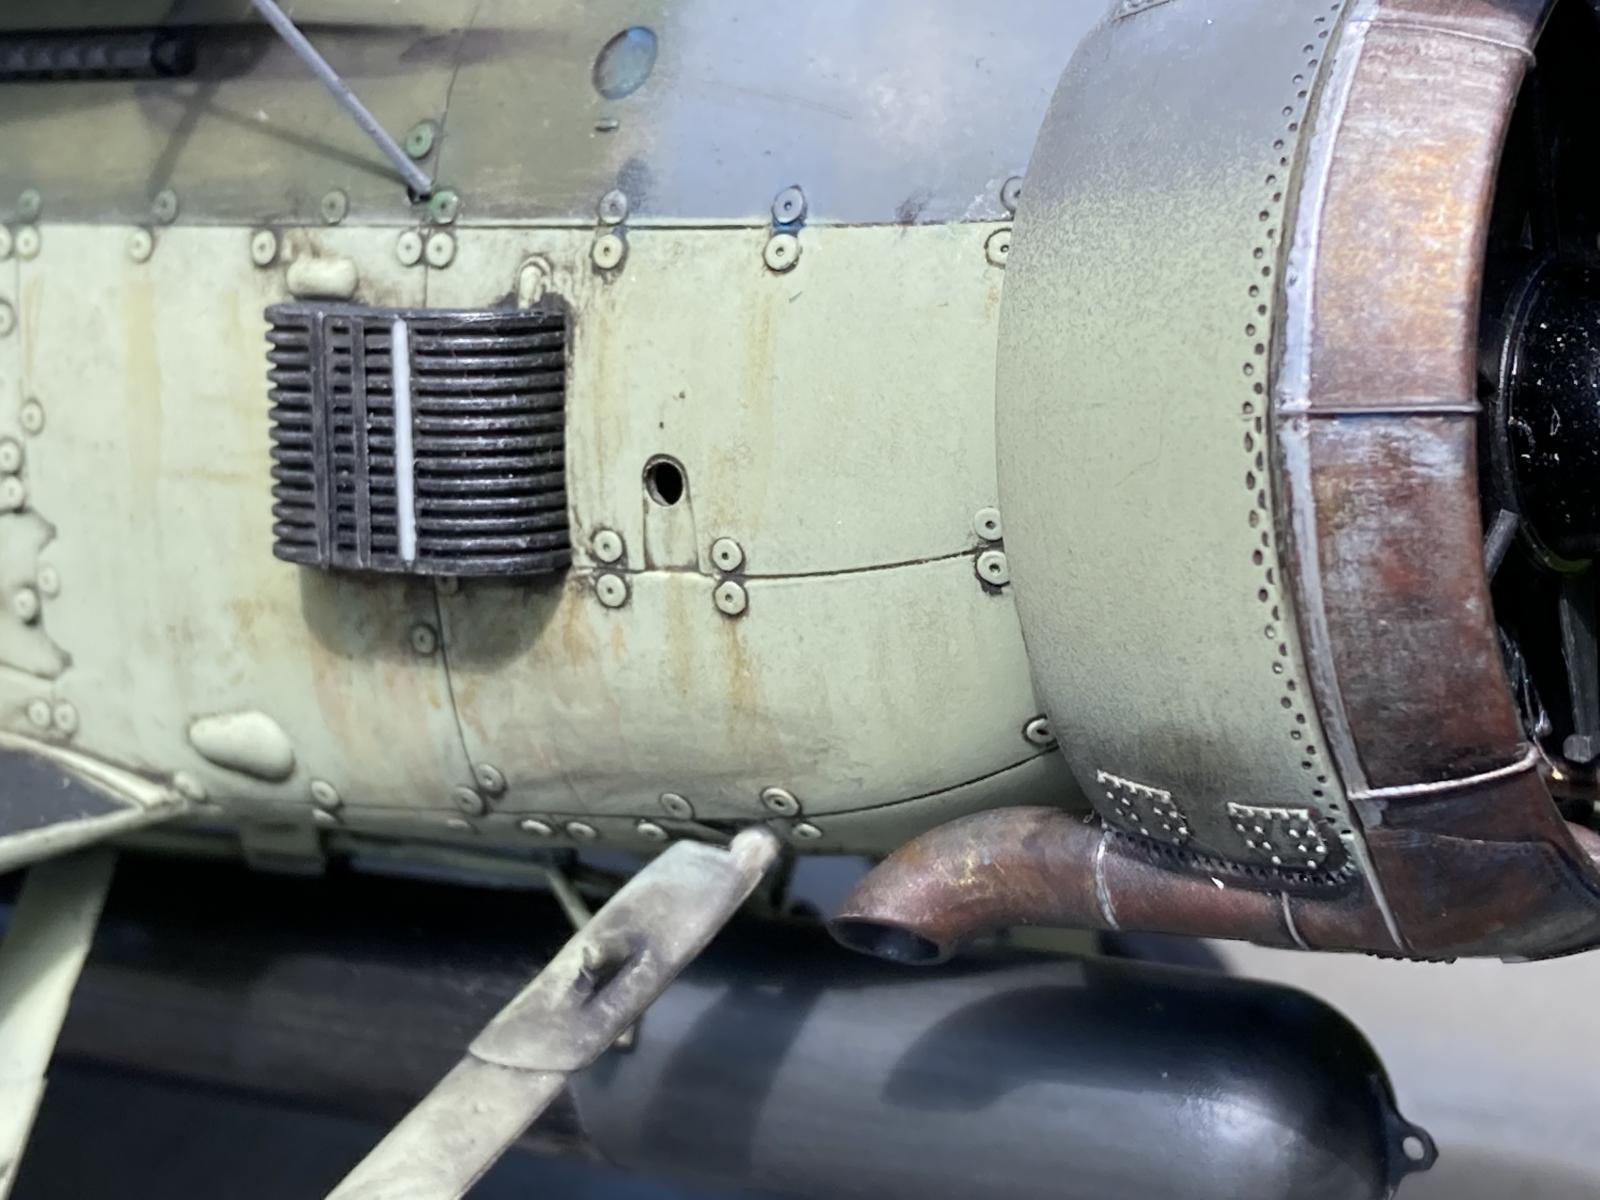
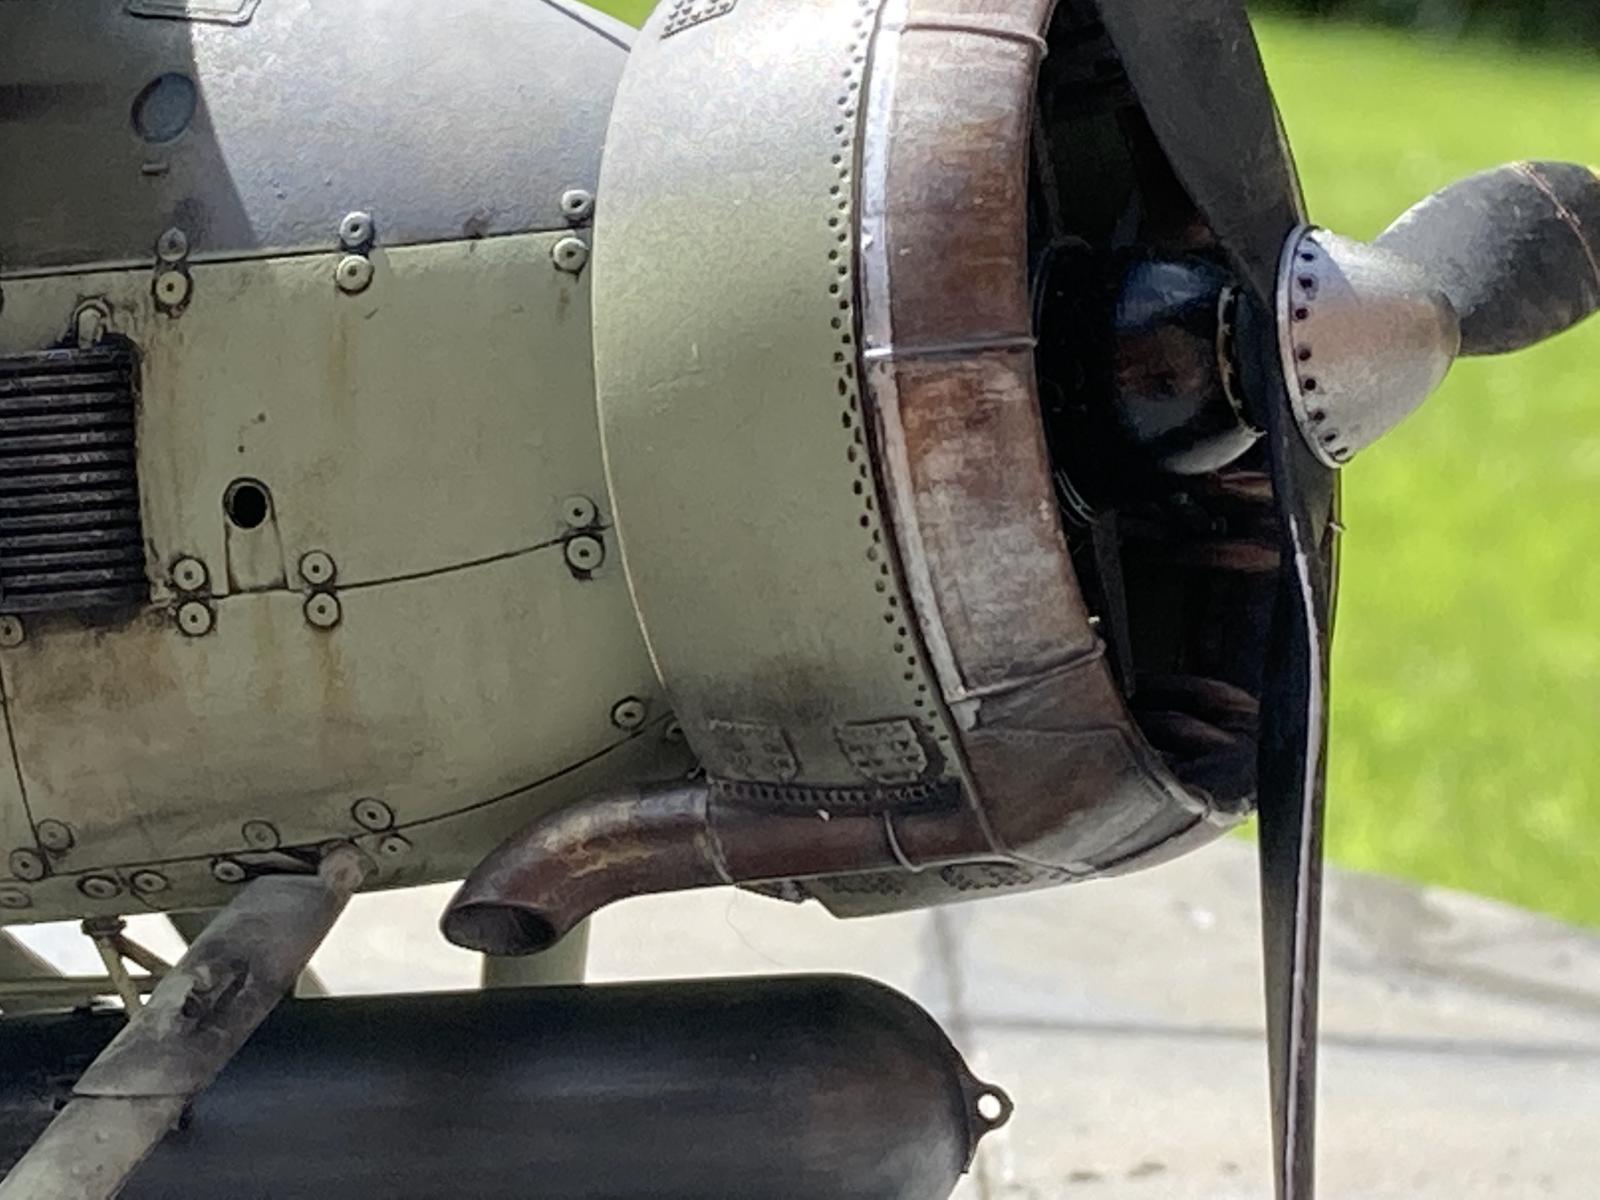
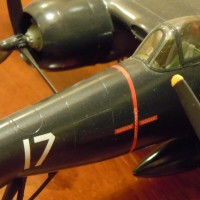
Happy to share my technique for painting the collector and exhaust if you would find it useful?
1 attached image. Click to enlarge.
Kevin any hints and tips are always most grateful Cheers Kevin 👍
Here you go Guy...maybe of some use?
Prime the ring with a primer of your choice ( I used thinned 50:50 Mr Surfacer 1000) Ensure the primer has dried thoroughly and you have a really smooth finish. The first coat is silver rub’n’buff (I always apply this with my finger in light coats..difficult to do on the inside of the ring so use a brush) Mask off the thin silver ring around the outside of the ring (again, make sure the paint is dried fully)
The next stage is to lightly stipple, using a sponge thinned Vallejo Saddle Brown (70.940) onto the ring followed by thinned Flat Brown (70.984) in a light stippling motion…you should still be able to see the silver base coat clearly. When the brown shades have dried and using the sponge stippling effect again, apply a thinned coat of Gunmetal Grey (70.863) followed by a thinned stippled coat of Oily Steel (70.865).
Leave the paint to dry thoroughly (I would recommend 24 hours if possible) and when the paints dry, take the rub’n’buff and apply a thin coat over the entire ring avoiding obscuring the previous coats of brown/steel. To do this, I use a finger with practically all of the rub’n’buff removed (a bit like dry brushing).
Once again, leave to dry thoroughly. If you think there is not enough discolouration go back and apply the browns/steel and keep building it up….this is not a quick process. Once all the paint has dried give it a semi gloss varnish and the job is done.
As always, practice is your key friend here! I've quoted Vallejo paints because that's what I used I would suppose any other manufacturers would do the same?
3 attached images. Click to enlarge.
Kevin that's a great detailed set of tips. I use AK Real colors but I'm sure the colours can be replicated to your advice 👍
Great "rid hard and put away wet" look. Nice backyard too.
Many thanks Bill, much appreciated!
A gripping, impressively realistic sight - this is model building art at the highest level - great and inspiring!
Thanks very much for your kind comments Roland, they are much appreciated!
Beautifully painted and weathered. I was just thinking this weekend that I should finally add a Stringbag to my stash (1/72), now that I found something I think I can rig it with that won't drive me berserk! Perhaps this is confirmation...
Get the new Airfix kit if that's your plan.
Thanks for your very kind comments Greg!
I tend to shy away from 1/72 kits but I'm given to understand that the Airfix kit is a nice kit?
This is incredible! Absolutely beautiful.
Wow, thanks Felix!
Dear Kevin @kevinrowbotham
I would definitely appreciate a tutorial regarding your rigging! I have the Swordfish from Airfix in my stash as well as the beautiful Walrus in 48. Due to the rigging i have refrained from building them so far.
Your build is amazing!
This is really nice - the weathering is highly realistic. Good work and a great result.
Many thanks Tom, very much appreciated!
You have put together a real beauty. Great execution of the build and then your paint and weathering really brings it to life. Great job.
Thanks Walt your comments mean a lot thank you!
I'm speechless, Kevin @kevinrowbotham
The realism you achieved on this kit is amazing, detailing, painting, weathering, everything looks top notch.
Great work on the rigging by using the stainless steel wires.
Thanks very much John, your kind comments are very much appreciated!
So what museum is this sitting outside of because this can’t be a model. Very realistic result. Thanks for sharing.
Thanks Matt, much appreciated!
Wow, very impressive Swordfish! The details are very realistic, in fact some photos can mistake the eye for the real 1/1 scale
Thanks for your kind comments Pedro...that was the look I was after!
Congratulations on an absolutely gorgeous build! Fantastic cowl and overall weathering.
I was on the fence about folding the wings on a couple of my 1/48 Swordfish, but seeing your 1/32 Trumpeter, I think I will be doing that for sure now!
Thanks for posting- an inspiration for me to finish off my stringbags!
Dan from Bermuda.
Much appreciated Dan!
I'm with you on the wing fold option, this started as a wings spread model but it is quite a large kit in 1/32 and so I opted for the wing fold (and I'm pleased that I did)...a more 'interesting' finished kit?
Excellent work, Kevin!
Many thanks for your kind words John!
Spectacular build - looks like the real deal!
Thanks very much Chas, much appreciated!
Beautifull build! Now to find the Bismark.
Many thanks Robert!
Strangely enough, my brother is in the process of building the Bismarck!