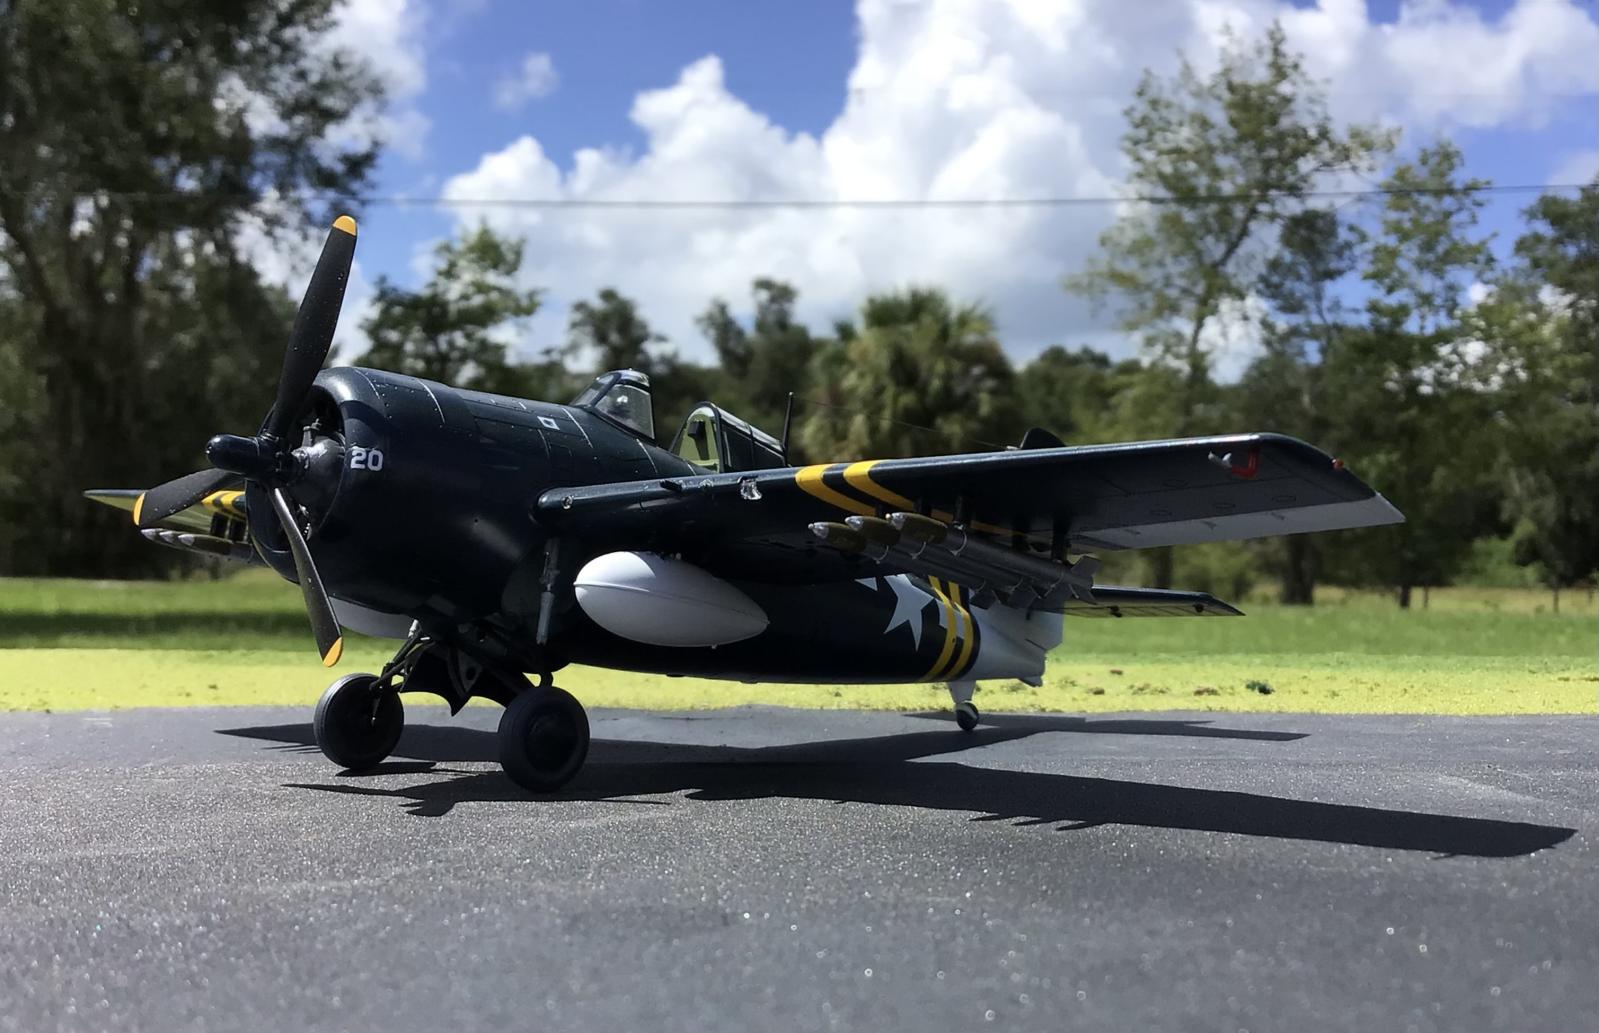
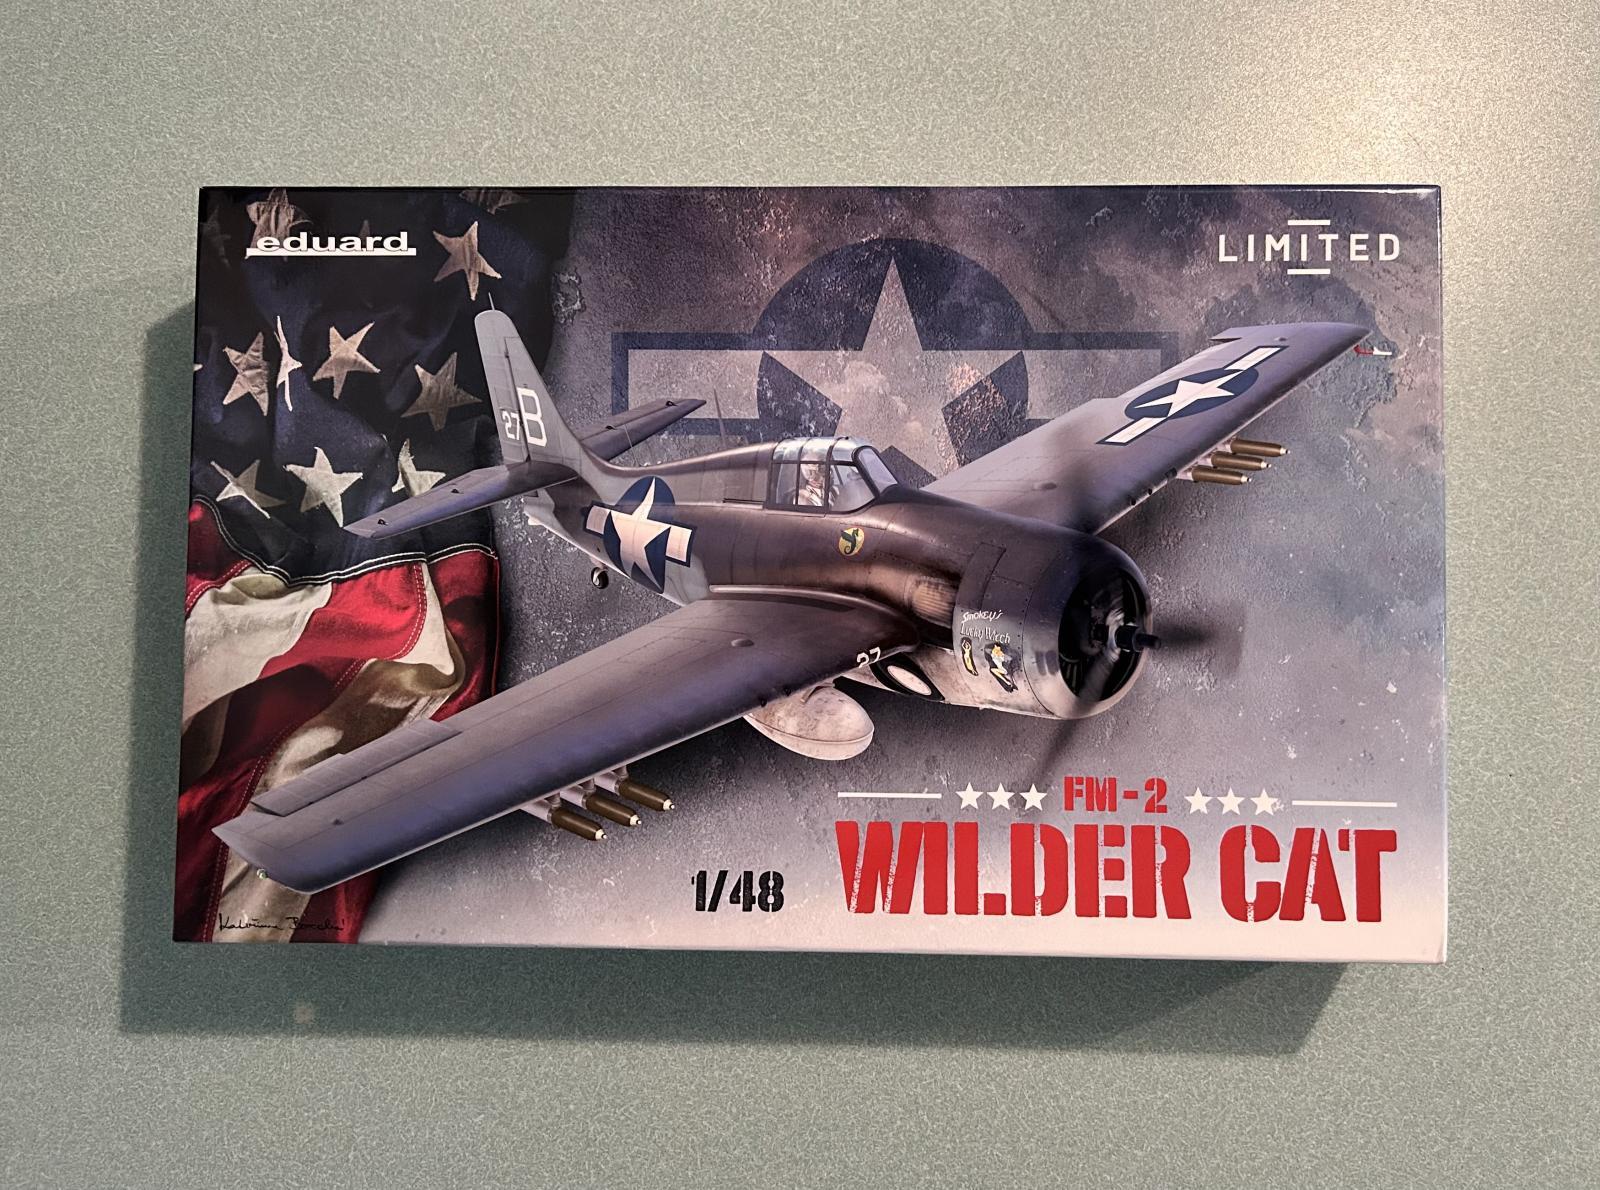
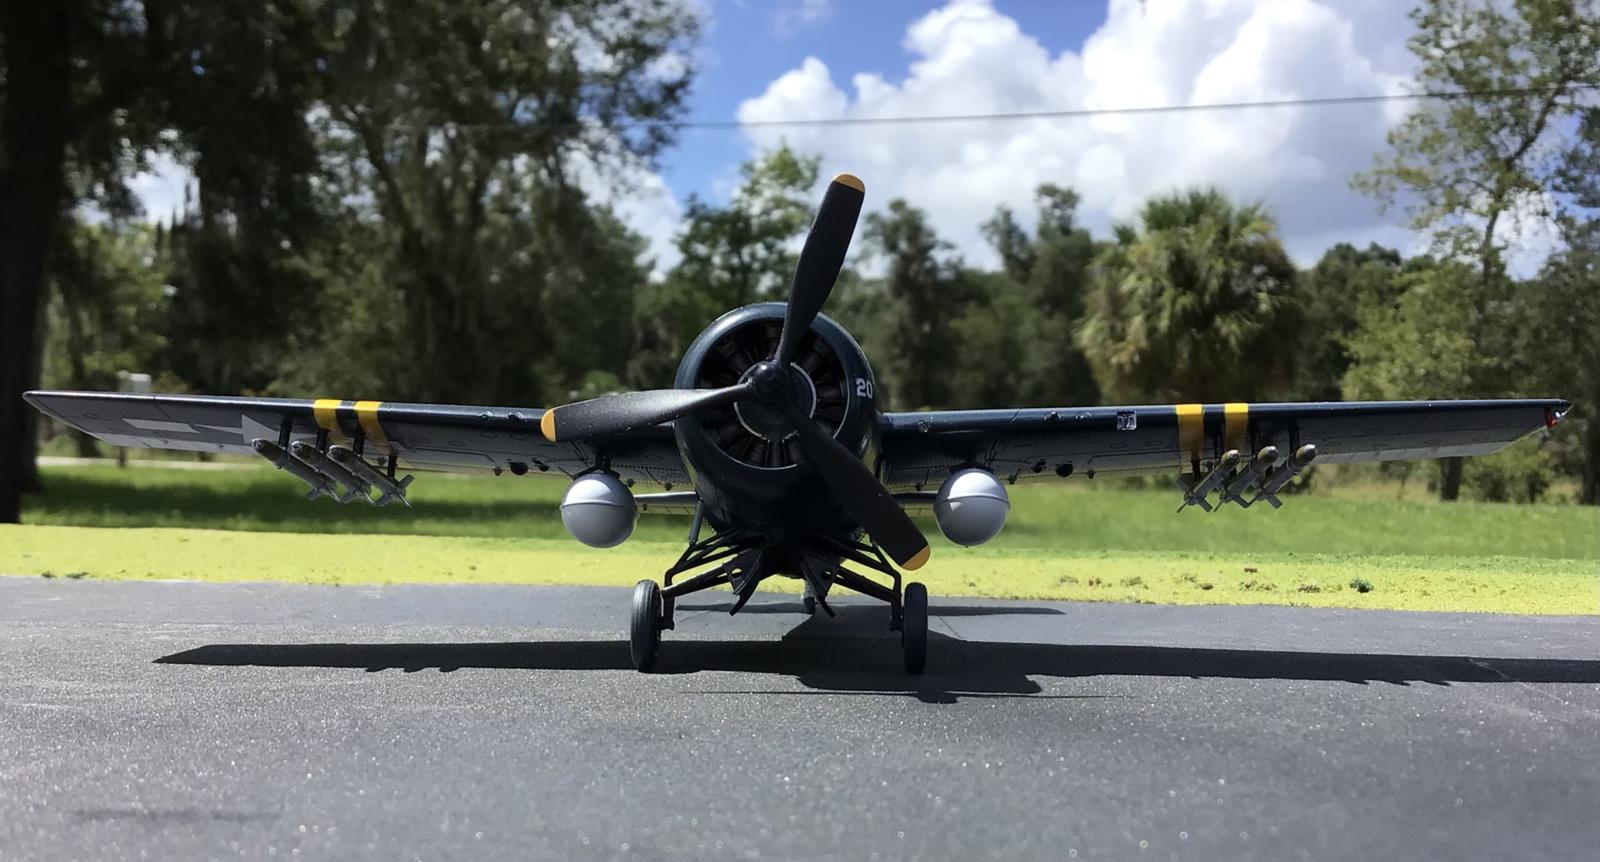
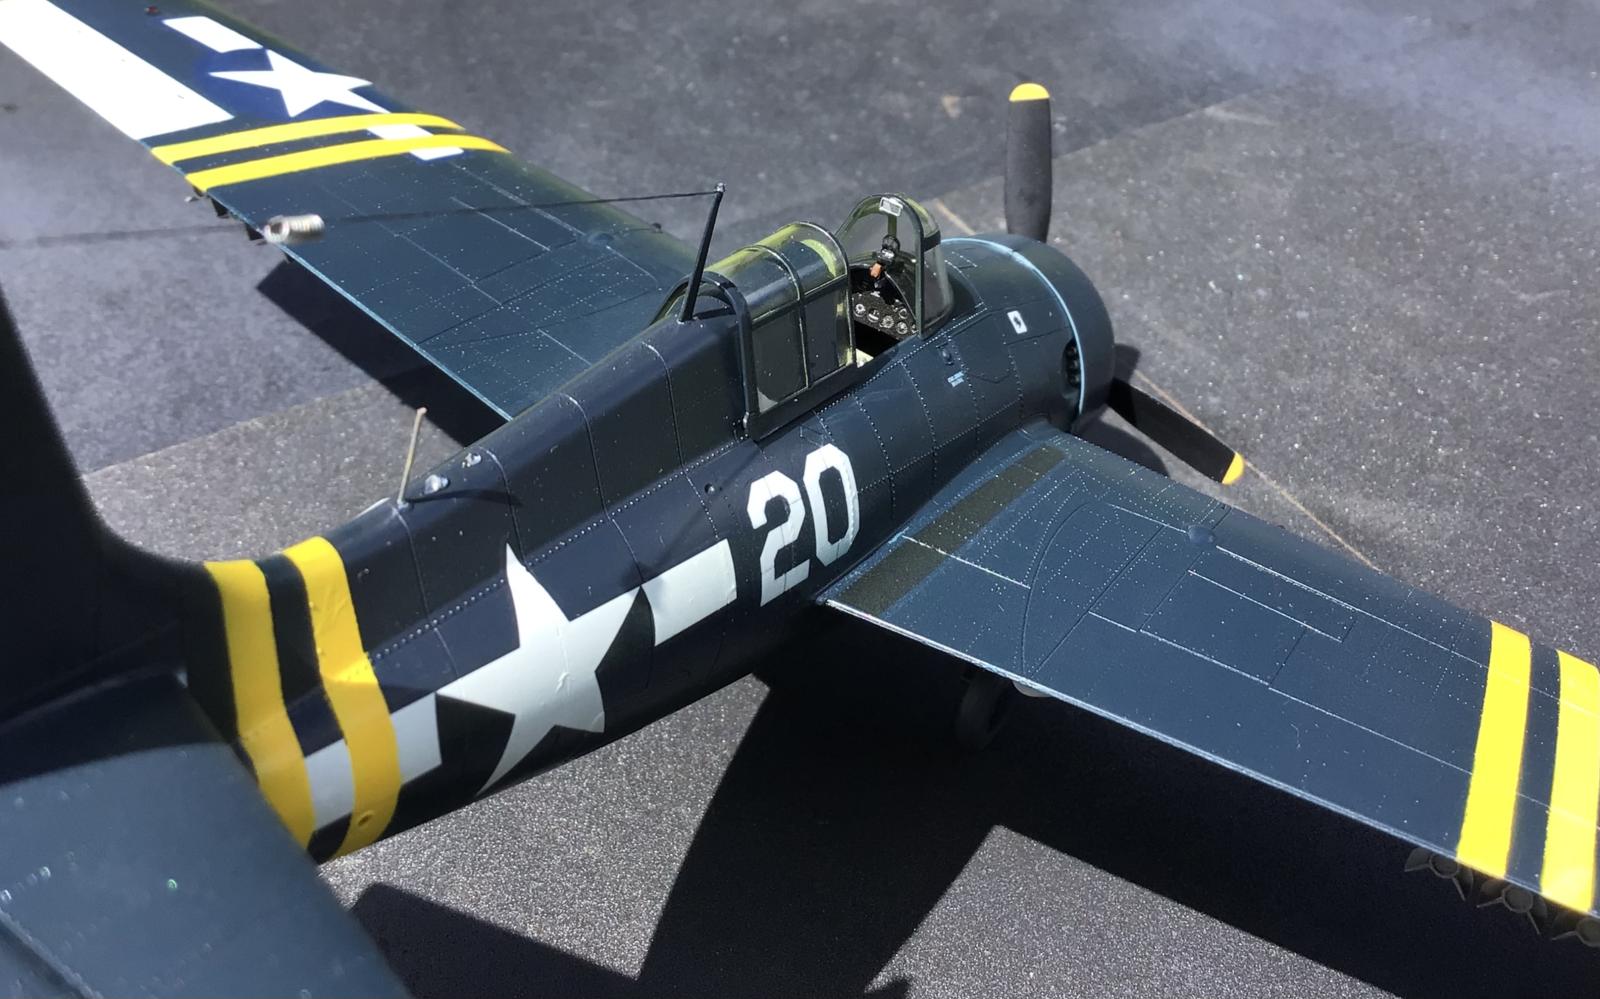
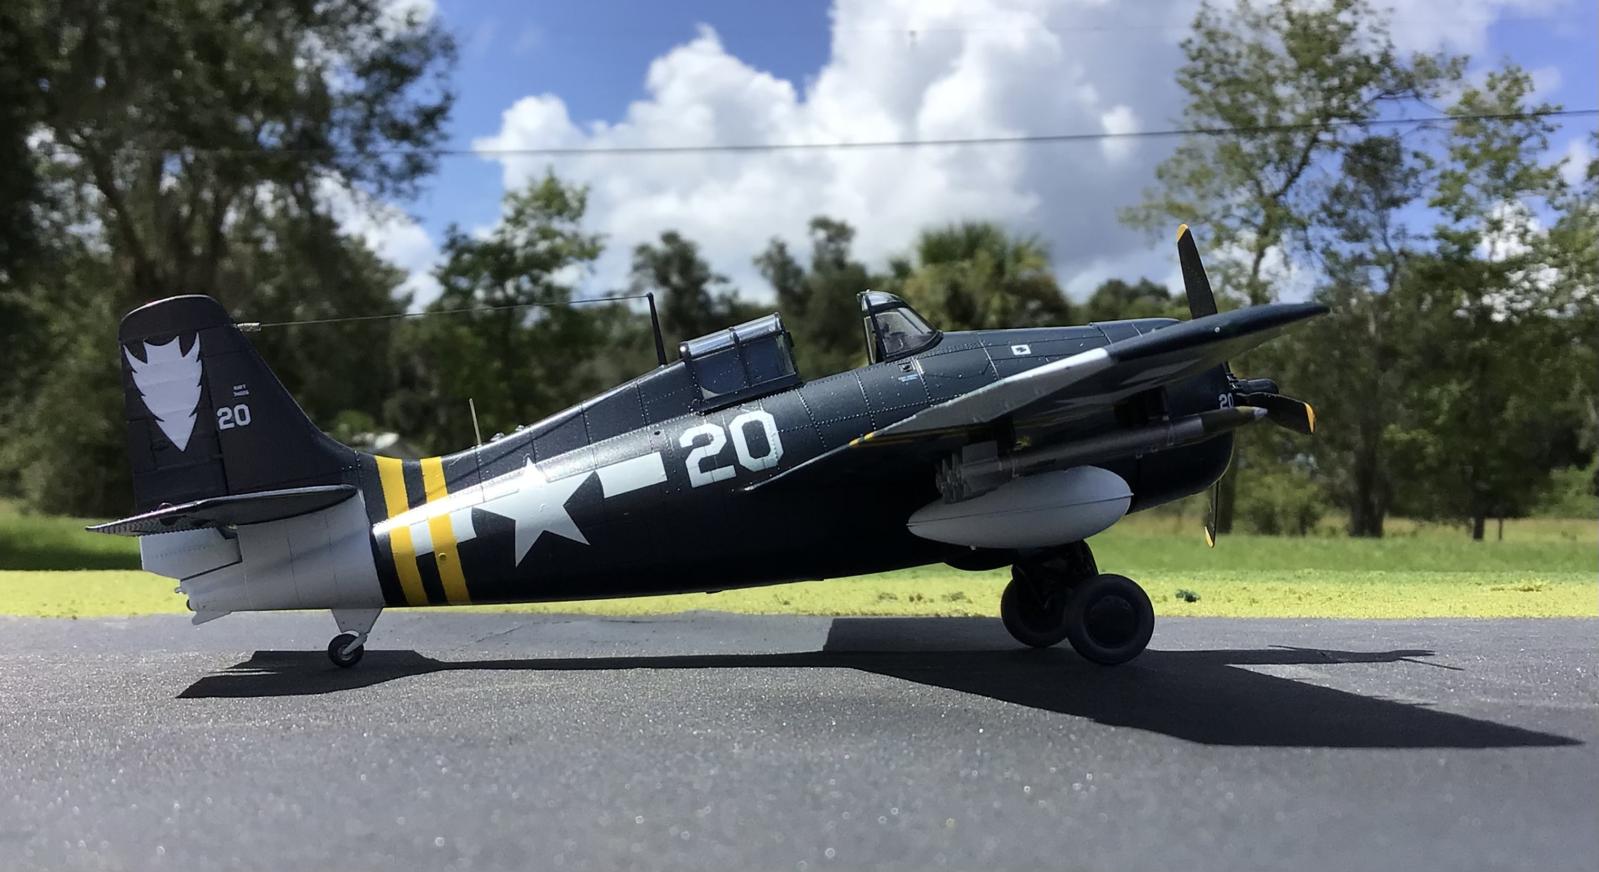
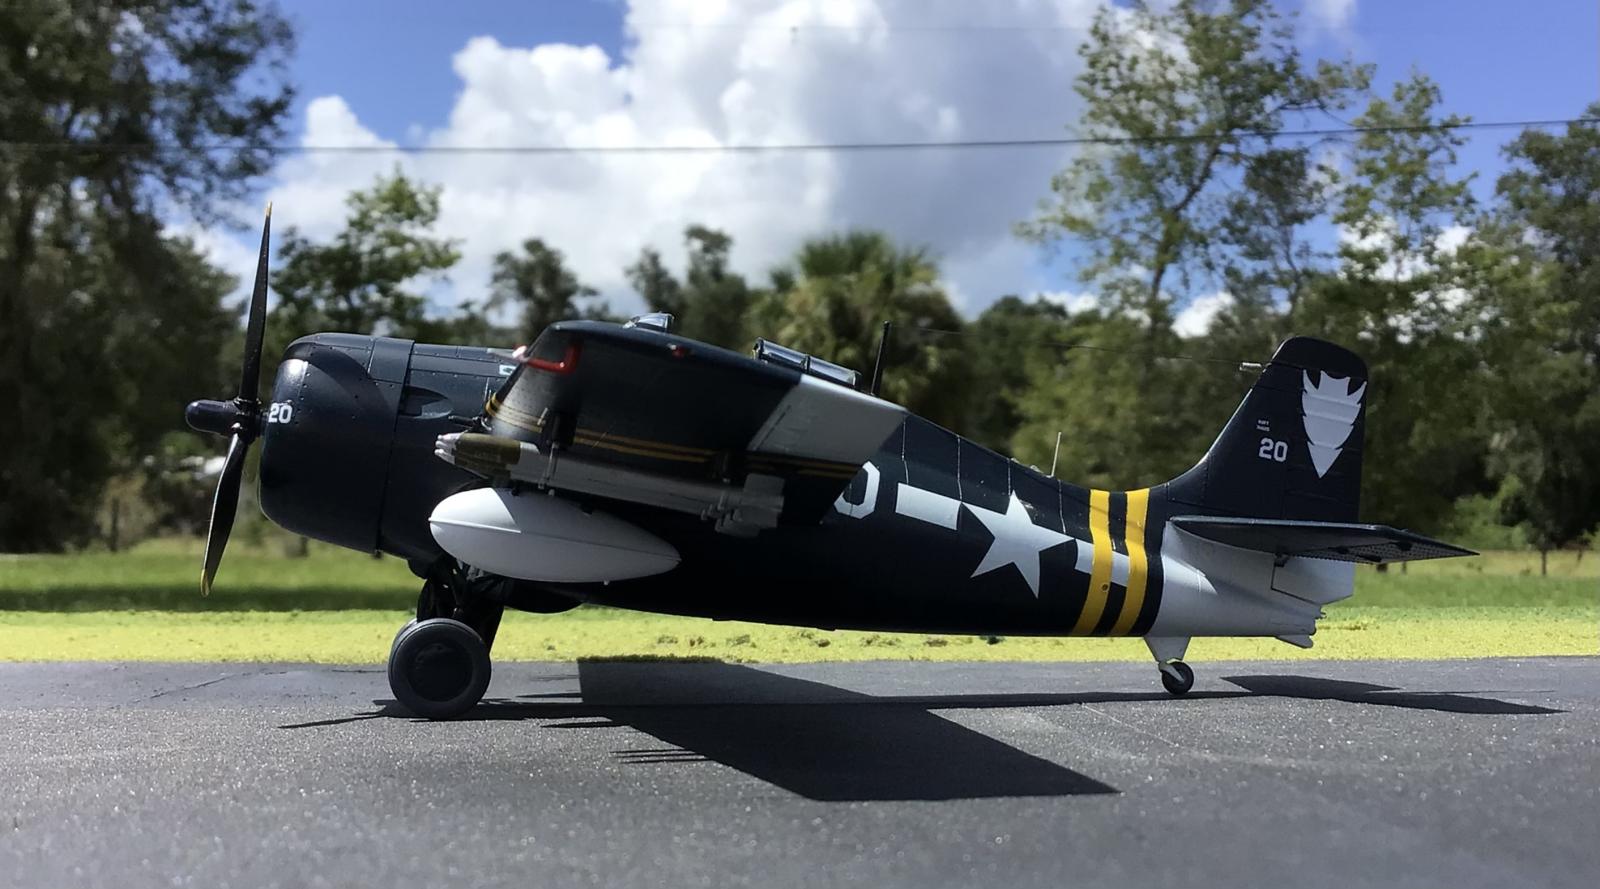
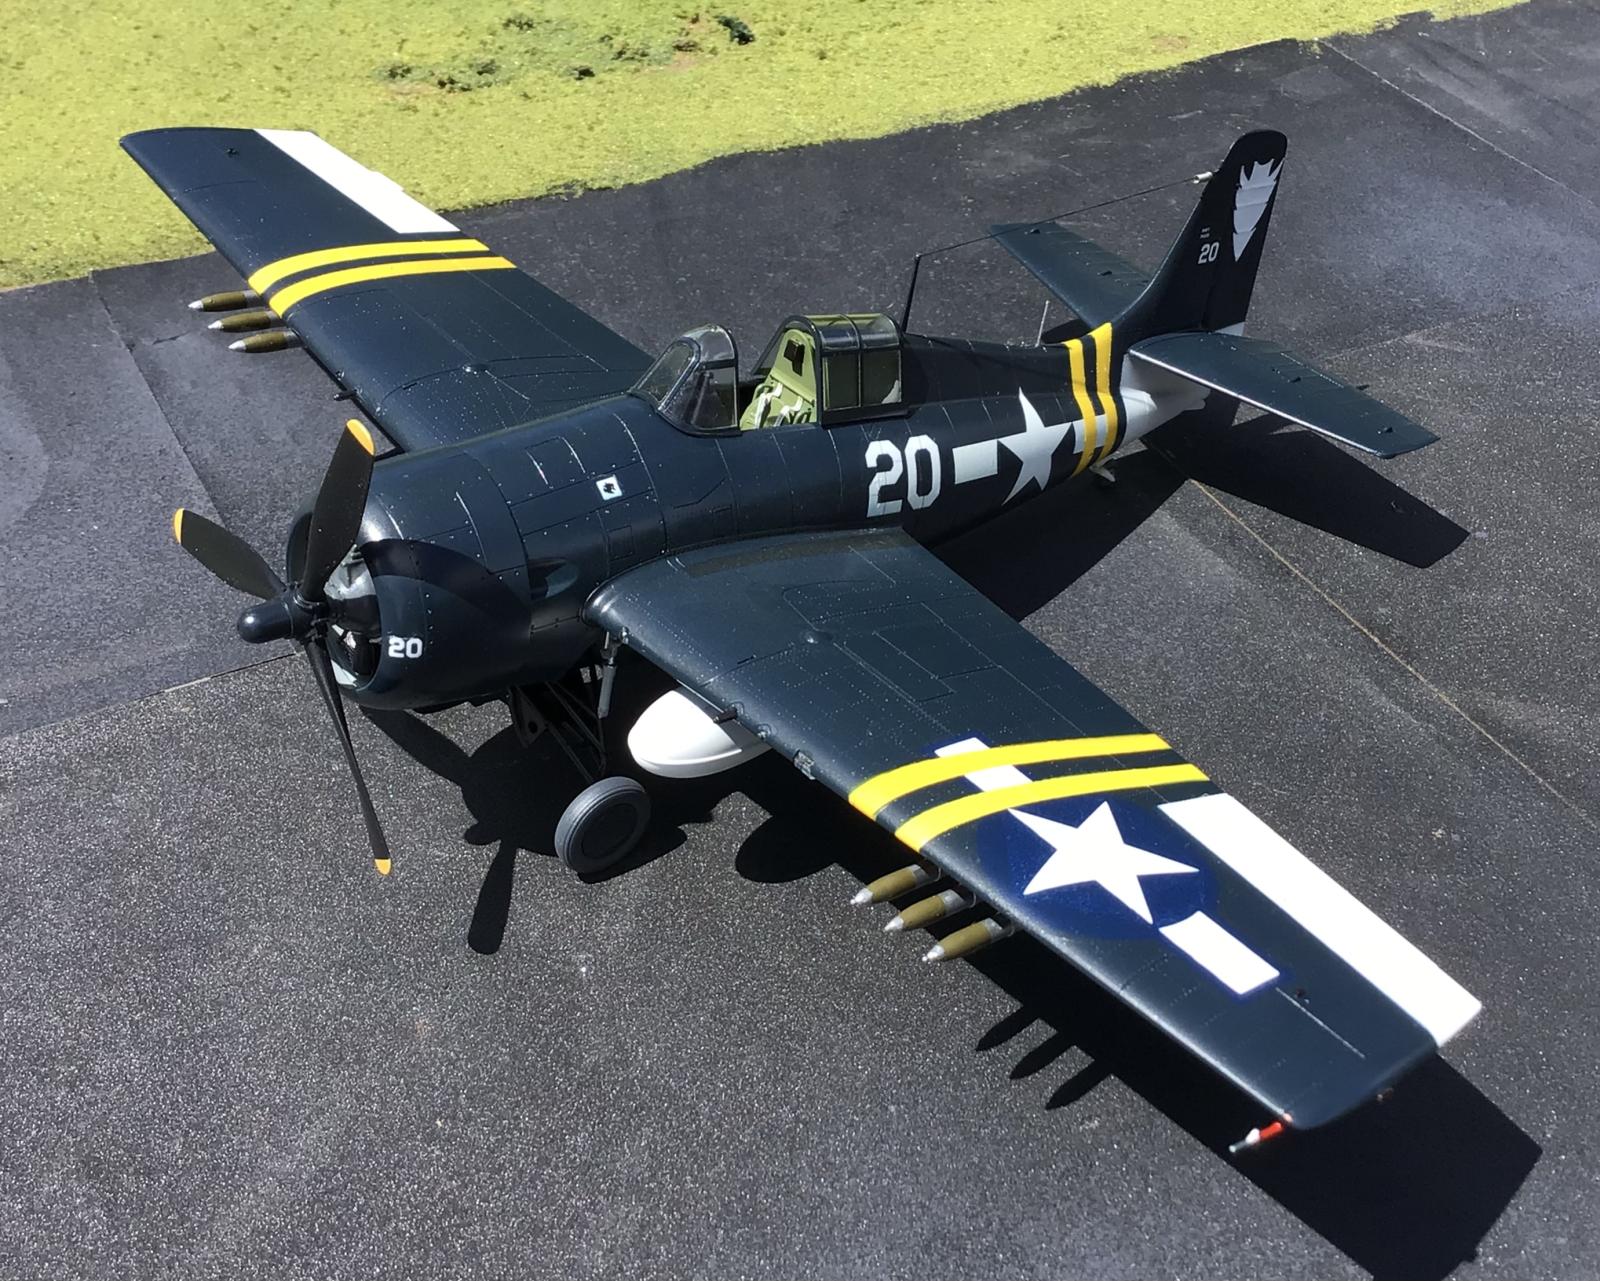
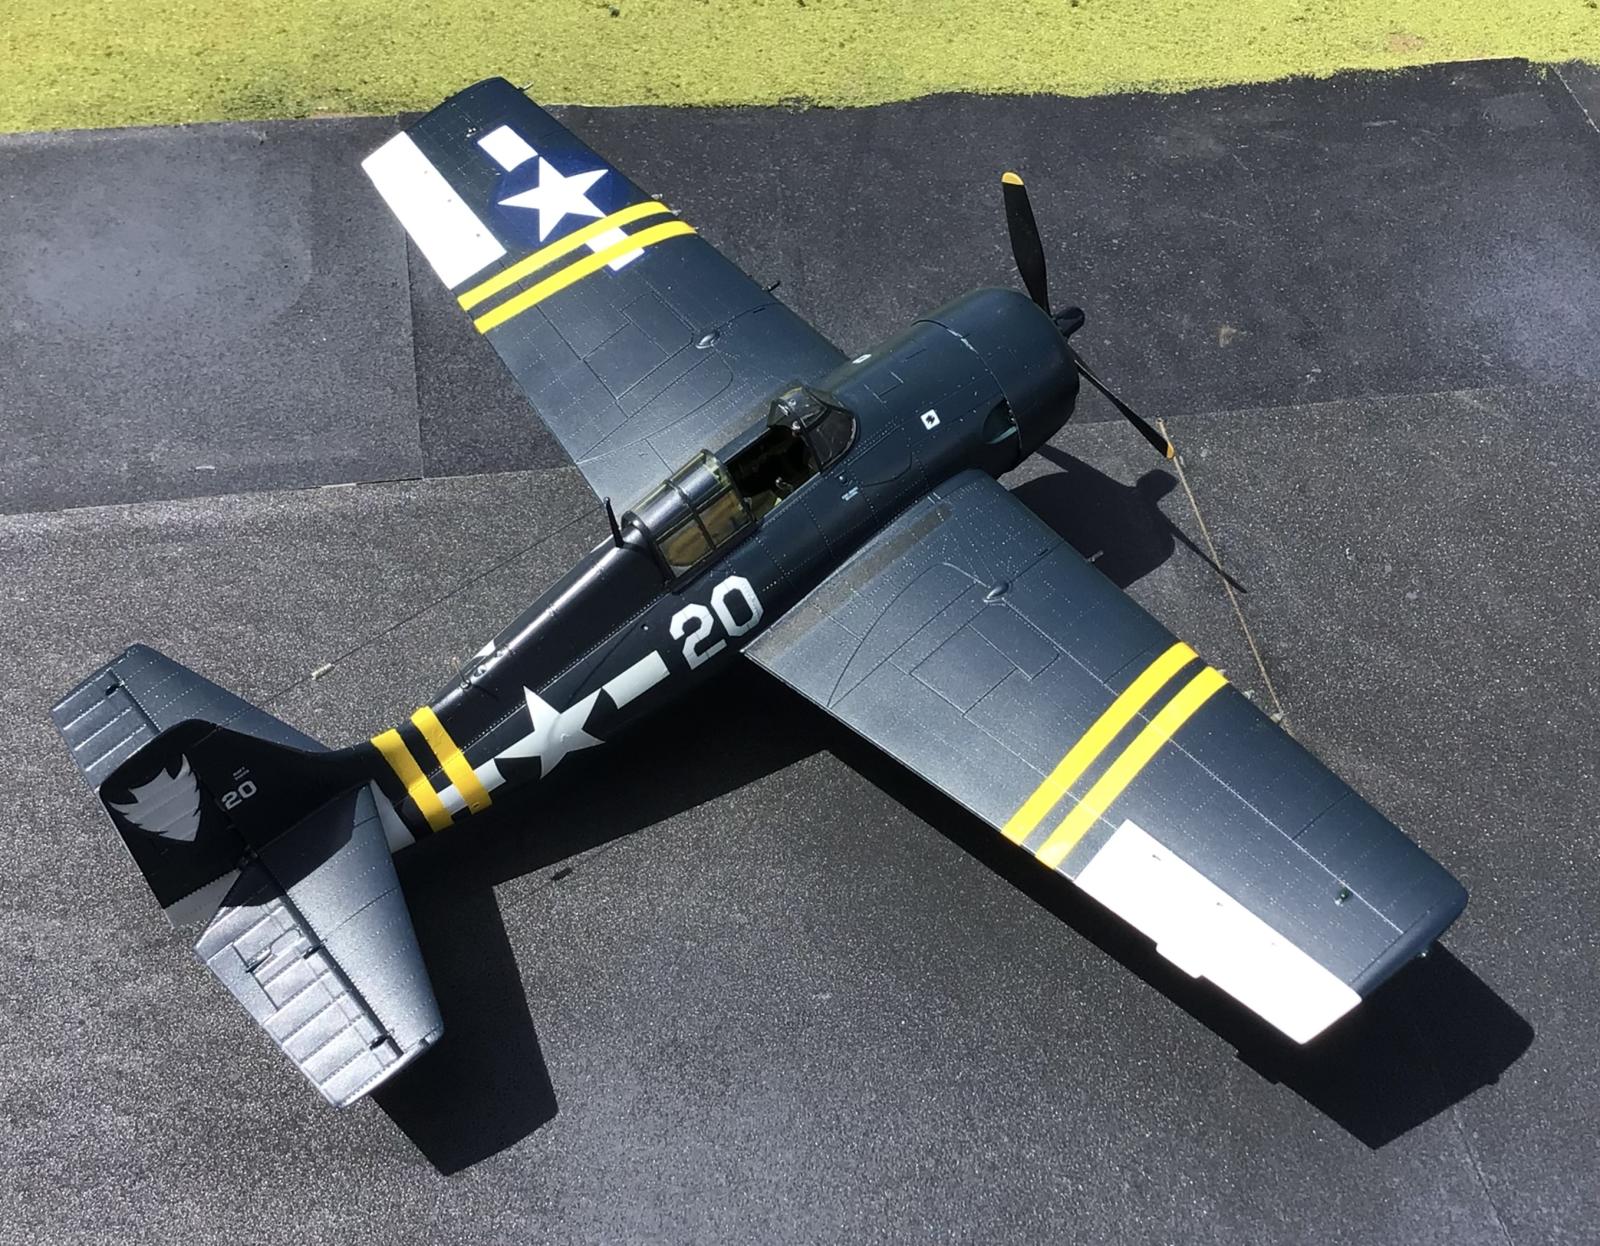
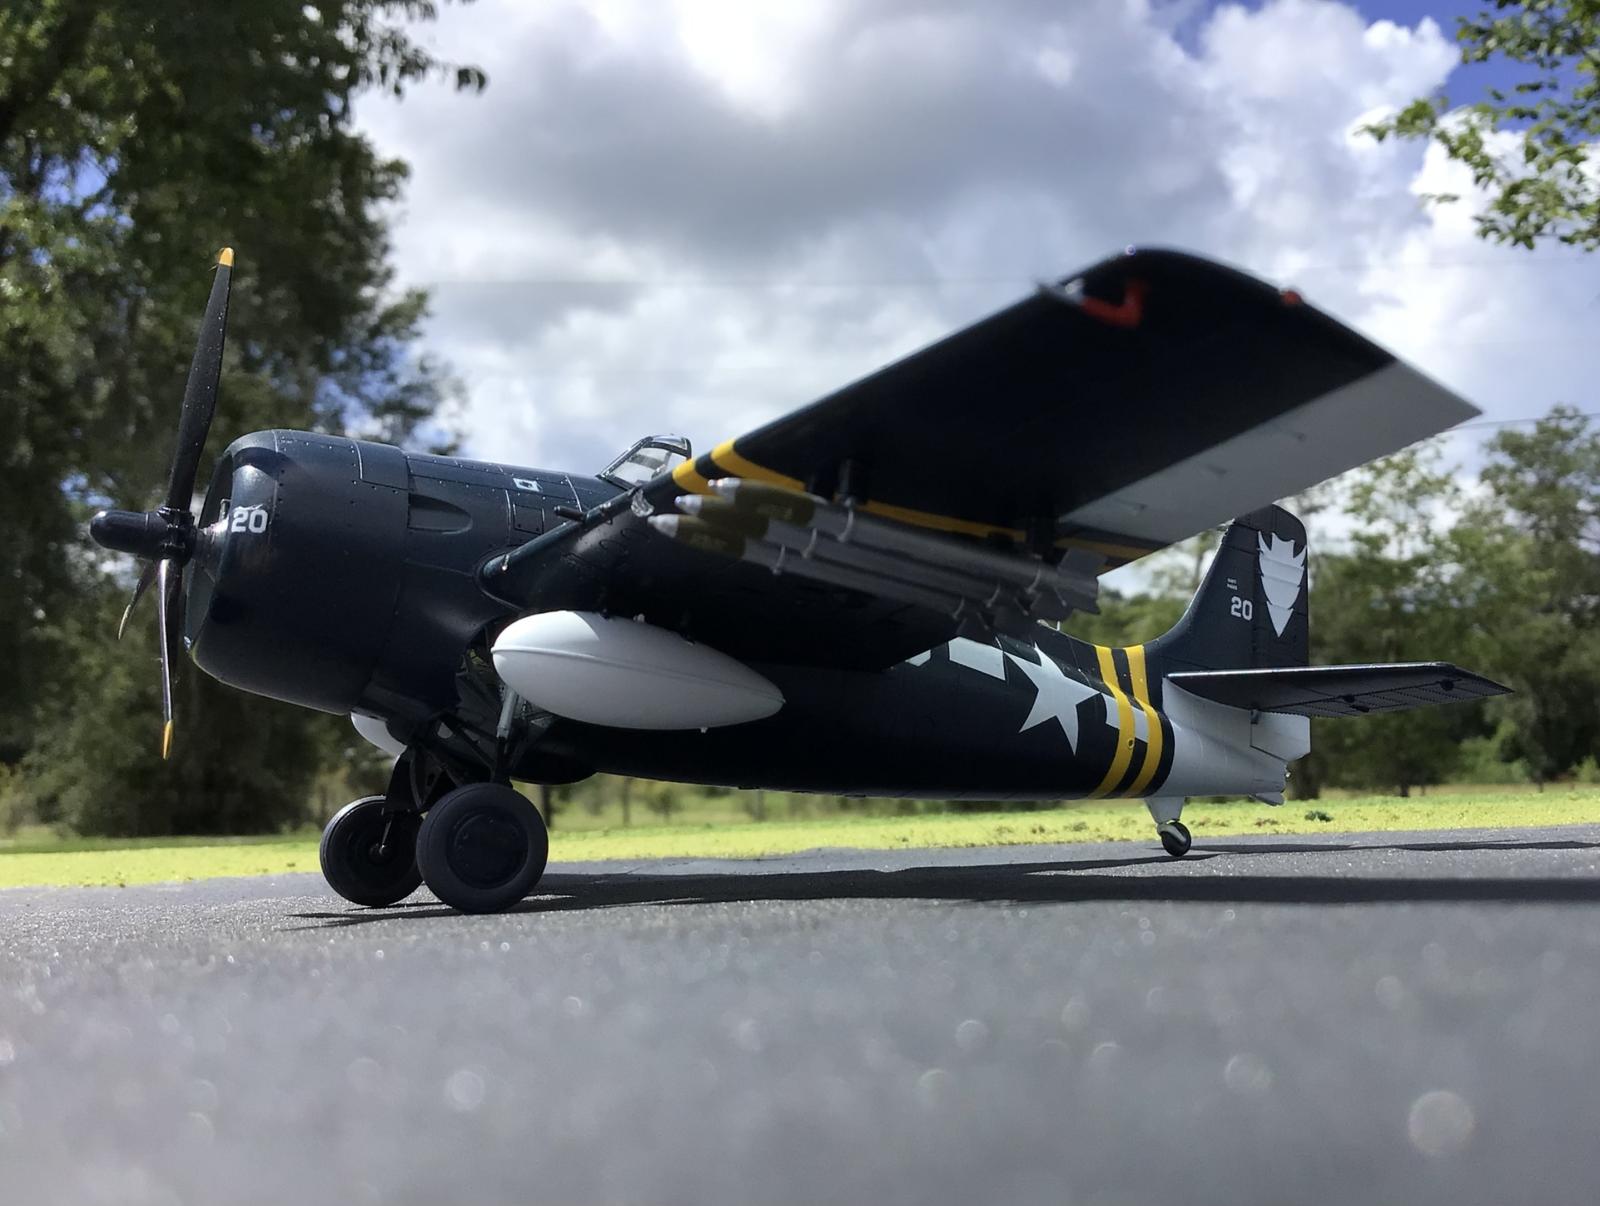
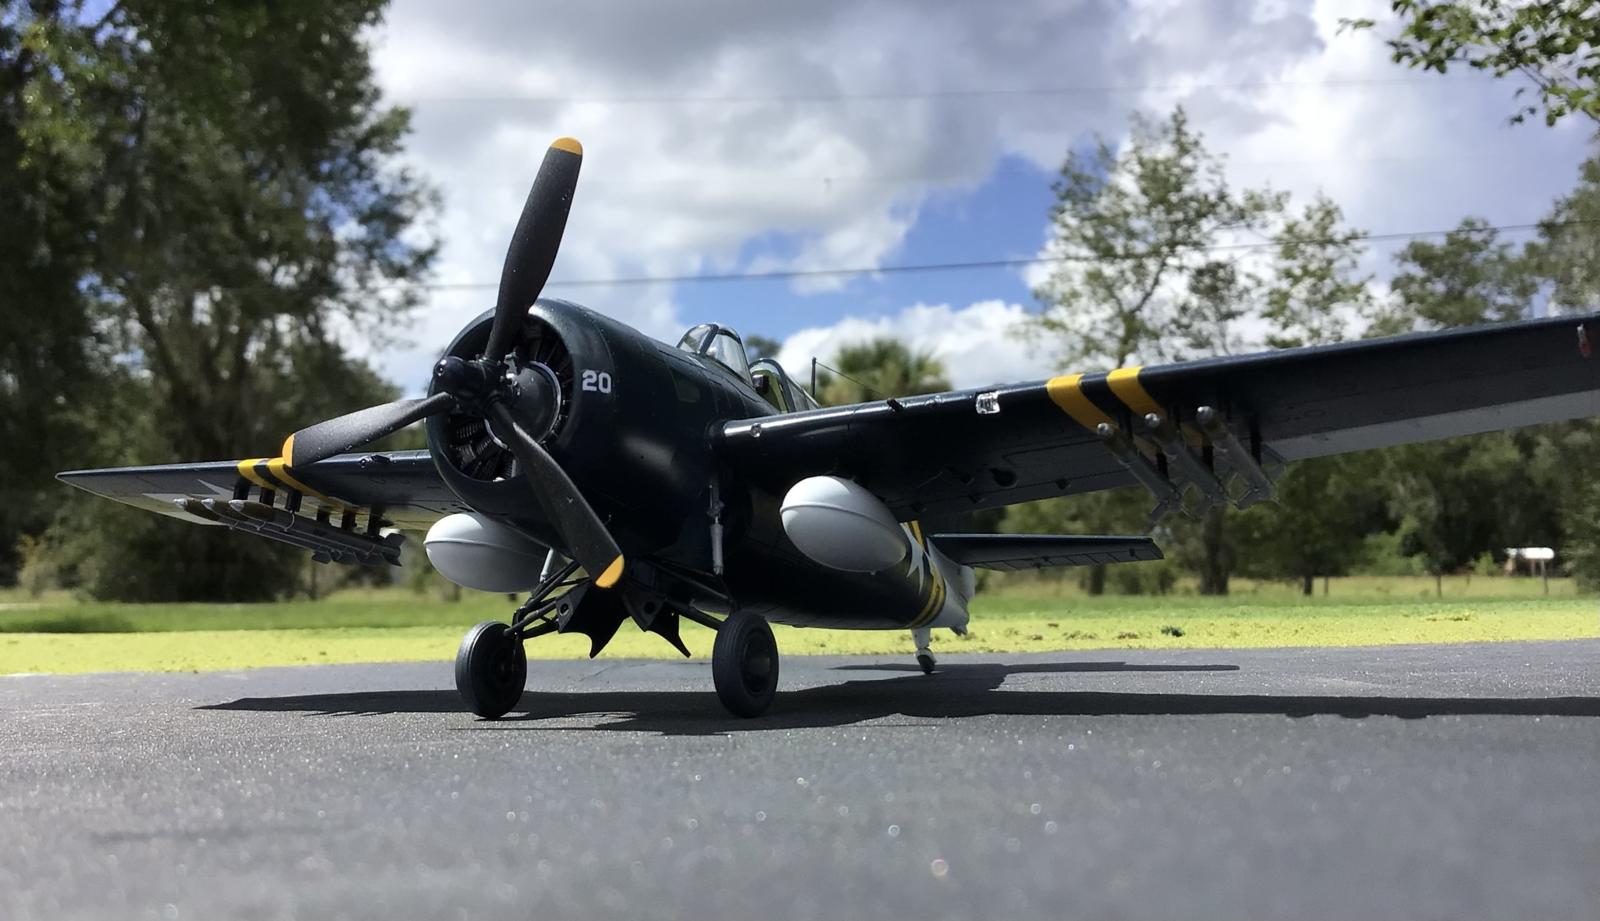
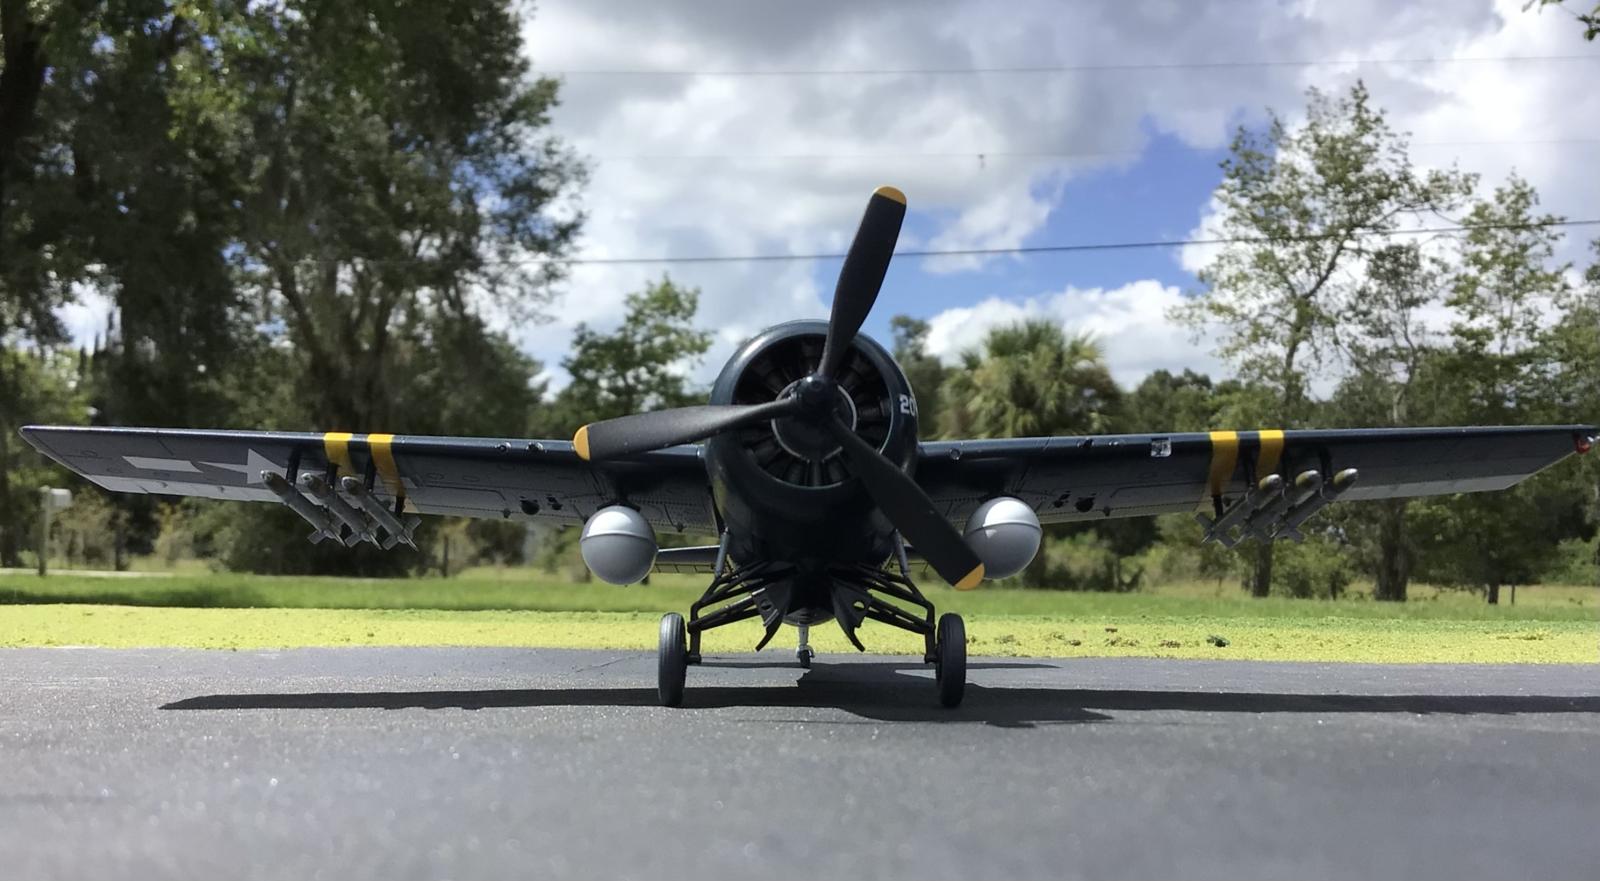
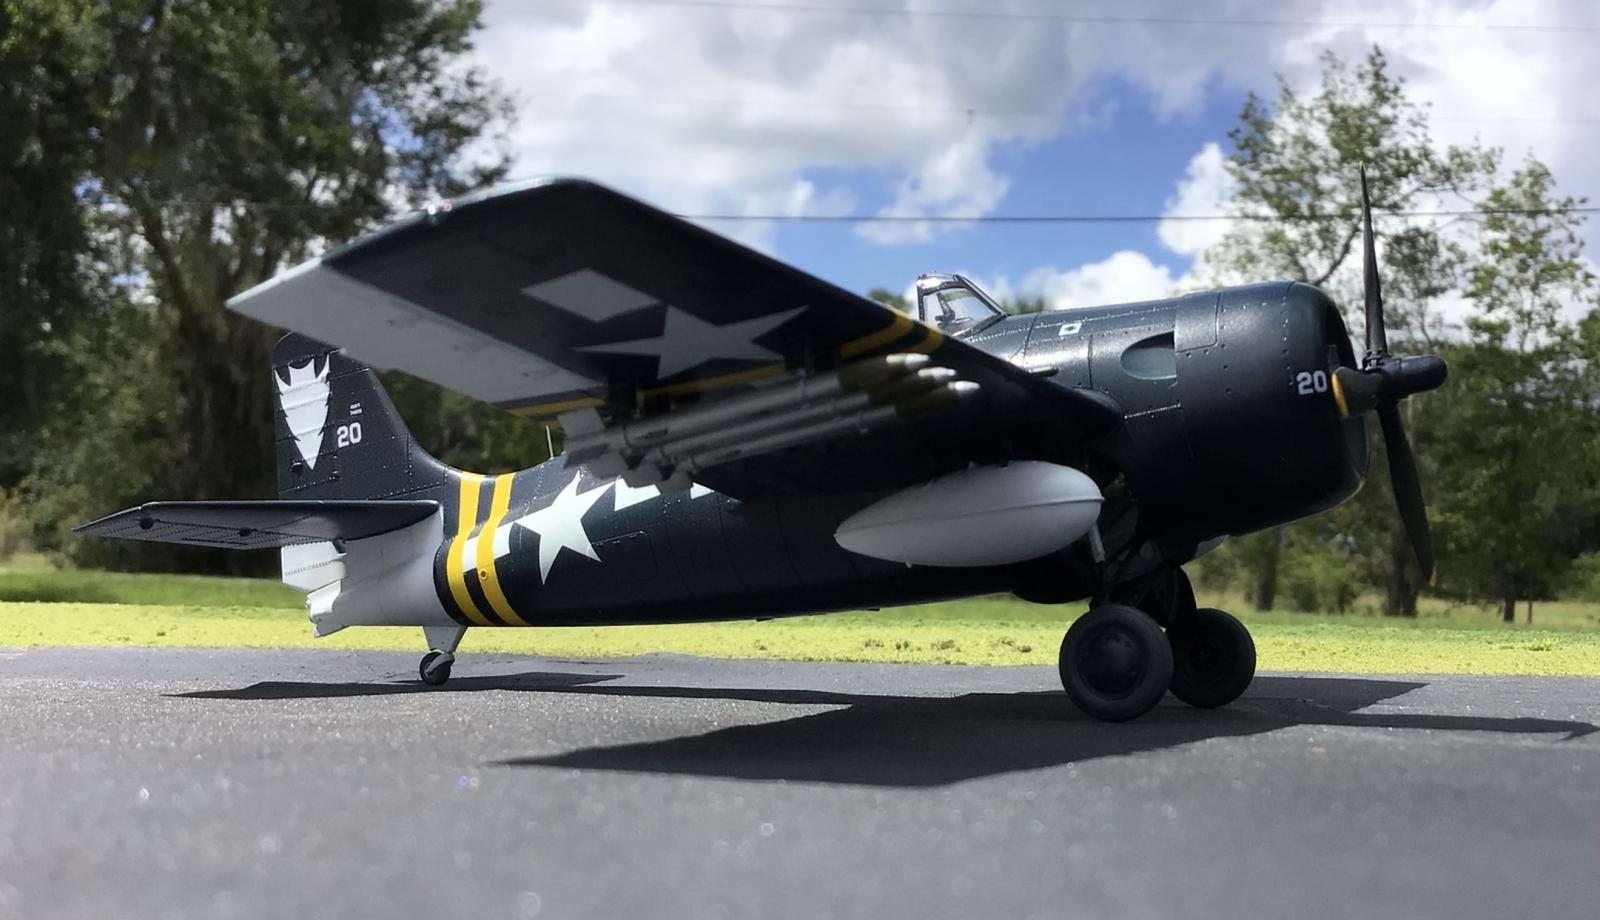
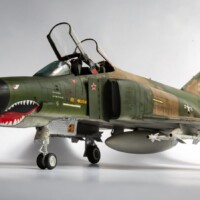
1/48 scale Eduard FM-2 "Wilder Cat" kit number 11175 USS Nehenta Bay, VC-8 August 5th, 1945. Lt / JG O'Connor
When I first heard that Eduard was going to be releasing a brand new FM-2 Wildcat in 1/48 scale, I was very excited. I had the older Hobby Boss FM-2 kit, and it fell short in some areas. So I was not in any hurry to spend as much money on resin replacement parts as I did originally for the kit to simply correct these defects.
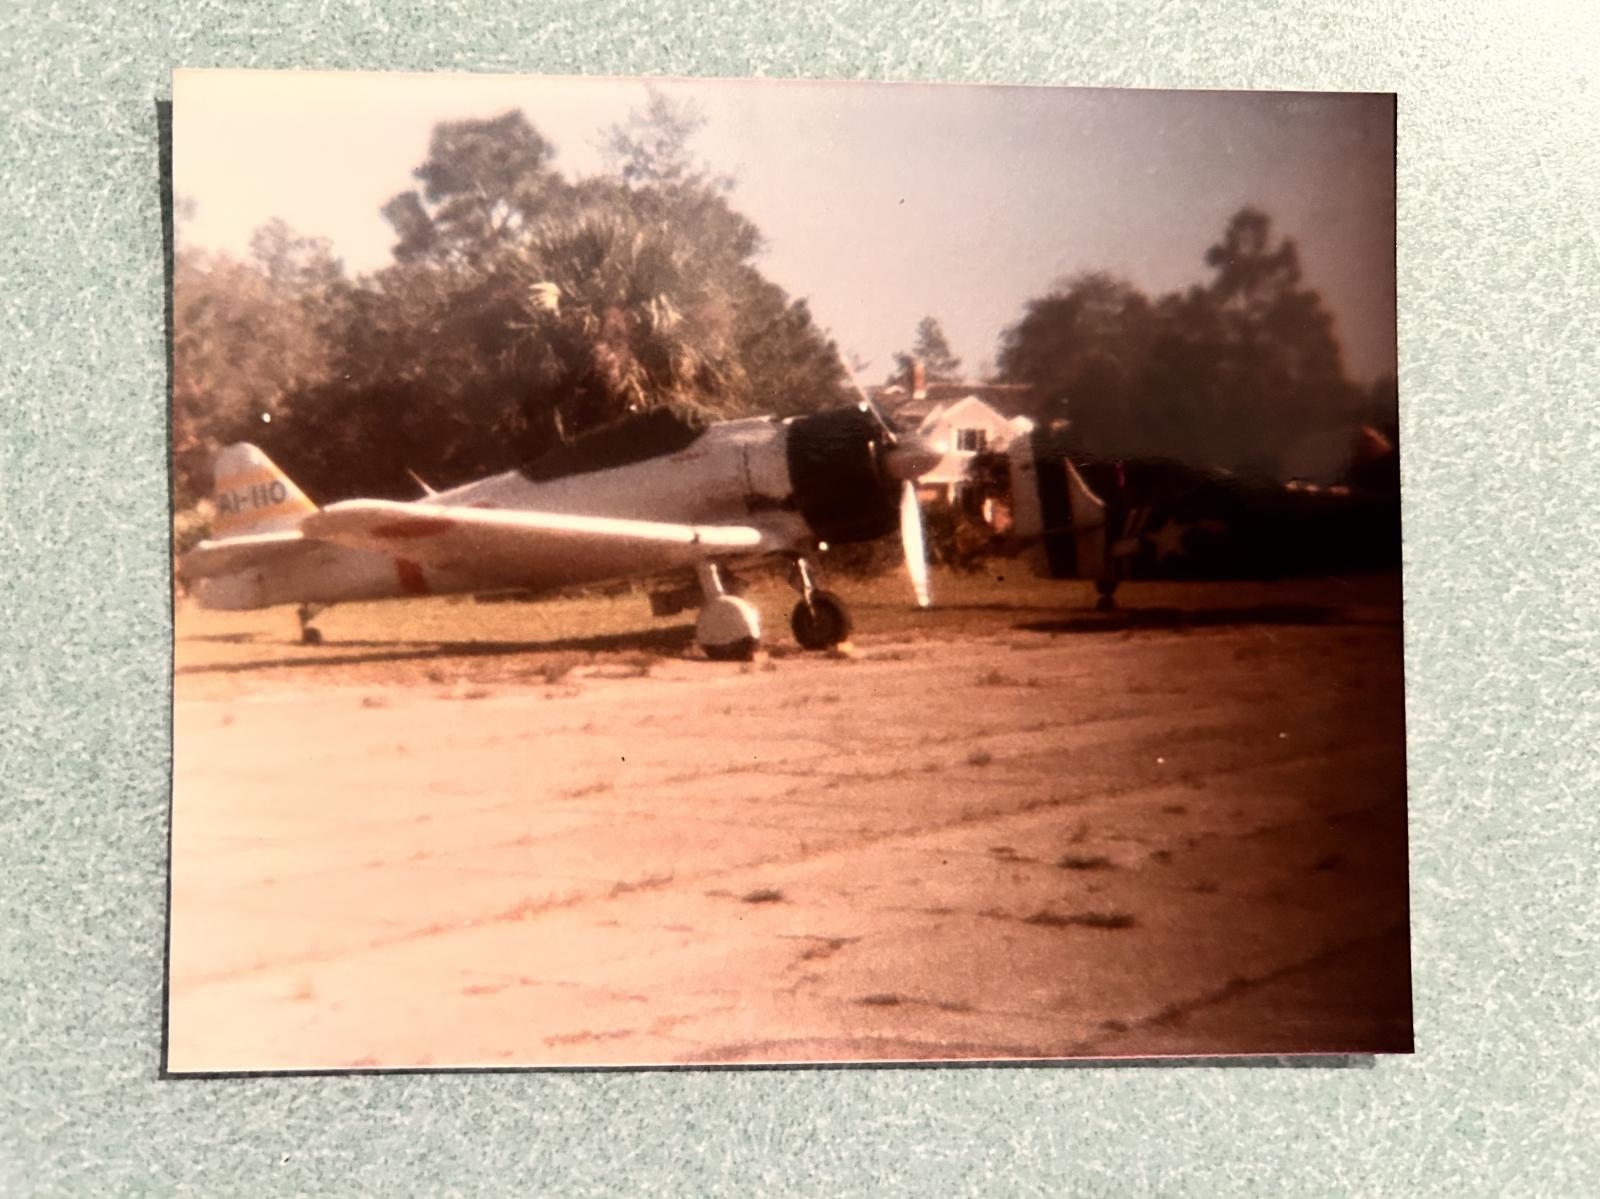
I have always liked the FM-2, ever since I saw a real one in a "mock dogfight" overhead with a converted SNJ that looked like a Japanese Zero as a teenager. I still have pictures of both planes to this very day. Here are a few I took as a kid from that day...
-

- 1. FM-2 is here
This shows the FM-2 parked next to the "Zero".
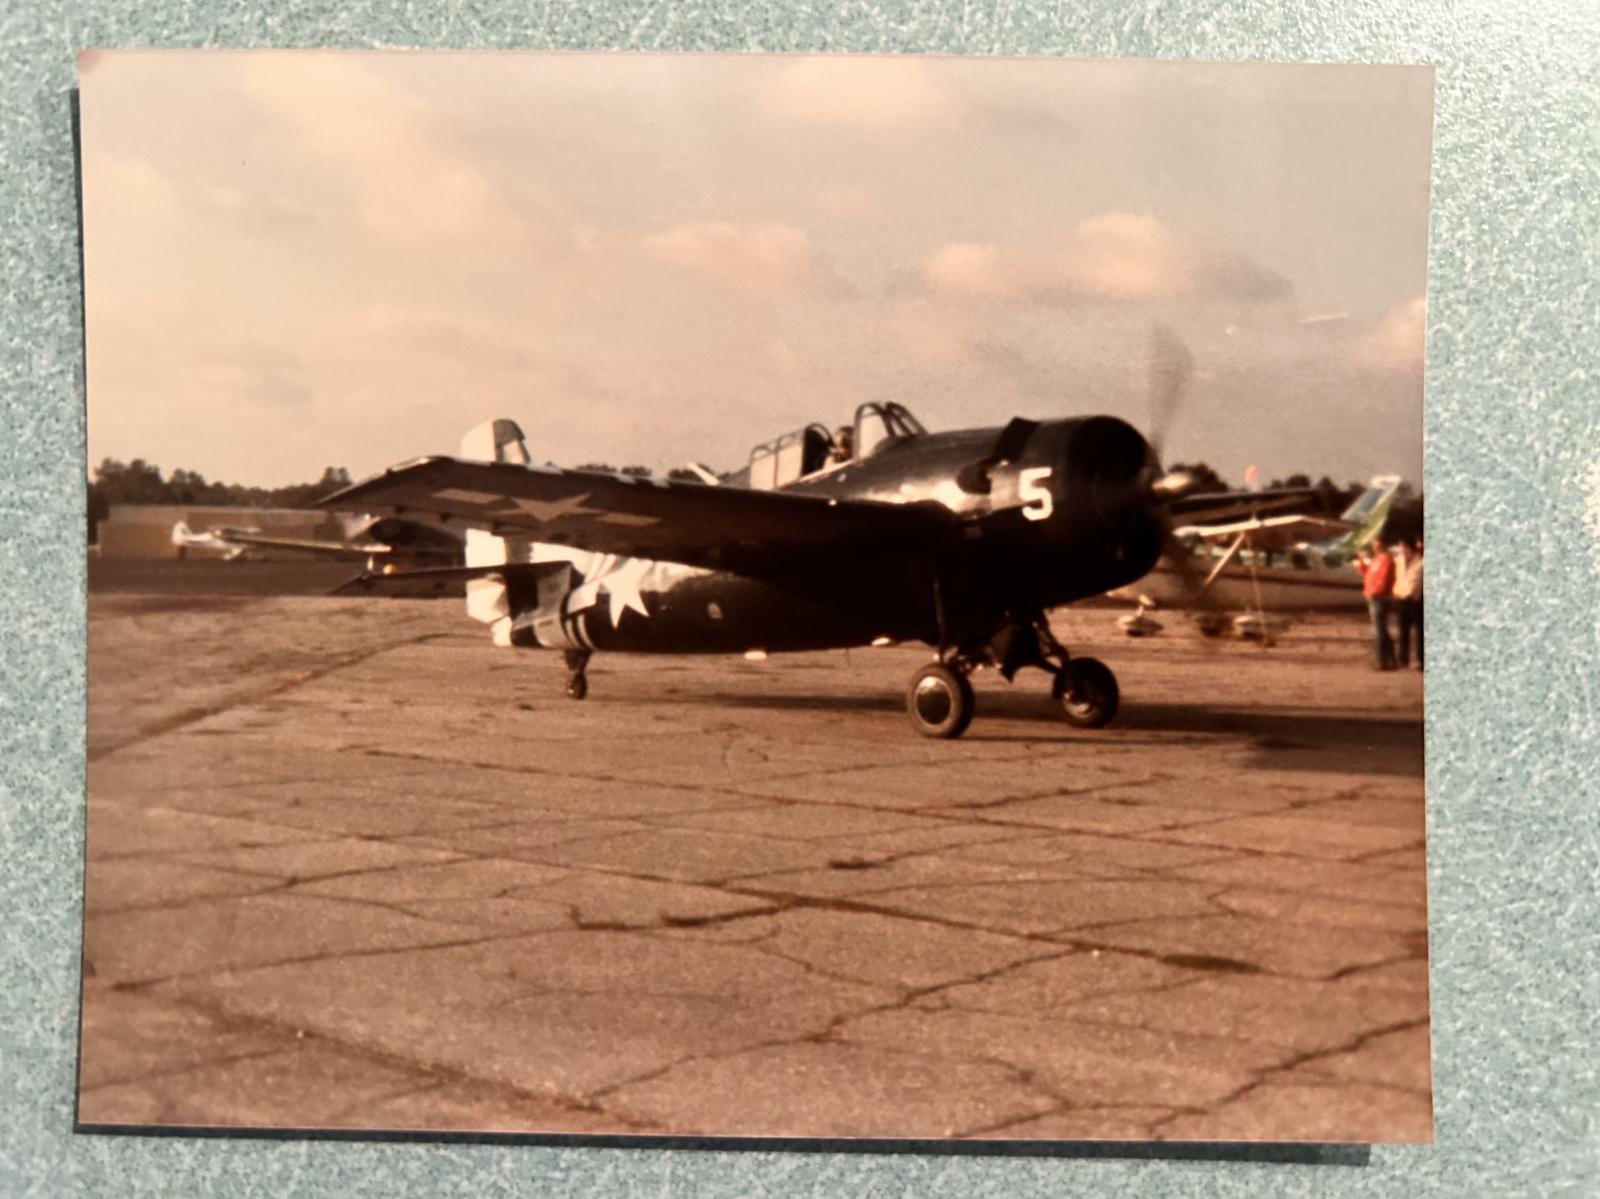
Here is the victorious FM-2 returning from battle...
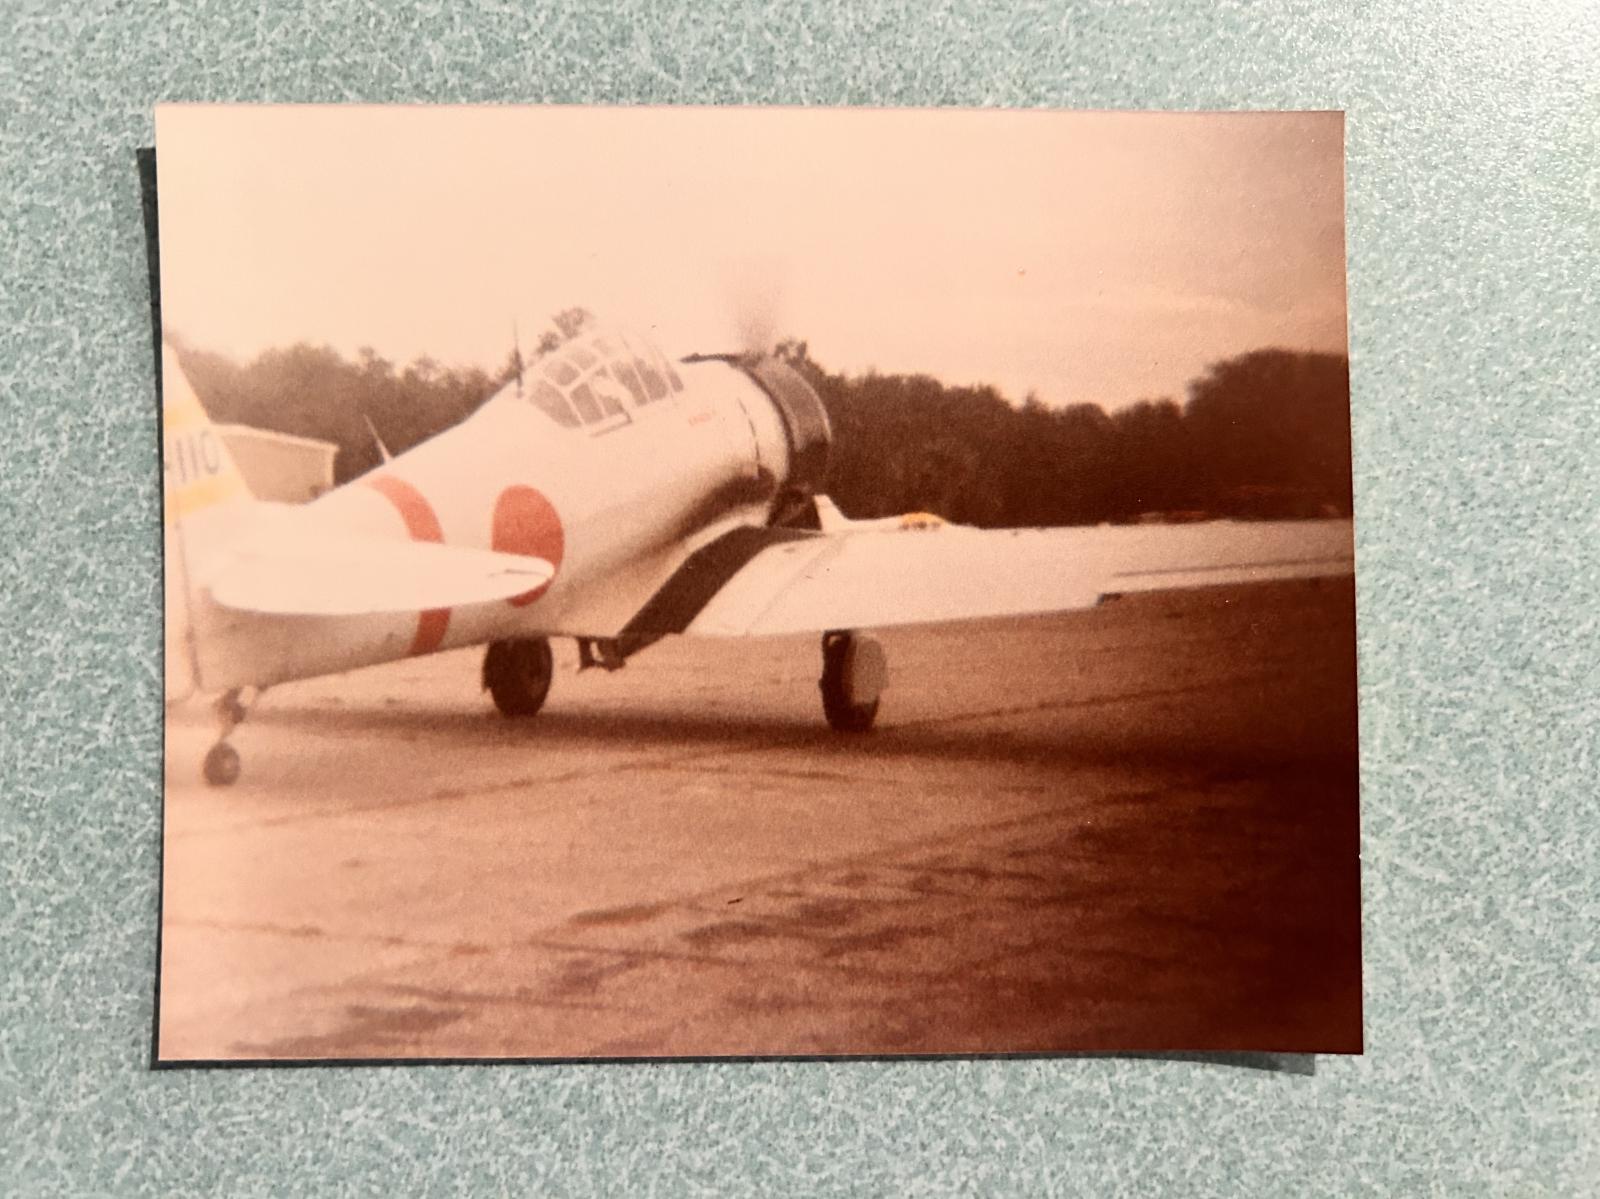
And the Zero (which is actually a T-6 or SNJ conversion). The smoke system worked VERY good that day !
Fast forward to a few weeks ago, and I heard these new Eduard FM-2's were going to be at the IPMS show in Texas.
I was hoping to get a few pictures of the plastic, if they were on display. So I asked a good friend if he would be so kind to take these pictures for me, since there was no way I could attend the show in person. He told me there were none open for inspection, adding they were available for purchase though.
Normally I would have jumped at the opportunity to grab one... but we just had to replace the tires on our truck. This took away any chance of that happening. I simply couldn't afford it, as the new set of truck tires set us back considerably.
This same friend told me that he was sending me a souvenir from the show, and to look out for it in the mail soon. I was expecting a show flyer or something like that...
Boy was I wrong ! ... and boy do I ever owe a great big THANK YOU to the anonymous friend / kit donor. This was indeed the perfect gift. I can't thank you enough.
Instead, I had one of these brand new Eduard FM-2's staring me in the face when I opened the box... 🙂 You can imagine my surprise.
I was SO excited that I immediately cleared off the ongoing projects and got busy working on this one.
Lately I have been accumulating some of the newer Eduard kits, and I had some of the older stuff like their 1/48 scale P-39's, a Hawker Tempest, and a Bf-108 Taifun in the model stash. But for some reason or another, I always steered away from building one of their kits mainly because I heard they were a "fiddly" build.
So this FM-2 also is my very first Eduard build... ever. What a very pleasant building experience it was.
I have a build journal posted here on Imodeler as a part of the Jim Sullivan memorial group. You can see what went into this model during the construction phase. Here is a link to the journal if you are interested.
I did a lot of research on how this plane should be painted. I found there were a few errors in the color call outs as indicated on the instructions.
On the very first 200 FM-2's constructed, the cockpit color was not "Interior Green" as listed on the instructions. Instead it was likely a Dull Dark Green, or possibly even a color called Bronze Green. My bet would be on the Dull Dark Green here.
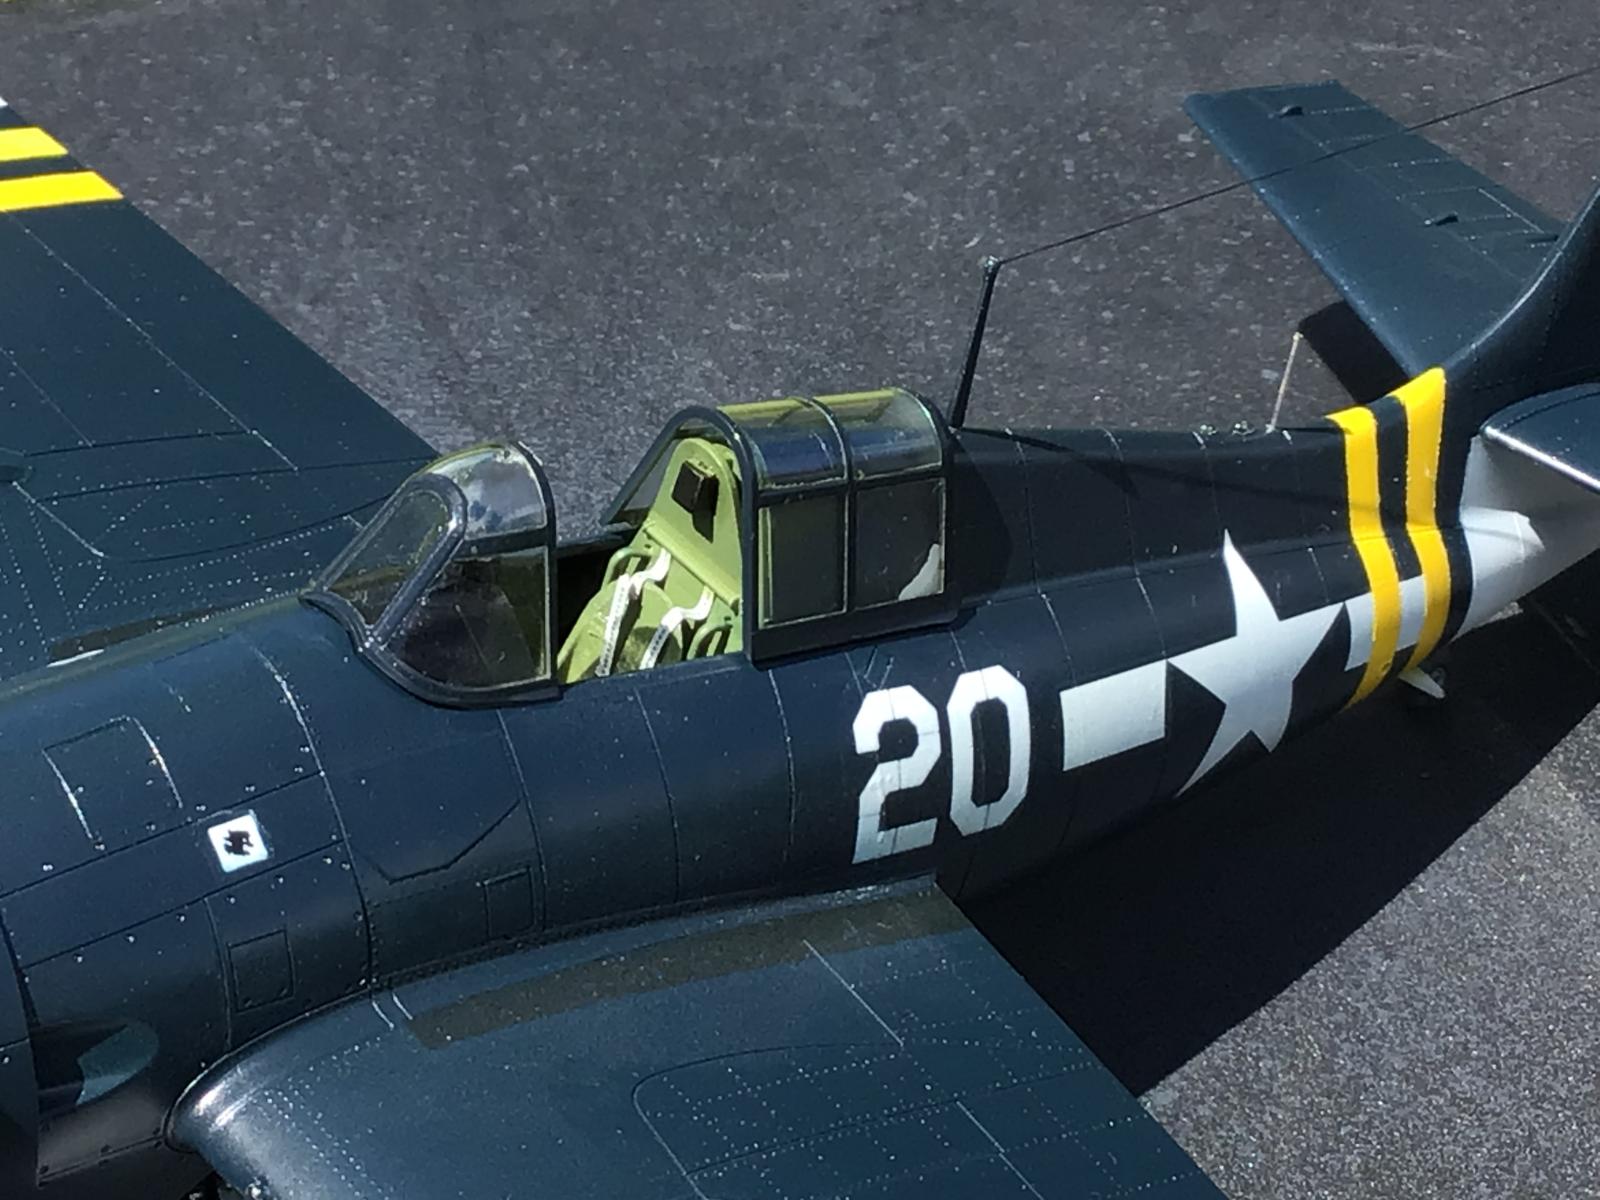
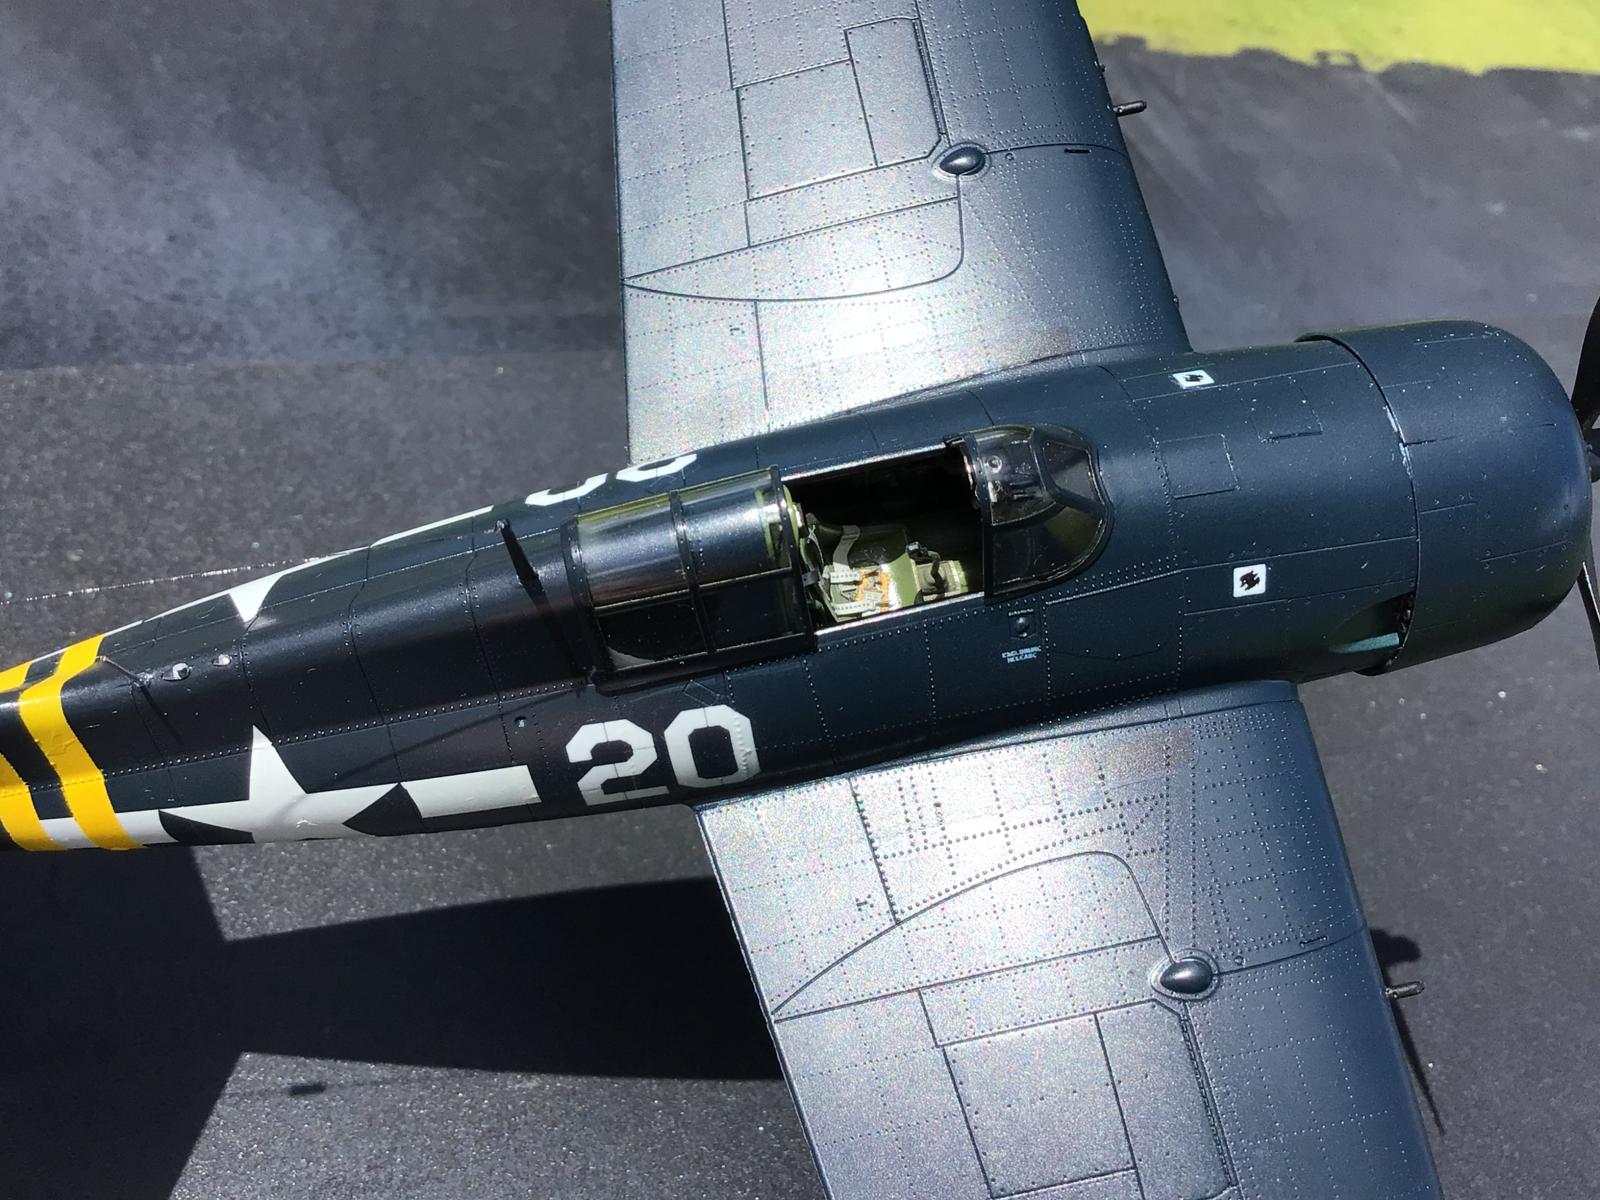
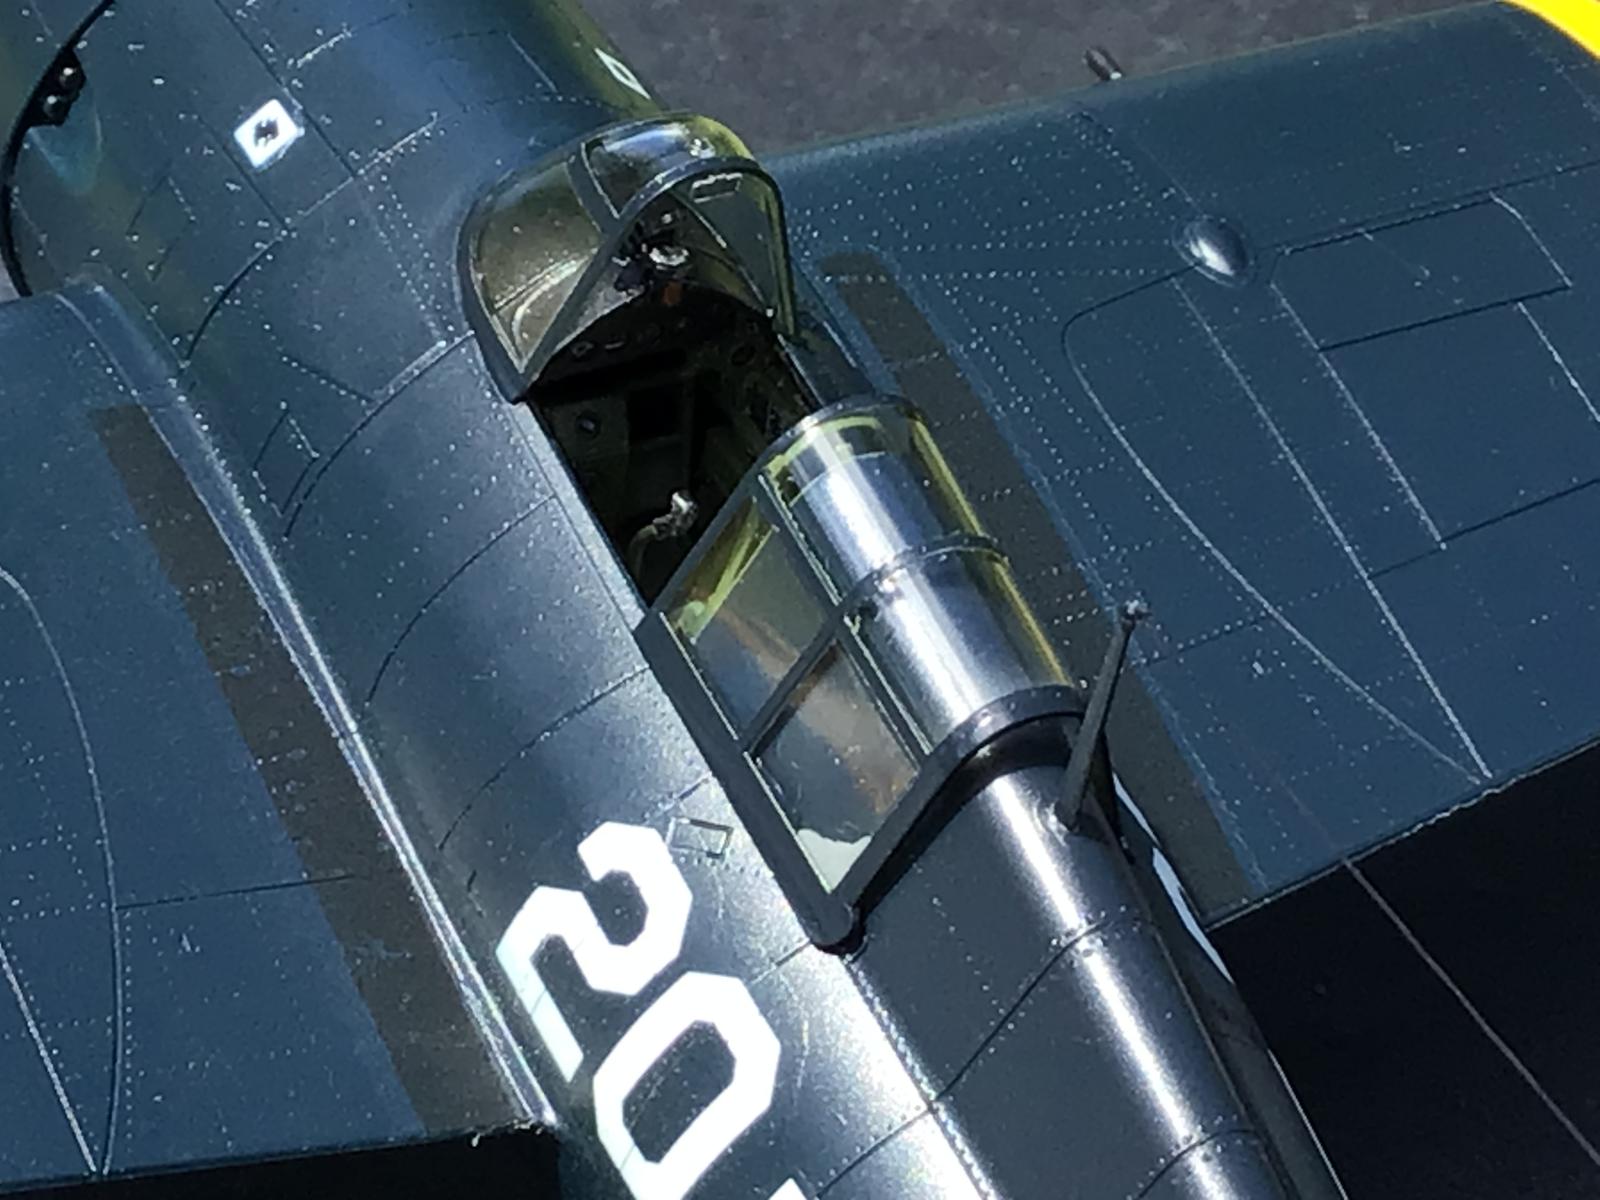
However, all FM-2 seats were painted using Interior Green throughout the production run. On this particular FM-2 you see here, the entire cockpit was painted using Interior Green. It was also approximately the 690th aircraft into the production run after where rockets would be installed at the factory. I'll cover the rockets a little bit later though.
The area ahead of the cockpit, and just behind the engine where the landing gear retract into should be painted in "Grumman Gray", and not the same color as the underside of the aircraft as indicated in the kit instructions. The same thing goes for the inside of the engine cowling.
This is proven by the recovery of several original wartime era FM-2's that were lost in Lake Michigan during the war during training exercises. These planes were in remarkable condition when pulled up from the deep, with one still having air in the tires !
You can clearly see these original colors present in the pictures of these planes after they were onshore again after 70 plus years underwater.
There is a tricky spot to watch out for during construction. This involved the assembly of the turbo charger (or what possibly could be the engine oil cooler).
Here I made a mistake and managed to somehow swap some of the parts around incorrectly. This didn't allow me to install the front lower fuselage cover later.
-
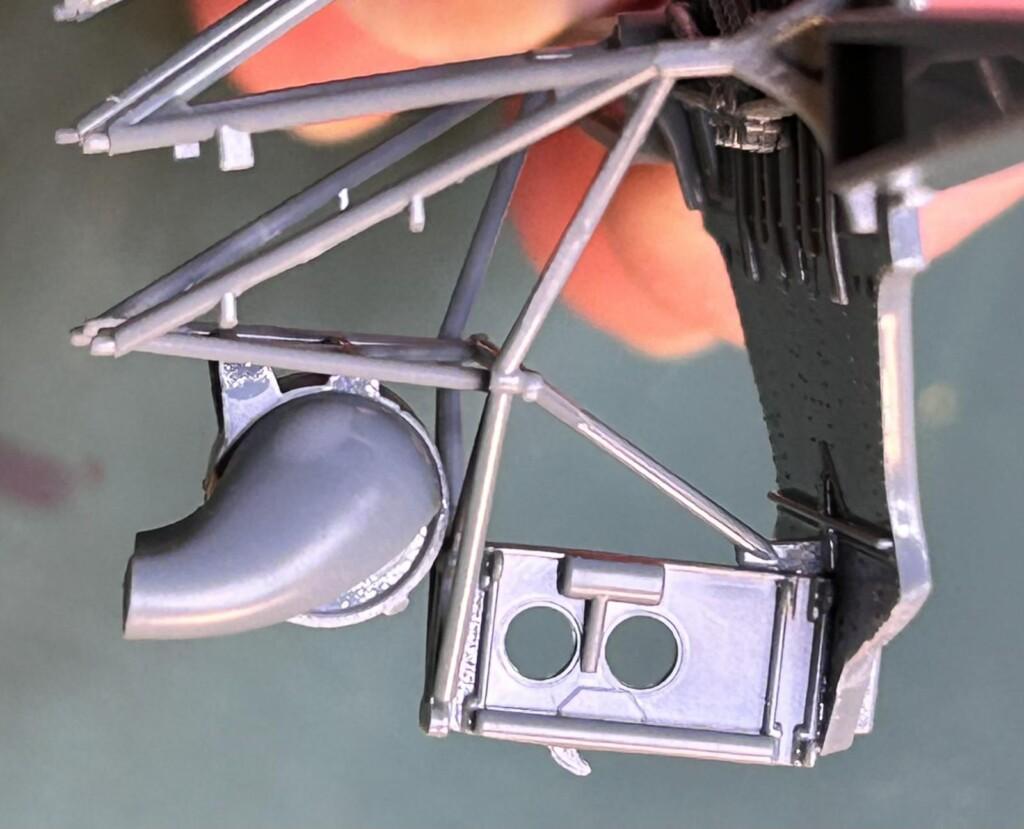
- 1. This is wrong !
Thankfully I was able to carefully cut the assembly out and correct things.
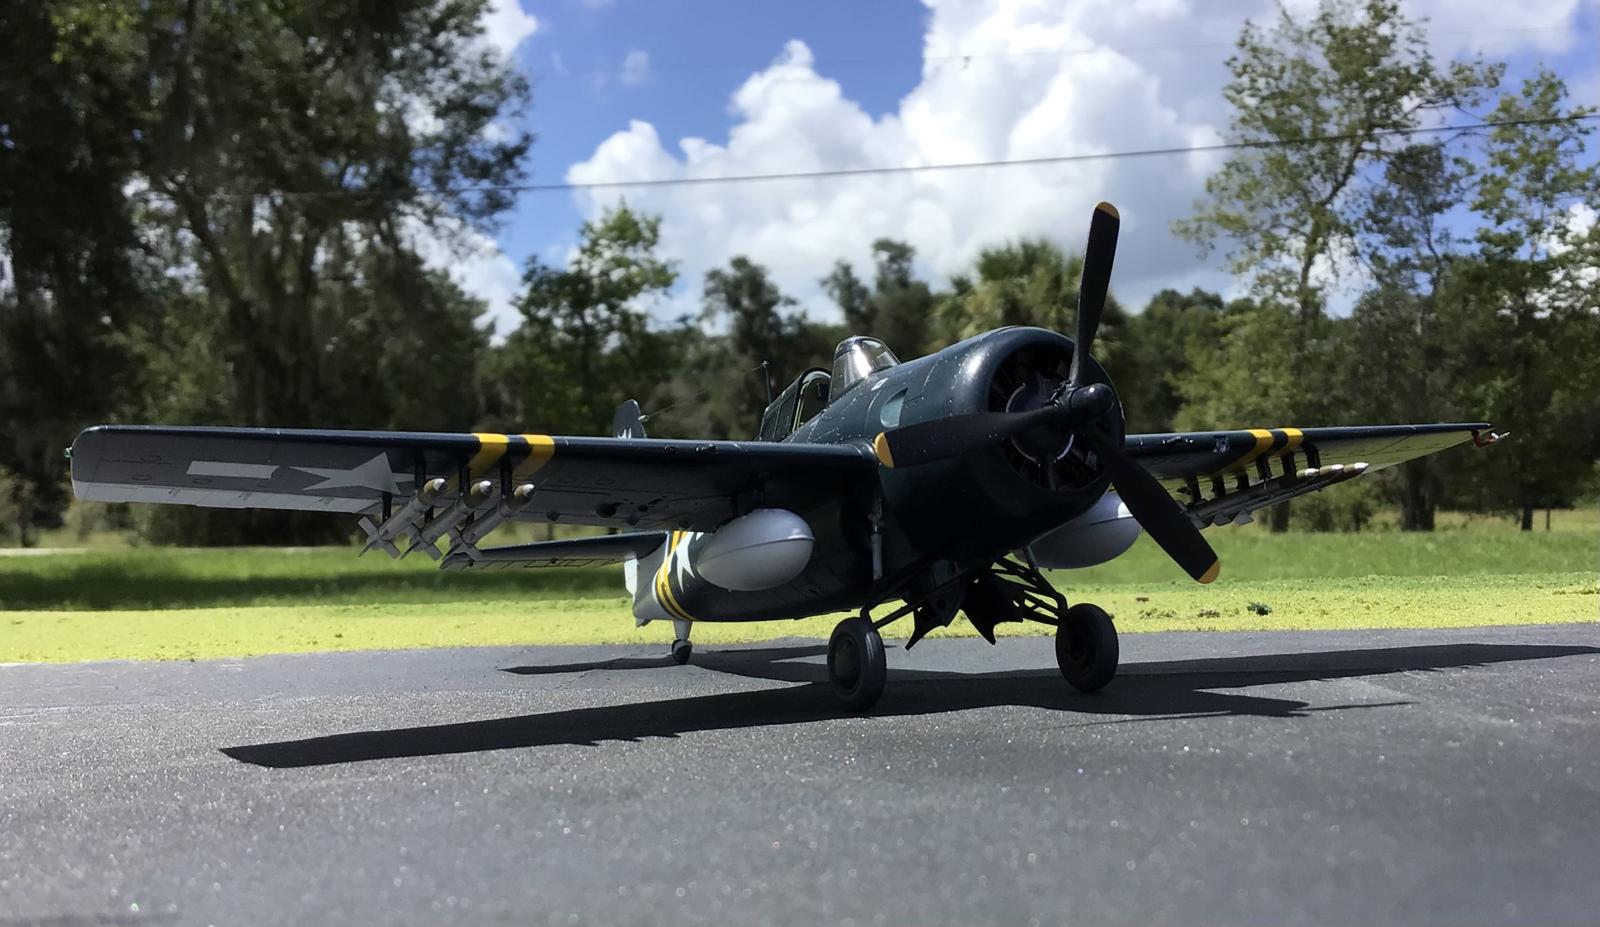
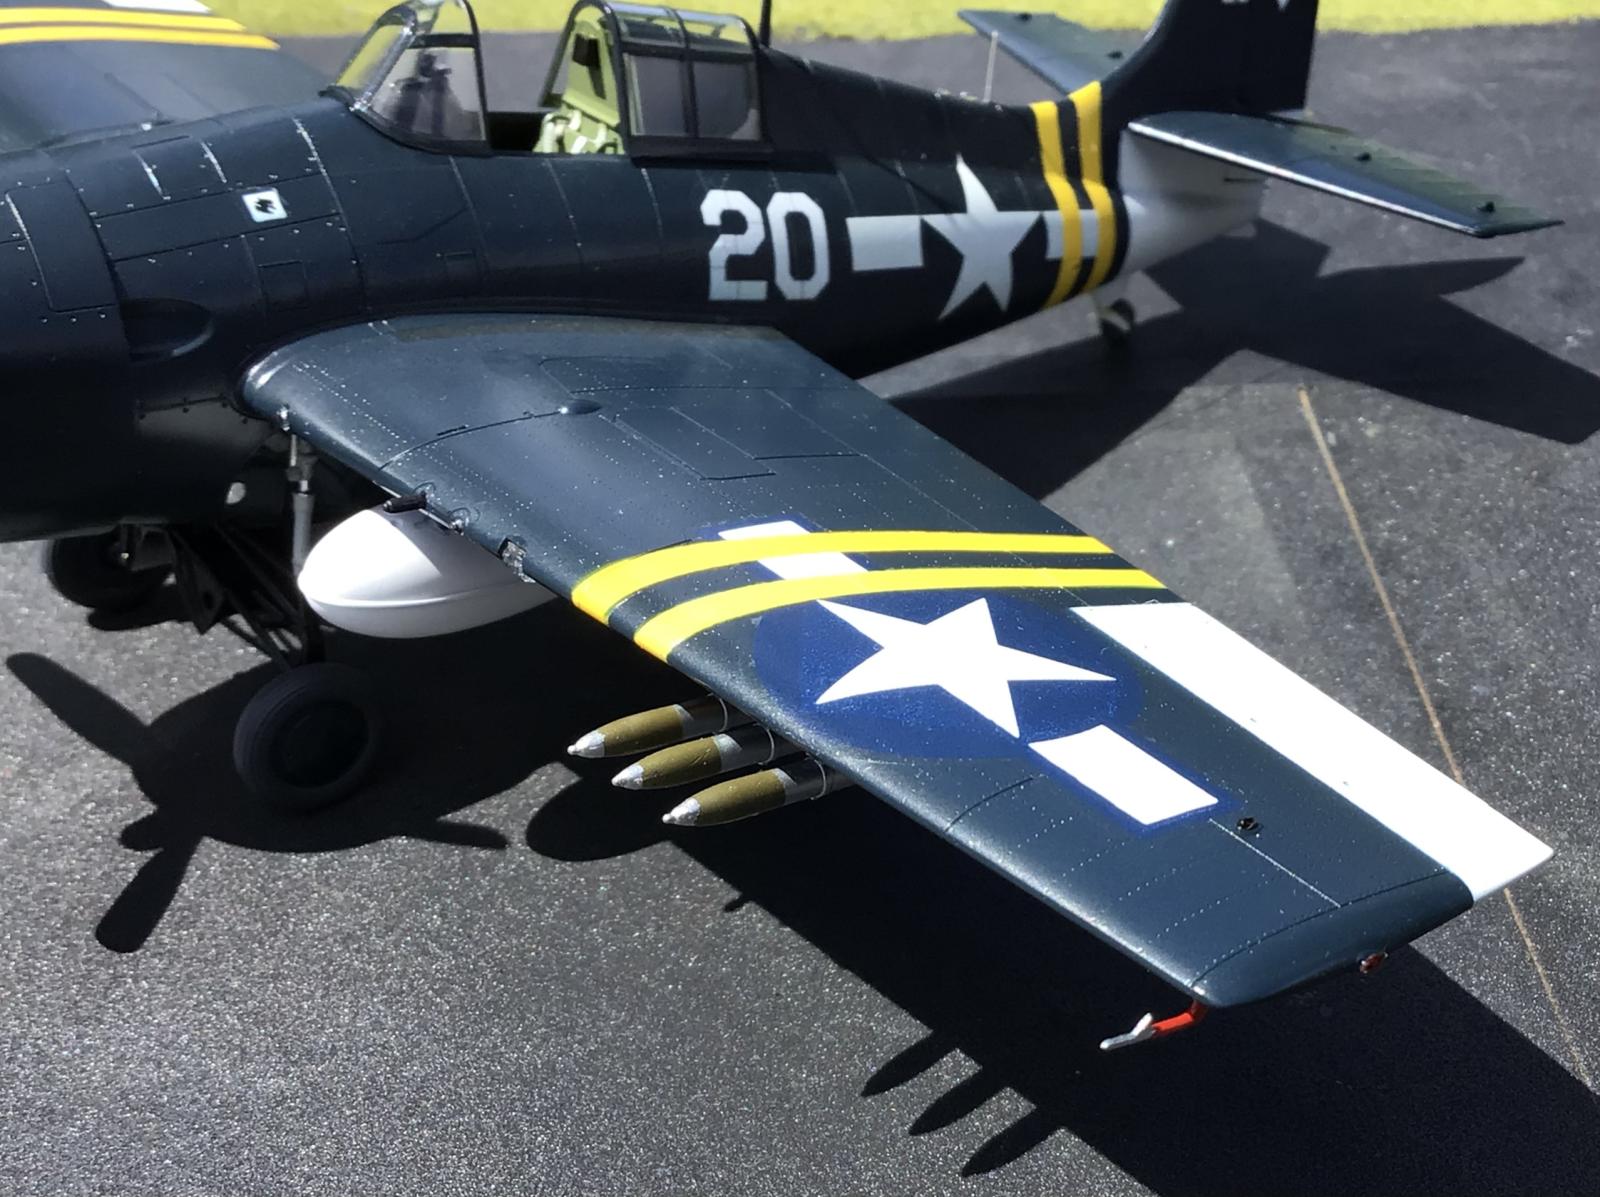
The other thing to look out for is in regards to the wing mounted rockets. The main rocket body could have been painted using a Light Gray or an Aluminum color. I have found several original wartime era color photos that show this. The instructions call for a Light Gray color... which is partly correct. I cover all of this in the build journal if you are interested.
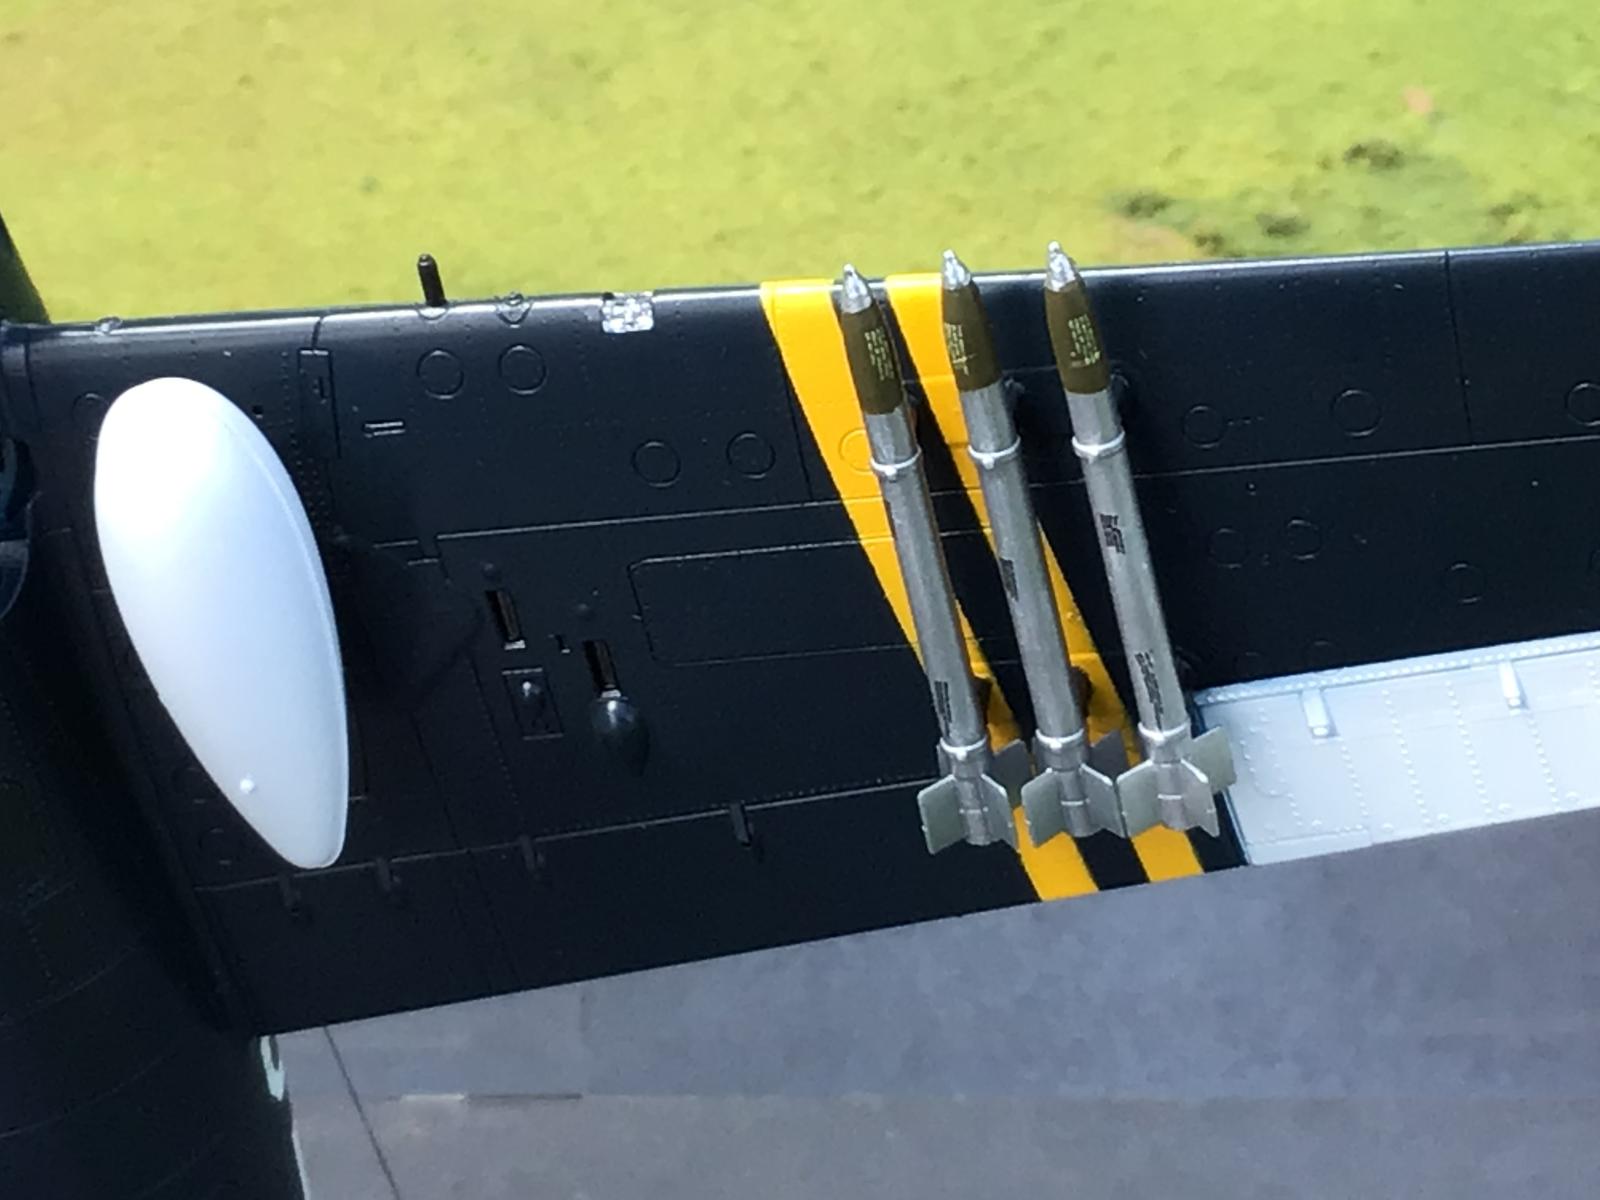
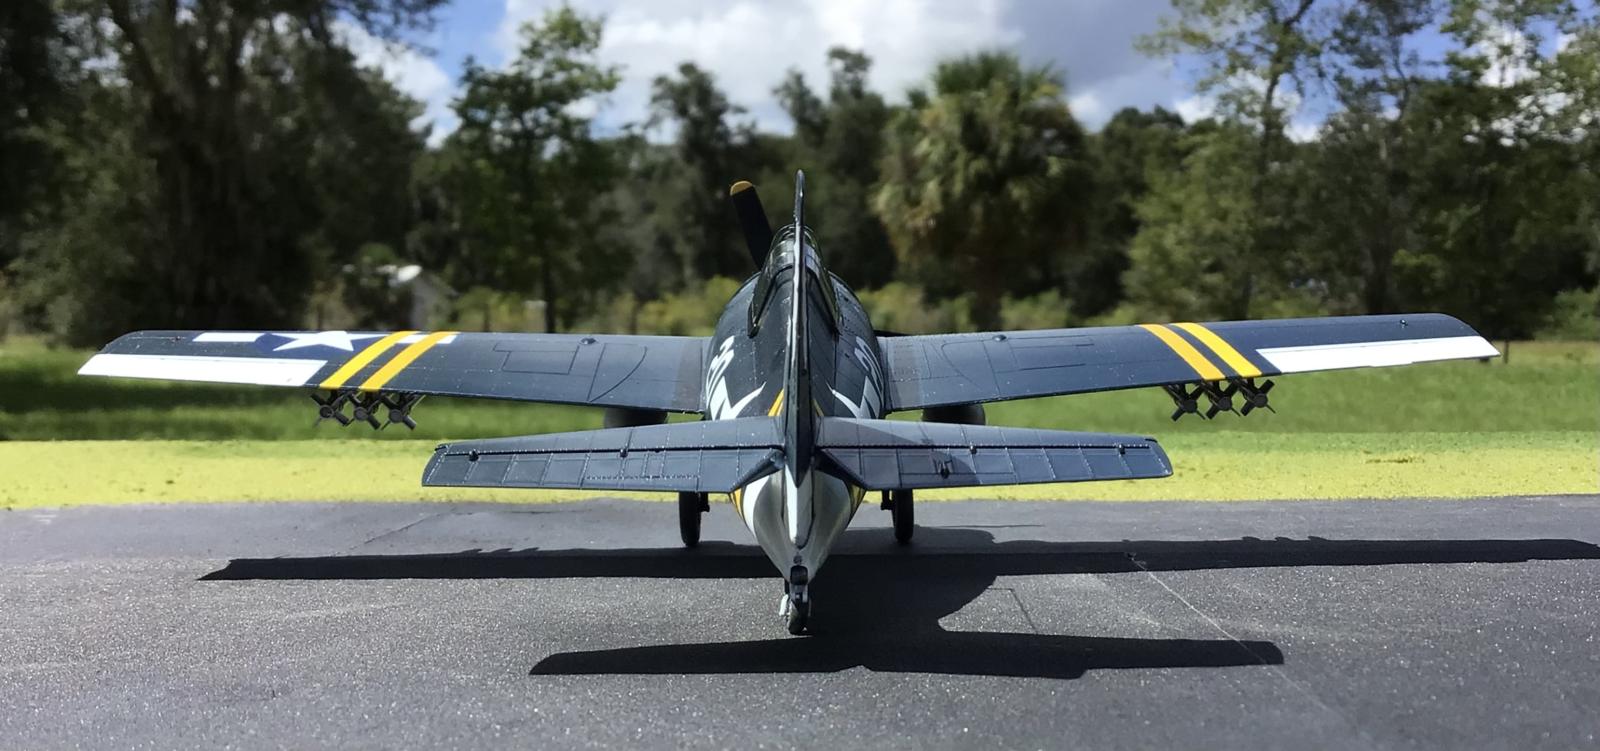
These underwing rockets were only installed on the last 1,400 aircraft from the factory. The earlier FM-2's didn't have them. I chose to paint mine in an Aluminum color.
But the rockets could have been added in the field once the plane was placed in service. So it pays to check your references here.
Tom Cleaver (@tcinla)
Tom Cleaver joined me in construction of his plane too. He posted a few pictures of his on my journal. Thanks Tom !
Tom was also able to finish his up about a week before I finished mine. His FM-2 has already been posted here on Imodeler, and at another modeling website M2.
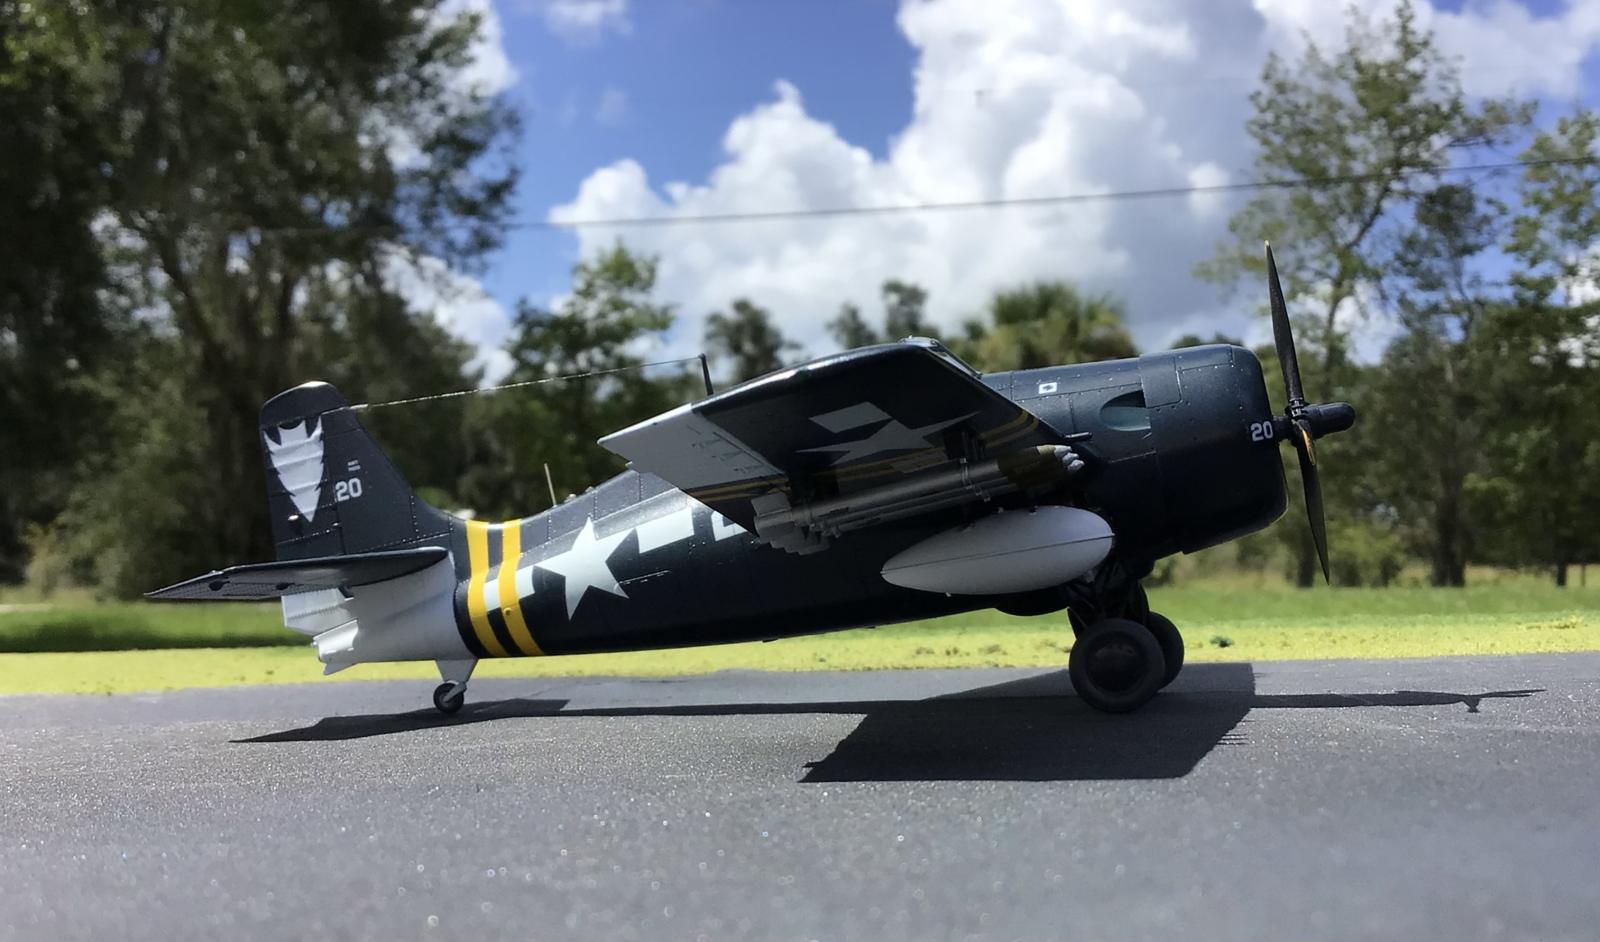
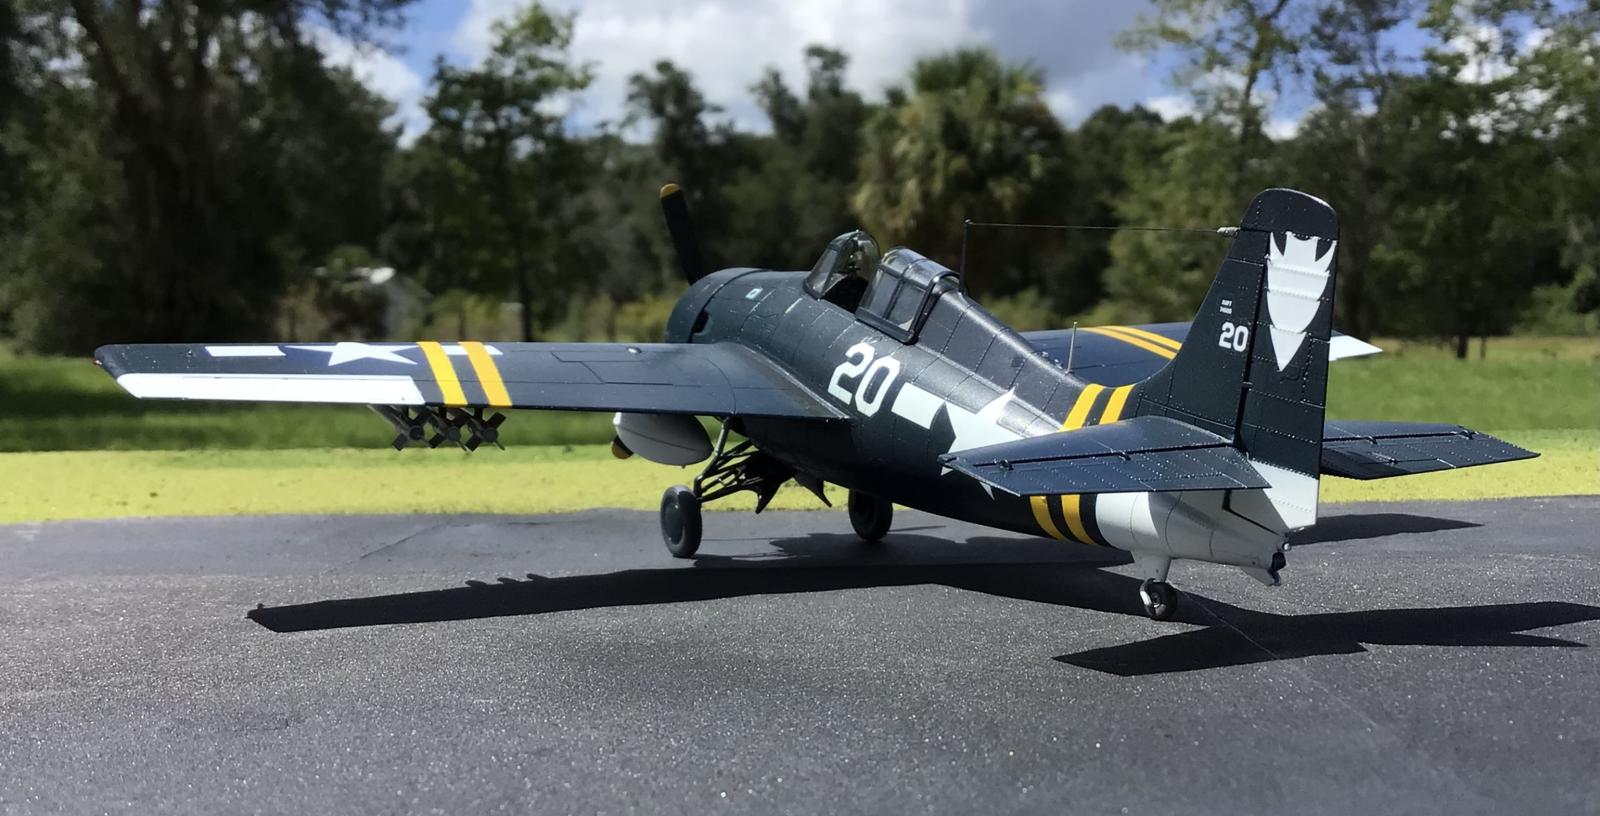
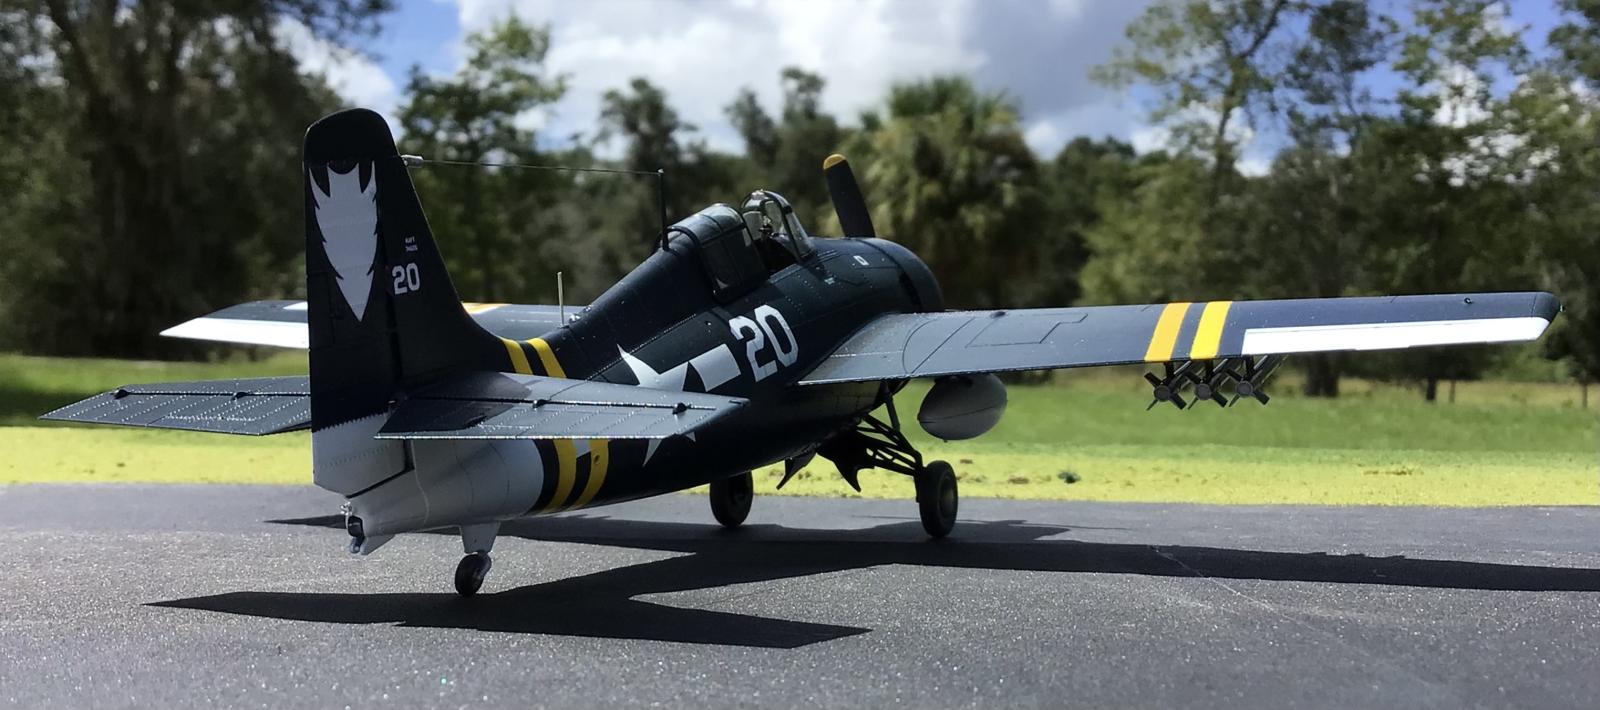
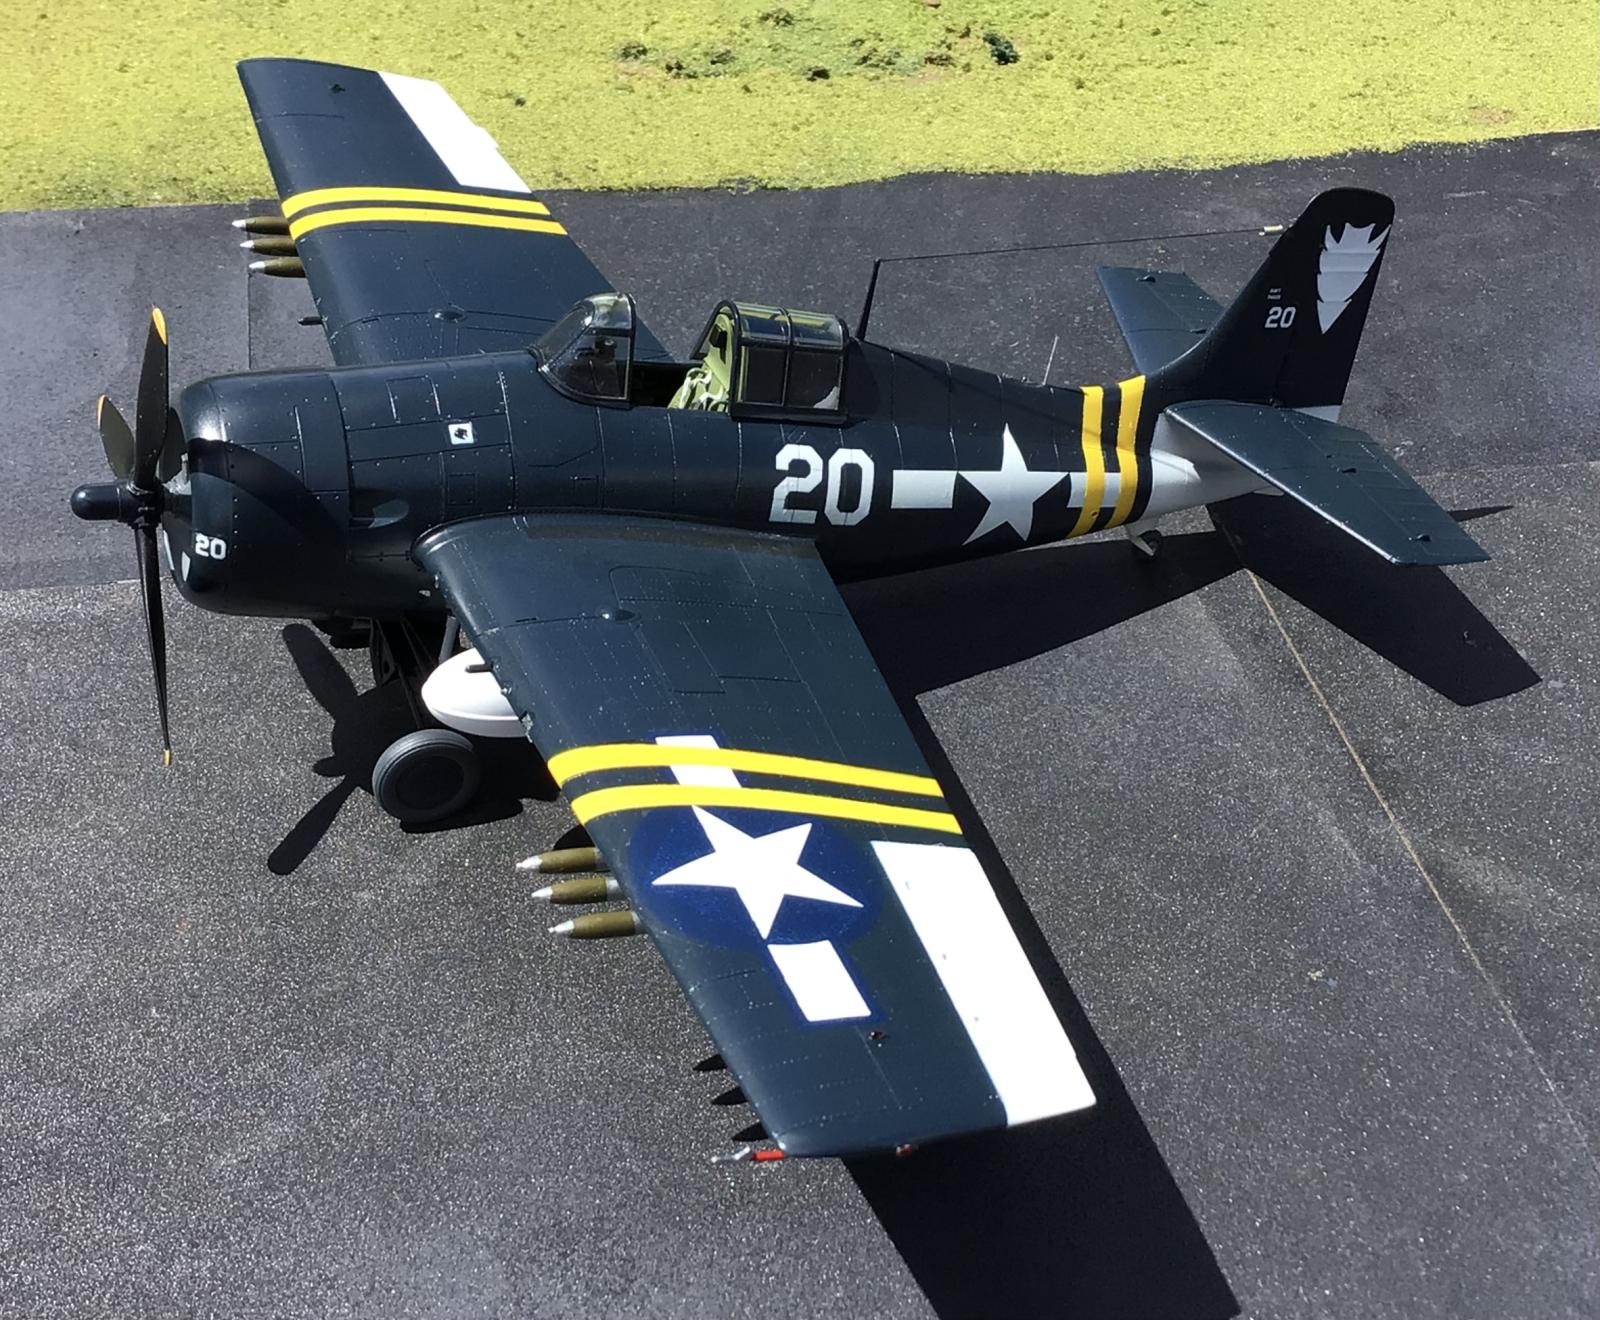
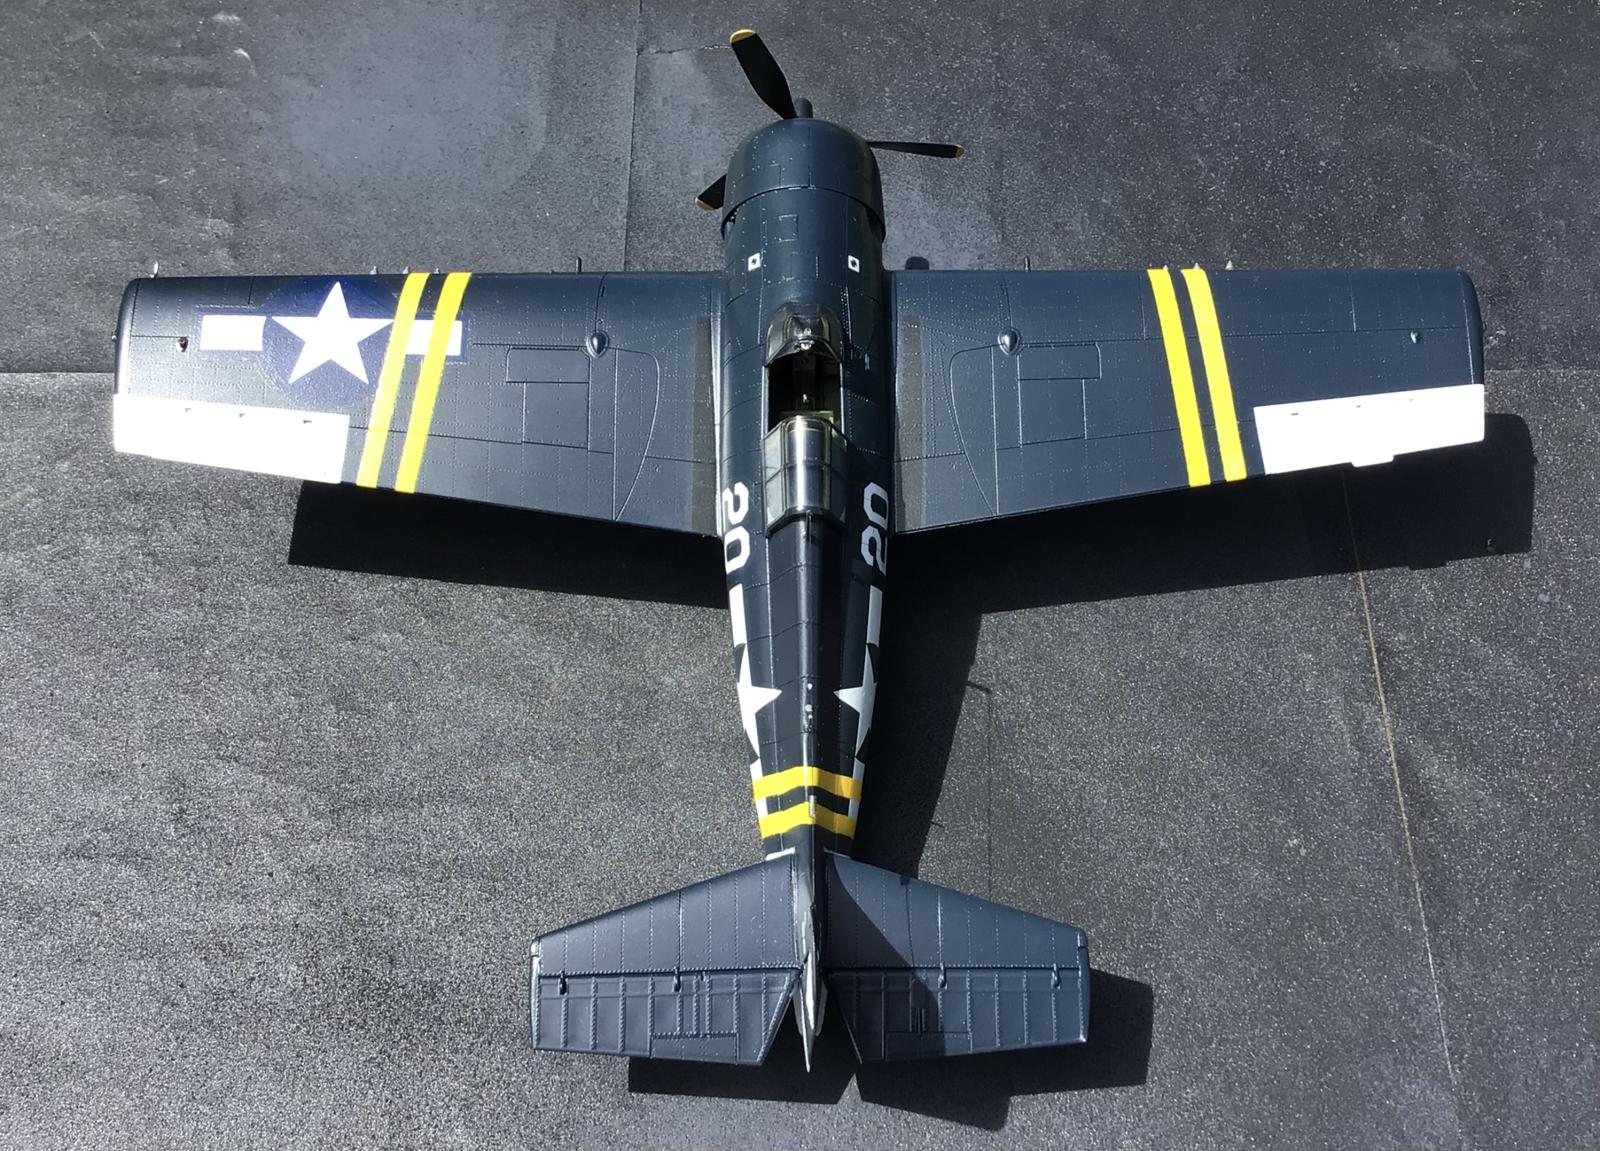
Mine would likely have been done several days sooner, had I chosen a different paint scheme. I didn't realize the yellow stripes were not part of the decals until I started applying them. Here again this is my fault and not a problem by Eduard.
I had simply been looking at some Fundekals for a similarly marked F4U Corsair... and I didn't realize this until it was too late.
I had some Yellow over spray to take care of, and I had to replace some decals when I masked over them to paint on the yellow stripes. This would not have been a problem if I went about things differently.
My kit was missing the "spoked" wheel hubs, part # L38. They were not molded on the parts tree.
I contacted Eduard customer service, and they told me that I somehow ended up with a "pre production" parts tree that for some reason did not have these parts molded on them.
They are supposed to be sending me a replacement set in the mail. This is something else to watch out for, as some of the decal options call for using the spoked wheel covers instead of the solid ones like the ones I used on mine.
I speak highly of Eduard's customer service. They answered my email right away. I'll be even happier when the replacement parts arrive.
I can see myself grabbing a few more of these in the future... They are an excellent building model. The details are spot on, and I didn't have to use any filler anywhere because the gaps are that good !
I have a F4F Wildcat "Kindergarten" started, and I plan to build up another 1/48 scale F4F as a training plane from NAS Daytona Beach, a FM-1 from NAS Sanford, along with a Hobby Boss FM-2 from NAS Miami.
Tom Cleaver (@tcinla)
Tom Cleaver sent me a set of decals for the NAS Daytona Beach F4F, but I'll have to improvise for the rest.
Please look for these to show up as a part of the Jim Sullivan group soon.
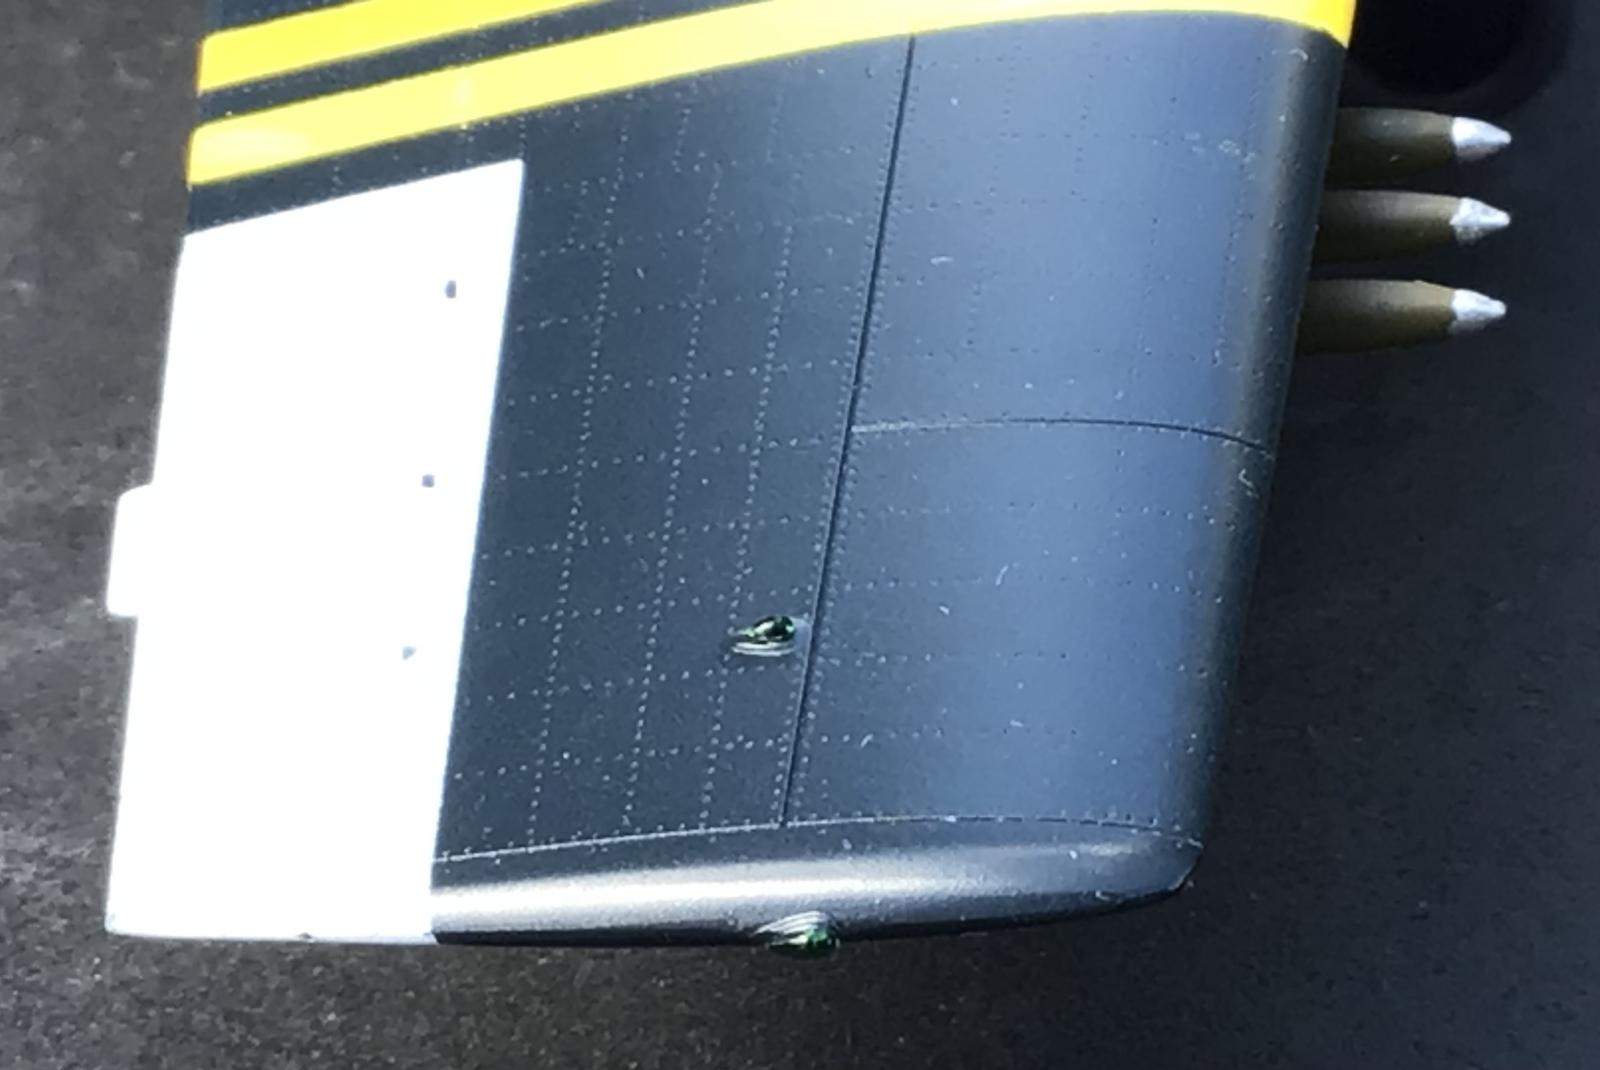
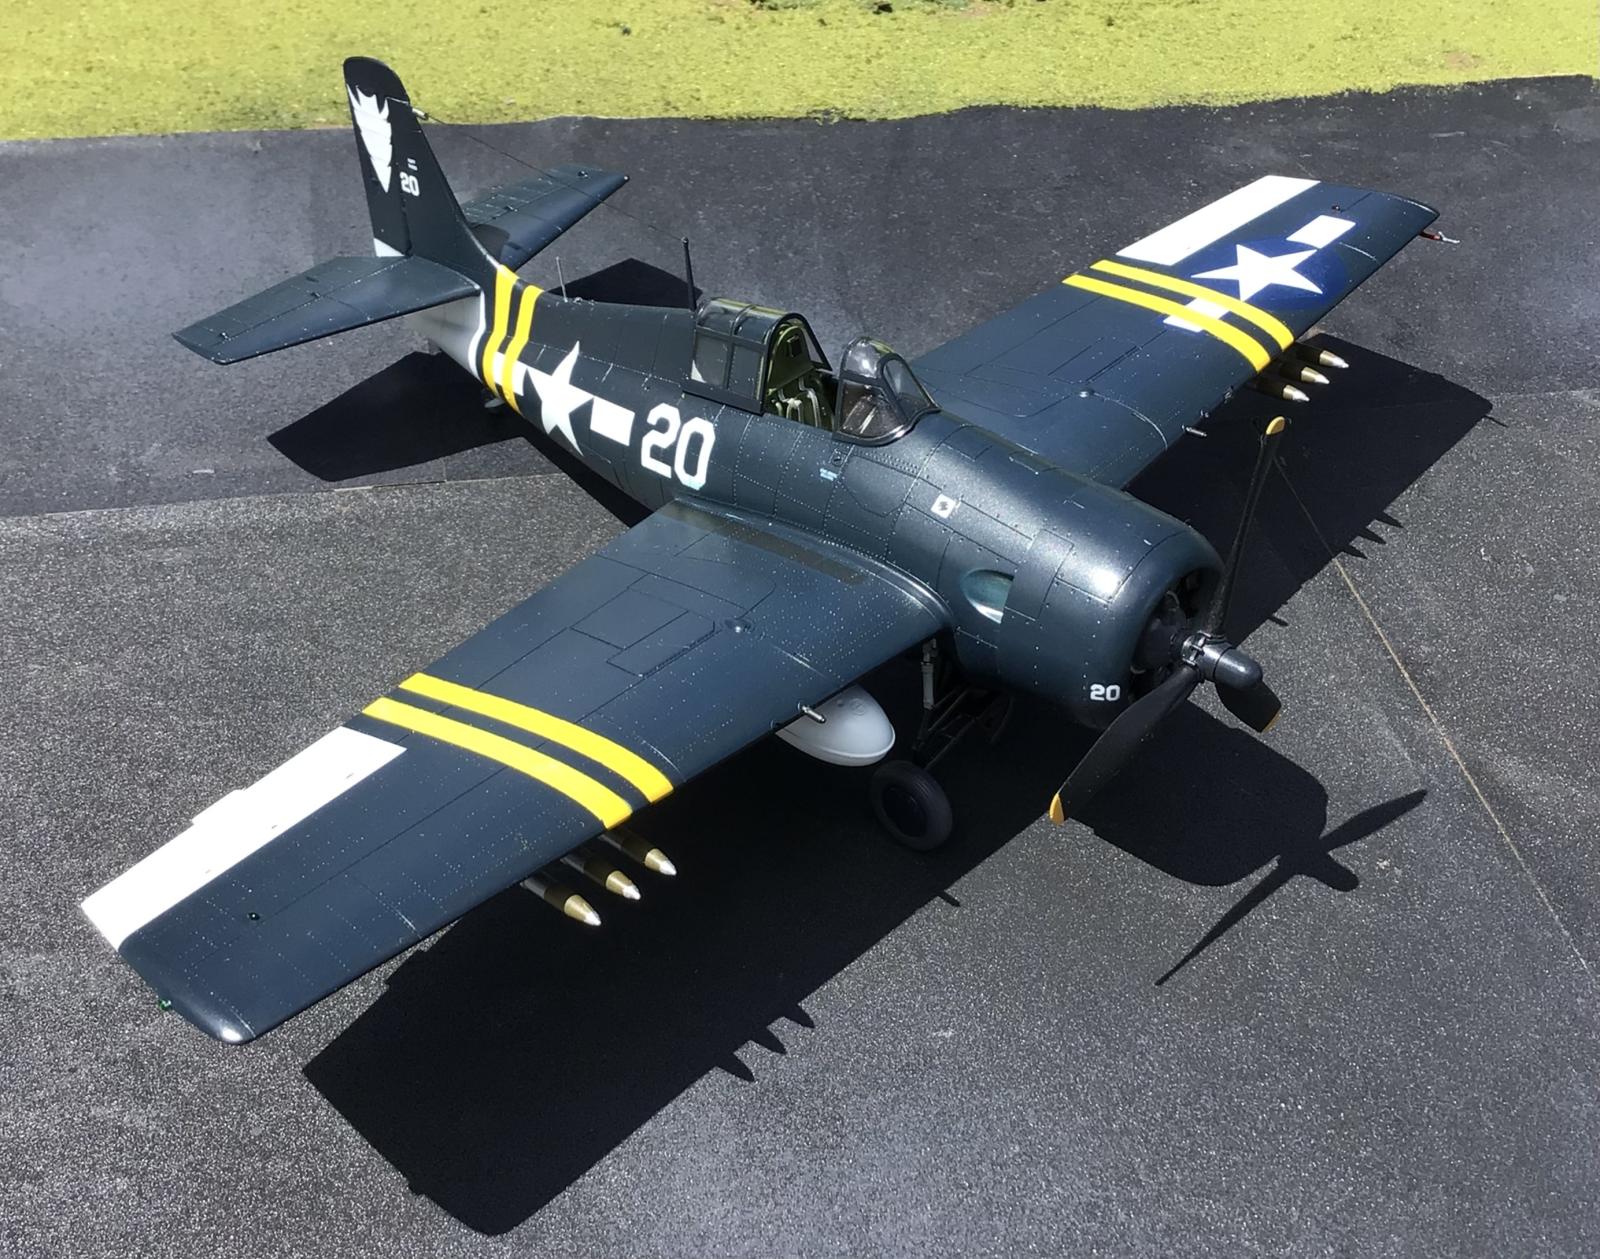
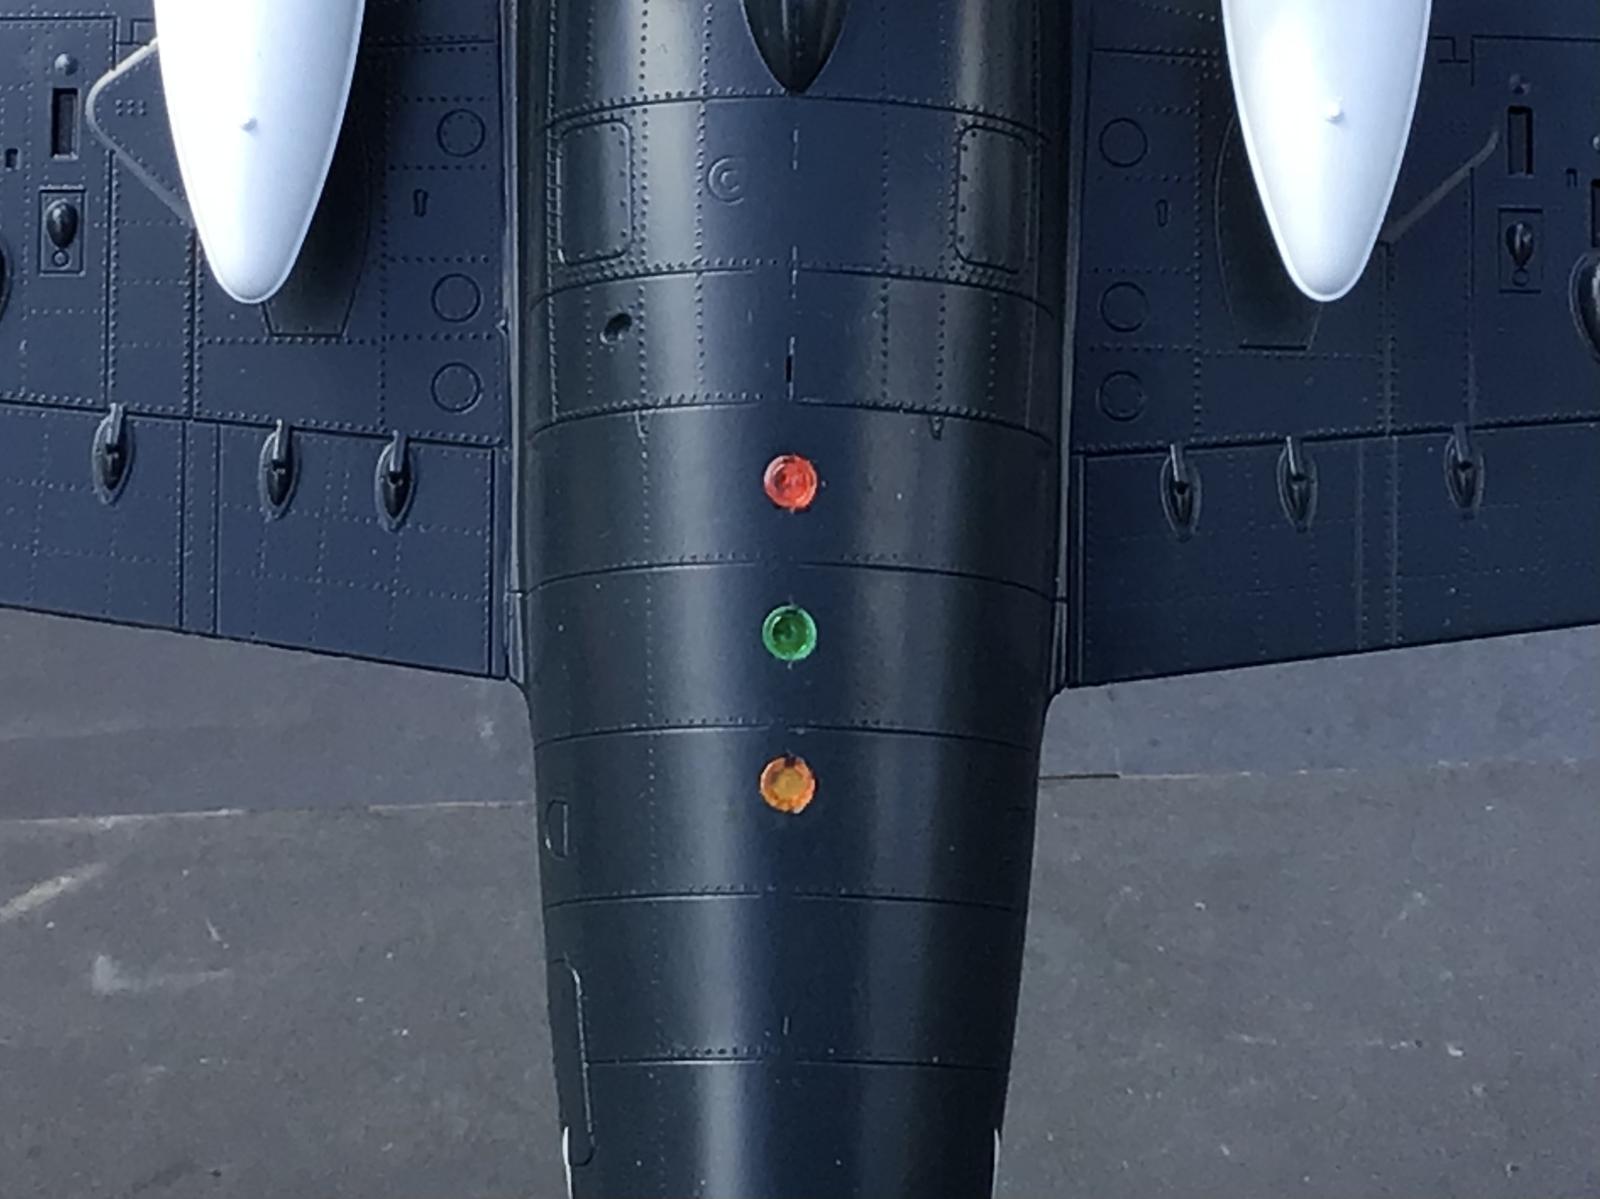
The wing and fuselage lights are very small but they look really nice once installed.

You could possibly press fit them in place and be OK. Be careful not to feed the carpet monster with them however...
I used a scratch built spring tensioner for the antennae lead cable. I also used EZ Line for the antennae. The small FM antennae was replaced with a piece of jeweler's wire.

The rocket fins were troublesome to remove from the parts tree. They do look very nice once completed though.
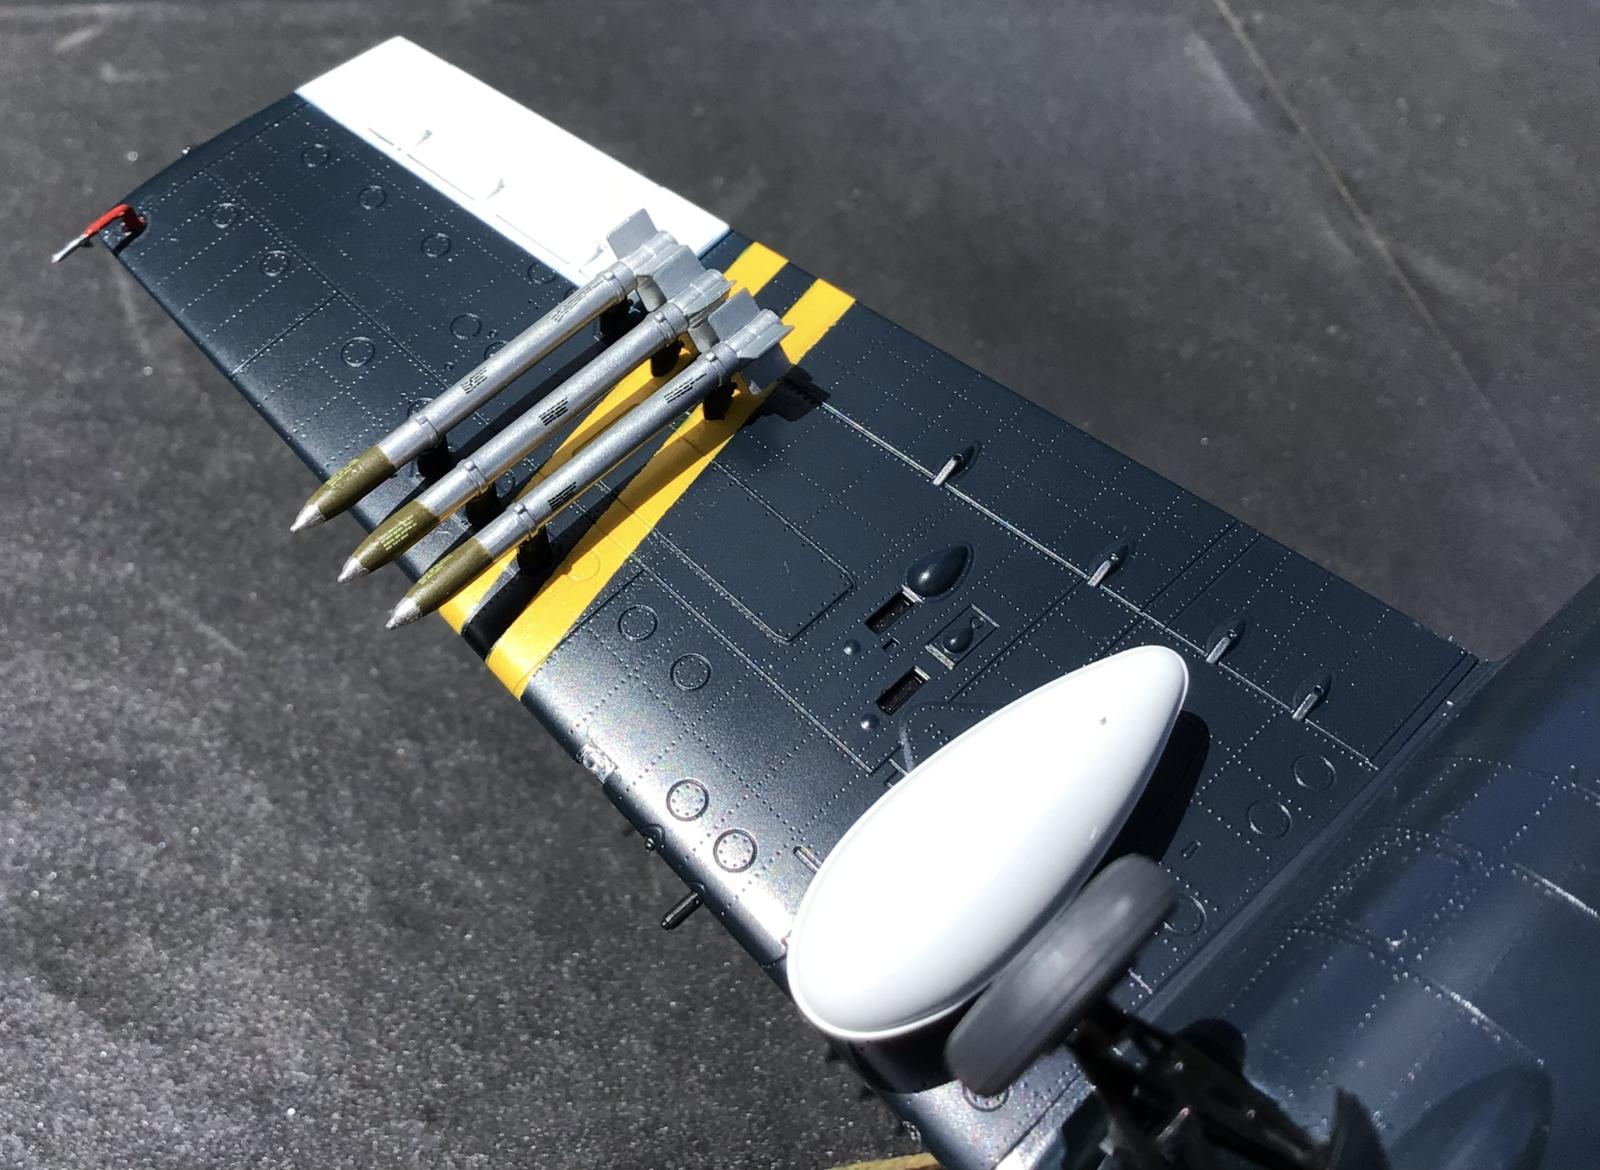
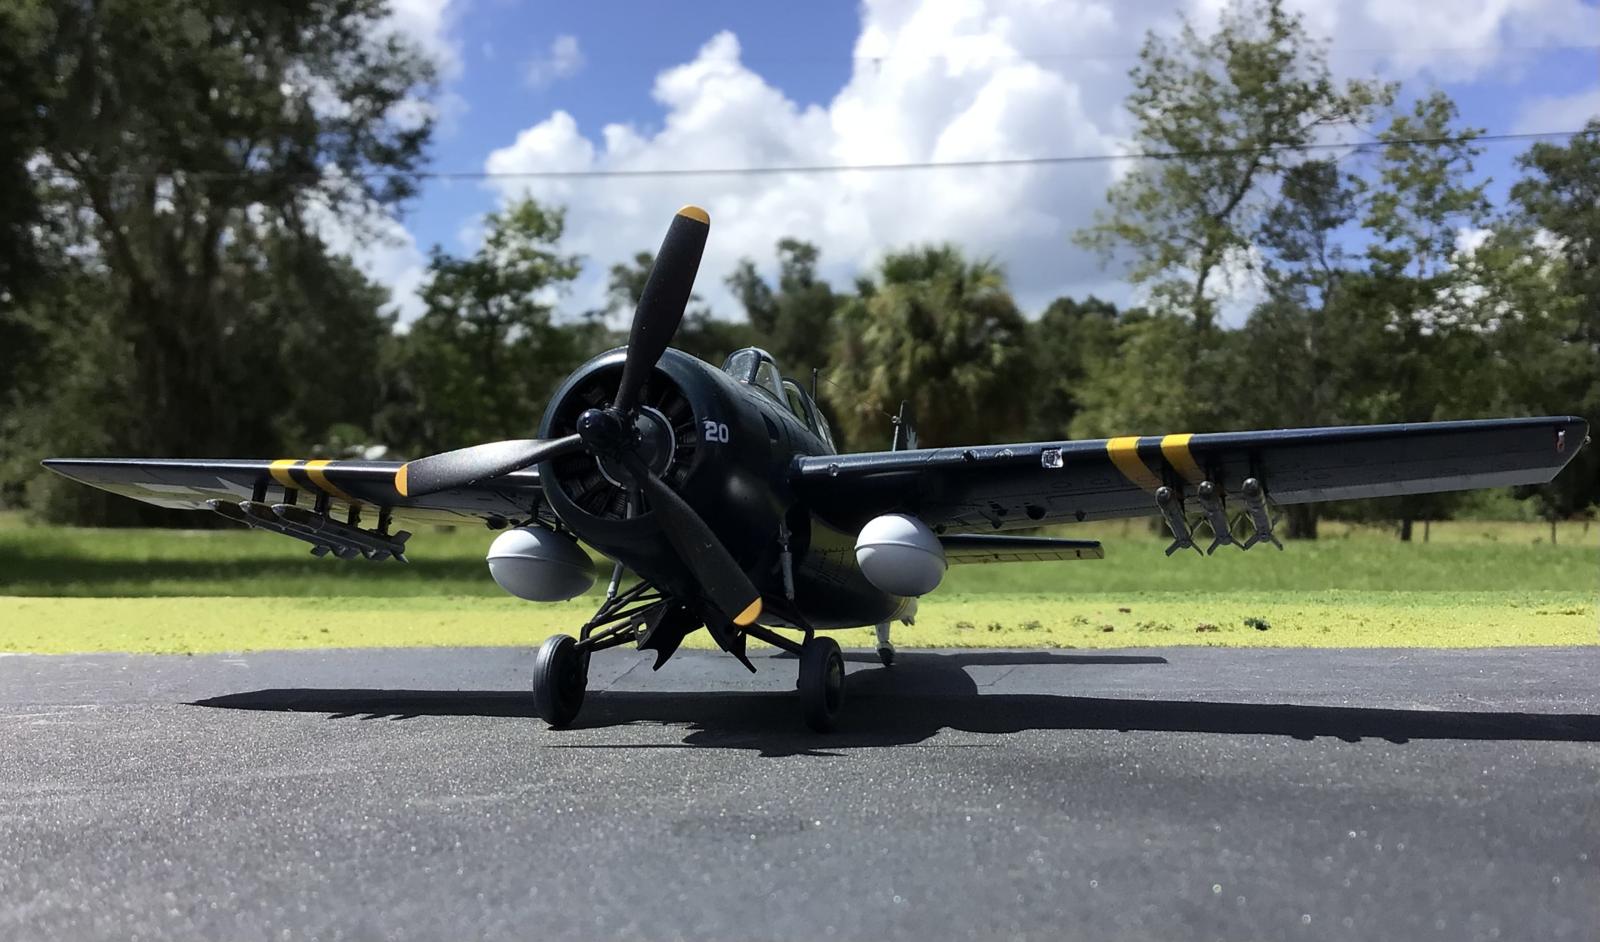
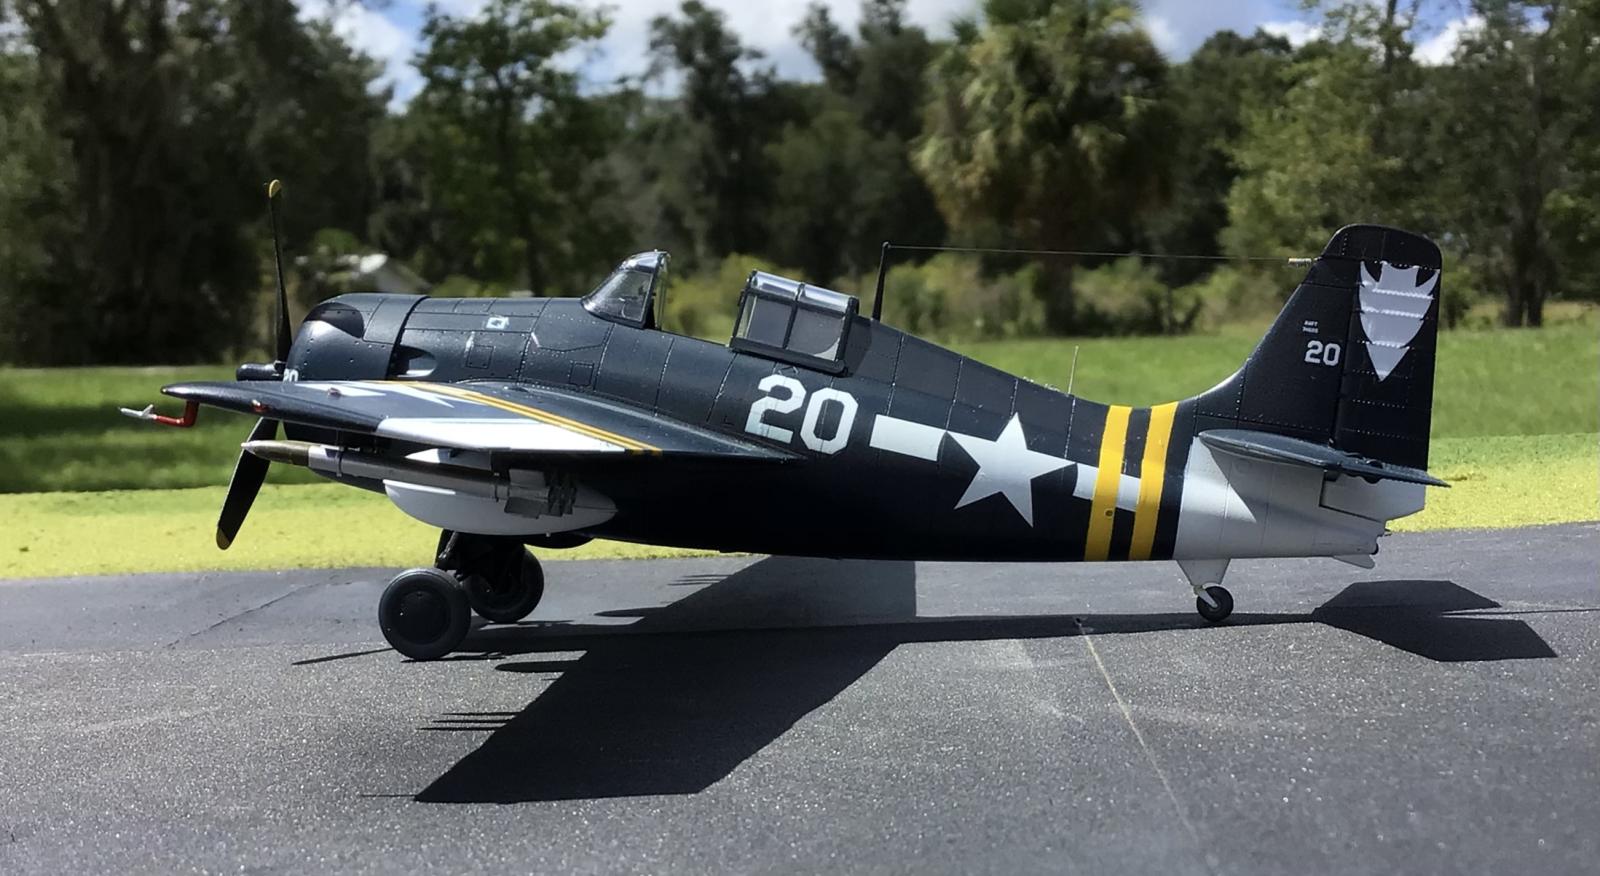
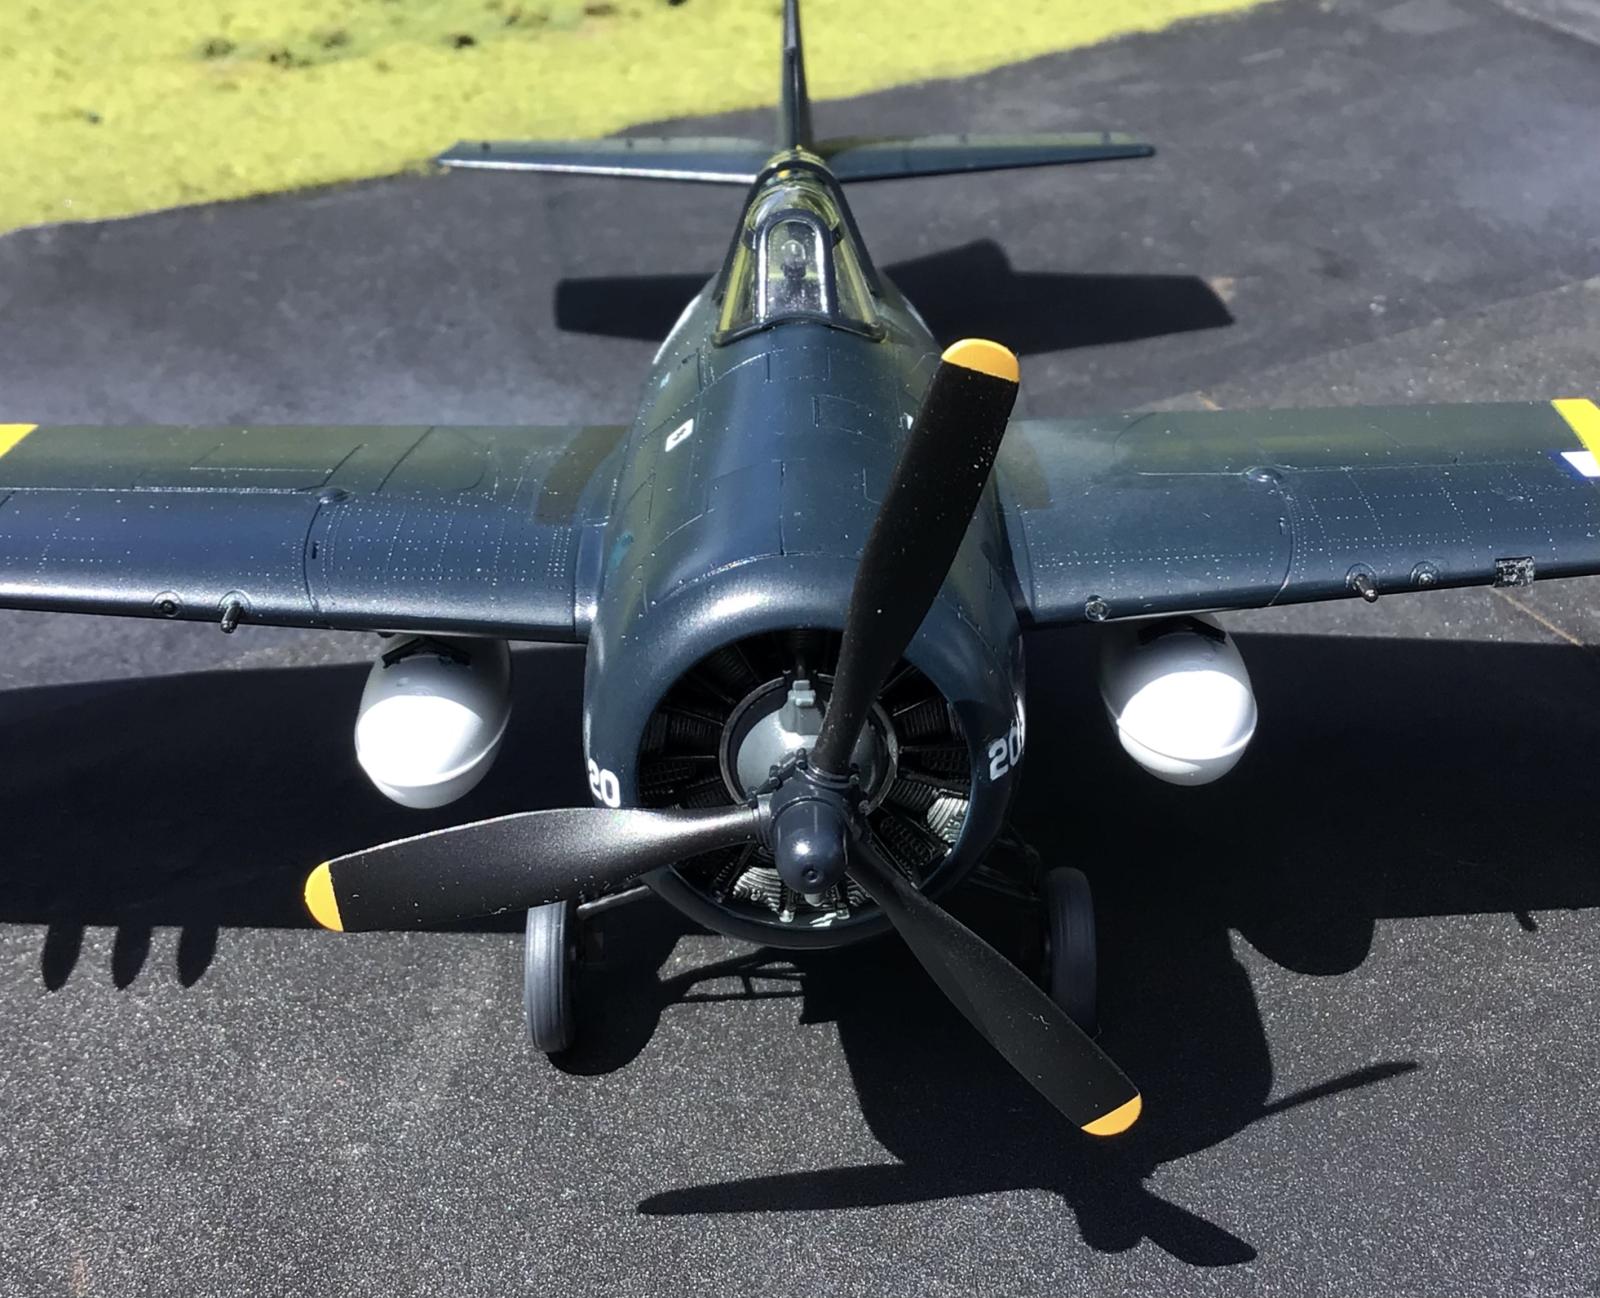
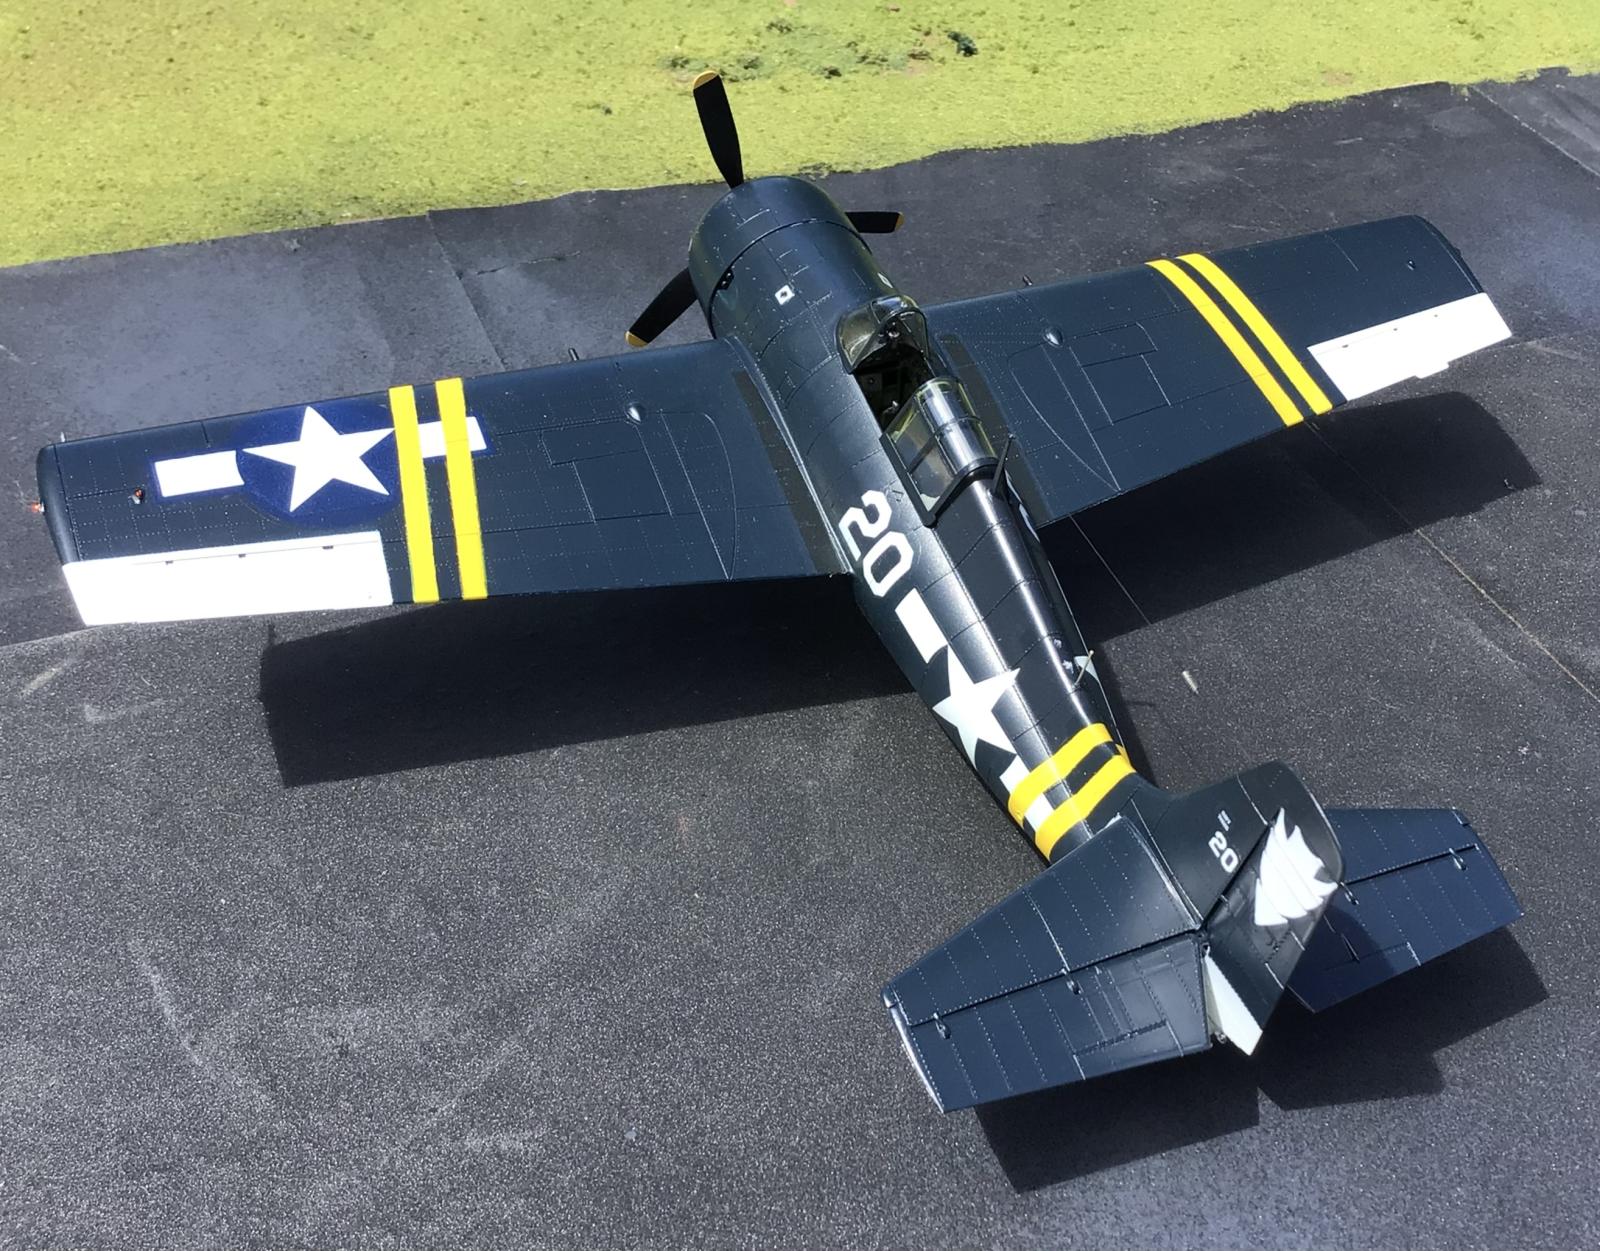
This is the only Wildcat in my collection that has rockets... armed for a close air support mission.
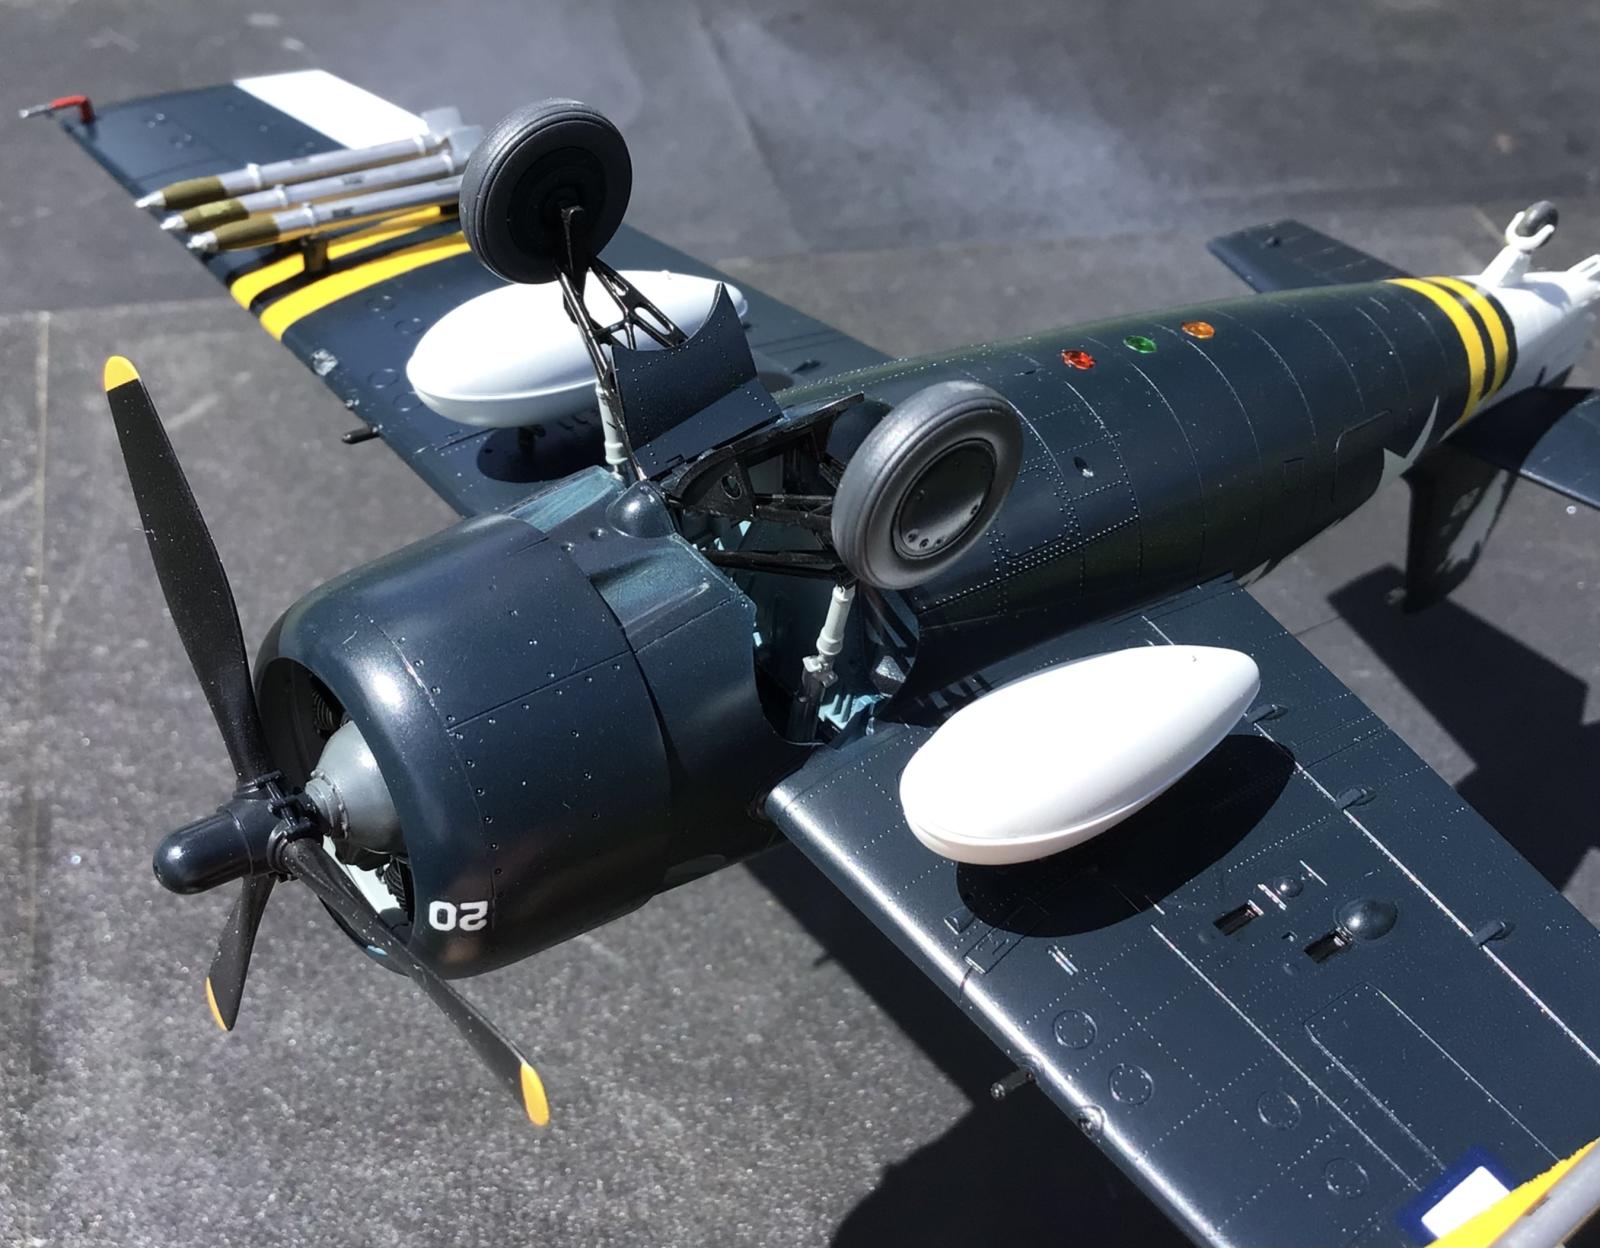
So I chose to install both drop tanks. In many pictures you will see these aircraft flying with only one tank though. This is when they were flying on CAP missions.
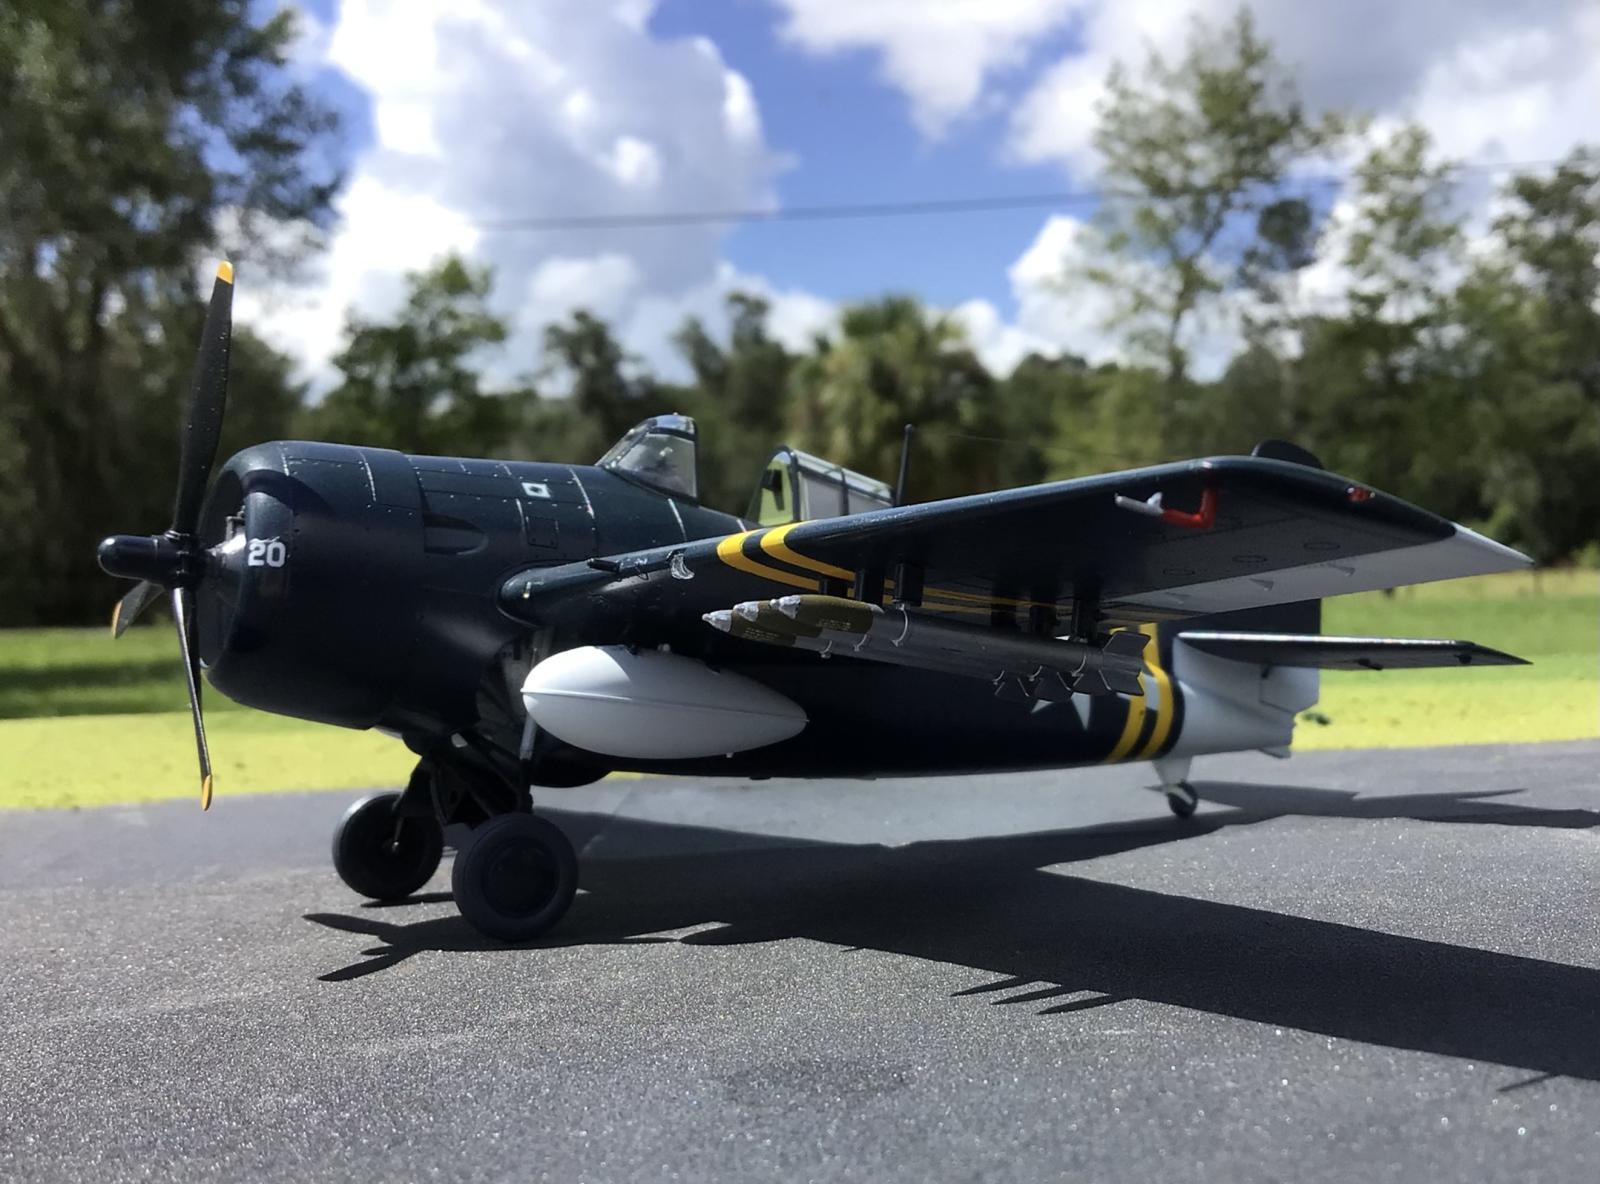
Having extra fuel to spend time on target would be nice... so I decided two drop tanks instead of one.

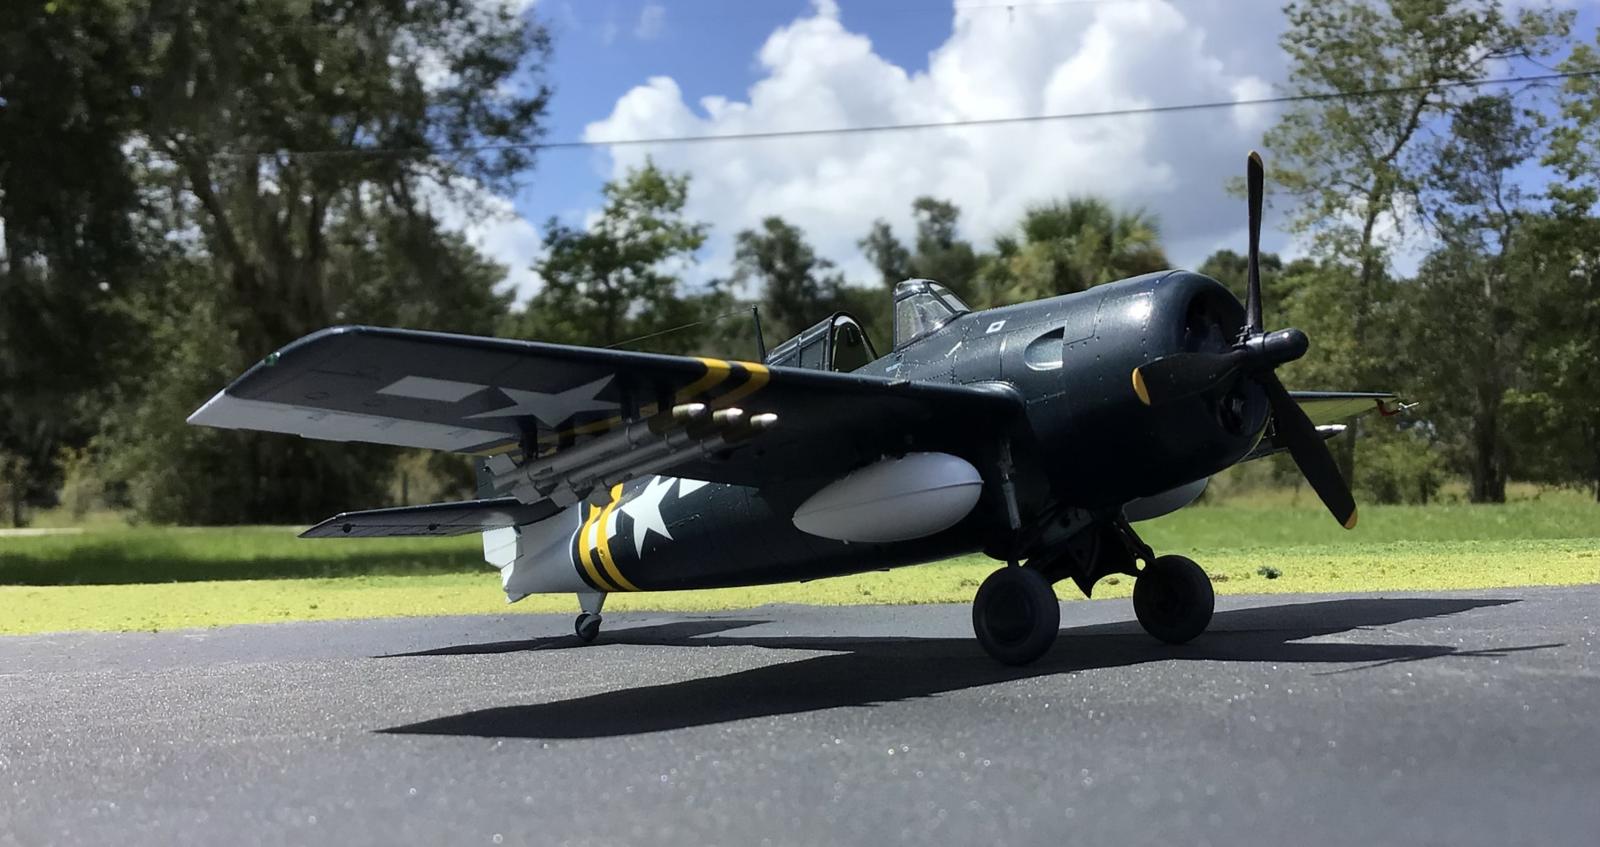
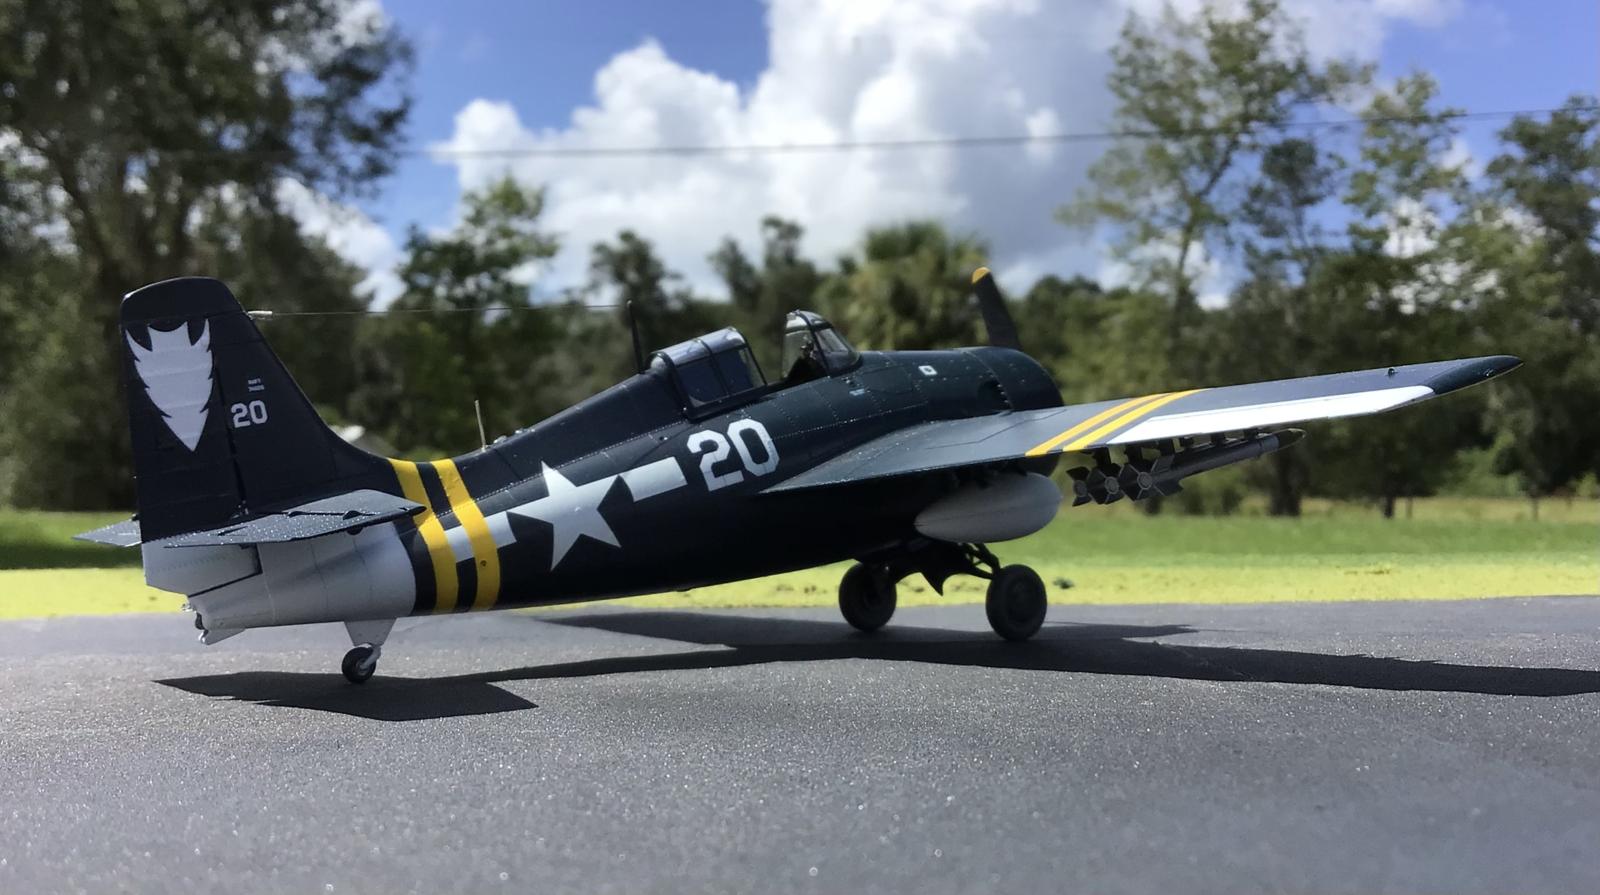
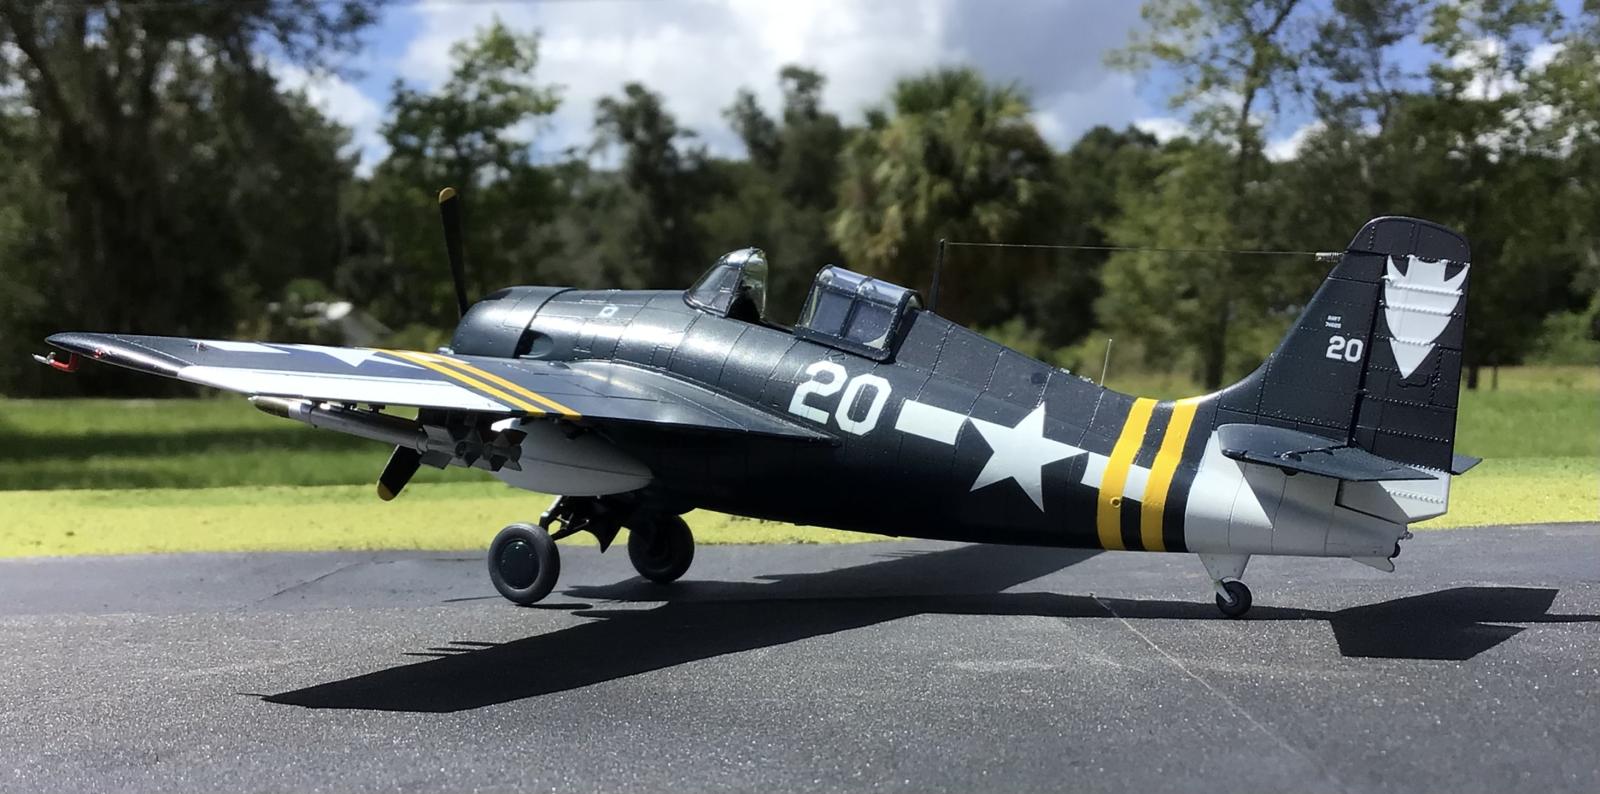
This Wildcat was painted using MRP acrylic lacquers. I really like how they spray.
Since my beloved Model Master enamels are drying up, I have been looking for a durable alternative paint.
These have survived several different masking's, since I had to come back and add the Yellow stripes on later.
Then I had to do some touch up work when I managed to get Yellow paint over spray on top of this beautiful Gloss Sea Blue finish.
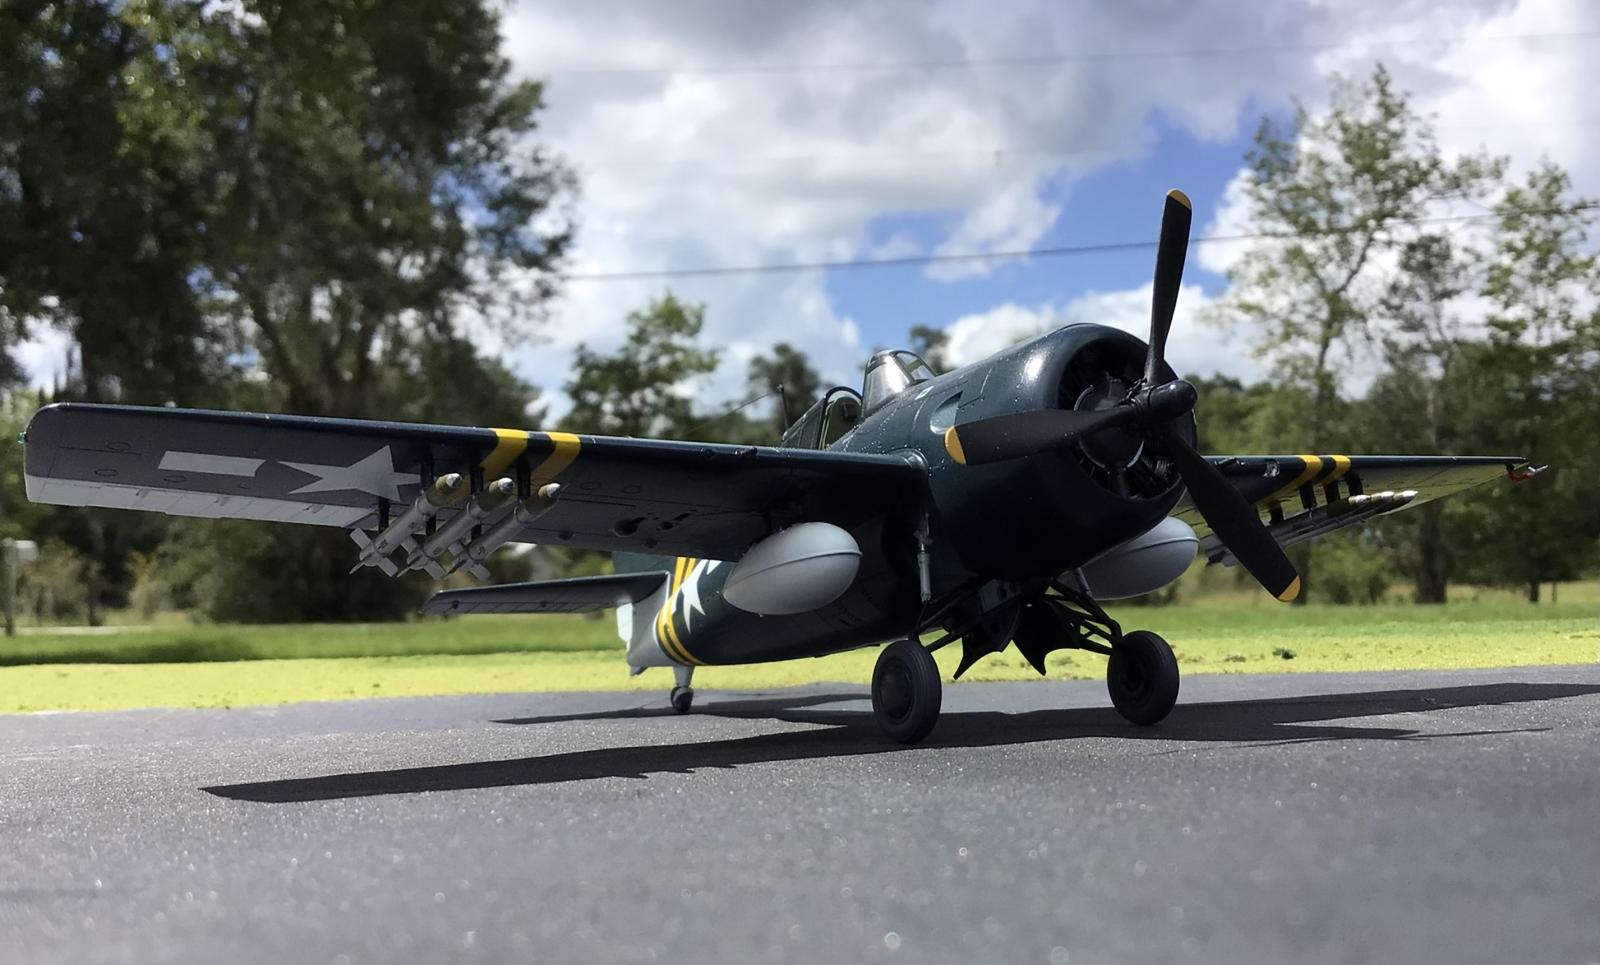
The original plane was photographed during a bad landing on the escort carrier, USS Nehenta Bay, on August 5th, 1945.
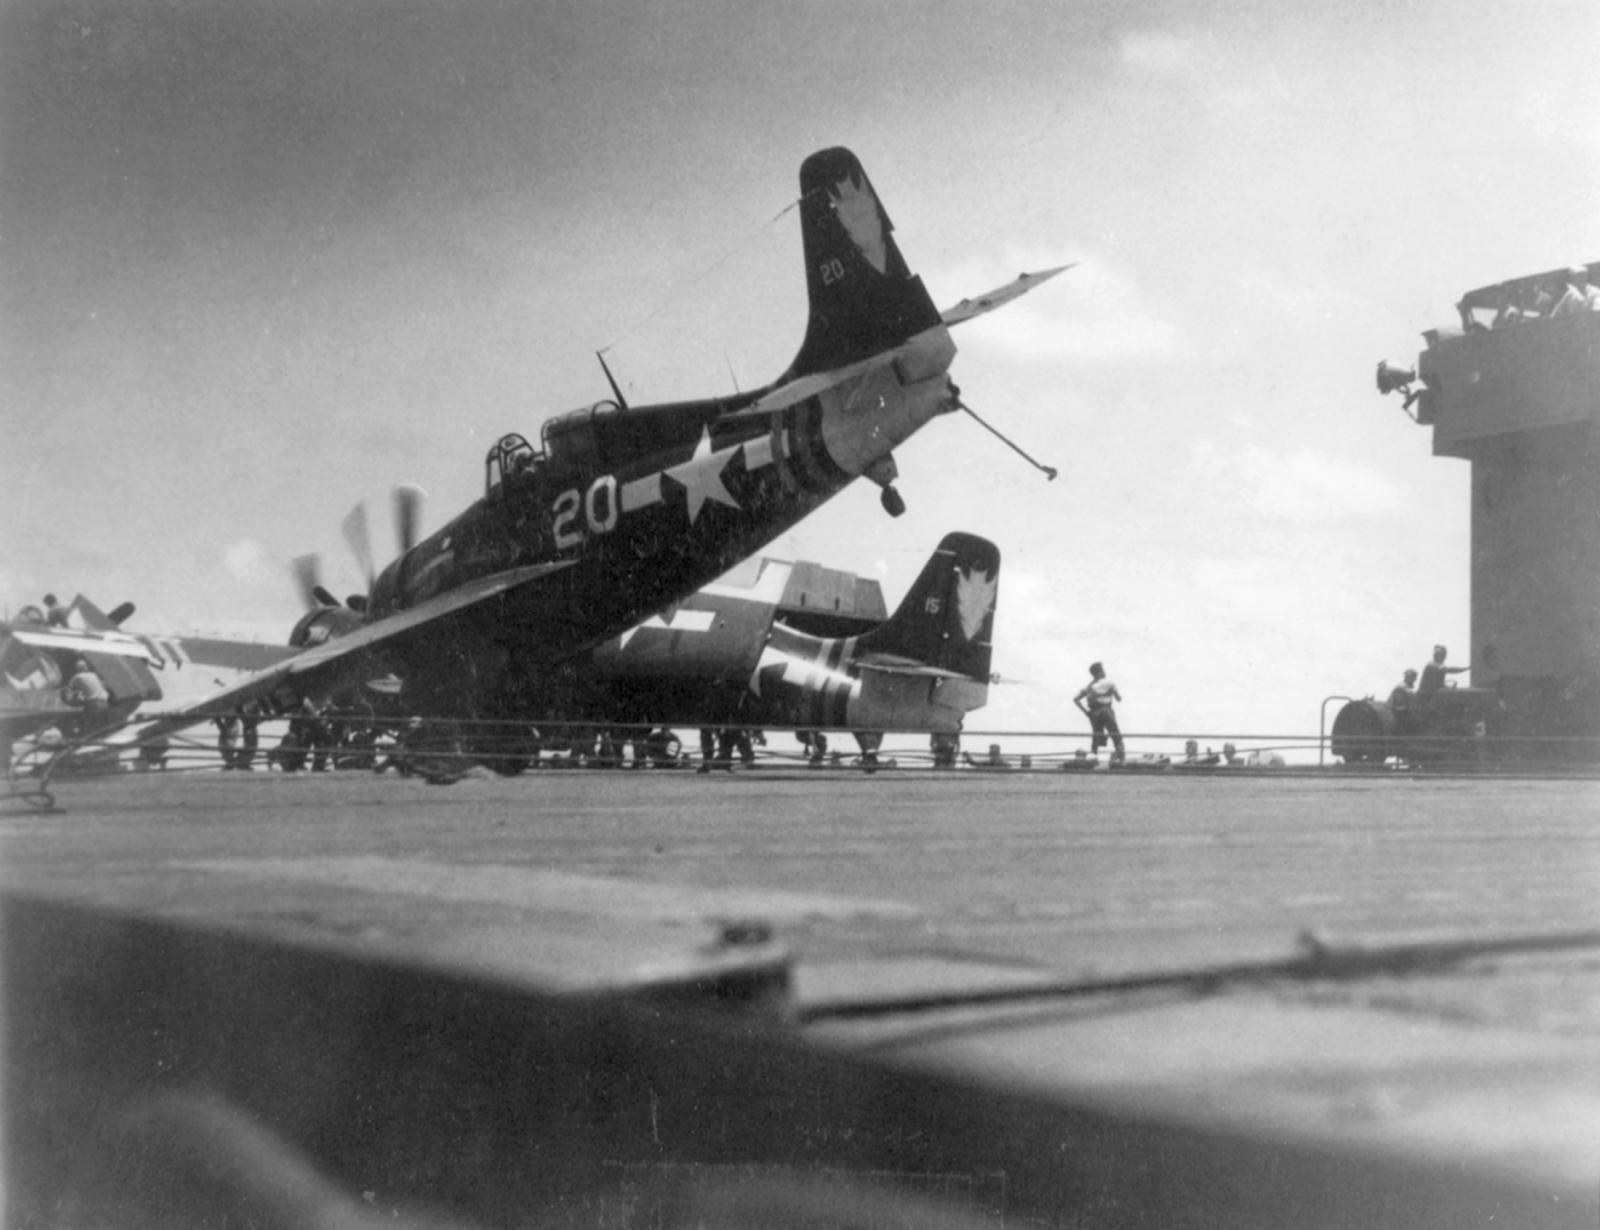
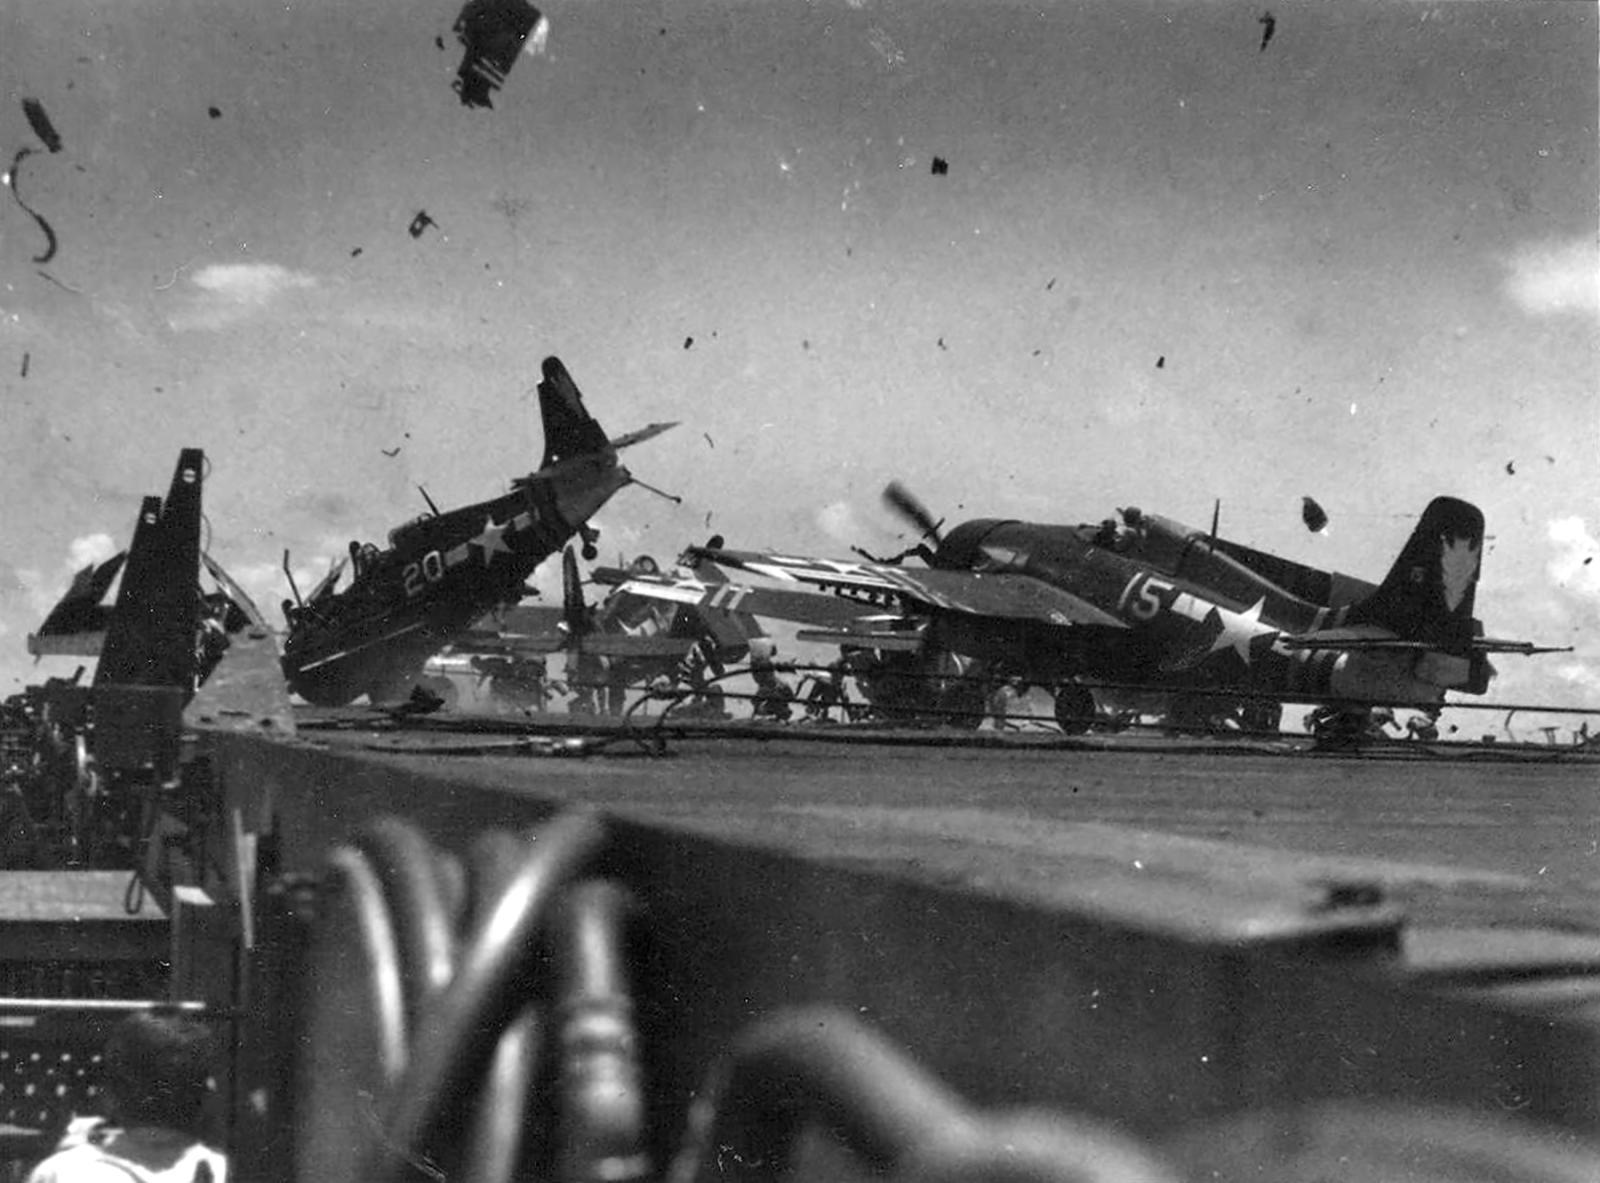
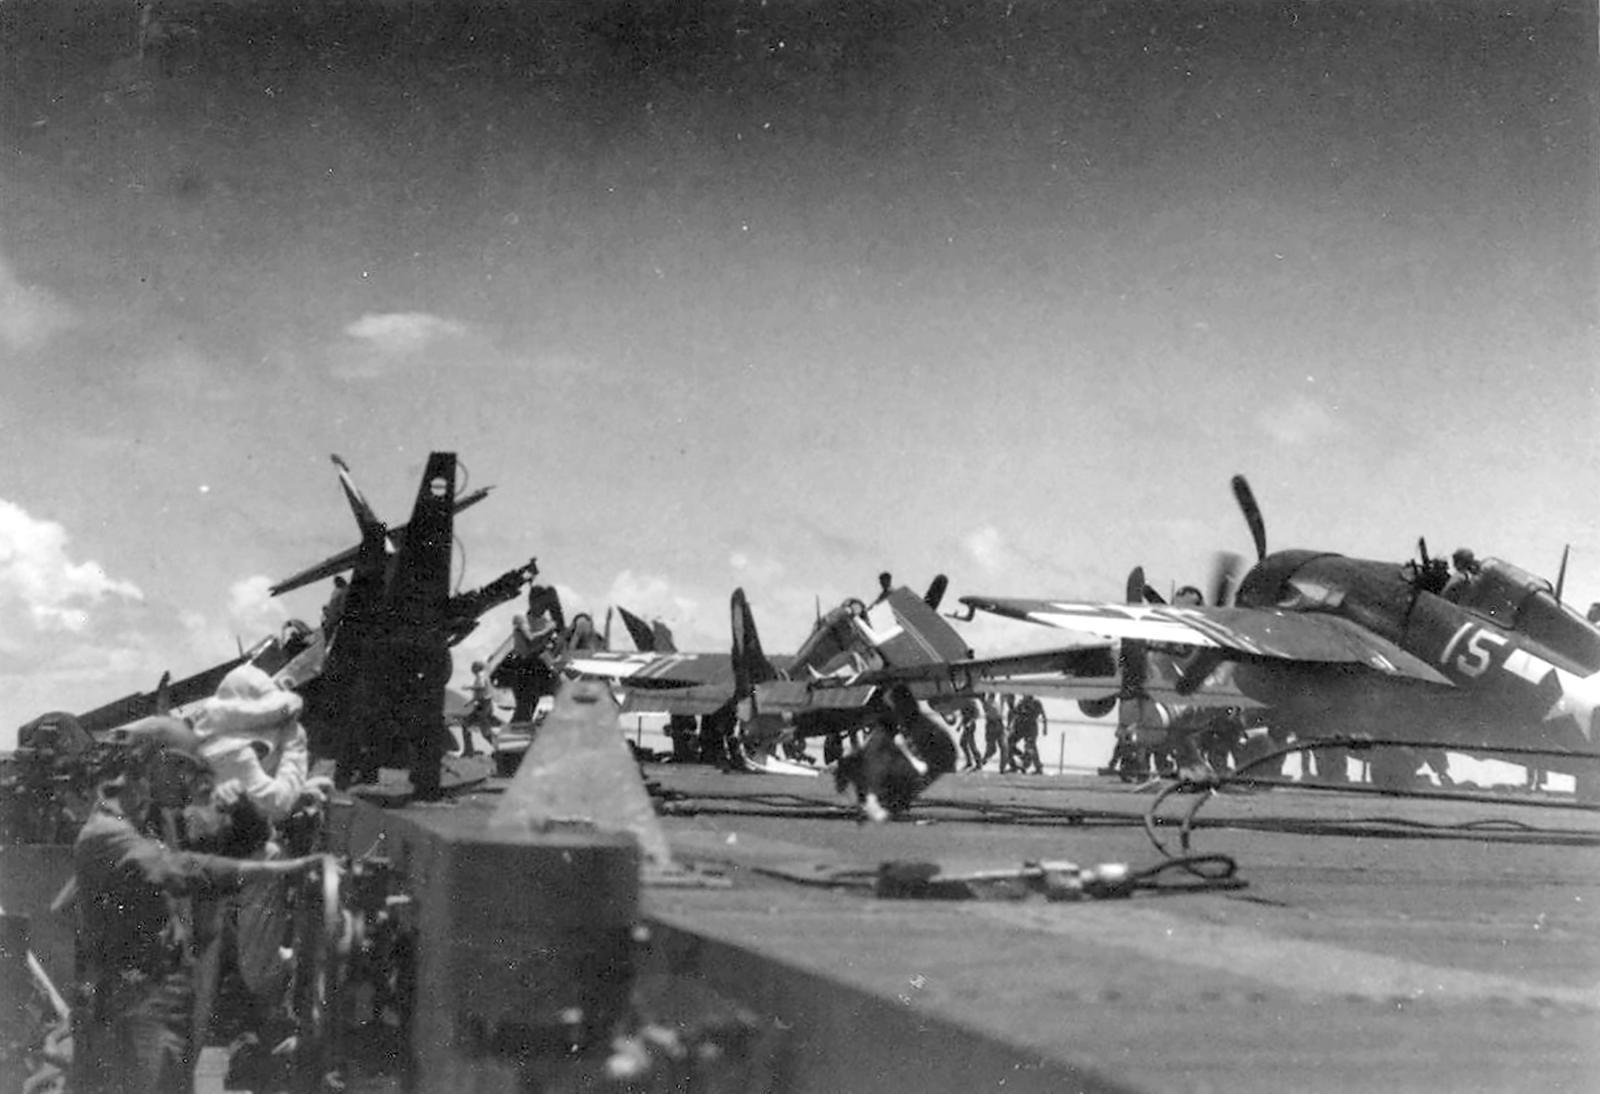
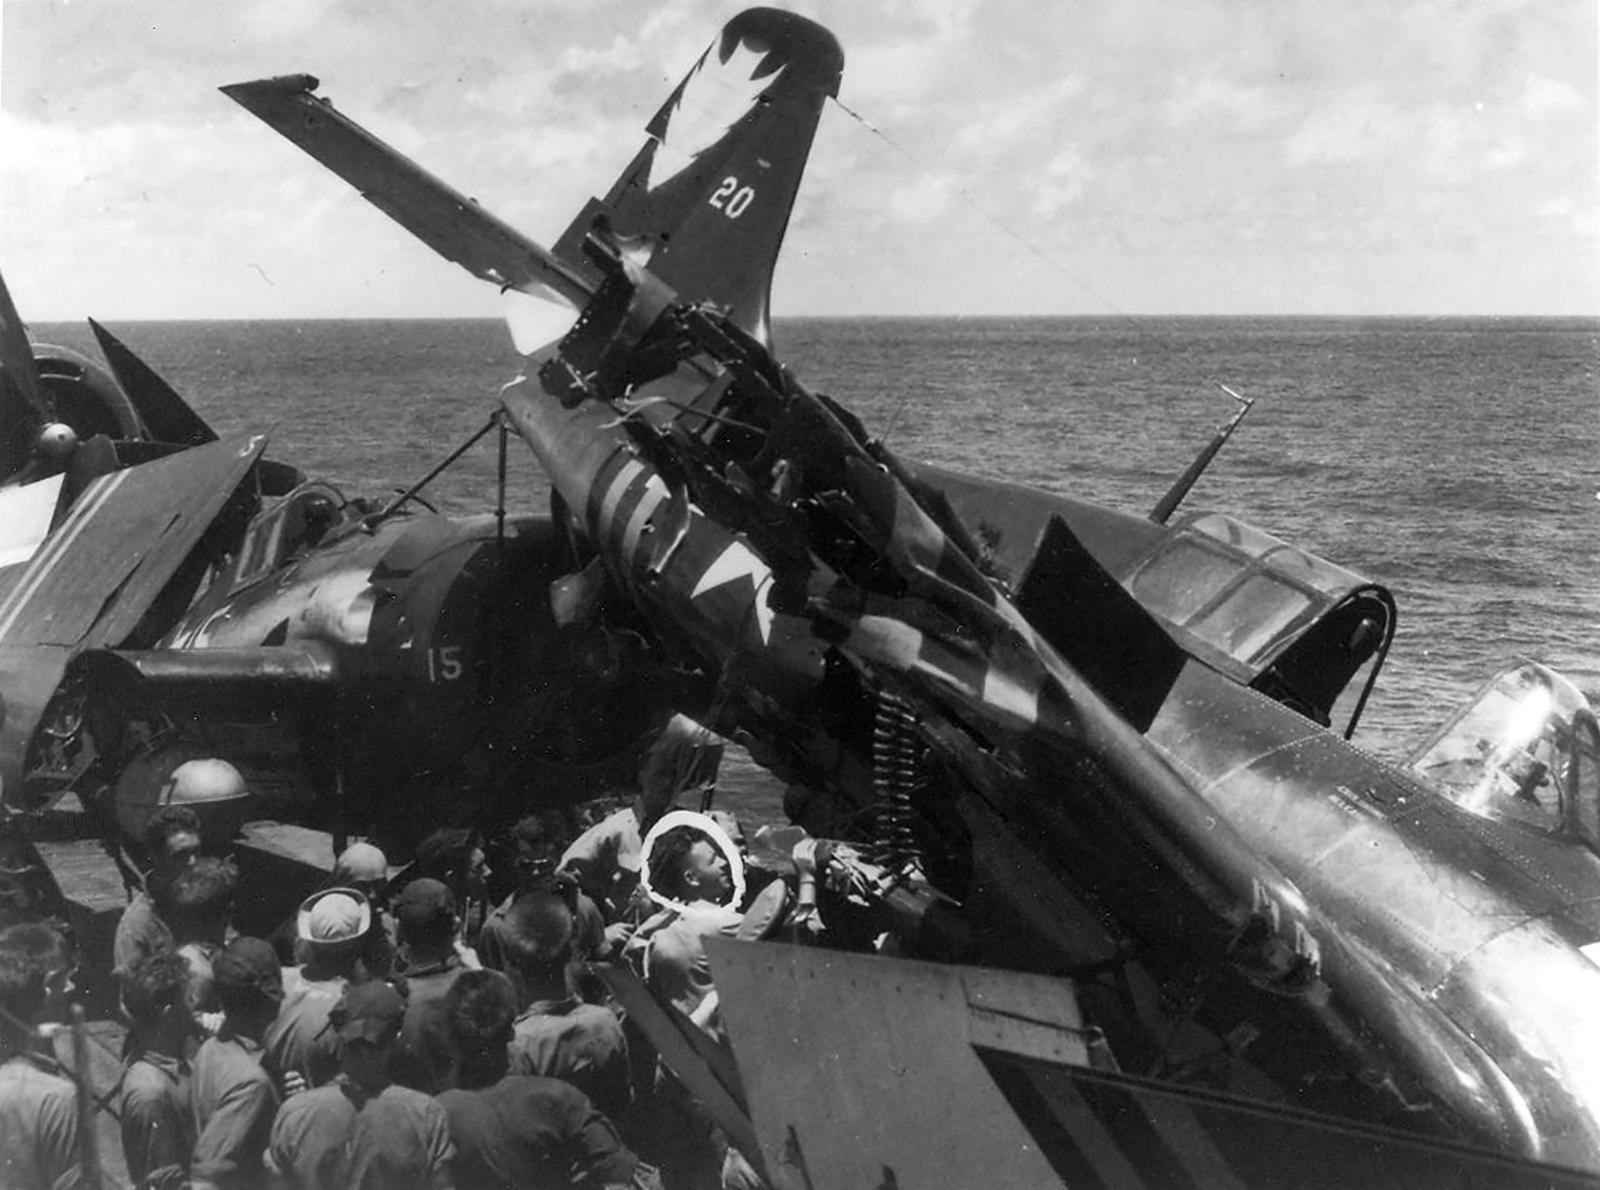
It came to grief and was destroyed along with two other FM-2's on this fateful day... which was the day before the atomic bomb was dropped by Enola Gay on Hiroshima.
I don't know the fate of any of the men who were involved in this accident. It truly looks horrible though.
I want to thank you all for following along during the build journal.
This was my very first Eduard kit that I have ever built...and I mean ever. I can honestly say without any reservations, that this will definitely not be my last ! They have managed to spoil me with this one.
As always, comments are encouraged. Thanks for stopping by.

Absolutely stunning, Louis. Certainly a striking set of identification markings for the carrier! I guess it’s tempting to throw these modern kits together and not consider the finer points. You have done so
much more than that! Another exceptional LG trademark build!
The current crop of kits, with such high standards of engineering really make it a great time to be a modeller. Well done on the save with the yellow stripes, too. Without the decals it took some work, but very much worth it in the end.
Congratulations on an outstanding build for the Jim Sullivan memorial group. I’m sure your WIP thread will act as a reference for all that follow.
Paul Barber (@yellow10)
Thank you for the very kind words. This sincerely means a lot to me. These yellow stripes are what drew me to this plane. I will eventually build a similarly marked F4U in the future.
I agree with you 100 percent about these new kits. I made sure that I carefully cut the parts off the trees, making sure I removed all of the attachment points. The fit is so precise I wanted to make sure that nothing interfered with the overall fit.
By the way, I just got an email from Tamiya USA, that they will soon be releasing a brand new FM-1 / Martlet Mk V. It will be kit # 61126. They are also releasing a brand new F-35B soon as well.
We are indeed spoiled ! What a great time to build plastic models... Not so good for one's wallet though. 😉
Thank you my friend ! It's great to hear from you.
She's a beauty! Pretty cool scheme with both the white highlights and the yellow stripes.
Greg Kittinger (@gkittinger)
Thanks Greg ! The bright Yellow stripes combined with the White markings are what drew me to build this particular plane. I have plans to build a similarly marked F4U soon. So please keep an eye out for it too. Thanks !
Super work and a fantastic result @lgardner.
Welcome to the Modelers Who Are Now Spoiled By Eduard Club. 🙂
@tcinla - just bought my first Eduard kits - double 109 package (F-2 and F-4). The plastic looks great!
Tom Cleaver (@tcinla)
Thank you Tom ! Now I am a proud new member of the MWANSBE club for sure... I plan on getting busy with the NAS Daytona Beach F4F soon. Thanks again for the Frozen Chosen book and the decals.
Got a feeling you’re hooked now Louis 😜
Beautiful photos of a splendid model, and your WIP provides very useful info about the FM-2 to the occasional builder who knows little or nothing about it.
Congrats buddy! One of your best models so far undoubtedly @lgardner
Pedro L. Rocha (@holzhamer)
Thank you brother ! I try to post a fairly complete build journal along with good reference pictures when I can. This one was a very nice building experience for me. Now I kind of wish I had not waited so long to build one of these newer Eduard kits.
I have been collecting some of them, and I have an "Overtrees" P-51D-5 that has been screaming my name for a while now. Let's pull the trigger on some Mustangs ... Shall we ? and see where it goes from there.
In "Ye Olde Stash" I have collected quite a few of their new Bf-109's and FW-190's too. You just never know what will happen next at the "Iron Werke"... 😉
Thanks again for the kind words. I do sincerely appreciate them. This is a kit that is fits together extremely well.
Excellent result, Louis! Thanks for blazing the trail on this one.
John Healy (@j-healy)
Thank you John. I look forward to seeing yours when you get going on it. You are definitely going to enjoy this one. The fit is exceptional. Just be wary of the turbo charger (or engine oil cooler I'm not sure what it is exactly), and you will be good to go. I tried to post up some good pictures that show the proper alignment of the cockpit and landing gear / engine mounts. These could be a little tricky if you are not careful.
How did you guys fare during the hurricane ? Well I hope.
Just heavy surf here. Photo was around 6AM. How about you?
1 attached image. Click to enlarge.
John Healy (@j-healy)
We were lucky too. Only lost our electricity for a few seconds. One small tree branch was down, and some Spanish Moss from one of our neighbors oak trees blew into one corner of our yard. It took us almost 15 minutes to clean everything up. This time we were very lucky. Others were not so lucky as we were. But we live on the other side of the State from where it hit. It was almost directly due West of us where it made landfall.
I'm glad you guys are OK. Thanks for asking.
Great Build, Great Tribute to Jim, Great Results! 👍👍
gary sausmikat (@gwskat)
Thanks Gary ! This was a fun build, other than my ham fisted troubles with the turbo charger / (or engine oil cooler)... I'm not sure exactly which it is now since the oil coolers were removed from under the wings on the FM-2.
I think Jim would have liked building this one. It has a Tamiya fit and it equals to or excels with the details of the latest kits they have released.
Thanks again buddy... 🙂
Lou,
The best thing you can do for a friend who gives you treasure is to make that treasure shine and glow into the special kit that is. Well done. Well done indeed.
Some strong work in the paint and photo dept.
Stephen W Towle (@stephen-w-towle)
Hey my friend. It's really good to hear from you. Thank you for the kind words. These are sincerely appreciated. This kit was very easy as far as the fit / finish is concerned. I made sure to clean off all of the plastic attachment points and the fit was excellent because of this. I used our older tablet to snap the photos. I'm not too good with using the phone's camera. My old phone died, and the new one came with an "improved" camera... which I personally don't think is true.
I made sure to get busy on building this one right away for several reasons. I didn't want it to languish in the stash so I cleared off the bench and got busy right away on it. Now I'm glad I did.
Thanks again.
Well you've spread a social disease . . . I caught the bug and went and ordered one. This article and of course the photos made it hard not too. 😉
I've been toying with a Wildcat build for some time - I'll definitely look into the Eduard offering.
By the way, regarding the photos of your ersatz Zero, I have a reel of 8mm film my father took. We were living near Pearl Harbor in the late 60's when they were filming the movie Tora! Tora! Tora! It shows a bunch of AT-6s/SNJs done up as Zeros and Vals flying chased by a pair of P-40s. There was also the odd PBY and B-17. I wouldn't be surprised if the Zero in your picture is one of those in my father's movie.
Greg Fabian (@gwfabian)
Thank you. I don't think you can go wrong with an Eduard Wildcat. Just watch out for the places I mentioned and you should be rewarded with a nice looking model. I just got an email from Tamiya USA, stating they will be releasing a new tool FM-1 in 1/48 scale soon. It is kit #61126 and it's supposed to be released in late November. I can see myself grabbing one of these to see what they are like. I enjoyed building their older F4F when it first came out. Now sadly it has been eclipsed by these newer offerings. It still assembles nicely though.
I took these photos of the FM-2 and the "Ersatz" Zero in the late 1970's or possibly in 1980 on Thanksgiving weekend at a place called the Spruce Creek Fly Inn. I grew up a few miles from there, and we could hear the war birds flying from our house. So Dad and I headed over to check it out.
Besides the WW2 fighters there, (and Martin Caiden's Ju-52-3M), we saw several other T-6's, and a modified BT-13 to look like a "Kate" and another one that looked like a "Val". Chances are these were indeed used in the making of the movie you mentioned. I also think these are the same planes that were filmed in various episodes of "Baa Baa Blacksheep", because it was being aired for the first time on TV back then. So there is a very good chance we do indeed have pictures of the same planes.
Great work, Louis, you’ve really made the most of what is obviously already a top-notch kit.
George Williams (@chinesegeorge)
Thank you George ! I appreciate your kind words.
This Wildcat was clearly built by a master, Louis (@lgardner). It was a pleasure following your WIP for this kit. the interior is spectacular, and the exterior is made even better by the seldom-seen yellow markings. The tail marking is also very cool. Hadn't seen that one before. Now that I have seen yours, I need to put mine in the building queue. Well done.
George R Blair Jr (@gblair)
Thank you George. The only thing I have mastered is eating and sleeping...and I'm still not too good at either of these ! 😉
I am pleased to hear that you enjoyed the WIP. I tried to post up everything, from the good, to the bad, and the ugly. Thankfully there wasn't too much of the bad or the ugly, other that what was self induced. I think you will be very pleased with how this one goes together. Take your time, make sure all of the sprue attachment points are removed, watch out for the turbo charger (or possibly the engine oil cooler, as I'm not sure exactly what it is), and you will have a fine model to display.
Also, please check your kit out carefully to see if it is missing the spoked wheel covers. Several of them were sold at the IPMS show in Texas that were missing these parts. The decals you decide to use will determine if they are needed or not. The same goes for the engine exhaust panels. Eduard is supposed to be sending me some replacement parts L-38. The L38 parts are missing on the "test" sprues that somehow were boxed for retail.
The Yellow markings are what drew me to build this particular model. I want to build a similarly marked F4U soon. They will look good parked next to each other.
Thank you again for everything you have done for me. I sincerely appreciate this. By the way, your SNJ is going to be looking good with the 3D seats you have been working on. I was fairly certain about the seats, and I'm glad to have helped you with this.
Take care buddy.
Bullseye, Louis @lgardner! Outstanding photos as well. So much valuable build info you have provided for all of us who have just added this kit to our stash pile. Thank you.
Eric Berg (@eb801)
Thank you Eric for the compliments. I hope to see you building yours soon. It is an incredible kit, and I can see myself getting a few more of these. I would like to build an Atlantic ASW schemed plane, and possibly a FAA version as well.
I'm also looking forward to your next installments from your Corsair.
Louis @lgardner.
Outstanding work, some great saves, and a beautiful Wildcat is the result. You did good, real good.
The new tool Eduard FW 190F-8 is a real shake and bake that falls together. The only place I needed a tiny bit of filler on both I have built is where the wing joins the aft lower fuselage. Still not mastered attaching PE fins to all those PanzerBlitz rockets though, so my Fw 190F-9 Green 2 has the rails but no rockets.
David Odenwald (@kahu)
Thank you. This one had me a bit nervous a few times. Mainly when it came to the decals, and the Yellow paint over spray that were both self induced troubles. I have several of the new tool Eduard FW's. I have been wanting to build several of them, mainly the early versions like the FW-190A2 and A3.
I'm not a big fan of using PE stuff either. I can imagine how you must have felt with the rockets for it ! You can tell everyone it has just returned from a mission on the Ost Front and is waiting to be re armed... When you get time, please post up your FW. They are my favorite WW2 German fighter.
Thank you for following along during the work journal. Take care.
I certainly will.
The kit comes with the cooling fan and propeller for an F-9. Then sourced an Aeromaster decal sheet with F-9 markings. So built Green 2.
I learned a lot from you and Tom Cleaver @tcinla following your FM-2 build.
David Odenwald (@kahu)
Thank you for posting your FW-190. It looks good in the headlines section. I'm glad to help you with learning about the Wildcats. I have had the very good fortune to have been around quite a few of the full sized war birds. I have some friends who restore WW2 era aircraft and they perform annual inspections on them too. I have tons of great photos because of this. I have been toying with the ide of writing a book or two on the subject. Thanks again.
You are very welcome. And yes I learned a lot about the hot rod of Wildcats following your build. I have a few photos also but I don't think enough to warrant a book. Most memorable photos were probably those I took for the 71st Doolittle Raider reunion. Got to meet Dick Cole, David Thatcher, Ed Saylor, and Carrol V. Glines. Six B-25s, Six SNJs/T-6s, and they let us on the ramp to experience all that beautiful flying metal.
1 attached image. Click to enlarge.
That FM-2 looks fantastic, great job!
Michael E Rieth (@mrieth)
Thanks Michael. This was a really fun kit to build. I appreciate the kind words. Take care.
Excellent result, nice choice of finish. The new Eduard kits I've seen are spectacular, you'll love them!
Chas Bunch (@chasbunch)
Thank you. I am very pleased with how this one looks now it is completed. This is my first ever Eduard build, and I can see myself building more of these Eduard kits in the near future. Next one will be their new tool P-51D-5 Mustang. It has been calling me for a while now...
Beautifully done.
John Truby (@jdtruby)
Thank you !
Fantastic job, Louis! The Eduard kit is certainly very good, but it takes your skills to produce such a masterpiece! Your build thread was, as always, a joy to follow. Your research, also as always, amazing.
Well done my friend!
Spiros Pendedekas (@fiveten)
Thank you my friend ! This is indeed a very good kit, one I can recommend to anyone who has built a few and has a little experience. This is one of those kits that makes the builder look better than they actually are.
I try to include a lot of pictures and information that I uncover as I research and build my models. Sometimes I get lucky and I find a lot of stuff to post. This was one of those times, so it made for a more accurate build.
Thank you for following along on with this WIP. Your continued support is most appreciated. Please tell QC1 and QC2 we were asking about them, and say hello to your family for us.
Take care brother.
Great job my friend. @lgardner. And I grieve with you about my dead MM paints.
Robert Paschall (@beauslx)
Thank you for the compliments. I wish we could still get our Model Master paints. But I don't think they will ever come back again... like the dinosaurs. Now I have been starting to use the MRP lacquers and I like them too.
A truly amazing result, Louis @lgardner
Reading your build journals and the information you gathered during your research is a pleasure to do.
After liking this first Eduard build, you might be interested in a lot more of their kits.
I was wondering how you created that antenna spring, it looks really good.
John vd Biggelaar (@johnb)
Thank you my friend ! I do sincerely appreciate these kind words from you. Yes I am a big fan of Eduard's new kits now. I can see myself building their newer tool 1/48 scale P-51D-5 soon. I have one of their Over Trees versions and it has been there waiting in line to be assembled for a while now...
I took an electrical wire and stripped the insulation off it to see how thin the twisted wires were inside it. I used a wire that was very thin. I simply wrapped it around a small thin piece of piano music wire, until it was long enough. Then I slipped it over the EZ line and pushed it towards the tail section. I did not glue it, so it has slid forward in a few of the pictures. I came back and glued it in place permanently using CA glue after the pictures were taken. I think it helps to look more realistic.
Thank you for following along during the WIP journal. I look forward to your next updates on your Tamiya Corsair. It's looking very good !
Take care my friend.
Turned out nice! congrats
When my dad recently started this kit, we had the same scheme in mind because it´s very colourful. Then we saw, no yellow stripe decals included and masking over decals would be a problem. Seen you experienced it...good recovery
Most probably gonna do the shamrock scheme now.
Reinhard Spreitzhofer (@grimreaper)
Thank you ! I commend you and your Dad with your recent Hellcat and F4F builds too. They look incredible ! If you were to build this same version, you could paint the Yellow stripes on first, prior to adding the decals. Had I done this step first, I would not have had the troubles I did to begin with. You can easily cut the decals away to reveal the Yellow stripes underneath.
Also watch out for the turbo charger / oil cooler assembly that is mounted under the engine. It is super easy to build incorrectly, and very hard to fix once it is glued in place.
I was seriously thinking about doing the Shamrock scheme too... it was my second choice. But I also wanted to build up the plane for the highest scoring pilot Elliot with 9 kills. Maybe in the future I will... The FAA planes and the ones from the Atlantic wearing the Gray / White ASW paint schemes also look good. They have made it VERY hard to pick just one...
I was drawn to this one because I have plans to build a similarly marked F4U in the near future. I think it looks really good with the Yellow and White colors combined with the GSB finish.
Thank you for following along with the WIP, and the continued support for our various group builds.
Take care.
Most excellent build and narrative Louis. Thanks for sharing!
Clark Cook (@clarkcook)
Thank you for stopping by and leaving these nice comments. I sincerely appreciate them.
This was a fun WIP to follow as you reached the final finish. From the beginning to the end, the excellent research and step by step process was like a documentary with the history and building process. Your attention to detail was bar none one of your best builds to date. A kit many will build using your notes and pointing out issues to look for and encouter will allow the follow on builds to be aware. Well done Louis, nice finish, excellent pics. Thanks for sharing.