Fork-tailed Devil in 48th by Tamiya

Hi all.
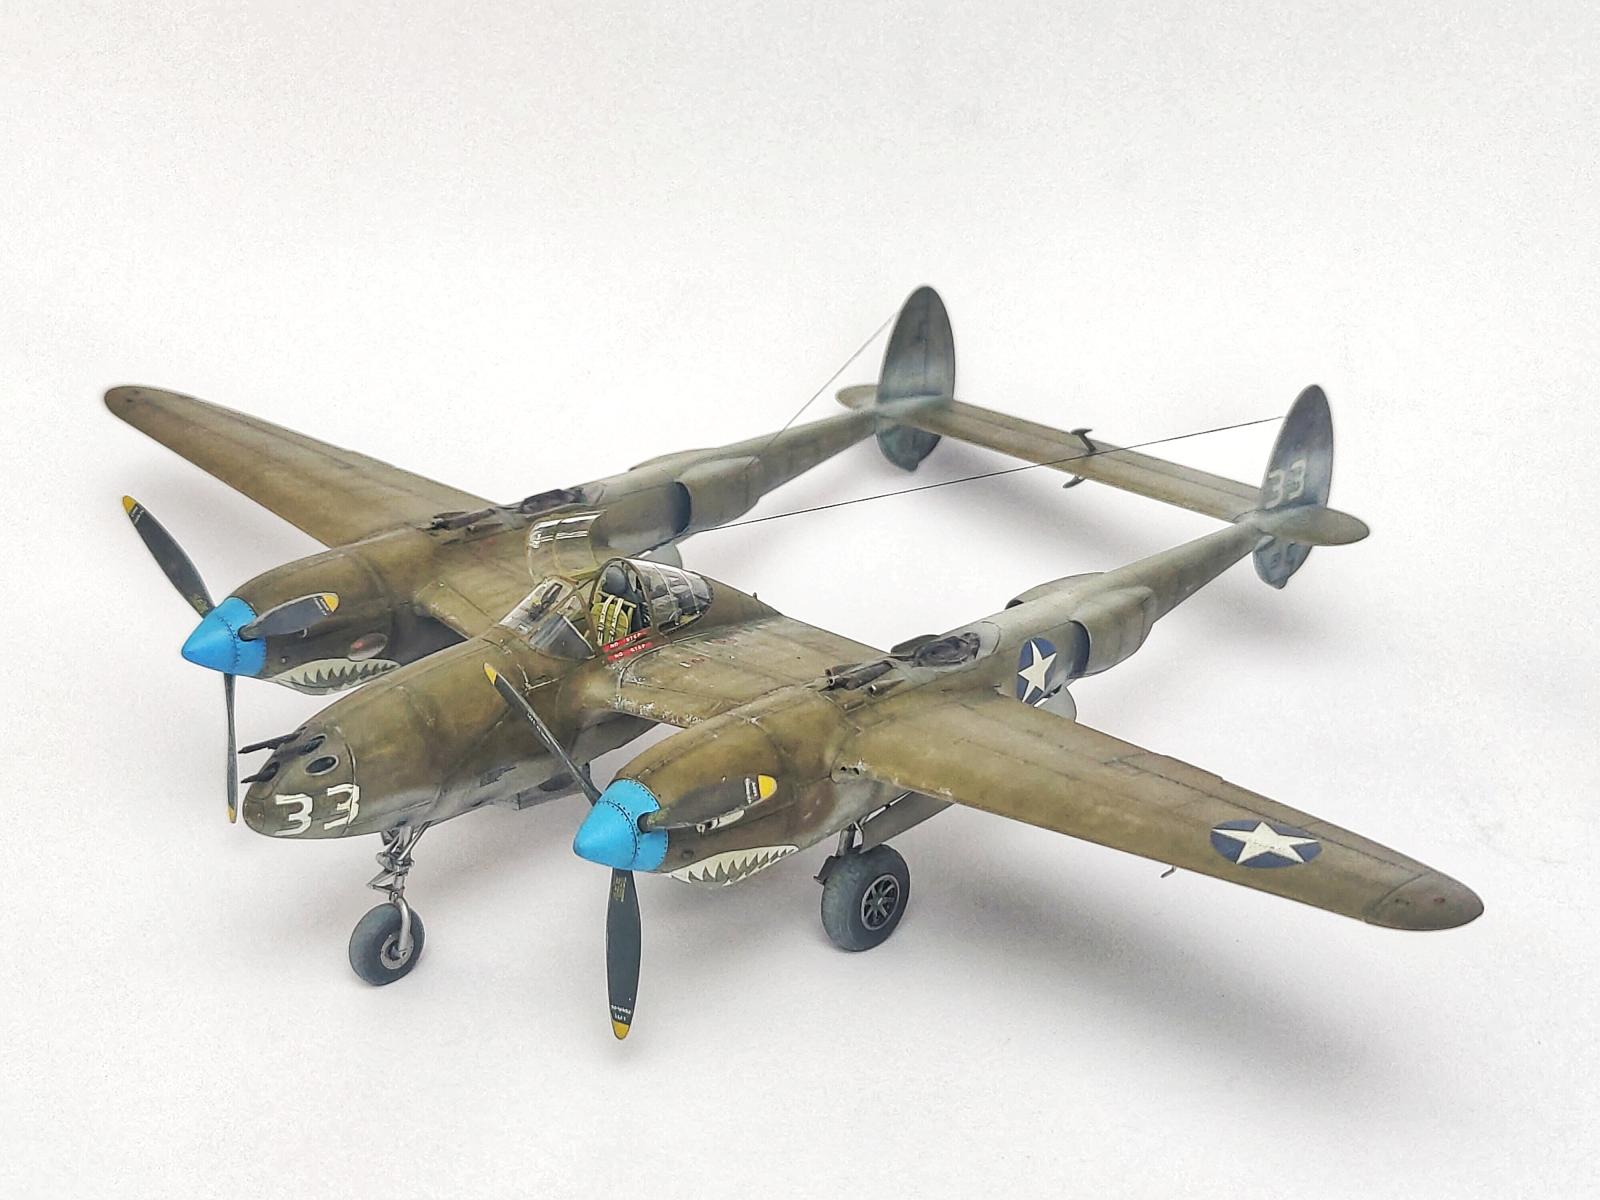
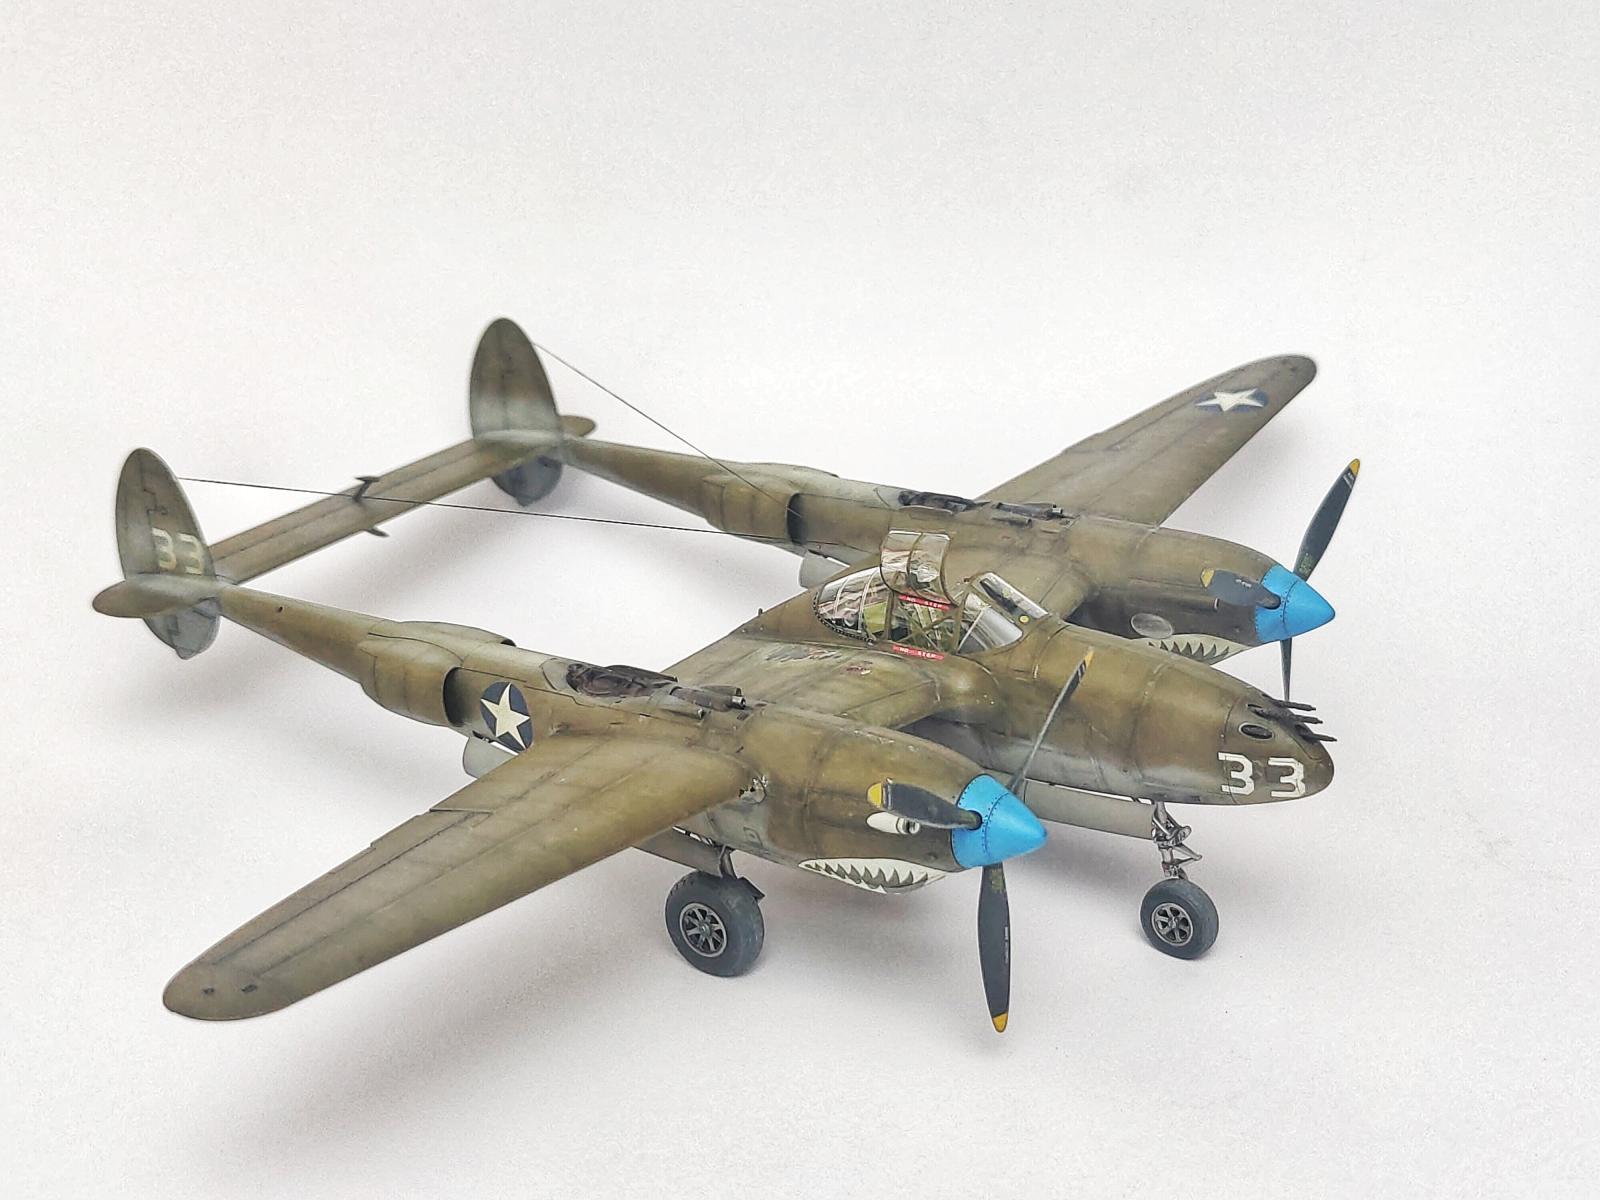
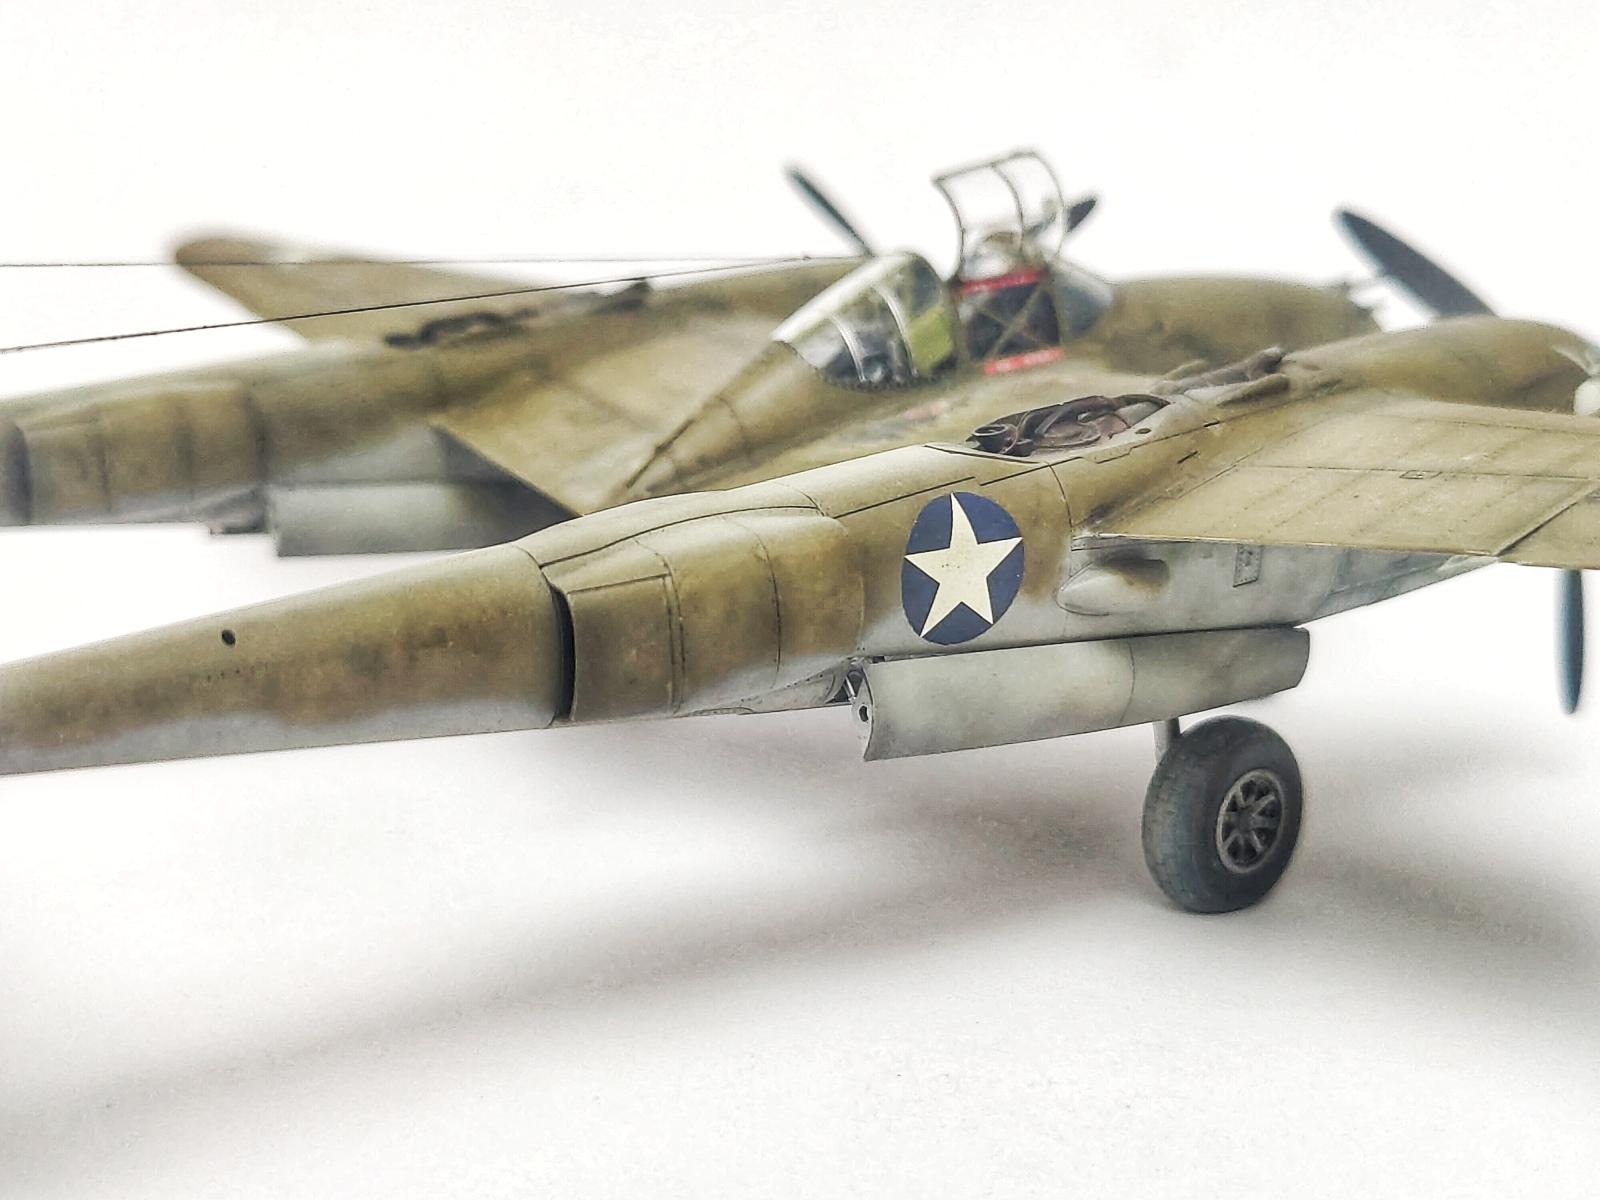
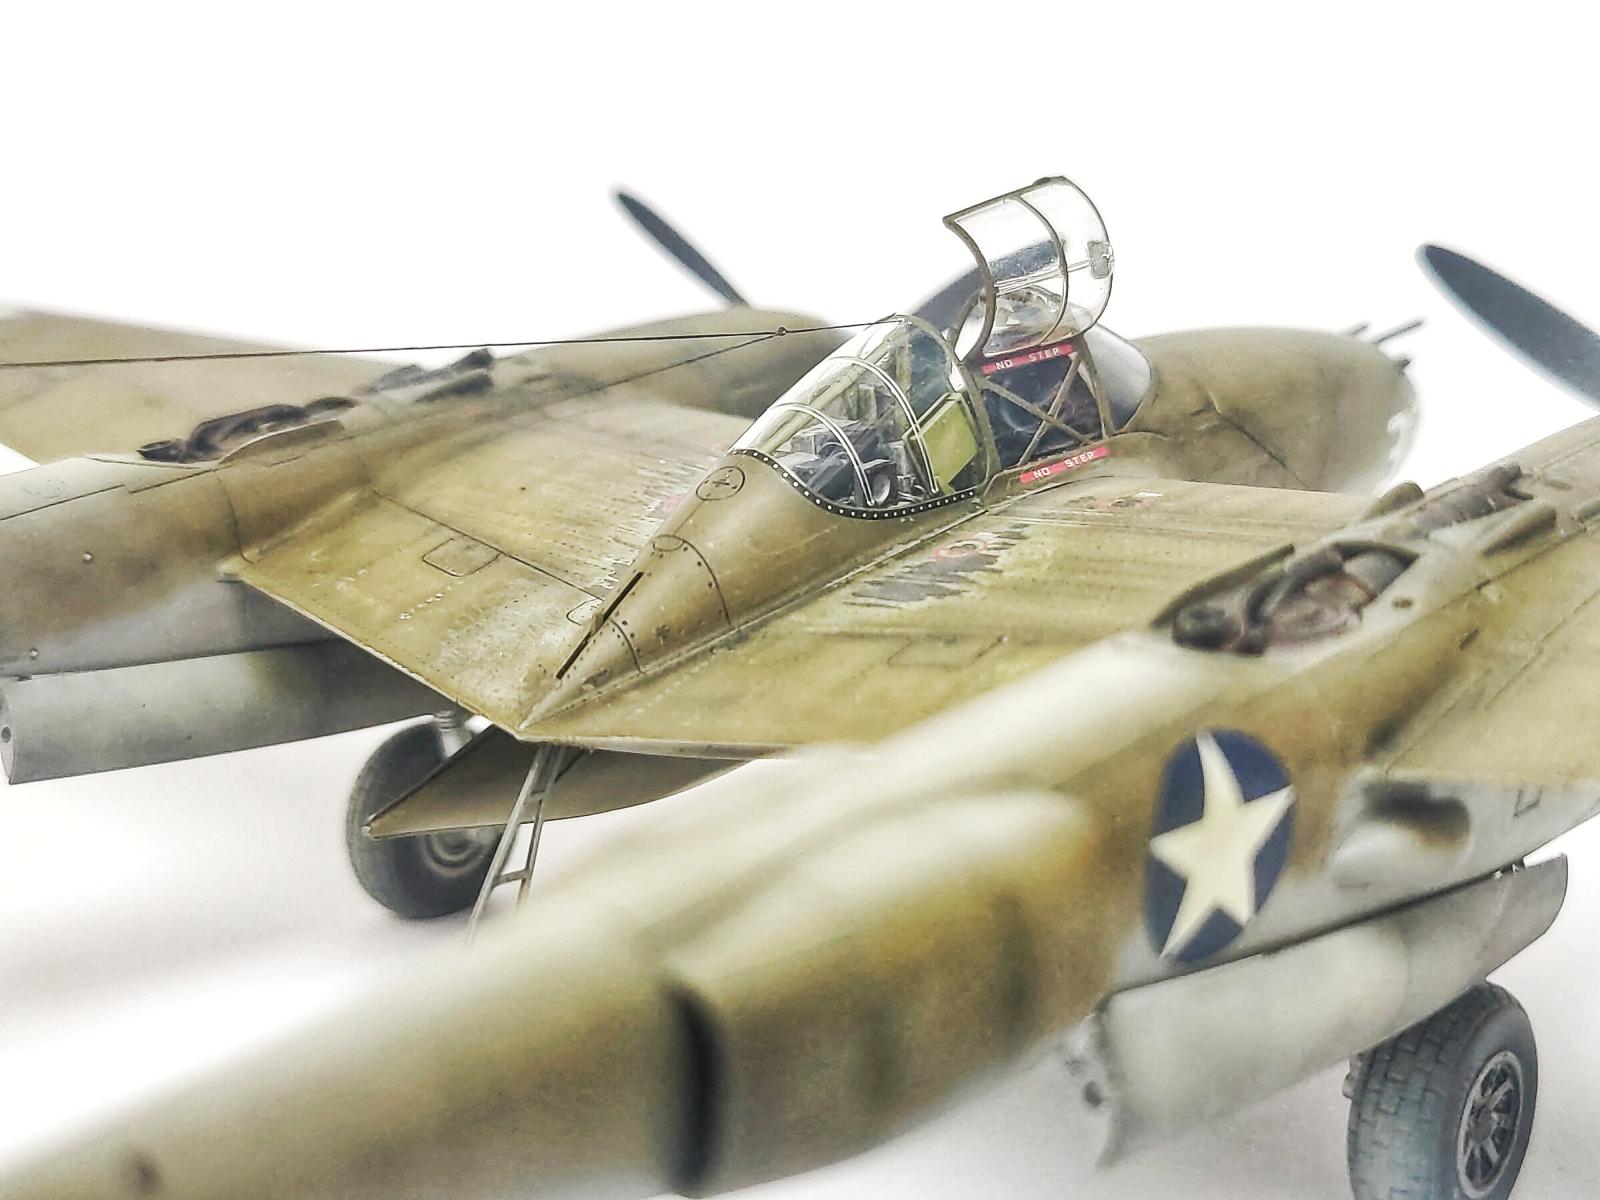
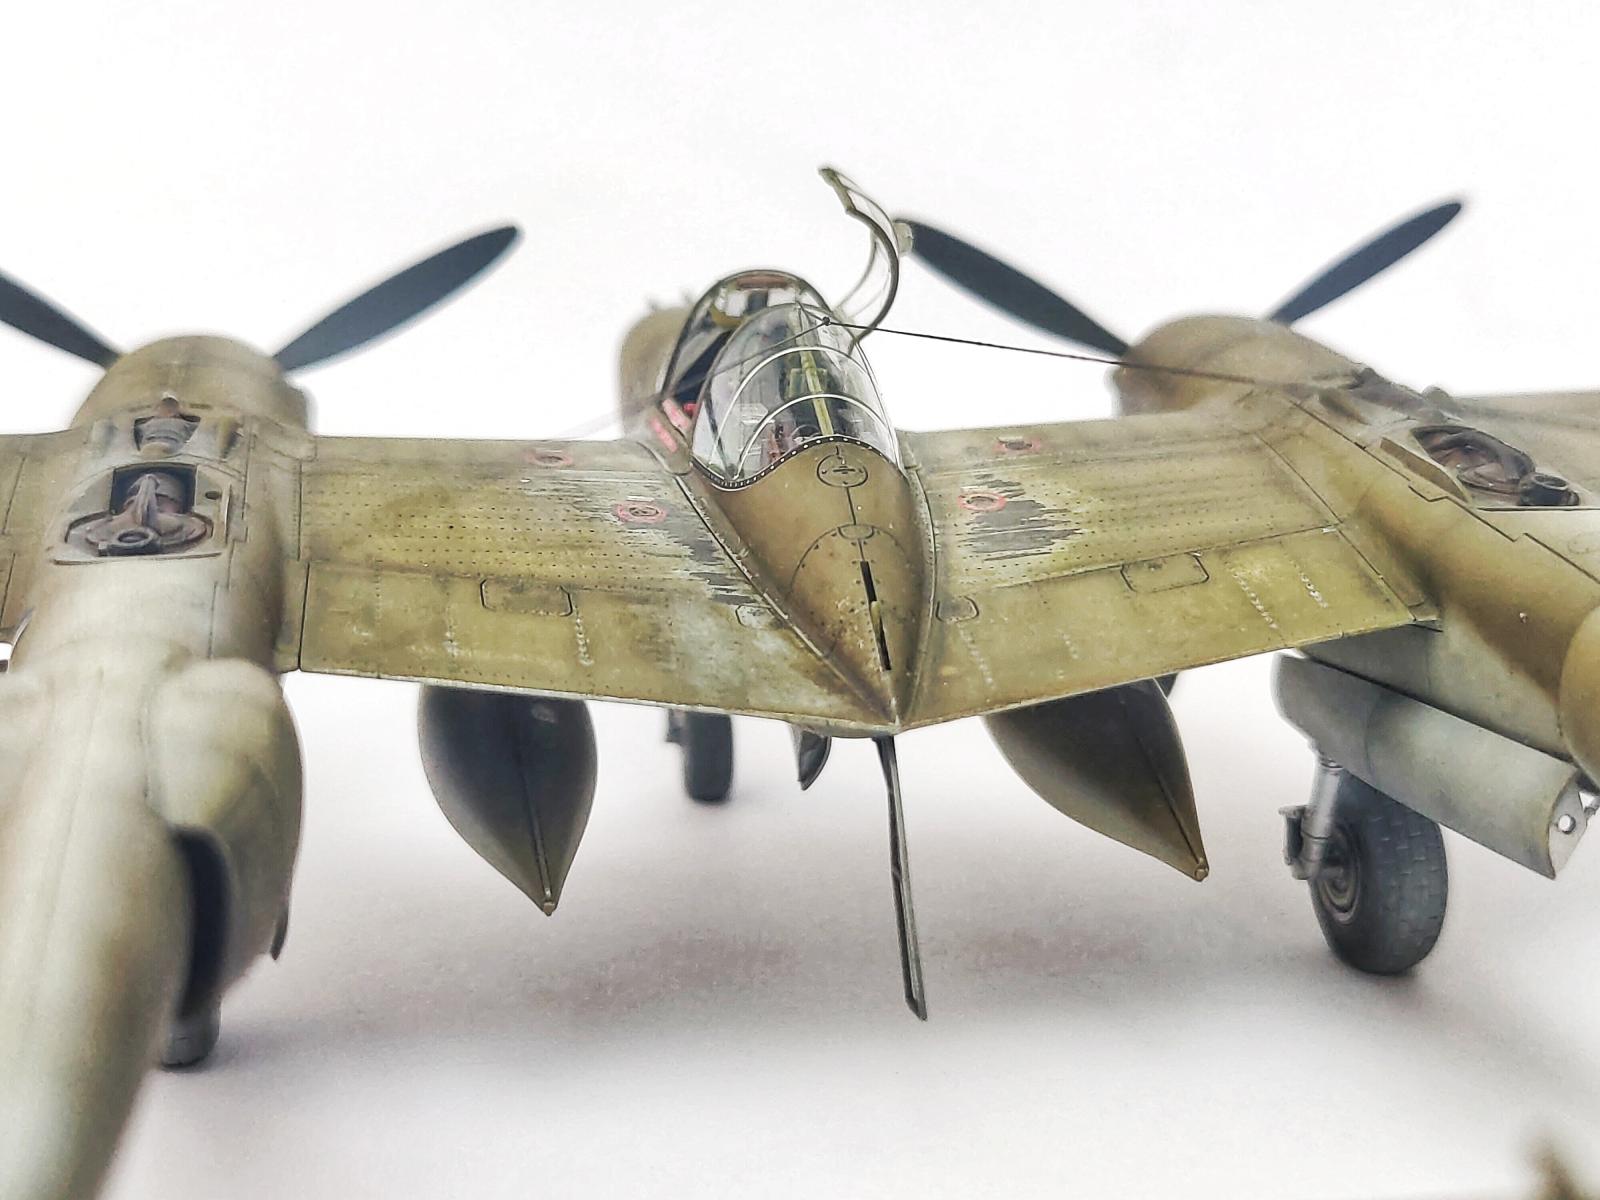
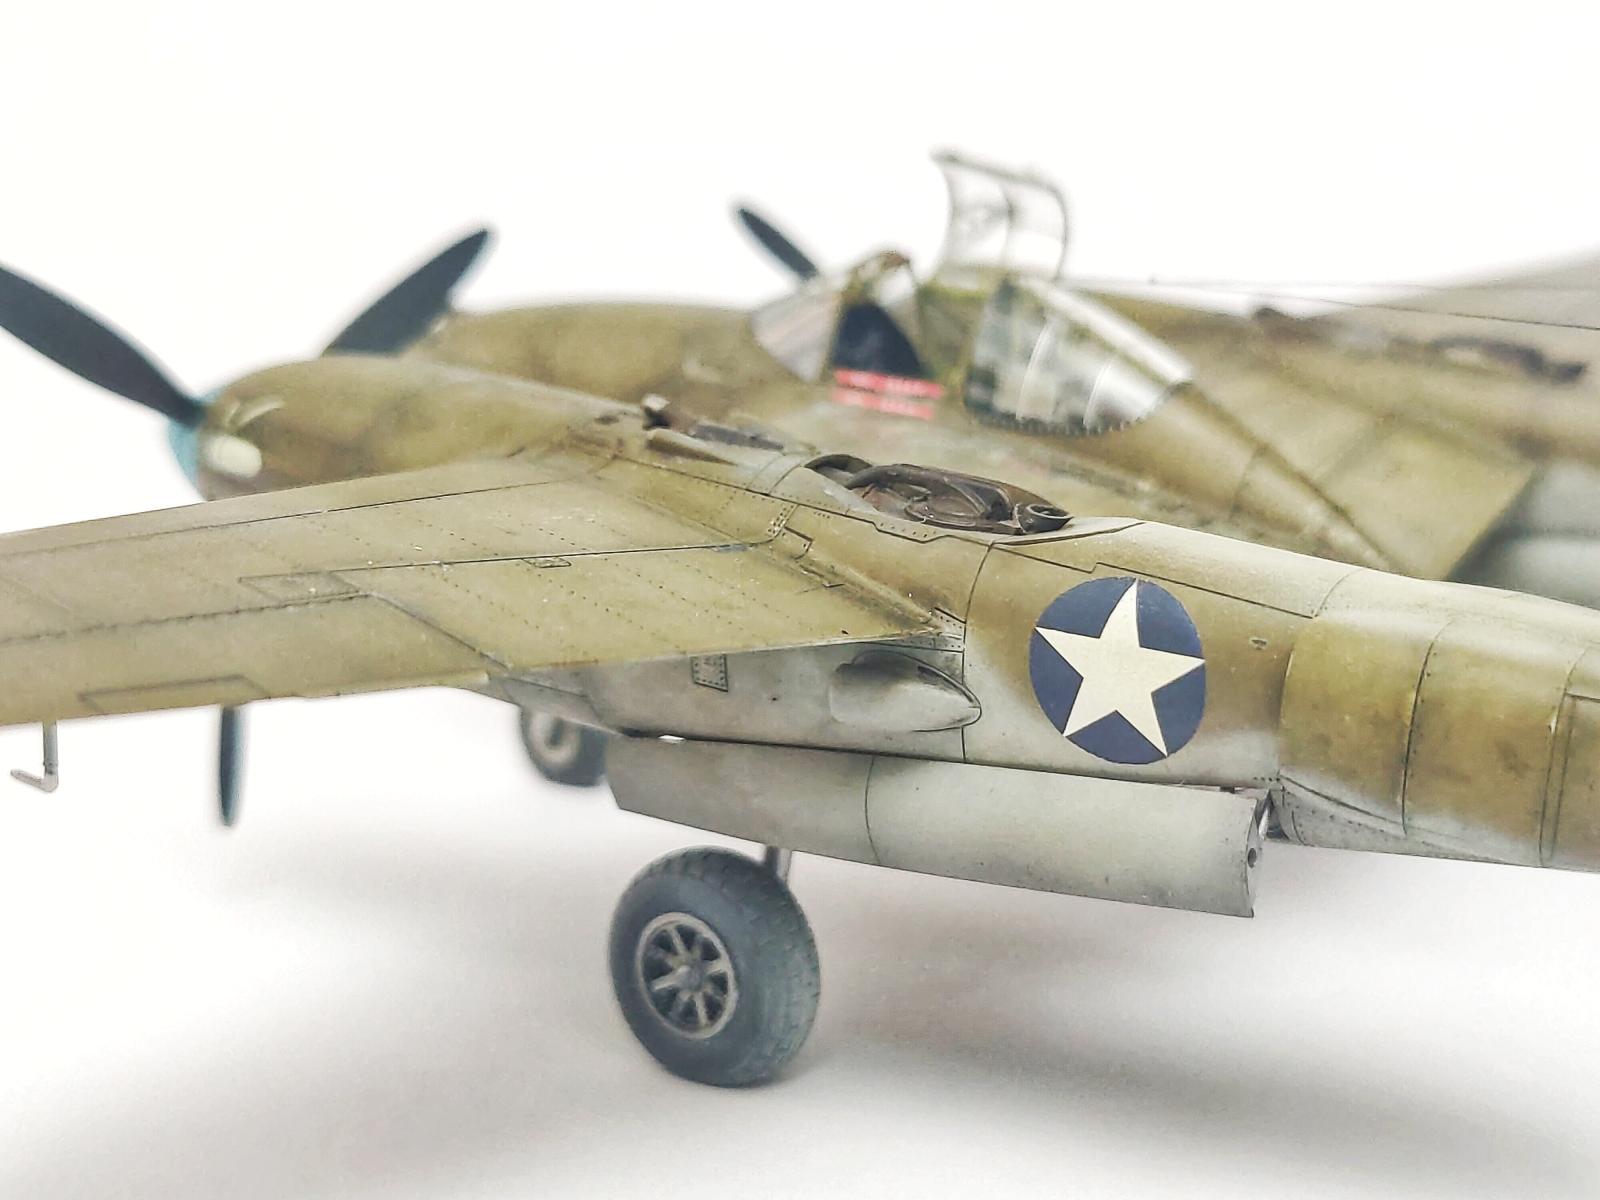
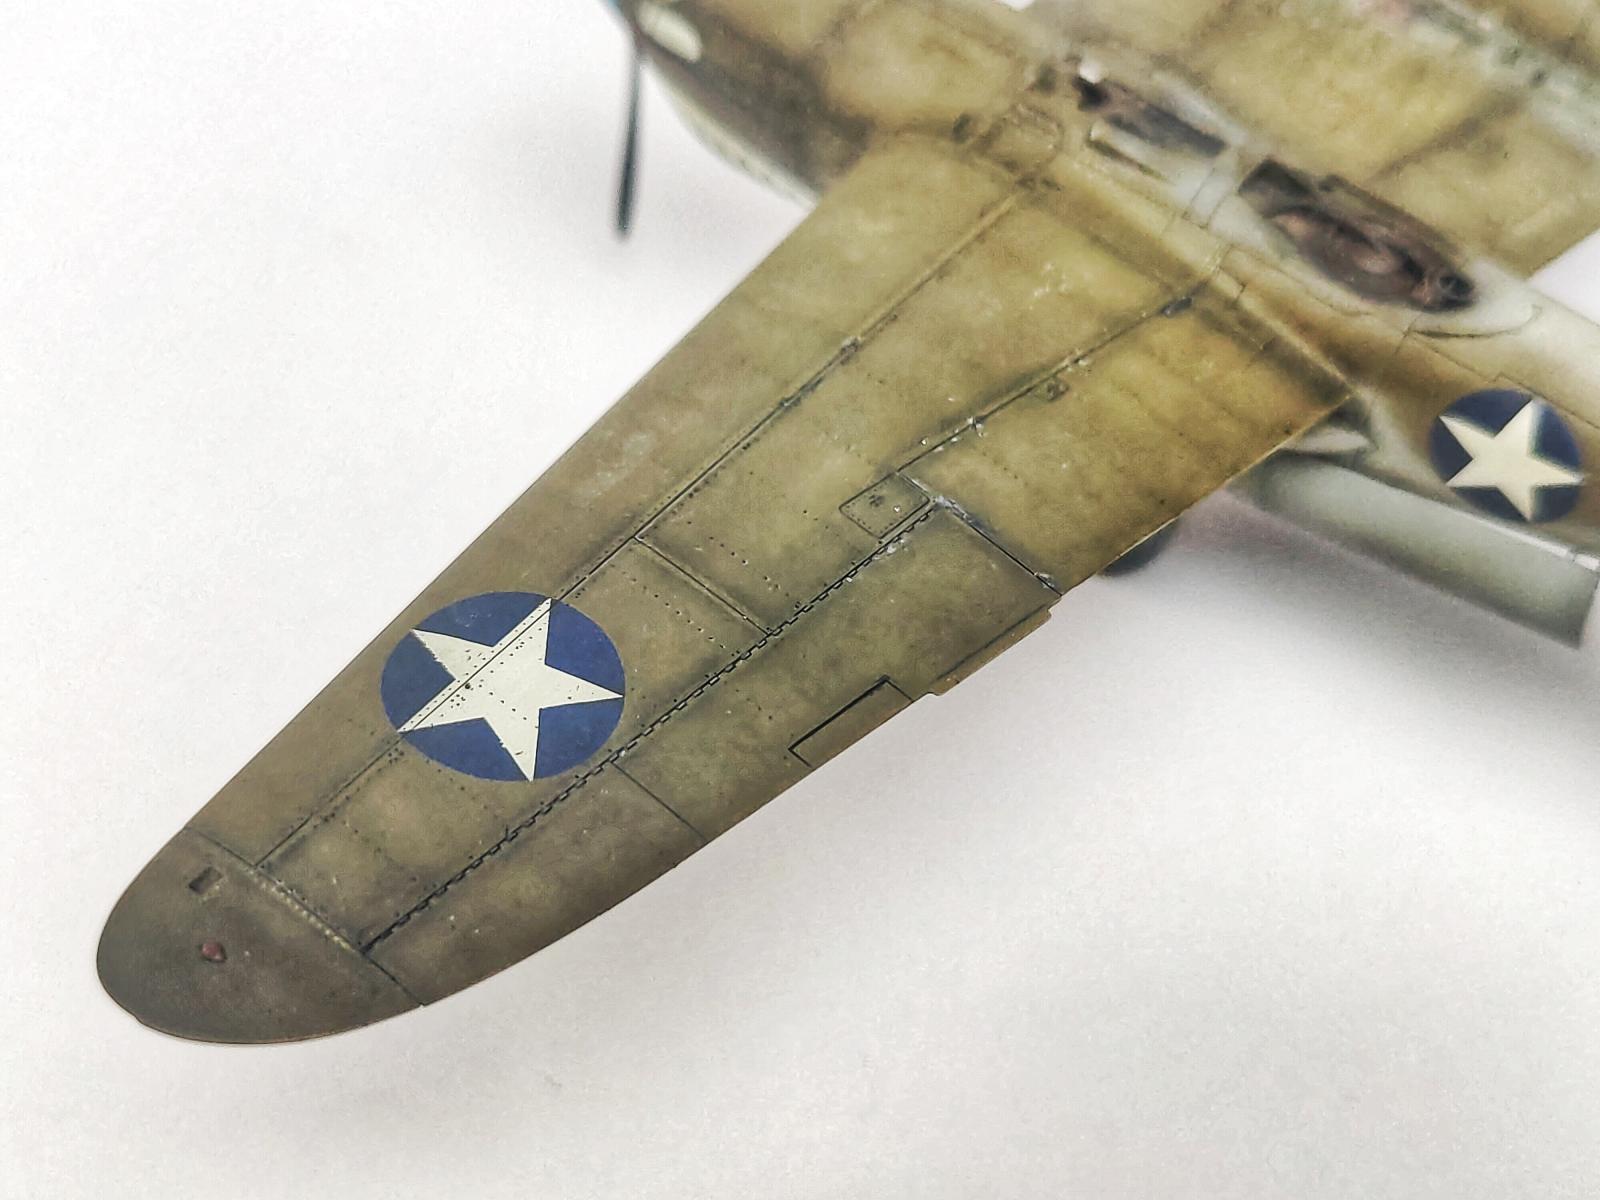
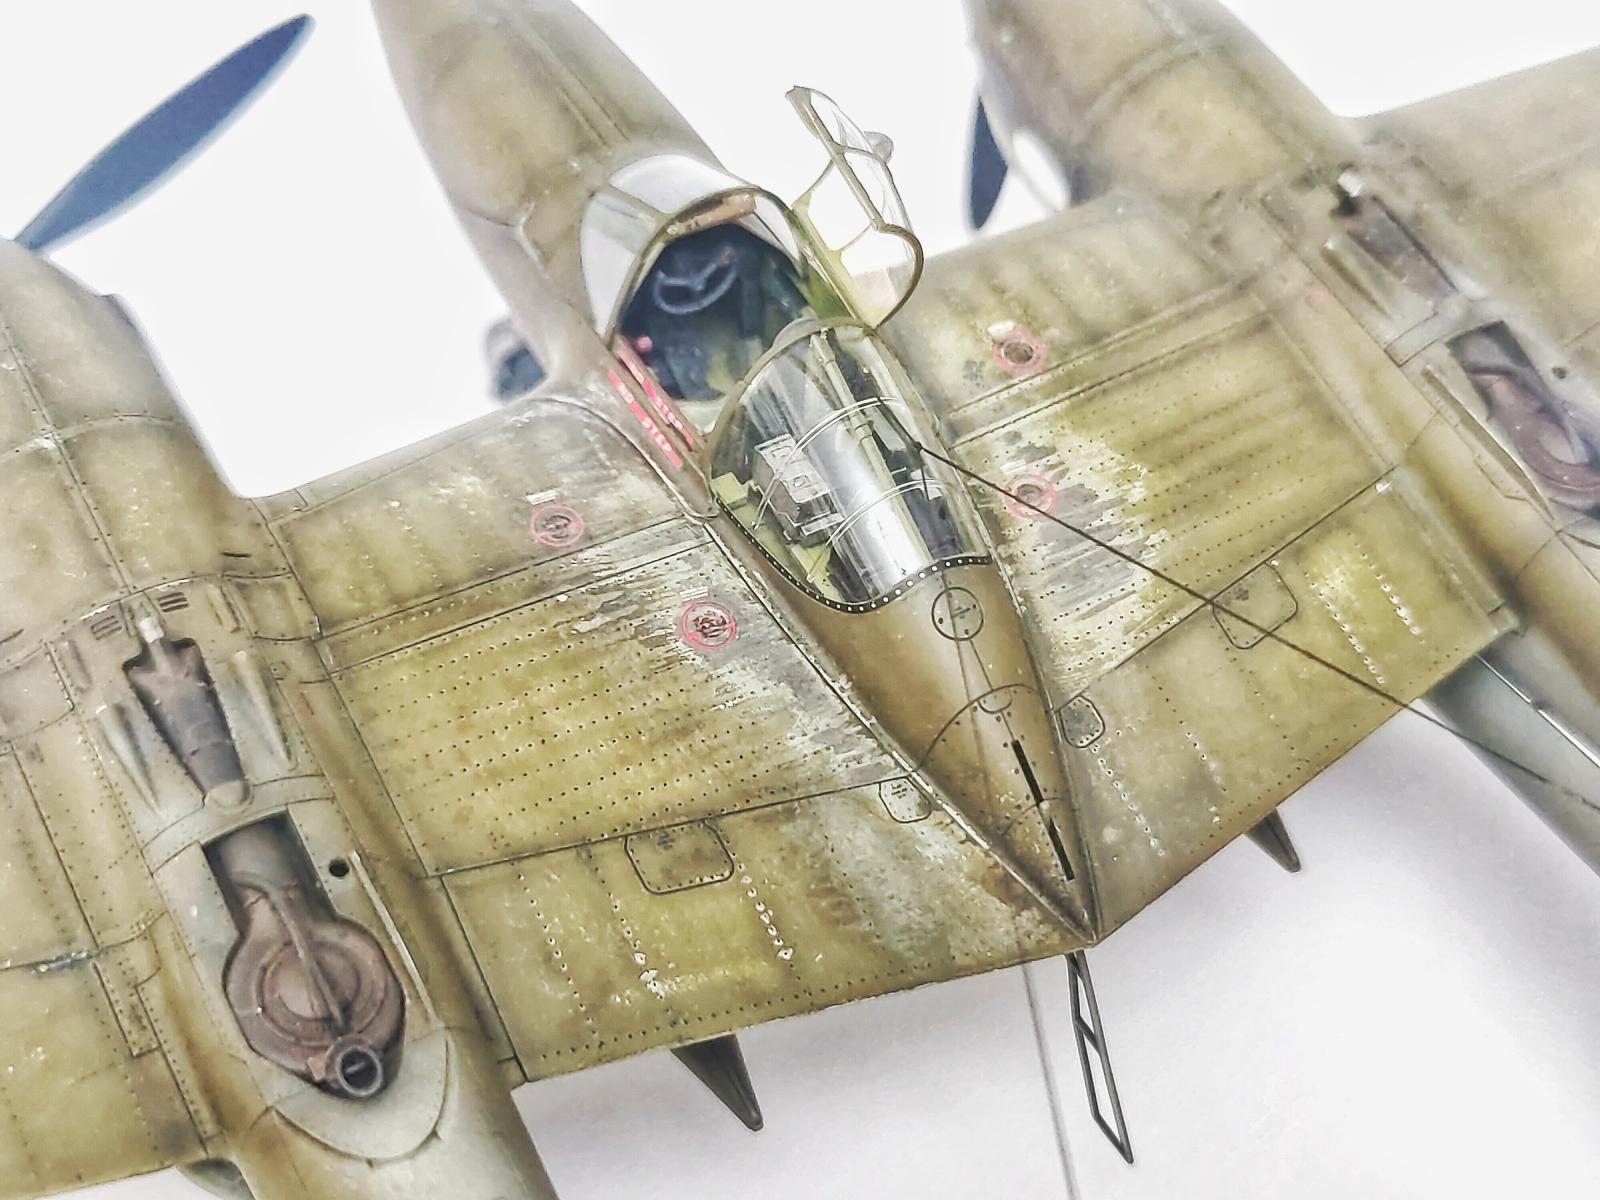
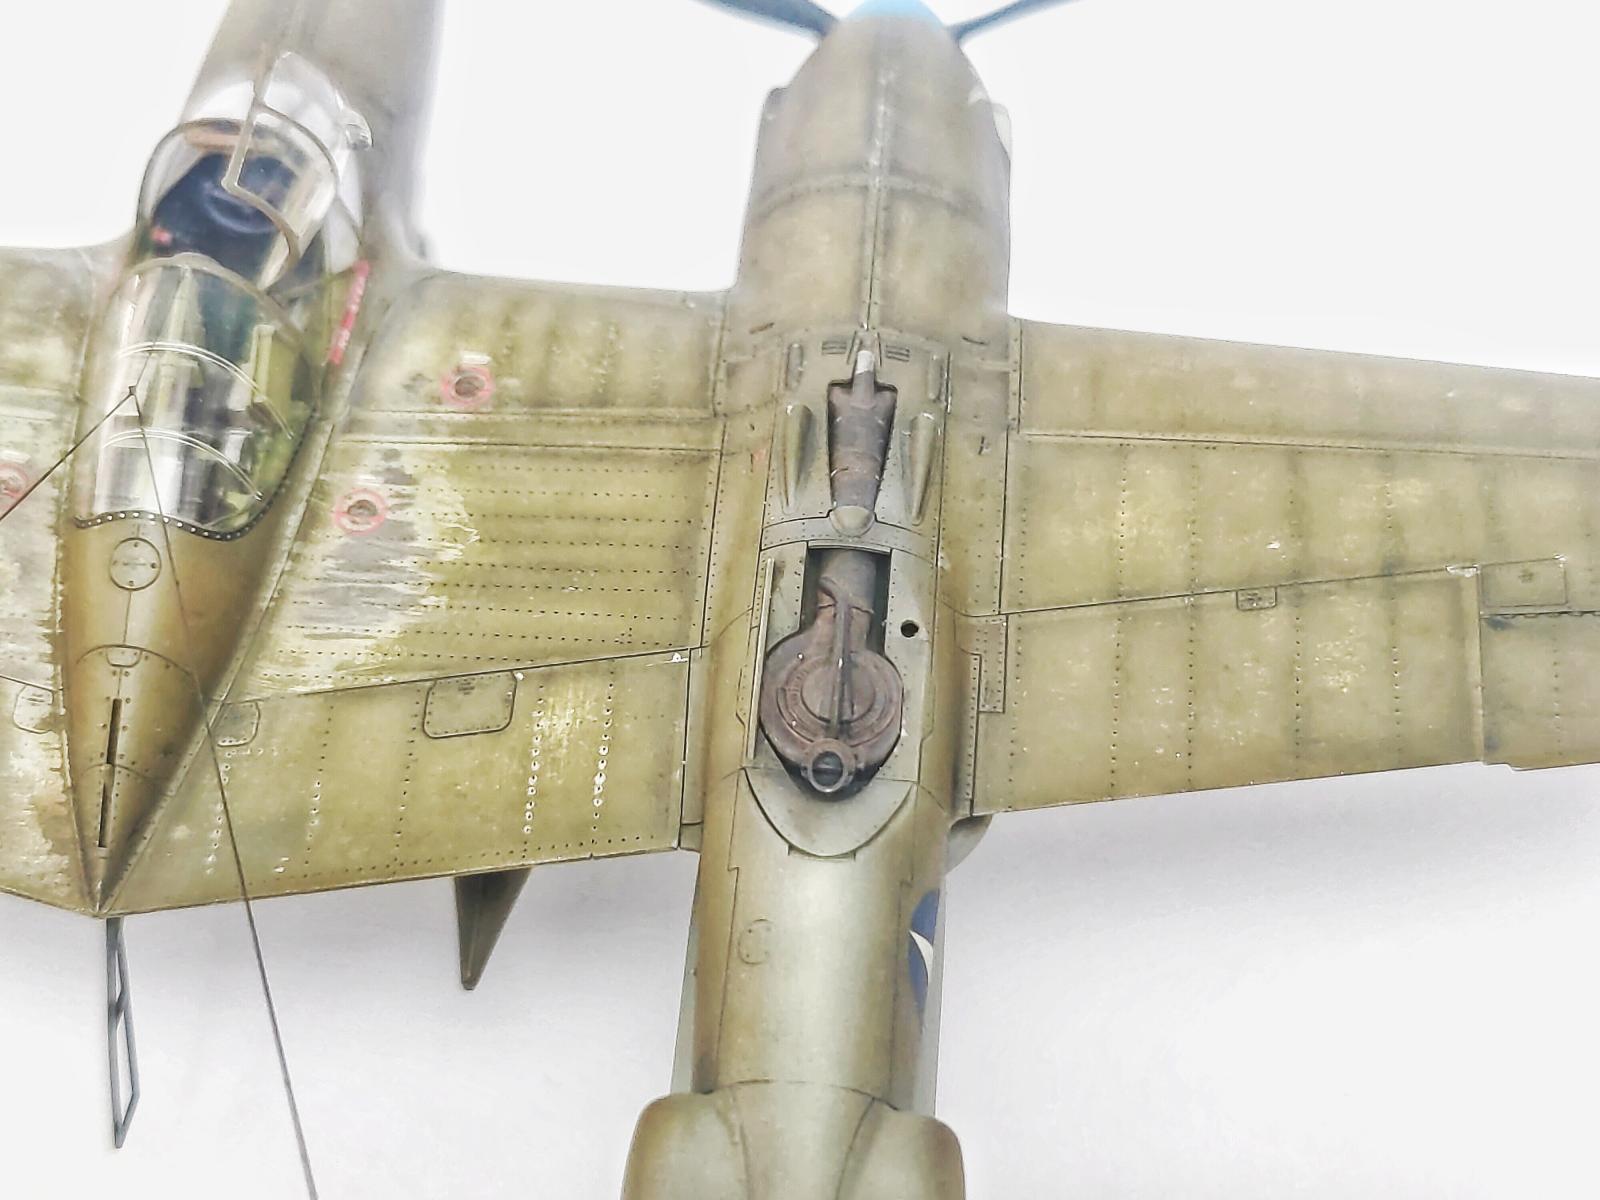
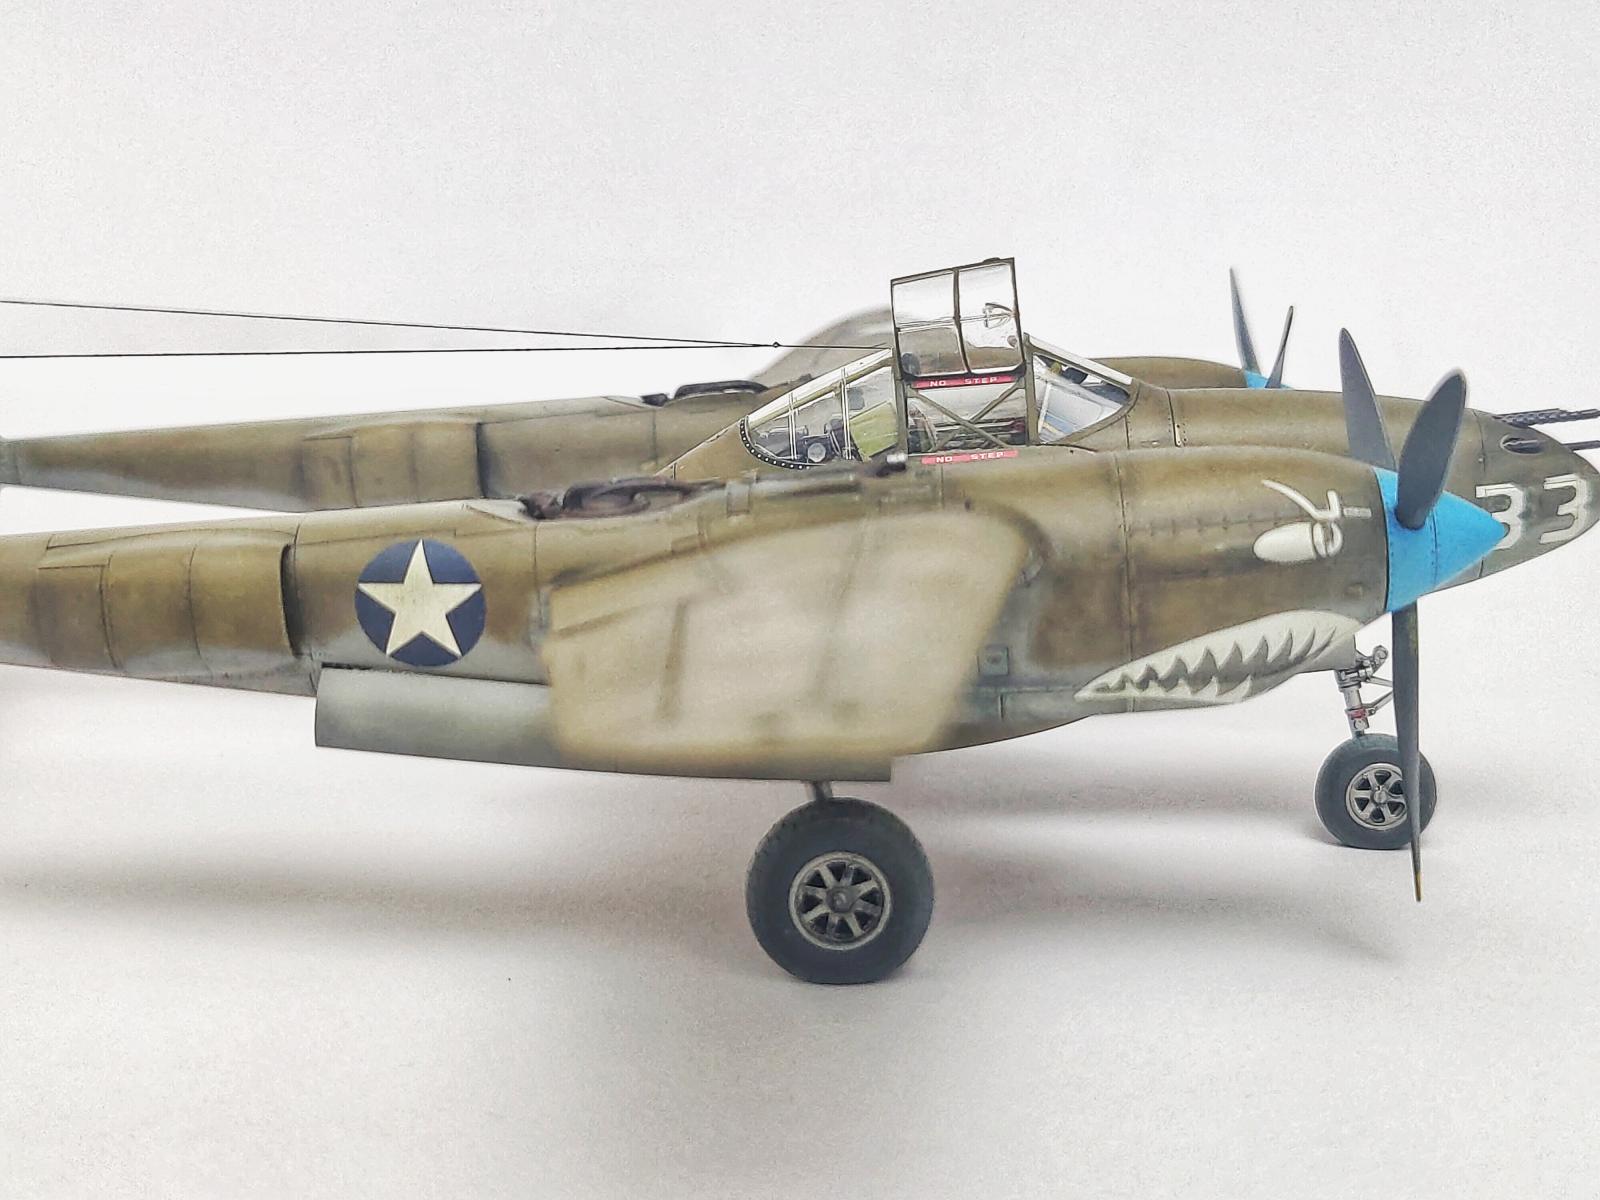
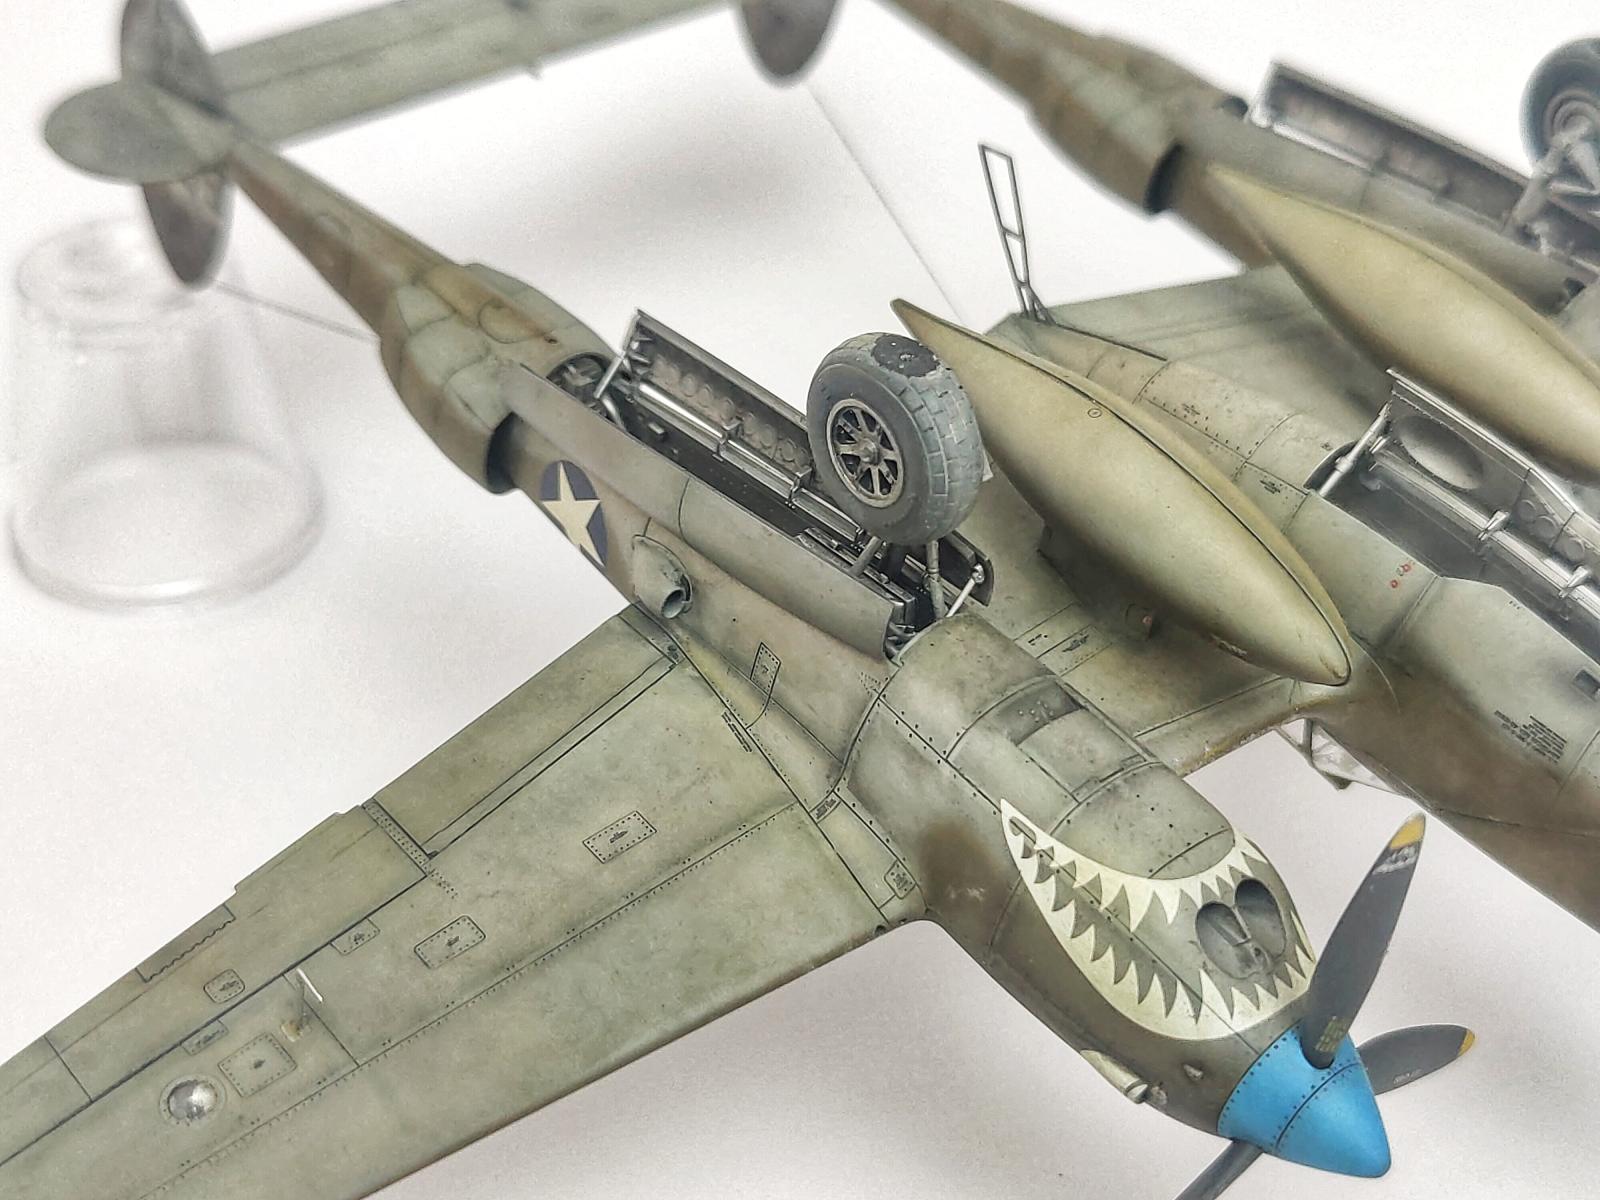
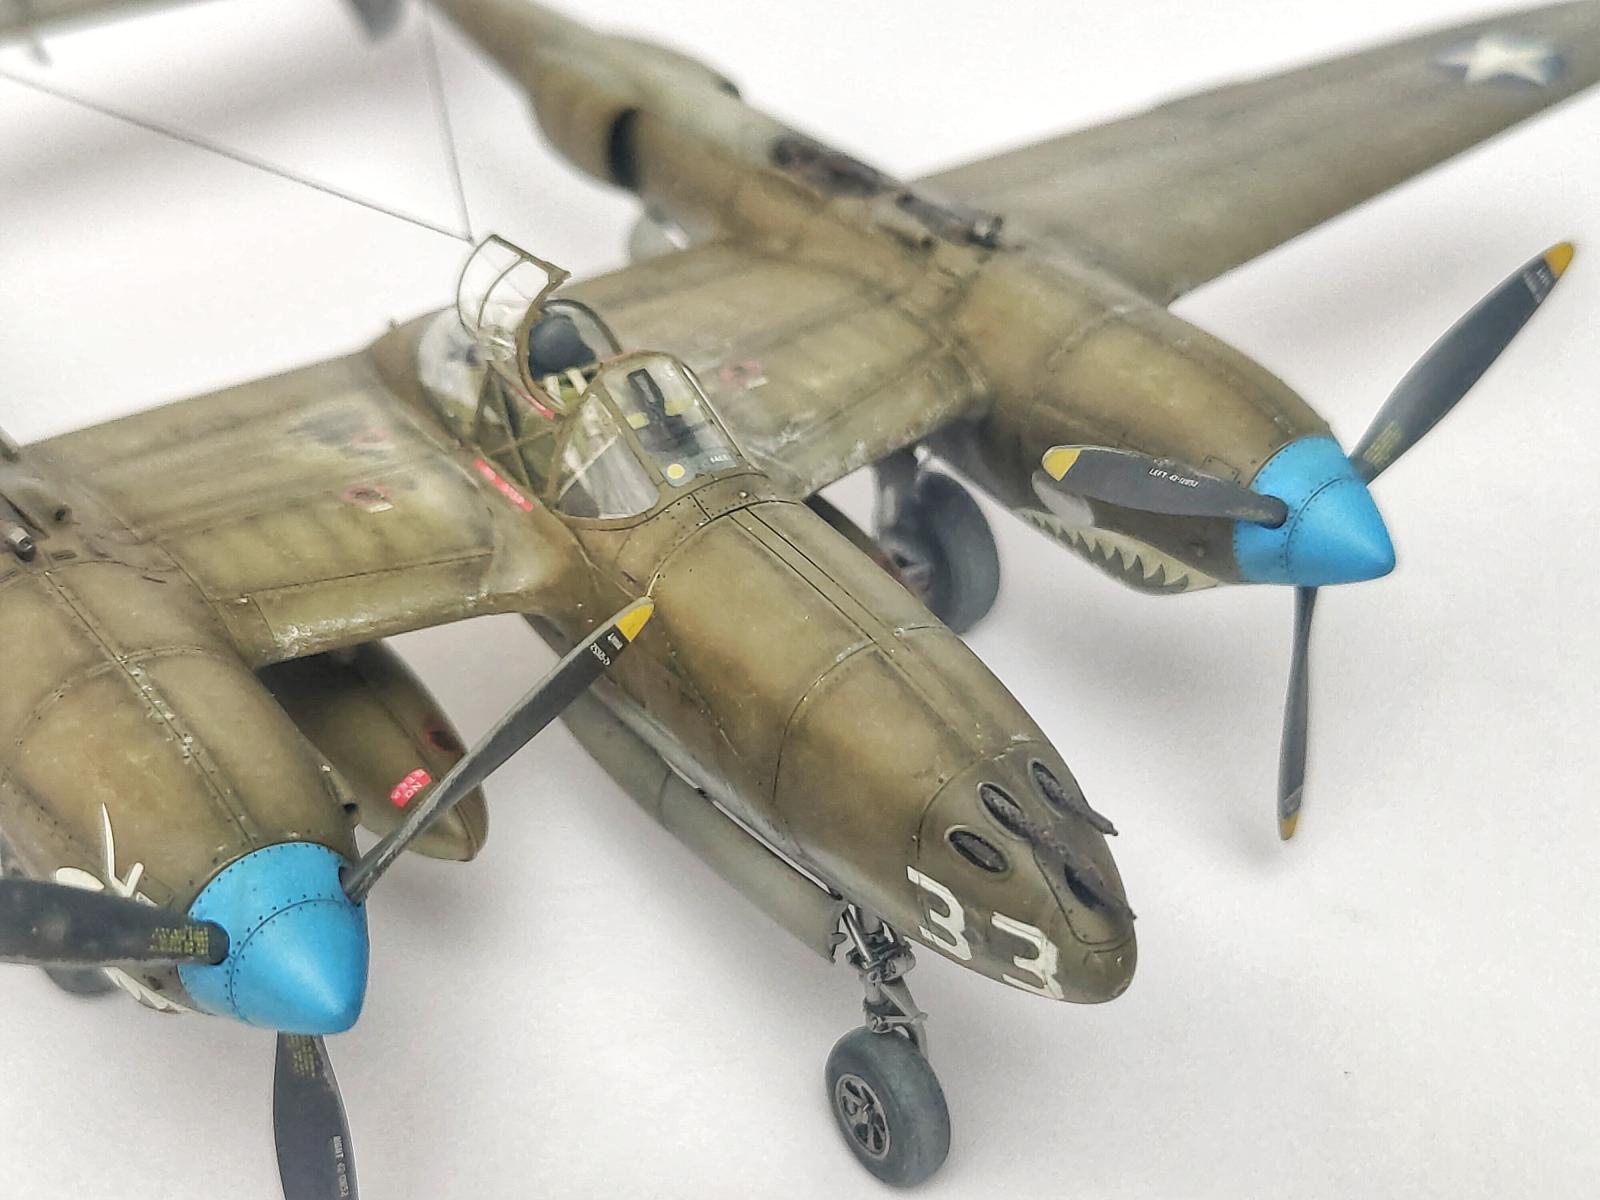
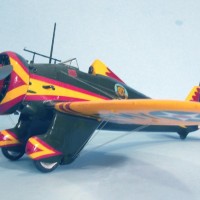
Here's my latest completion, their VERY nice 1/48th Tamiya P-48F Lightning. The model represents White 33 from the USAAF serving with the 39th Fighter Squadron, 35th Fighter Group, 5th Airforce while operating in Port Moresby during 1944.
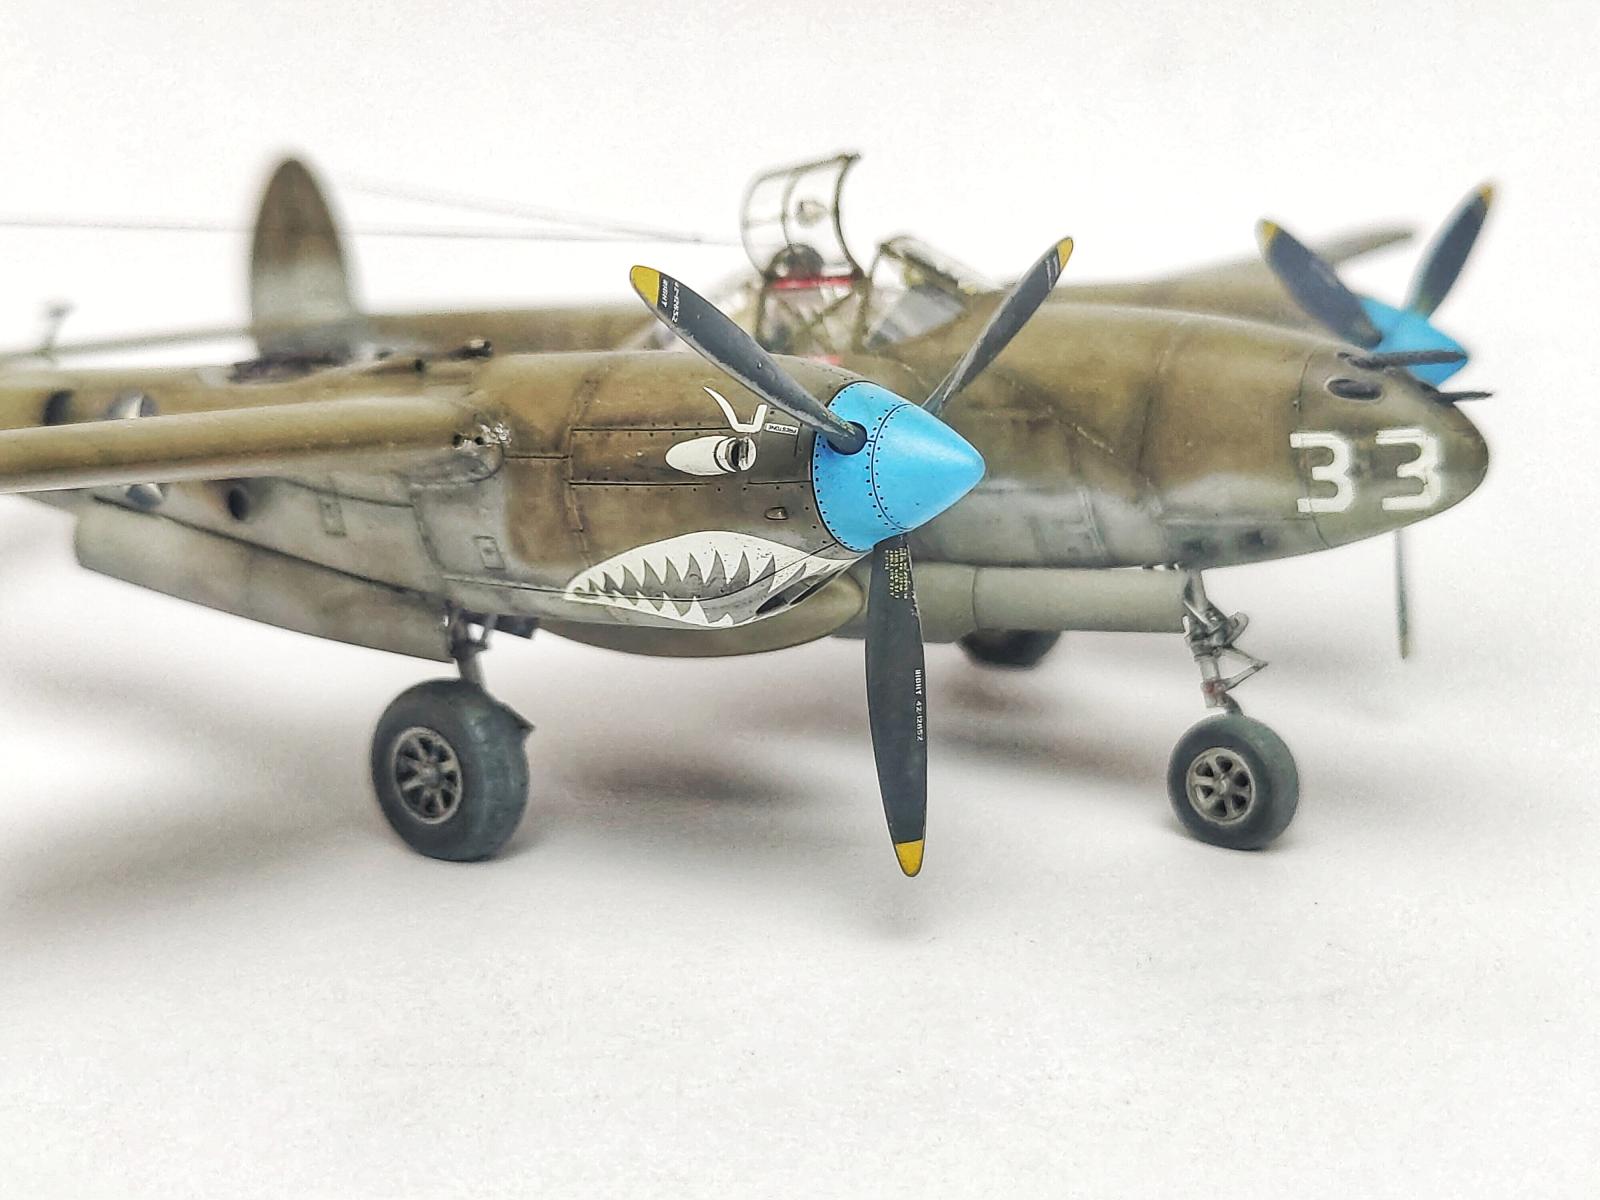
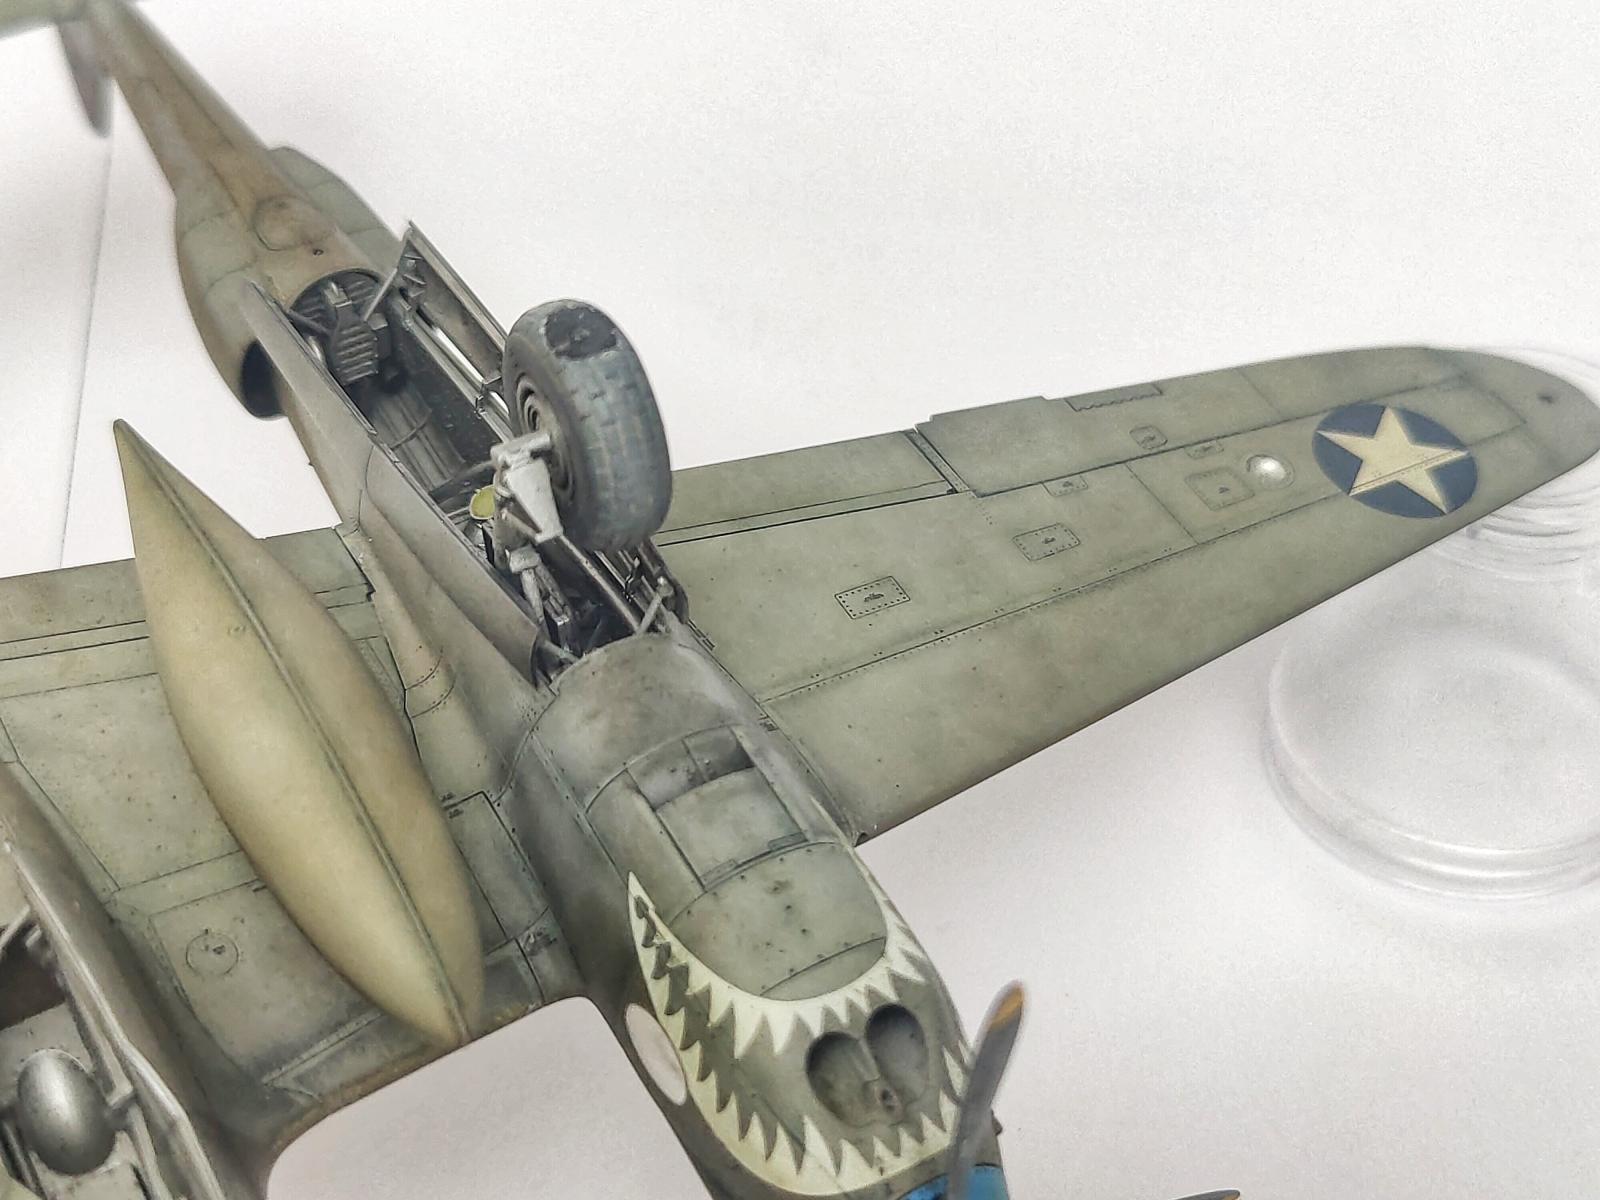
The scheme is one of the options supplied in the box. I created paint masks for the insignia and White 33 on the nose and tail so I could paint them. I would liked to have made them for the shark mouths on the cowls but time was against me as I had to have it completed by last weekend (19/ 20 August) for our state competition. The stencils are from the kit.
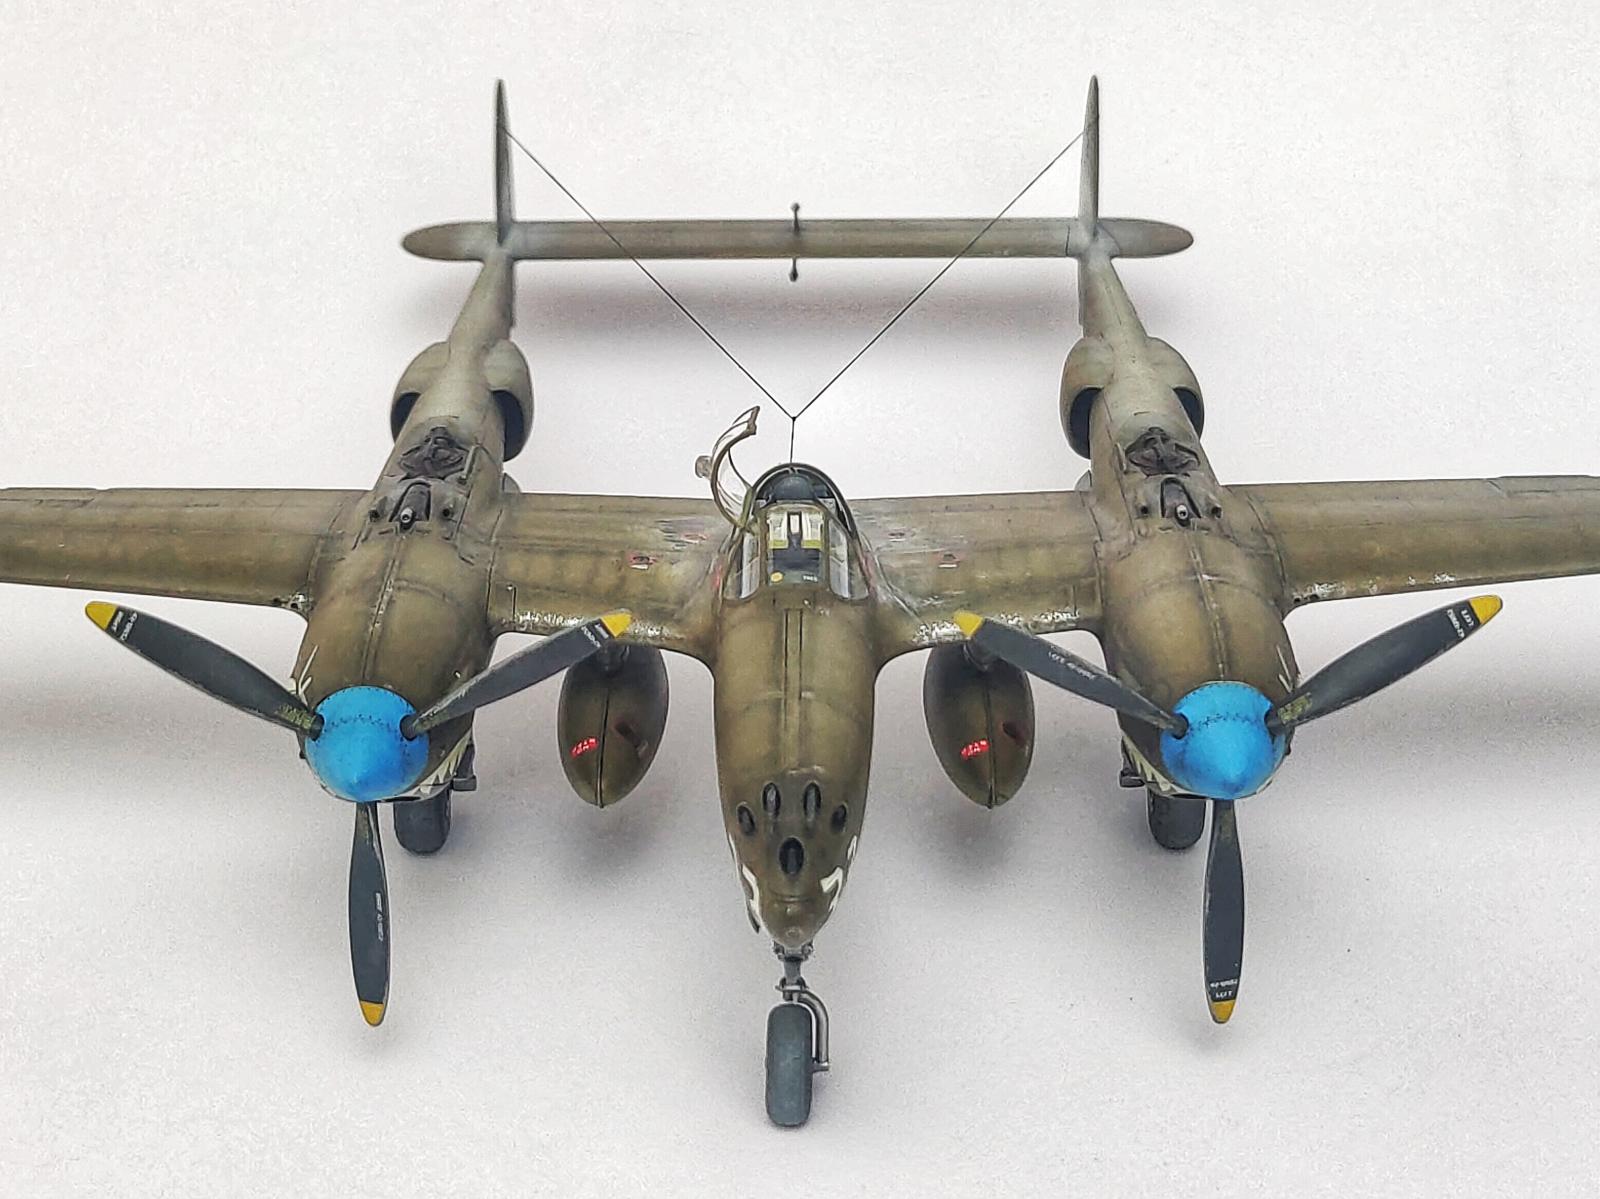
The embellishments are by way of a 3D Look panel, resin superchargers and etch seatbelts; all from Eduard. The wheels and tires are from DEF models.
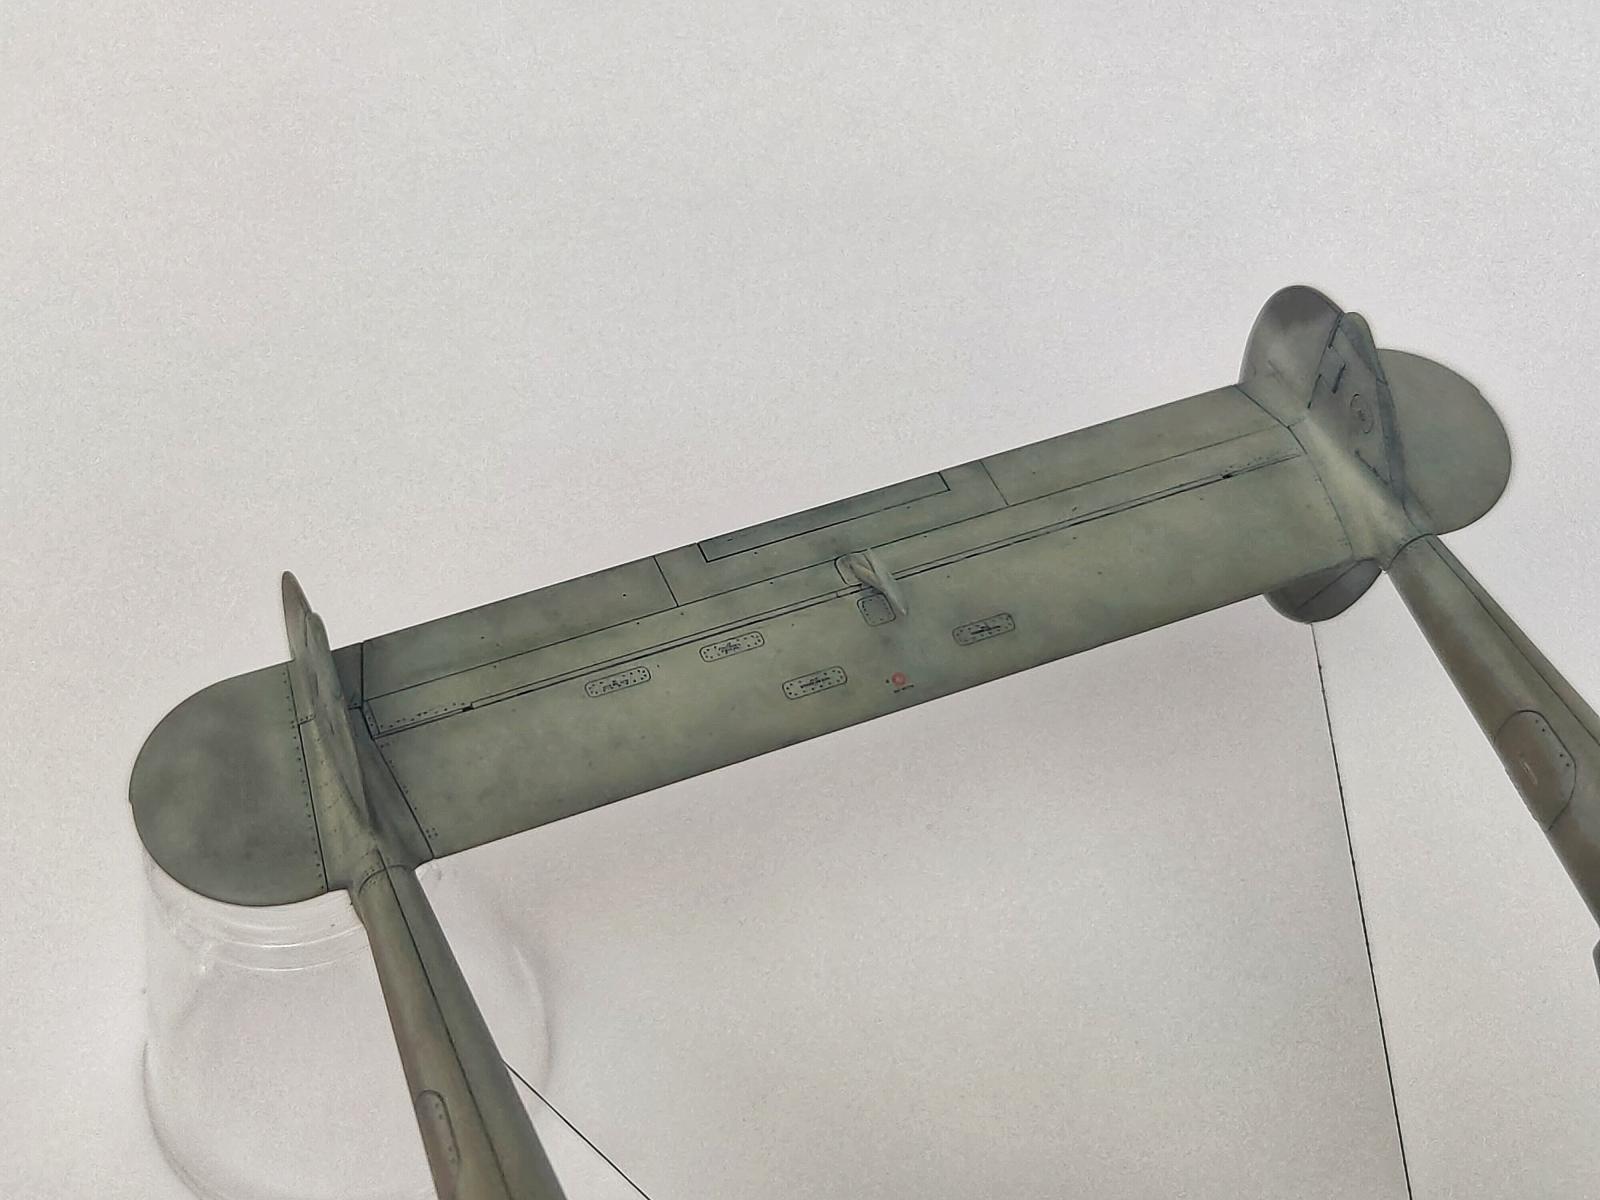
The top surface is rivetted so I could get some of the nice wear and tear around the rivet heads can be seen on P-38's and the colours are various darkened and lightened shades of OD/NG from Tamiya and Gunze acrylics. All of it over a silver base. I wet sanded the areas around the canopy to get the worn away silver look. I had applied hairspray but I wasn't getting the results I wanted so tried the wet sanding method.
The final weathering once markings was applied was with a variety of oils and washes applied in small amounts but gradually layered to achieve the worn OD look. The underside received a similar treatment.
The antennae wire is elastic thread.
I'm really happy with the final result. I'd recommend getting yourself one, if not to enjoy the wonderful engineering and fit of the kit.
Cheers,
Mick

Very nice
Thanks George. Nice avatar BTW.
Excellent work on the paint and weathering!
Thanks John,
Your oil layering is commendable, and extremely satisfying to look at... and truly just a great looking build all around.
Thanks Andrew. Abteilung 502 oils and Ammo Oil Brushers were used extensively on teh top and bottom side. Glad you like it.
Awesome build, Michael!
Well done!
Thanks Spiros.
Excellent workmanship on this nice looking Lightning !
You really put a lot of extra effort in to the weathering, it sure paid off on this.
Thanks Jay. A lot of work went into the paintwork too before the weathering was applied. It's my favourite part of the build.
Really nice result, Michael @mickdrover
Thankyou John.
Gorgeous work!
Cheers Felix.
Great paintwork results in a superb model.
Cheers Tom, much appreciated.
Fantastic weathering all round
Thanks Pedro.
Very nice “worn” look.
Beautiful rendition of this iconic twin-boom warbird!
It certainly is worn-out looking Alfred. Glad you lo like it.
Fantastic example of what is already a classic kit.
It's certainly a fall together kit George. Not one I'd build another of but a pleasure building it anyway.
Awesome work on this! This kit/scheme is next up on my build list for this fall so I will be using this as a reference
Thanks David. Glad you like it! Perhaps use it for artistic inspiration rather than accuracy!
Michael, @mickdrover, I absolutely love your P-38. Your paint work and weathering is phenomenal and beautiful. I would love to know about your technique for accomplishing your finish. It is something I would love to be able to accomplish that kind of finish on my builds. To put it simply, your build is Stunning!
Beauty Mick @mickdrover!
Thanks Gary.
Great looking early Lightening!
Thanks Robert.
Nice job! Great airbrush work.
Thanks John.
Beautiful! Love the paint and weathering - a grand slam!
Thanks Greg. It's such a lovely kit to build.
Excellent!
Thanks Derek.
Hi Mick,
I'm currently building the Tamiya P-38 J kit and just shaking my head with how good it seems to fall together. I want to give it an OD scheme and your build will serve as inspiration (in addition to a source of artistic theft). The antenna wire seems a difficult part of the project and I think yours is really excellent. Your photography is so well lit and crisp. It makes your weathering and shading really pop.
Hi Dave. Great to hear that you like it!
The images have been tidied up a bit to make the detail pop. Obviously, it looks much better in the flesh.
The antennae wire is the stretchy stuff from Ushi. It's a two-piece affair with a single piece between the fins that's long enough to have a bit of tension on it when stretched towards the canopy. The smallest hole I could drill (0.3mm) was drilled through the clear part at the hinge. Another piece of thread was run through that hole and then a double granny knot tied at the end to prevent it from running back through the hole. I could then stretch the thread to the correct length to connect it with the piece between the fins. It's held in place with a slip knot so it can find its own centre on the rear piece. The tag end is clipped as close to the knot as possible and then secured with some thin CA.
I hope all of the makes sense. Drop me a message if you need any more info.
Regards,
Mick