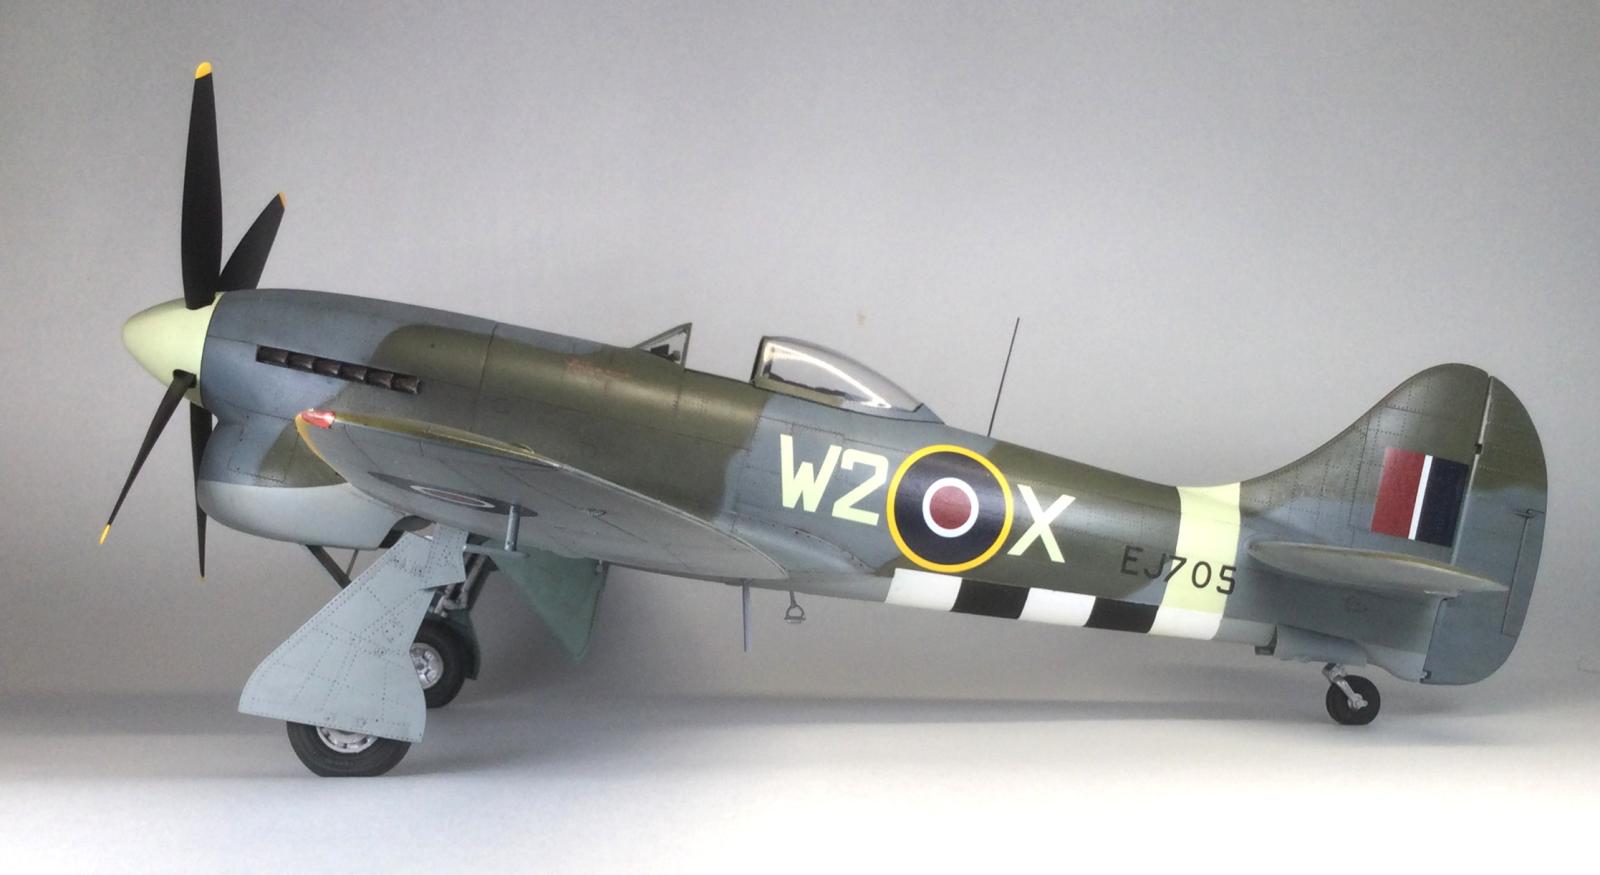
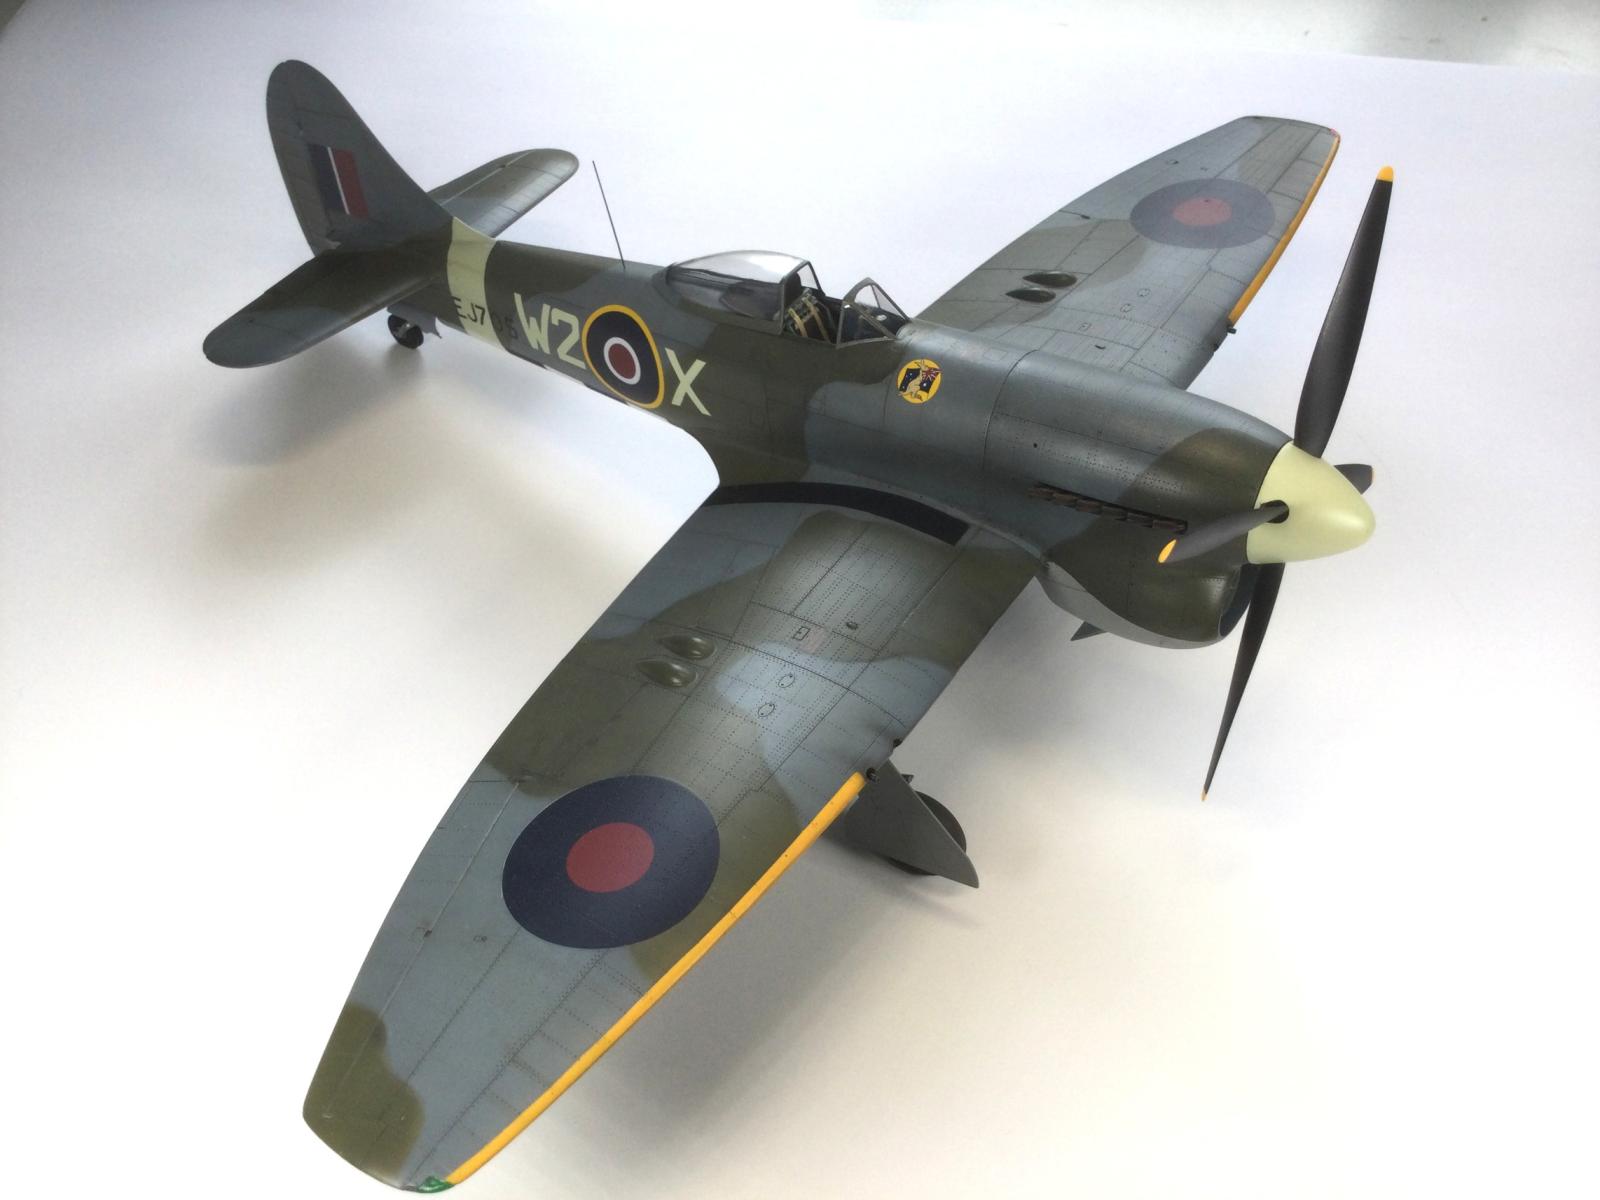
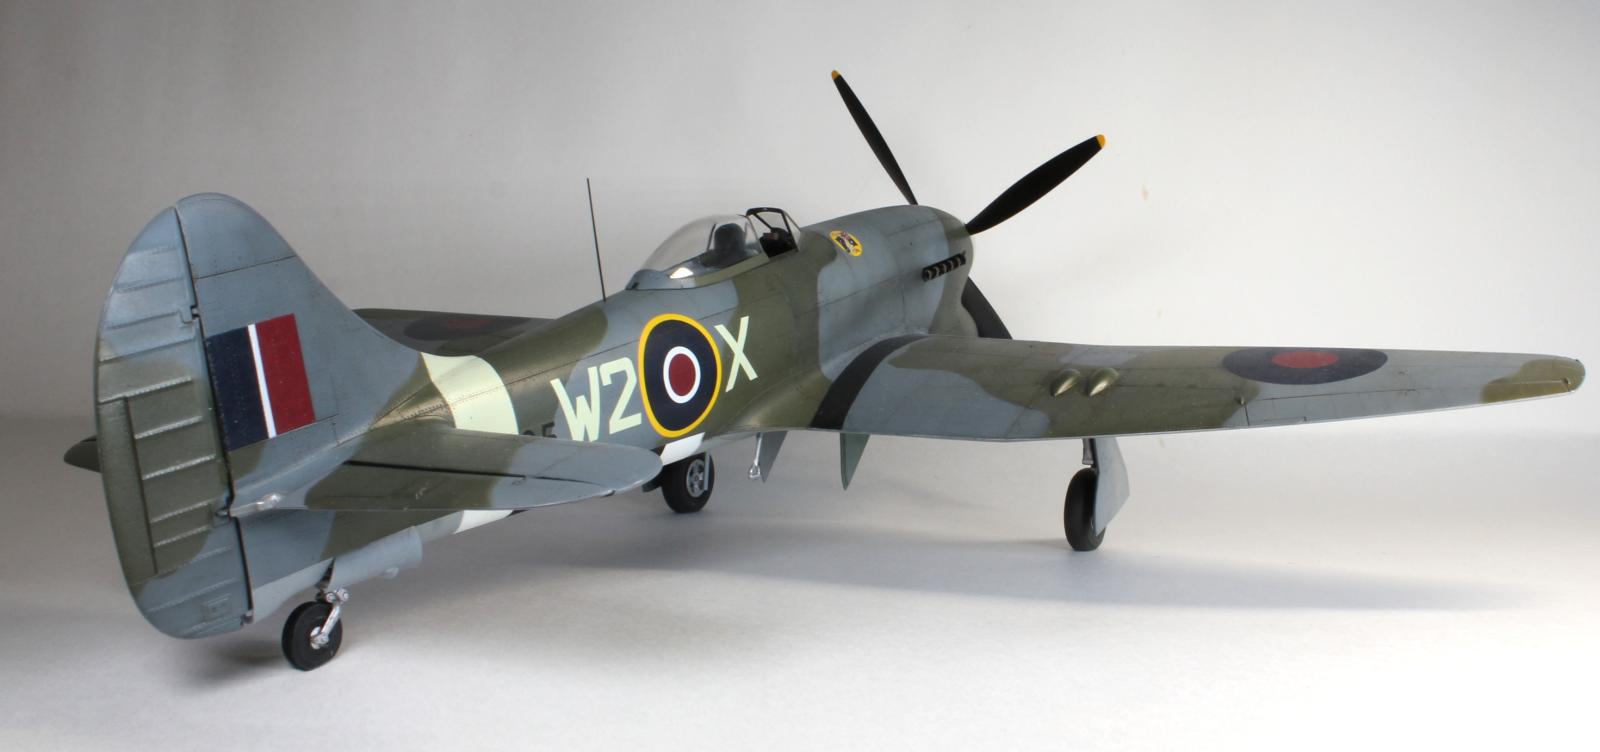
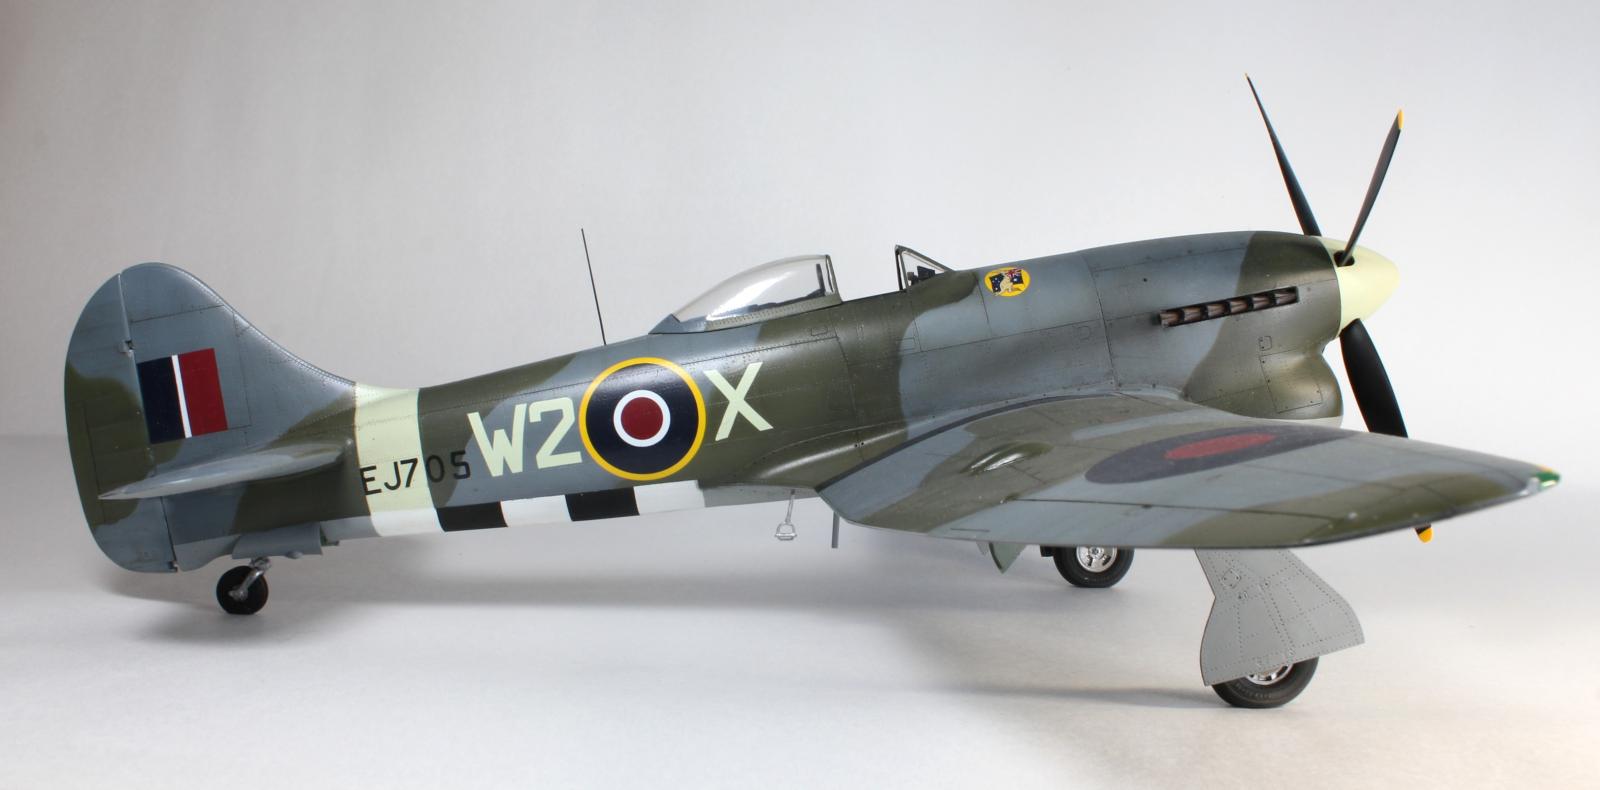
Hawker Tempest Mk V – 1/32 Special Hobby + Barracuda Resin

https://imodeler.com/groups/work-in-progress-aircraft/forum/topic/hawker-tempest-special-hobby-1-32/
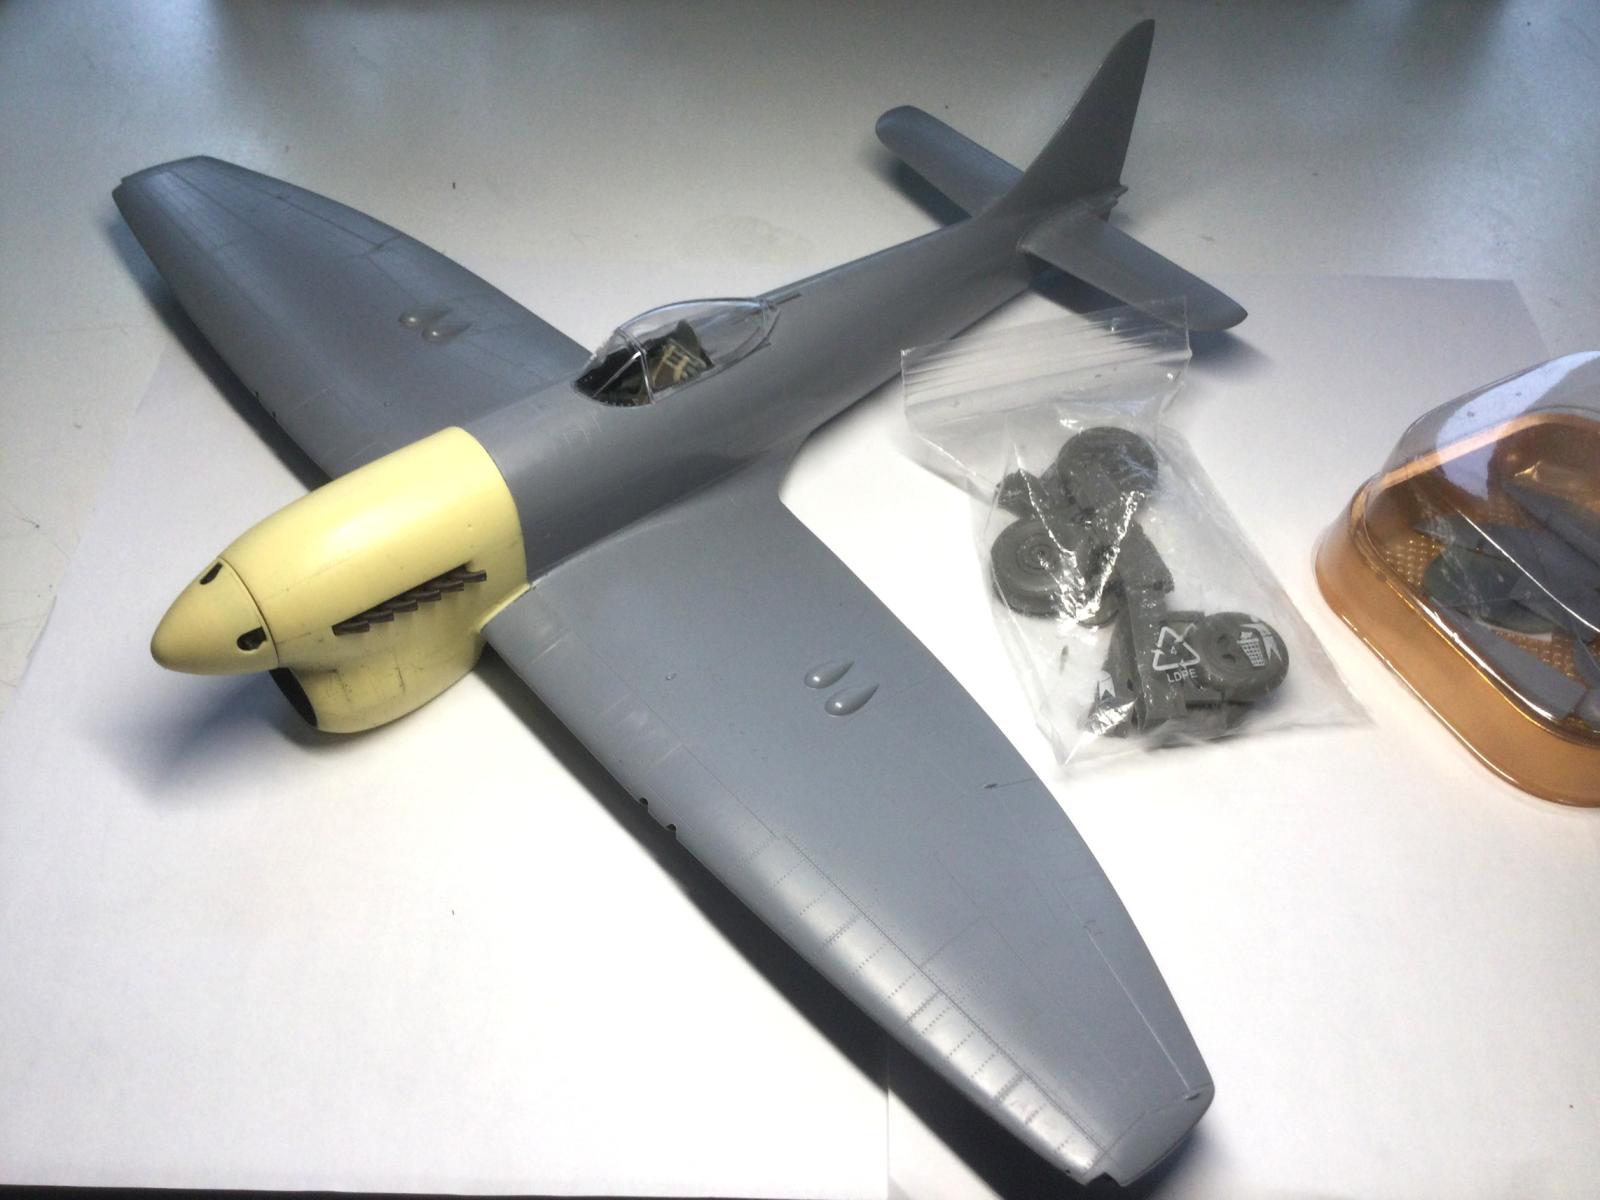
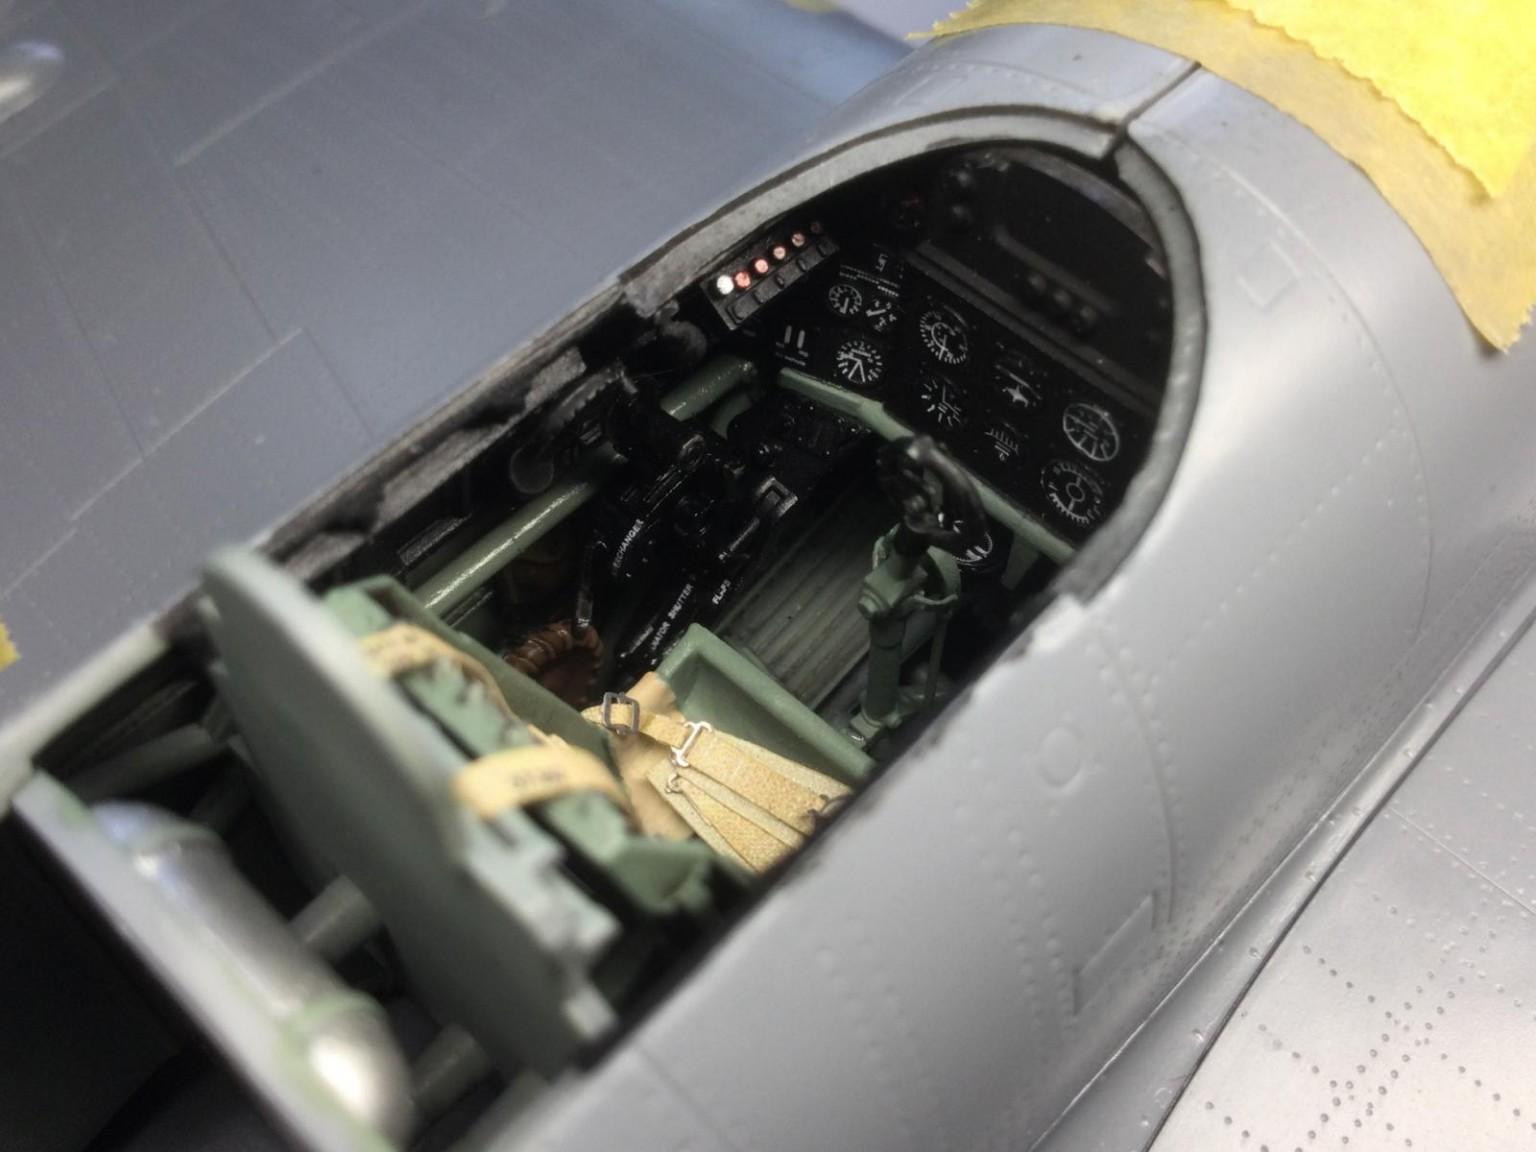
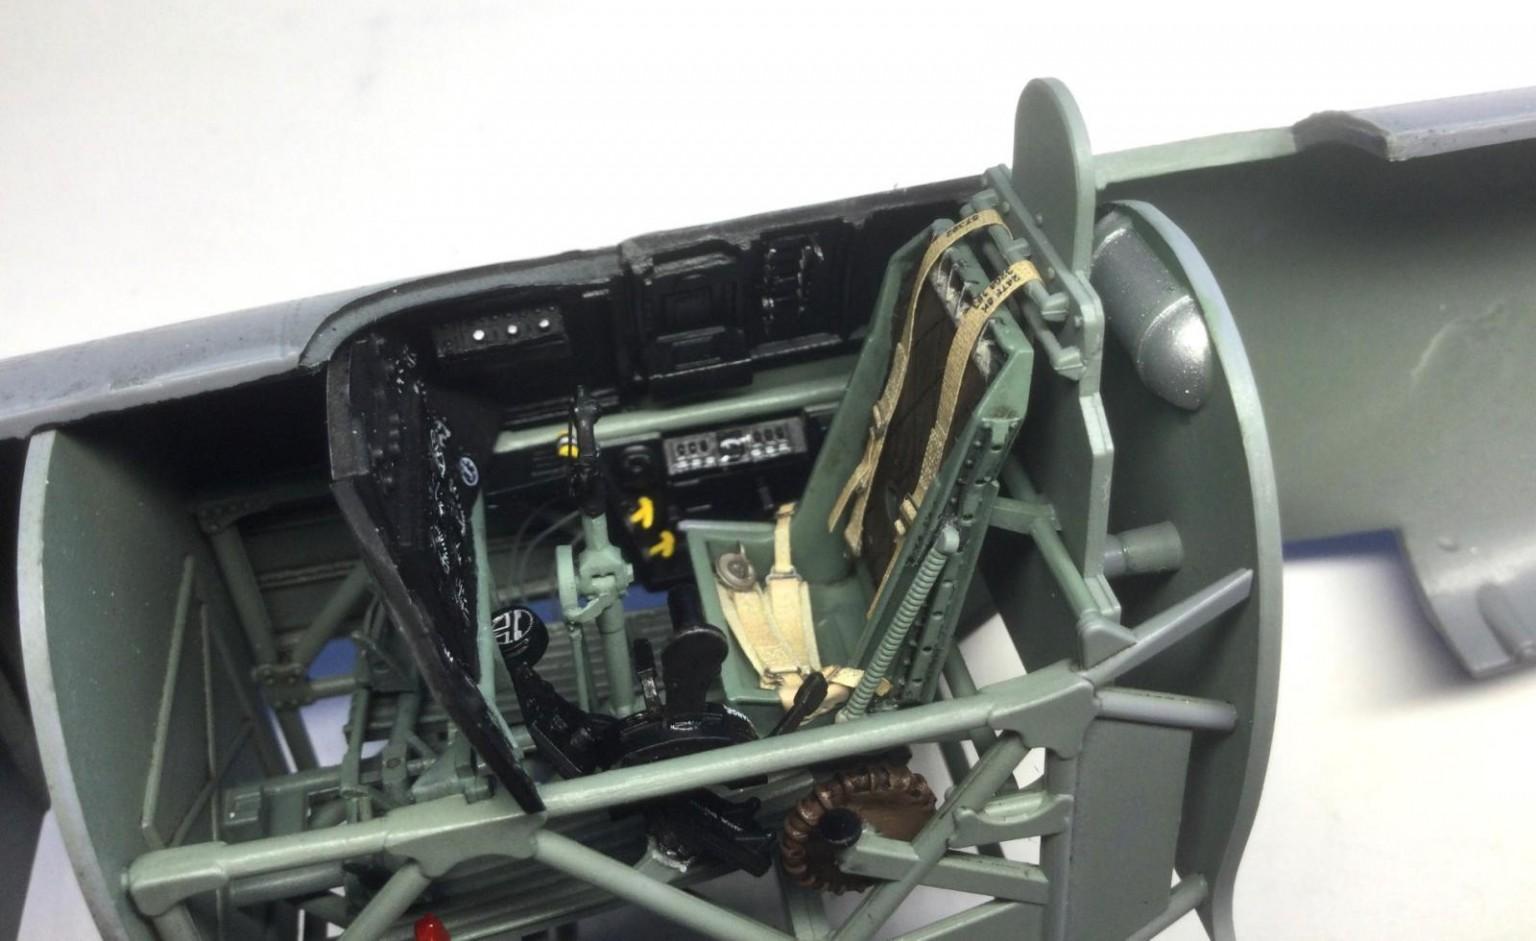
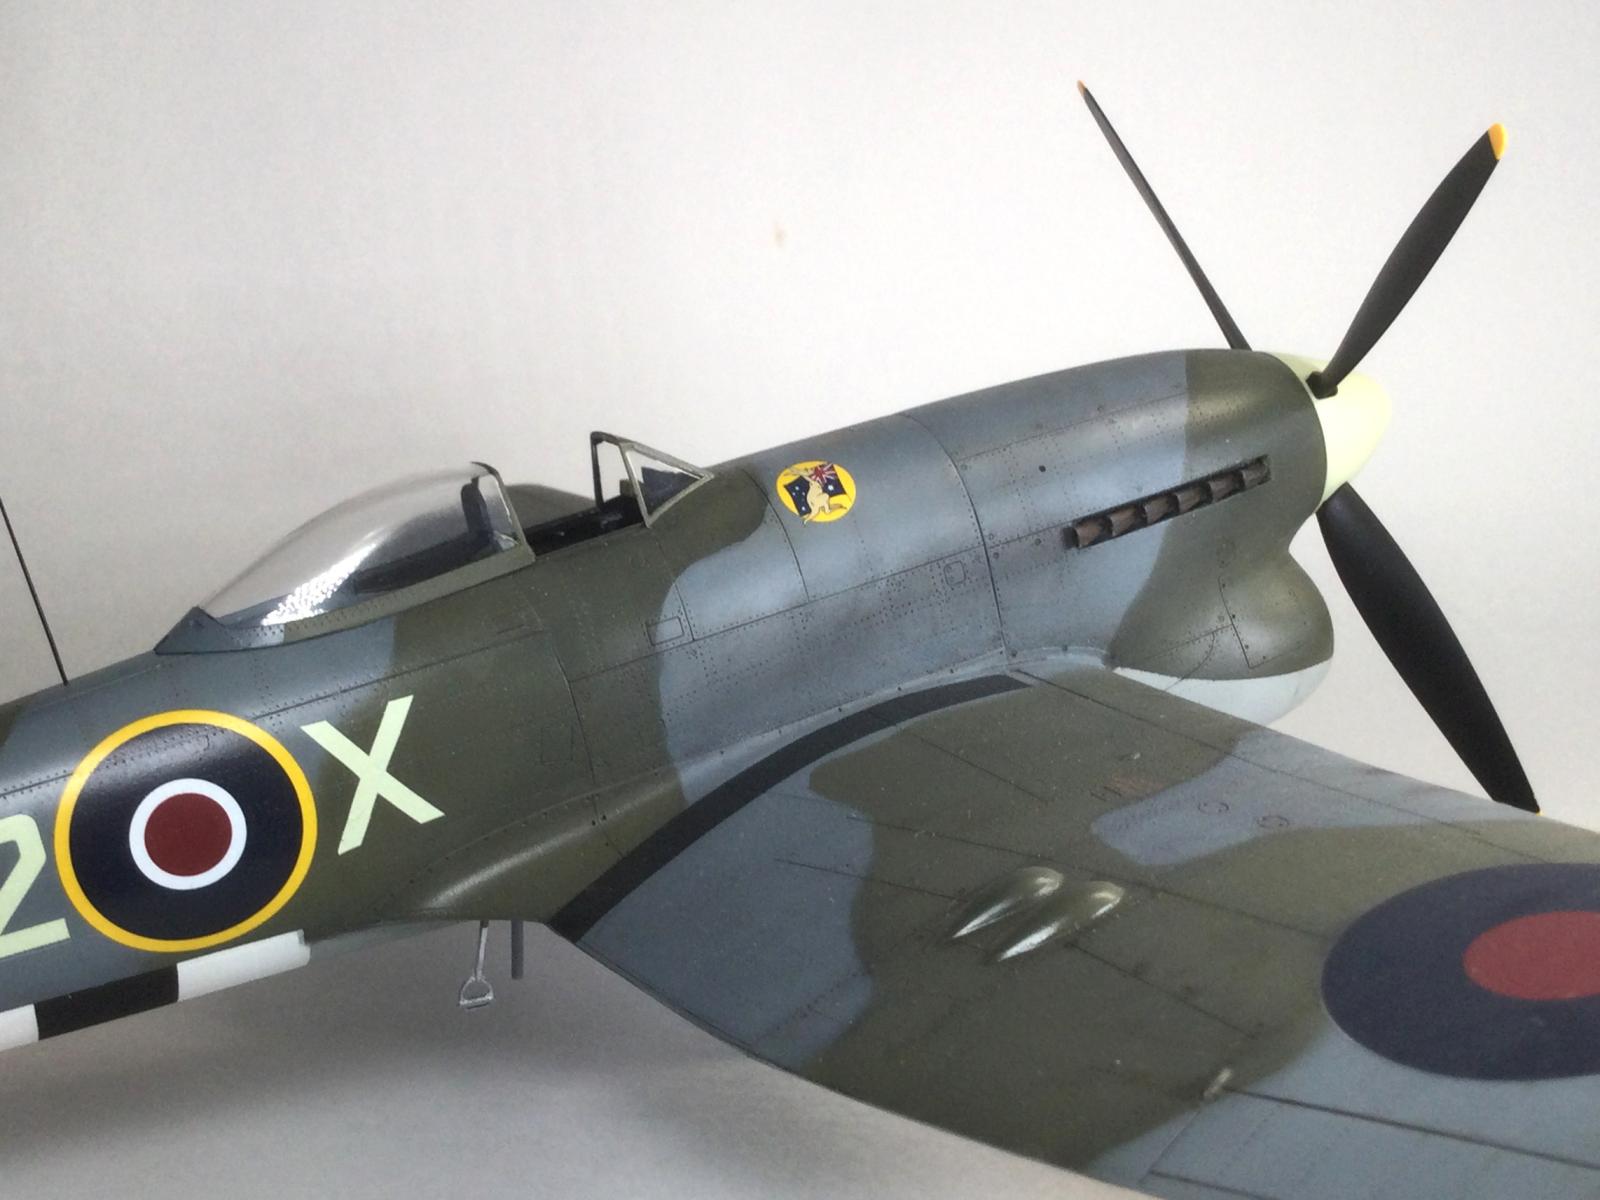
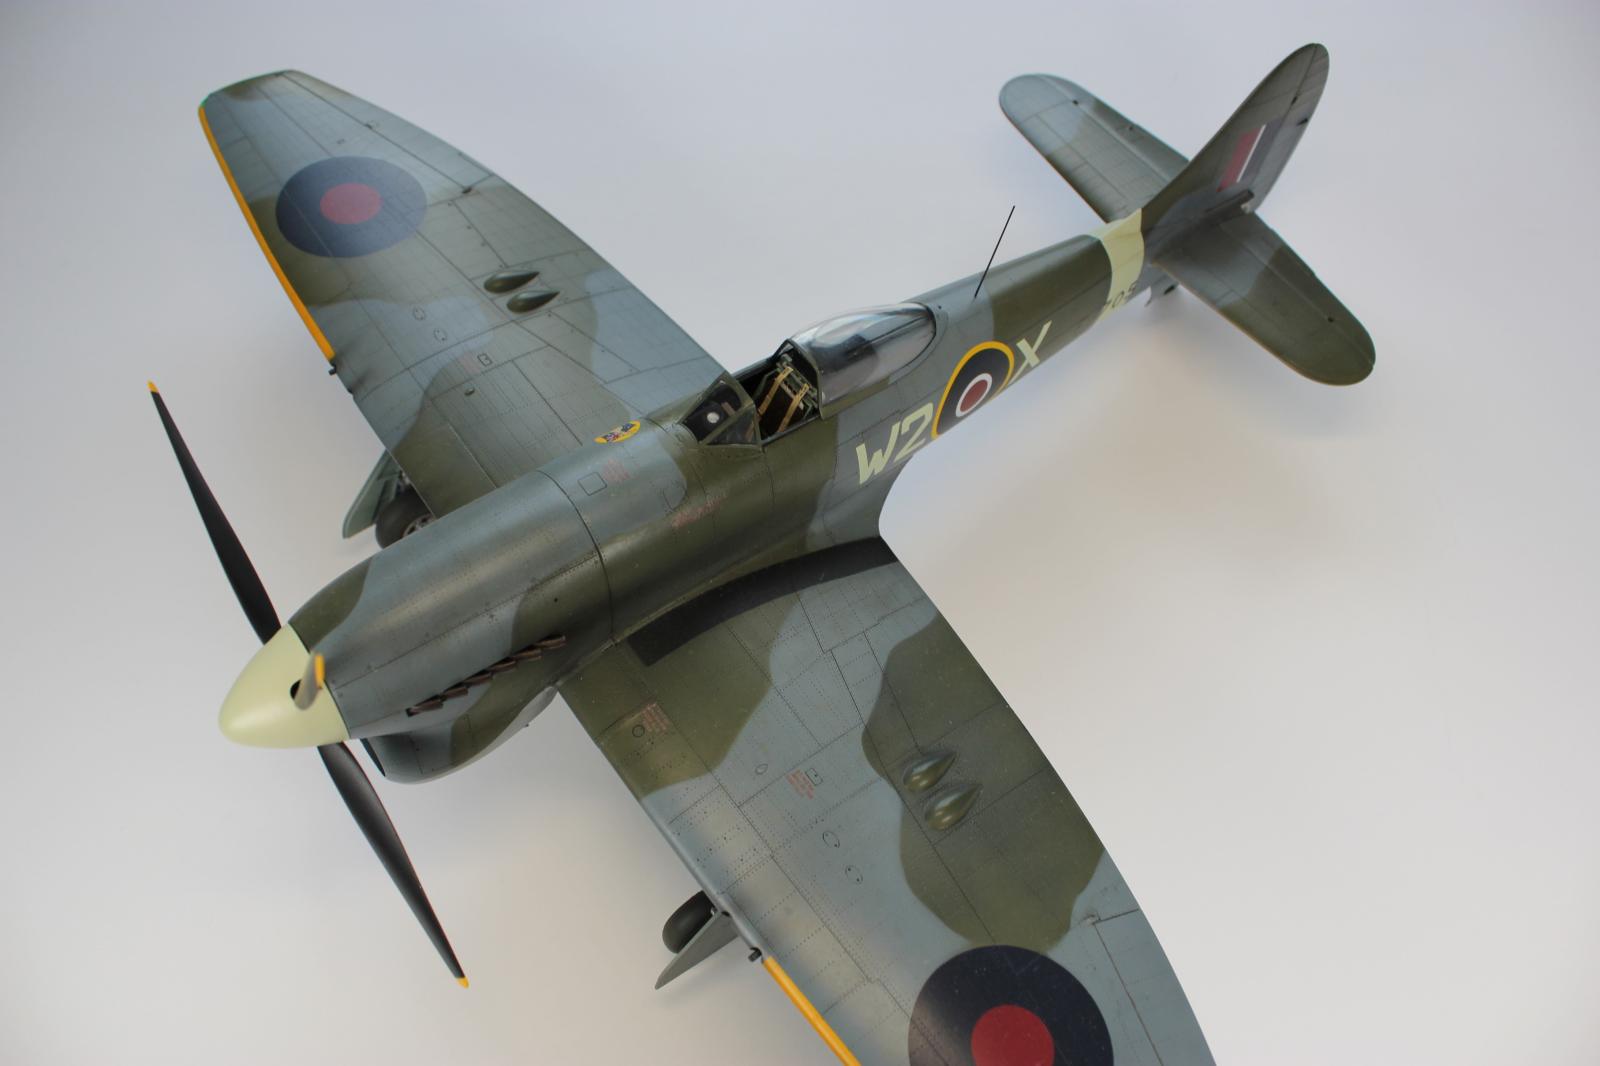
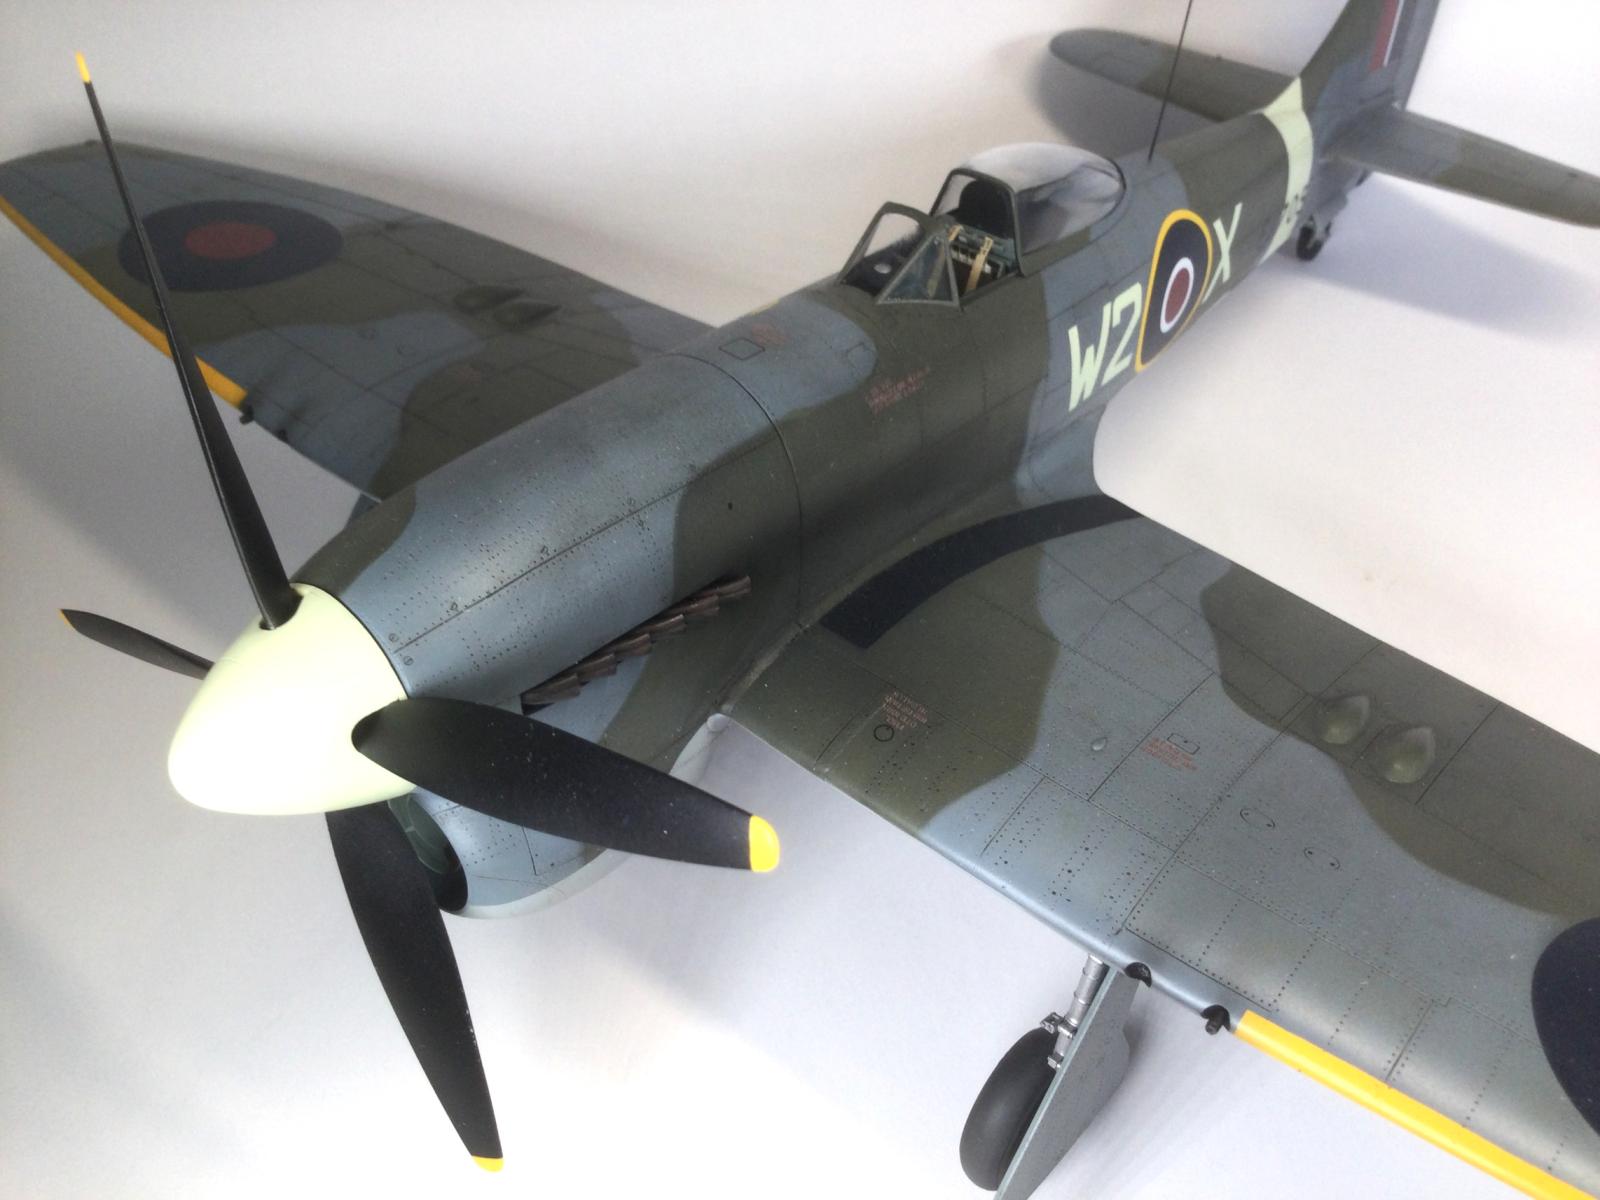
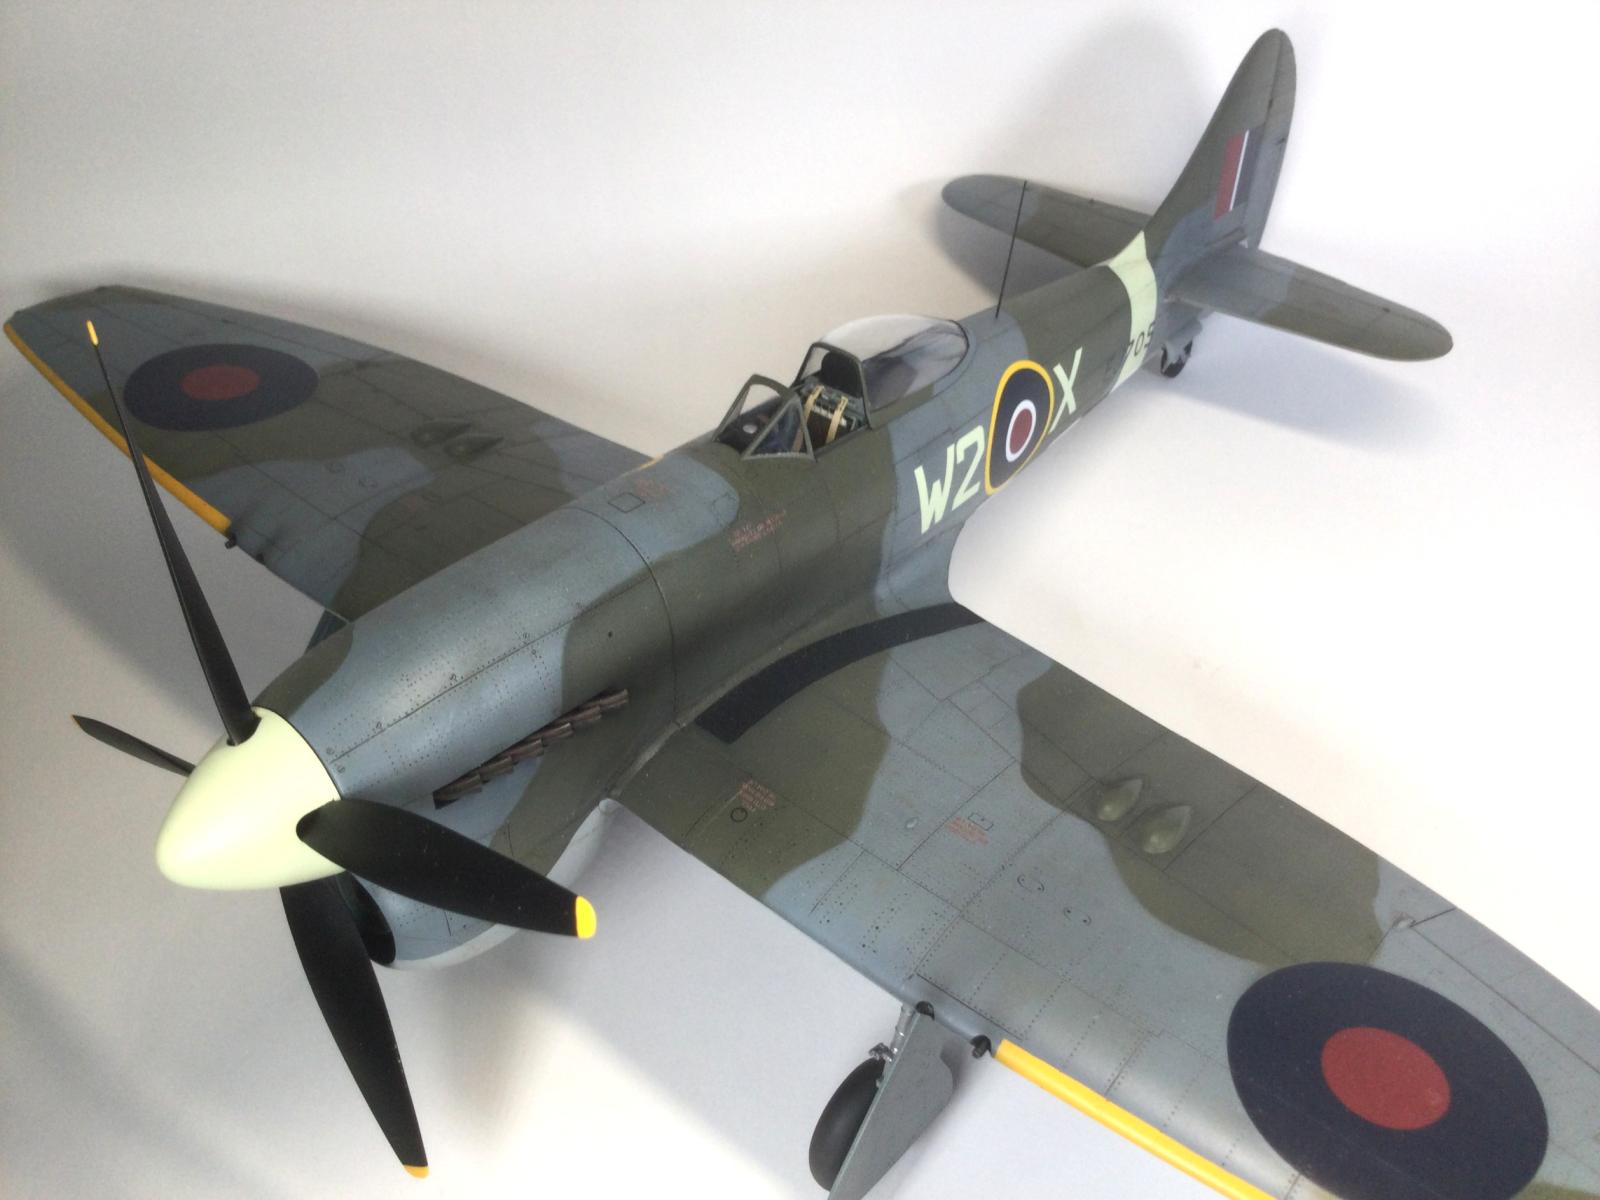
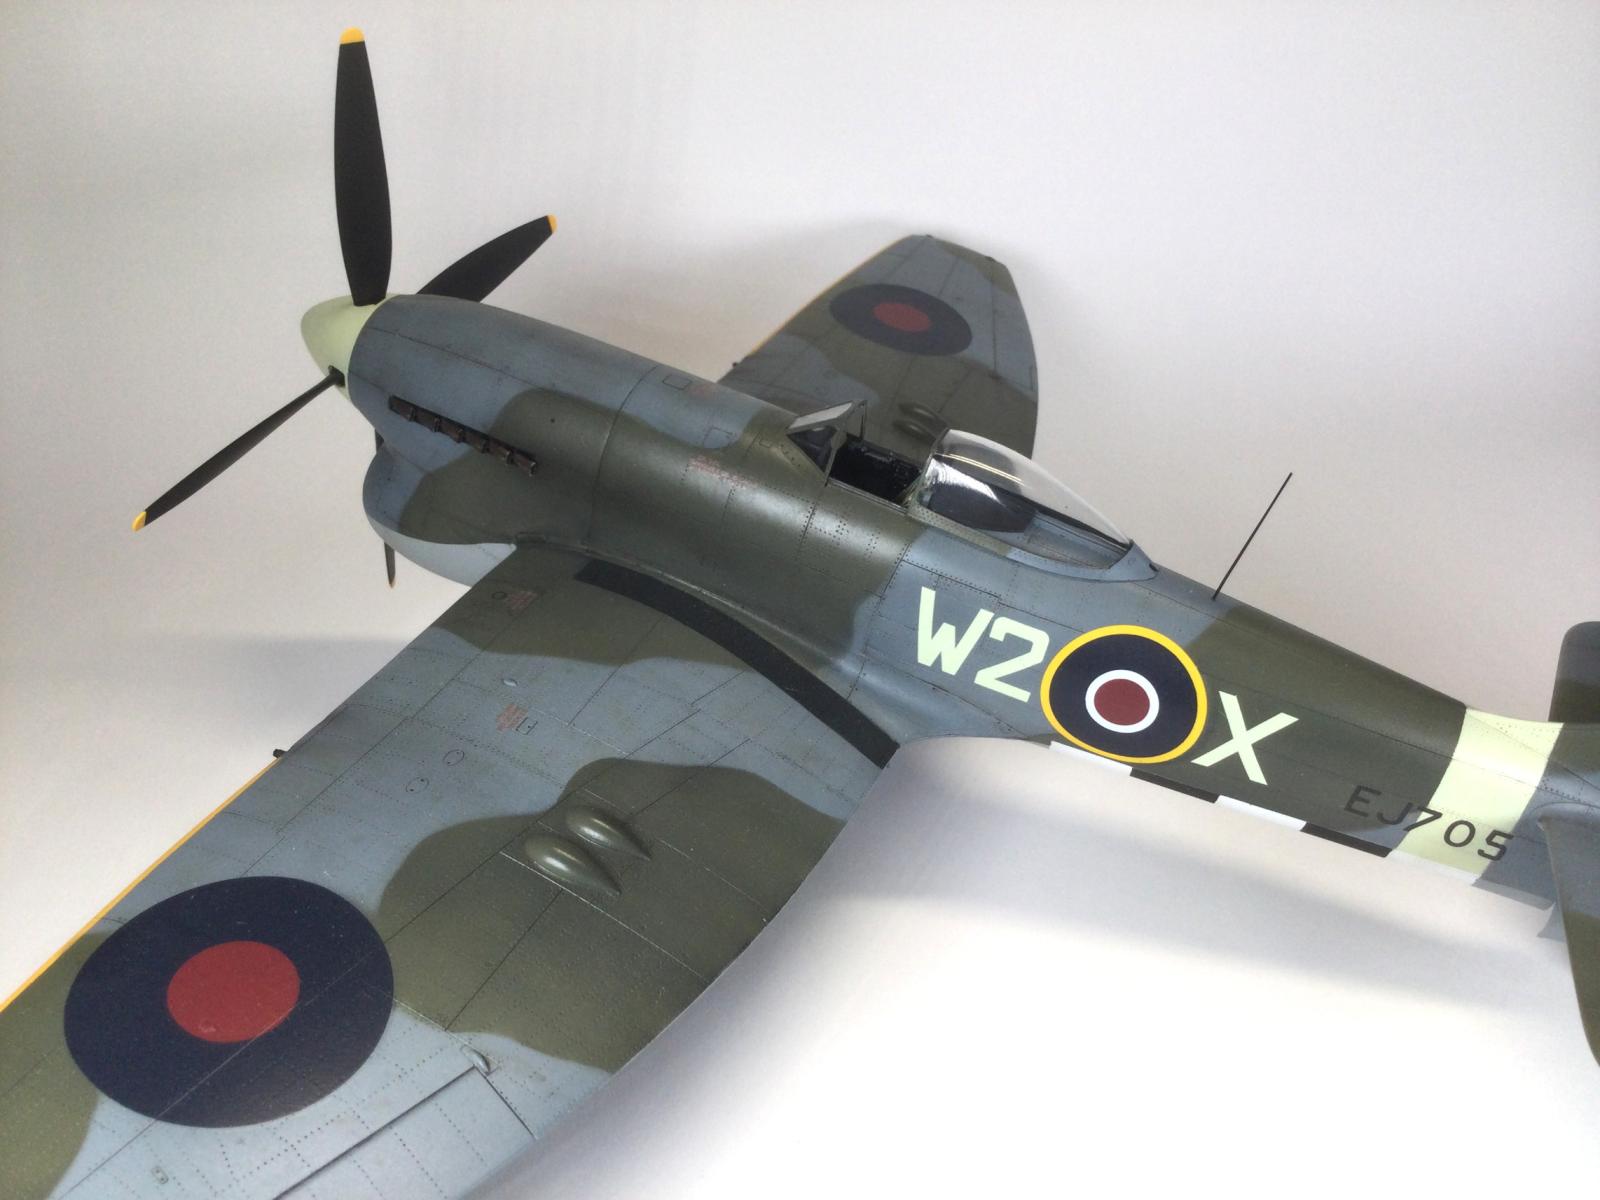
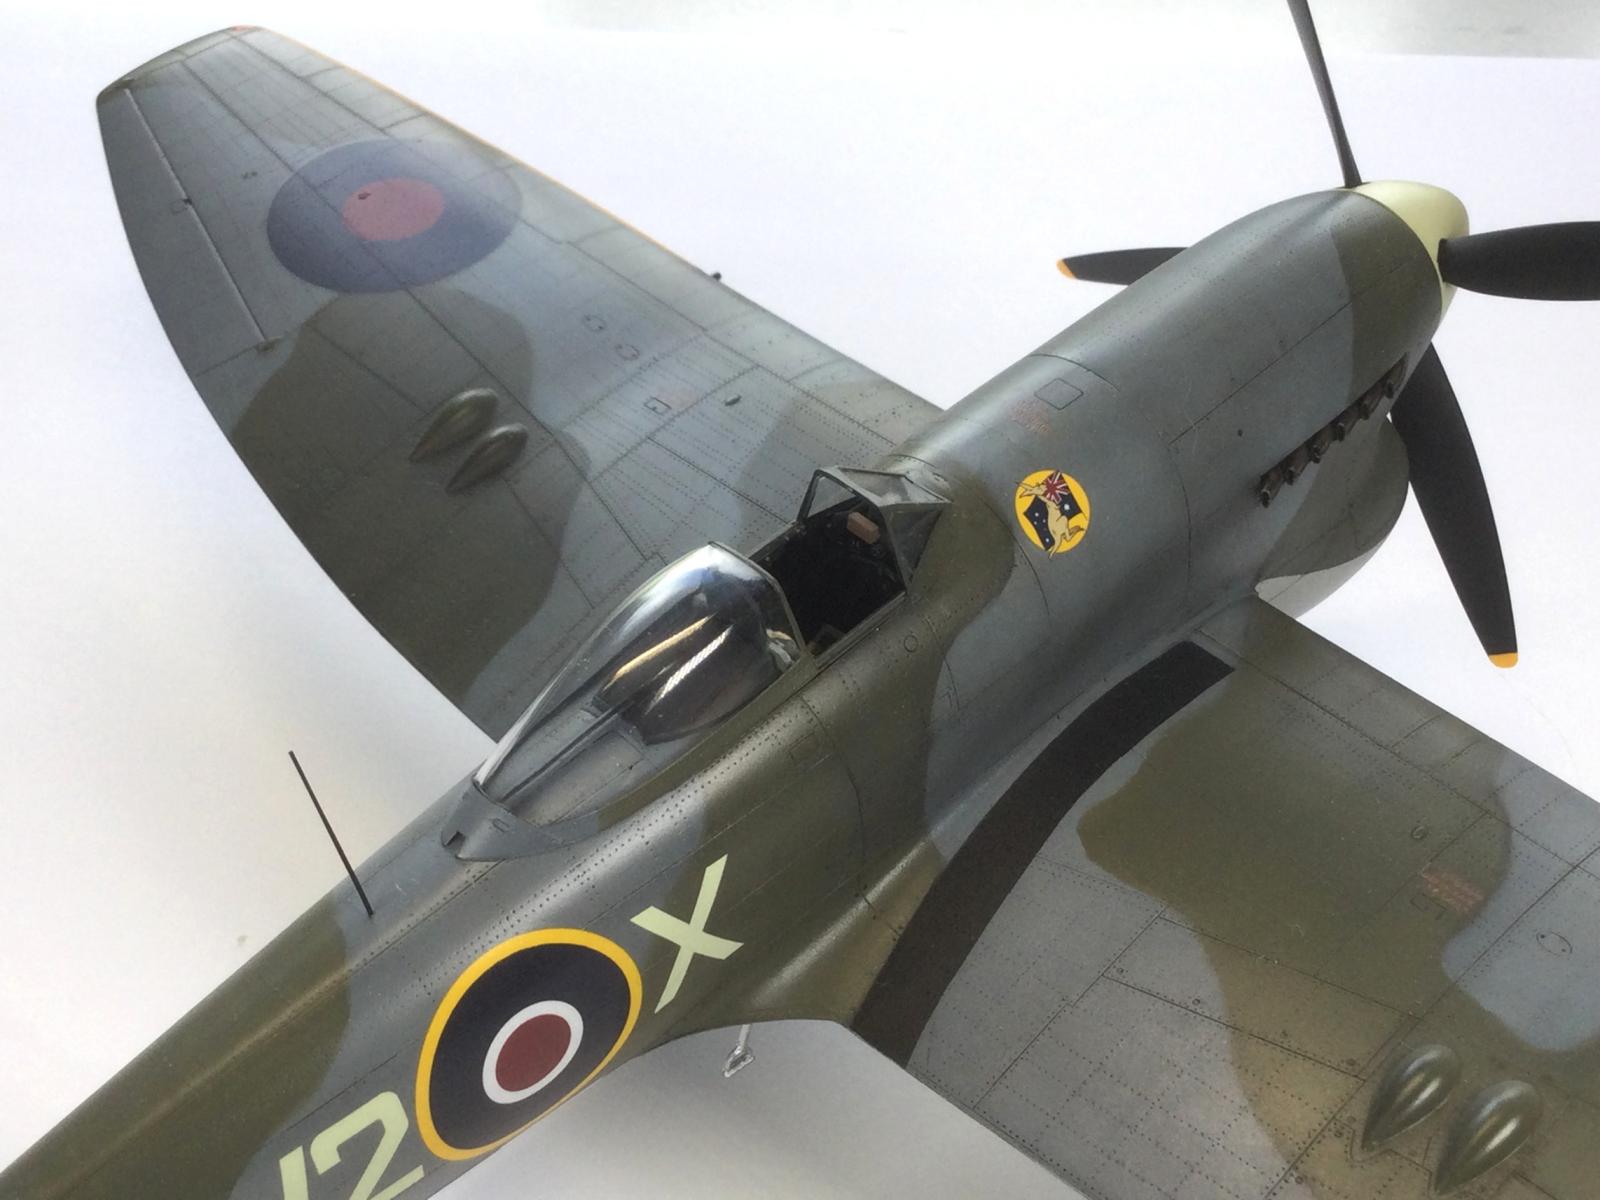
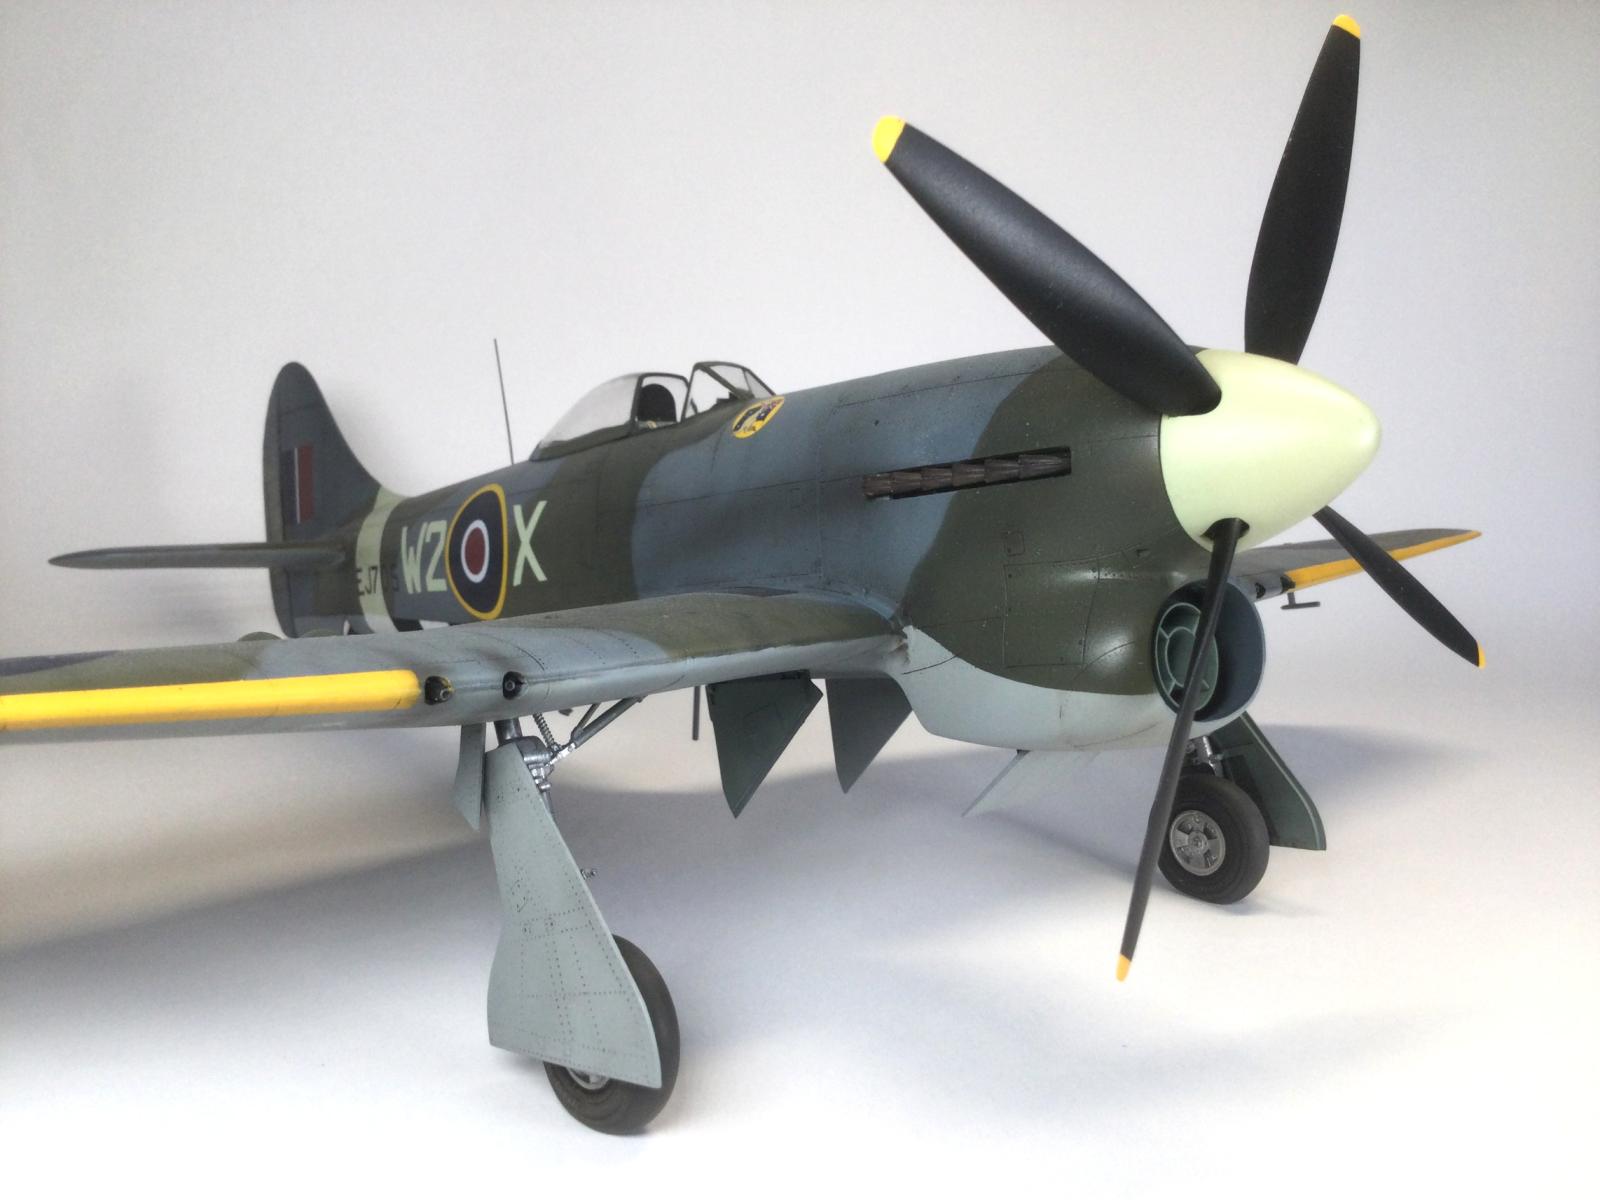
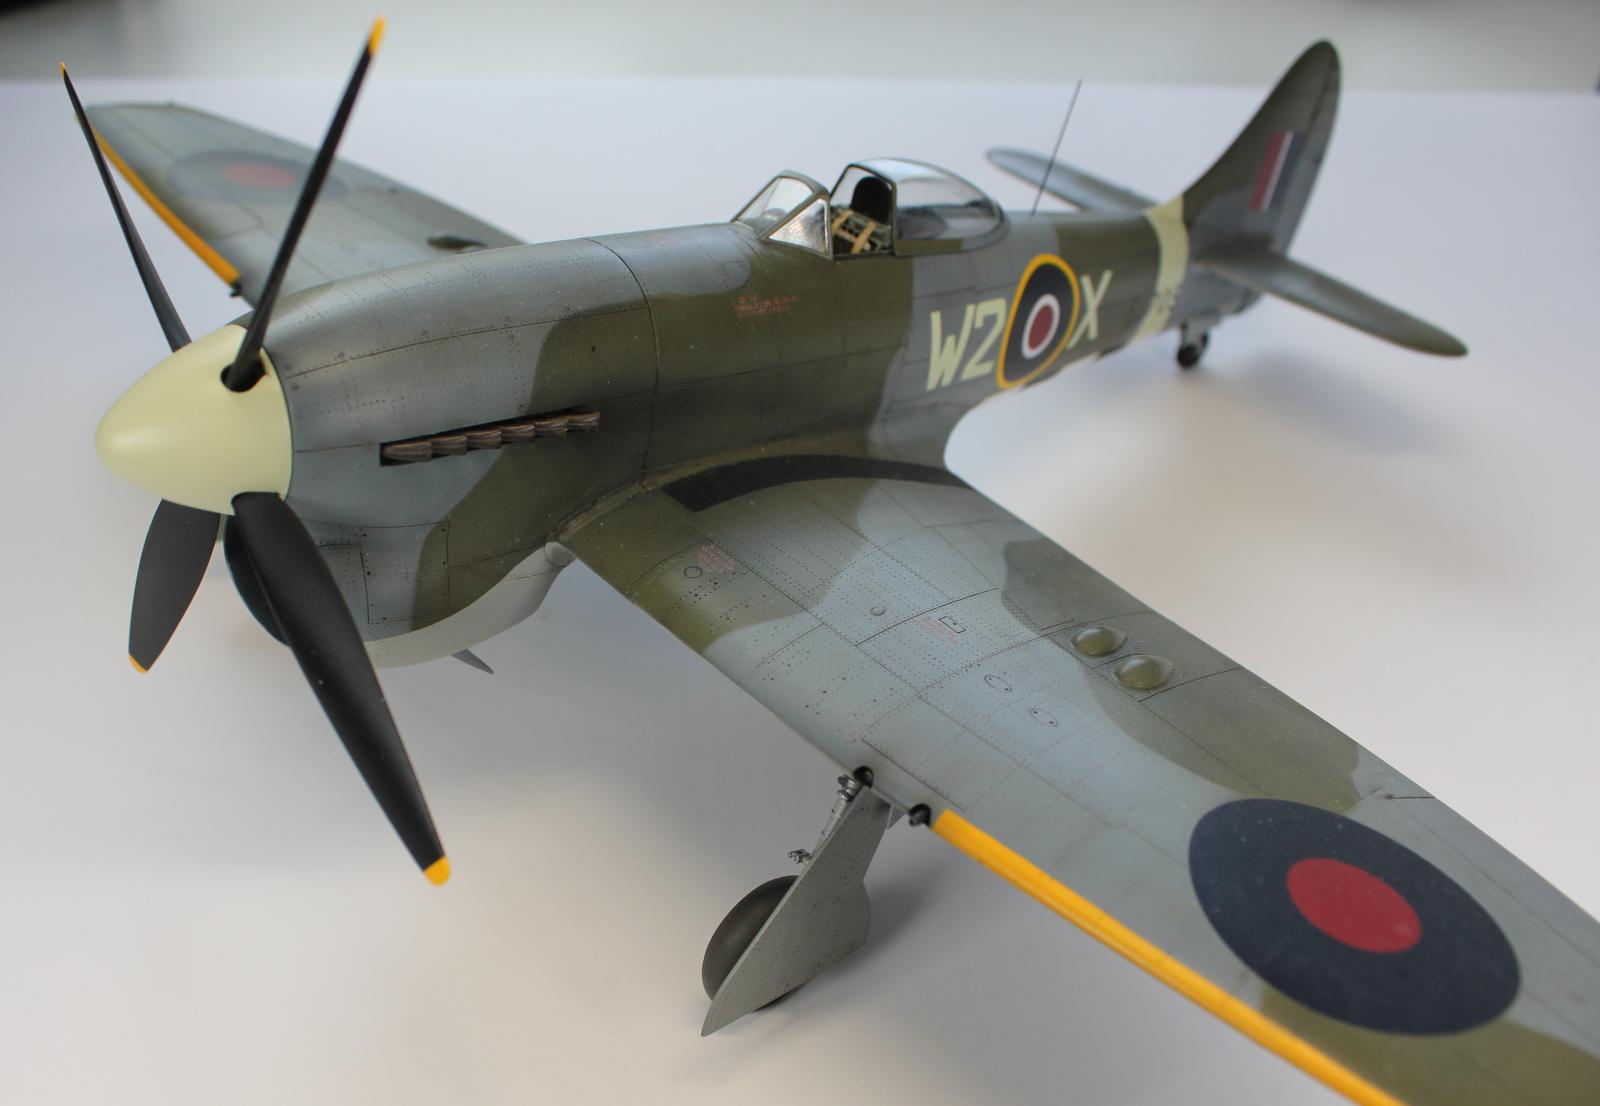
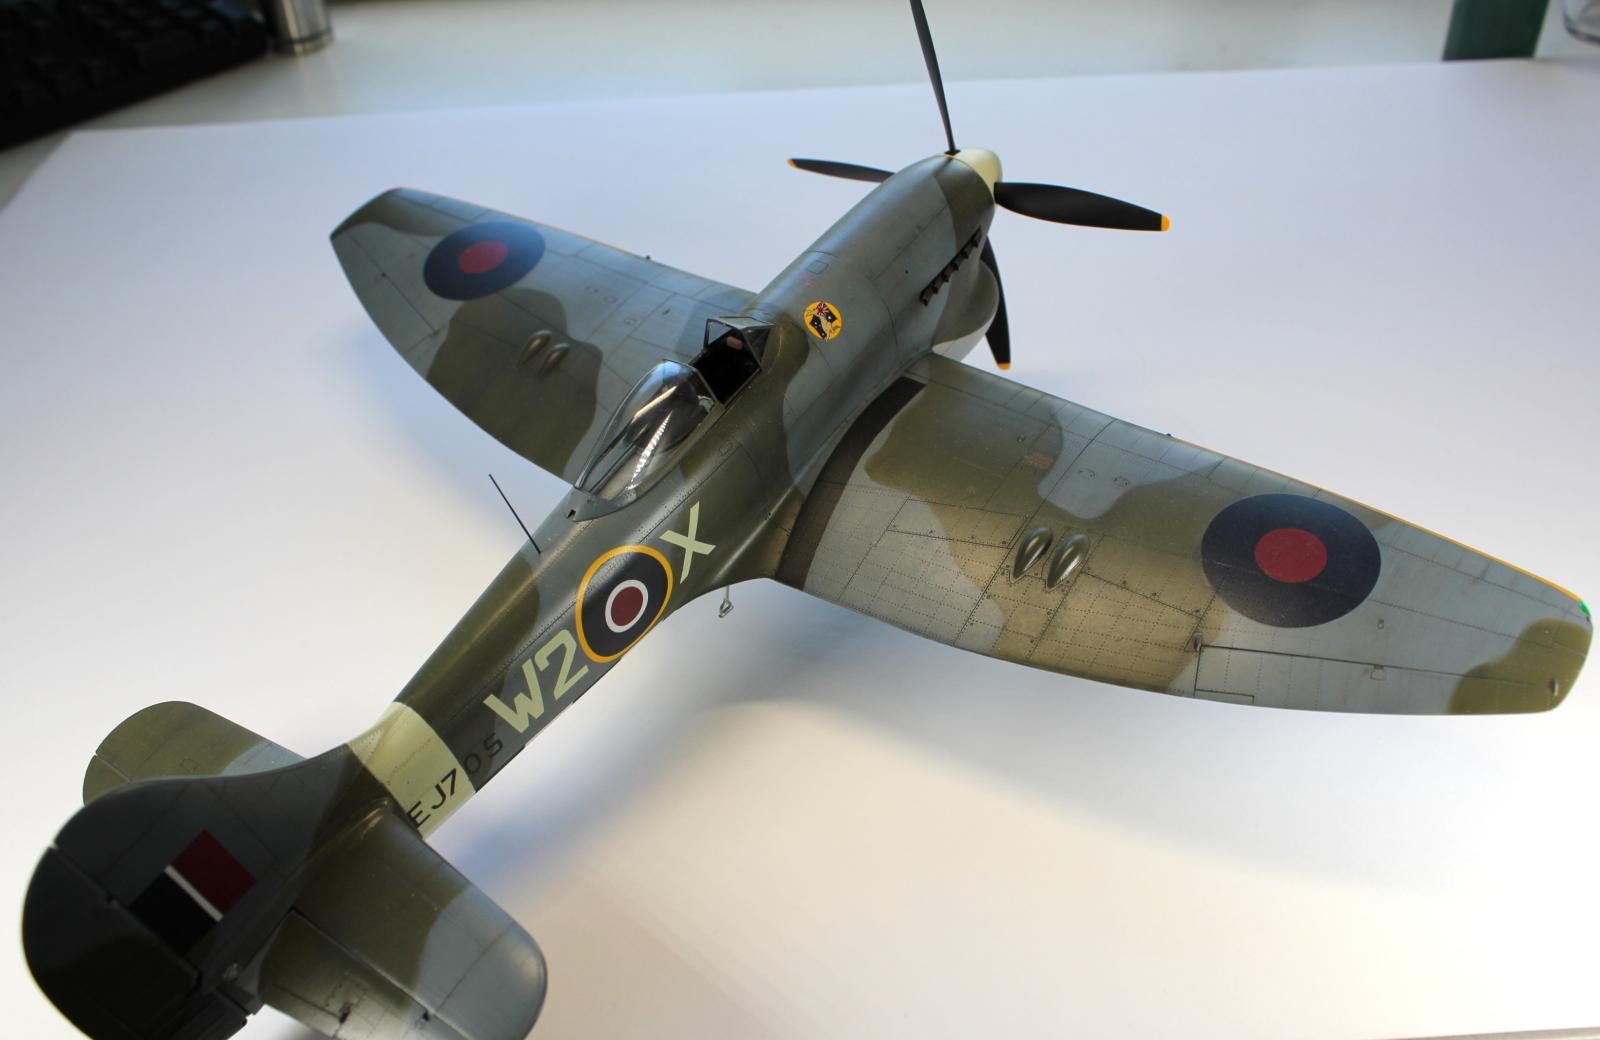
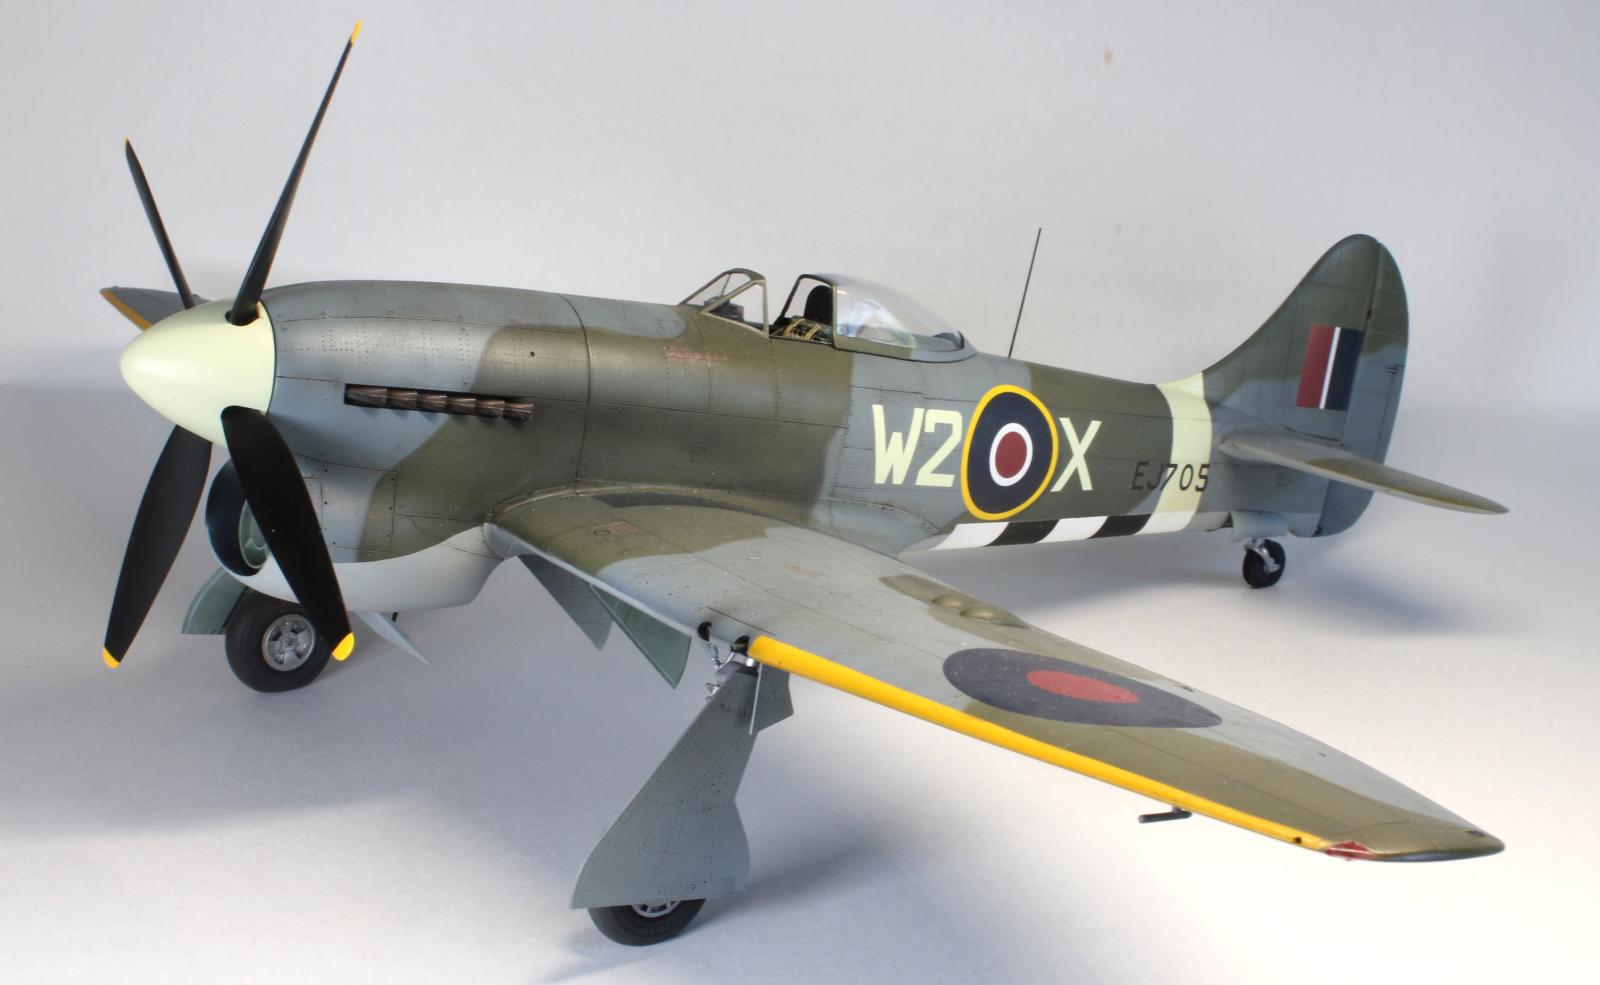
This was the Hi Tech kit so it has a full resin cockpit with etch parts, carefully painted and detailed with fine wire and solder.
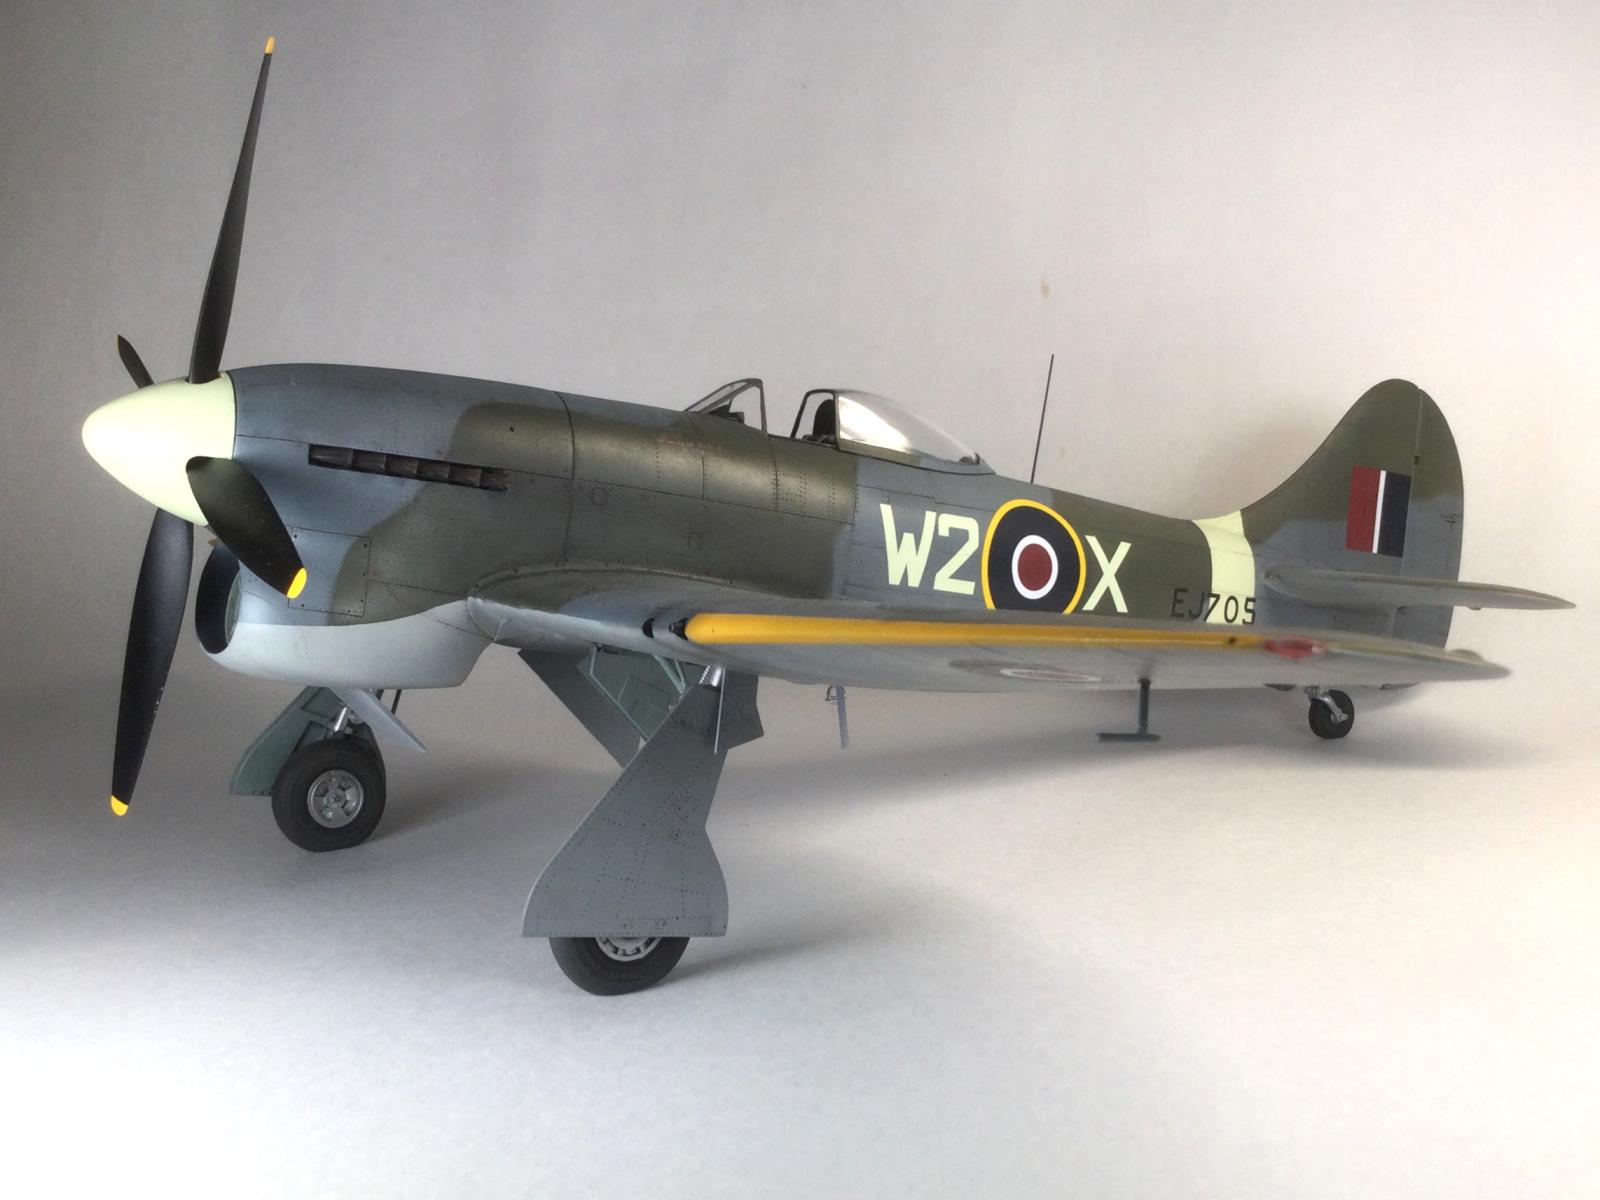
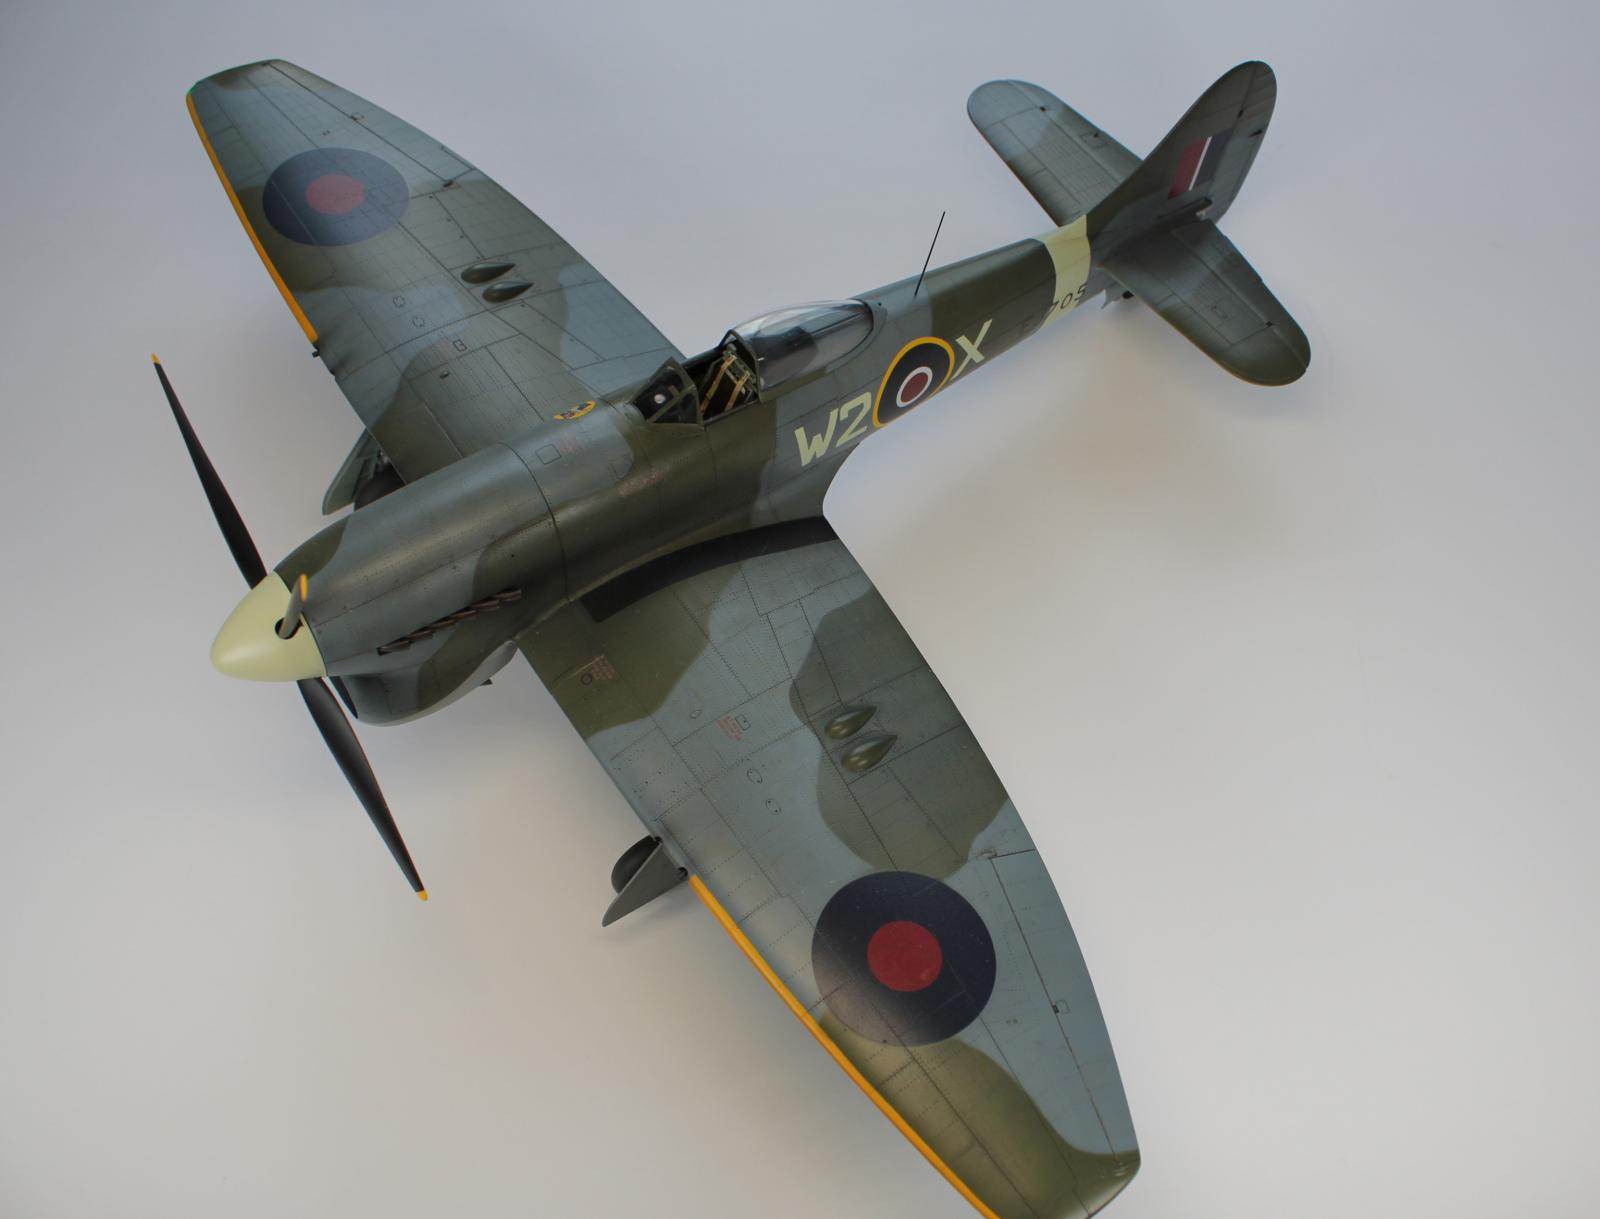
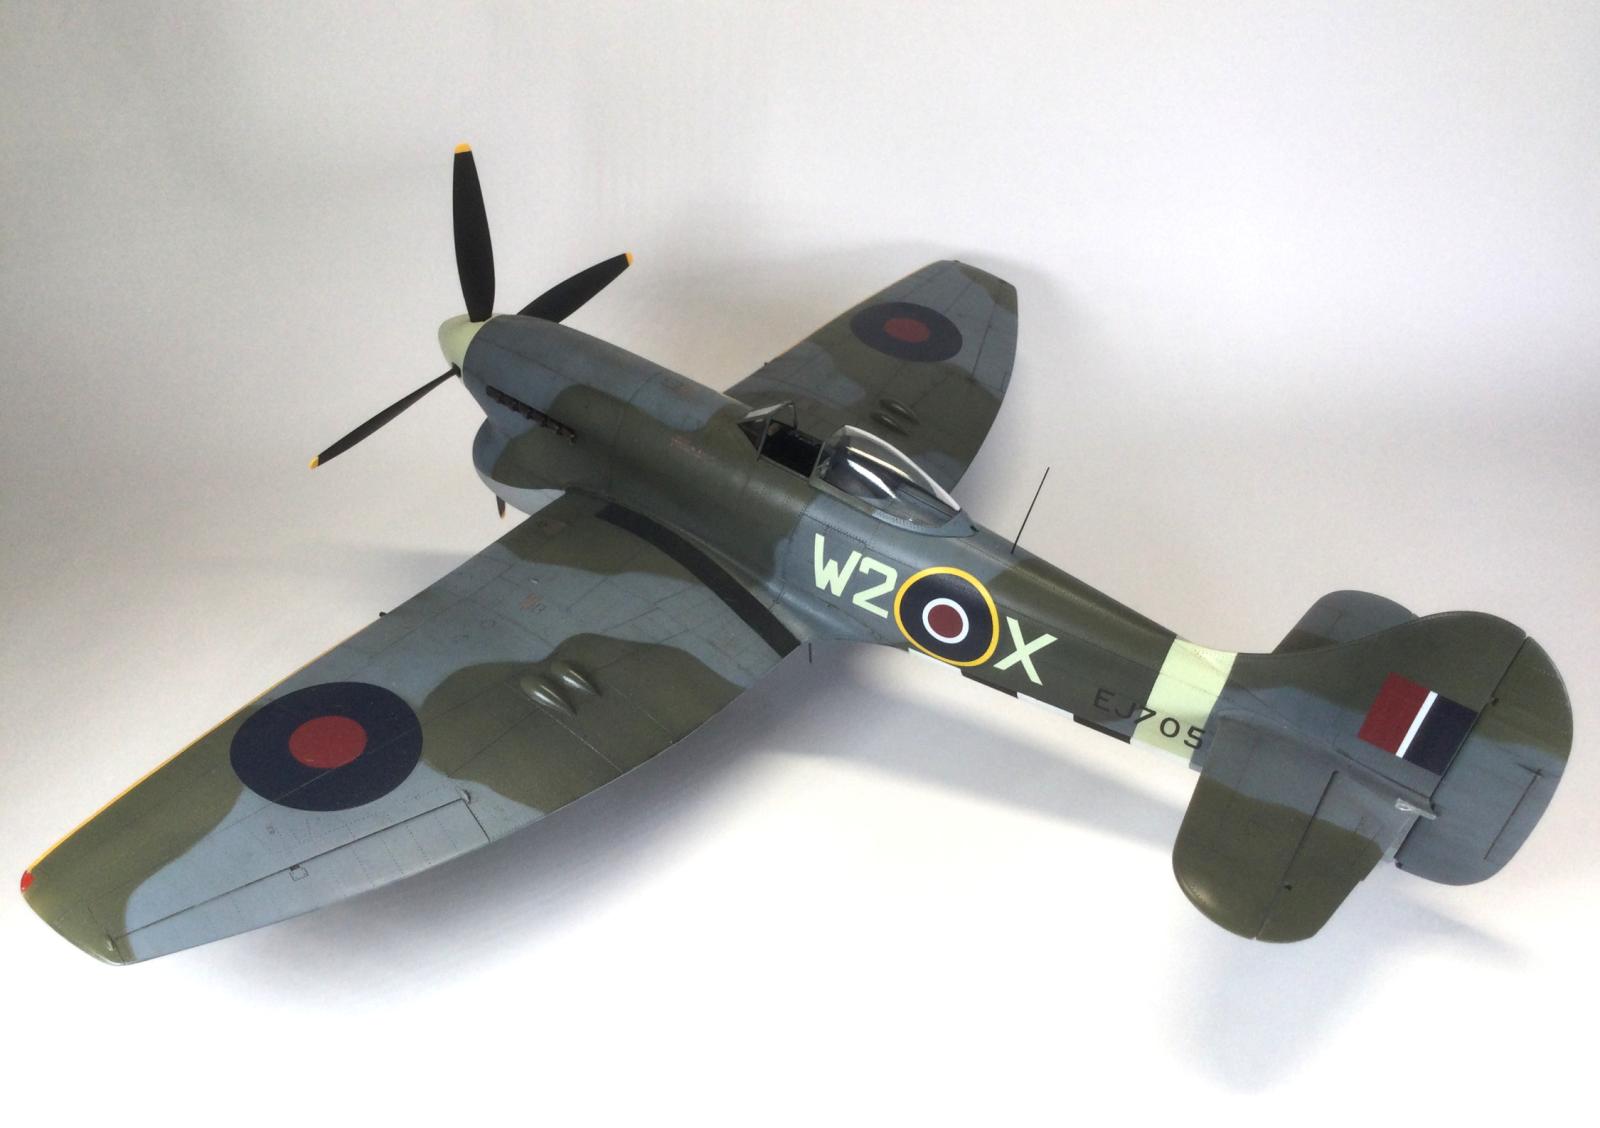
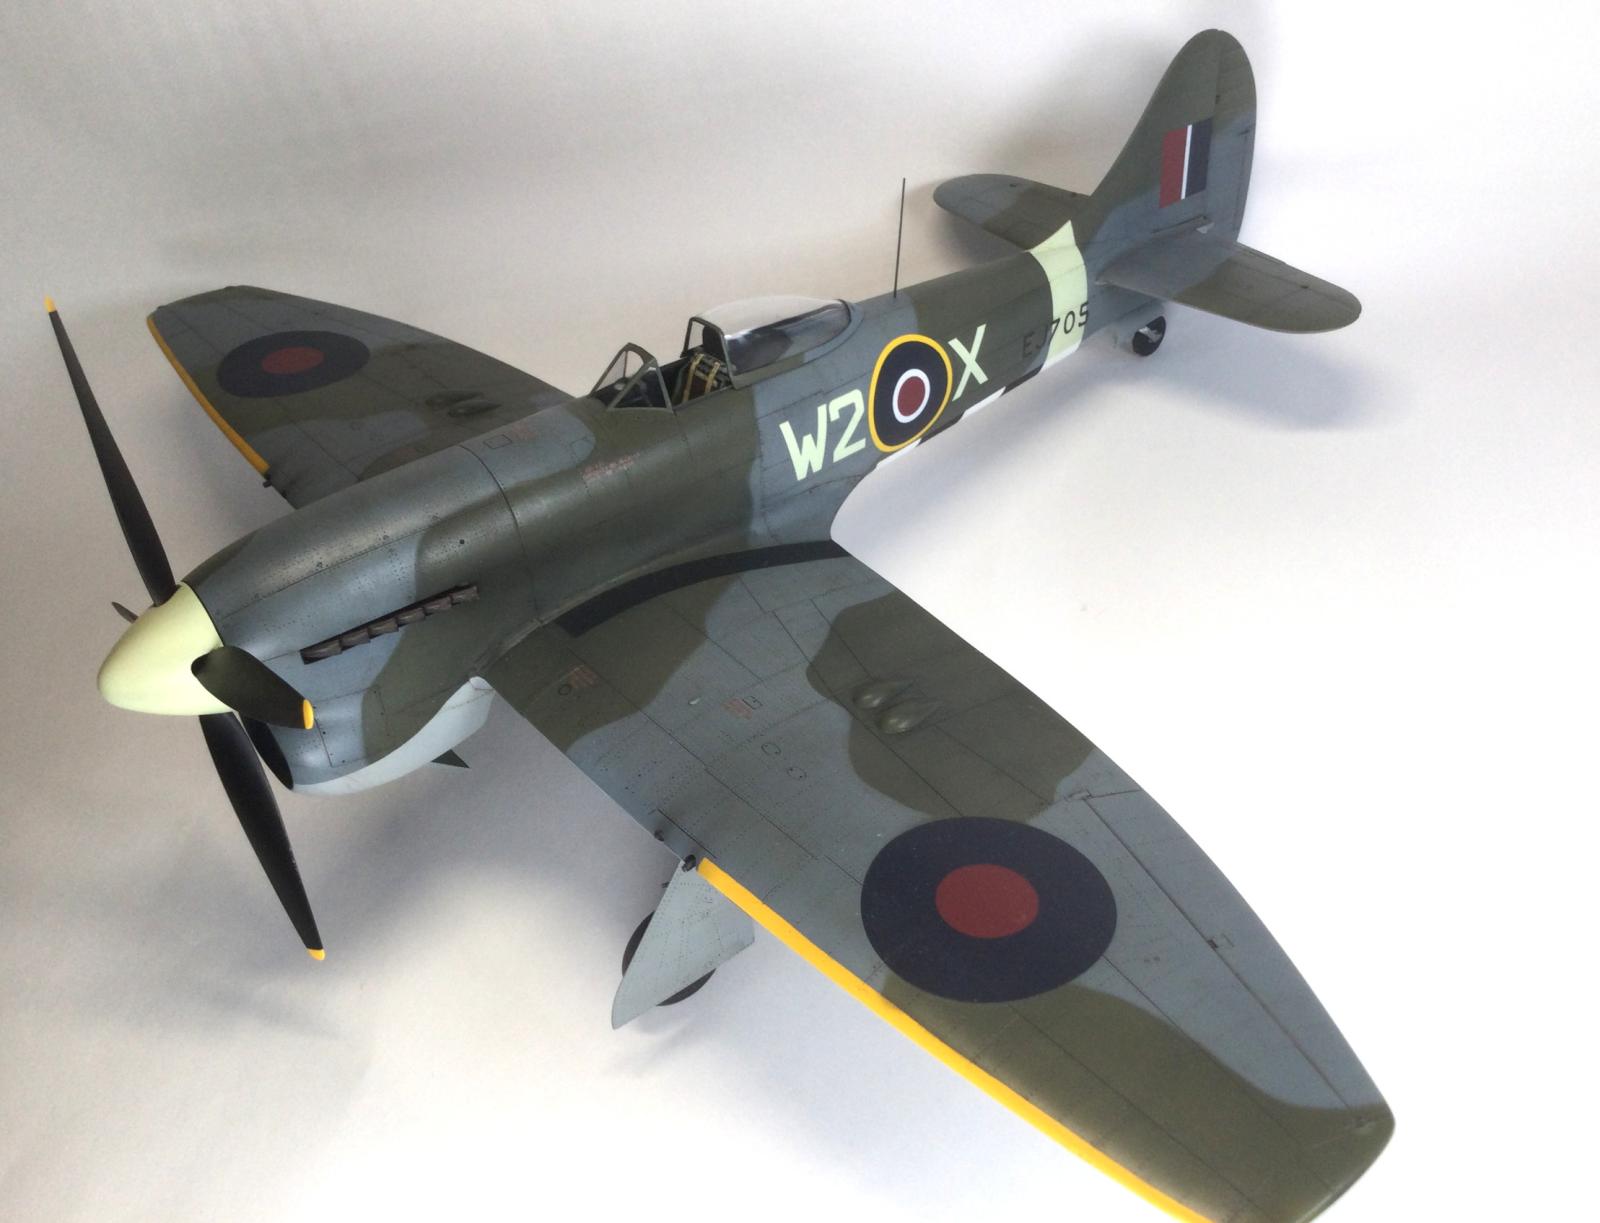
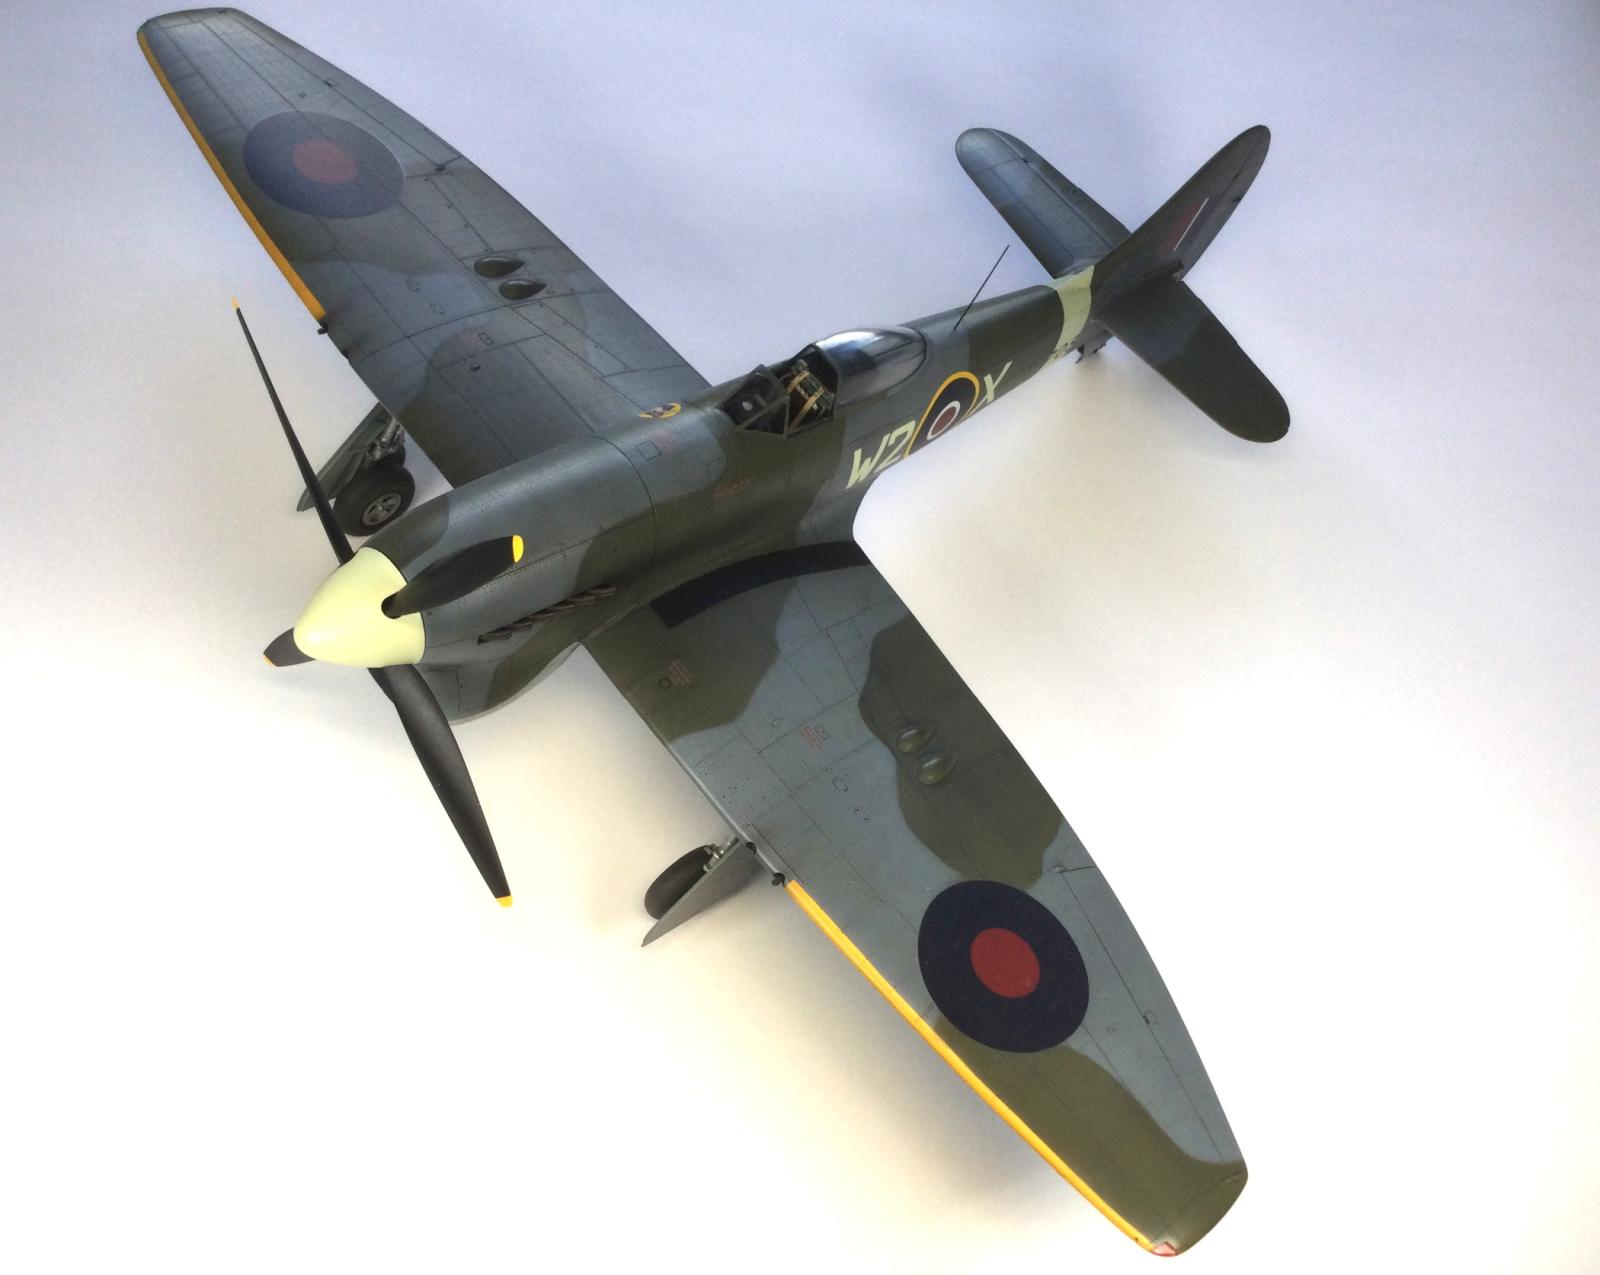
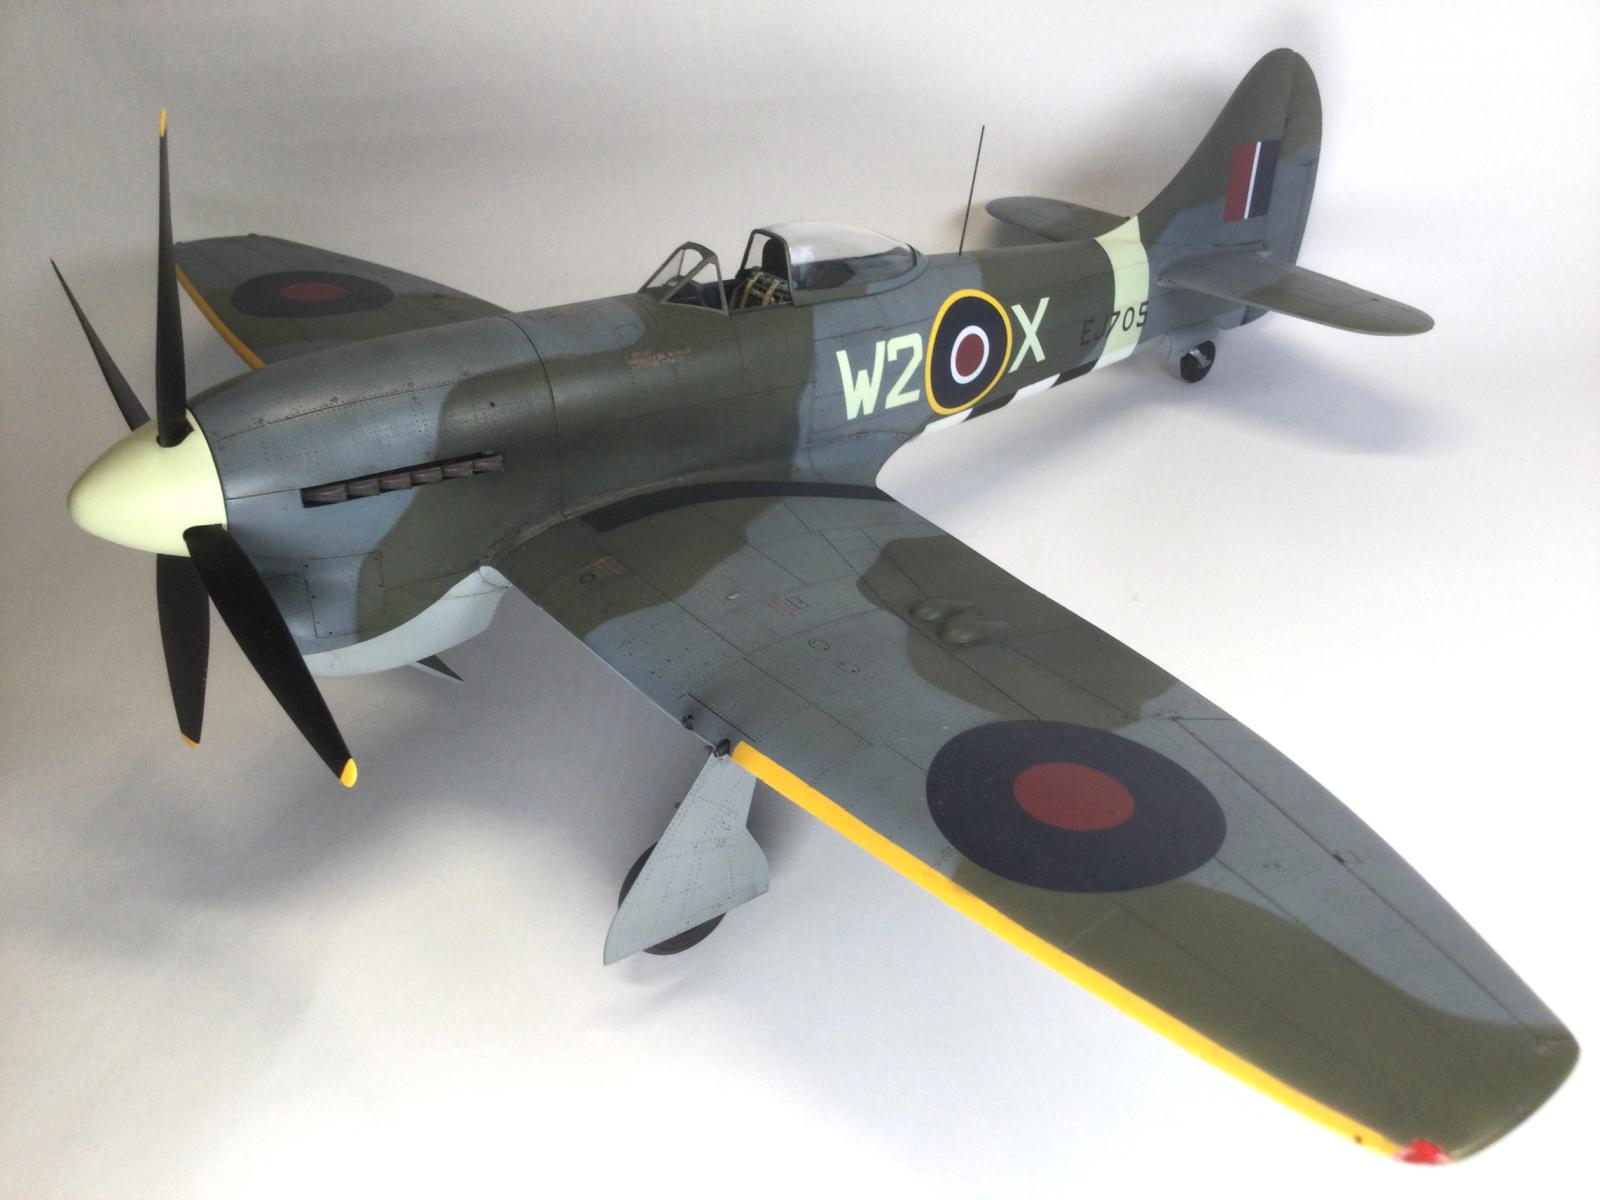
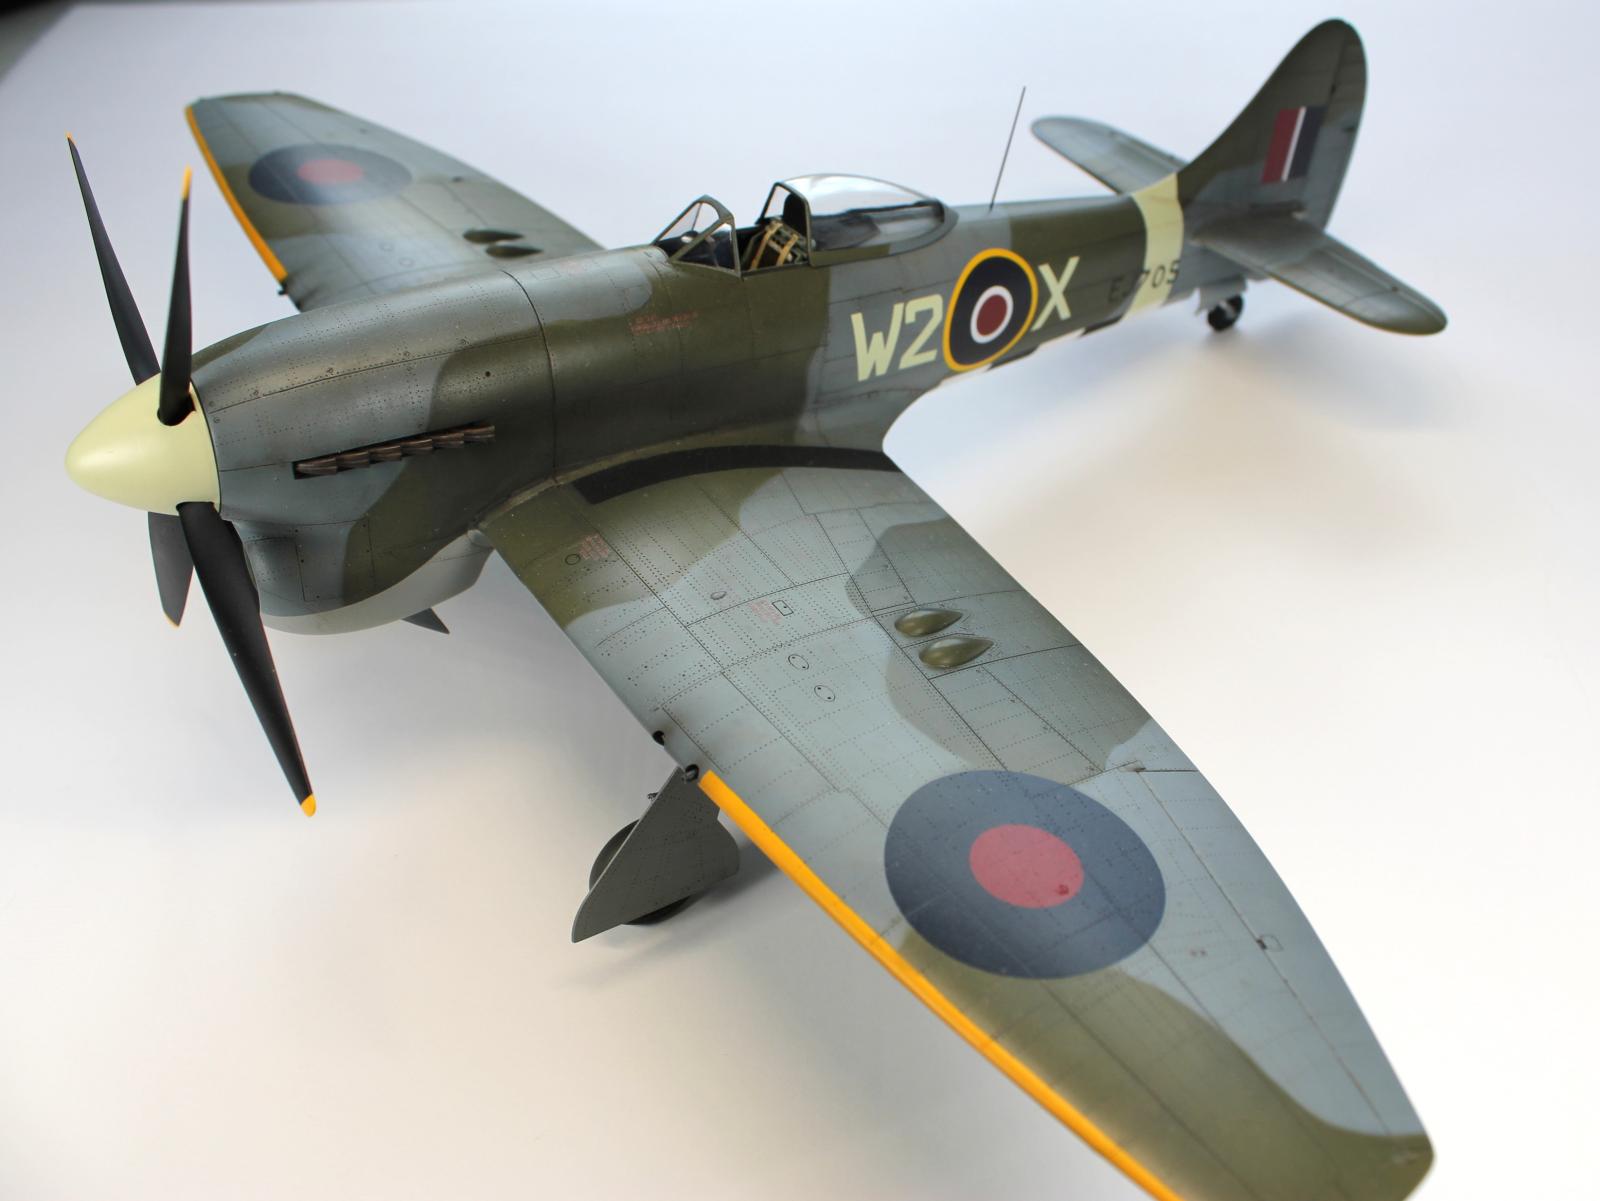
All in all this was a beautiful kit. The surface rivet detail is magnificent. I worked hard in the painting process to bring it out without exaggerating it too much with heavy washes and the like. I am pleased with the results. Kit decals are very good quality. The fit was very good with more work than a Tamigawa kit at the wing root.
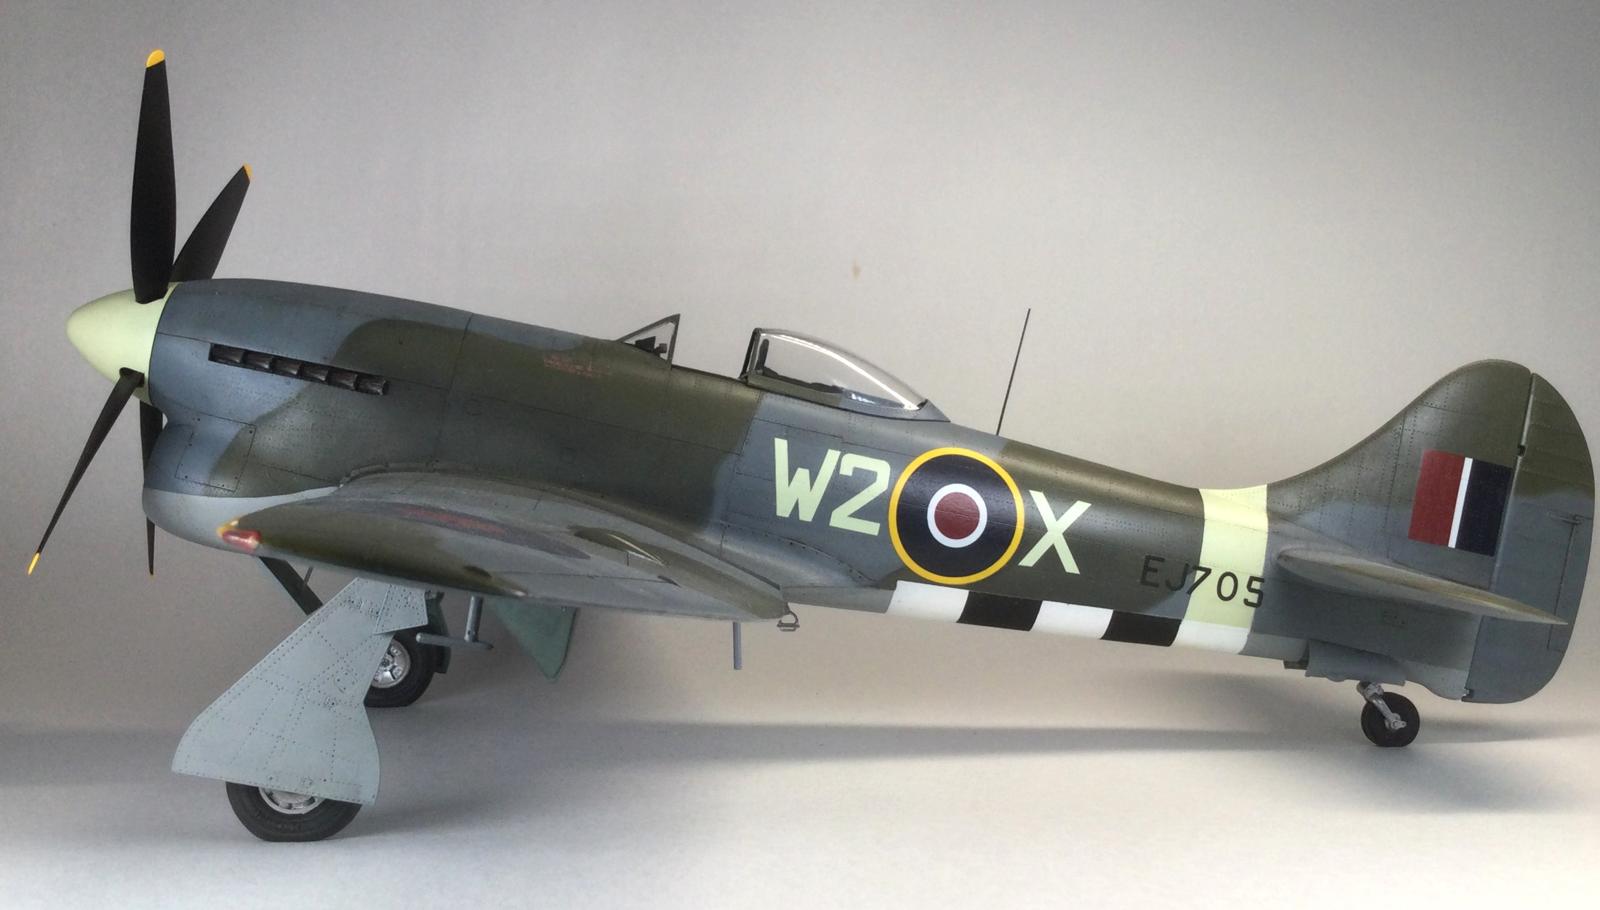
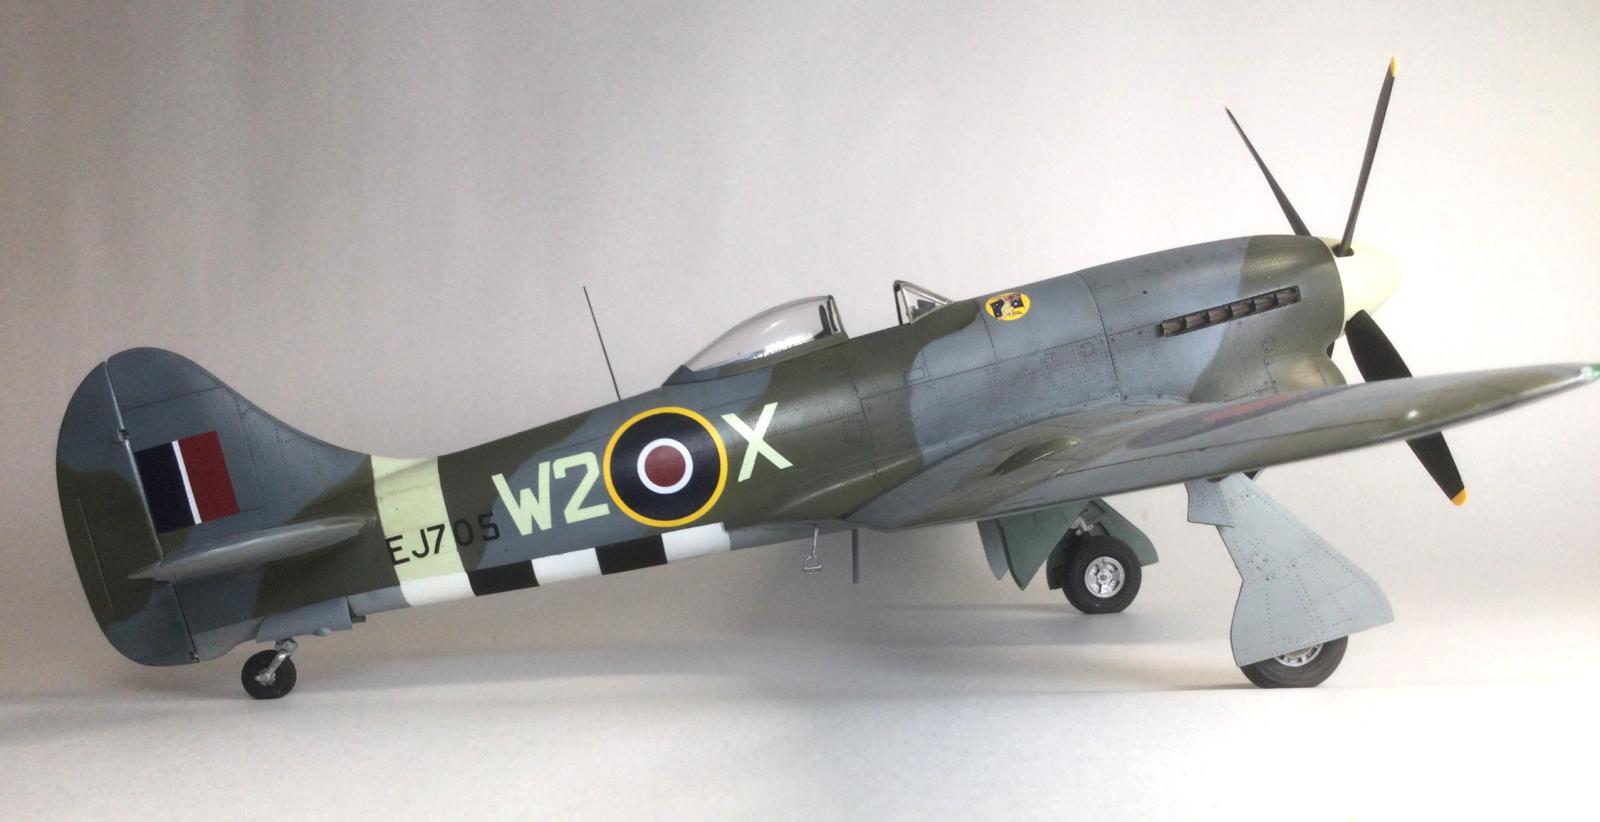
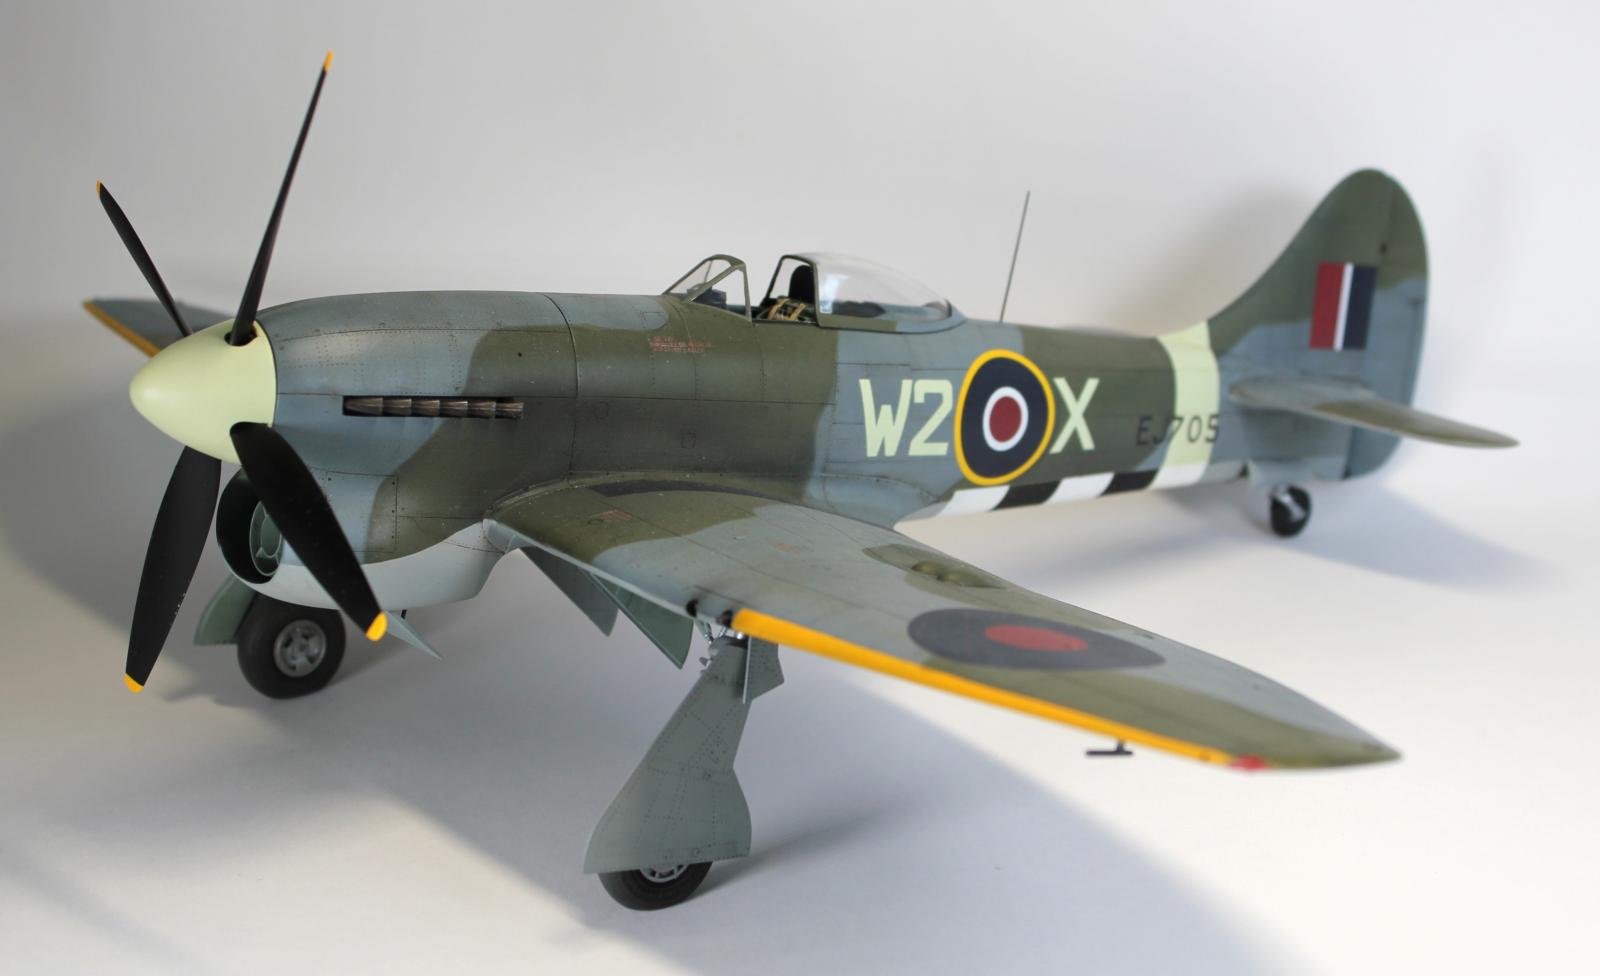
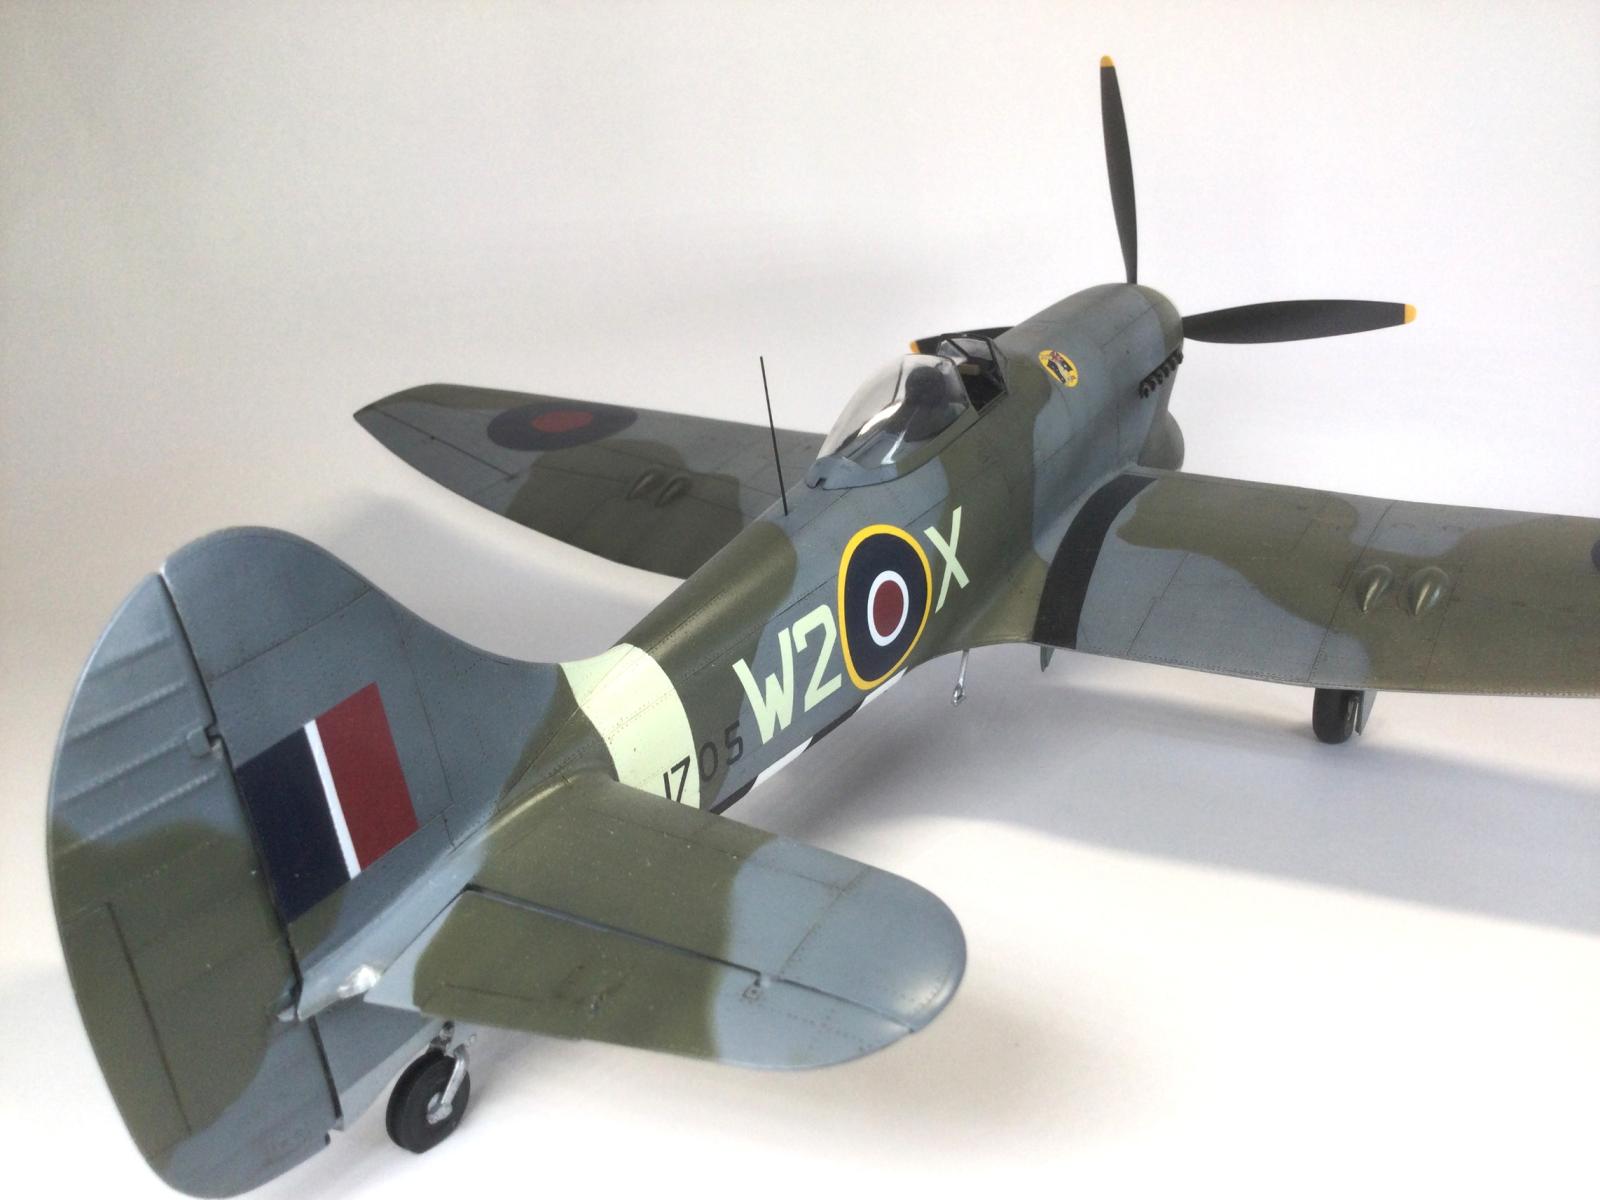
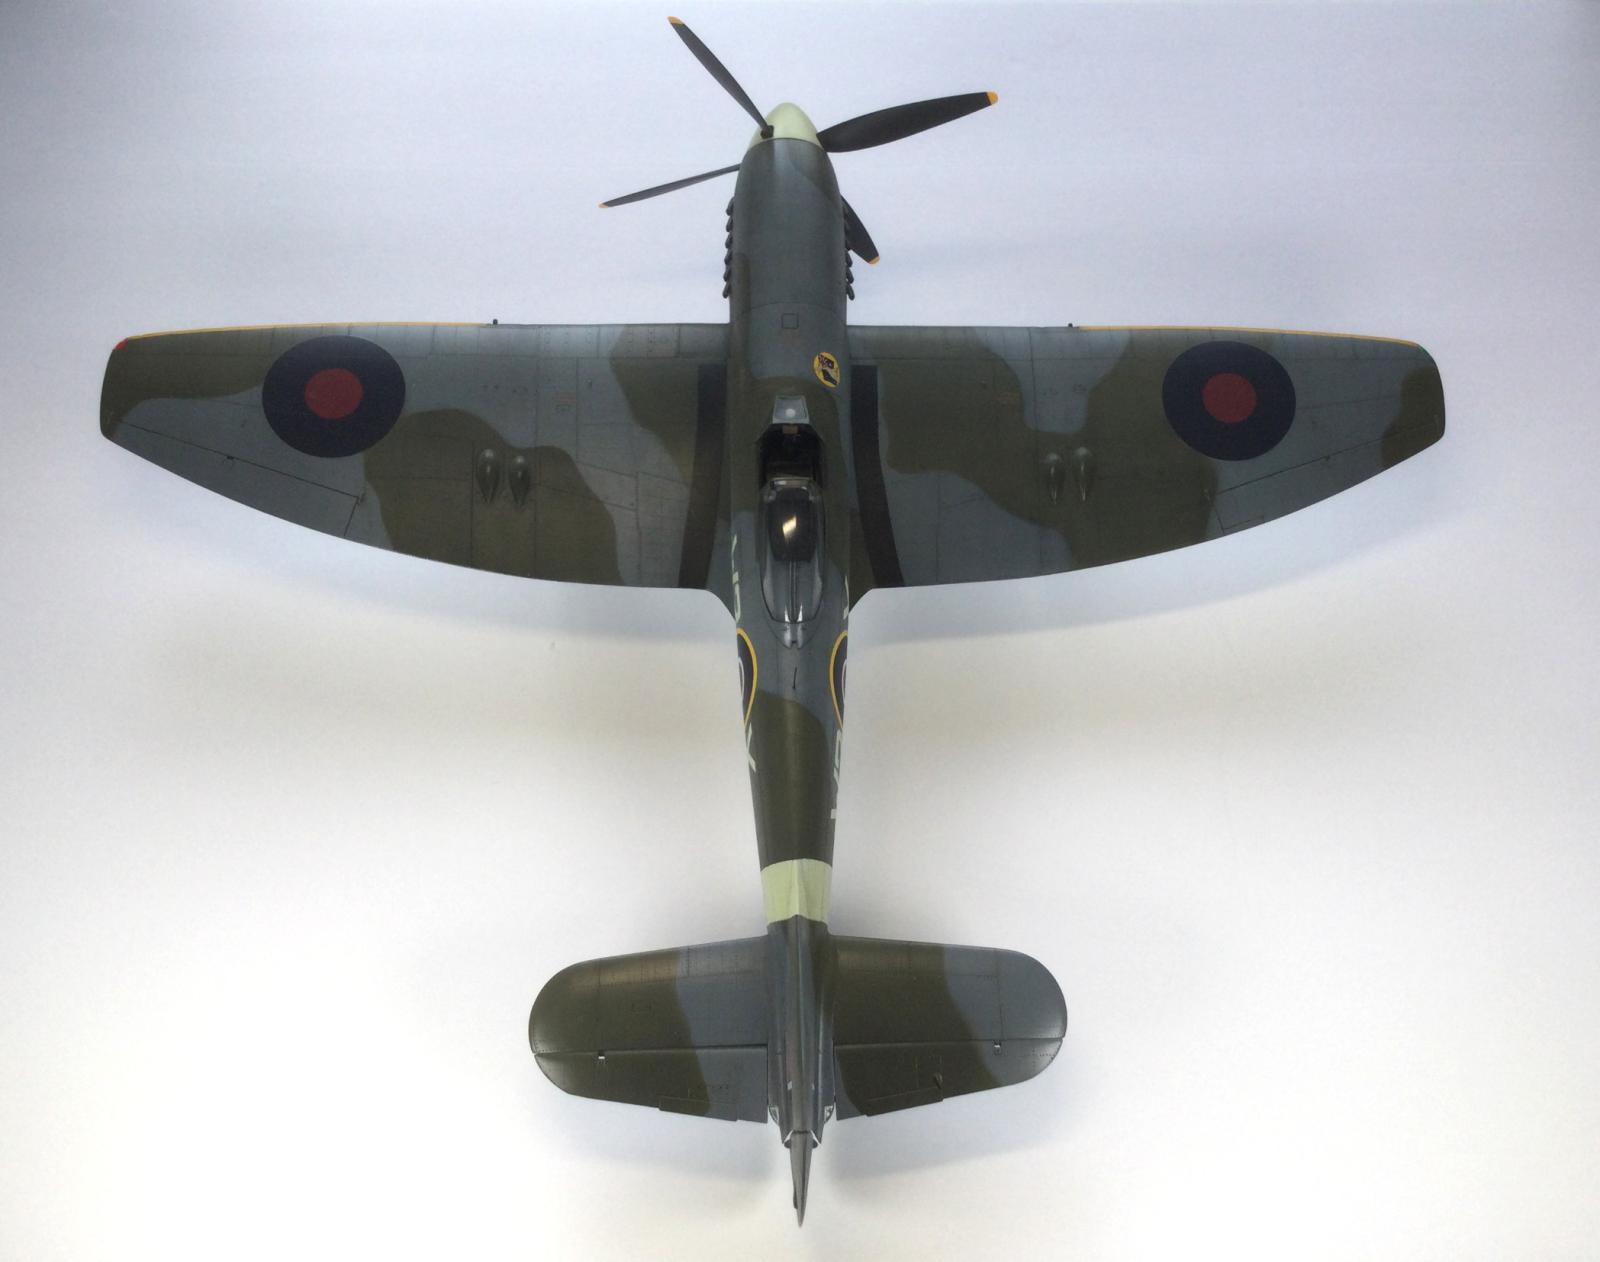
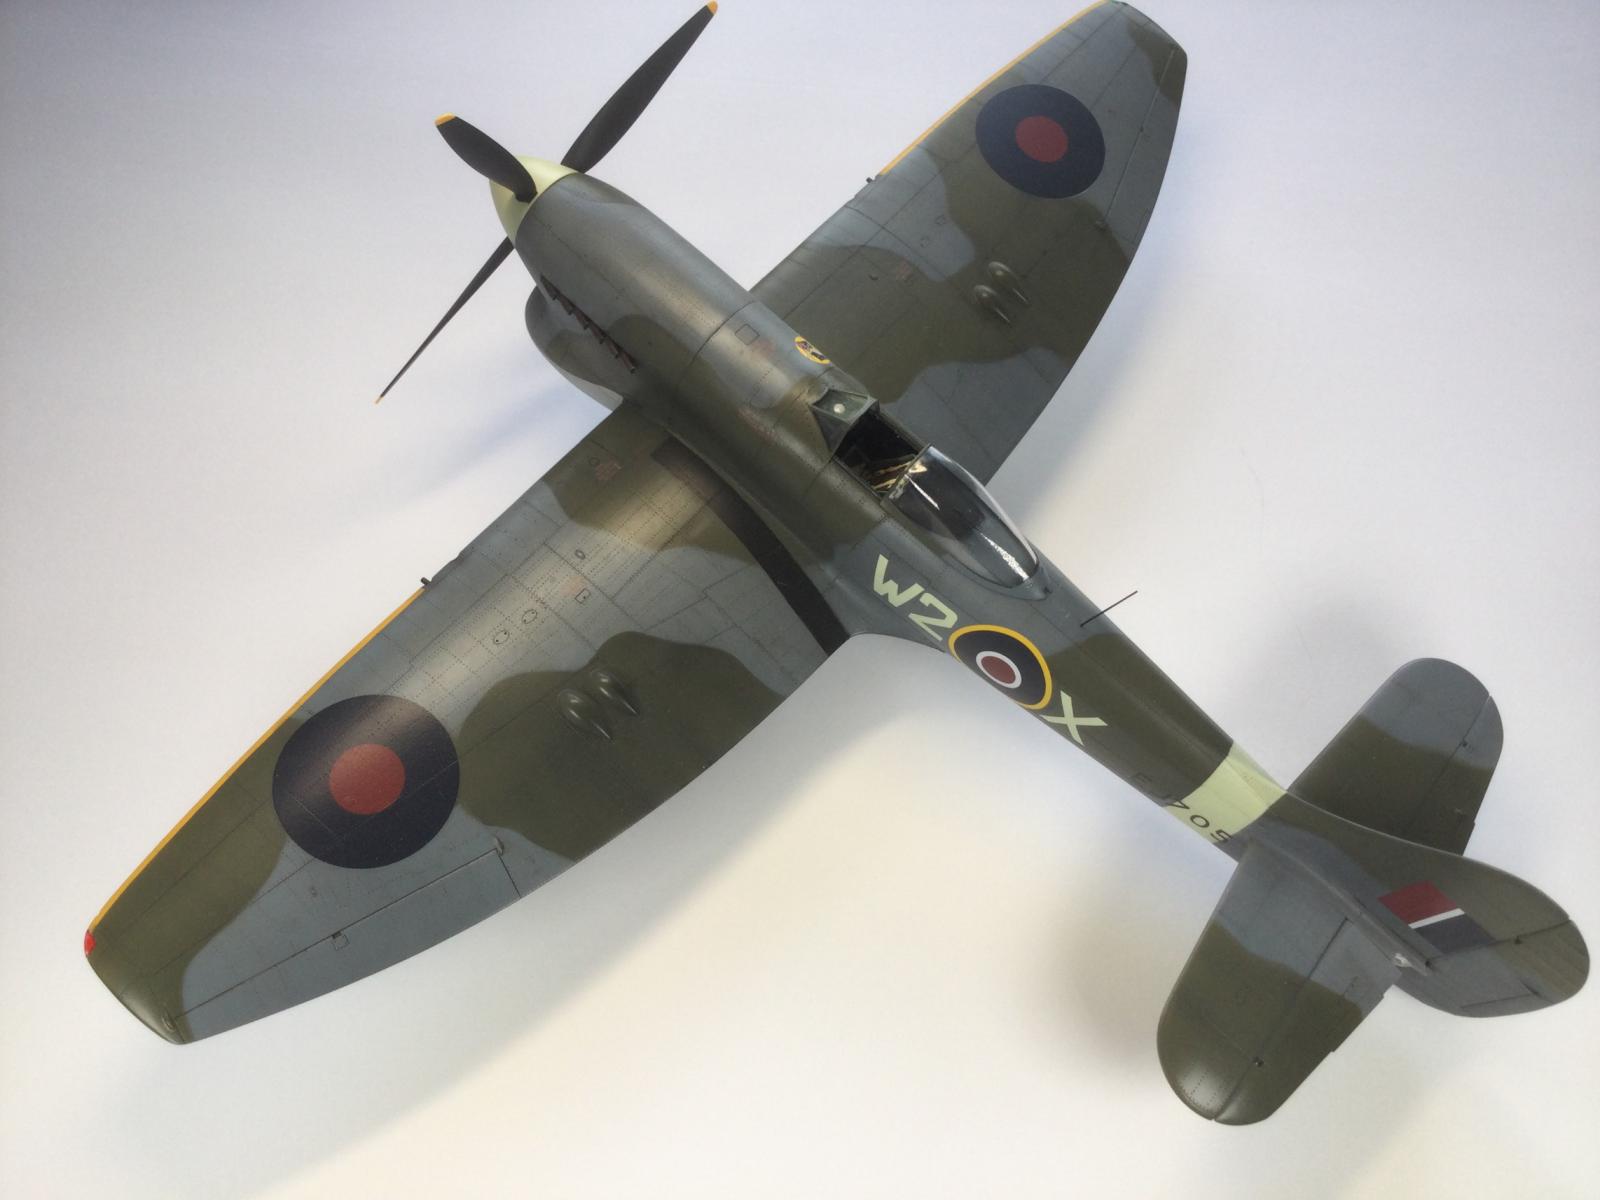
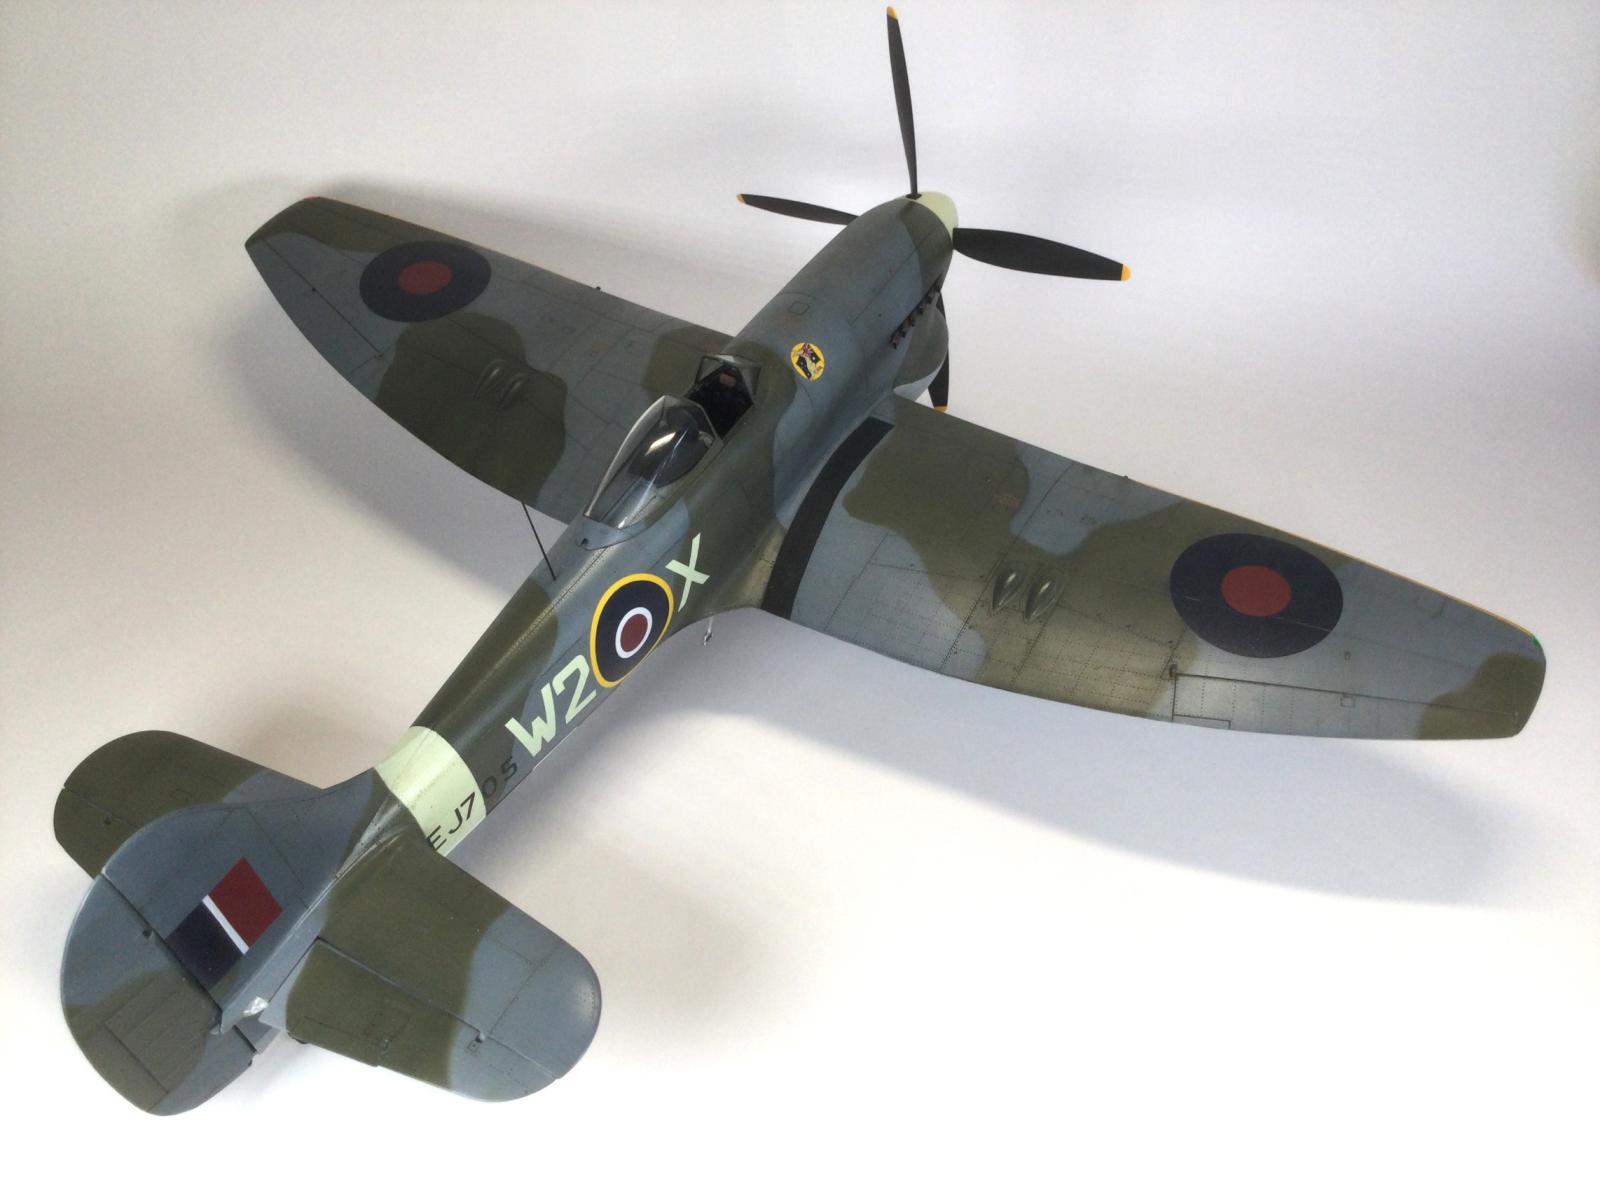
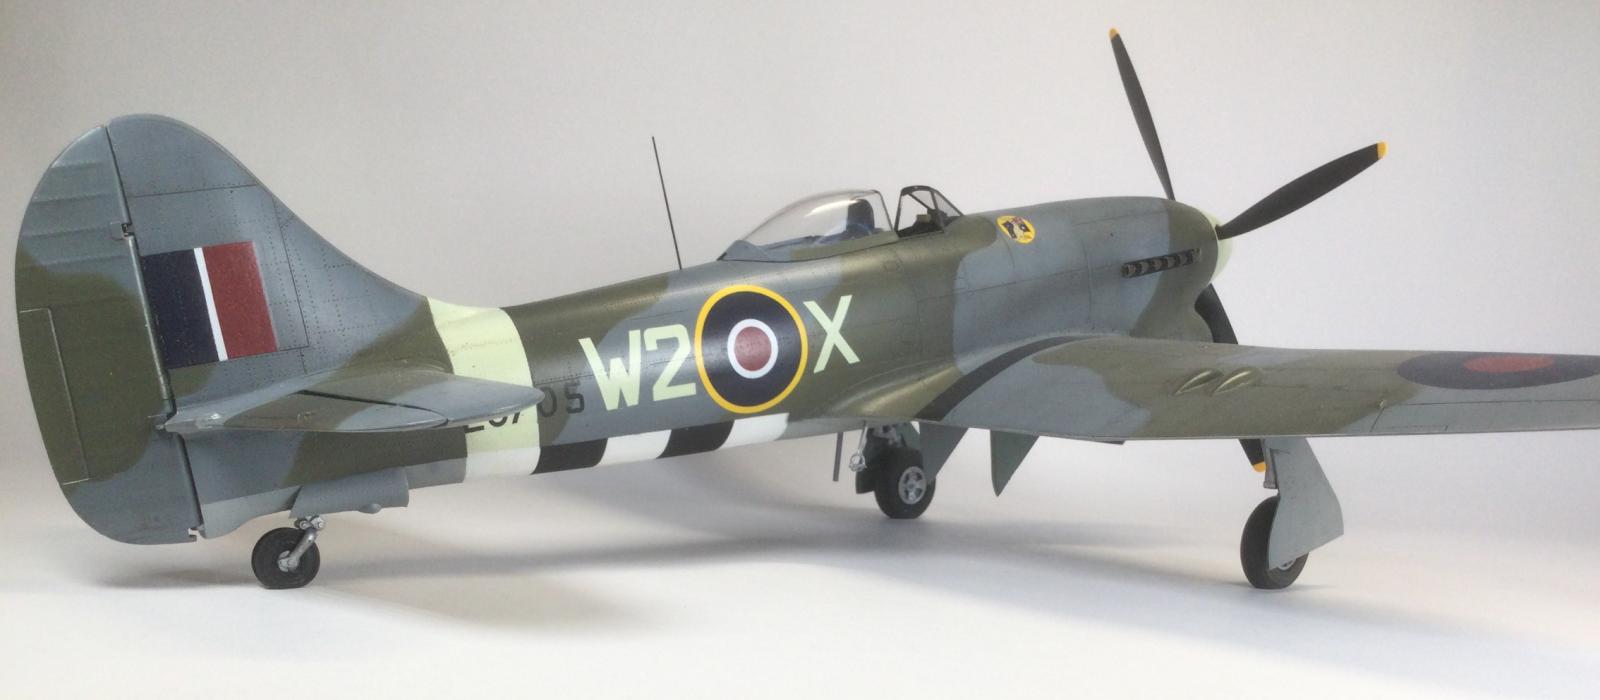
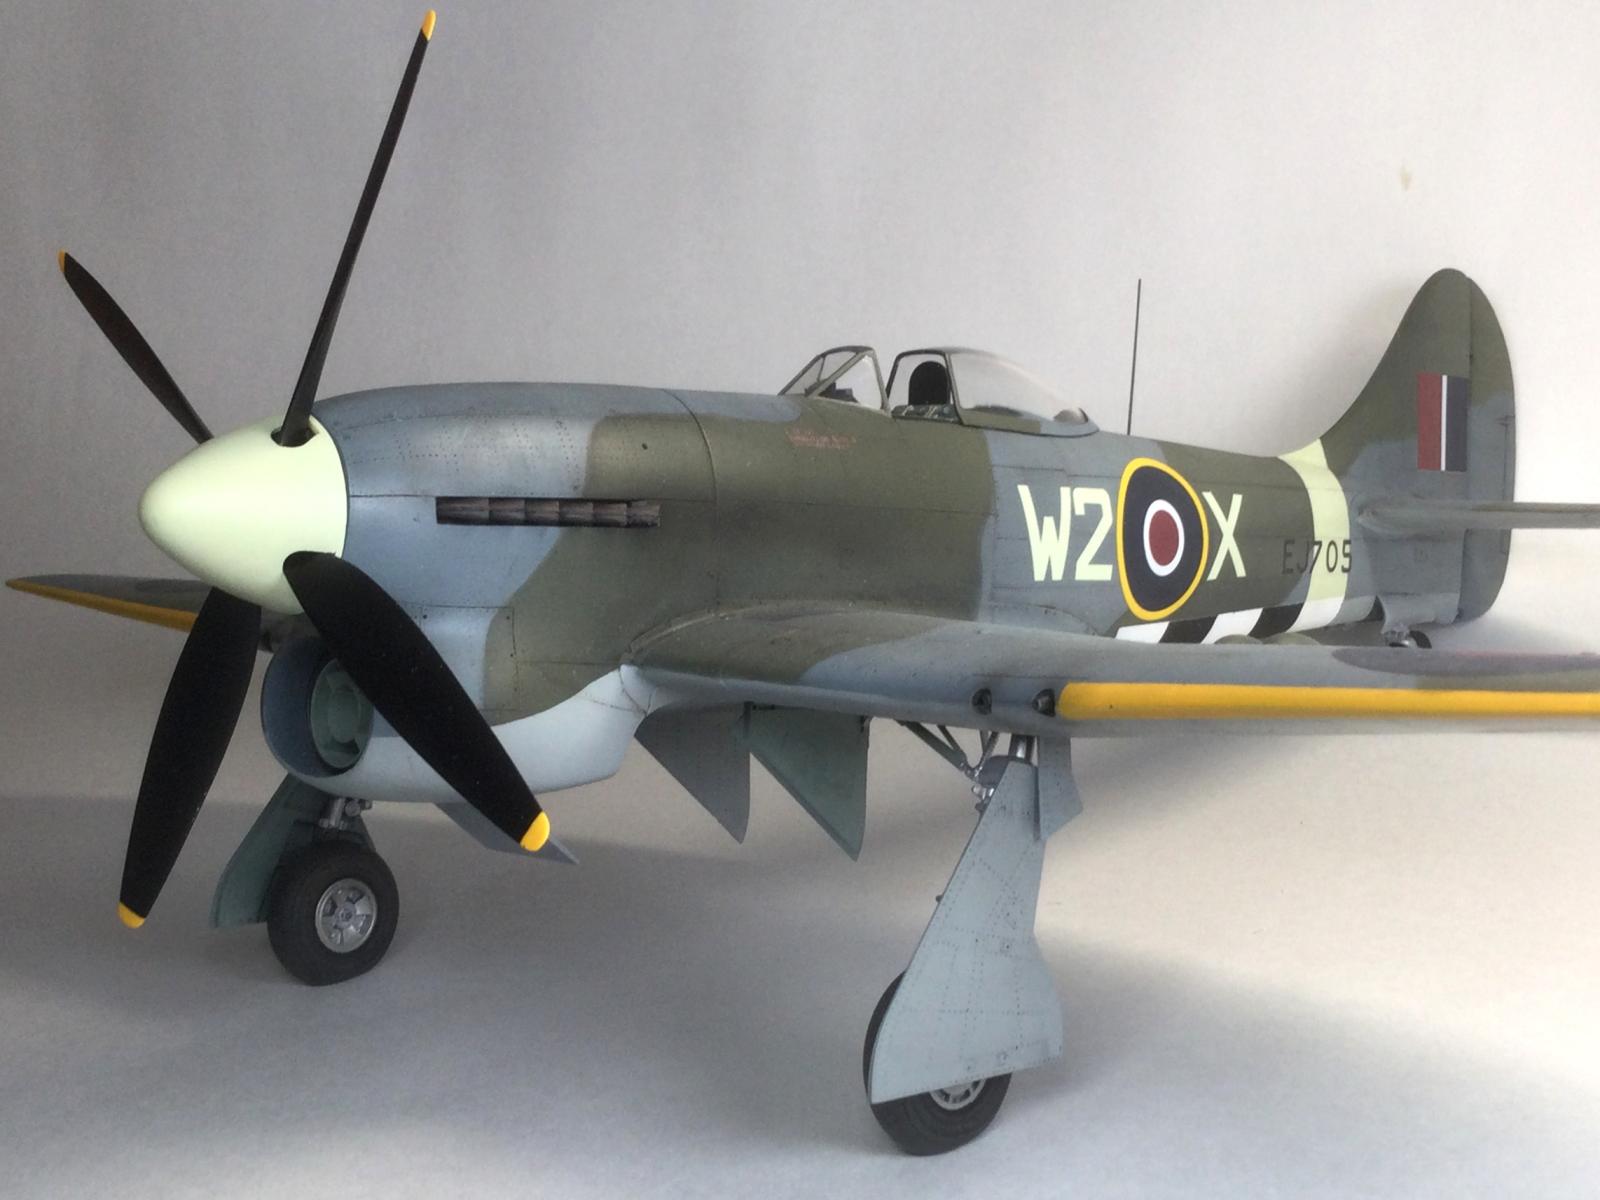
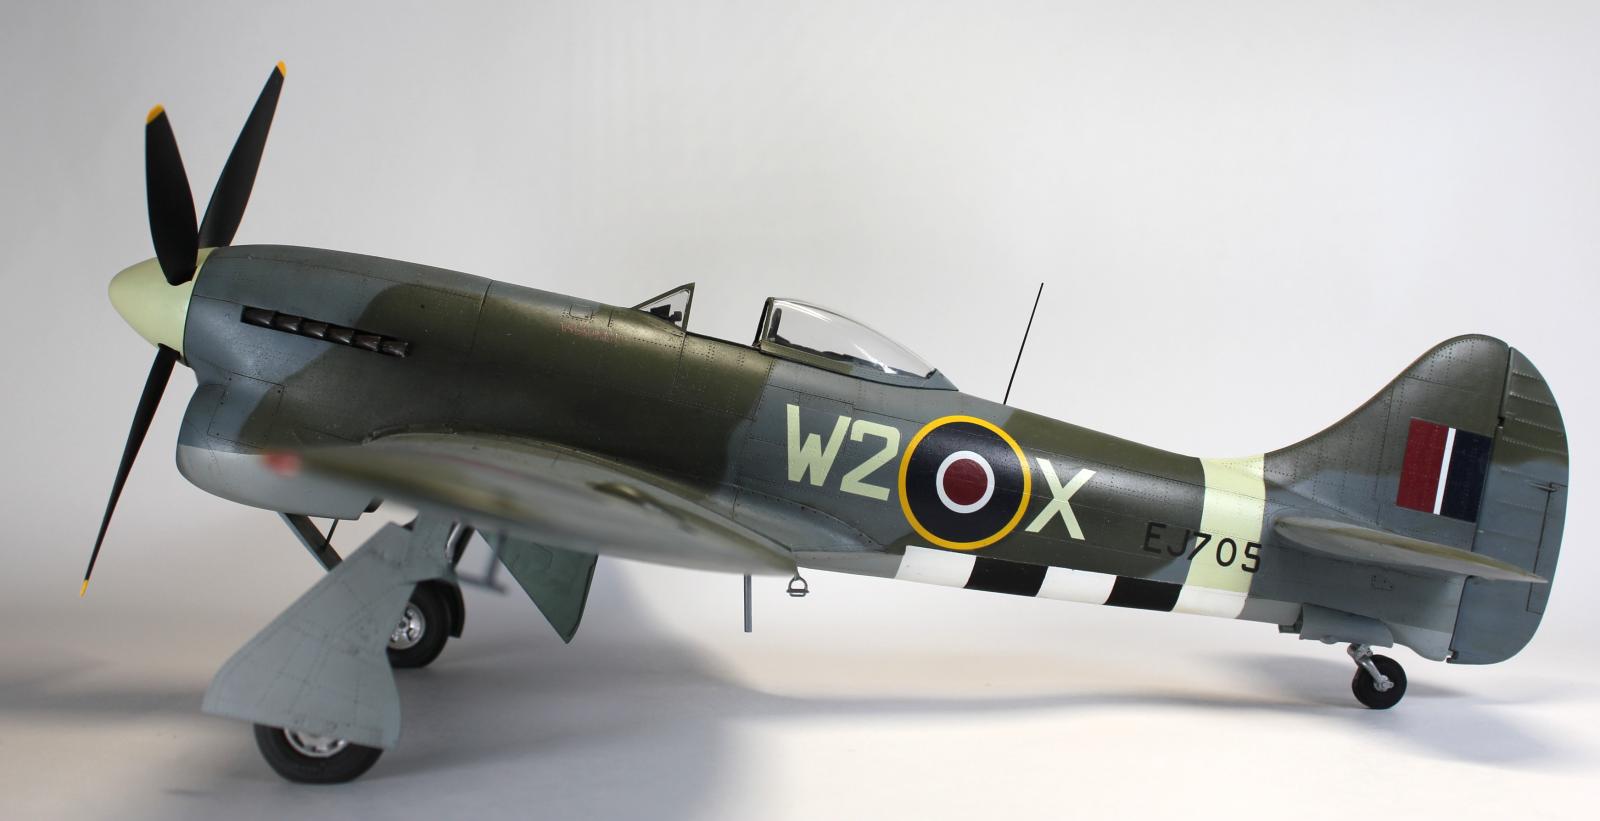
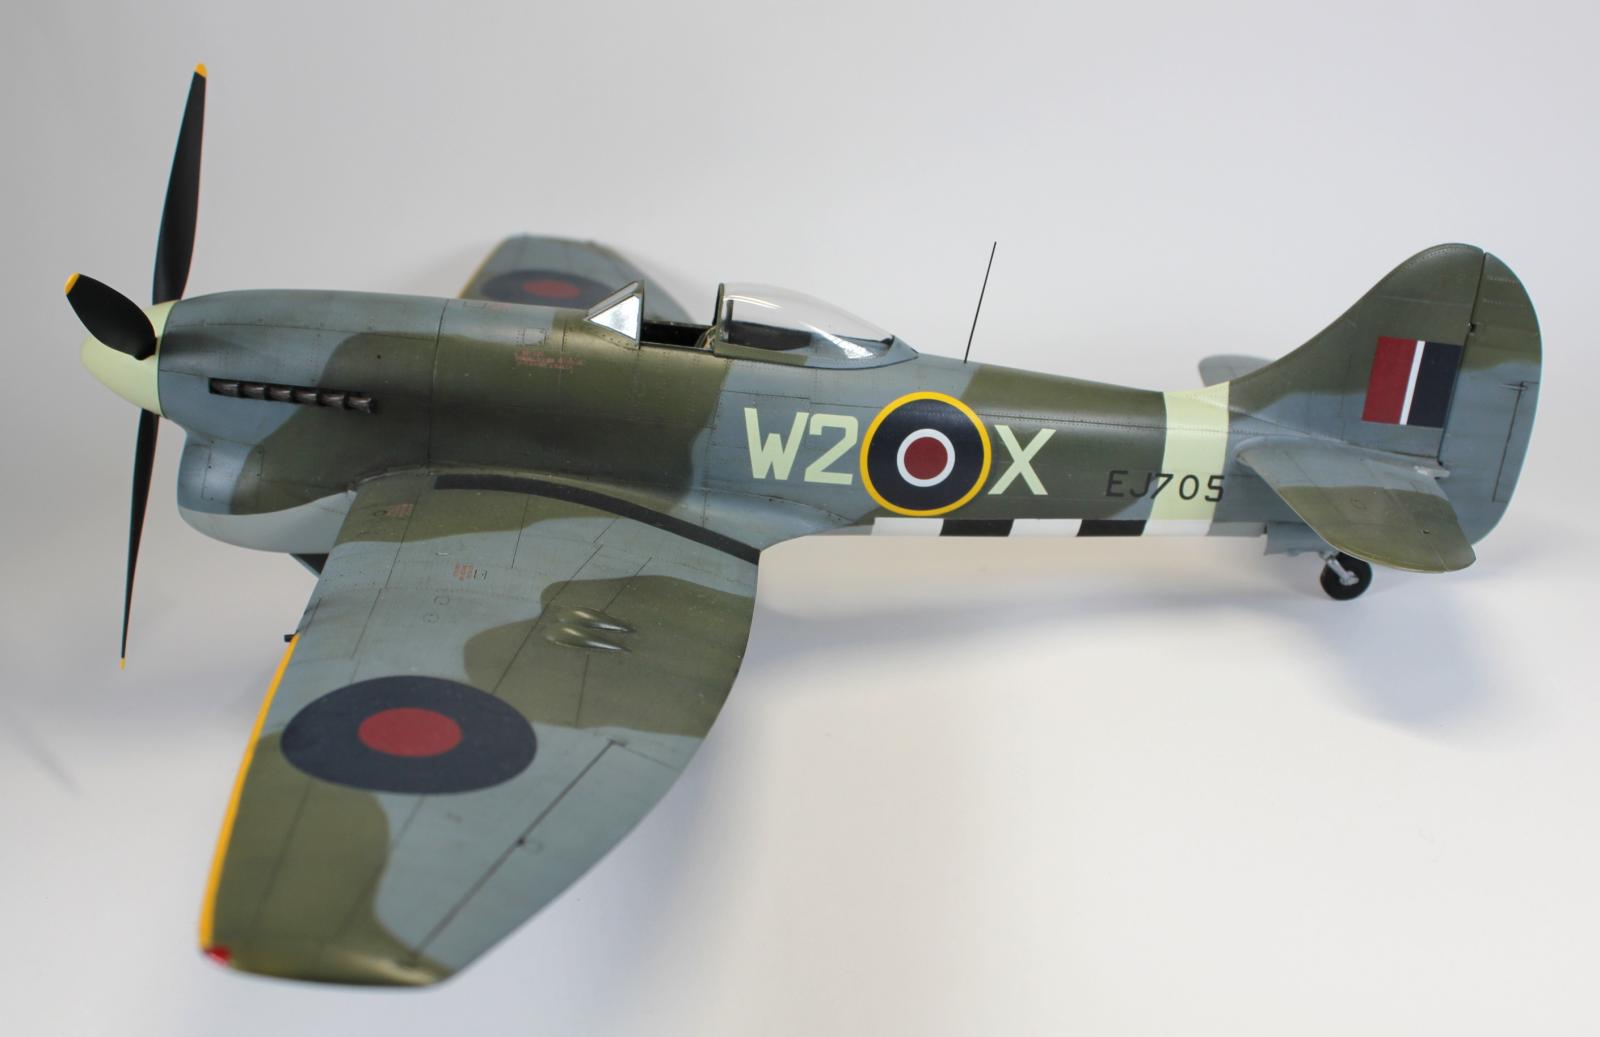
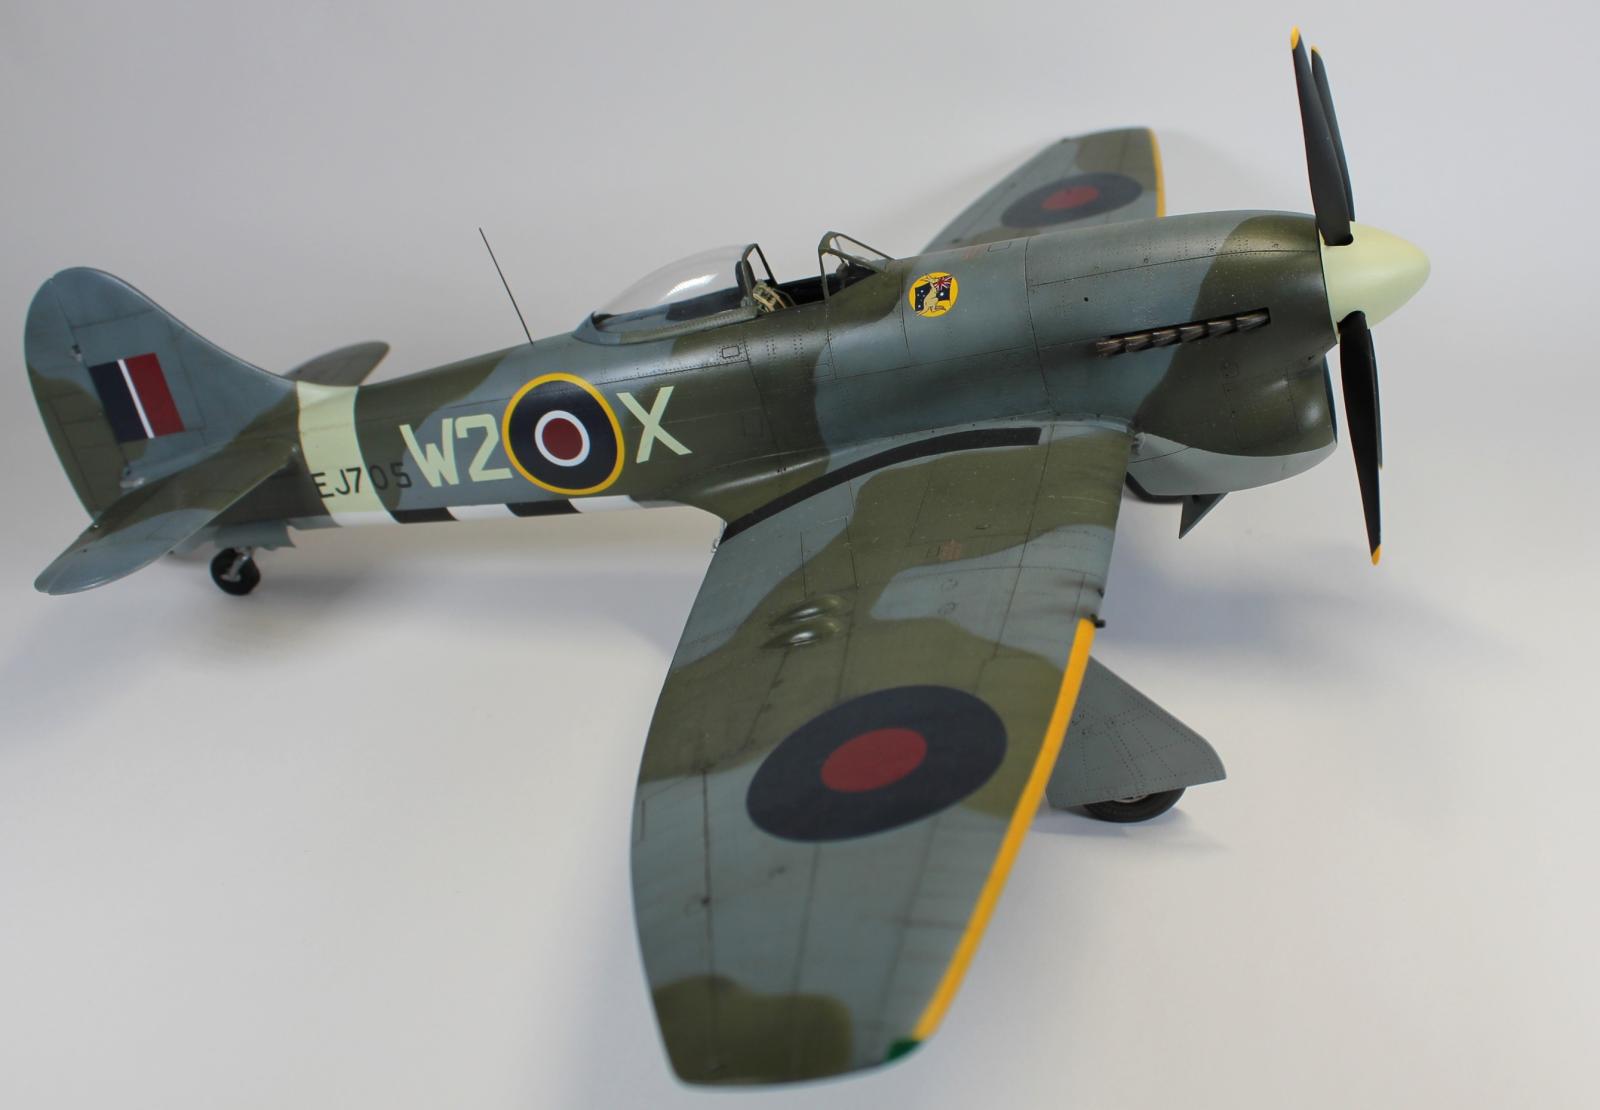
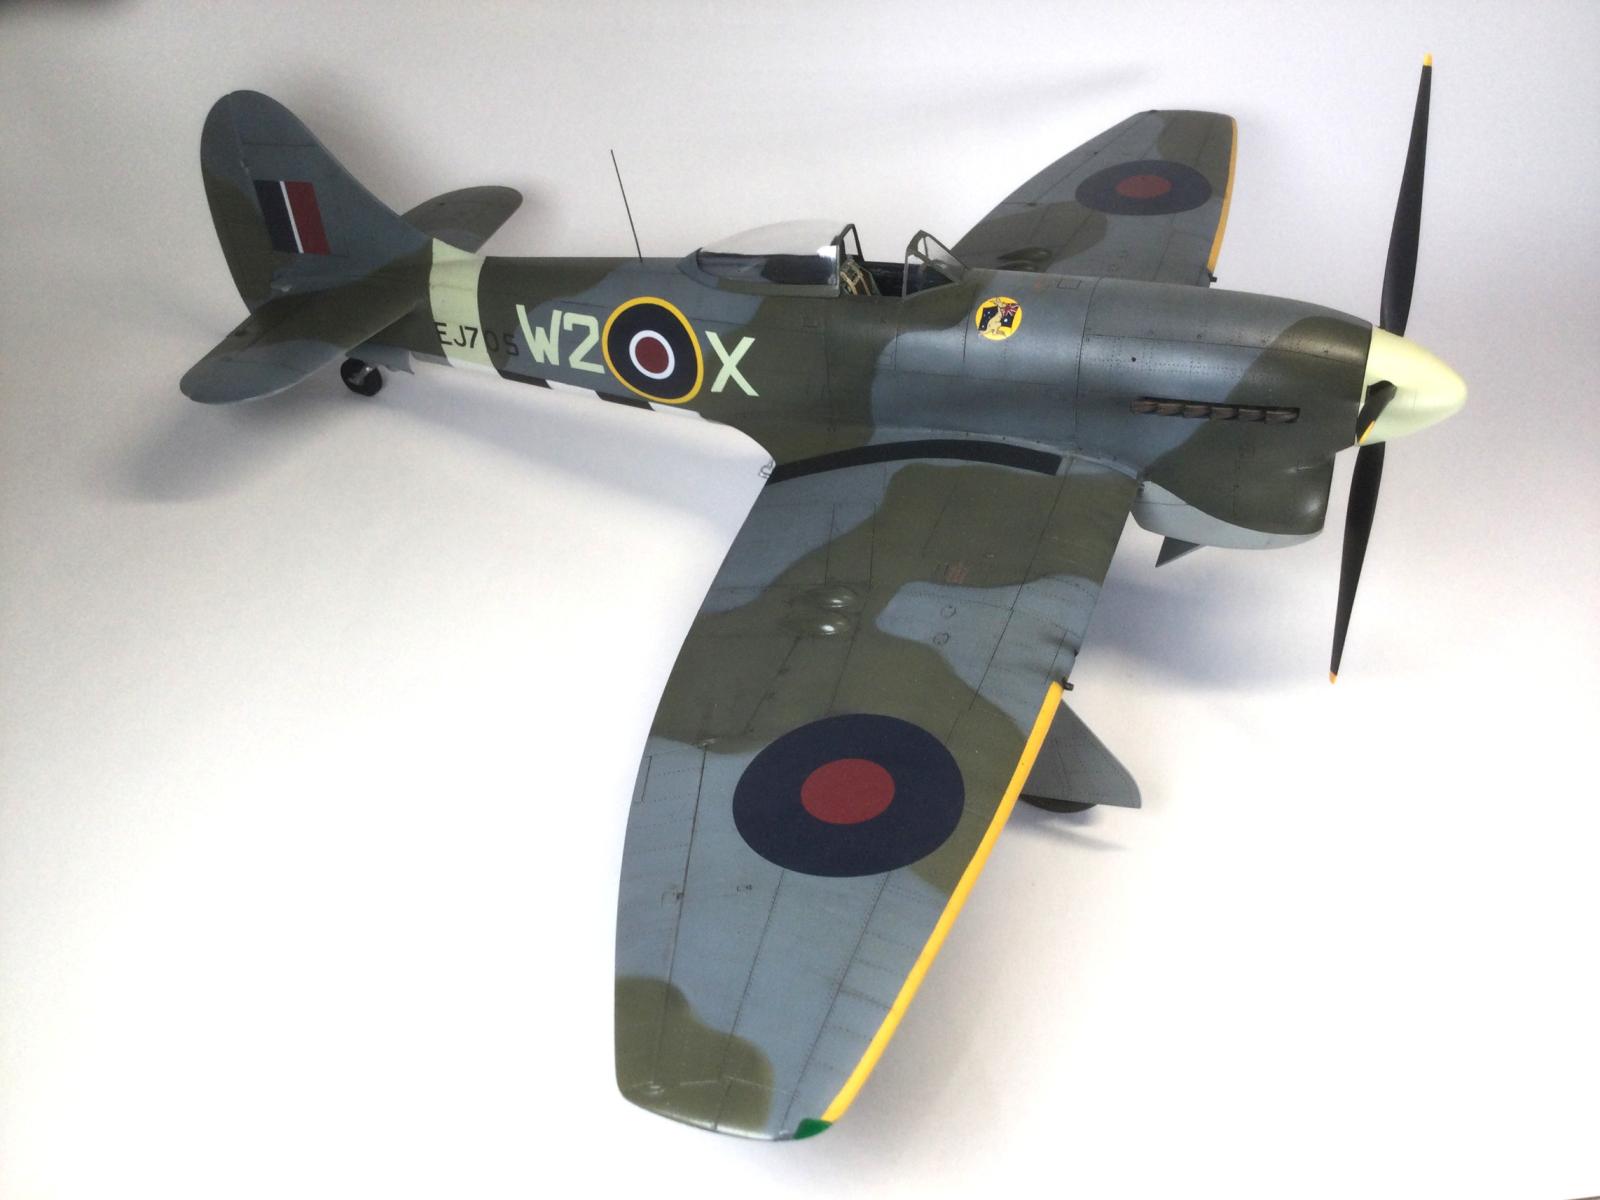
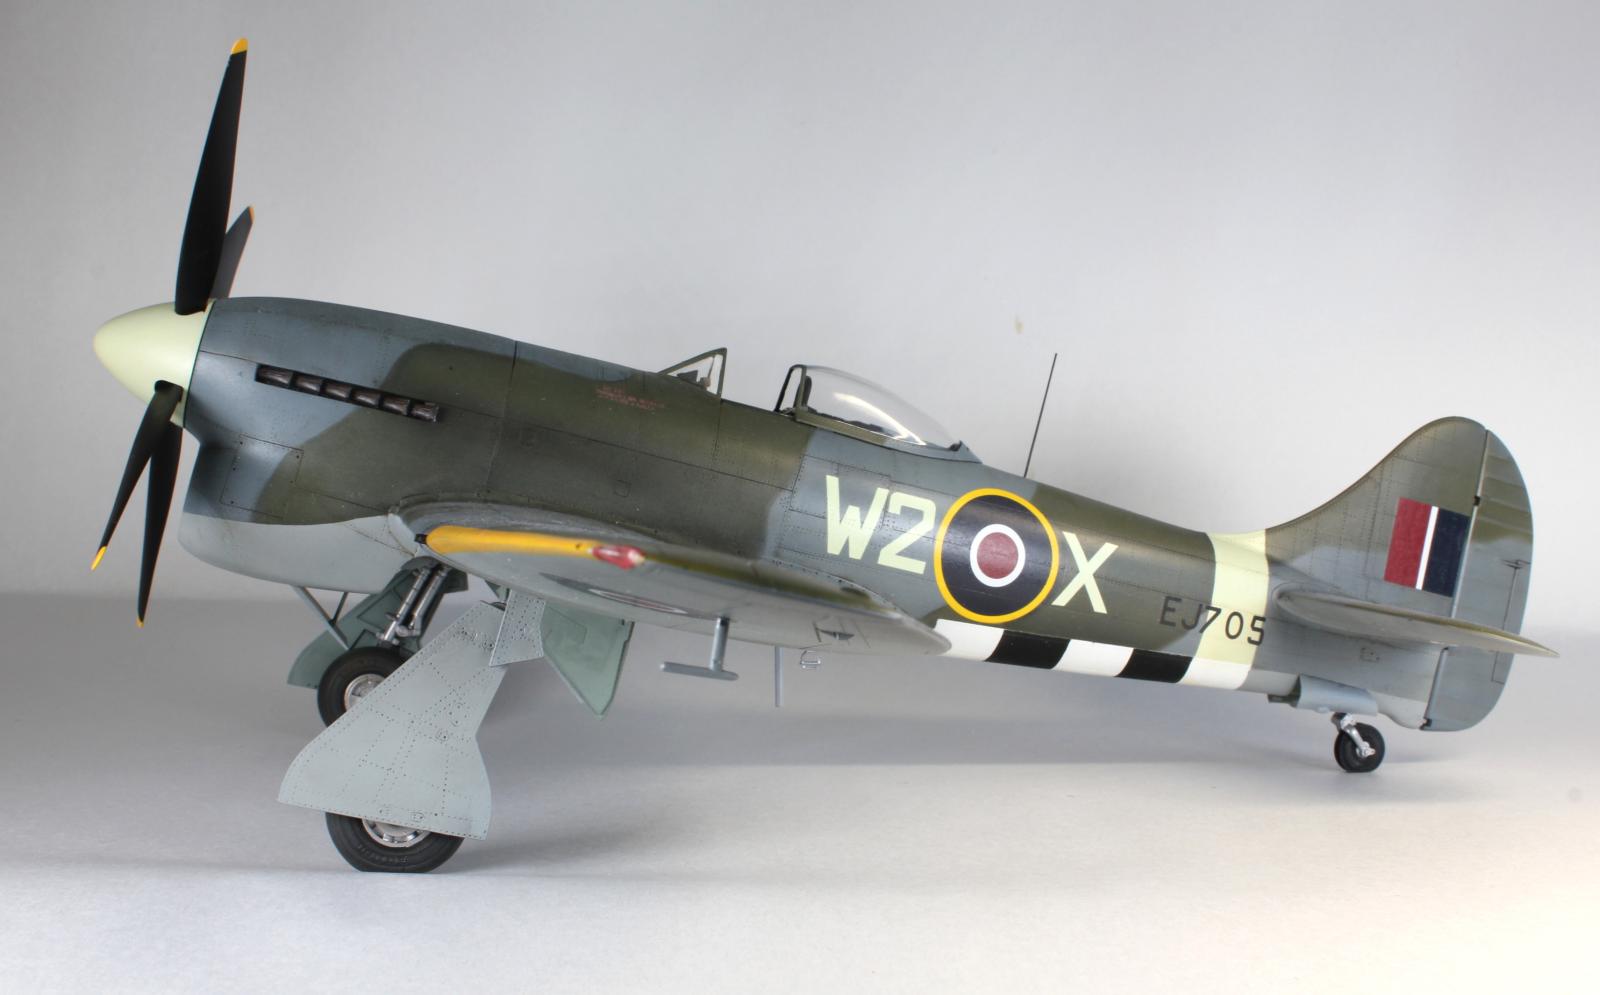
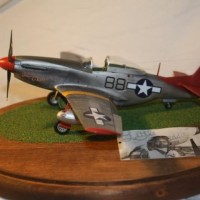
The subject is W2-X EJ705 - an aircraft of No 80 Squadron RAF, 2nd TAF flown by a variety of pilots, mostly Australian - hence the kangaroo and Australian flag badge on the starboard side near the windscreen. I wanted to do a Tempest with dog fighting experience, rather than a V-1 killer and this particular plane destroyed three Bf-109s and an FW-190 while flown by four different pilots. Painting was as follows: I began with a a pre-shade and mottle using Tamiya greys and flat black. The camo is Tamiya XF-83 Medium Sea Grey for the undersurfaces with Tamiya XF-82 Ocean Grey topsides, both lightened a bit with Flat White. I wanted to get just the right amount of contrast with the Gunze H73 RAF Dark Green I used to complete the pattern. Weathering comes through in the preshade along with a bit of post-shading using very dilute Tamiya smoke dulled with Flat Base and Flat Black, mostly applied for exhaust staining, oil streaks, and cannon smoke stains. An oil wash for panel lines and paint modulation (blended dots of earth-tone colors) went over the usual Tamiya Clear glaze, which I always use for washes and decaling. Semi-matte finish with Vallejo Satin Acrylic Varnish and a light overspray of Gunze Flat Clear. I am finally moving on from my previous use of MM ACryl Flat which has now dried up completely, as has the manufacturer. Vallejo seems the way to go.
So that's it for this build. I hope you like it. Comments welcome as always.


Nice clean Tempest, Colin! Great cockpit work too.
Thanks John. I took special care with the weathering, so wouldn't want it to appear too clean! 🙂 I used an oil wash technique with drops of various colors to make the greys vary in tone as well as pre-shading. Some of that is more visible in the SLR shots but the iPad doesn't capture it well. The exhaust staining is quite visible against the grey on the starboard side but does get lost in photos against the green. Still working on the photography. Anyway thanks for commenting. Much appreciated.
A beautiful Tempest all round, Colin, excellent work on the conversion, and the extra detailing, especially in the cockpit, make it really stand out.
Absolutely gorgeous, Colin. Totally agree with John and George on the detail work. Glad you hung in there to the finish line.
Thanks, George and Eric. Glad you like it! The model has been quite a journey and I am really happy to have it done. It was a labor of love since I have always loved the lines of the Tempest and needed one in my collection. Lots of hurdles to overcome but well worth it in the end. I am getting confident enough to do a full resin kit next.
An absolutely wonderful Tempest, Colin!
As always, your attention to detail and overall work is second to none.
Congratulations!
Thanks, Spiros. It was great to have you along for the build when it was a work in progress. Many thanks for that! As you know it was quite the project to work through over time.
Very well done. Perfect finish for the use/time. I see you had no trouble downloading a slew of pics.
Thanks, Bill! Glad you made that observation about the period look. I studied so many photographs of 2nd TAF aircraft in 44-45 I nearly went cross-eyed comparing details about the finish. As for the pics, I may have an easier time uploading since I resize each one pretty laboriously in ArcSoft Photo Studio. They are all between 300 and 600 mebabytes, which is about right to keep them from getting too grainy.
Excellent result, Colin @coling
So much details in this build and all of them stand out nicely.
Glad the resin nose in the end did fit nicely.
Beautiful paintwork as well.
Thanks, John. I really appreciated your encouragement in the build process. You know all the details that were included all along the way so that means a lot.
She's a beauty!
Thanks, John. Happy to bring out the beauty in the aircraft design and quality of the kit.
Very nice work @coling. A superb result.
I have to plead guilty to being unable to tell the difference between your model and mine, which was built OOB without the Barracuda resin.
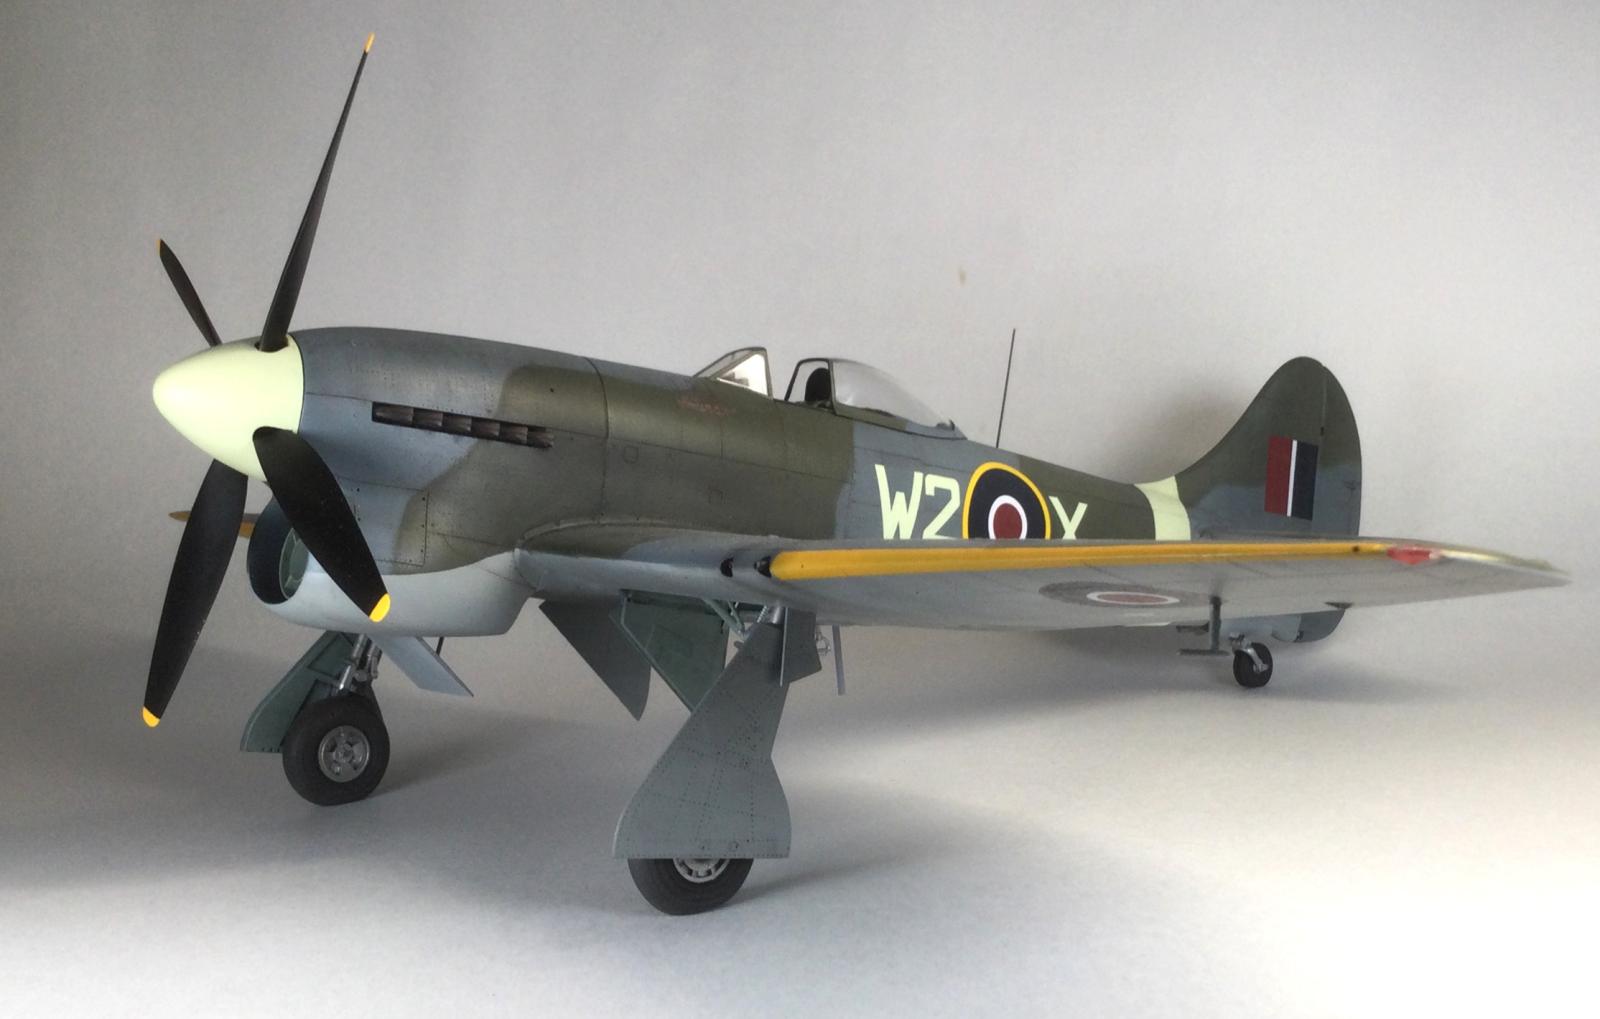
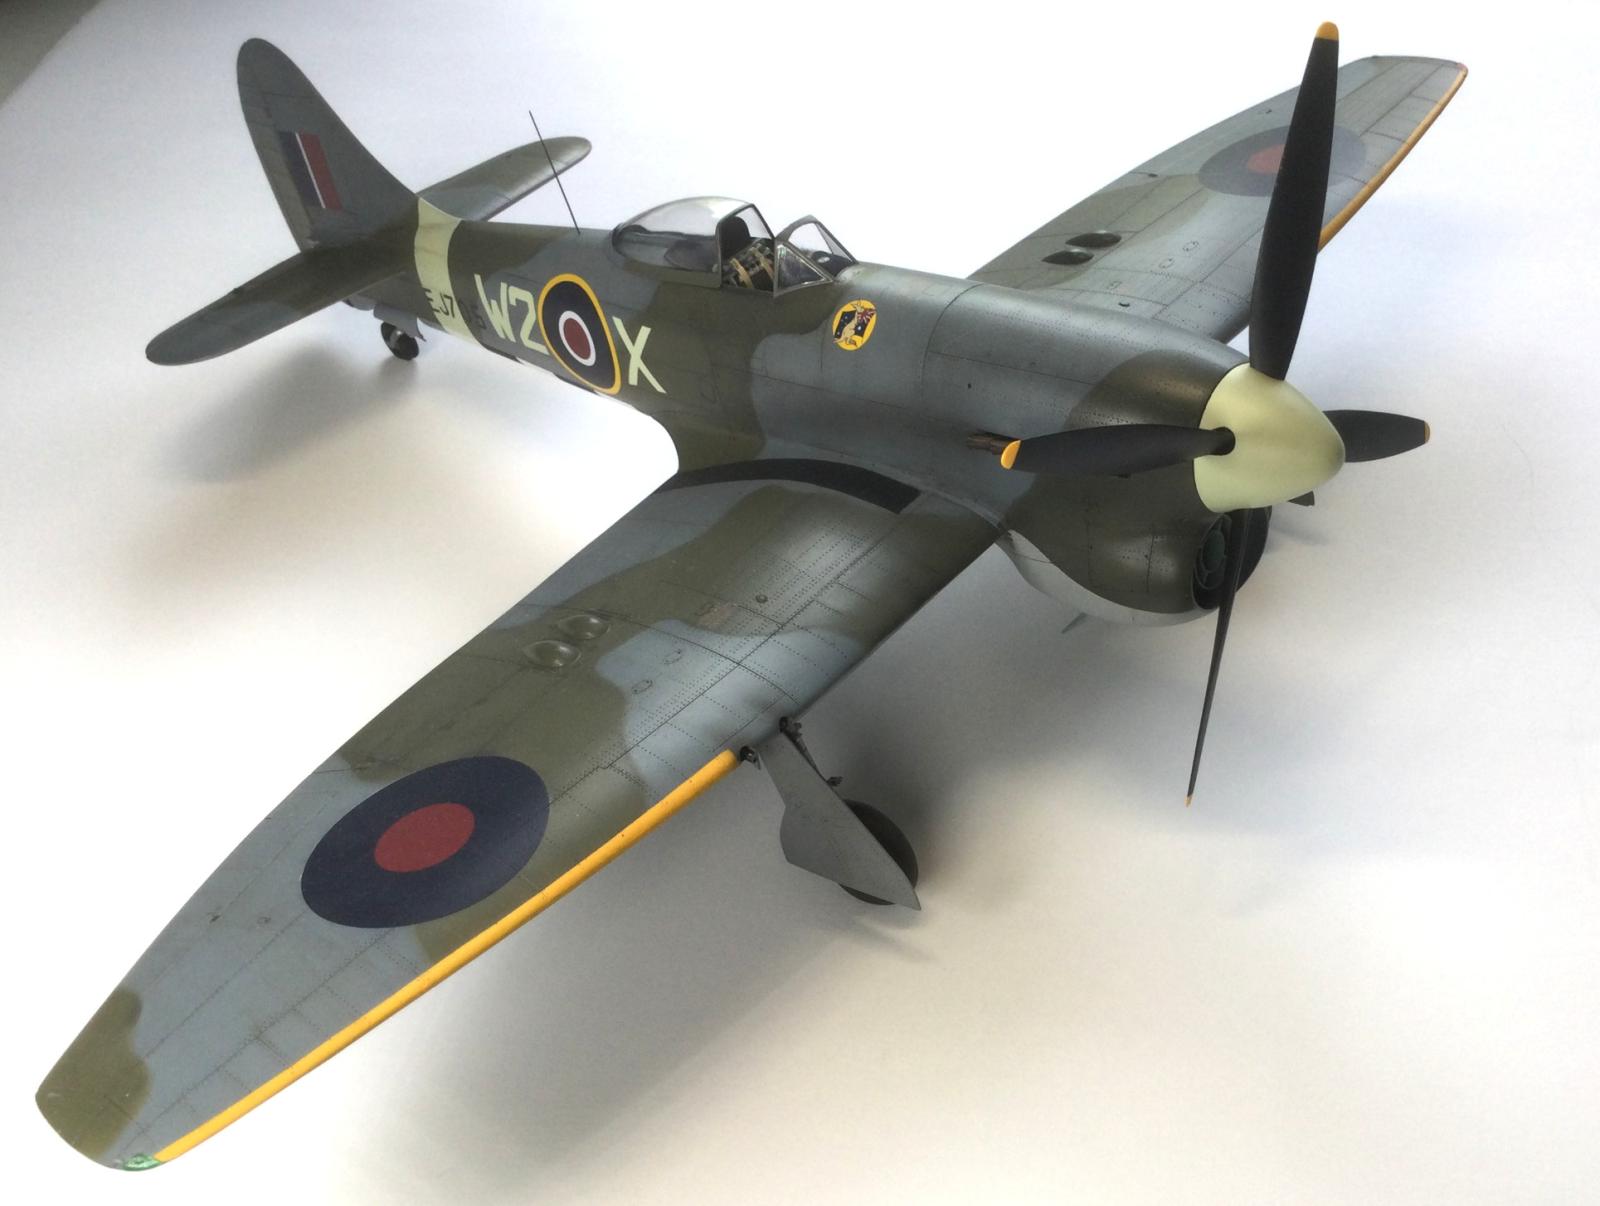
Thanks, Tom. You know I actually really appreciate your skepticism about the need for expensive add-on resin improvements for supposedly flawed kits. I think it is good sometimes to just build a good kit as is with no one noticing much difference. I was on the fence about doing the conversion, particularly the messy business of cutting and sanding to remove it from the casting block. I took the plunge though and don't regret it. When I visited the RAF Museum in London I took the time to photograph the intake and spinner contours and I think Roy Sutherland got it right. The spinner is definitely pointier in the real thing than in the kit and the contours and size of the intake need changing to get everything looking proportional. The Barracuda nose is better. How much better is a matter of taste, though, since no kit is perfect in shape. I value your comments and think you have a point about enjoying what is already an excellent model. I thought your build of Roland Beaumont's R-B was first class. Life is just too short to fuss sometimes.
5 attached images. Click to enlarge.
Very nice finish Colin @coling !
Great work with the resin nose.
A lovely build, its not the easiest kit - but a very rewarding one when its finished!
Thanks, David. I liked your version of SA-M as well. It's an inspiration to see other modelers get these big beasts finished and on the display table.
What an awesome build, so clean and full of details. Fantastic paint job!
Thanks, Felix. Although the build was the core of the work, I took a lot of time with the painting process. It's kind of like doing an oil painting with all the layers and glazing involved. I have a lot more confidence with my various airbrushes now.
Looks great - cockpit details are especially nice.
Thanks, Greg. Funnily enough, it's really hard to see inside the cockpit of the finished model and nearly impossible to photograph, at least with my meager camera skills. Still, I am glad I did it. I was especially happy to do the instrument panel with just individual decals for each dial, rather than using photo-etch this time.
Super result. I admire your detailing and weathering ability. How many hours would you estimate all totaled.
Thanks, Mark. Wow, that's hard to say. I took a long time to prepare the resin parts and do the cockpit and then I had to recover from a couple of accidents with the interior of the intake and the wheel wells. Painting was slow. I started posting the WIP build 2 1/2 years ago and kept putting it away for 6 month stretches as problems arose. I built lots of other models in between to recover my mojo - the Bf-109G and P-51D in 1/32 and the He 111, Grace and Lynx helicopter in 1/48. If I built my second SH Tempest kit now I could probably finish it in about 6-8 weeks working on weekends and evenings. That would include dropping the flaps this time. That's mainly about waiting for stages of paintwork to dry and cure. I still work full time and need family time as well. I could spend 2-3 couple of hours of a free day on models, though. With weekday hours here and there, 10 hours a week x 8 weeks would be 80 hrs I guess.
Exceptional build, Colin (@coling). The interior looks just like the real thing, and your paint is perfect. Too bad this plane doesn't have a nose gear, because I would bet the resin plug weighs enough to keep a nose wheel on the ground. Well done.
Thanks, George. The resin nose is pretty heavy. Overall, it could be a tricky model to handle because of the weight and wingspan. I had to be really careful getting it in and out of the spray booth. I will have some better techniques for avoiding damage while building when I do my next one. I have a second kit with resin nose plus photo-etch flaps to build eventually.
Very nice build. I know a lot of what you went thru as I built the Tempest II version.
Thanks, Dan. You did a super job on your Tempest ll over on Modeling Madness. Great inspiration and guidance for me when things got tricky . At least you avoided the resin nose in the radial version. I had real challenges with the landing gear as you did, but these were problems of my own making. Got it fixed with some scratch-building, and it's pretty solid and straight in the end. You really have to eyeball the angles, since the instructions are of no help. Some use after market metal struts given the weight of the model but I didn't see the need.
Fabulous build - details and finish outstanding!
Thanks, Chas. It was a challenge to get the right lighting on the pics to show the detail adequately - especially the weathering. I finally got my SLR to work as it should for the last 4 pictures. A juggling of settings in aperture priority between depth of field and exposure compensation. I learn new stuff about my camera every day, usually more by accident than design.
Spectacular Colin! A very clean build and controlled finish. Definitely inspiring. The Tempest is a definitely way cool aircraft. I also love the Typhoon. Keep it coming!
Thanks, Brian @brianbart! I enjoyed building the kit, in spite of a couple of self-inflicted mishaps along the way. There's a build log if you want to see an exercise in patience. 🙂 Always glad to provide some inspiration to fellow modelers. I recommend the Special Hobby Tempest without reservation, in case you like that scale. I also love the Typhoon. I have the Airfix 1/24 Bubble Top and will build that some day. I did the Hasegawa Typhoon in 1/48, posted to this site:
Thanks again for your comments. Happy modeling!