YGBSM: Meng F-4G Wild Weasel
This article is part of a series:
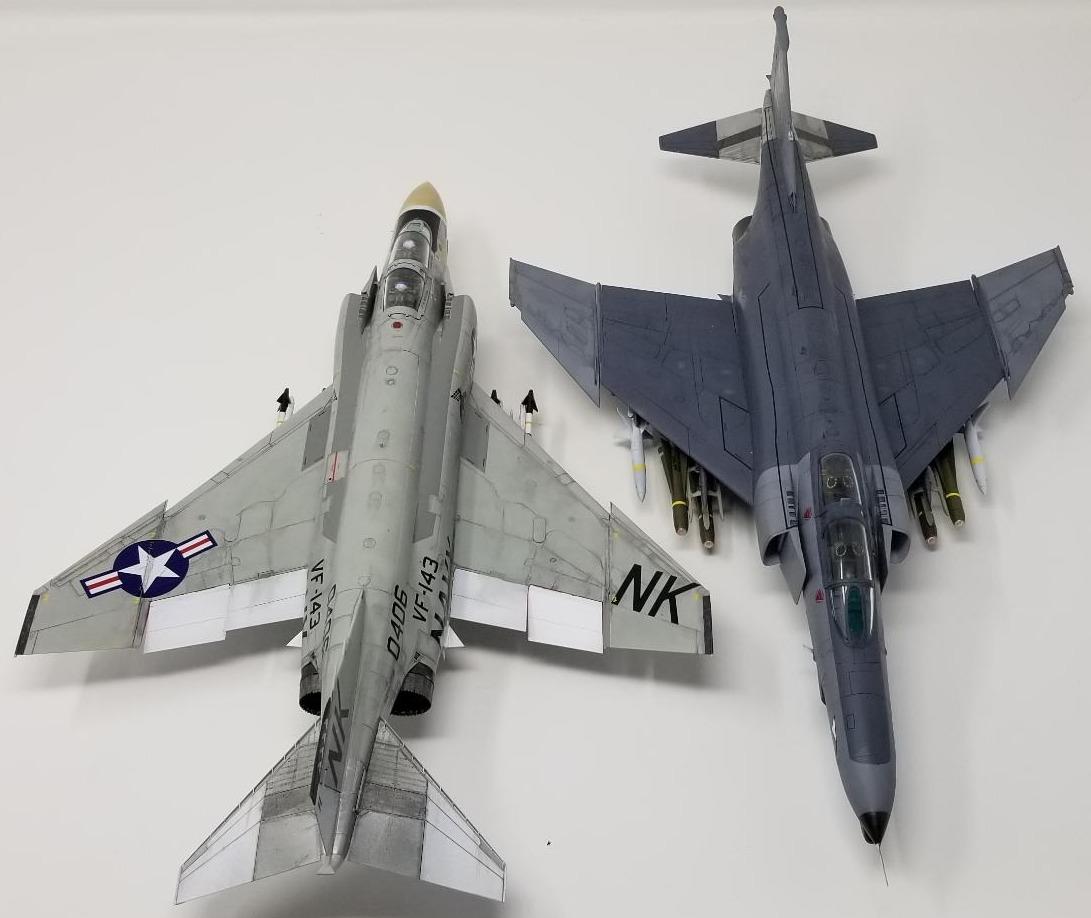
MENG F-4G 69-7582 7440th Composite Wing 23rd Tactical Fighter Squadron
There is not much more that I can add about the Phantom that everyone else who is far more obsessive about this plane hasn't already said. My advice? Listen to the "10 Percent True" podcast which has, at last check, over 15 hours of interviews with Phantom pilots. Most of these are interviews with Wild Weasel pilots and Electronic Warfare Officers, so nearly everything you could ever want to know about the Wild Weasel mission, its history, teething problems, support aircraft, weapons systems, sensor packages, training routines, and integration of all of that into the "Wild Weasel" role itself is there for you.
Since in my other life I'm a amateur radio operator, I found myself engrossed by the mechanics and engineering of detection, discernment and destruction of enemy radars, and just how many leaps in technology that have been made in this field. The first dedicated "anti-radiation missile" in the US inventory was the AGM-45 Shrike, which was used to devastating effectiveness against Vietnamese SA-2 installations... until the SAM operators realized that if you shut the radar off, the missile would veer wildly off course. The Shrike would belch white smoke upon launch, which was a huge signal for every SAM operator to shut off their radars, and Shrike attack runs were so distinctive that SAM sites could be baited into shutting down just by dipping the nose of the plane. There are apocryphal reports out of Serbia and Iraq that SAM operators would listen to the radio for any pilots making HARM launch calls ("Magnum") and shut down. Oddly, these are all examples of successful suppression of enemy air defenses because you're forcing the SAM operators to shut down. As was said on one of those 15 hours of podcasts, a successful Wild Weasel campaign breeds smart SAM operators because it only winds up killing the ones who make dumb mistakes.
The AGM-78 Standard ARM ("Starm") came into service after the Shrike, and it used a primitive memory circuit that would still hit the location of the radar after the SAM crew shut it down. The AGM-88 HARM is the current USAF/USN anti-radar missile, and its current upgrade iterations are jam-packed with some astonishing tech that (apparently) allows the pilot to sit comfortably out of SAM range and selectively destroy any radar at their own leisure-- or even tell another aircraft to fire ITS HARMs at a completely different target. It's a very bad time to be a SAM operator.
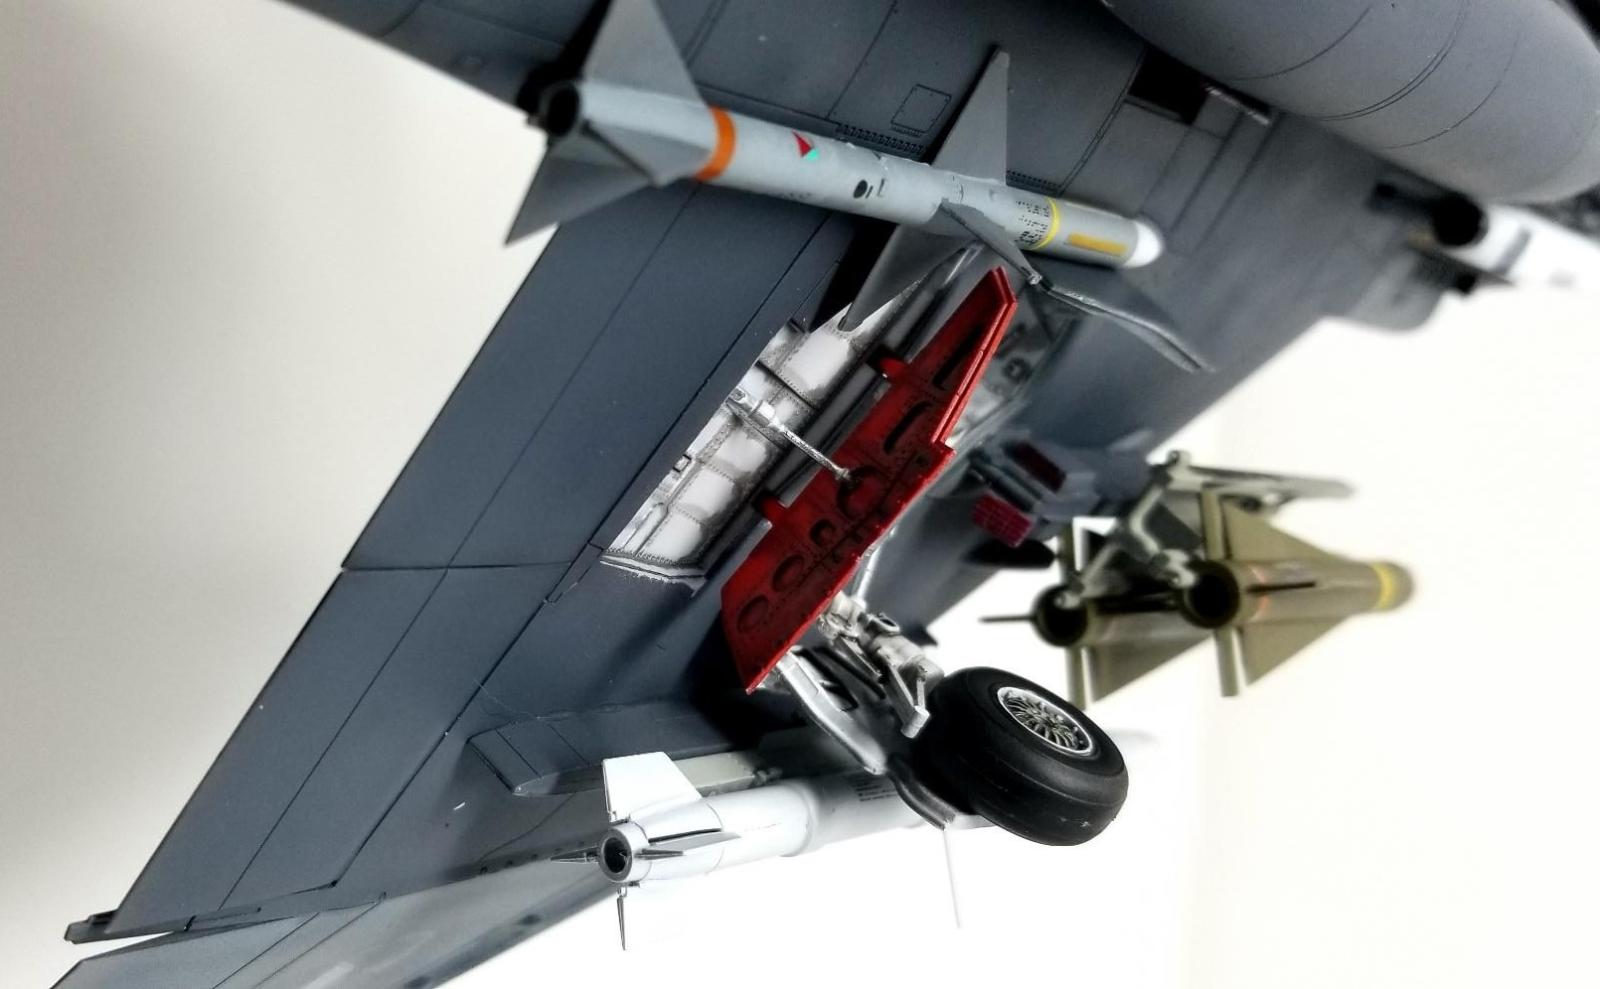
I've noticed that with all of the kits I've done, when it comes time to build up the ordnance I just lose all motivation. Maybe it's the prospect of spraying something with 8 billion thin coats of white primer or the fiddly assemblies of billions of parts for one missile, but I just can't summon any motivation to do them. Here I decided to get ahead of myself and start on the underwing bits before anything else.
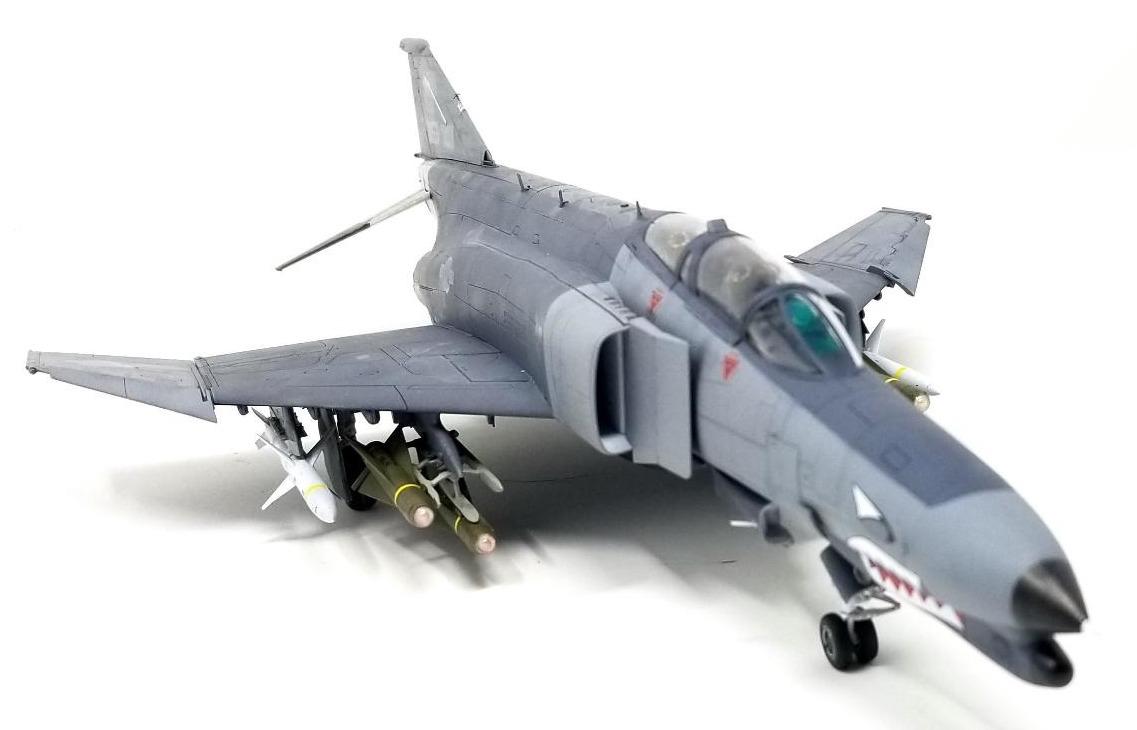
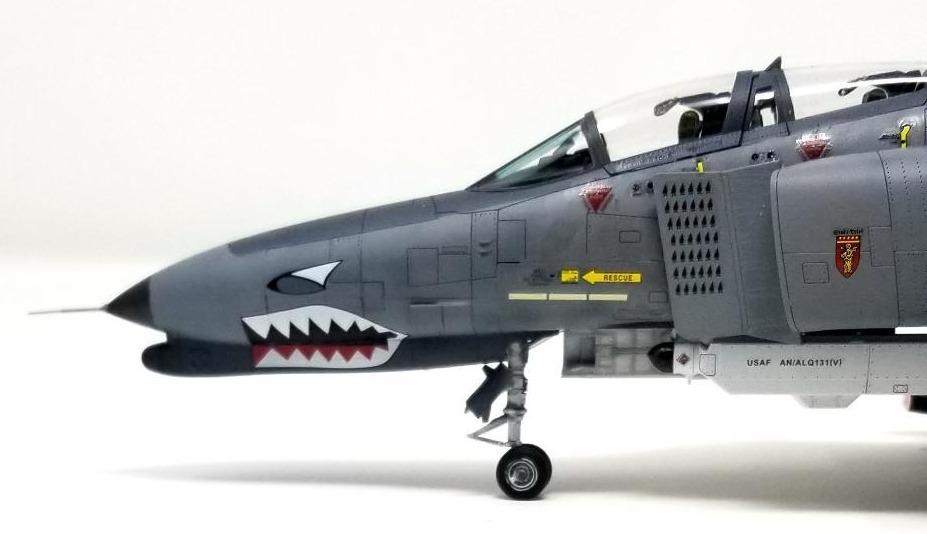
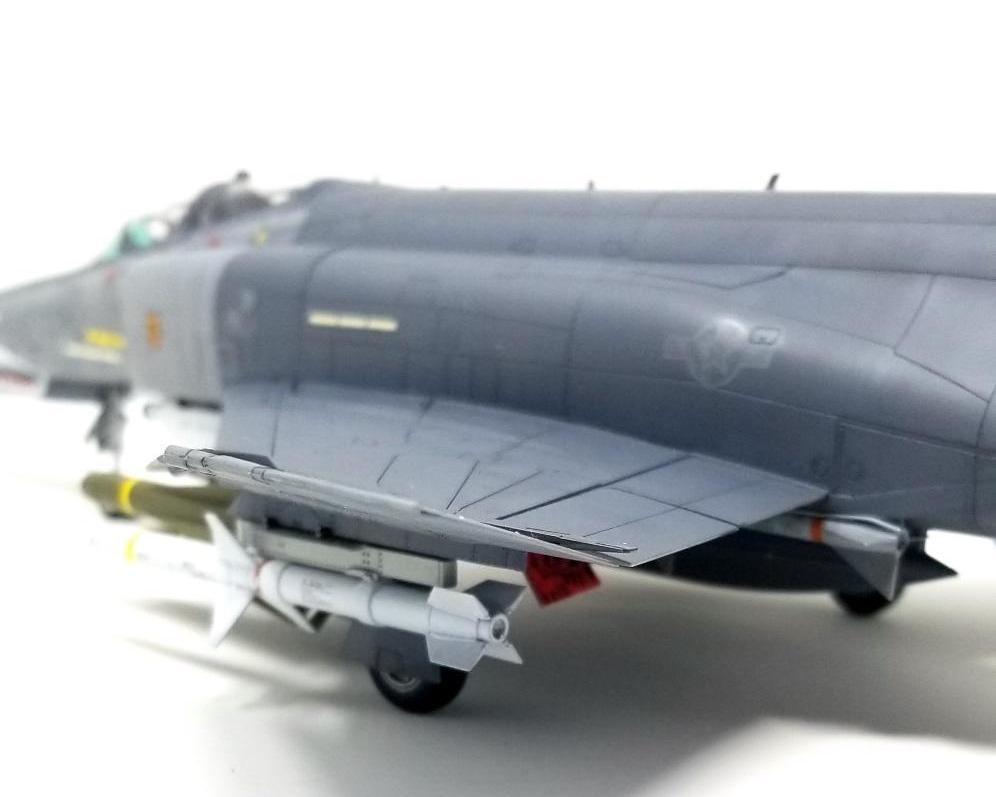
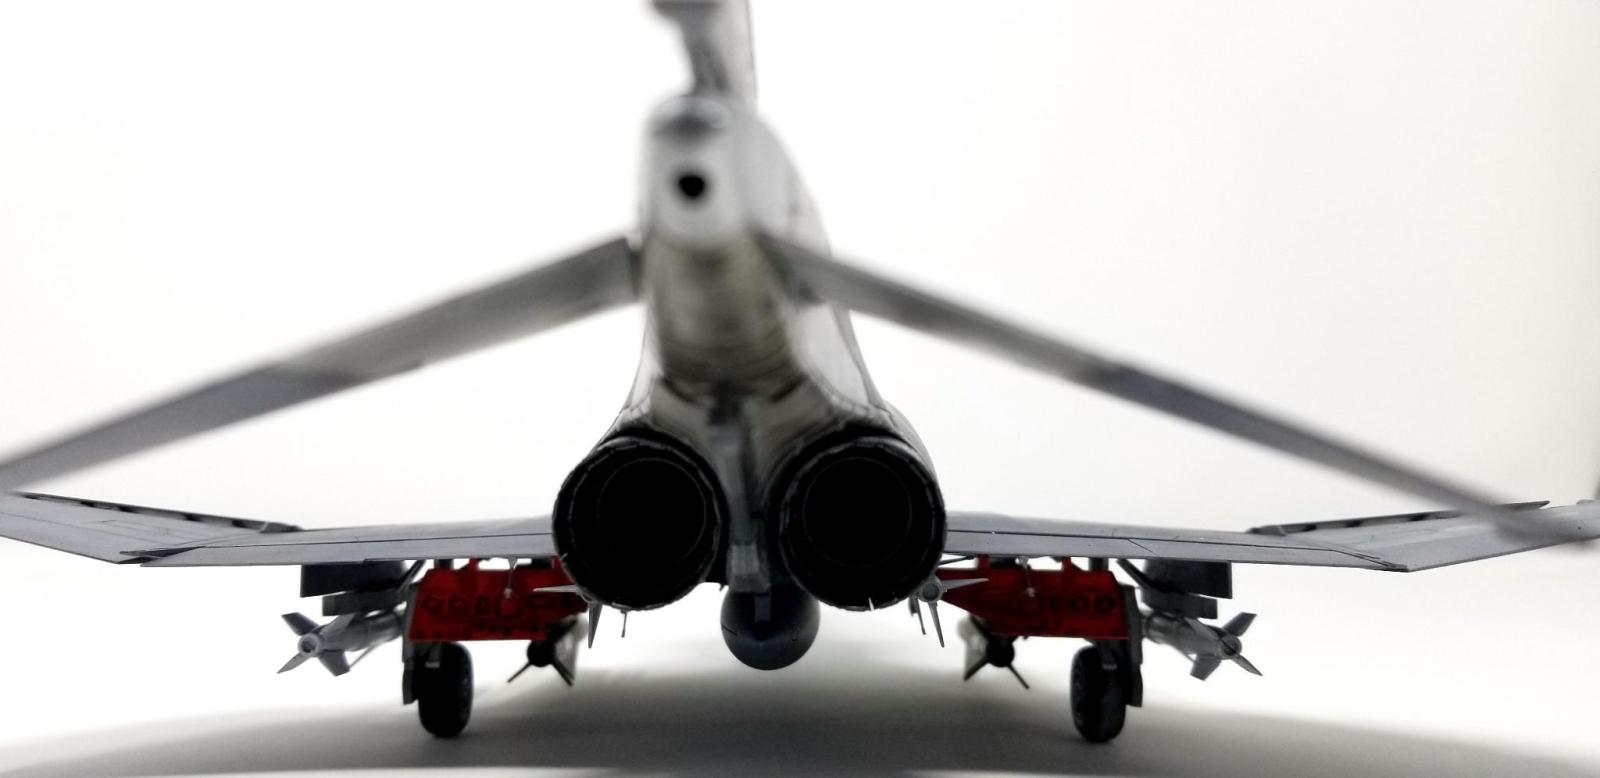
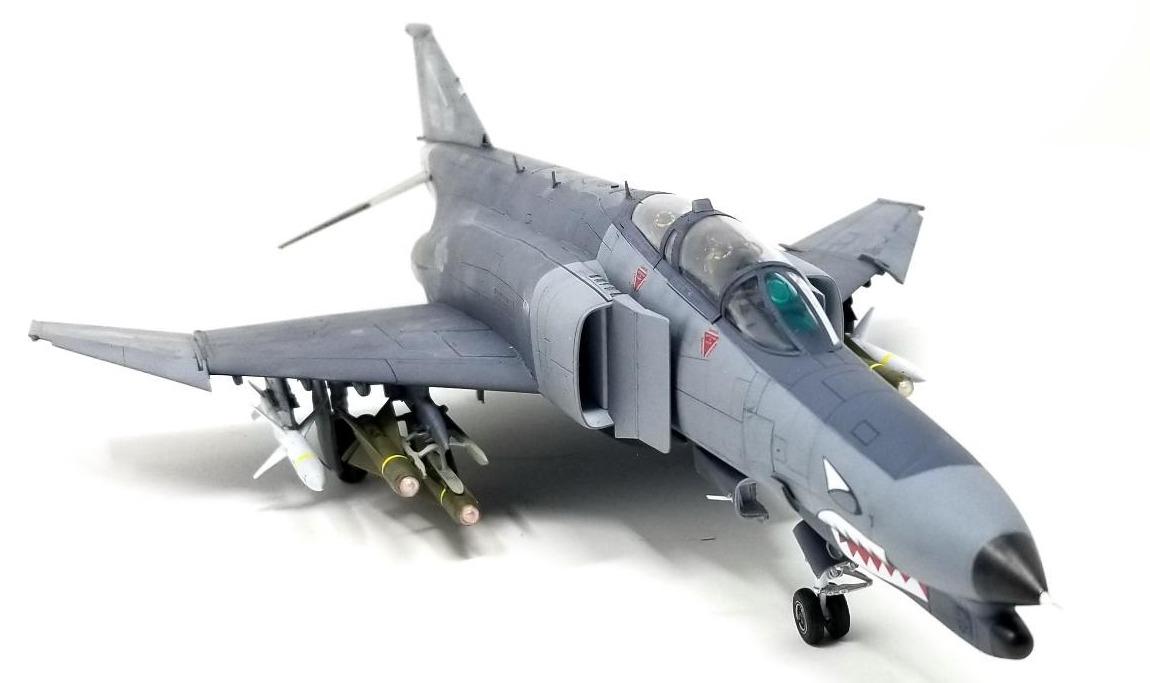
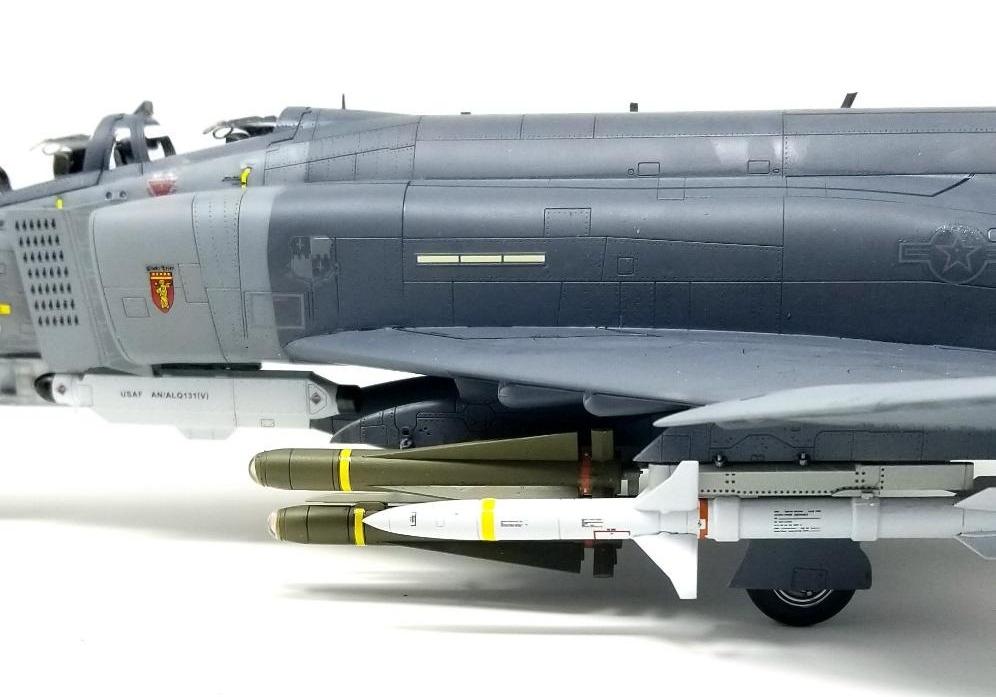
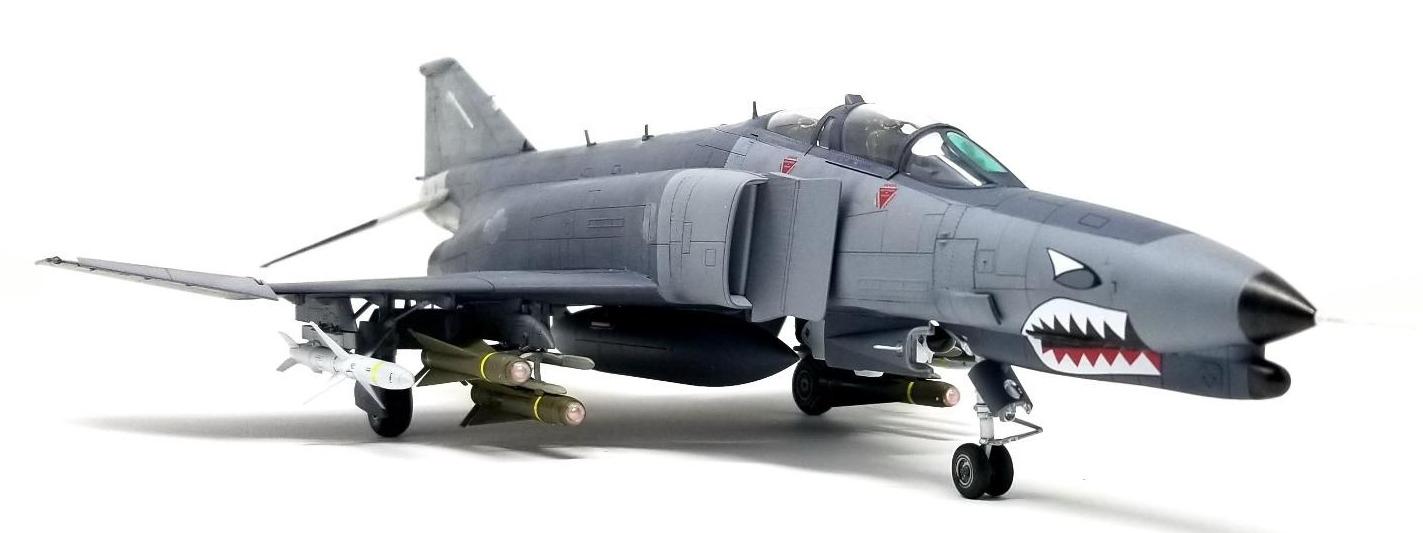
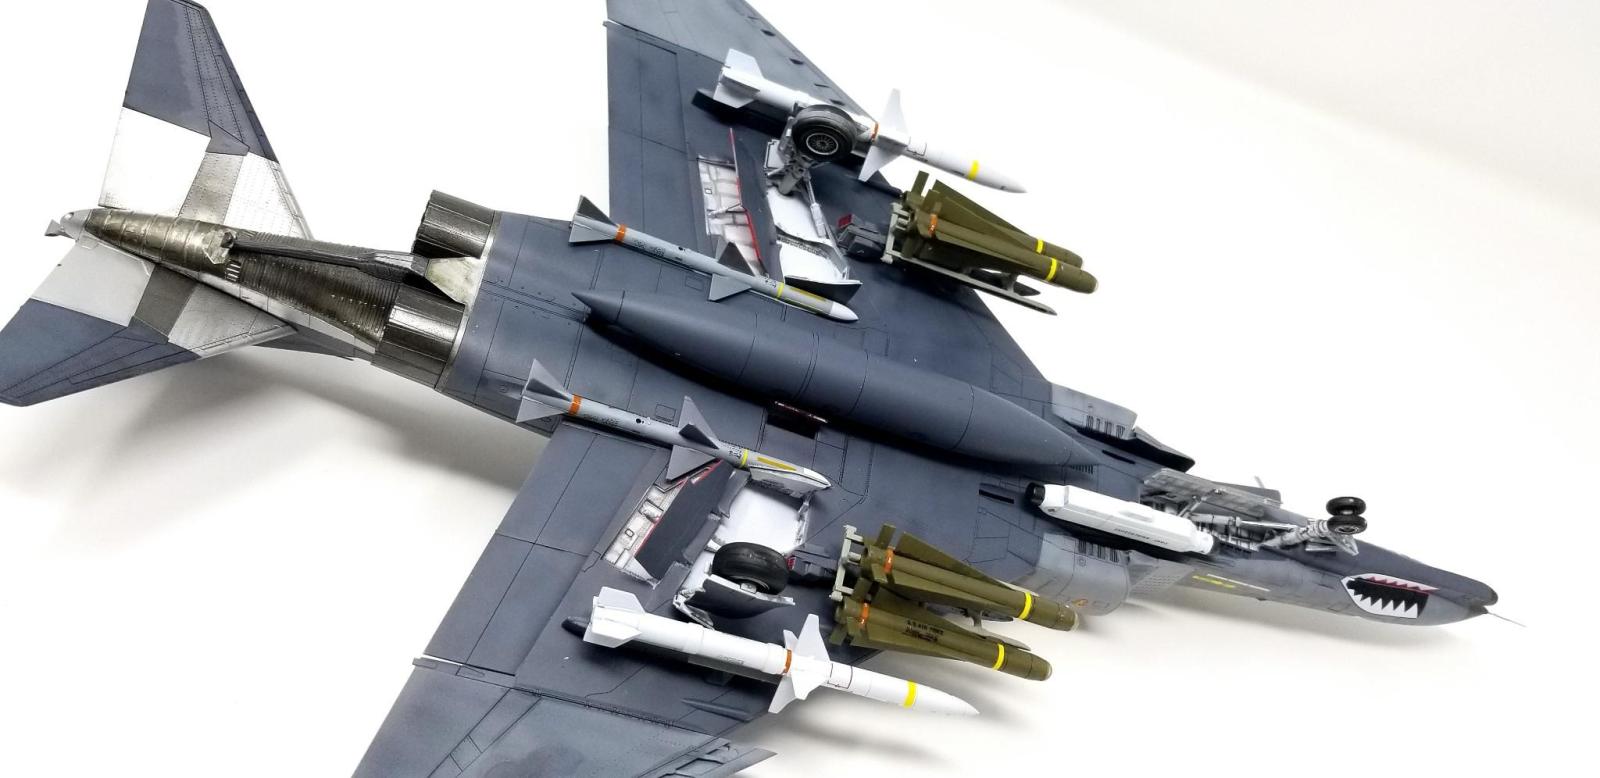
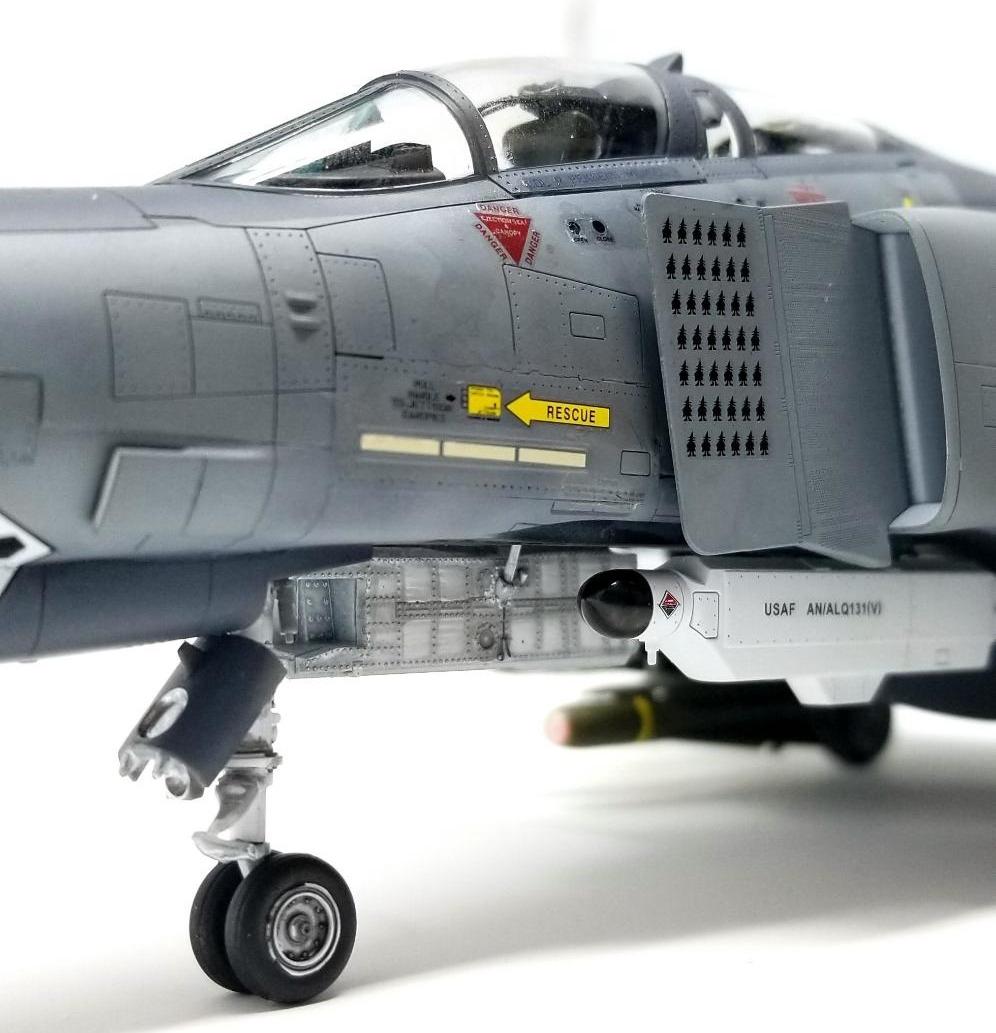
I chose 69-7582 of the 7440th Composite Wing, 23rd TFS out of Incirlik AB, for the very grown-up and sensible reason that it's got a shark mouth and it looks cool. I used the SEAD 3 loadout, which featured two AGM-88s on the outer pylons, Mavericks slant-loaded on the inner pylons, two Sparrows, a 600gal tank and an ALQ-131 ECM pod. The kit decals have you mark the Mavericks up with LASER stenciling, which makes them AGM-65Es. That's not correct for this bird, but it's an easy fix. Both the AGM-65B and D models were used by the USAF during desert storm, so it's up to you whether you want them white (B) or olive (D). Since I have more than enough Mavericks, I experimented a bit. Most -D Mavericks have nose sensors that range anywhere from orange to black, so I painted the inner gray plastic with a bright silver to reflect any available light, then the inside of the seeker "pinky blue" colorshift paint. If you use the colorshift paint as intended-- meaning you spray it onto gloss black-- you get the advertised effect; if you spray it onto clear plastic or silver, you get the opposite effect. I assembled the "Starms" too because why not. I used gundam markers for the yellow strakes on the Sparrows. The two Mavericks were carried on triple-rail launchers; I've seen photos of Phantoms flying around with either the inboard or outboard rails bare and there doesn't seem to be any specific consensus about these apart from the bottom rail always carries a Maverick. The Aero5a rack for the ALQ-131 will be mounted later in the build because it's one peice and is fuselage colored. With all of the ordnance completed and decaled I wound up assembling the crew ladder, which is normally something I rarely do considering the added tediousness but there's nothing wrong with "I bought the whole kit, I'm gonna build the WHOLE kit!"

There is a fit problem regarding the interface between the cockpit tub and the nose gear well. I wish I could tell you what causes this, but this is actually hampered by the way the rest of the fuselage fits together. You see, everything aft of the intakes fits together so snugly and so perfectly that there's no easy way to pry the top and bottom fuselage assemblies apart to do any dry fitting once you have the wings assembled, and you really must assemble it according to the instructions. I'll be shaving the top of the wheel well and the bottom of the cockpit tub in the future. The good thing is that the gap isn't THAT big, it's largely hidden behind the intakes, it's not a "load bearing" joint so it won't be subject to a lot of flex, and the resulting minor alignment mismatch is on the underside of the intakes. Meng does not provide the reinforcing "belly strap" but the aftermarket is well appointed here if it matters to you that much. I have solved this problem by never allowing anyone to pick up and handle my models.
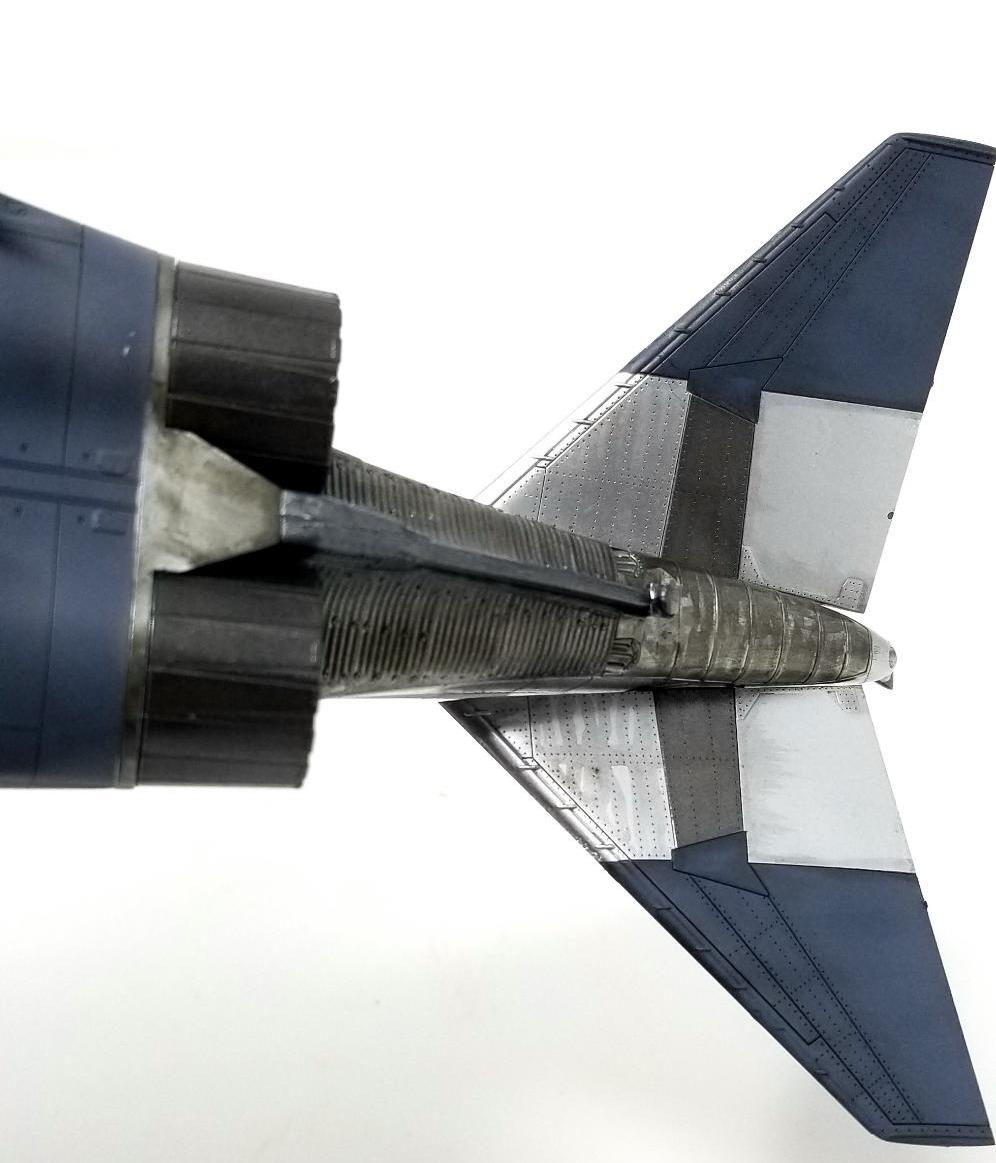
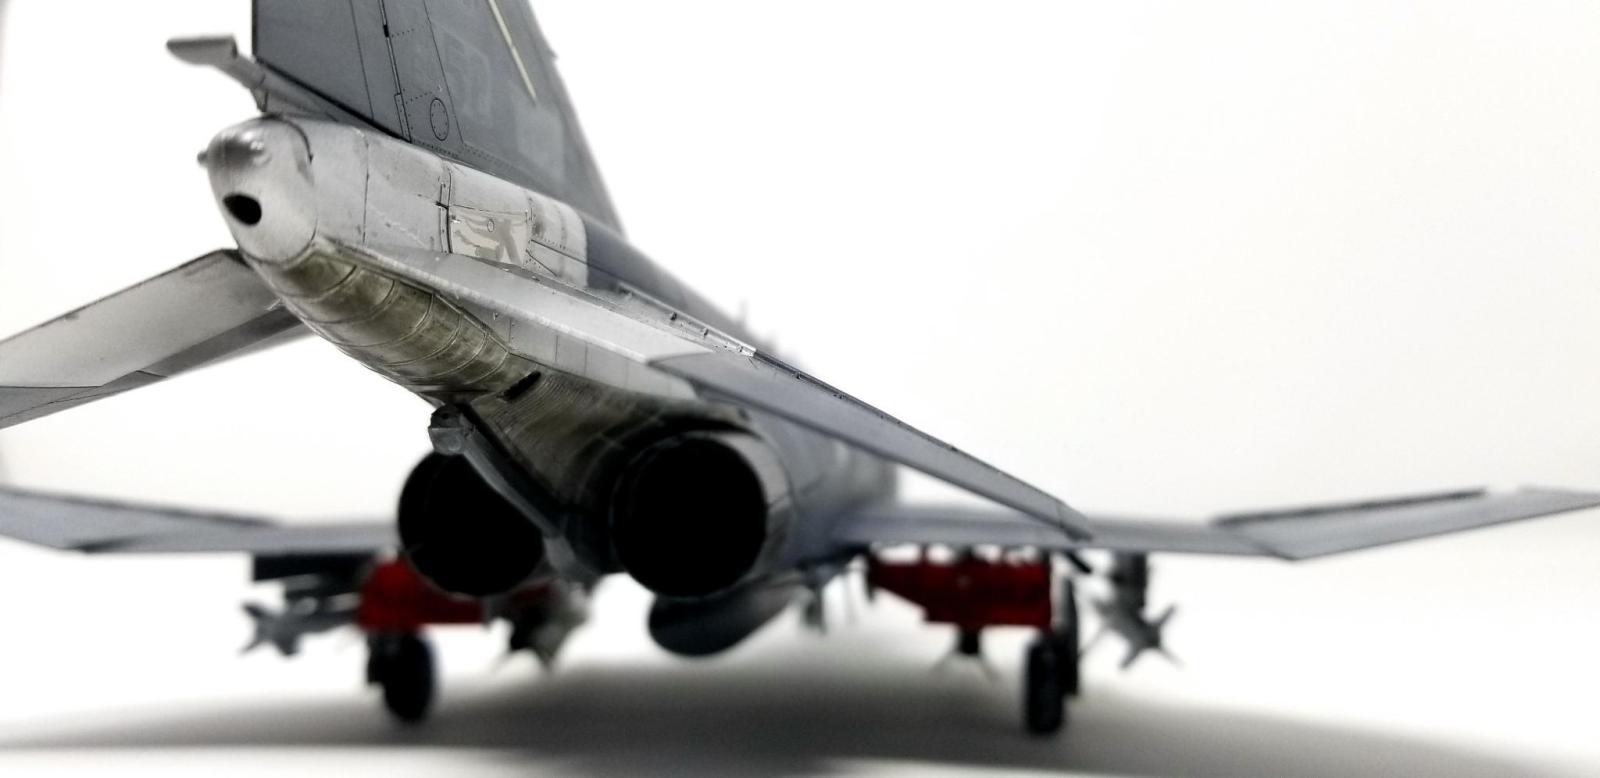
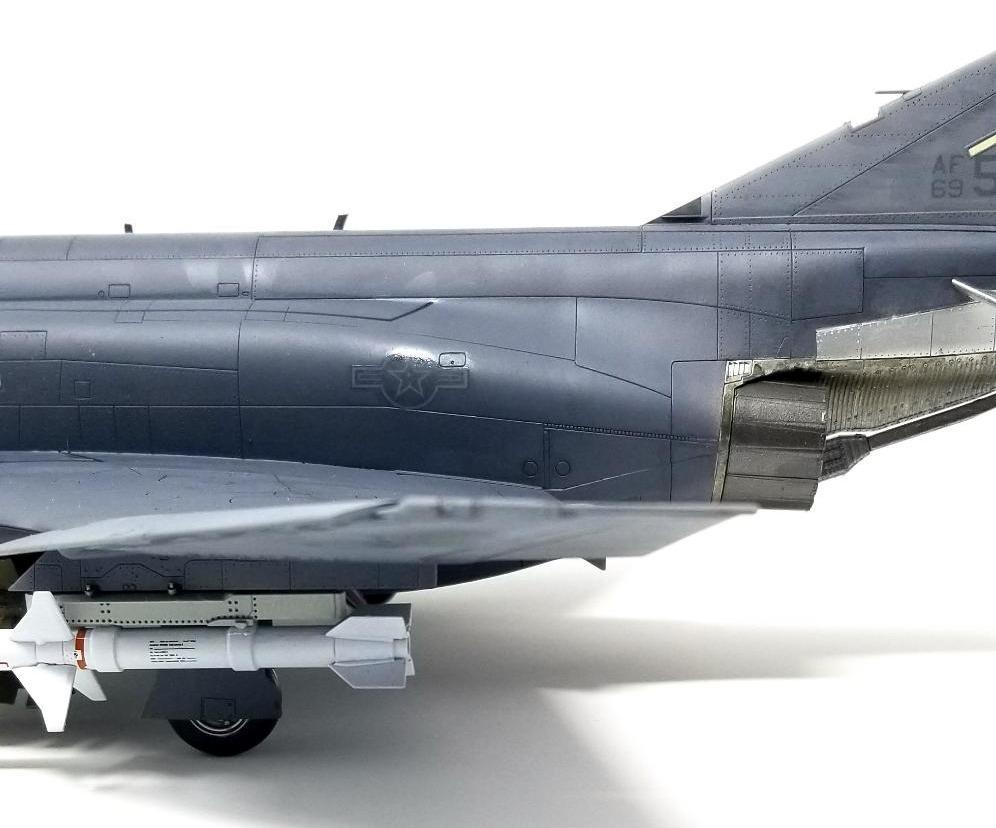
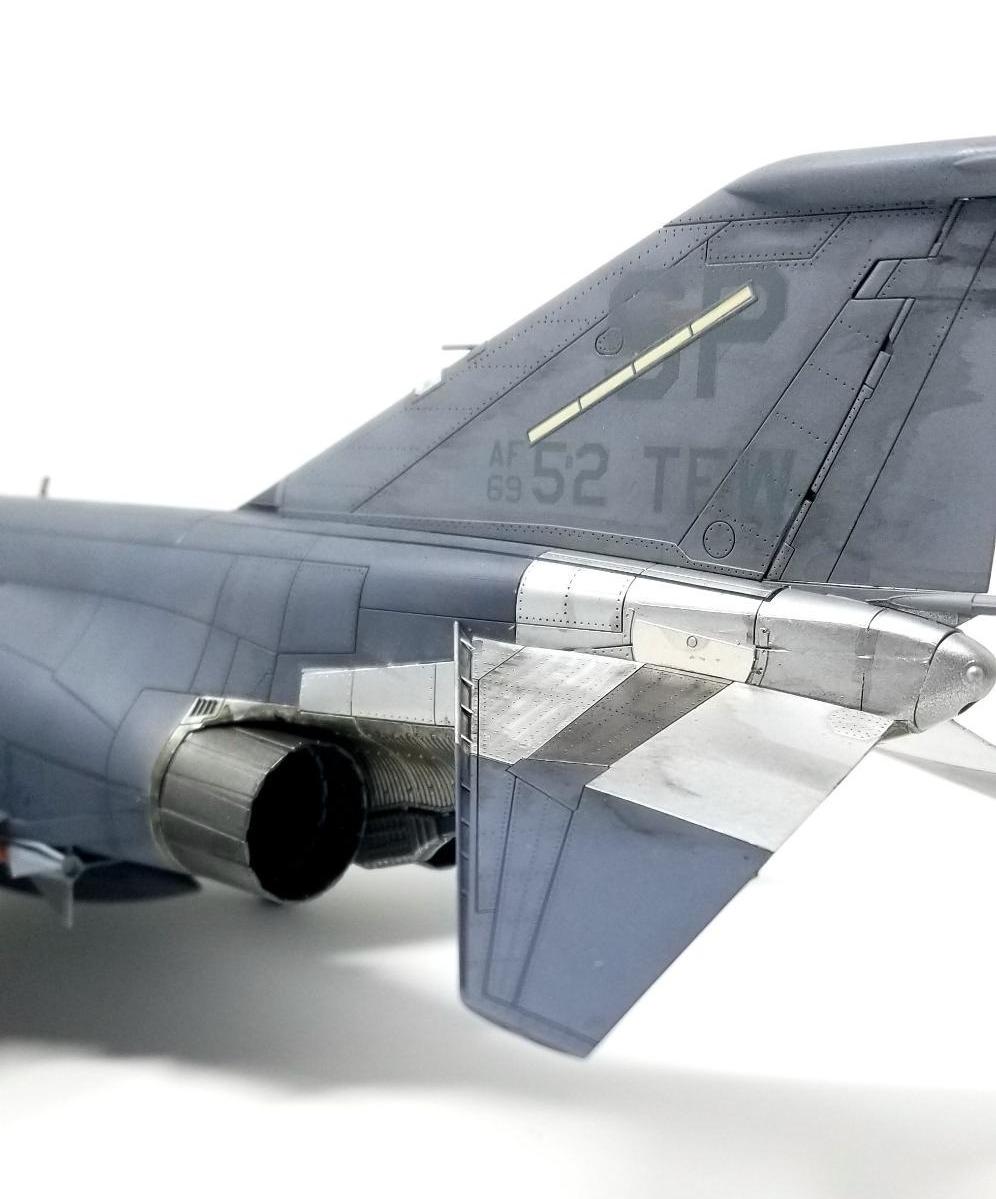
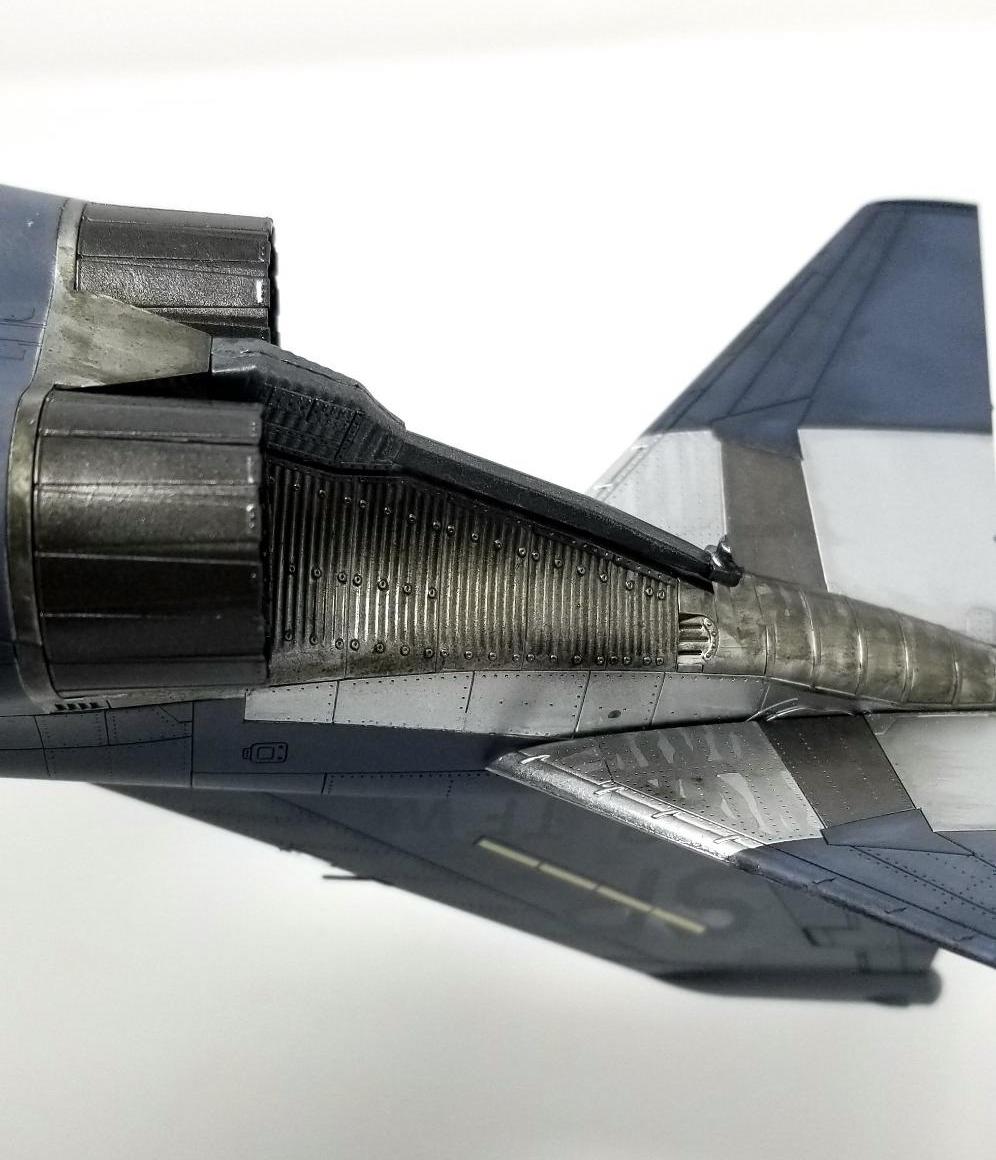
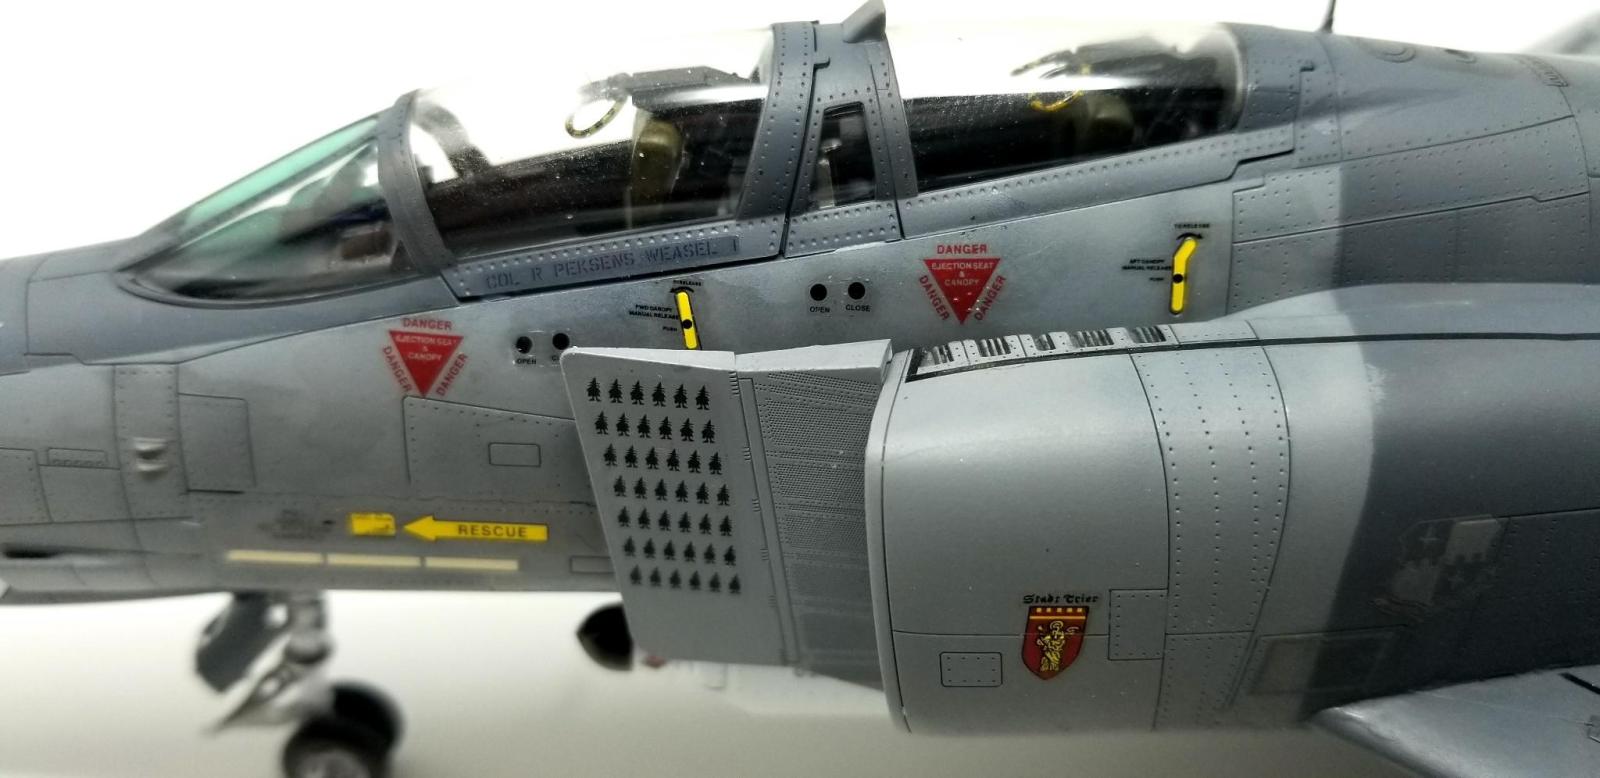
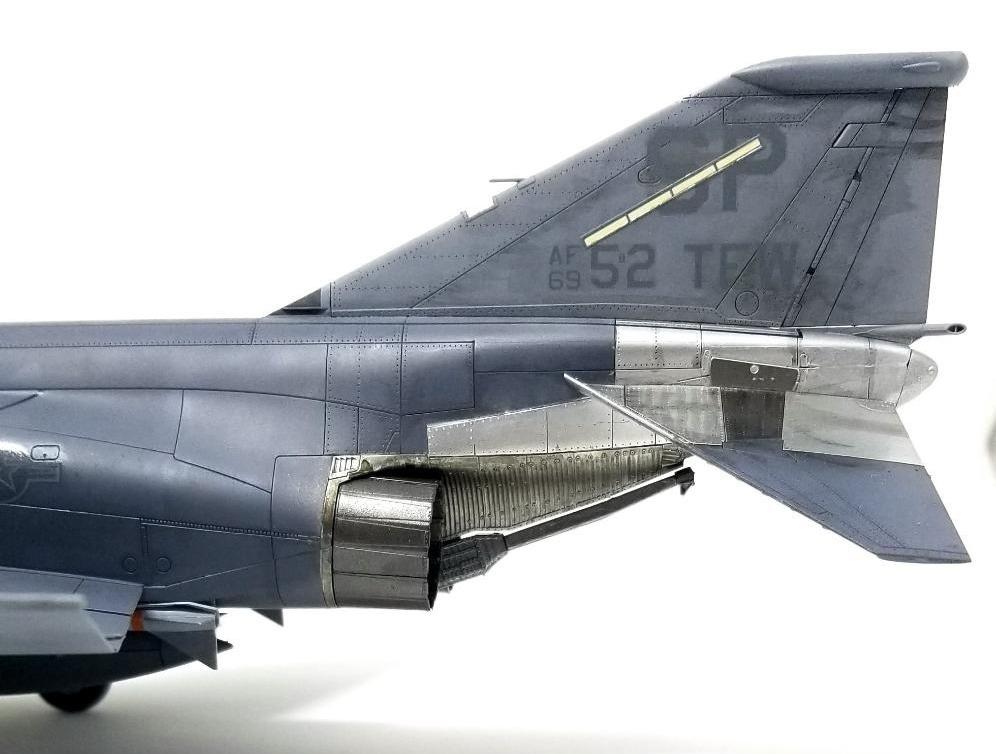
The main issue that a lot of people have with the Meng kit versus all of the other kits is an odd inclusion of ribbing on the rear fuselage behind the afterburners, which clearly does not exist on the real thing. Except that it DOES. Kinda. What Meng is doing here is depicting the ribbing BEHIND these fuselage plates, and while the SURFACE of the fuselage is smooth, these areas exhibit heat discoloration which makes the presence of the ribbing visible. It's an interesting approach but I'm not sure I like it. The kit is also missing the little strakes between the fuselage and the backside of the vari-ramp.
Decals are acceptable, although this sharkmouth plane is supposed to have a blue-yellow-red flash on its vertical stabilizer tip and no such decal is provided.


Another great Phantom, and an entertaining and informative write-up. Doing the things you like least first is often a good idea, it’s often how I tackle the local Chinese food.
Haha! Same here! Maybe next I'll do a writeup on this local place's Chengdu Kung Pao chicken that's super spicy and made with those Szechuan peppercorns so they numb up your mouth, and... uh... where was I?
Your build of the Phantom, plus all of that in-depth information makes for an outstanding presentation.
Beautiful work on the Phantom and supported by a great article, well done, Wes @avispa93
This Weasel does look absolutely wild.
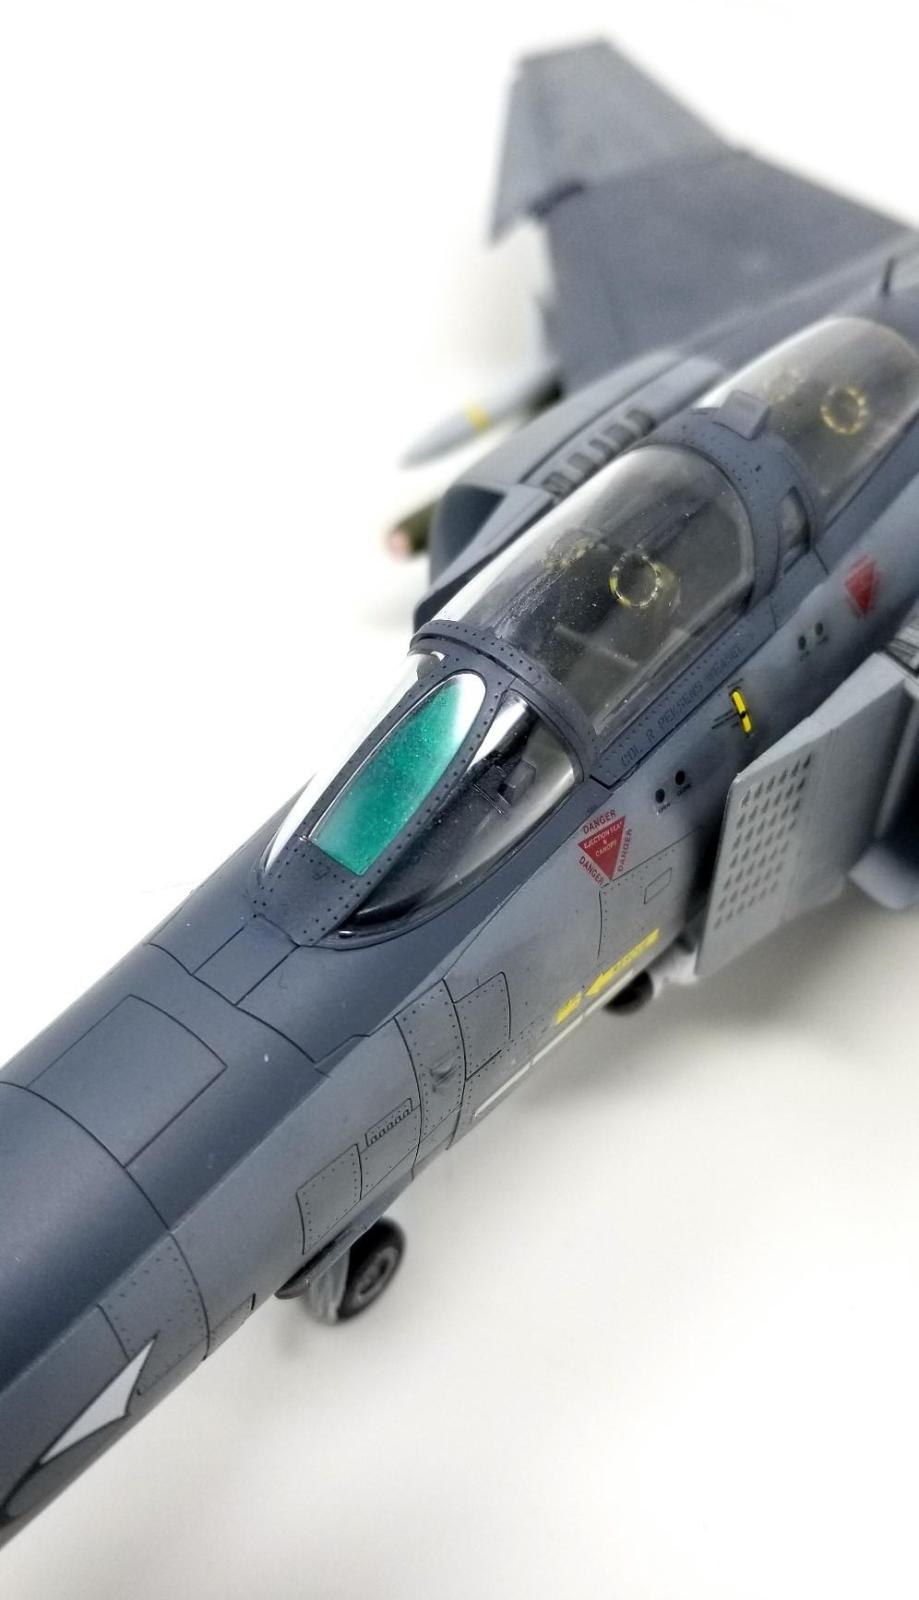
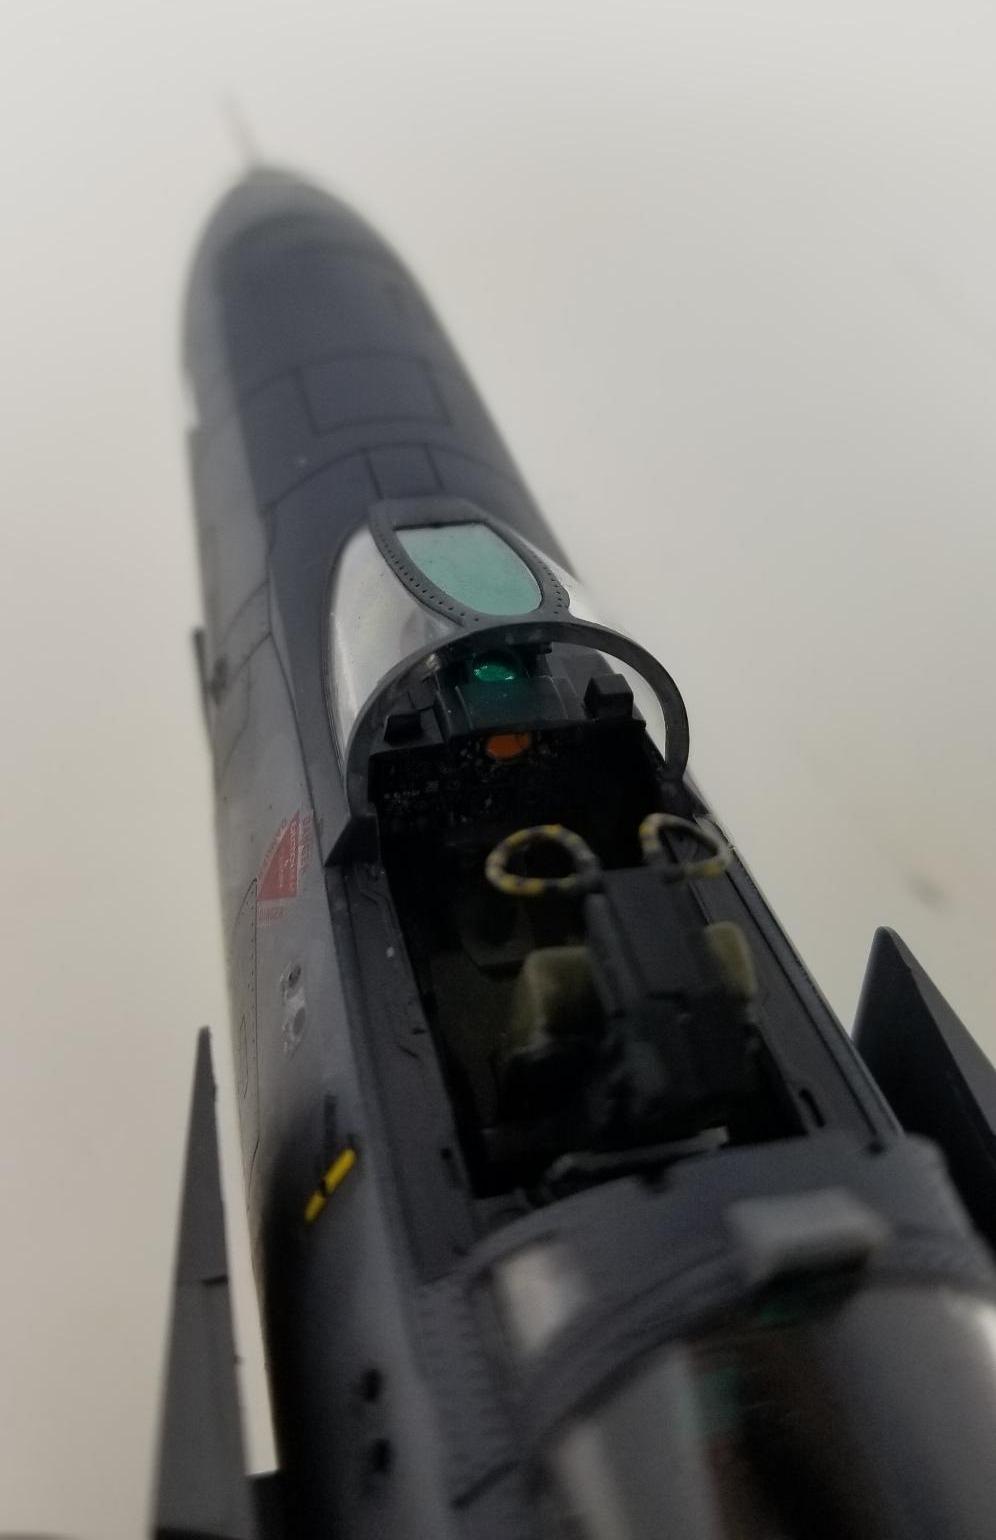
What technique did you use to get that canopy part transparant green.
A lot easier said than done: mask off the interior save for the center pane, add a few drops of transparent green into the airbrush, then mist over the inside surface of the windscreen.
I also suggest thinning down the clear green with a clear gloss as it should be as subtle green like a coke bottle.
I used about a mix of 10:1 or 5:1 of clear to clear green (vallejo) to get that effect.
Great build!
Lovely build. The Phantom is one of my favorites.
With respect to your story on Wild Weasels I can recommend a book I’m currently reading.
It is “Hunter Killers” by Dan Hampton. The book describes the deployment of the first Weasels.
1 attached image. Click to enlarge.
Lovey Weasel! One of my favorite YouTube builders mentioned that he also found he lost mojo when he finally got to the ordnance, so he now builds it up first! I'm starting to do that with ordnance and pilots, because it always slows down my momentum at the end.
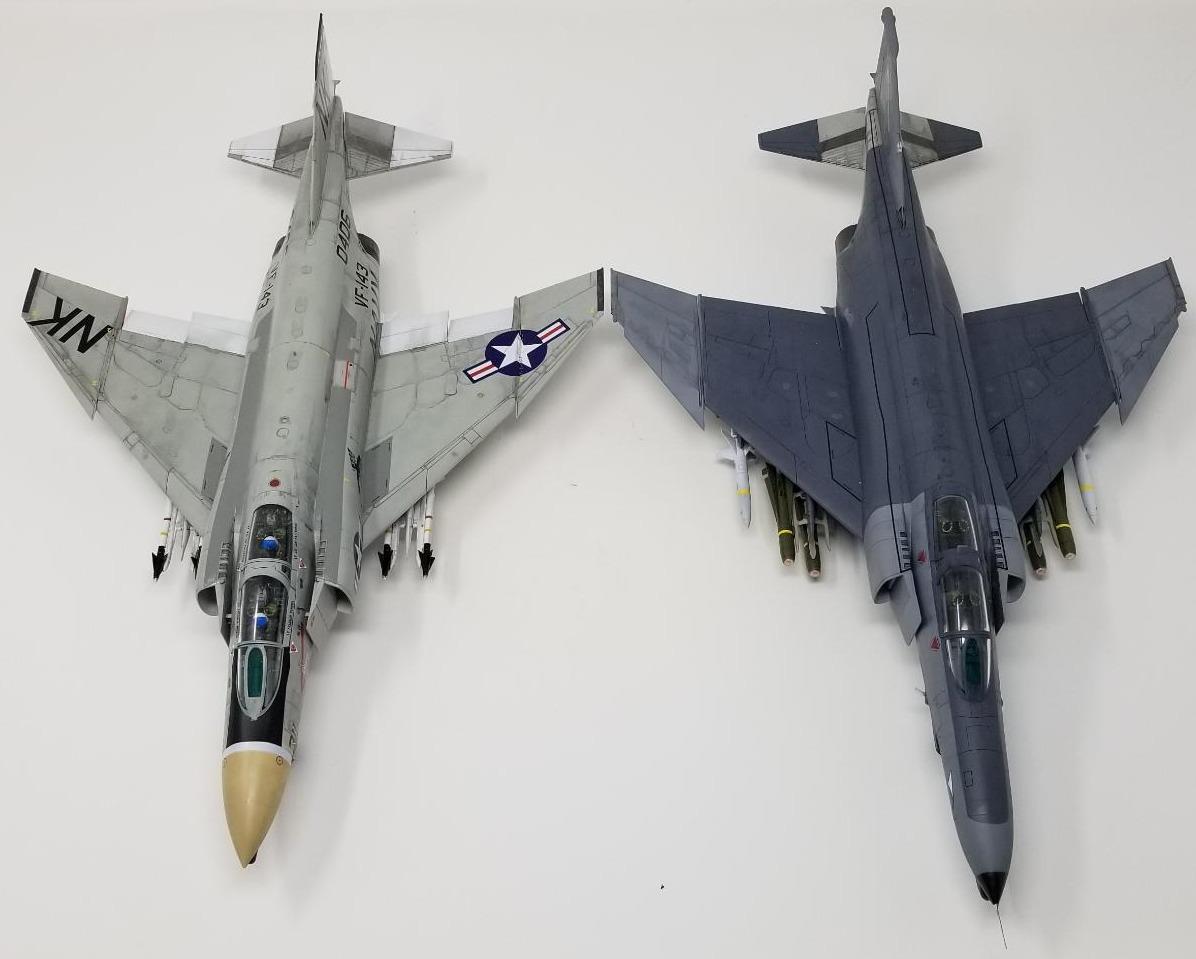
Great looking Phantom, Wes. And nice touch on the Navy F-4B cousin, very cool pics! I built the Meng F-18D Hornet and was impressed with the overall fit, really enjoyed that build. I have the Meng F-4E sitting on the shelf ready to go, if only work and a nagging F-104 Starfighter would get out of the way!
Nice work and a great result.
Back in 1982, Air Force magazine PAID ME to take a ride with the Weasels of the 35th TFW at George AFB. I flew in an F4E with two F-4Gs - one with the legendary Colonel Sam "Papa Bear" Peacock in back (a Weasel WSO back to the F-100F, was Wing King of the 35th TFW in Desert Storm when they took out the Baghdad air defenses in 25 minutes) - up to the Red Flag range. I can say it was definitely the best roller coaster ride ever. So I have a soft spot for the Weasels.
Thanks for the heads up on the MENG F-4. I've been meaning to get one (the G) because I like building Wild Weasel/Iron Hand planes as the mission is the most dangerous air mission.
Not a bad idea to start the ordnance first. I do something similar building aircraft carriers... doing the air wing first which eliminates some of the tedium.