The ultimate Snoop: RC-135V/W Rivet Joint (Roden, 1/144)
It is plain for all to see that my misadventures building the B-36 (https://www.marcellorosa.com/1-144-b-36d-peacemaker) were not sufficient to keep me away from Roden kits. I think his Ukranian manufacturer found an excellent market niche, providing reasonably accurate, reasonably priced kits of difficult-to-find subjects. I continue to be victim of their charms.
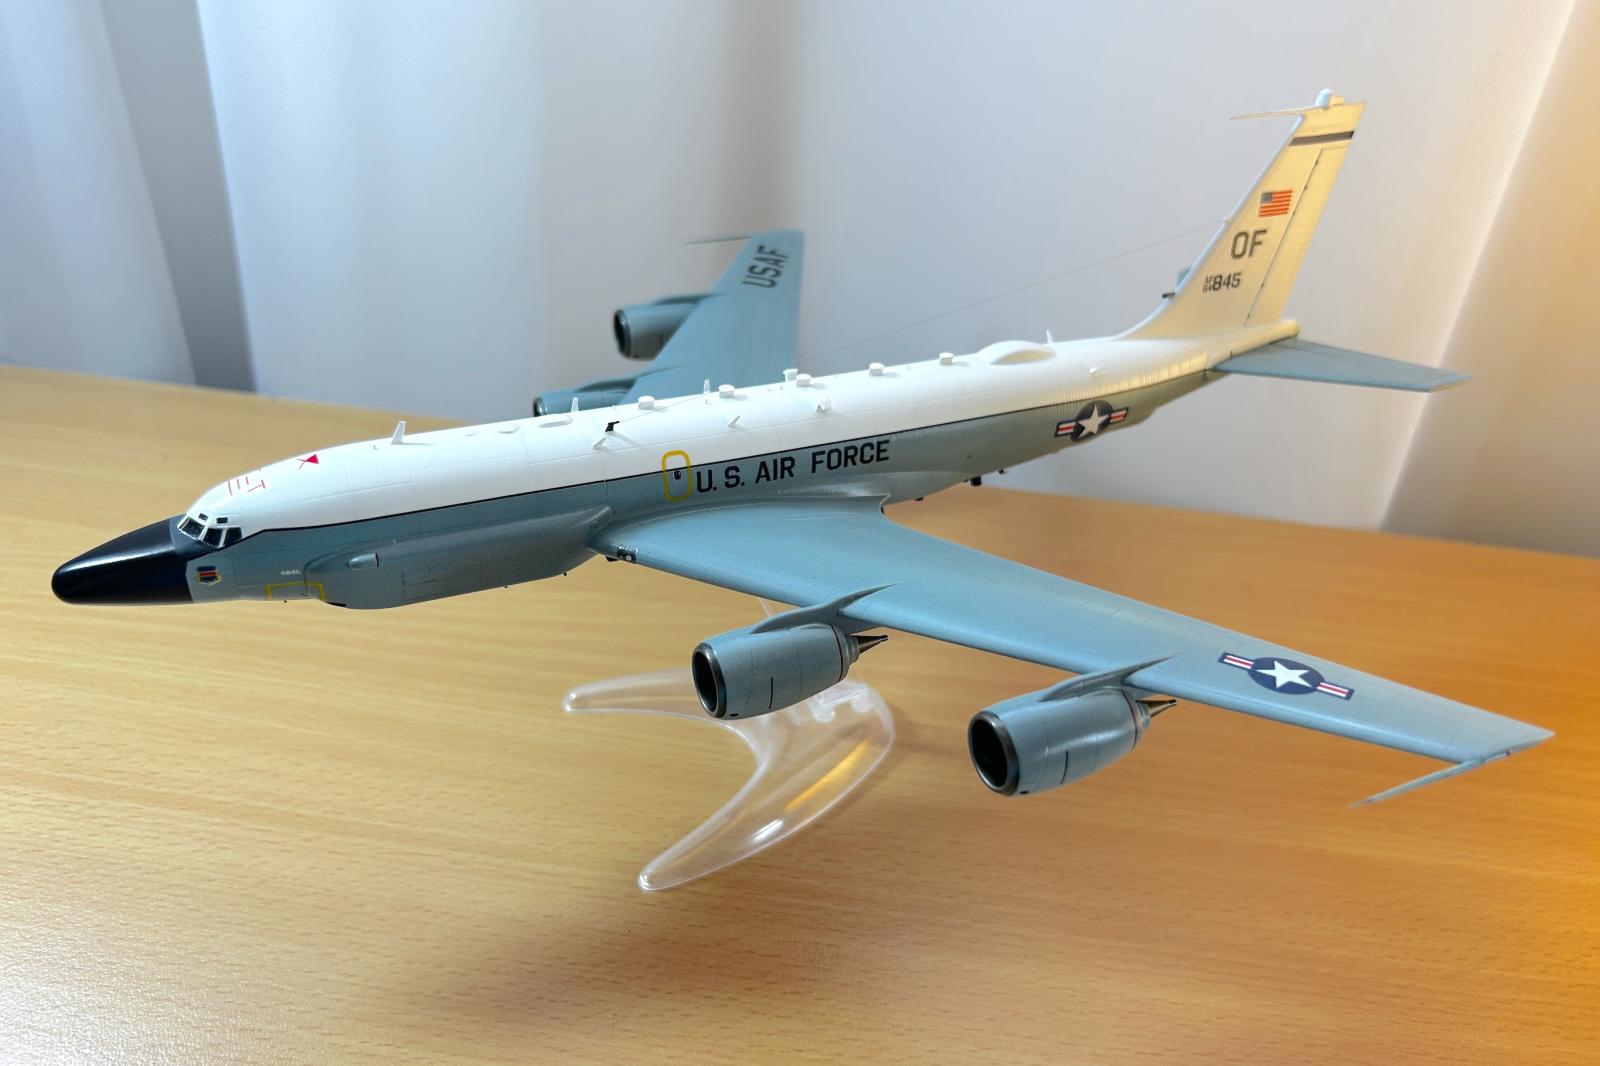
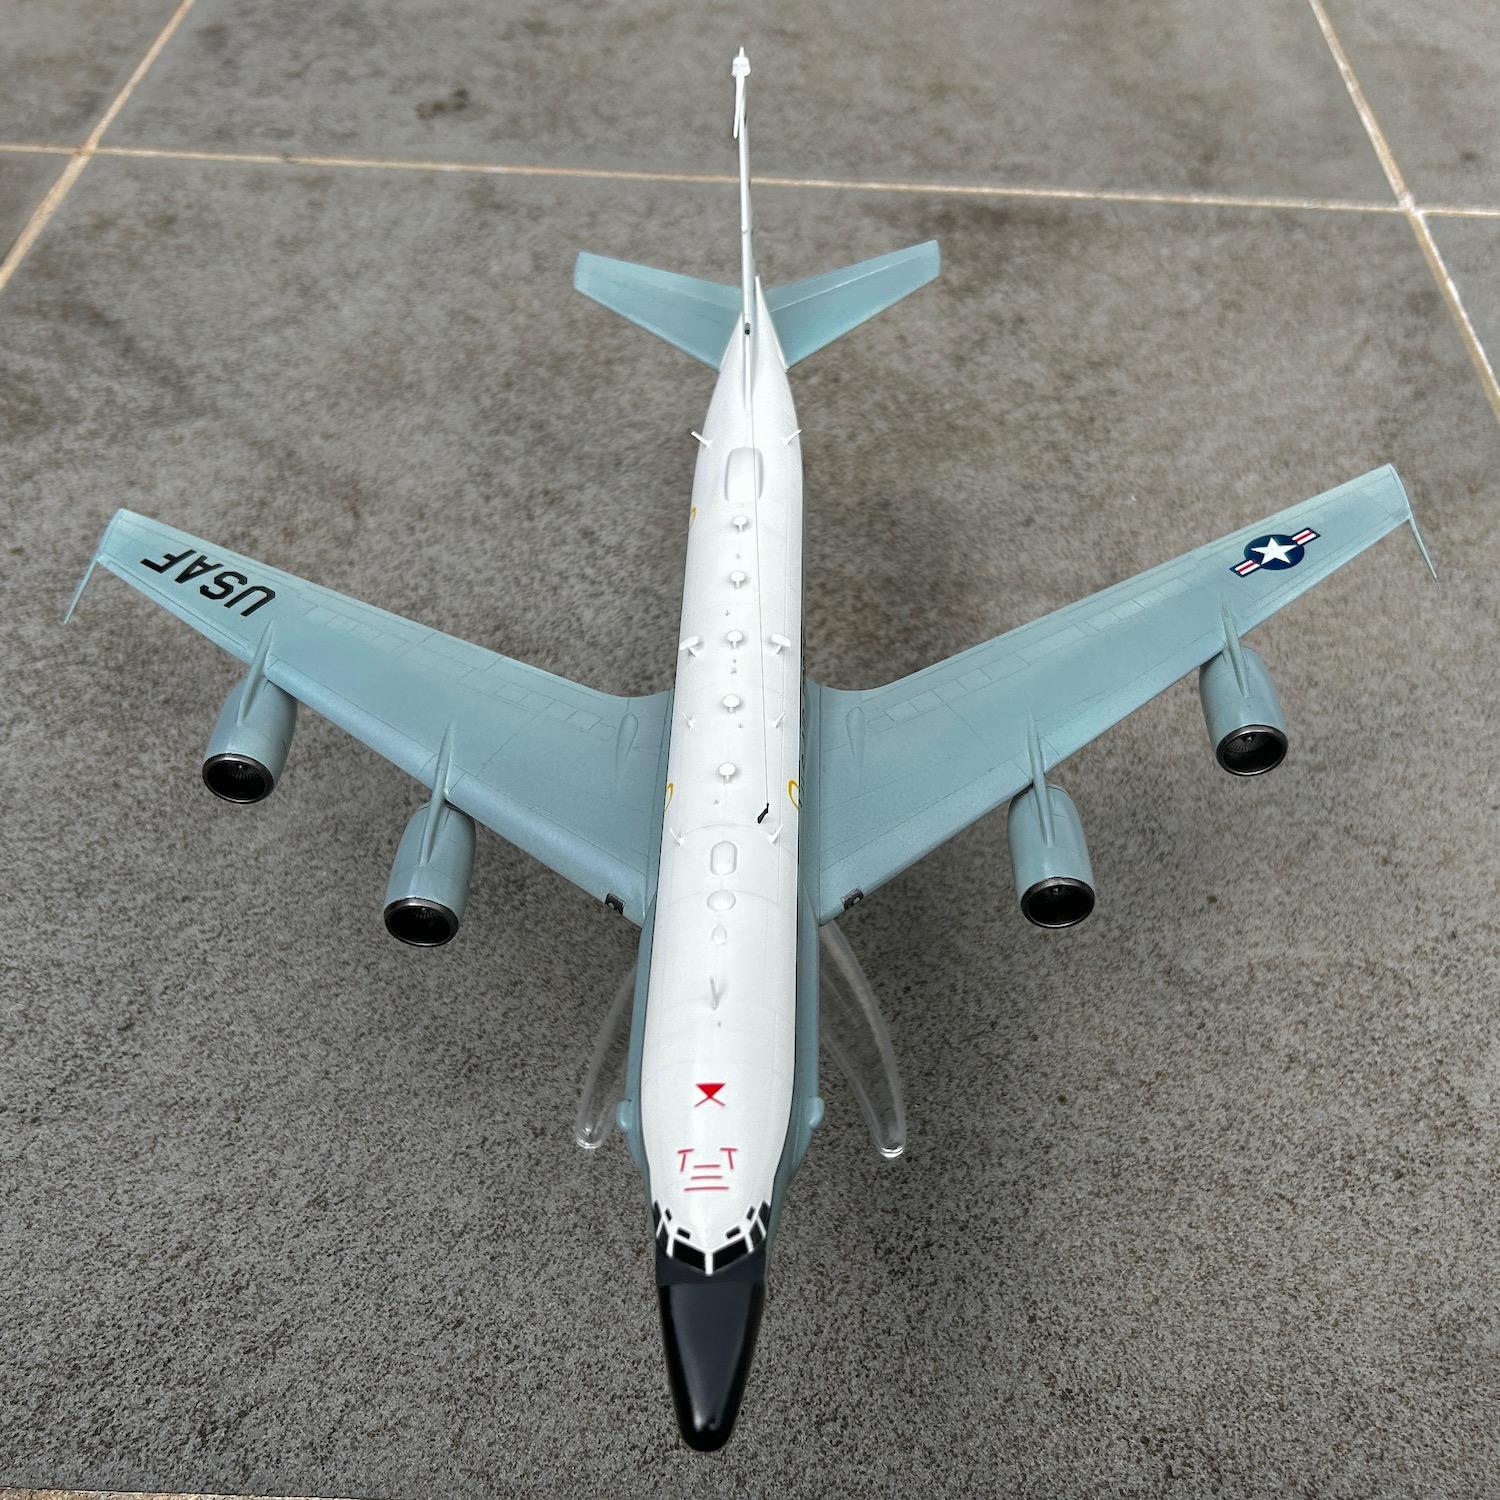
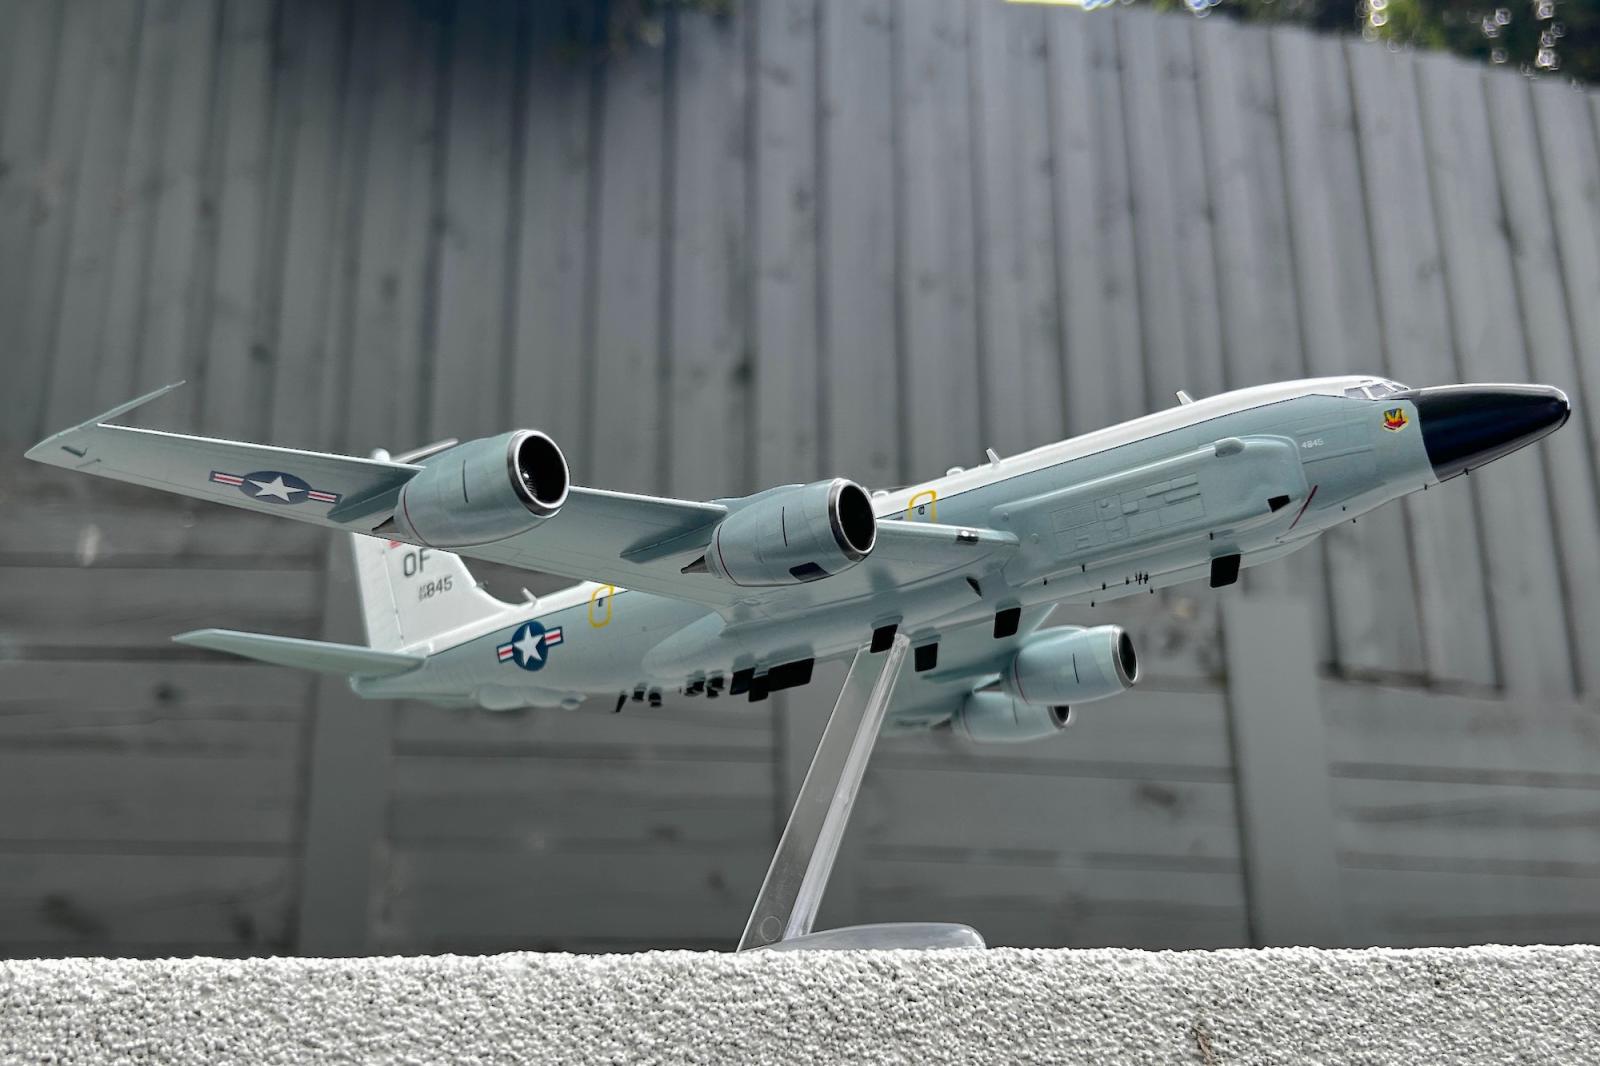
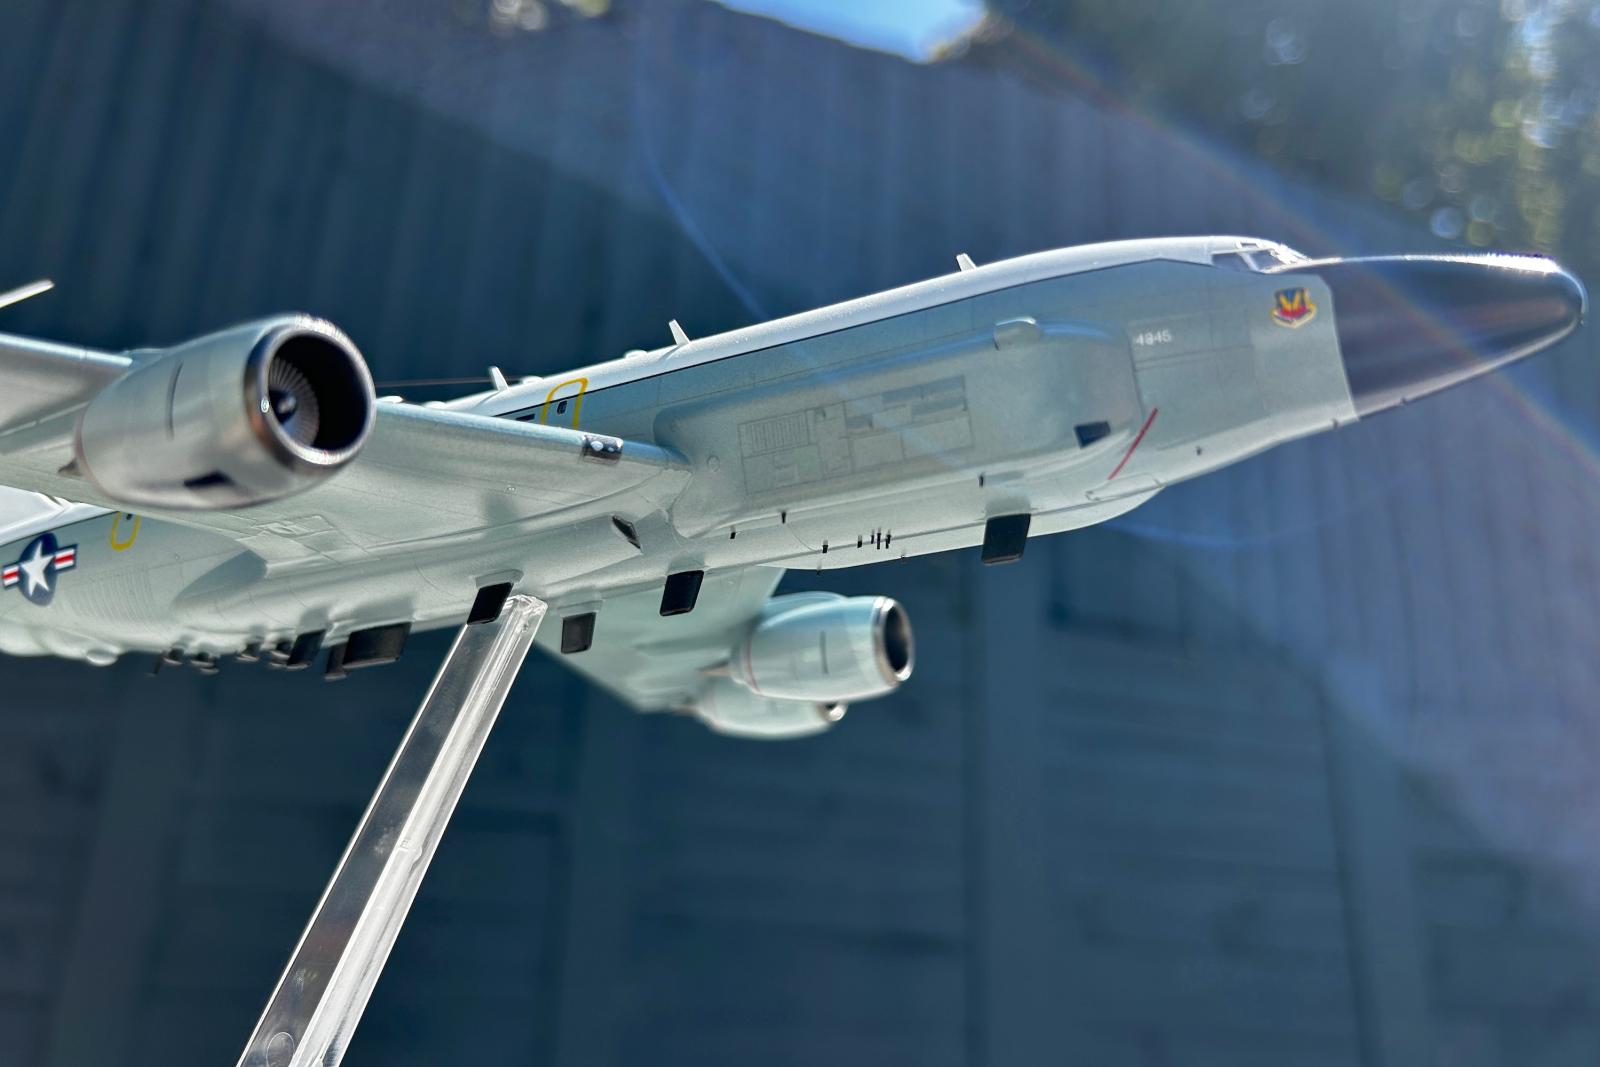
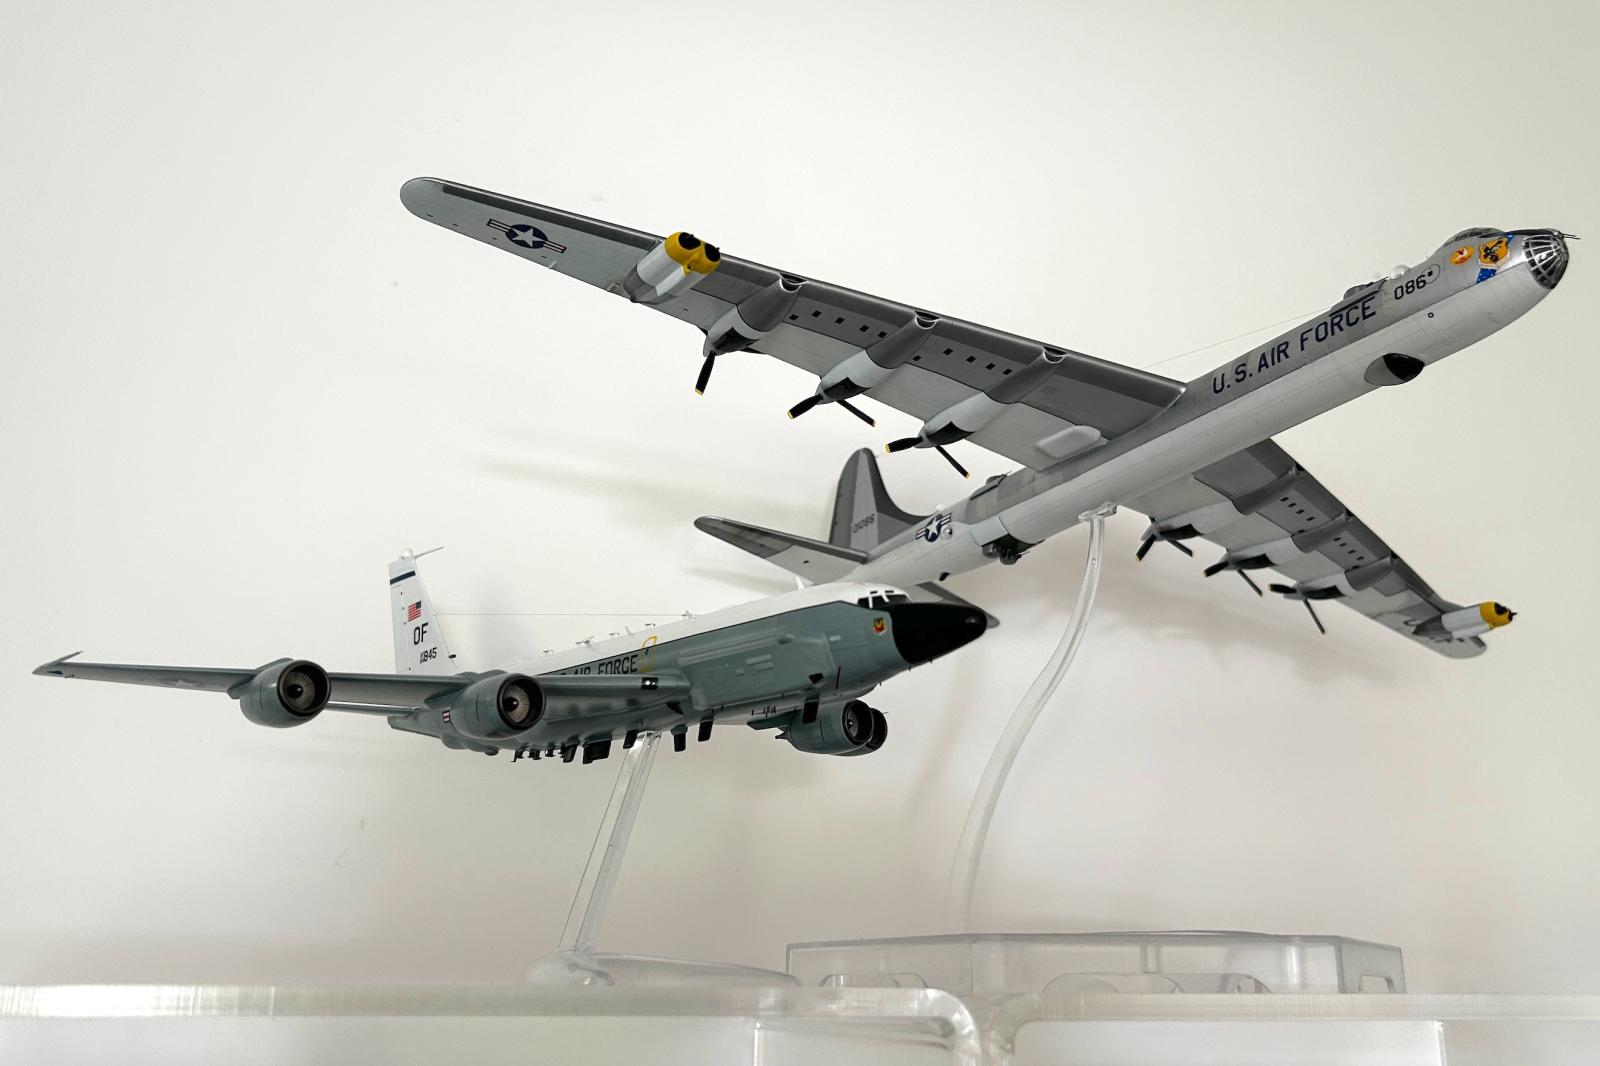
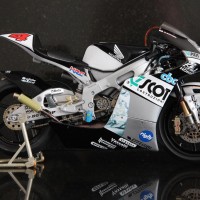
The C-135 family of planes has been flying since the 1950's, and continue to look great after all these years. When I heard that Roden was going to release a newly tooled kit of the "Rivet Joint" (RC-135V/W, a heavily upgraded signals intelligence platform) I felt that it would be a challenging, and somewhat unique modelling subject. I mean, look at all those antennas! This is the first model I have ever built of something that does not carry weapons.
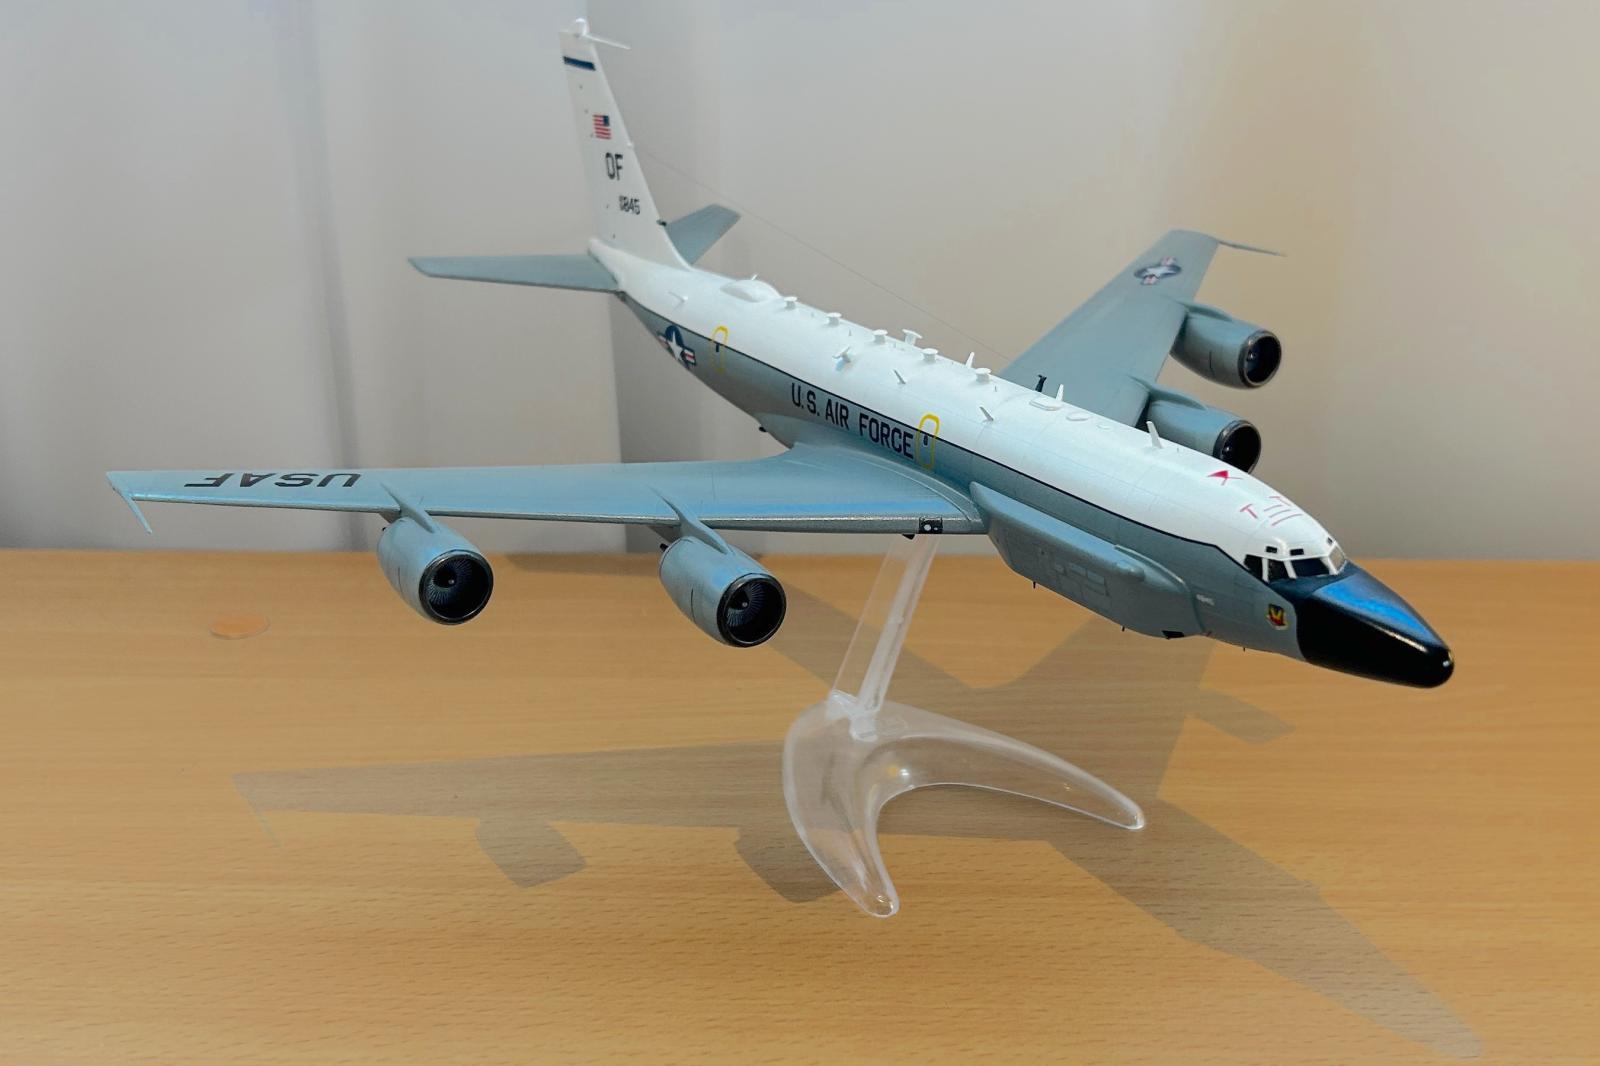
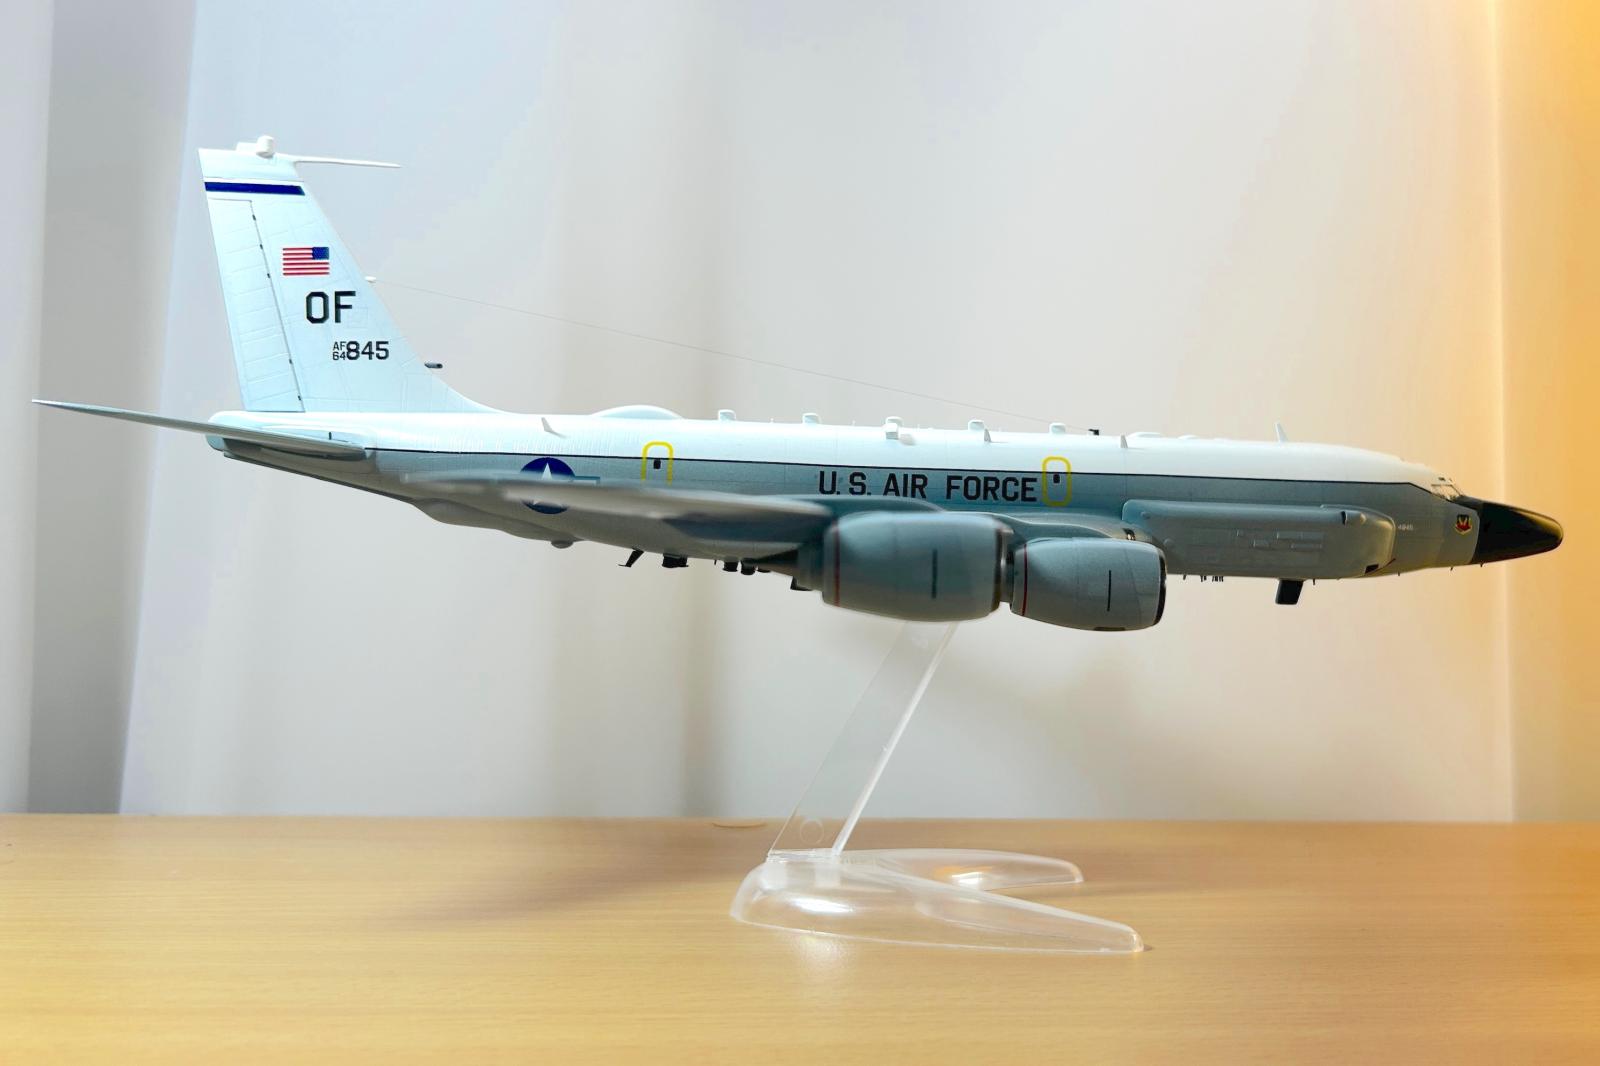
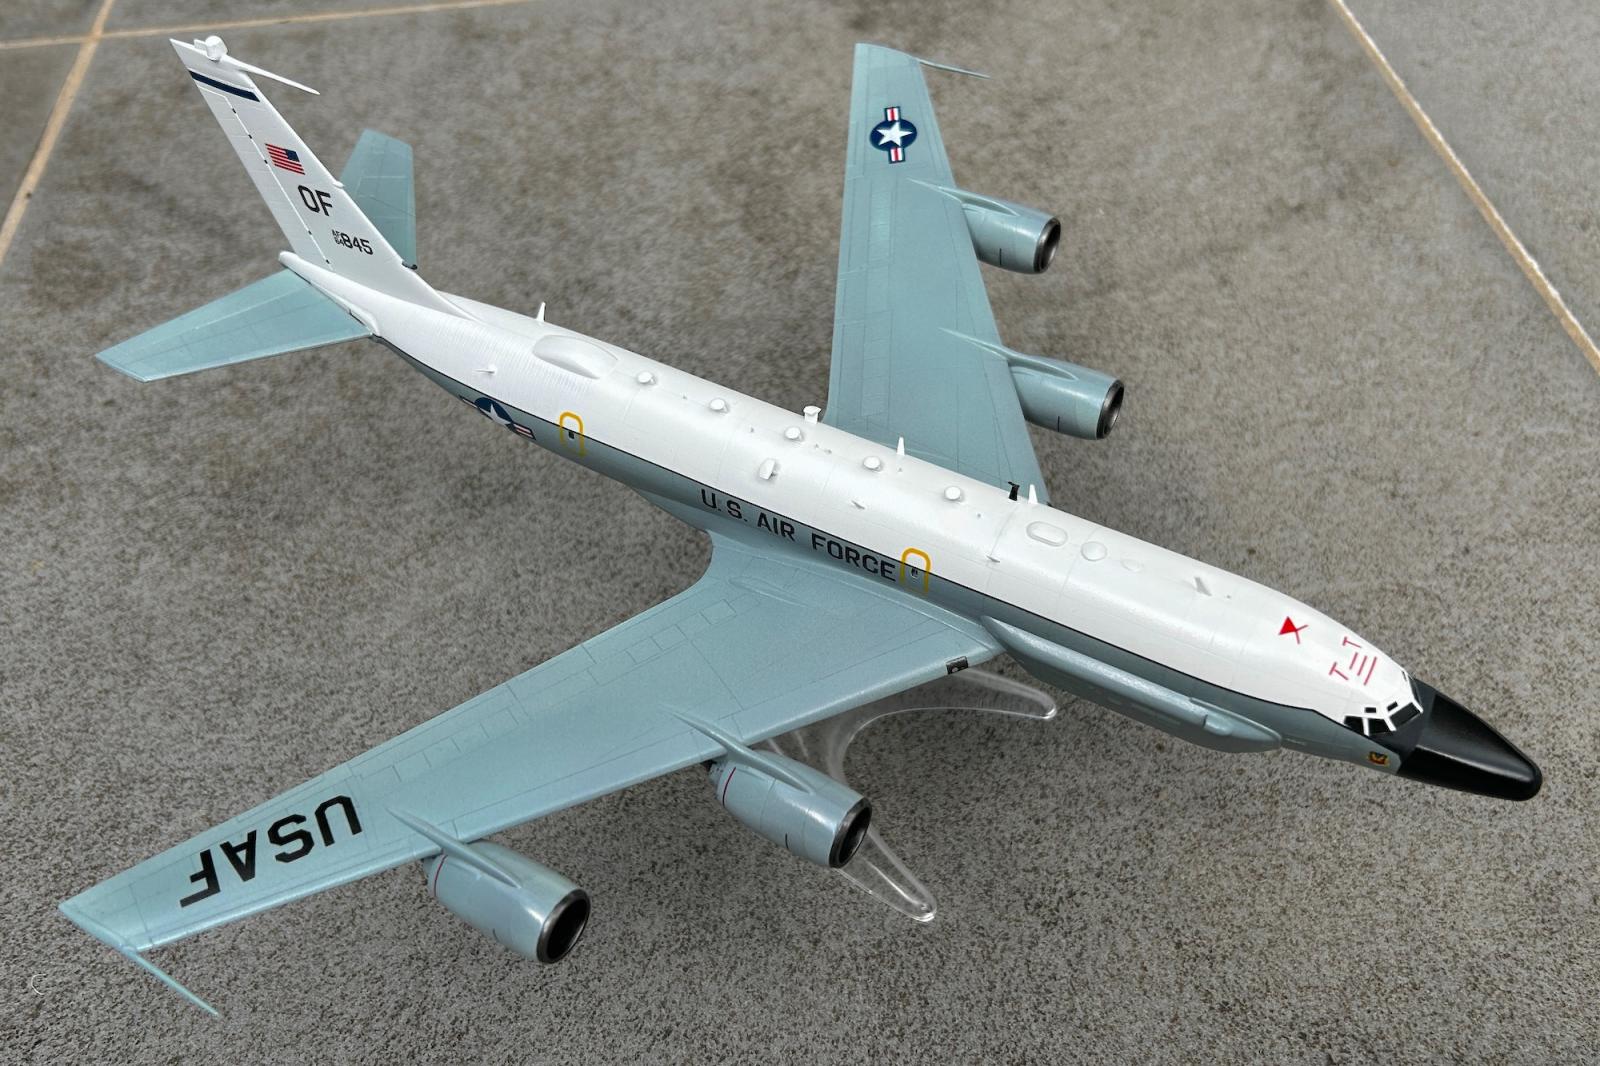
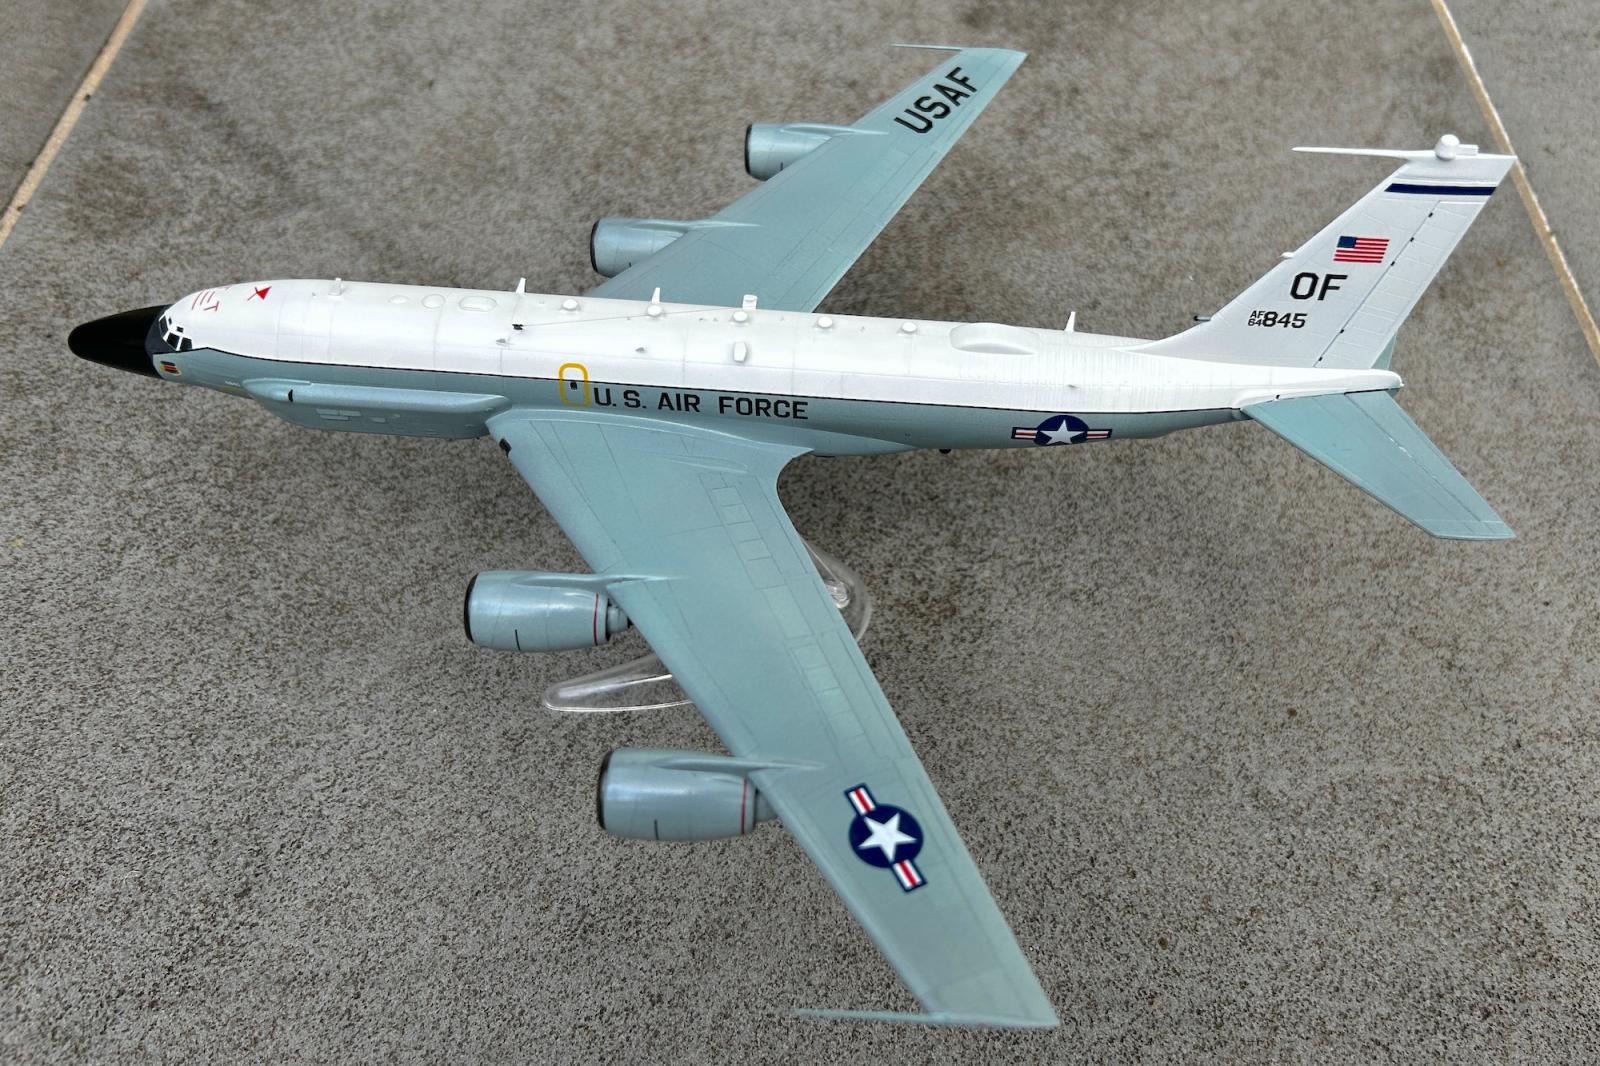
I have a more comprehensive build review with construction pictures in my web site (https://www.marcellorosa.com/144-scale-aircraft/rc135rivetjoint), so here is just the summary. On the positive side: the shape appears accurate to me, and the parts fit shows some improvement relative to the B-36 kit, which was released just a couple of years earlier. This suggests that Roden is on a path to improvement. The kit has recessed panel lines. Like many 1/144 kits, these appear a bit too deep and wide for the scale, but this is easily fixed by sanding. Better to have them and tone down, than not to have.
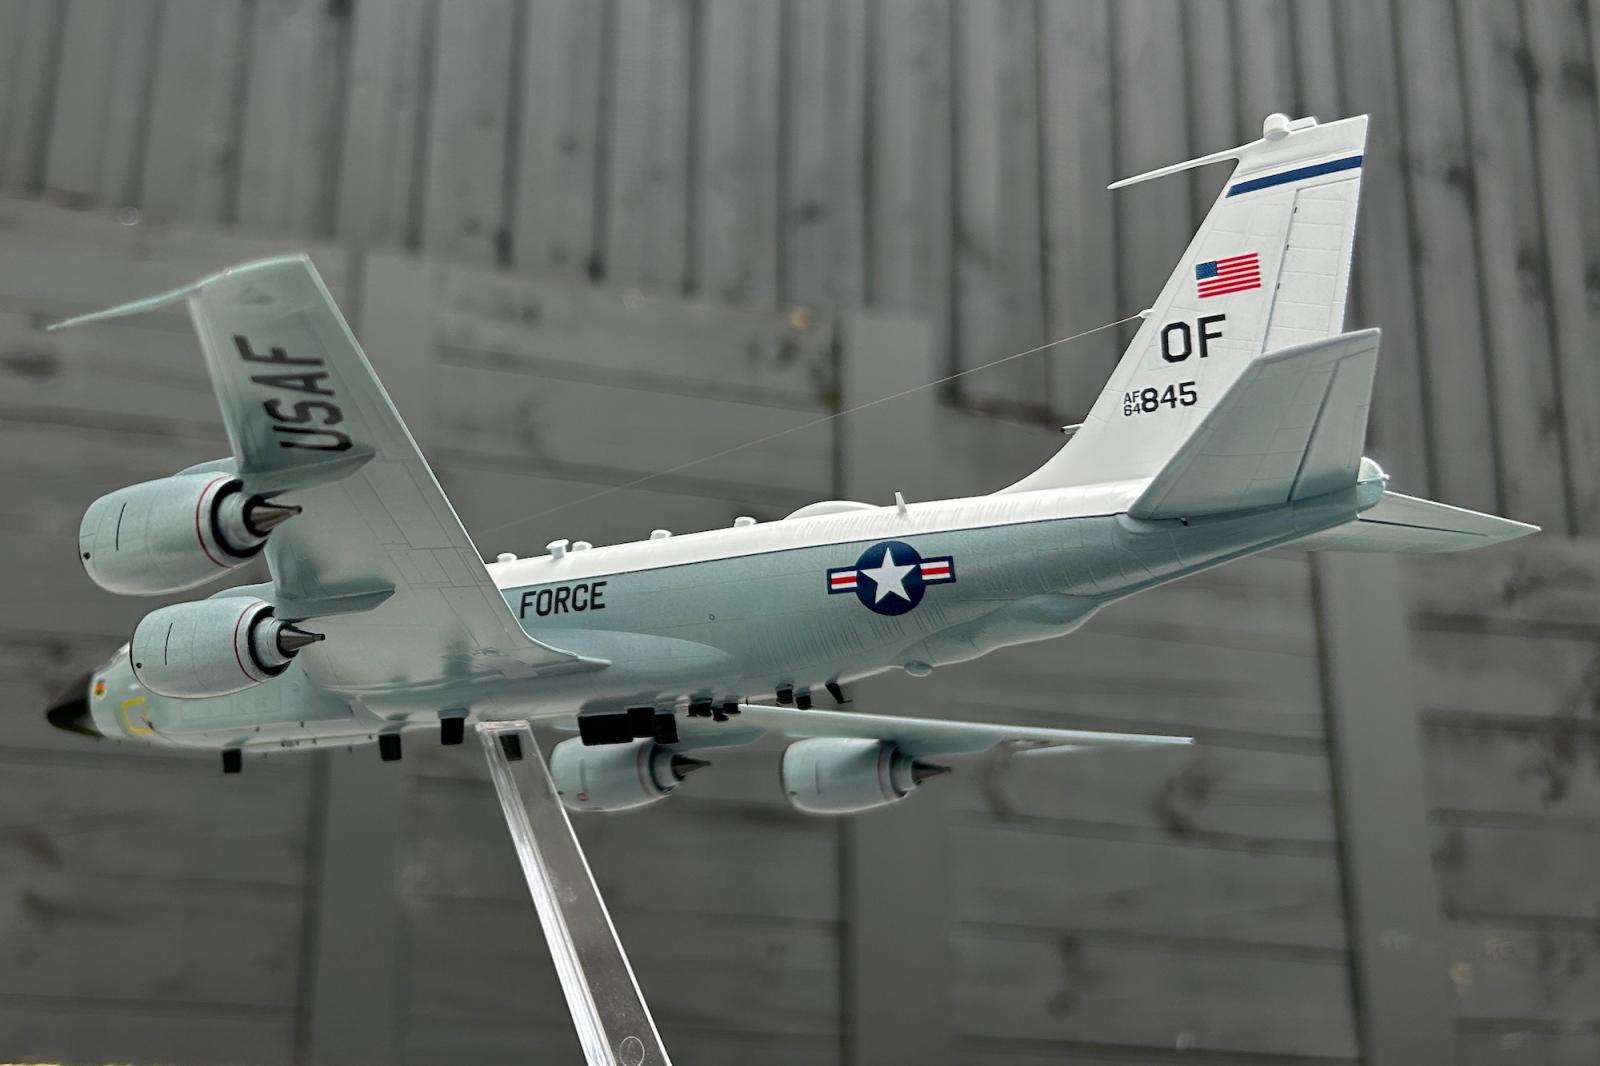
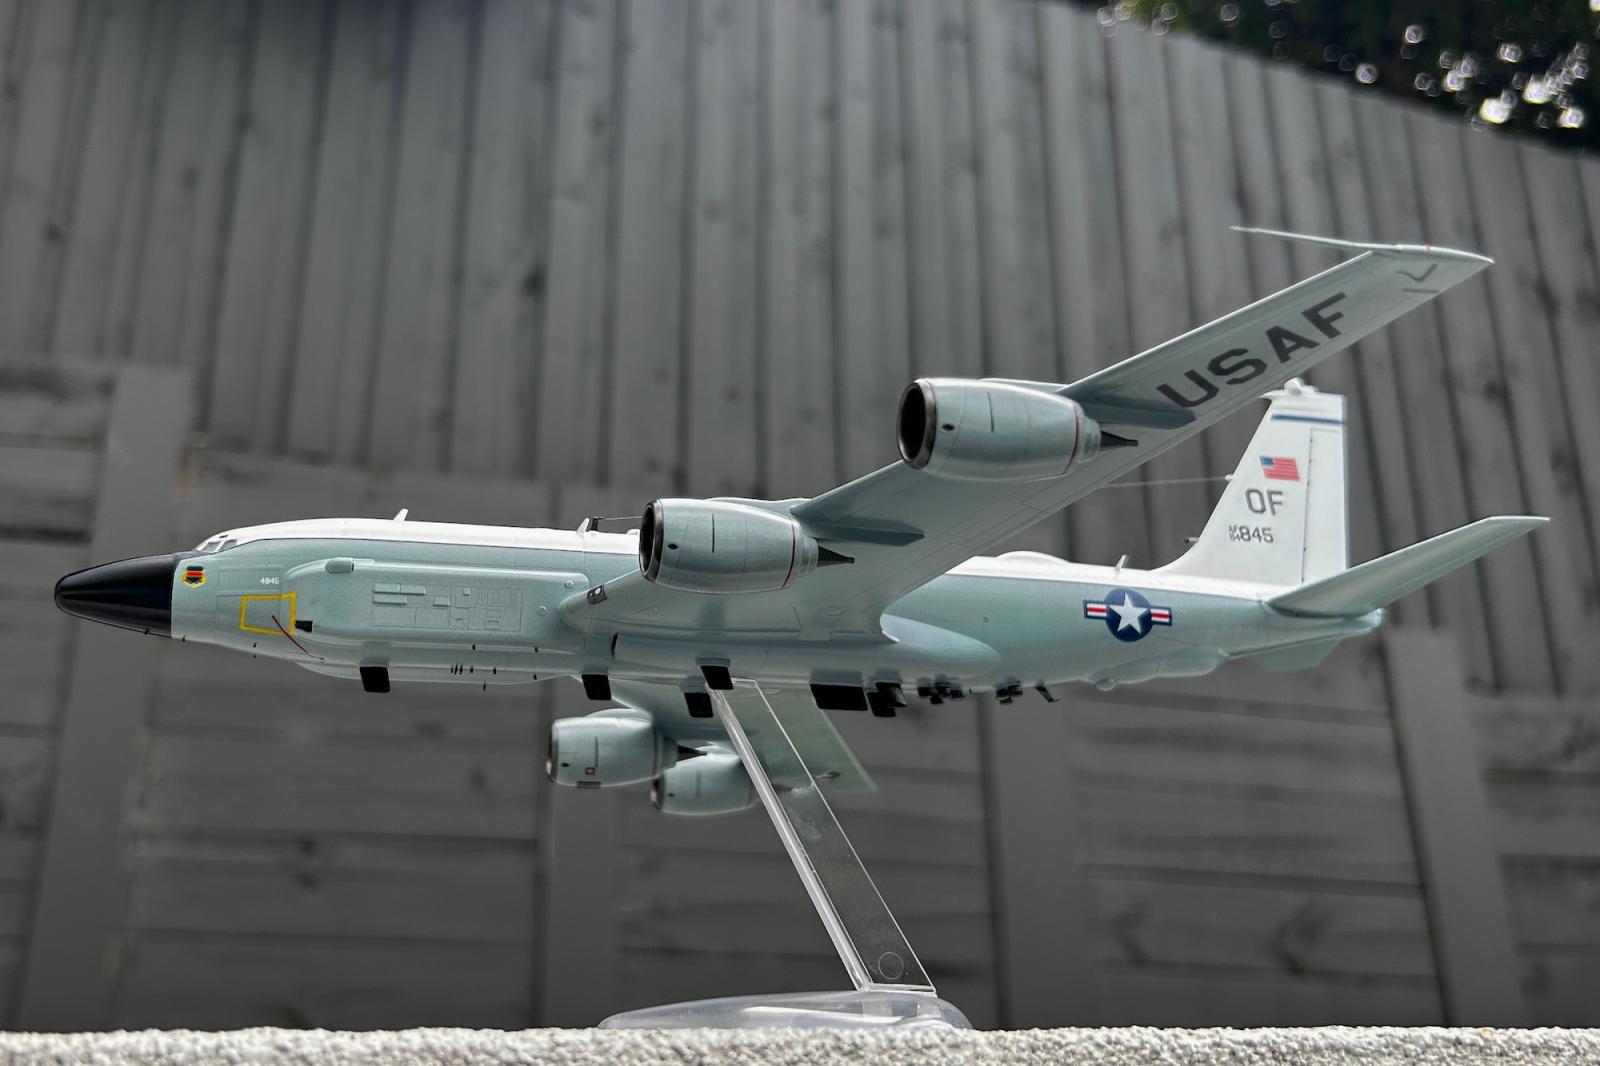
The main negative: the decals continue to be truly awful. Here I used what I could from the kit, combined with bits from the spares box. Specially bad were the yellow outlines for the doors and portside instrument bay, which broke into bits and/ or had a mottled appearance even after multiple applications of Sol and Set. In the end, I painted them over with Tamiya XF-3 yellow. Other lines (like the black trim separating the white and grey parts of the fuselage, and details in the engine cowlings) were too thick, so I used bits from the spare box instead. There is a suggestion of improvement in that the colours in the insignias were less misaligned than in the B-36D kit (which still takes the cake as the worst-ever I have tried, including decals that had been kept in a box for >40 years).
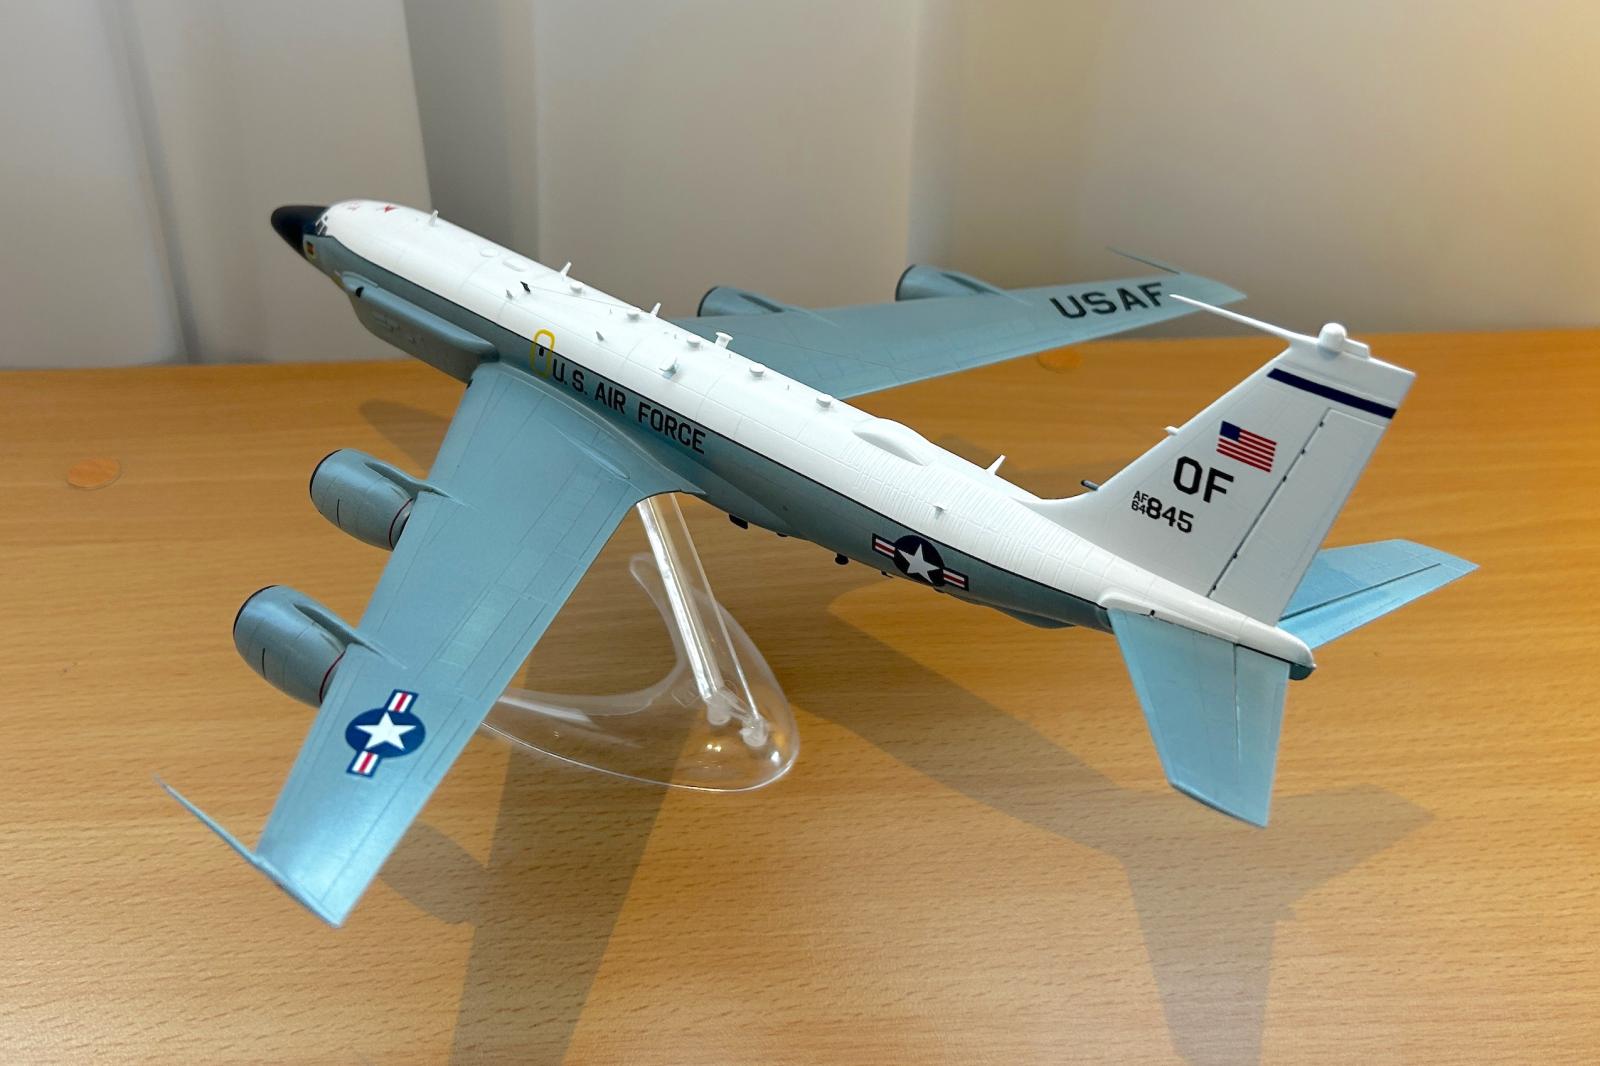
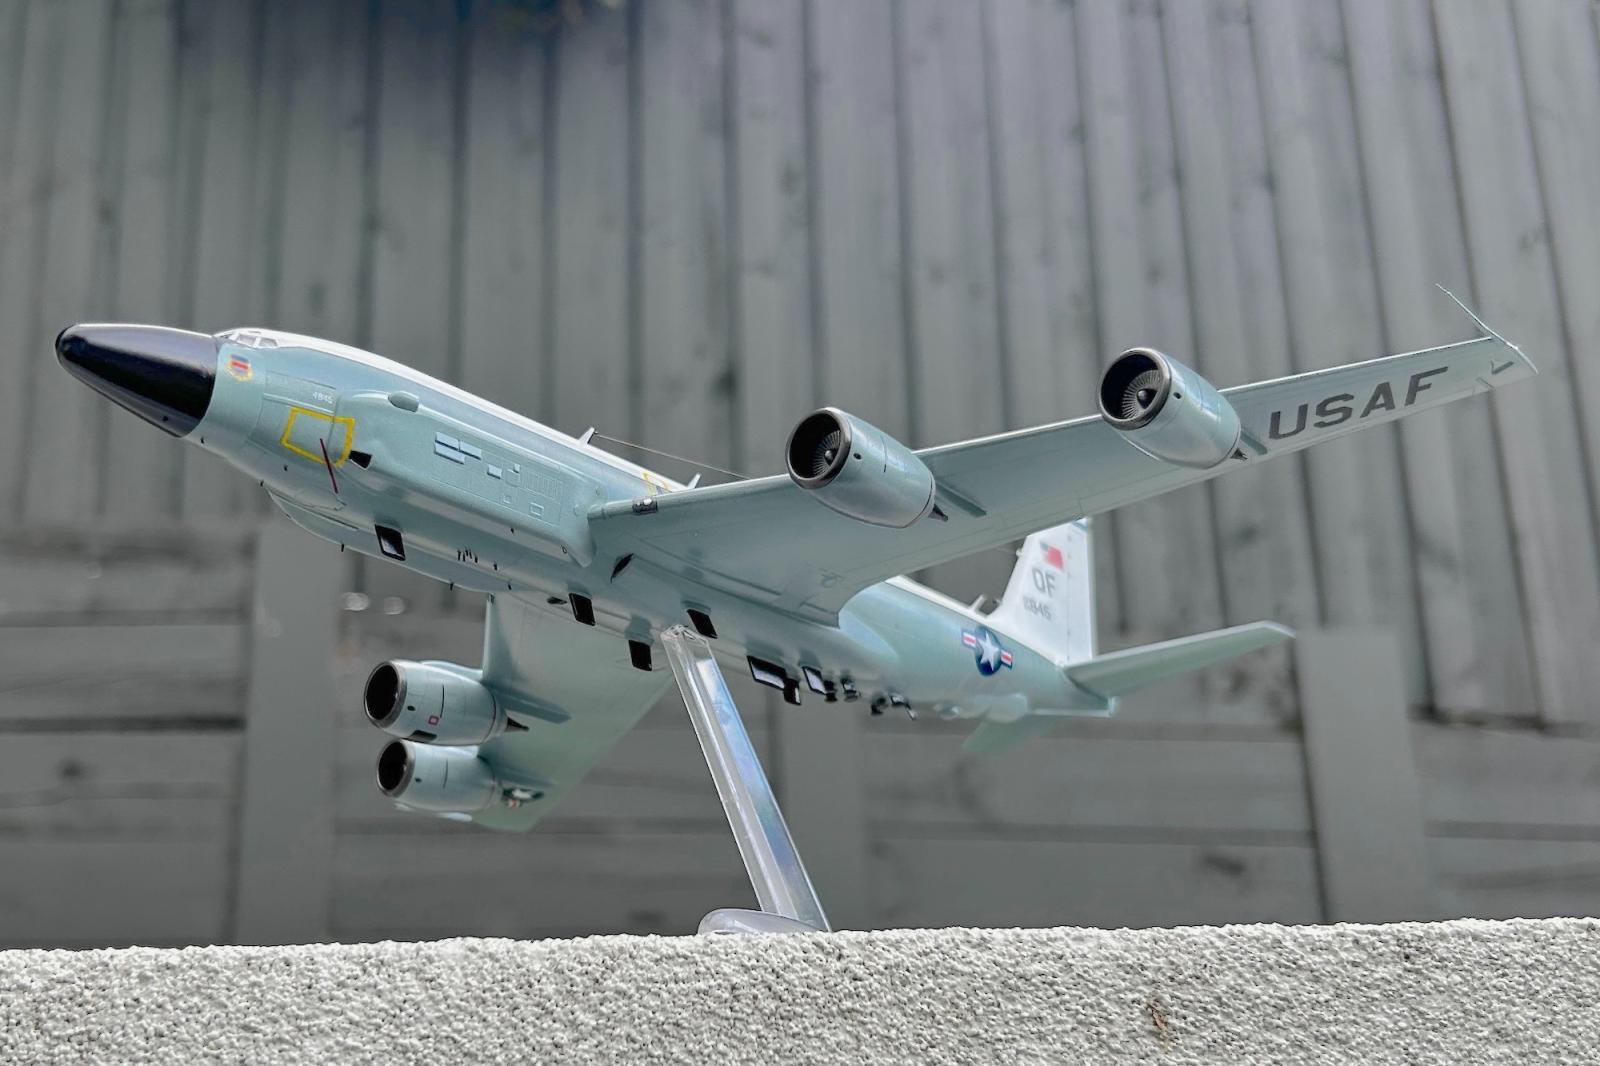
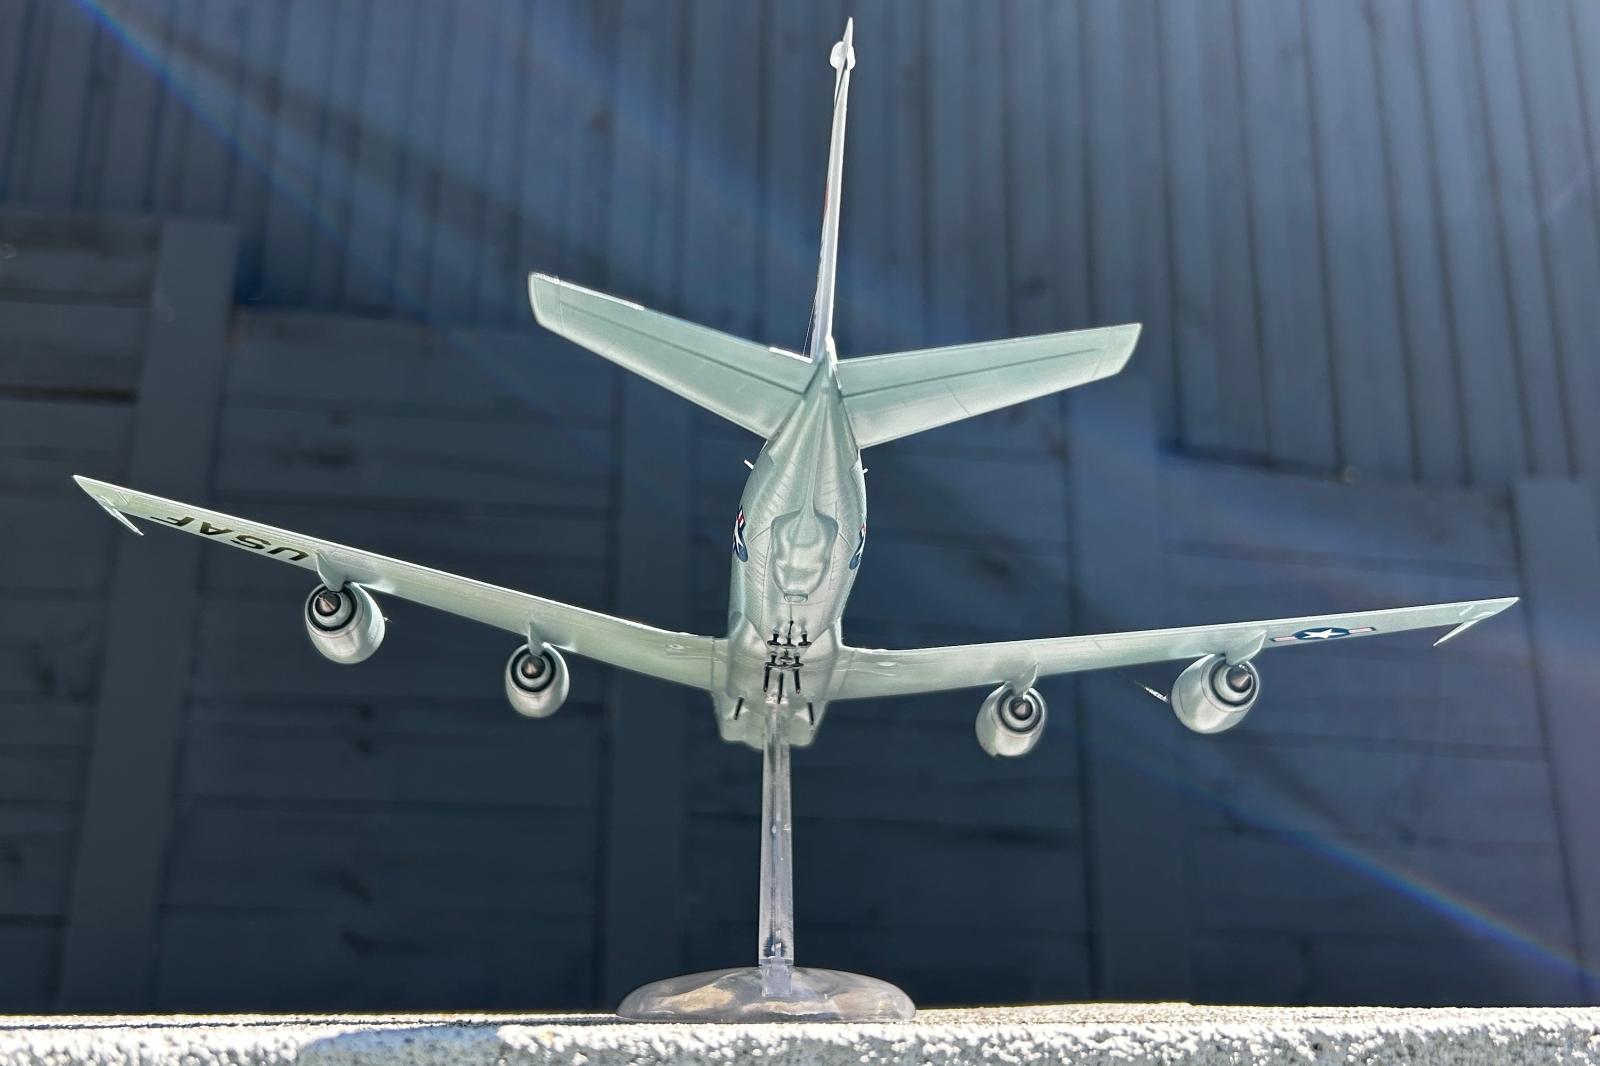
Surprising no one, all of these antennas were a big pain in the backside during the construction, but given that this is what the plane is all about, I made a reasonable effort to get them "right". The long ones in the wingtips and top of the vertical stabiliser broke off multiple times. I took the opportunity to correct their length (too short as provided). Many of the fin-shaped ones on the dorsal and ventral parts of the fuselage also broke off. In the end I substituted most of them with bits of spare photoetch, cut to size. This also gave me the opportunity to add several antennas that should exist according to reference pictures, but were not provided in the kit. Most notably, the tiny little ones (e.g., along the midline at the level of the "cheeks" were all additions. Rigging the dorsal aerial used a human hair. Having decided to represent the plane in flight, I also recruited an old Airfix stand into a new mission.
The panel lines were pre-shaded by running a lead pencil over them. I then used airbrushed SMS white for the dorsal fuselage, Tamiya X-1 for the nose radome, and XF-1 for the antiglare panel. The grey colour of the ventral fuselage, wings and horizontal stabilisers was gradually built up with thin layers of AK ADC Grey, Mr Color Greyish Blue, Mr Color RLM78 Light Blue, and Vallejo Flanker Light Grey (sometimes focused on specific panels, to add variety in order to suggest weathering). All covered with SMS clear gloss, before and after decal applications.


Awesome job, Marcello!
Congratulations!
Thanks for the encouragement, my friend.
Nice work on a unique subject. Roden’s inability to make decals is really astounding. I refuse to purchase a lot of their WW1 kits simply because no aftermarket decals are available for them.
Yes, I have to confess that buying aftermarket would have been the smart course of action here. But these ones looked OK-ish in the box, and it was not until much later in the build that I realise the extent of their problems. As I said, they are better than the ones I got with the B-36; at least the USAF roundels, USAF/ U. S. AIR FORCE lettering and all of the tail decals were usable.
Great finish on this and fantastic work on all antennae. I thought I recognised that stand.
Companies providing the kits with the option to display them in flight is something that was common when I was young, but sadly became rare. For the B-36 I had to buy a stand, but fortunately this model is so small that an old Airfix one could do the job.
Very nice work Marcelo, and a great result.
That's one of the best-looking Rivet Joint models I've seen! You are a glutton for tough builds (and storage space!). Well done.
Really nice job Marcello! I know what you mean about Roden kits, great subjects, but with some fit issues, and lacking some detail. Most of my Roden stash is WW1 fighters, there nice enough to warrant the extra effort it takes to make them nice, so I keep buying them.
You did an amazing job on this kit, Marcello @marcellorosa1
Well done.
🙂 ... Greetings ... 🙂 :
Very nice eye candy Marcello. This is a very seldomly seen aircraft, you have shown your skills and talent on this model. Thank you for sharing these images.
Great work on this Roden kit ! They are challenging. I’ve tried two of their models and have since put Roden on my “do not buy” list.
What a great model, Marcello (@marcellorosa1). The sheer number of antennas on this plane make it challenging to start with, and the kit has a few challenges also. Well done.
Nicely done Marcello.
Great looking build, Marcello (@marcellorosa1).