Big Beautiful Doll
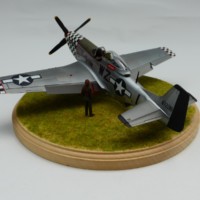
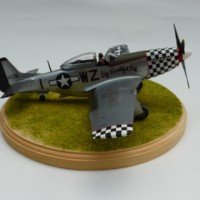
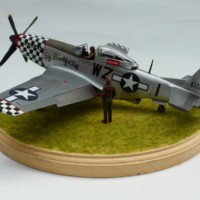
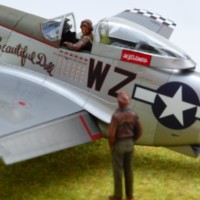
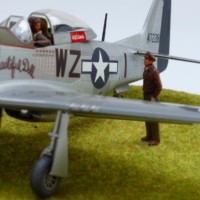
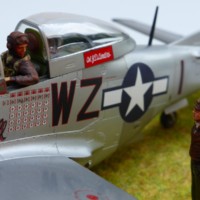
This is the aircraft of Lt. Col. John. D. Landers, P-51D, Big Beautiful Doll.
This is the Tamiya North American P-51D Mustang in 1/48th scale which came with
Cartograph decals. The model is painted with various shades of Alclad 11 & Aeromaster Acrylics. I built the kit straight out of the box with no added detail.
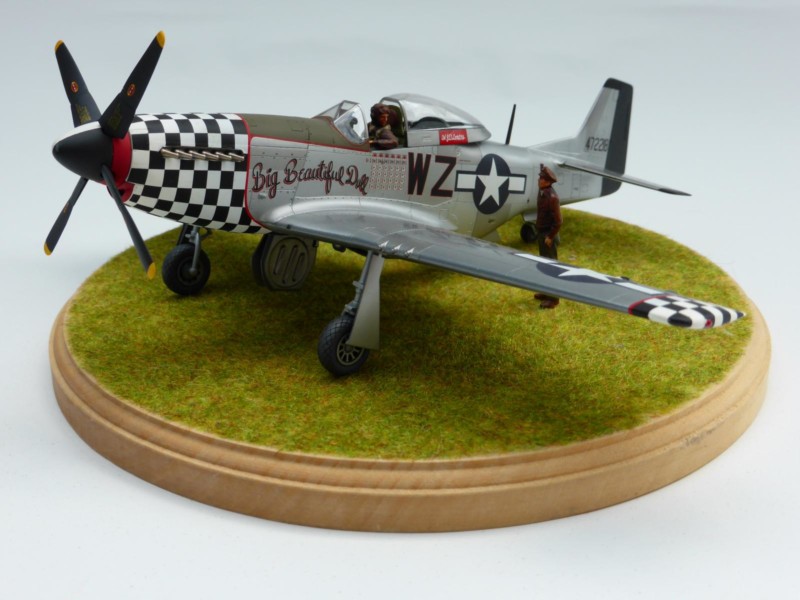


Outstanding ! What a big beautiful Mustang !
Thank you Louis.
Very nice work, my friend...I wish other Tamiya 48th aircraft included this particular figure/pilot set (it's the only one I know of that has the pilot's arm on the canopy rail in a familiar pose - and the "hands-in-the-pocket" pose for the second one - especially for ground-based dioramas). 🙂 🙂
Many thanks Craig. They are nice figures.
Julian, this is a (not-so-Big) Beautiful Doll of a model! I'm with Craig in liking both figures. Great poses - although every Military or Veteran knows that hands in the pocket are strictly verboten! HaHaHa!
Great job, amigo!
Air force gloves!
Good looking Mustang! Wondering where Tamiya got the additional figures? Thinking ICM.
Thanks Bernard. I don't know about the figures. They came with the kit. I've not seen them anywhere else as far as I know.
Tamiya released it in 2003 with extra figures, and Cartograph decals. The box was titled, P-51D Mustang 8th A.F. ACES.
Hello Jeffry, thank you, glad you like it.
Absolutely gorgeous. Another triumph, Julian!
Hi David, thank you.
Julian, This looks great. A famous/popular scheme done right is always nice to see. Well done !
Thank you Terry. I'm pleased you like it.
Marvelous Mustang ! and figures.
Hello Robert, thank you. I've seen a Mustang in that scheme several times flying at Duxford a few years ago.
Nice work, Julian. You did it proud, especially hiding the sprue attachment point on the windscreen!
Thank you John. If I recall correctly, this release came with a new set of transparencies. The sprue gate was on the bottom edge of the moulding, so the canopy side was untouched.
Absolutely STUNNING!
I'm pleased you like it Morne. Thank you.
You can never get tired of seeing a Mustang, especially one that is so well built, Love the paint work and the build, you did a great job, well done.
Thank you Marc. It's not in the same league as some of your masterpieces.
You say "out of the box" but it is only illustrative how great these modern kits (and I mean since mid-1990s) really are if only finished with care & skill. This looks very good indeed. Note to self: must build OOB more often!
Wait till you see the new Airfix P-51D. Got mine yesterday and it took a whole 5 hours (taking care in assembly and not rushing things) to have it assembled. It takes 1/48 P-51Ds to a whole other level, and price for quality is going to make it unbeatable. Eduard's release next year will be 3x as expensive. OOB with this kit is easy-peasy.
Sounds like we are in for a treat with the new Airfix P-51D
Thank you Martin. I build most of my models out of the box. I normally just add the seat harnesses.
Excellent Mustang. The whole vignette is very well made and composed. P-51 is incredibly well painted. Are the checkers made with decals?
Yes, there are several sheets out there for this - the Tamiya "8th AF Aces" release of this kit has the nose and wingtip checkers and they work fine.
Thank you Pedro. The nose checkers are in four pieces and fitted perfectly.
Having seen the headline I was looking forward to seeing some nice nose art, oh well, never mind, it's certainly a great looking Mustang, and those figures definitely add a certain something.
Hello George, thank you. I posted a P-47 with nose art. If I remember correctly, you were kind enough to say you liked it.
Beautiful work and a really nice result.
Modelers have complained since it was first released that a major drawback of this kit is that the canopy cannot be opened properly (i.e., with the rear end atop the fuselage, not sticking into the air). One solution is the Falcon/Squadron vac canopy, which is very nice. One can also modify the kit with an easy trick: thin down the edges of the canopy frame from the inside, creating an angle about half the total depth of the frame. Do not do this to the visible end, the rest will not be seen. Then round down the fuselage at the rear of the canopy. Voila! You can now place the canopy correctly, and no one will notice what you did. It's really very easy. HTH
Many thanks Tom. That's a great tip for anyone making the Tamiya Mustang.
Lovely build Julian!
Thank you Greg.