Work-In-Progress: 1/32 Trumpeter SBD
This article is part of a series:
- Work-In-Progress: 1/32 Trumpeter SBD
- WIP 2nd Update: 1/32 Trumpeter SBD (Color Challenge Resolved)
- Update WIP 3: 1/32 Trumpeter SBD-3 Midway Variant…need to resolve a decal issue.
- Update WIP 4: 1/32 Trumpeter SBD-3 Midway Variant
- WIP: 5th Update for 1/32 Trumpeter SBD-3 Midway Variant
- WIP: 6th and Final Update: Trumpeter 1/32 SBD-3 “Midway Variant”
- 1/32 Trumpeter SBD-3: Battle of Midway
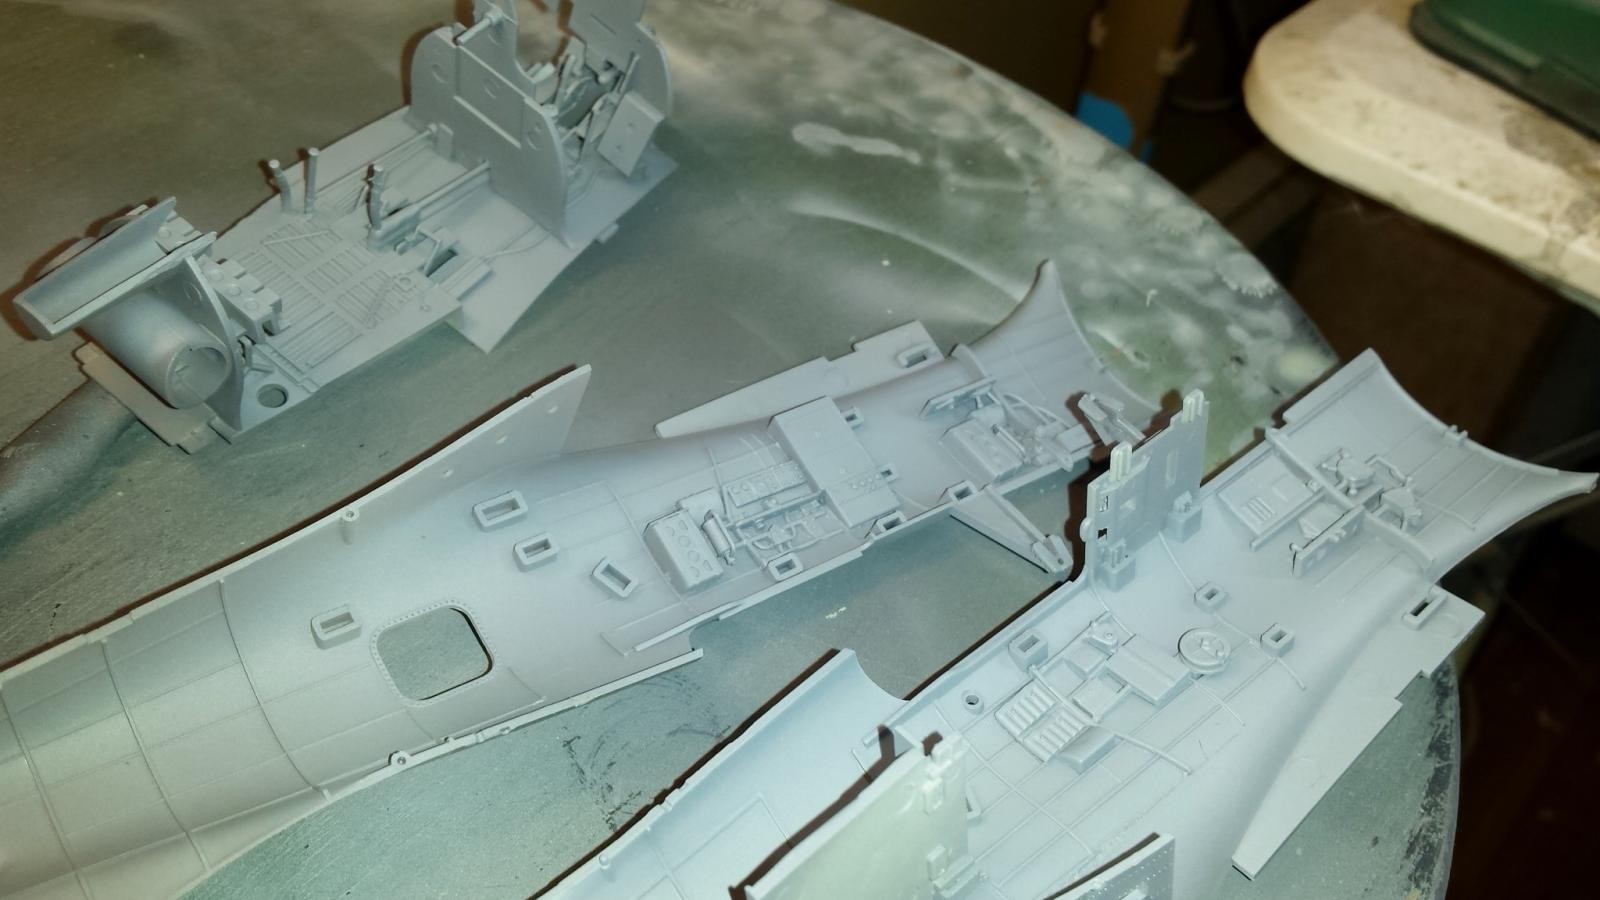
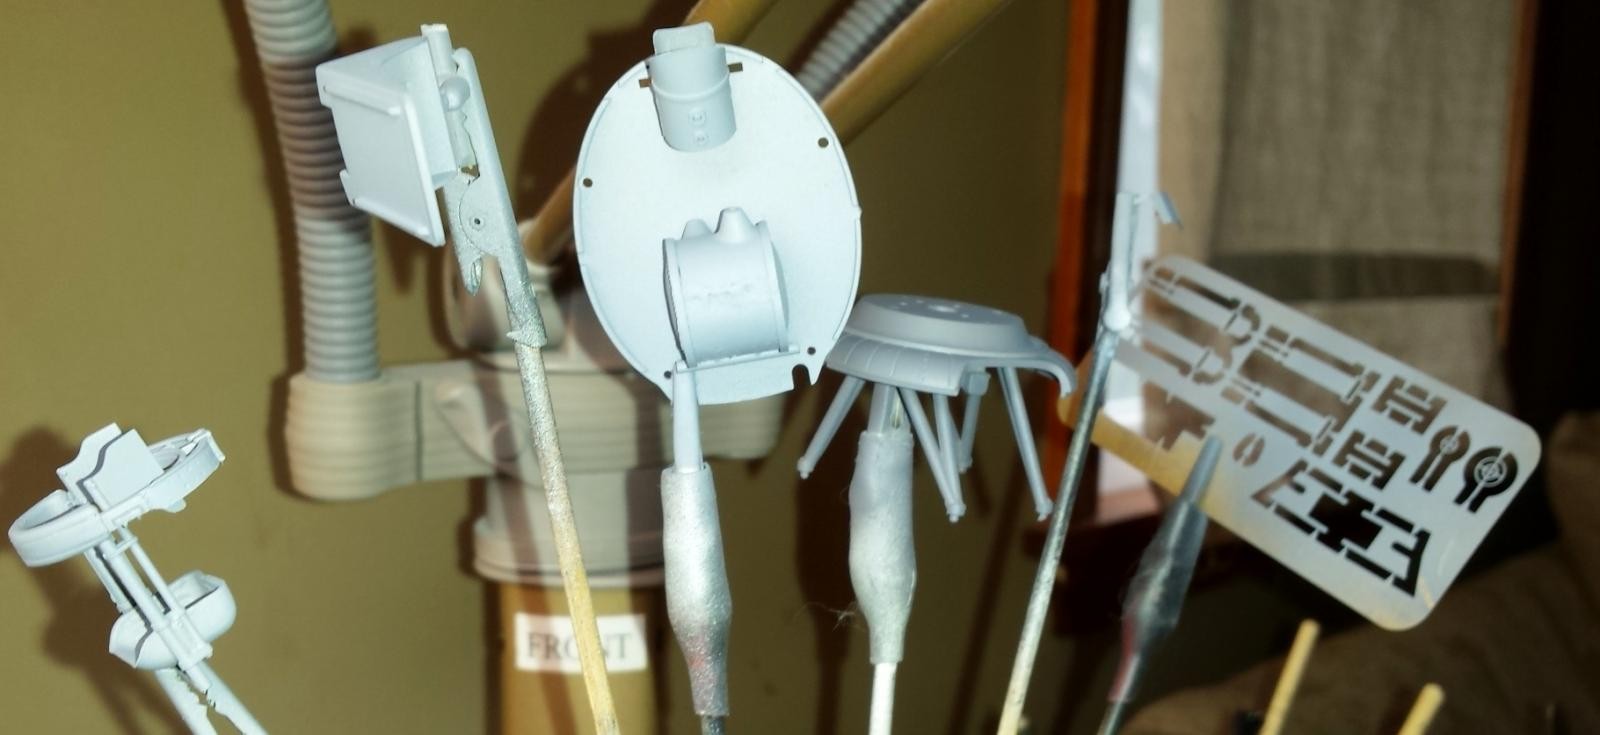
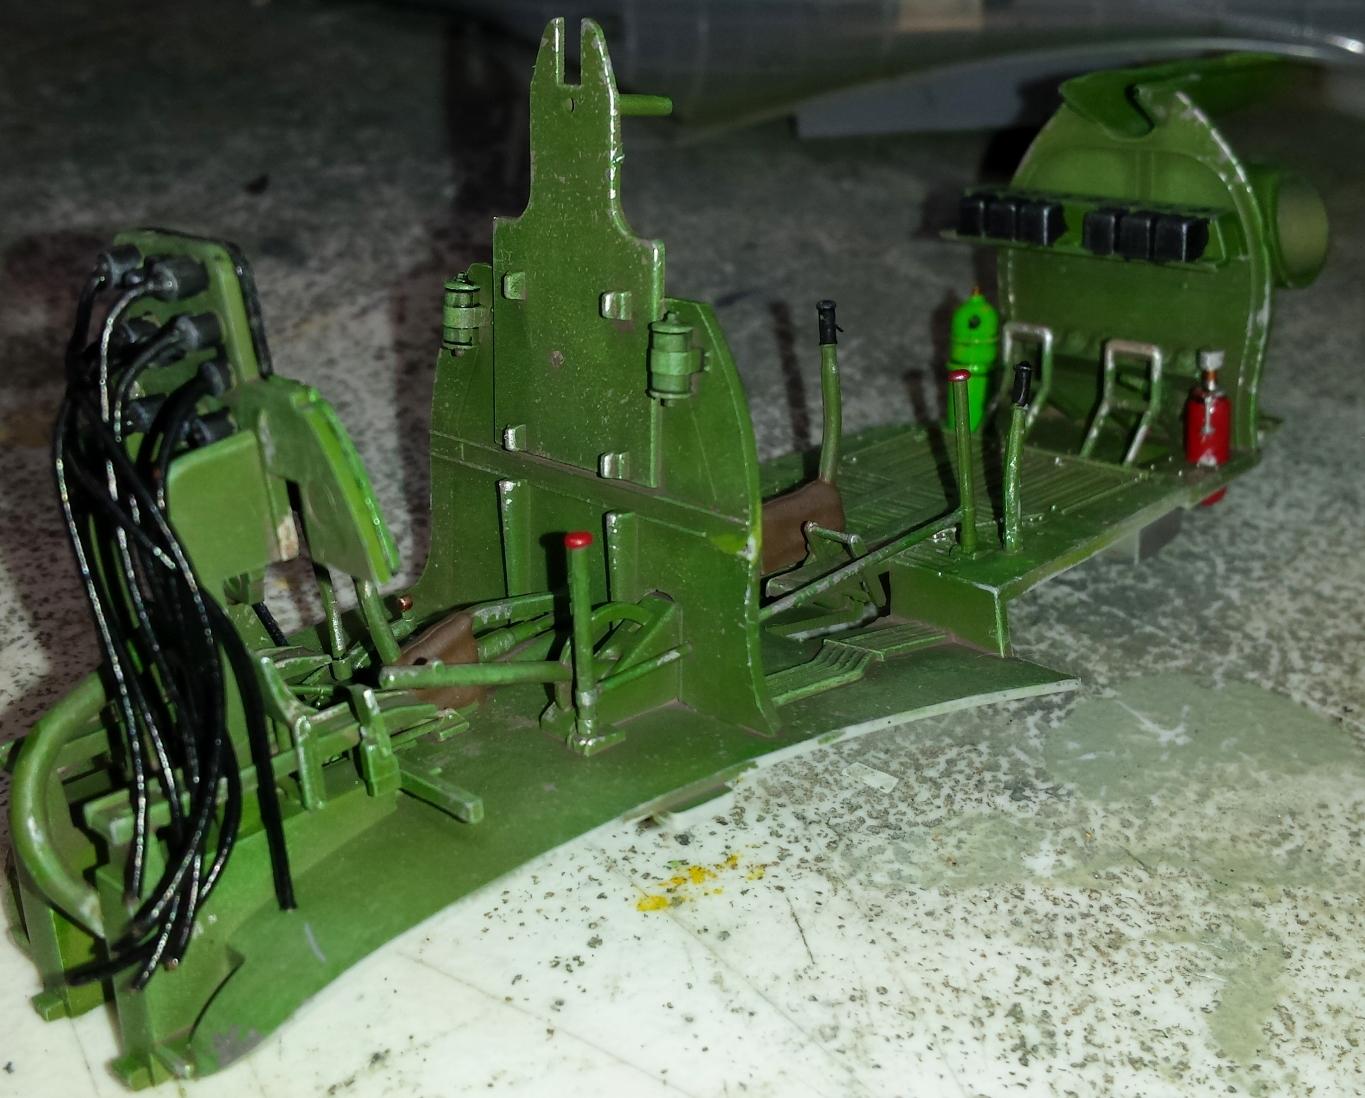
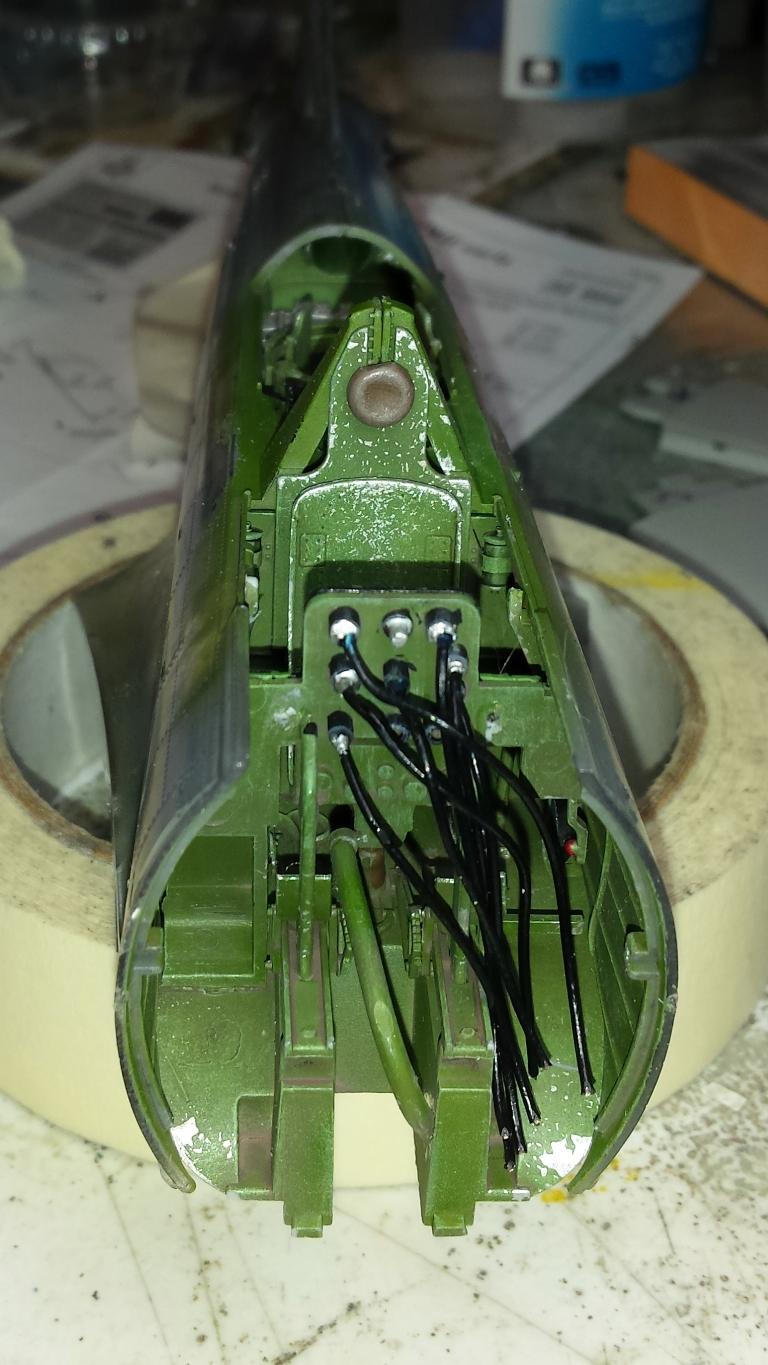
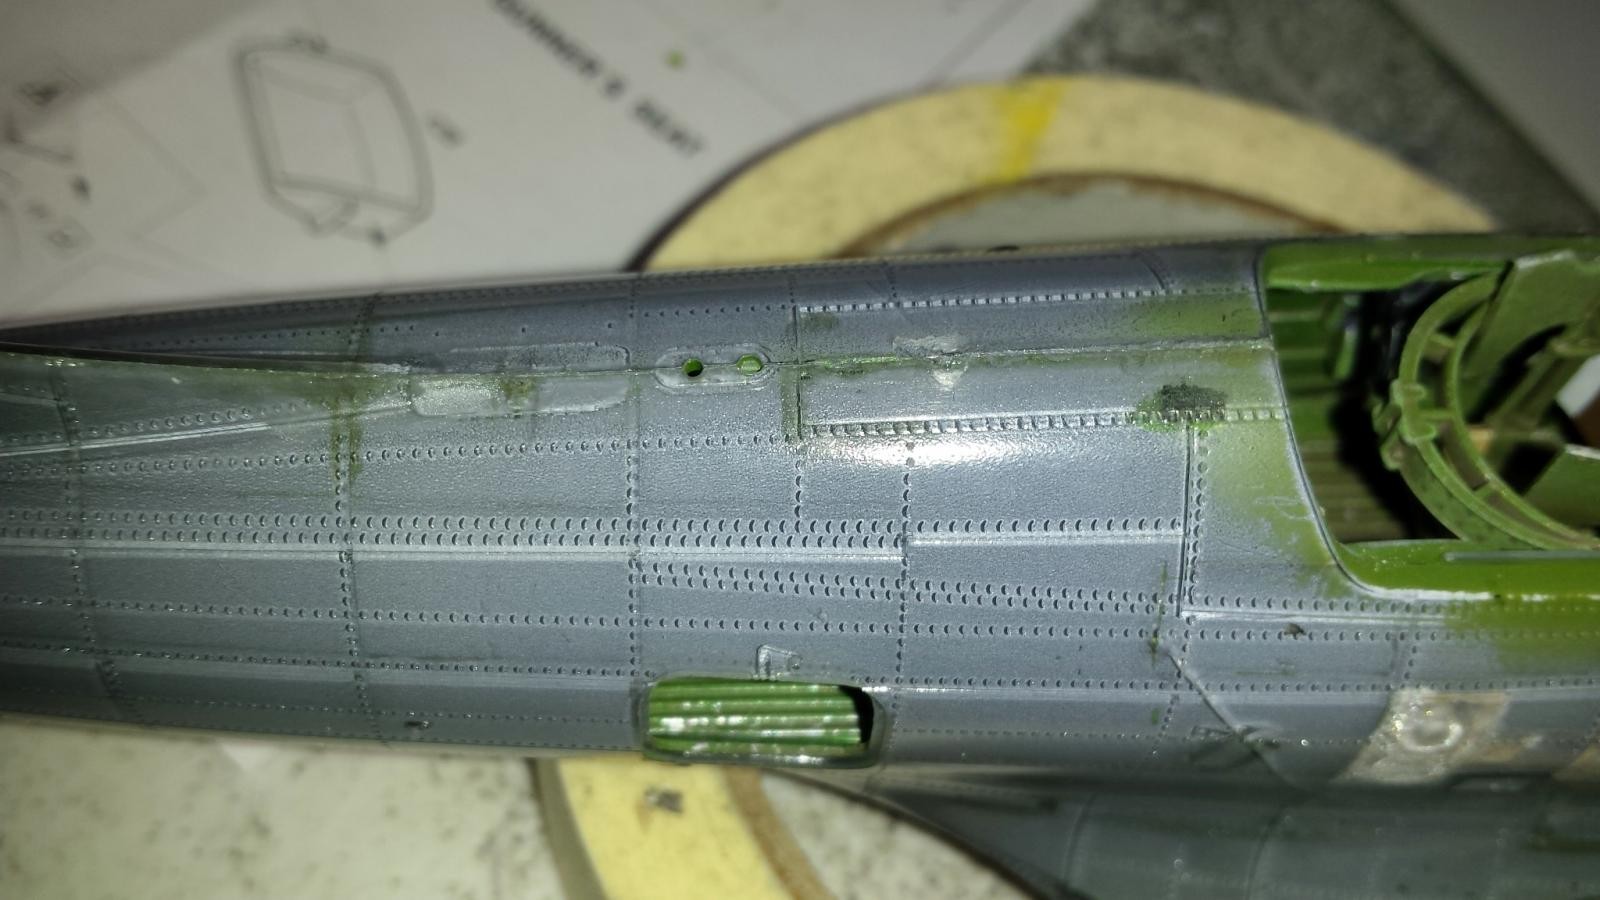
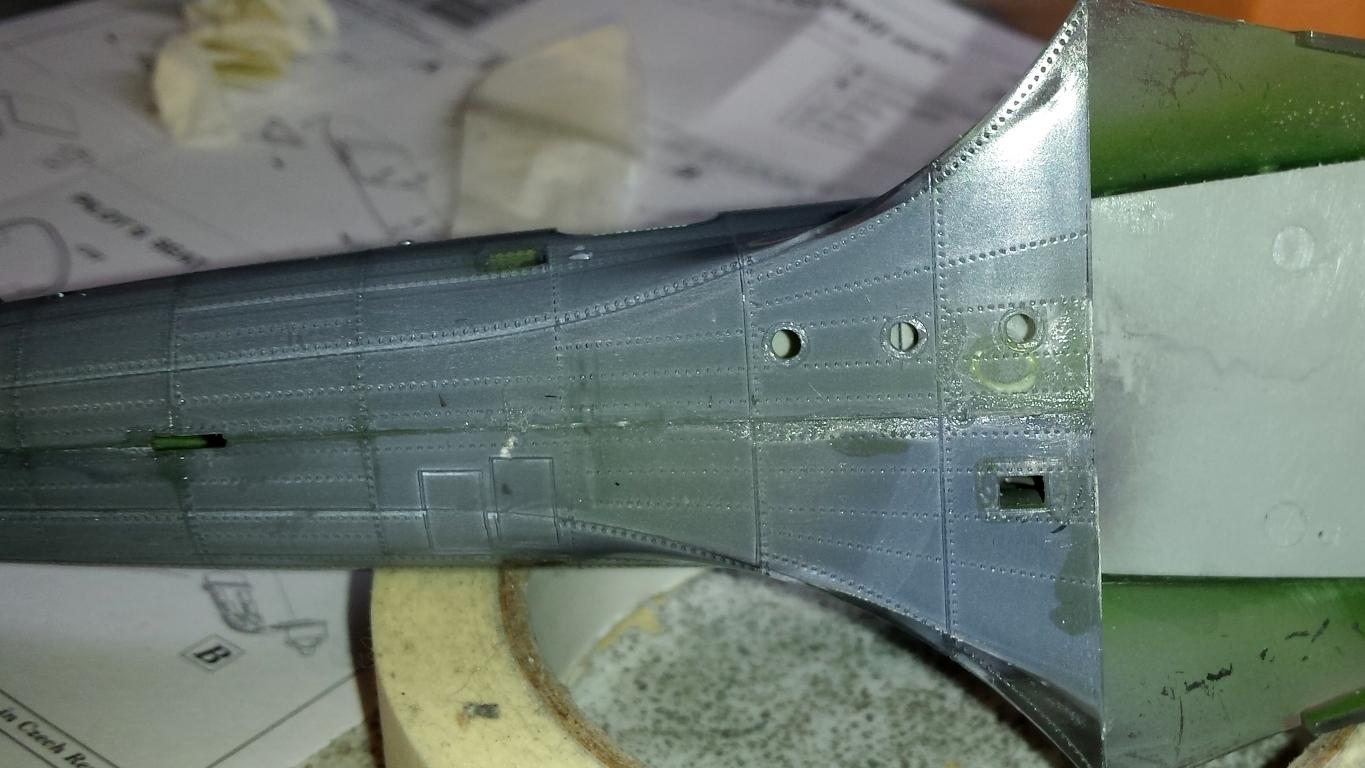
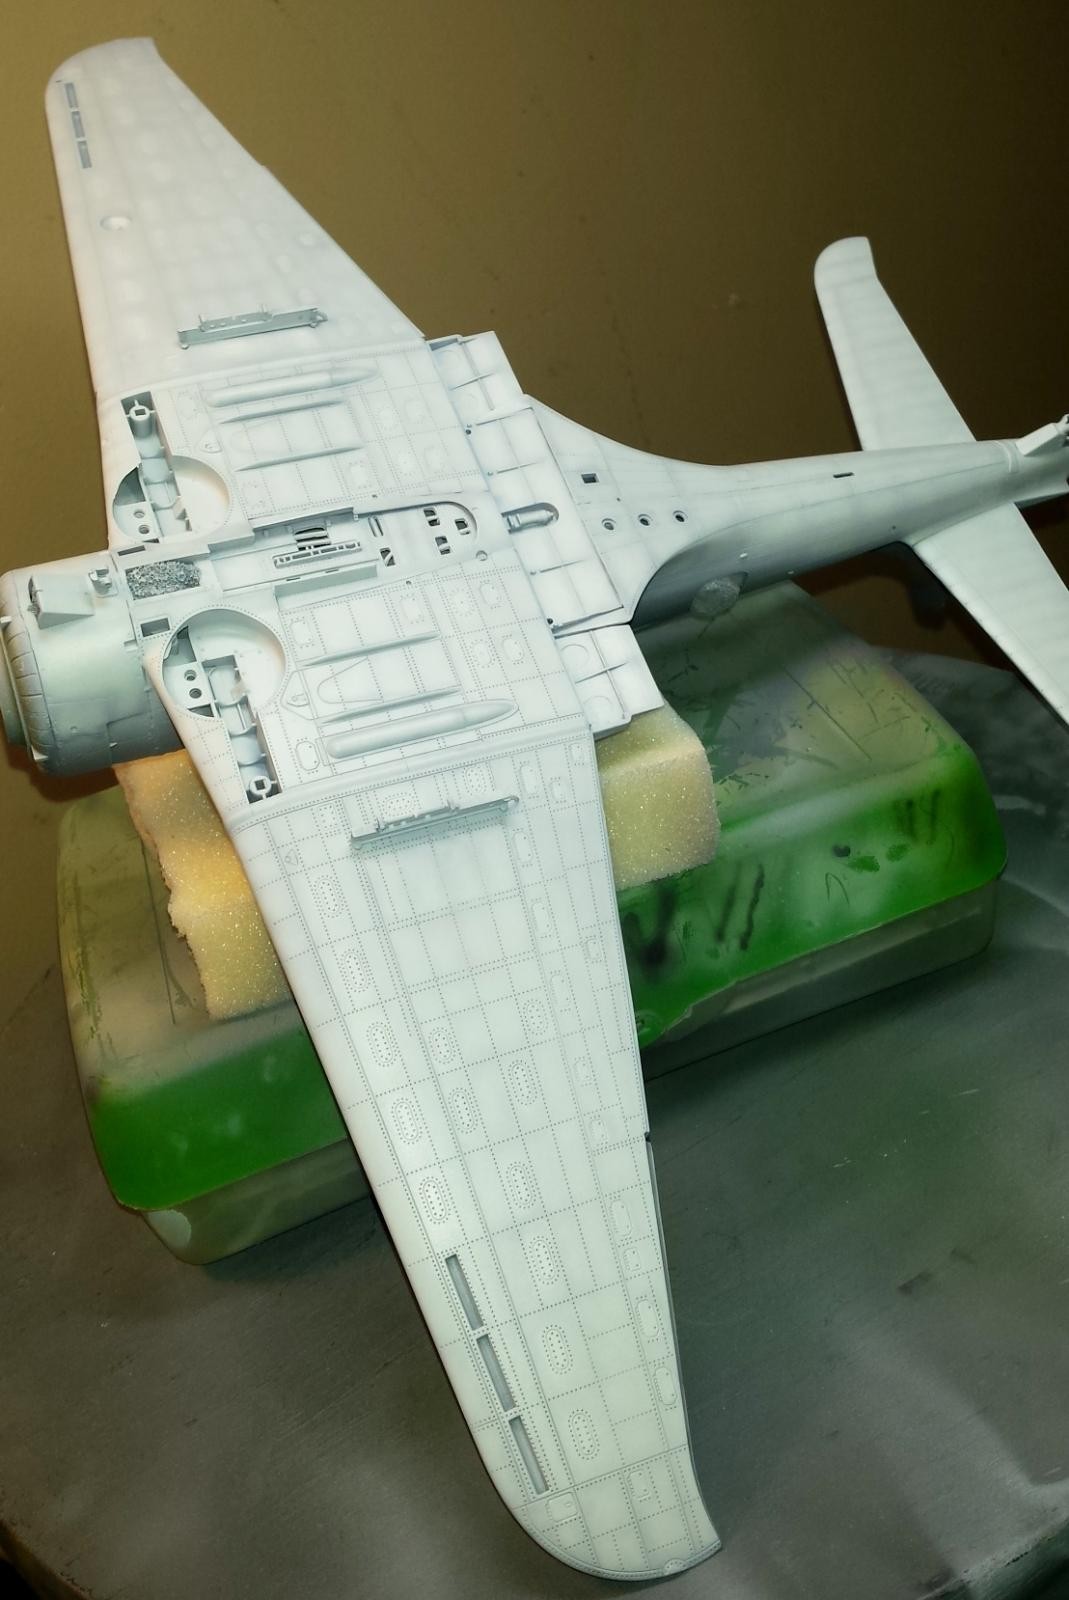
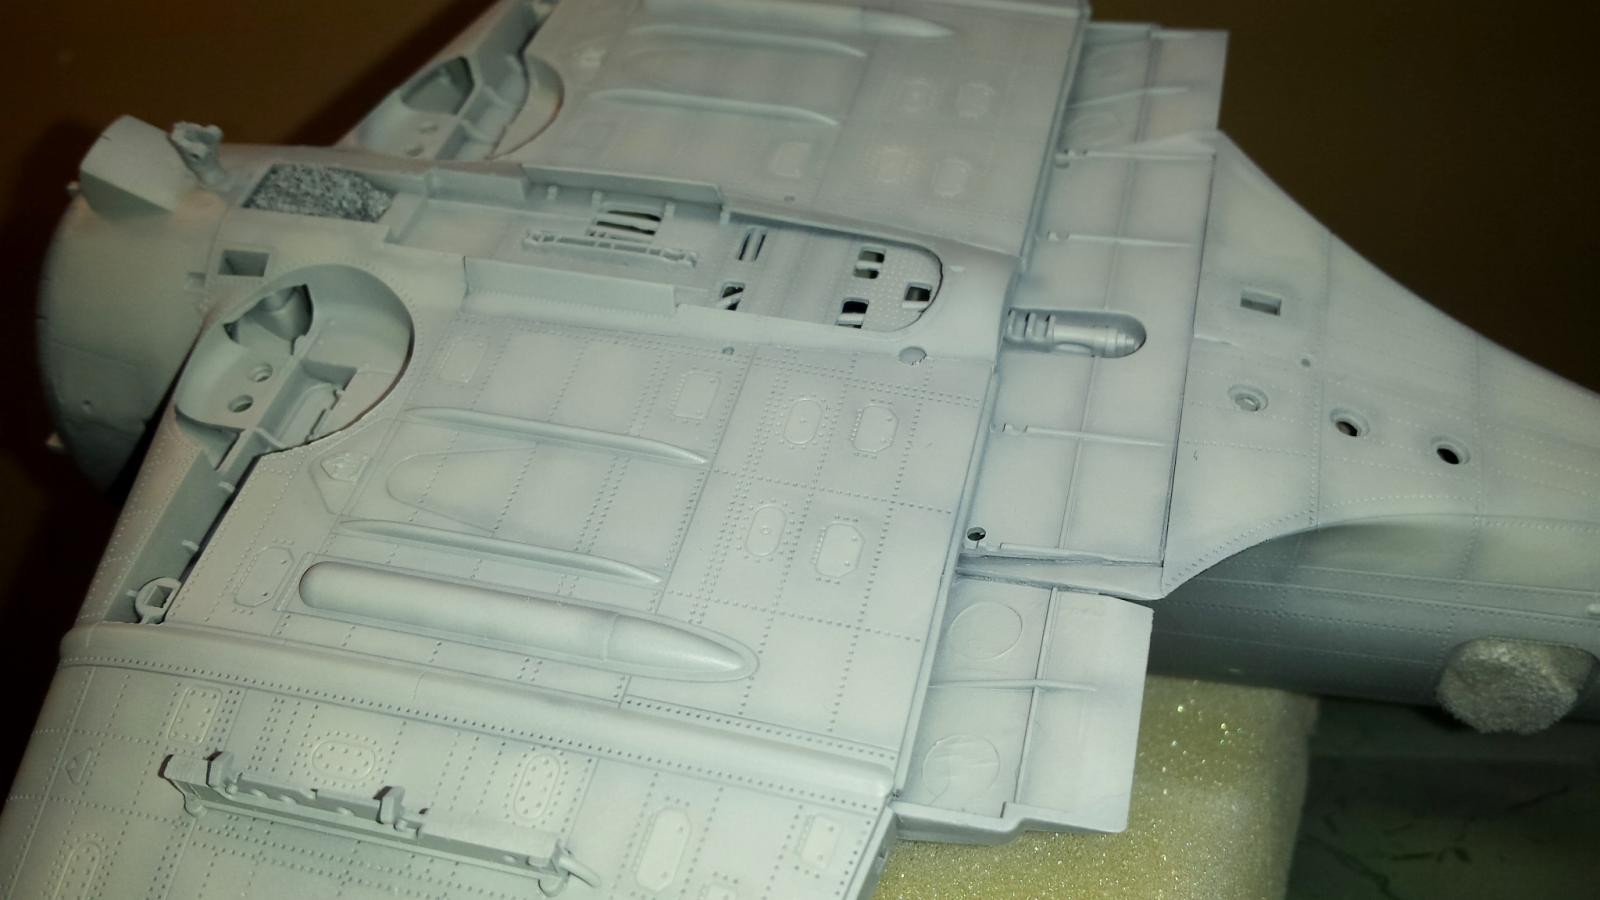
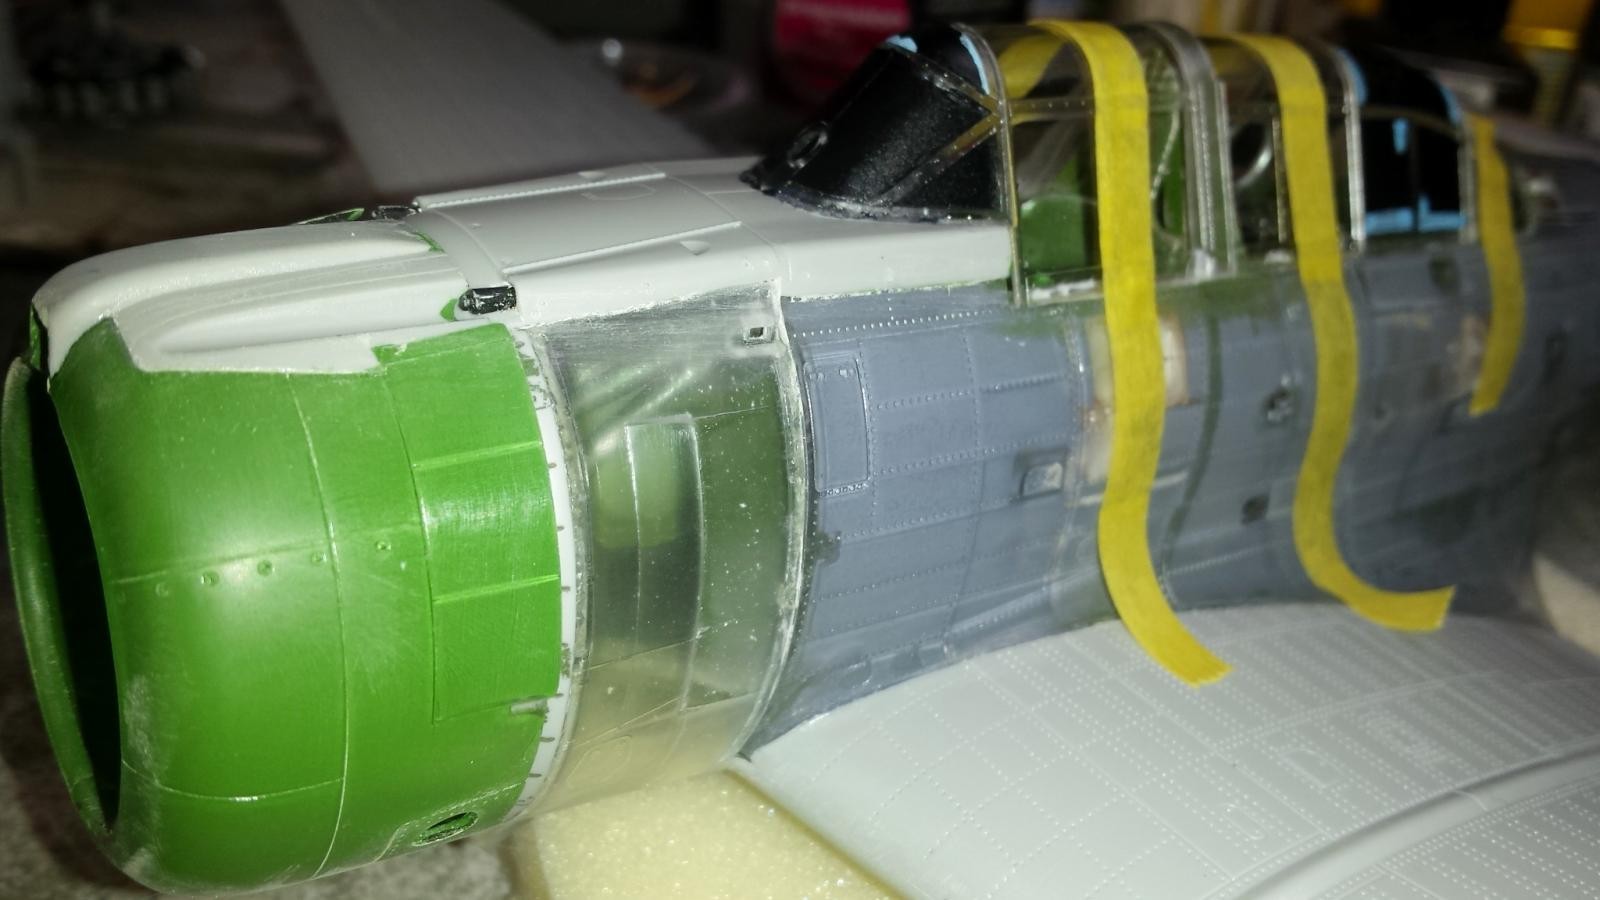
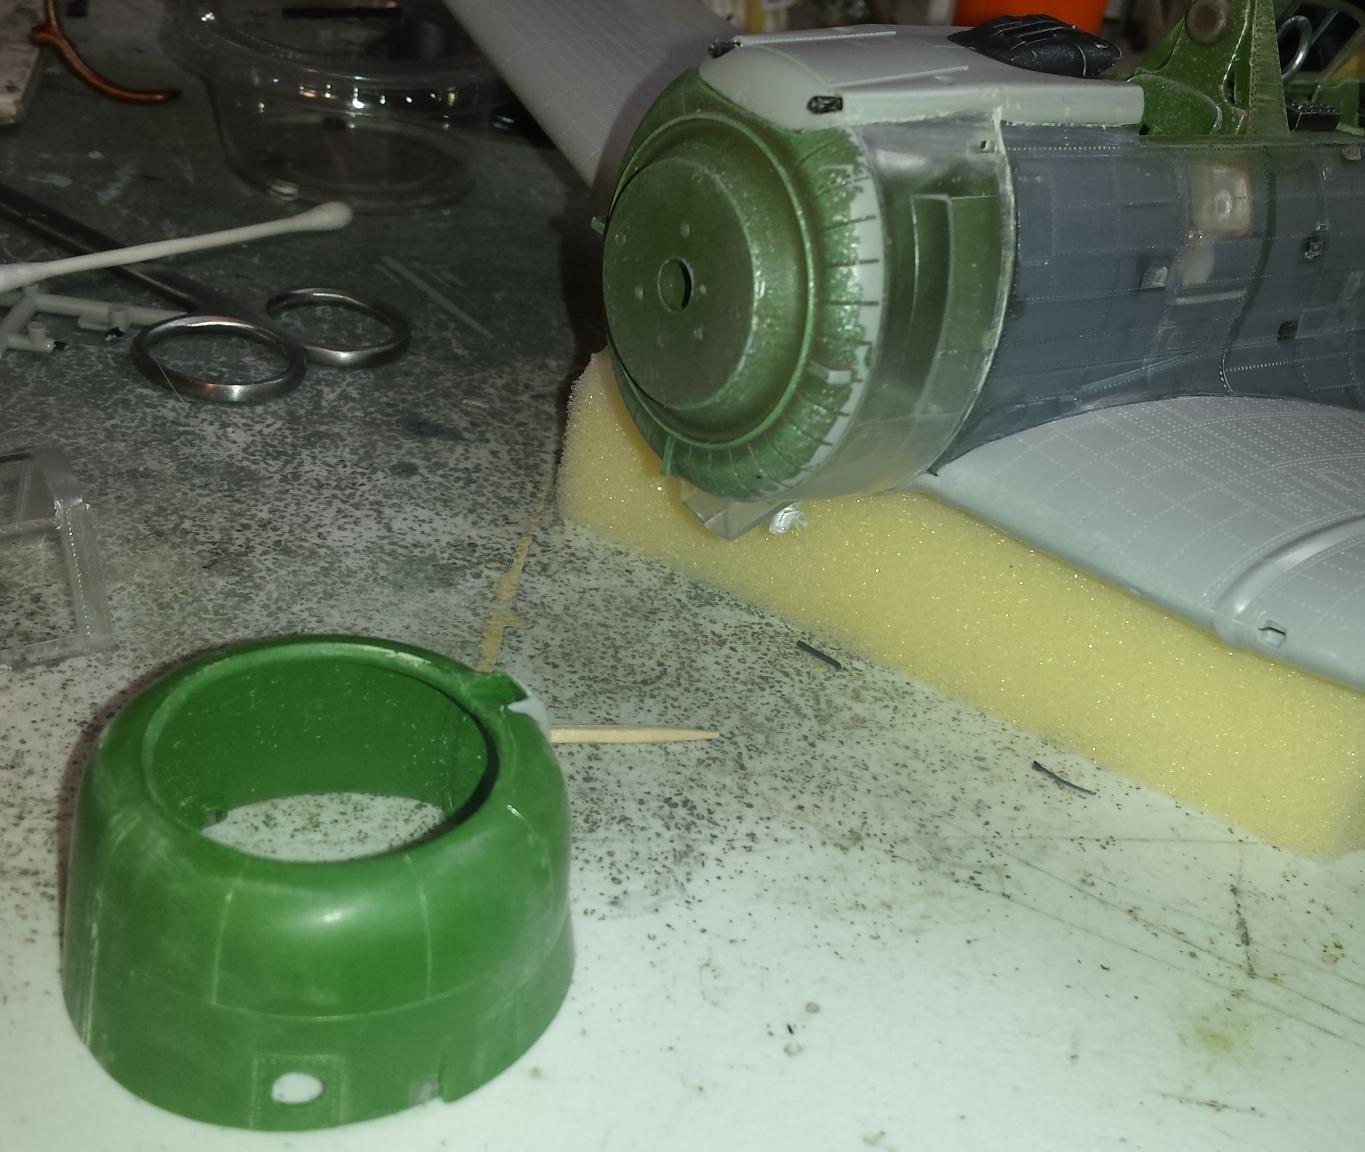
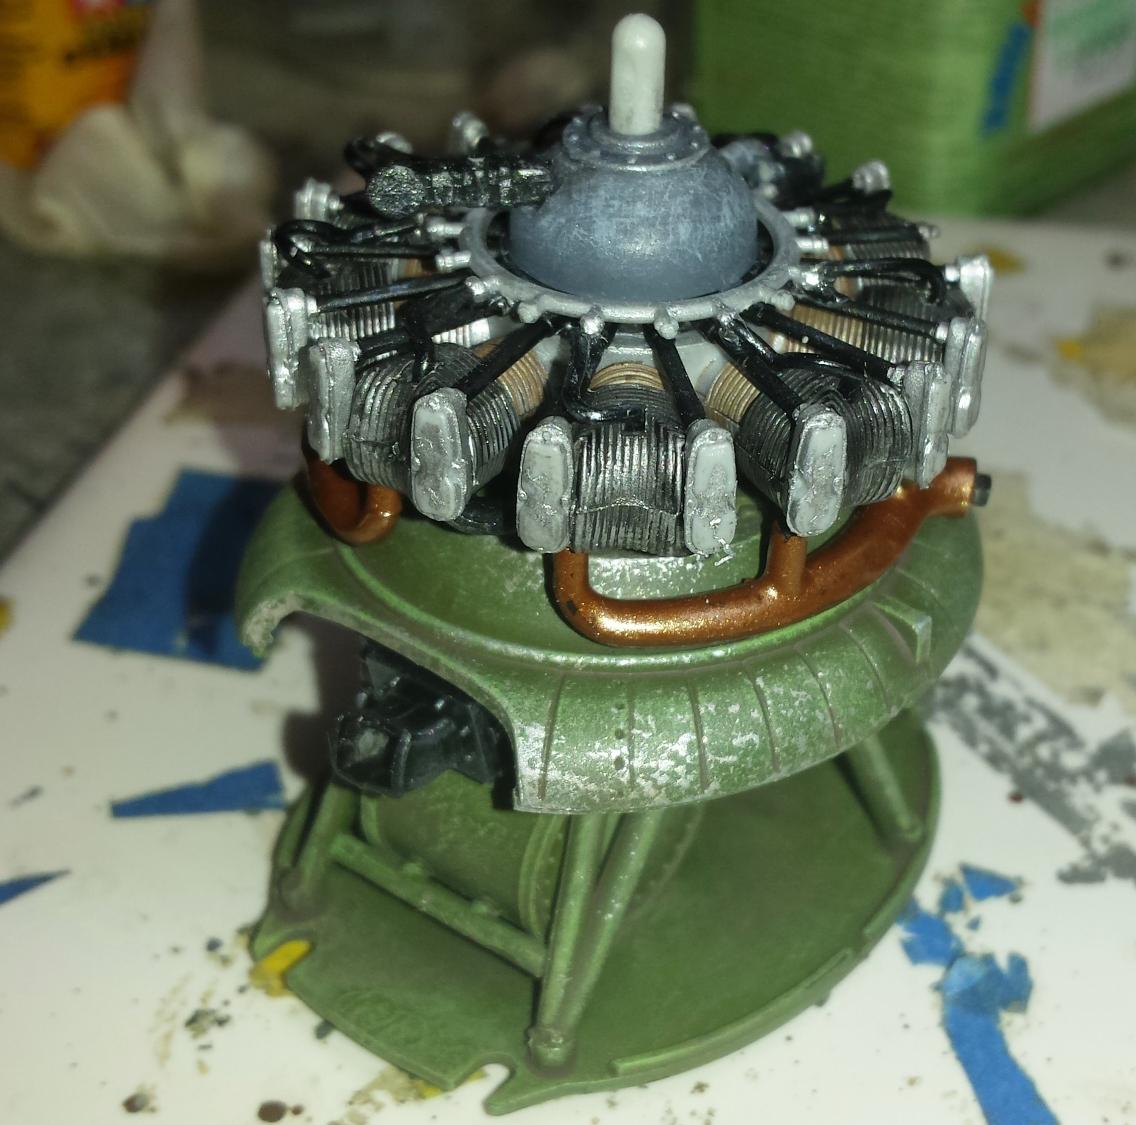
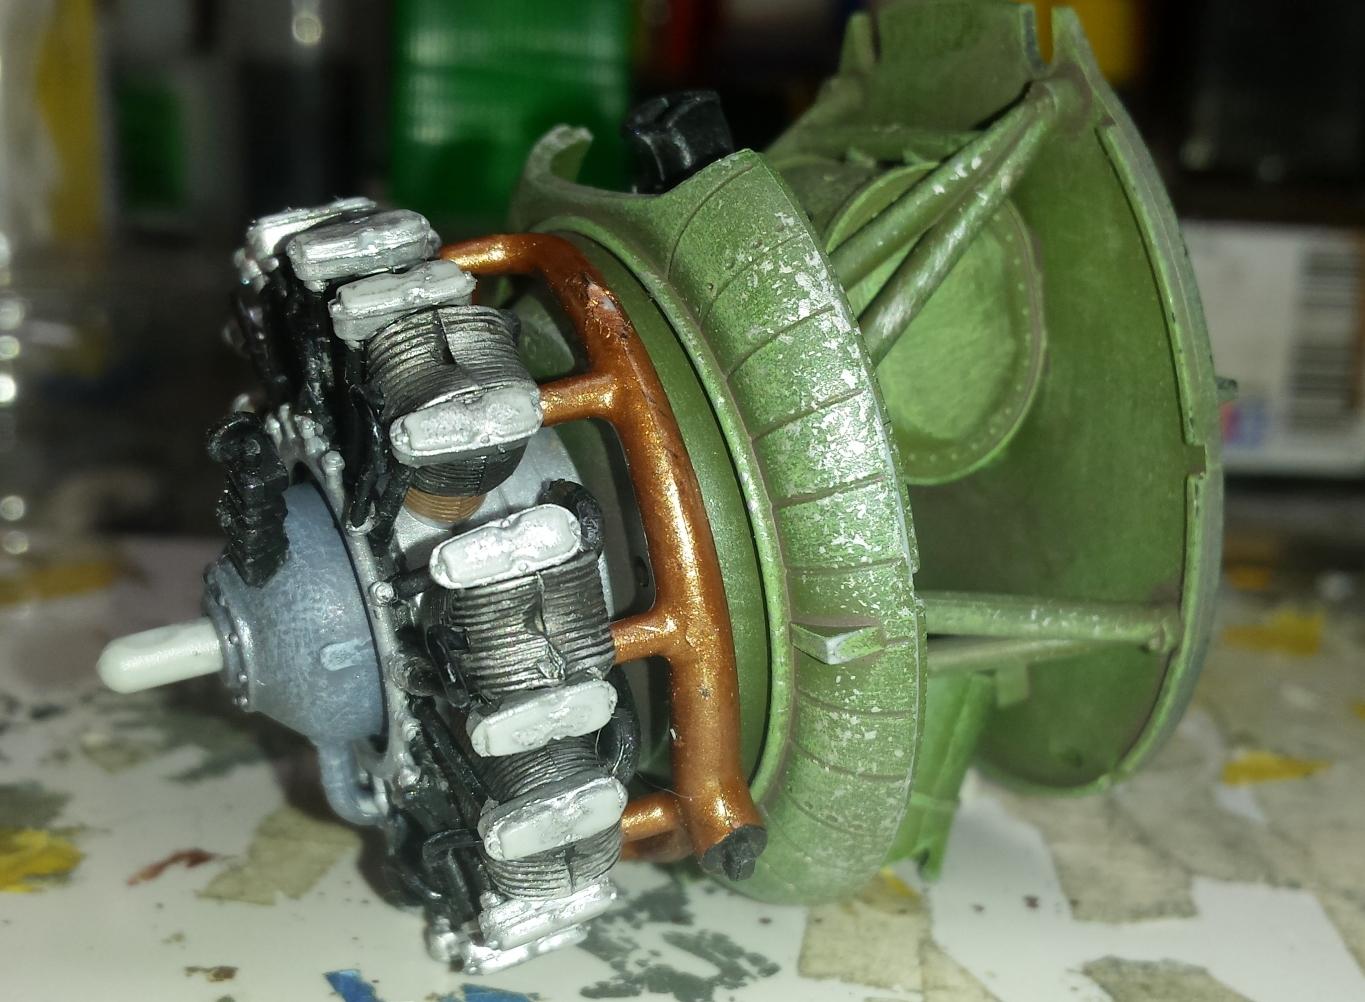
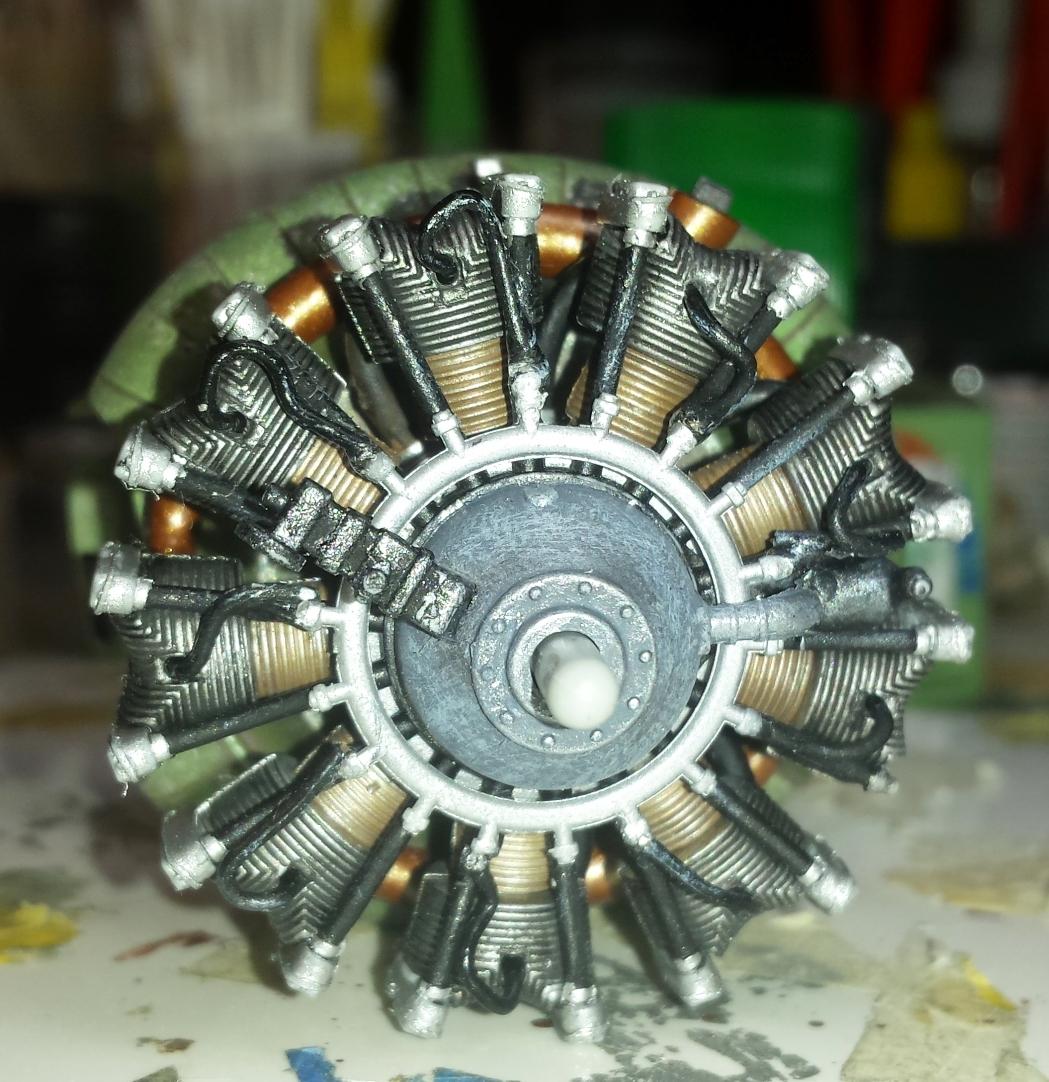
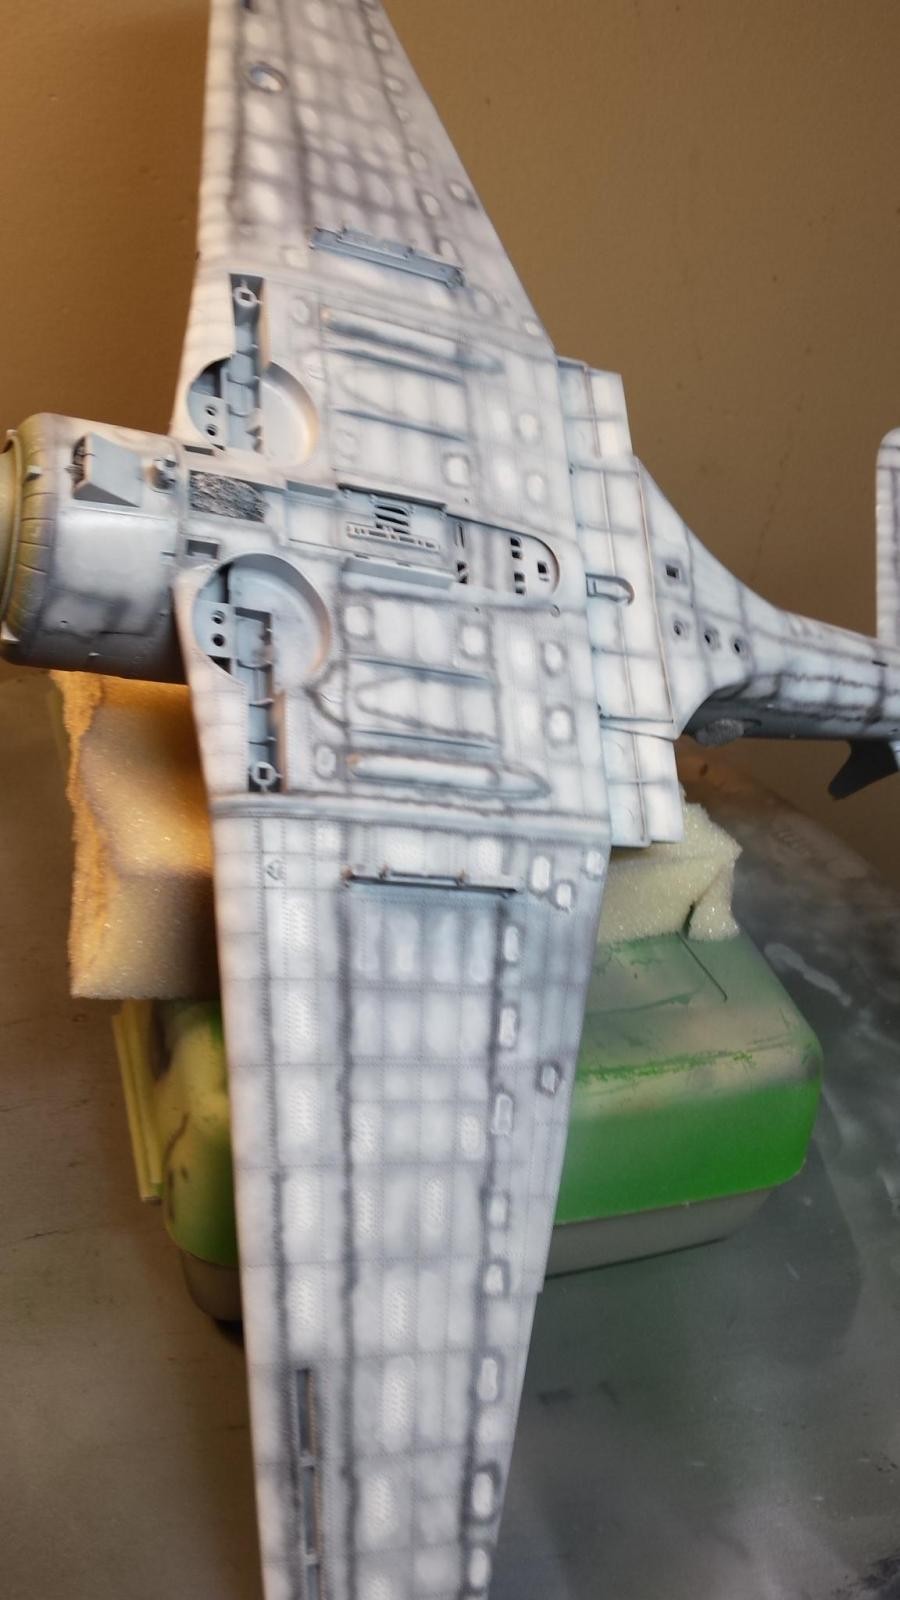
Here are some pictures showing some of the assembly steps I took in building this Trumpeter 1/32 SBD Midway Edition. It is currently completely assembled, or at least assembled enough to start the painting process. Most of it is built OOB except engine and cockpit wiring, cockpit placards, and some instrument dials for radios and electronic equipment.
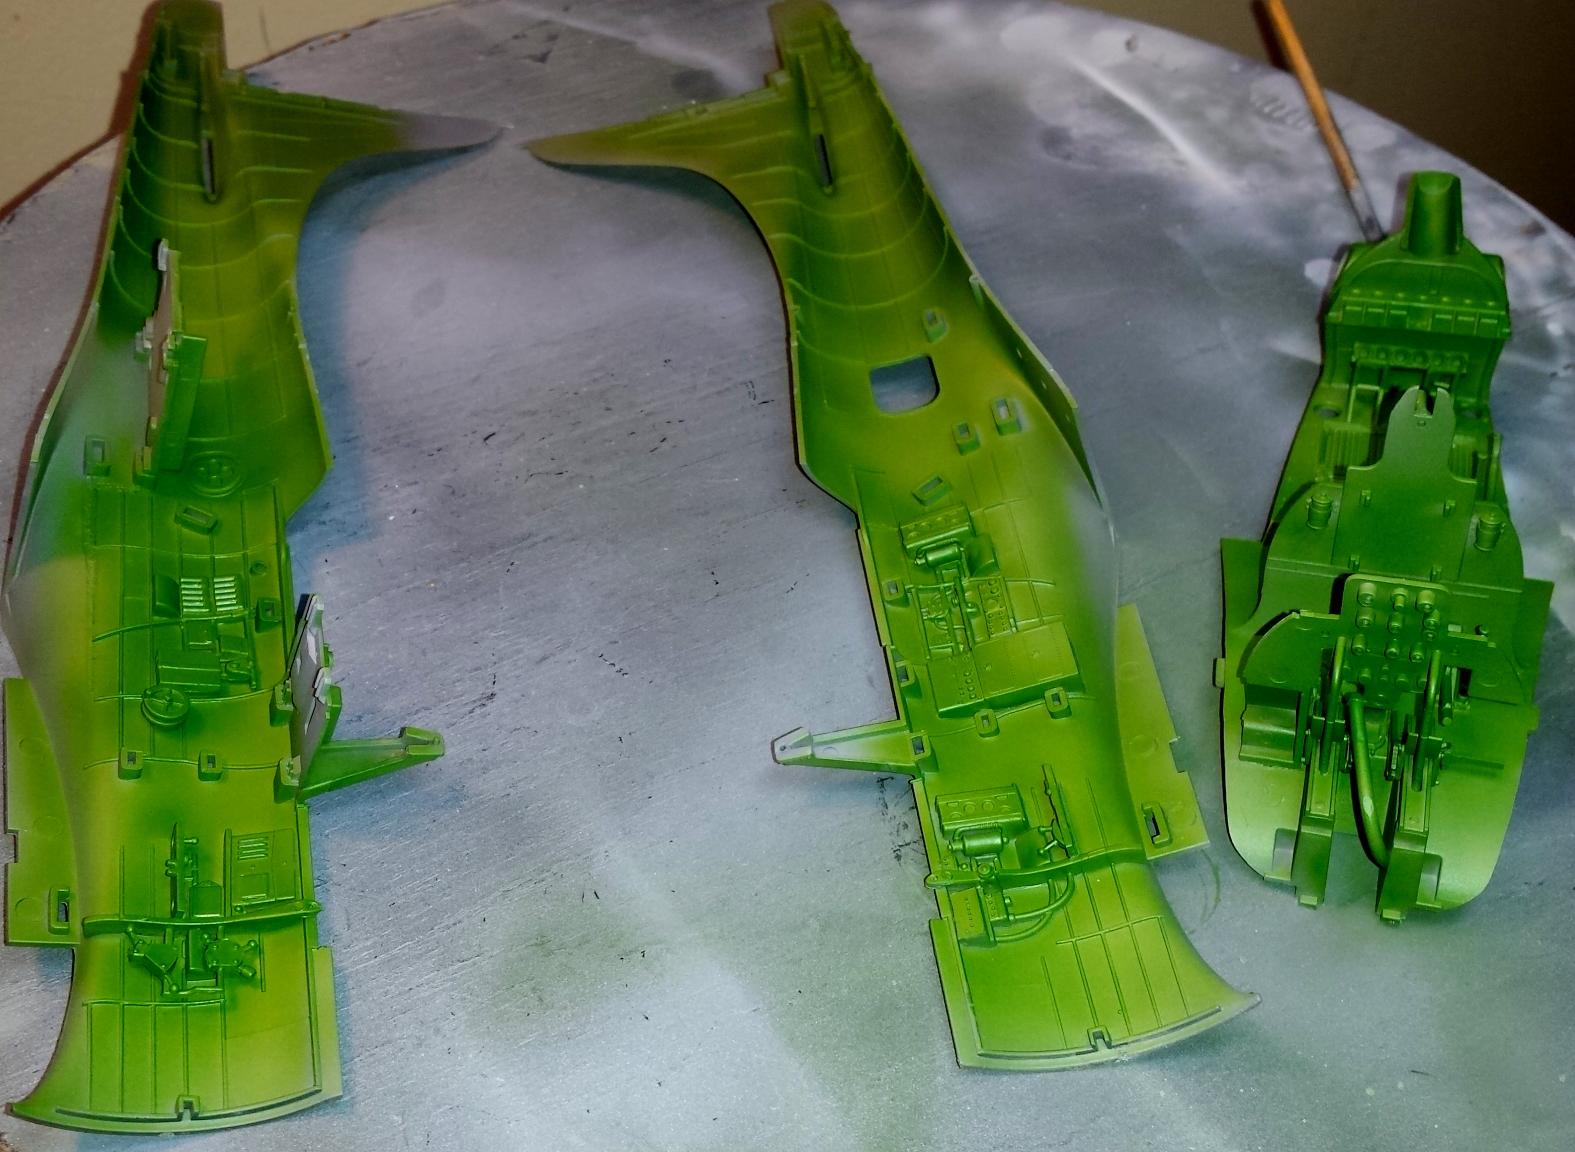
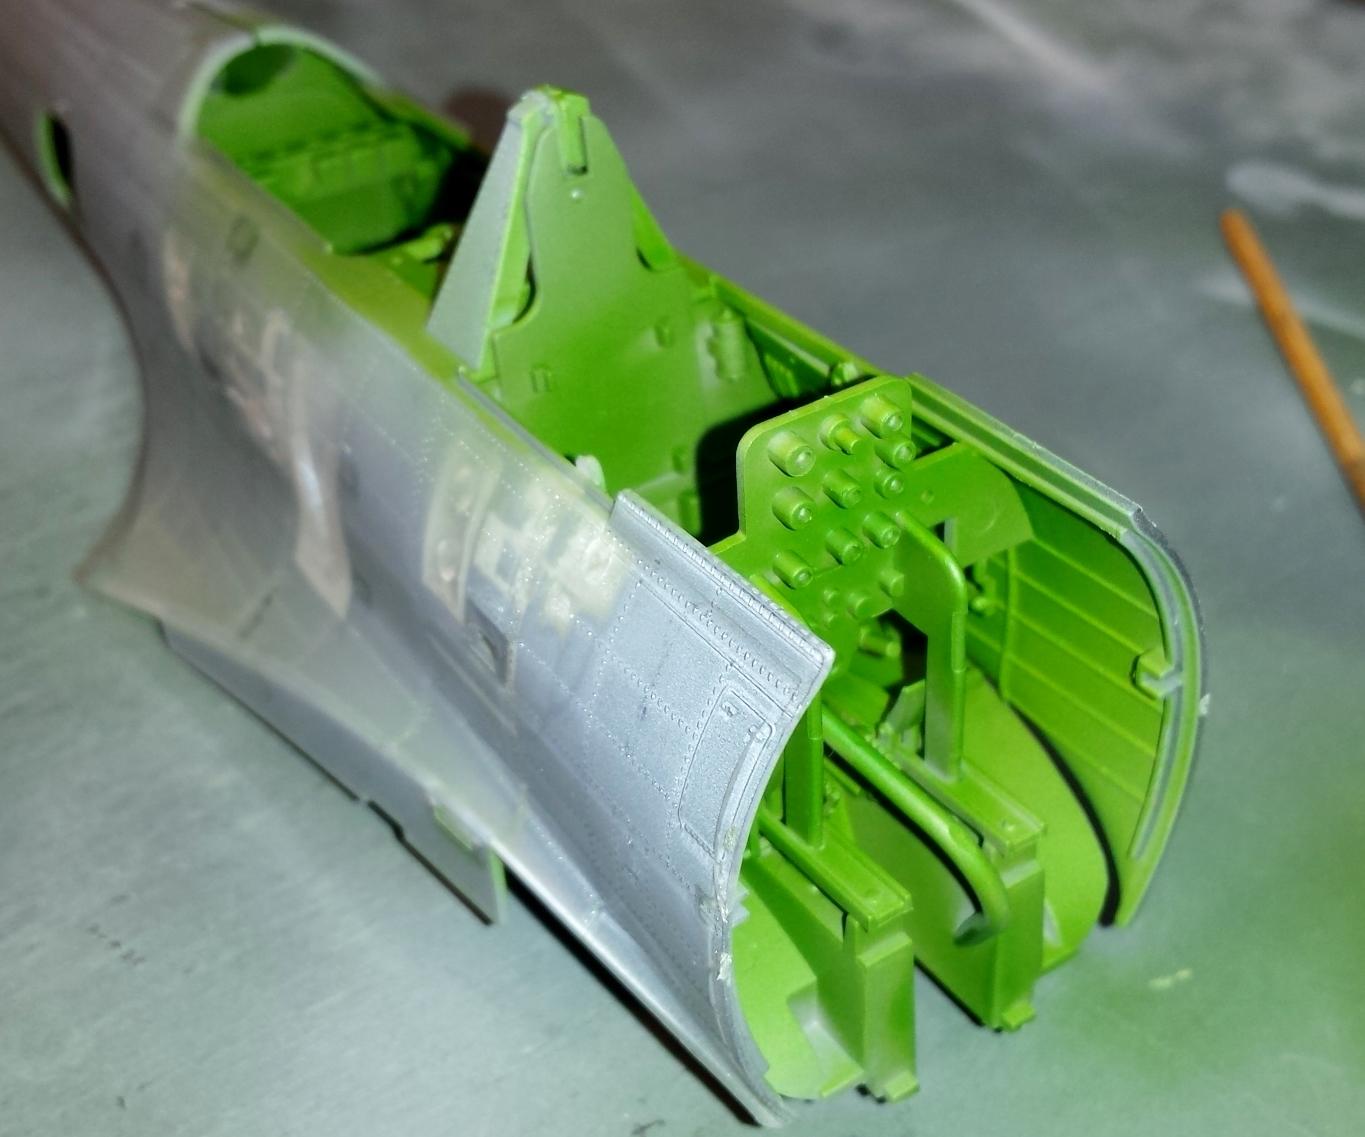
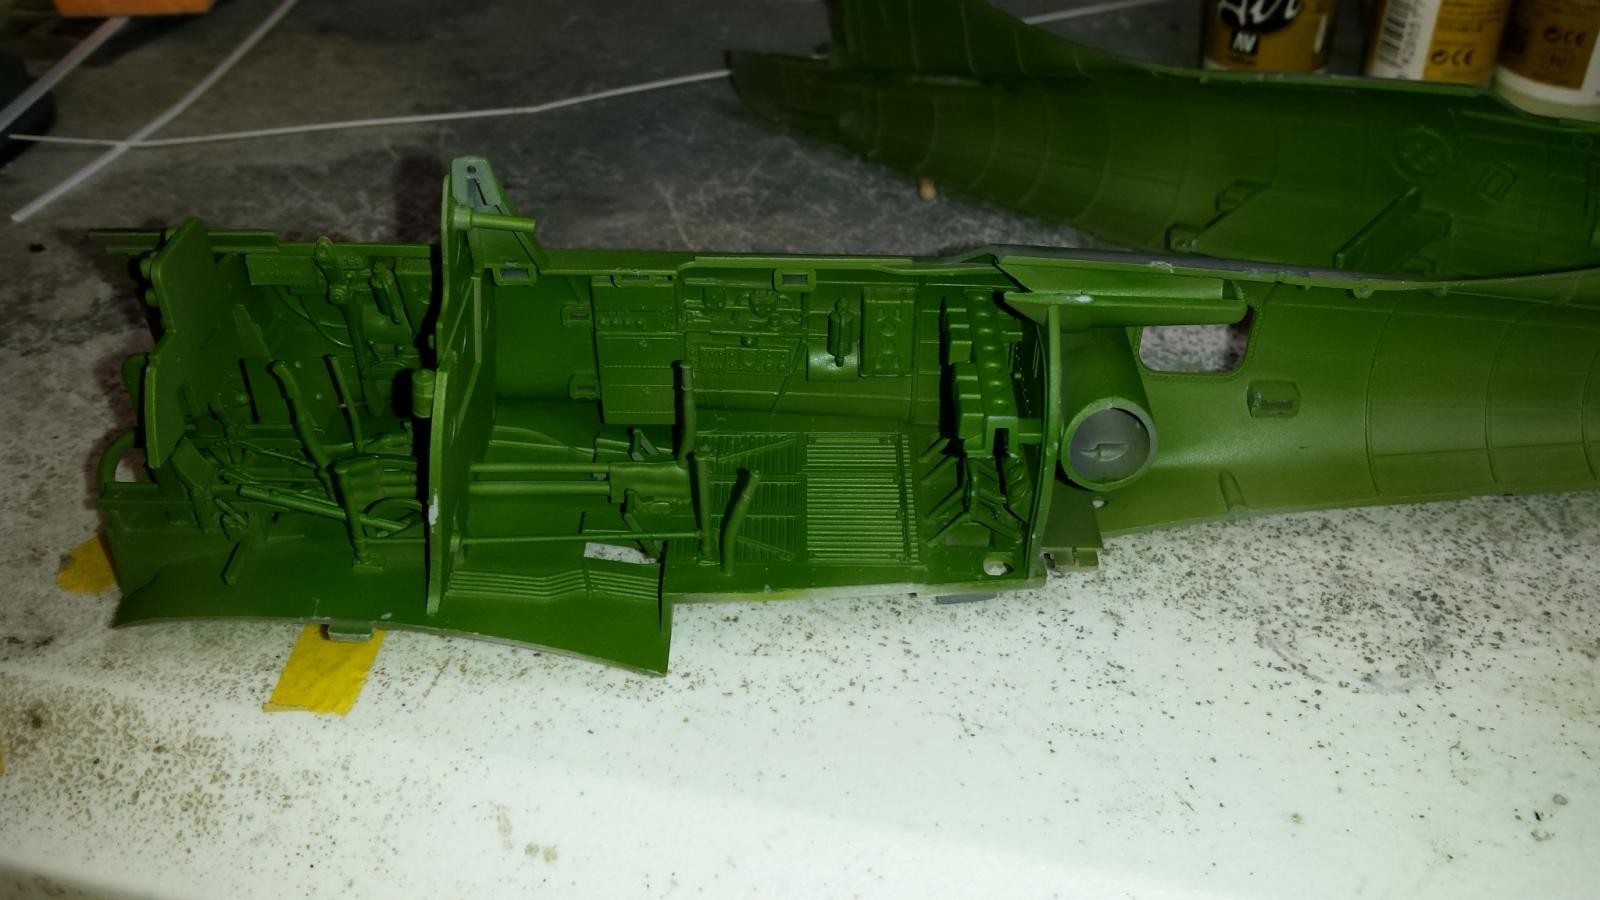
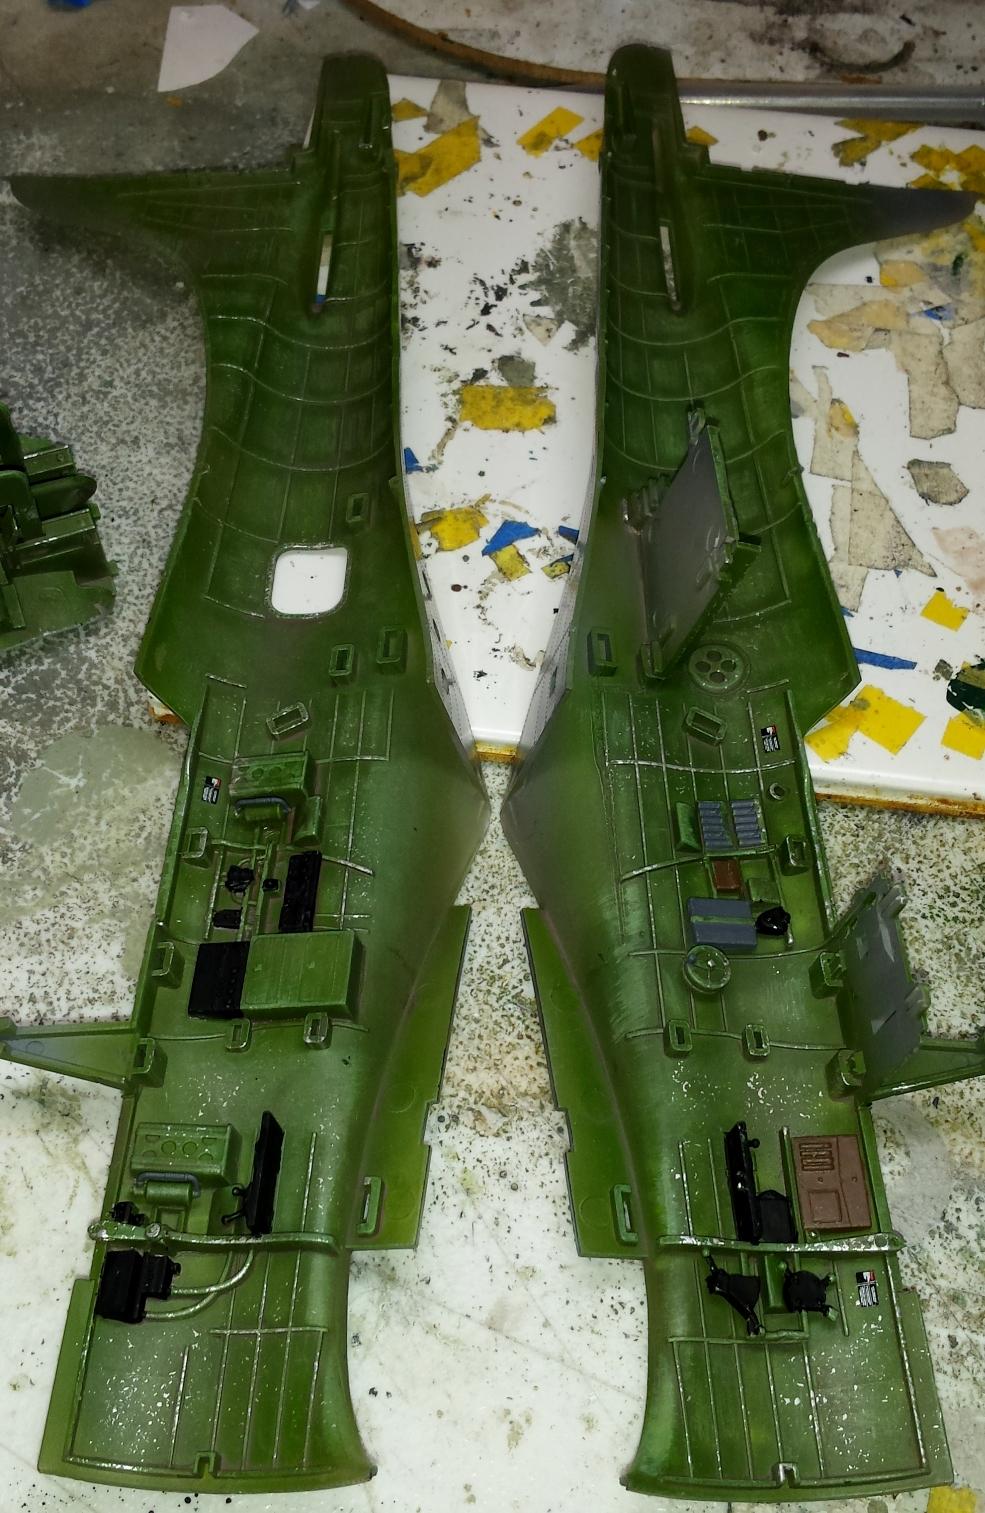
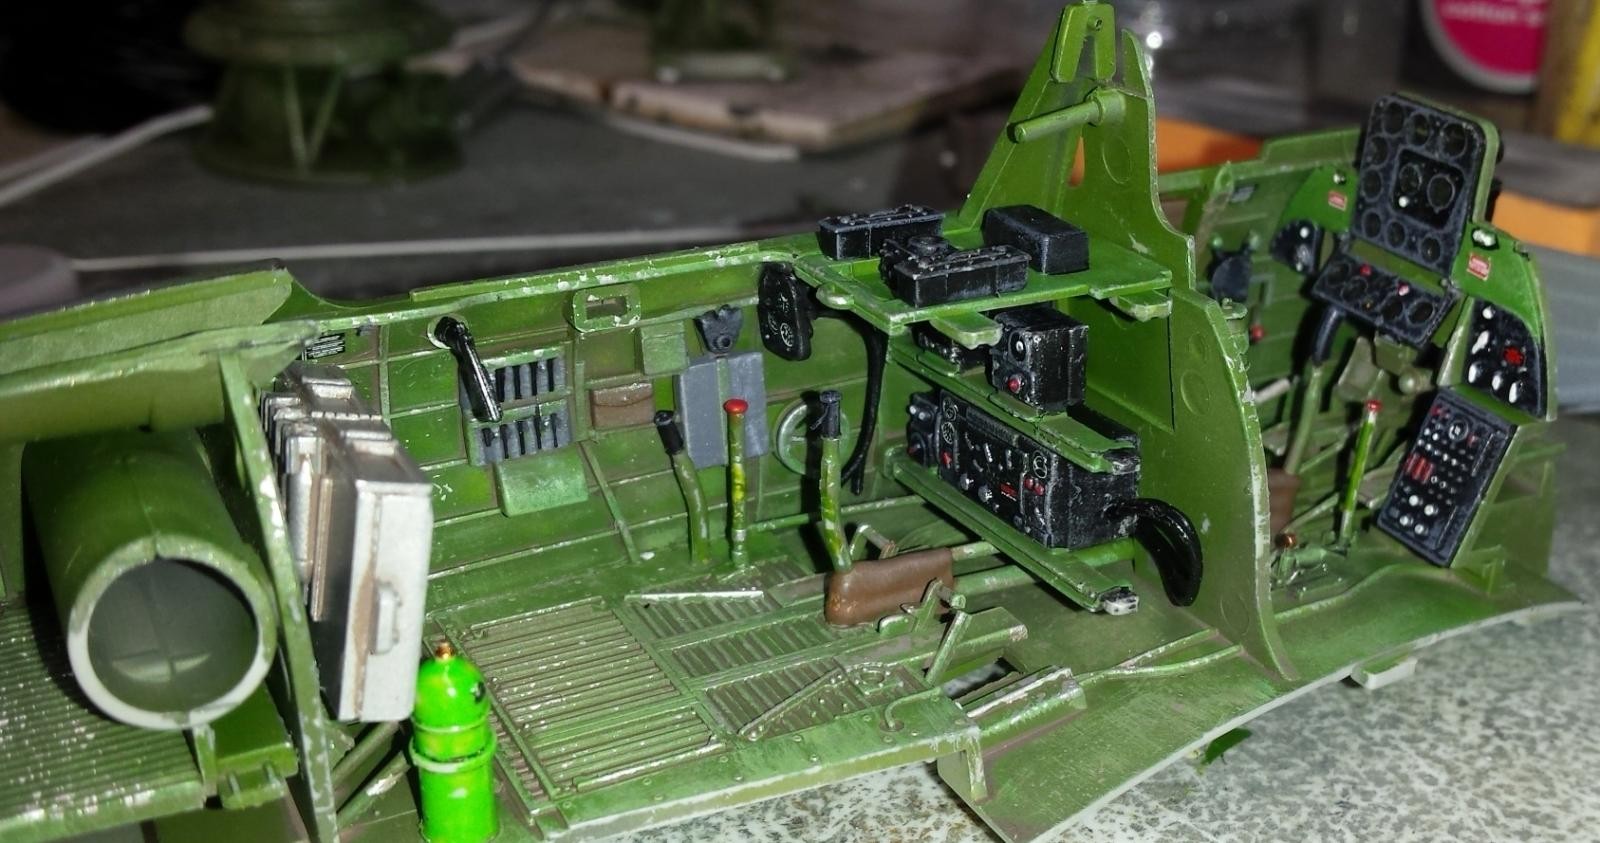
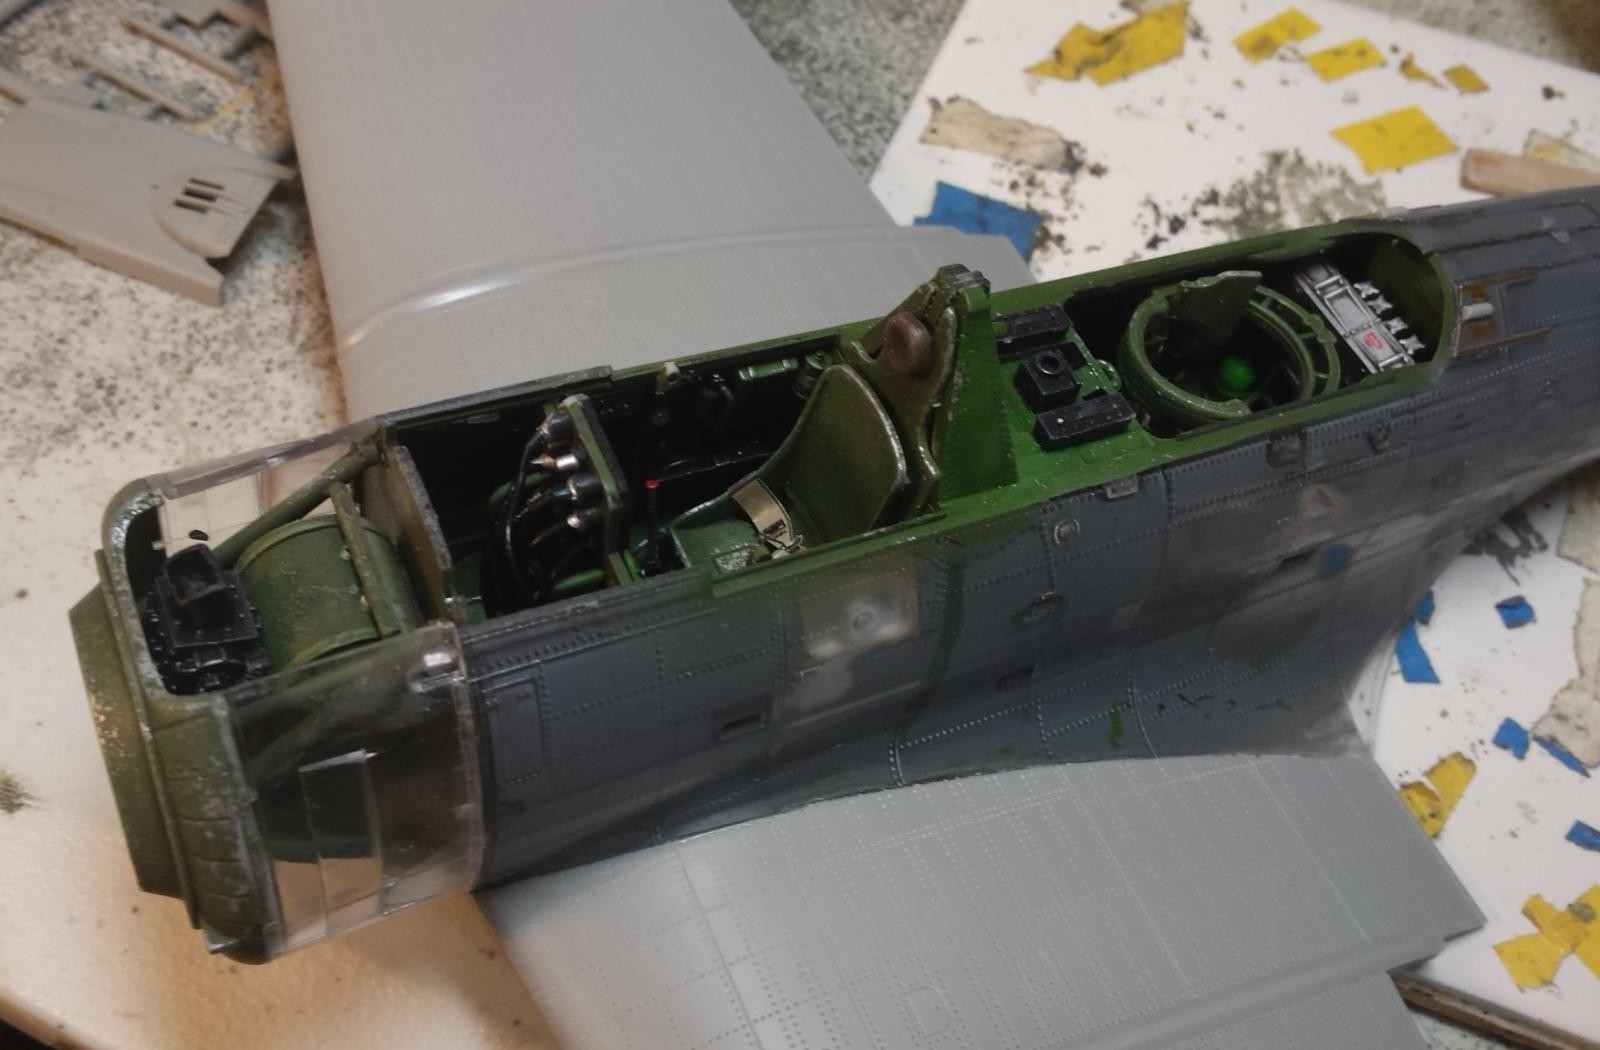
The interior was primed in Dark Grey then a coat of zinc-chromate was added to complete the interior base color. Several lighter shades were used to enhance fuselage walls then a dark enamel wash was applied to weather the cockpit sides and cockpit assembly.
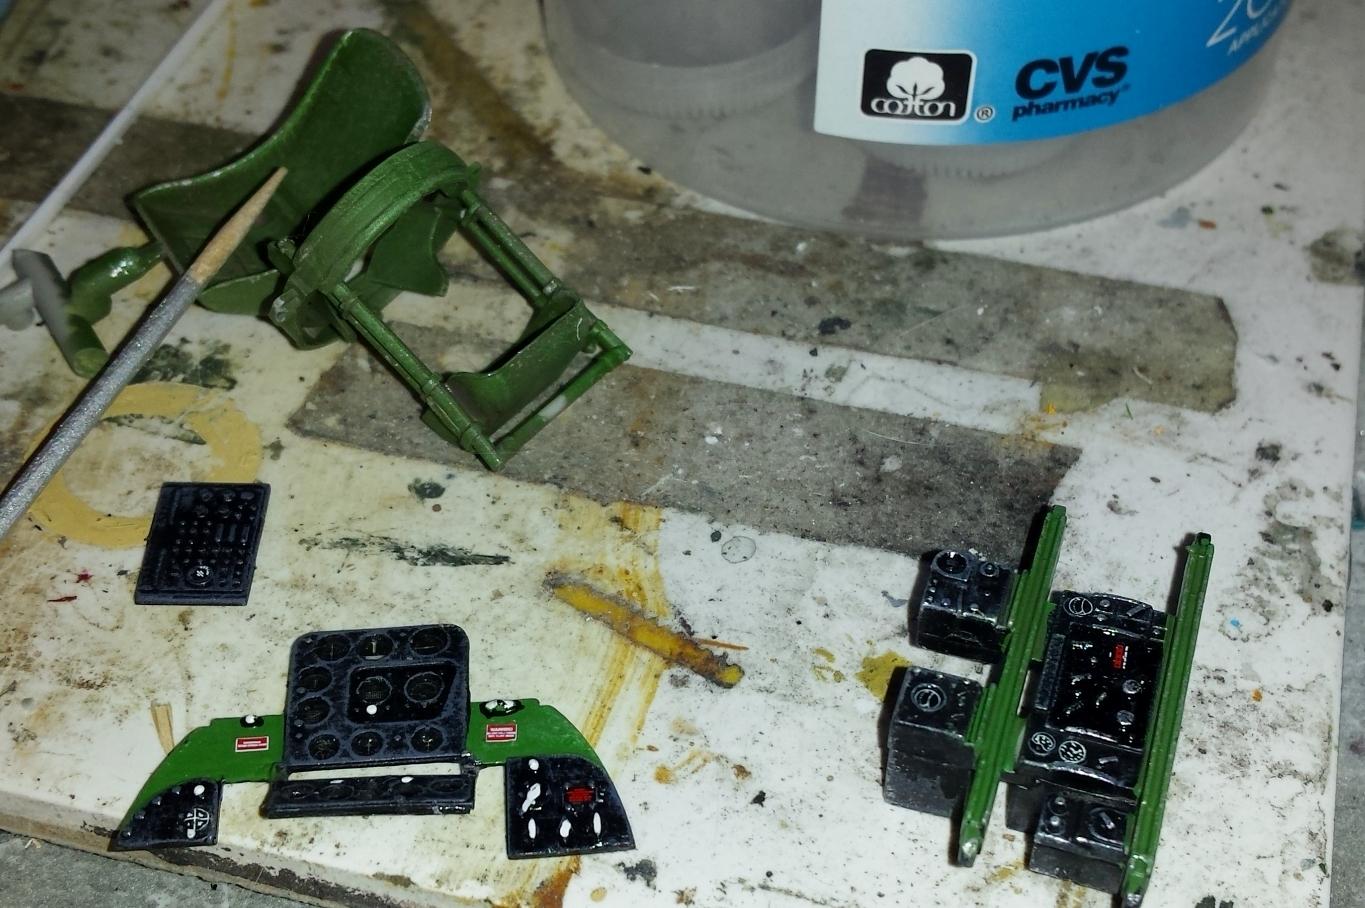
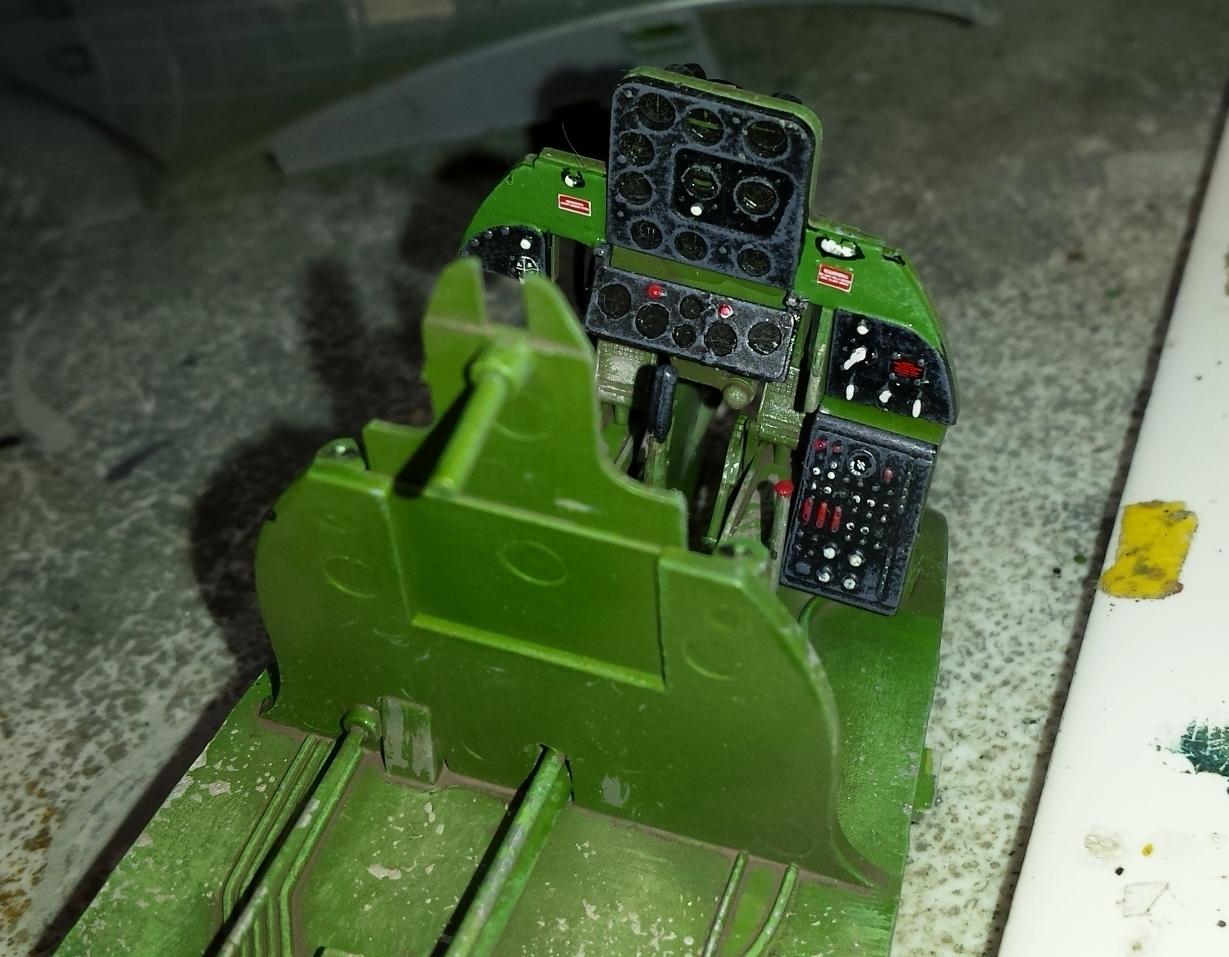
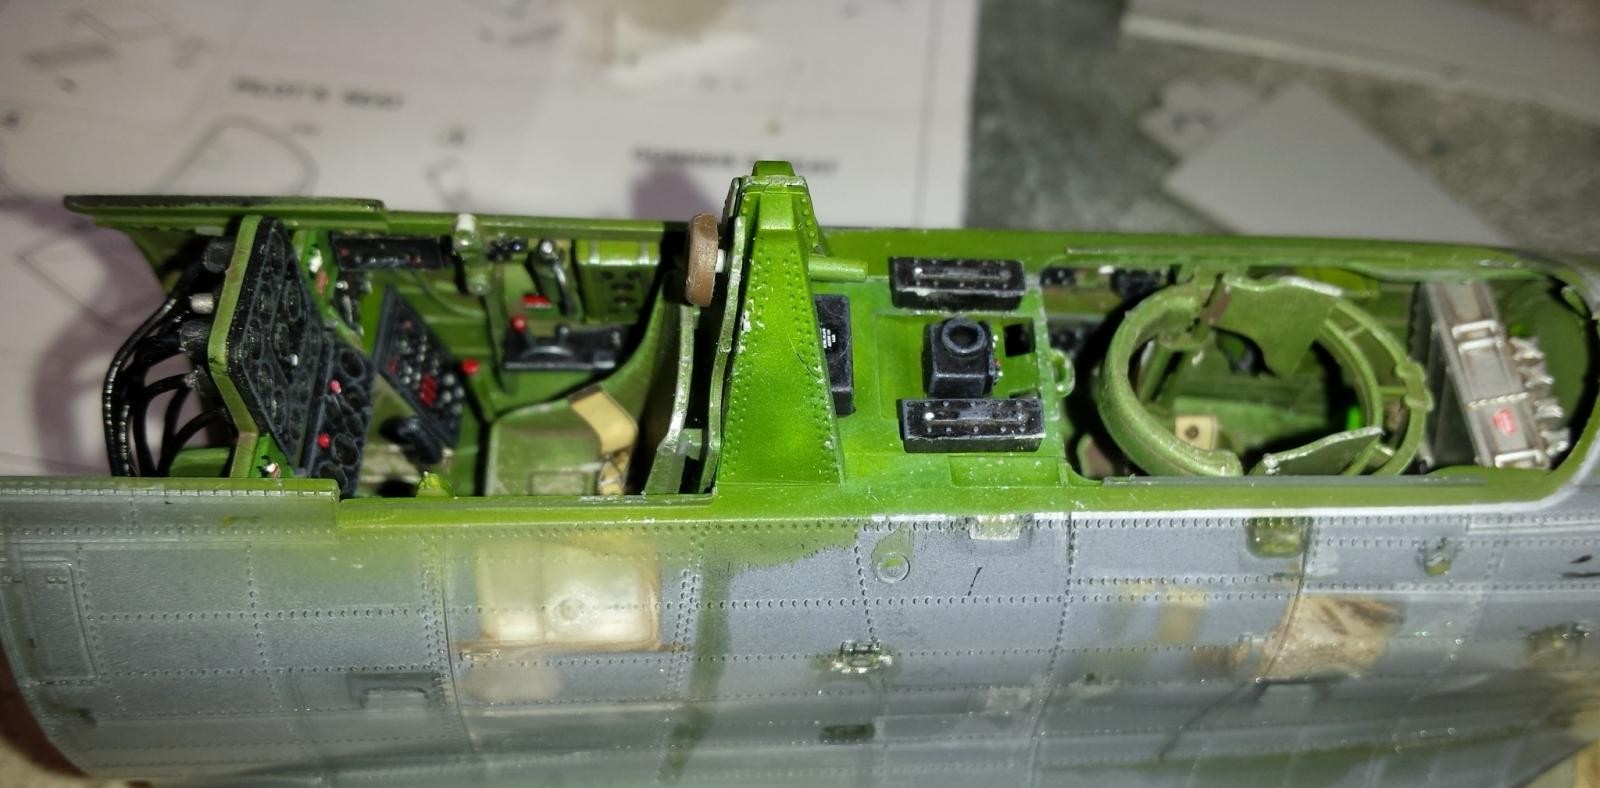
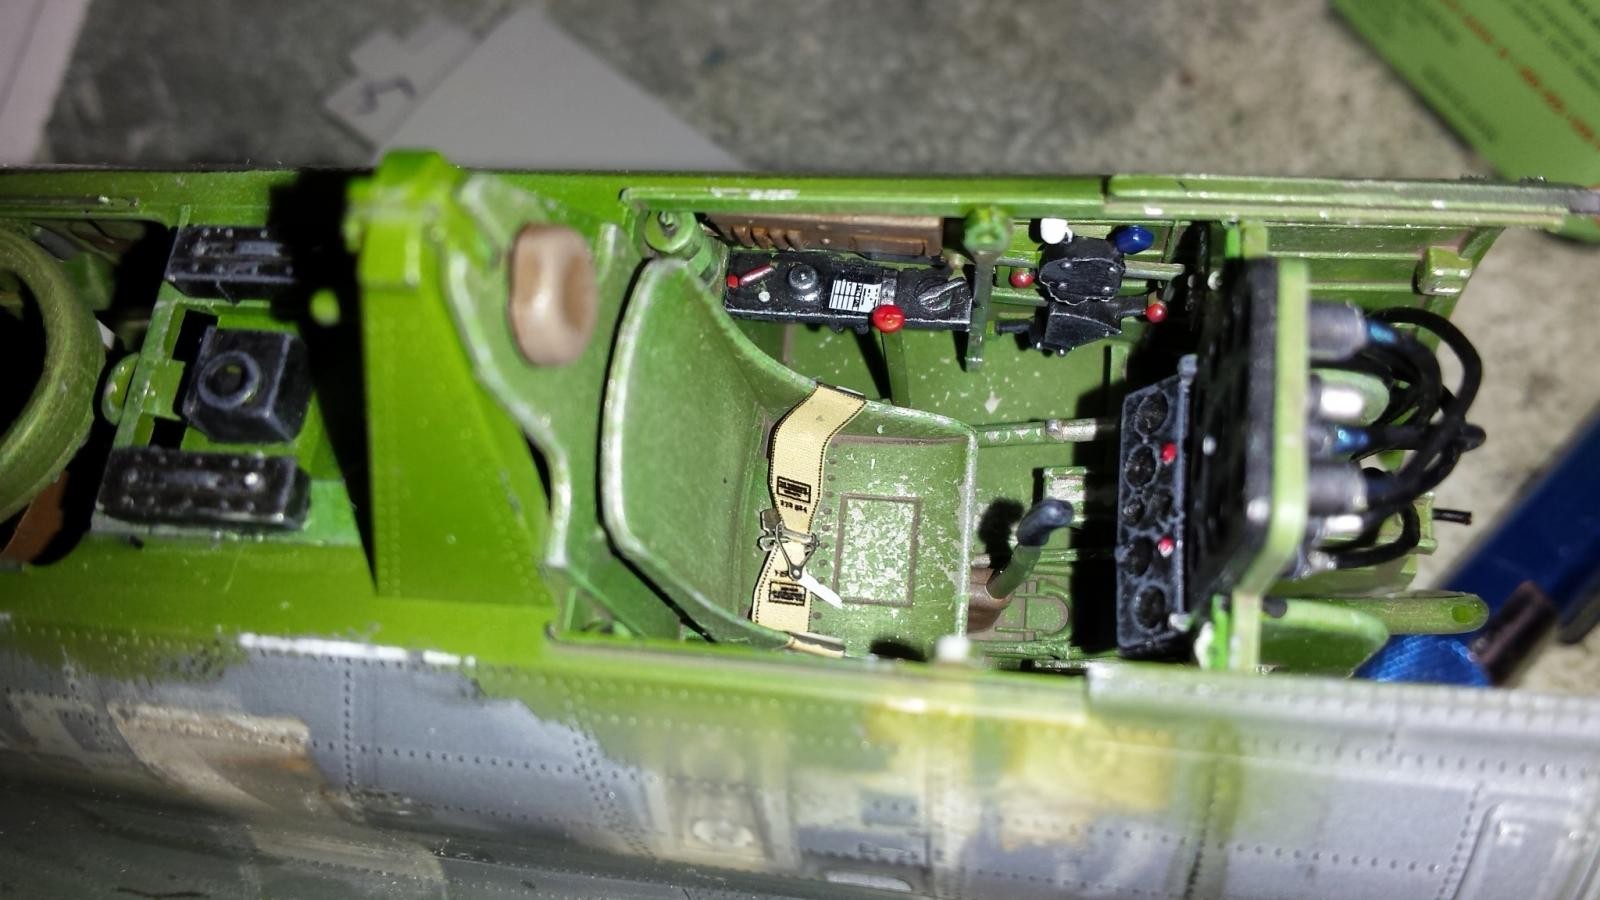
The cockpit is very detailed right out of the box. It assembles well and requires lots of fine detail painting. The instrument panel had the dials drilled out to avoid needing to mask the dials prior to painting black. Also the real aircraft has recessed dials not raised dials as provided on the stock IP.
The seat belts for front and back are painted photo-etch. Some from the stock kit others from an after-market kit.
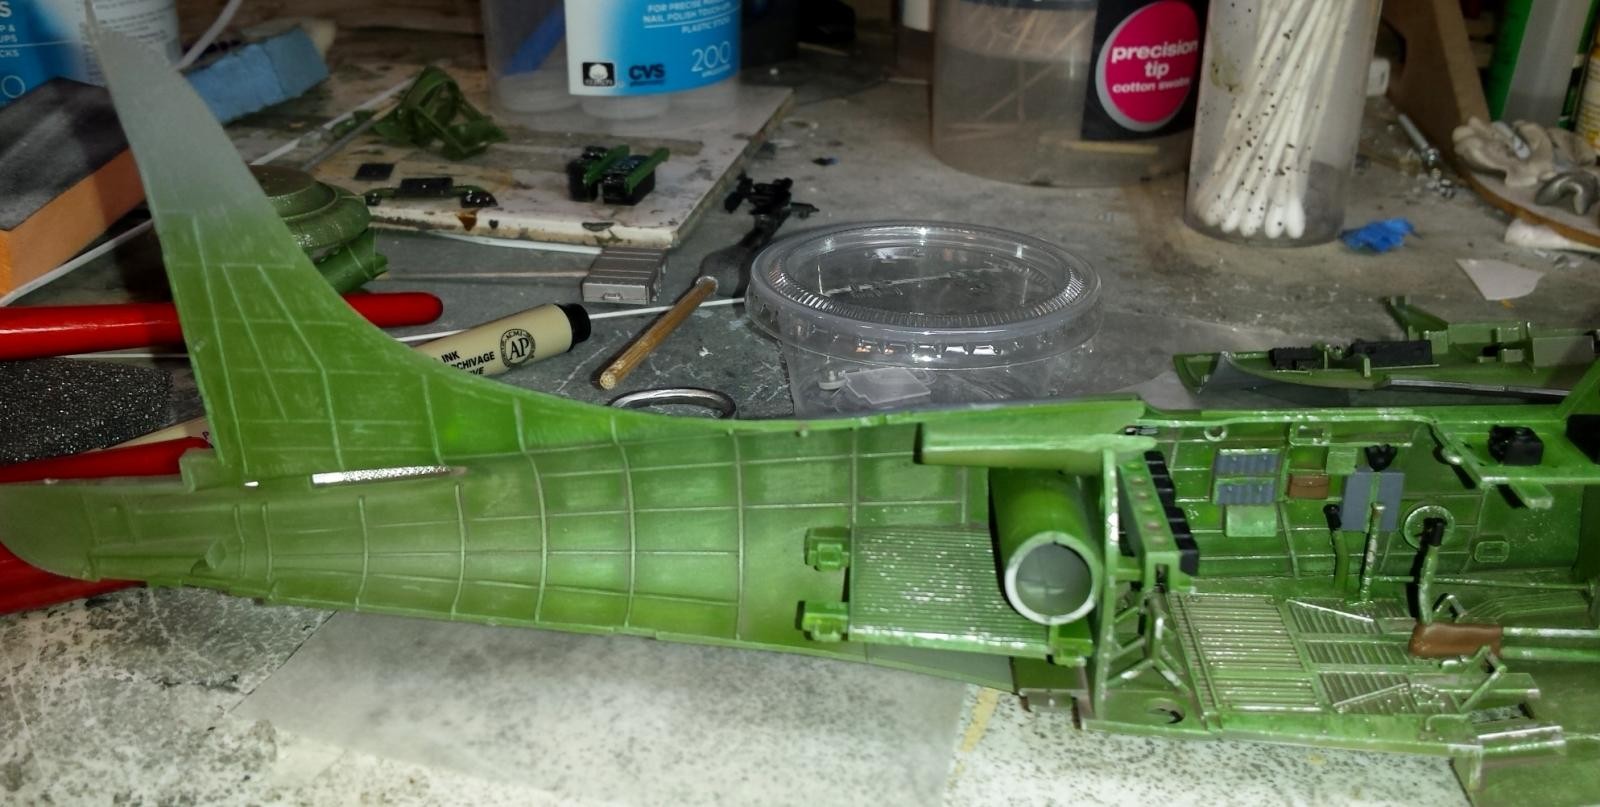
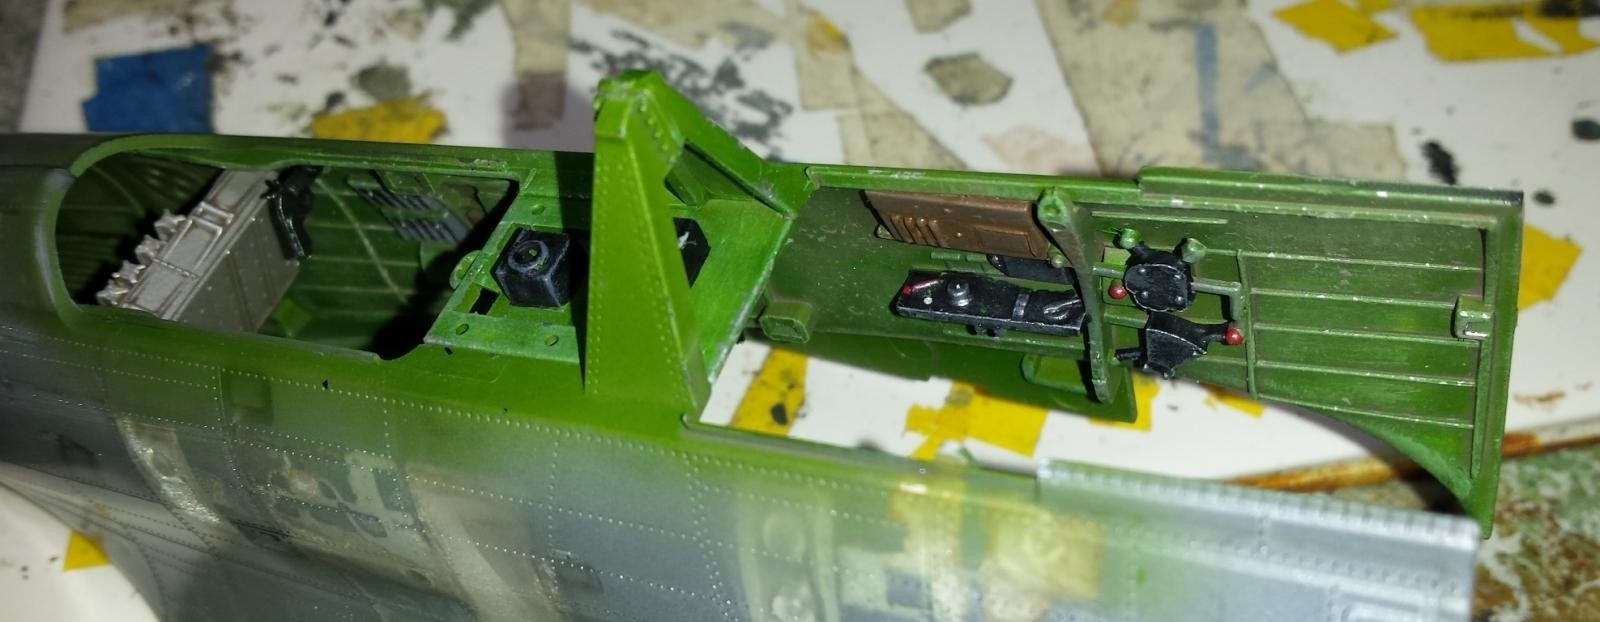
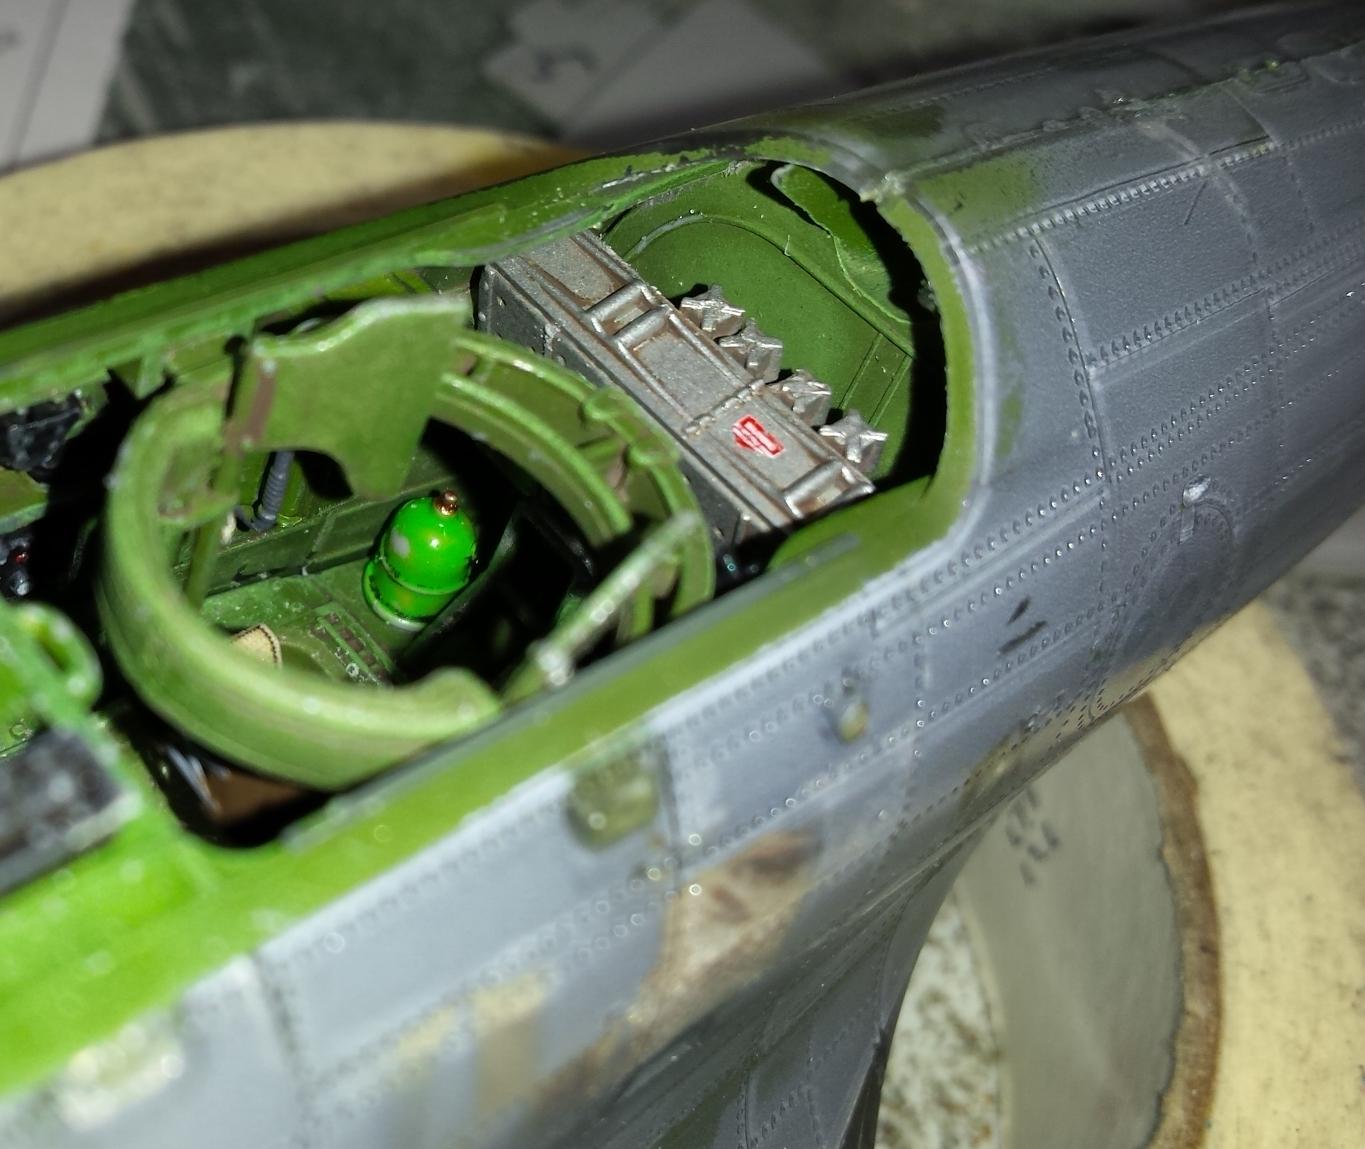
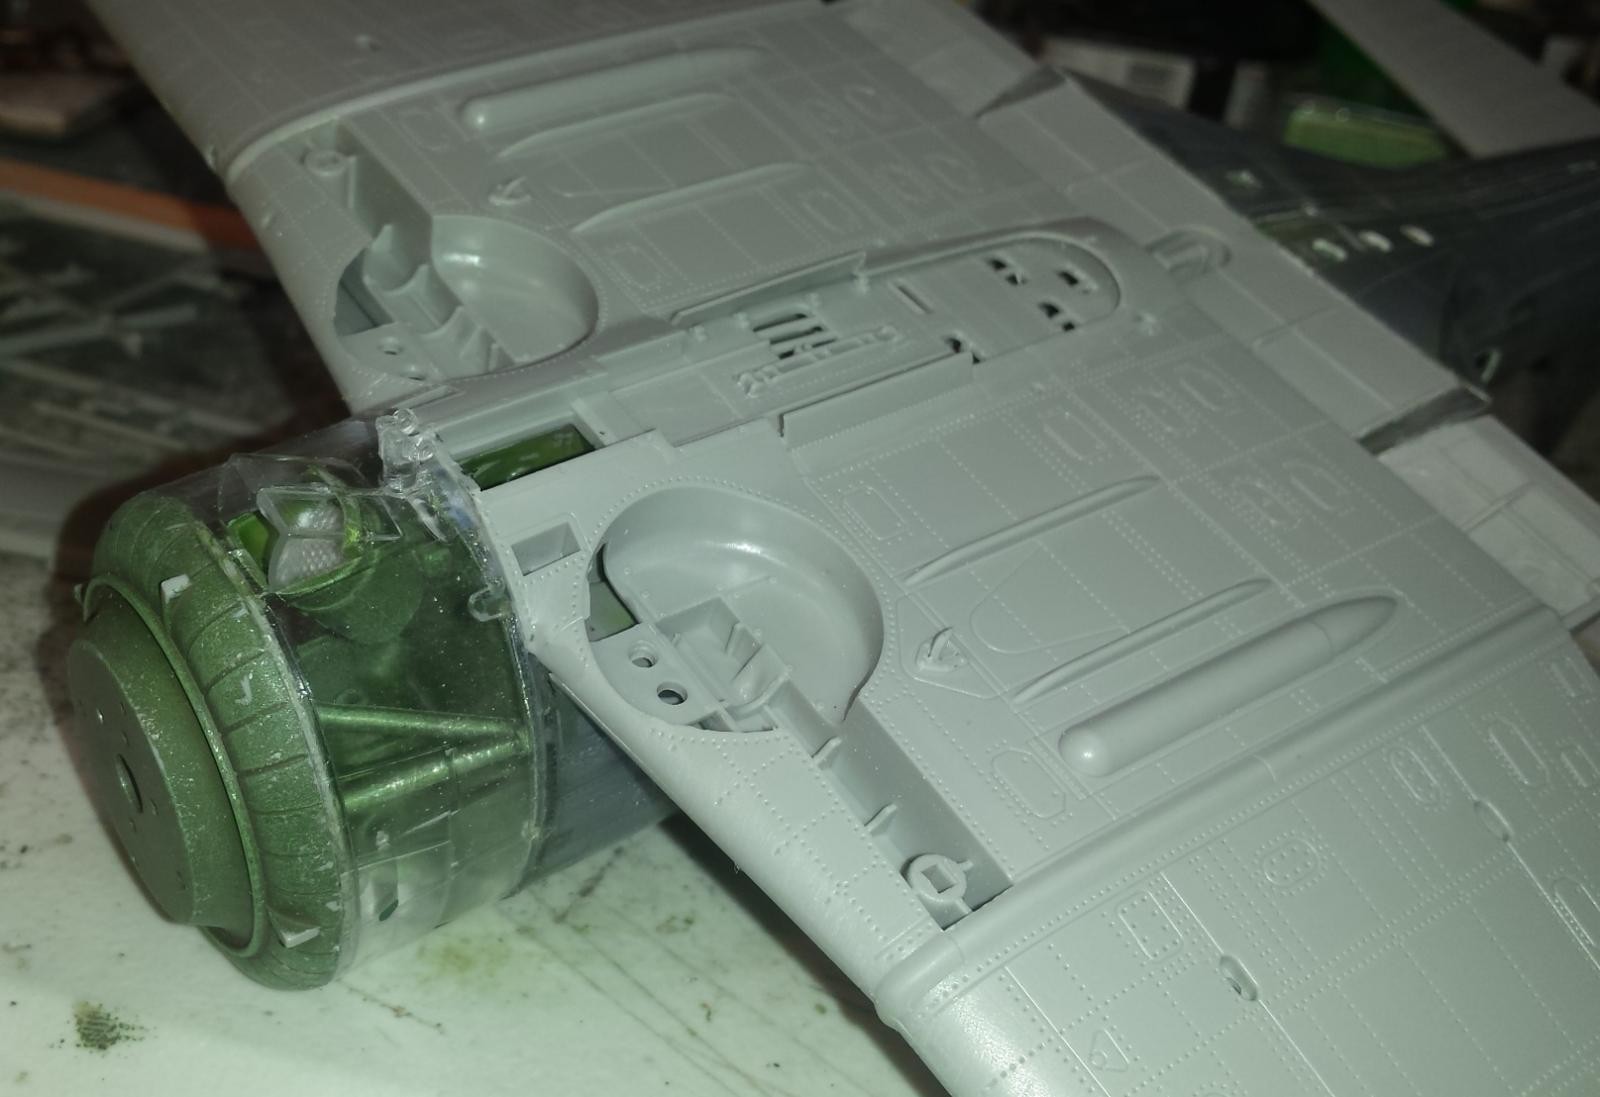
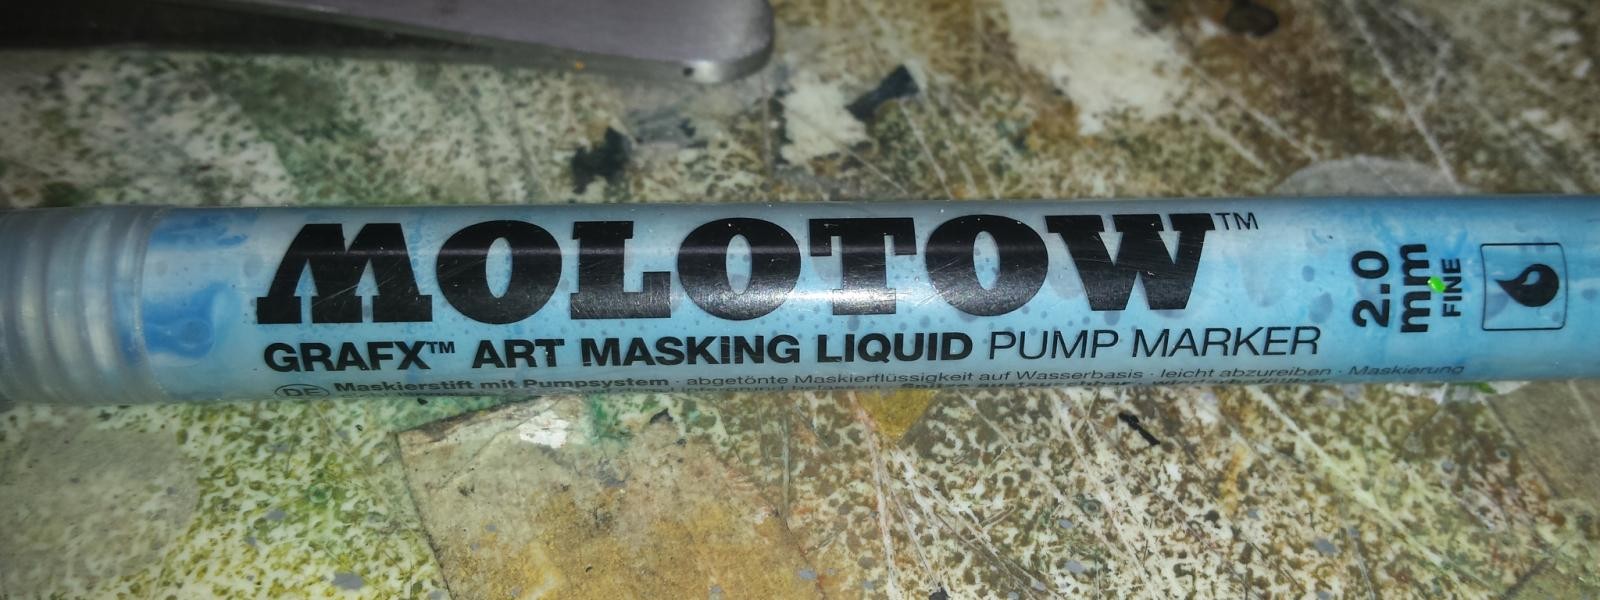
Pictures show the complete fuselage with wings attached being primed in a Dark-Grey color. The canopy sections were masked with after-market masking kit and then 1st painted in green zinc chromate. Then a second coat was applied using the dark-grey primer.
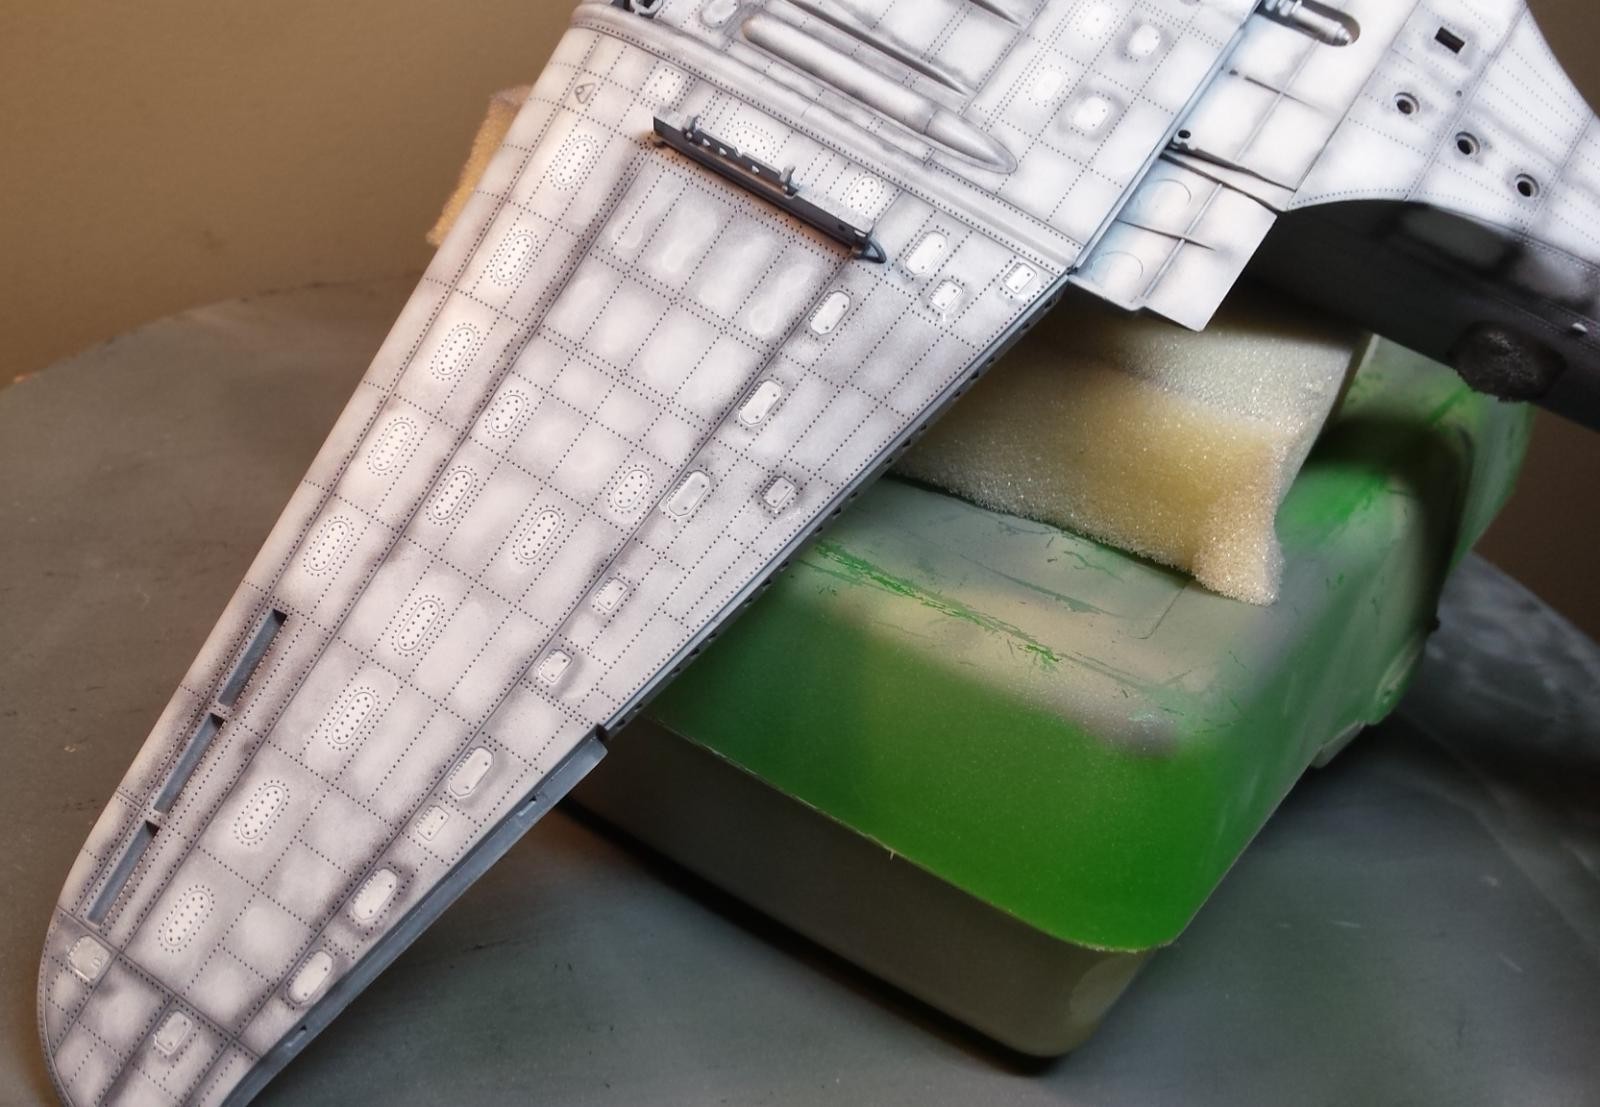
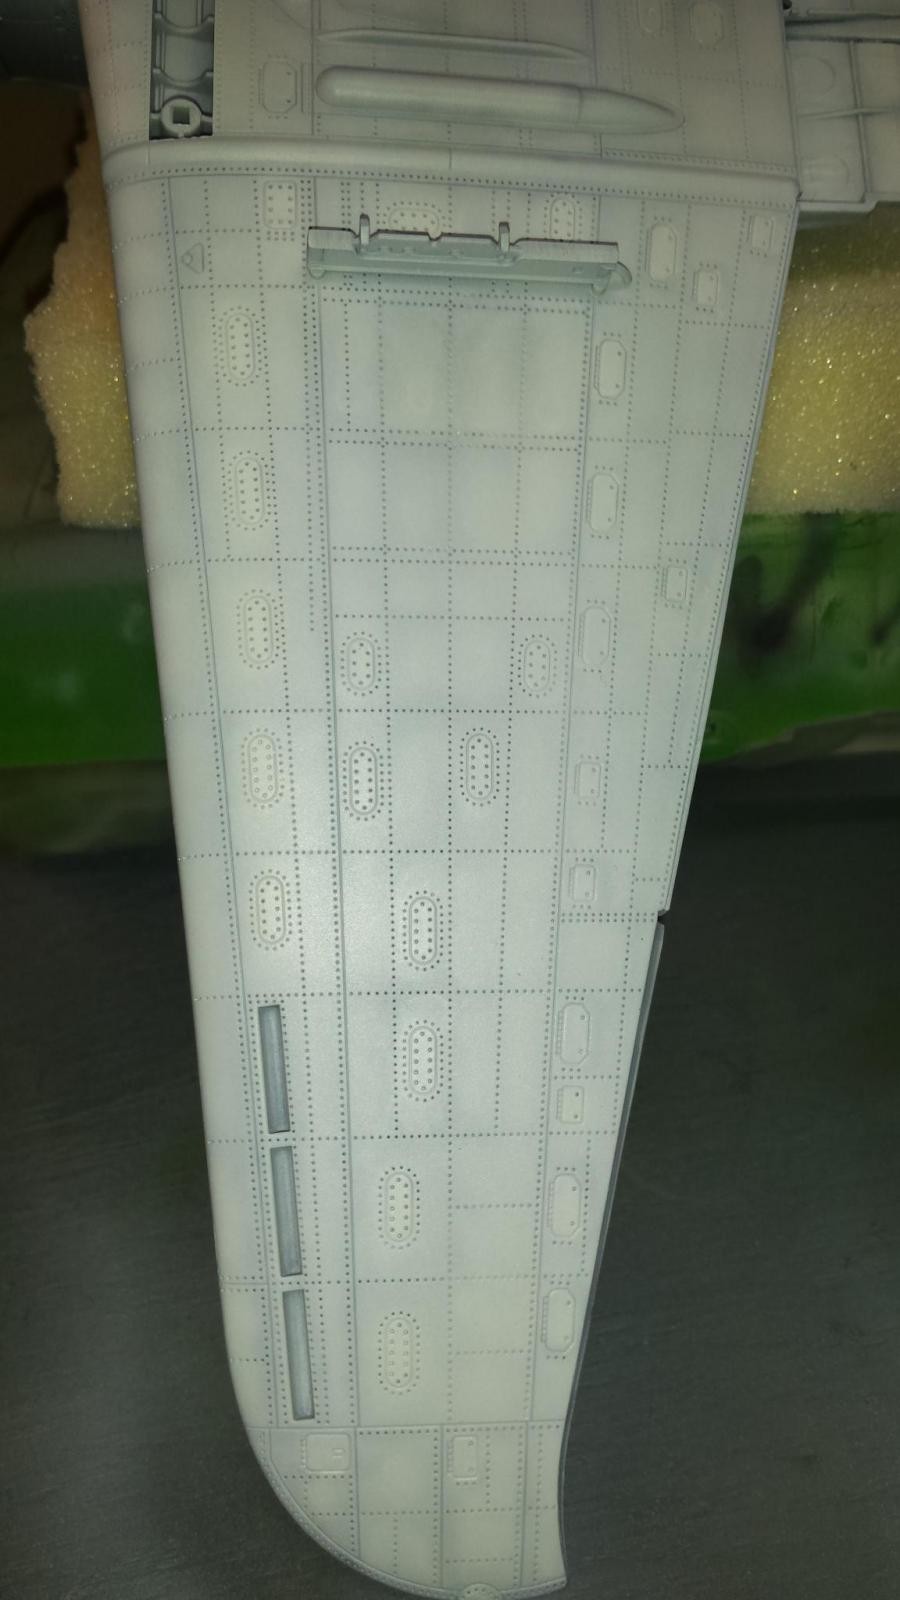
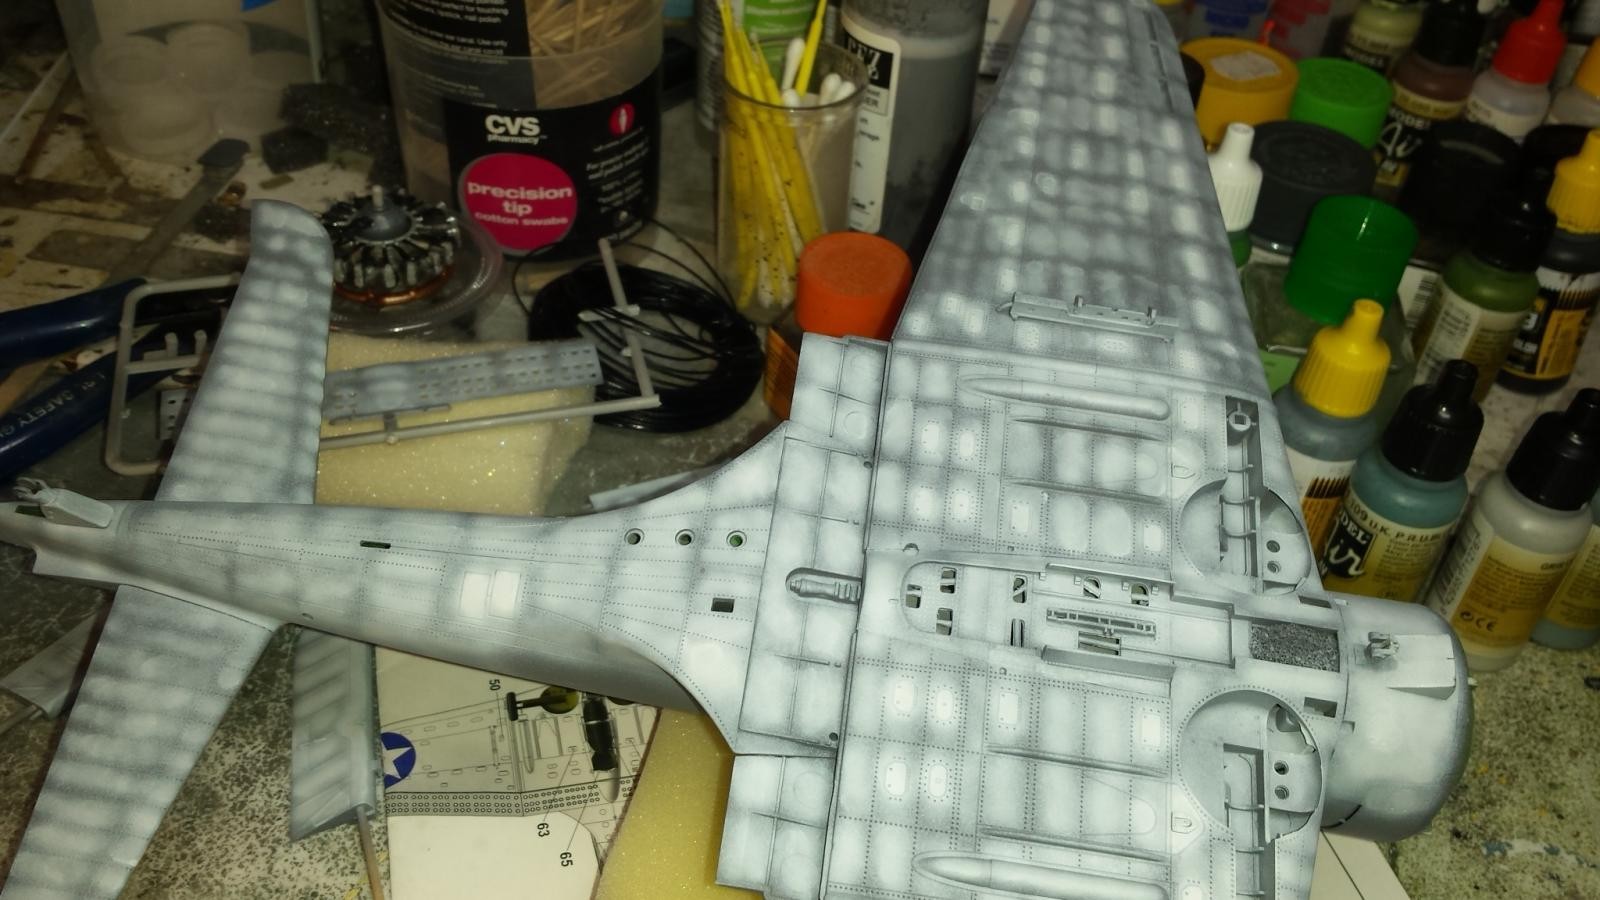
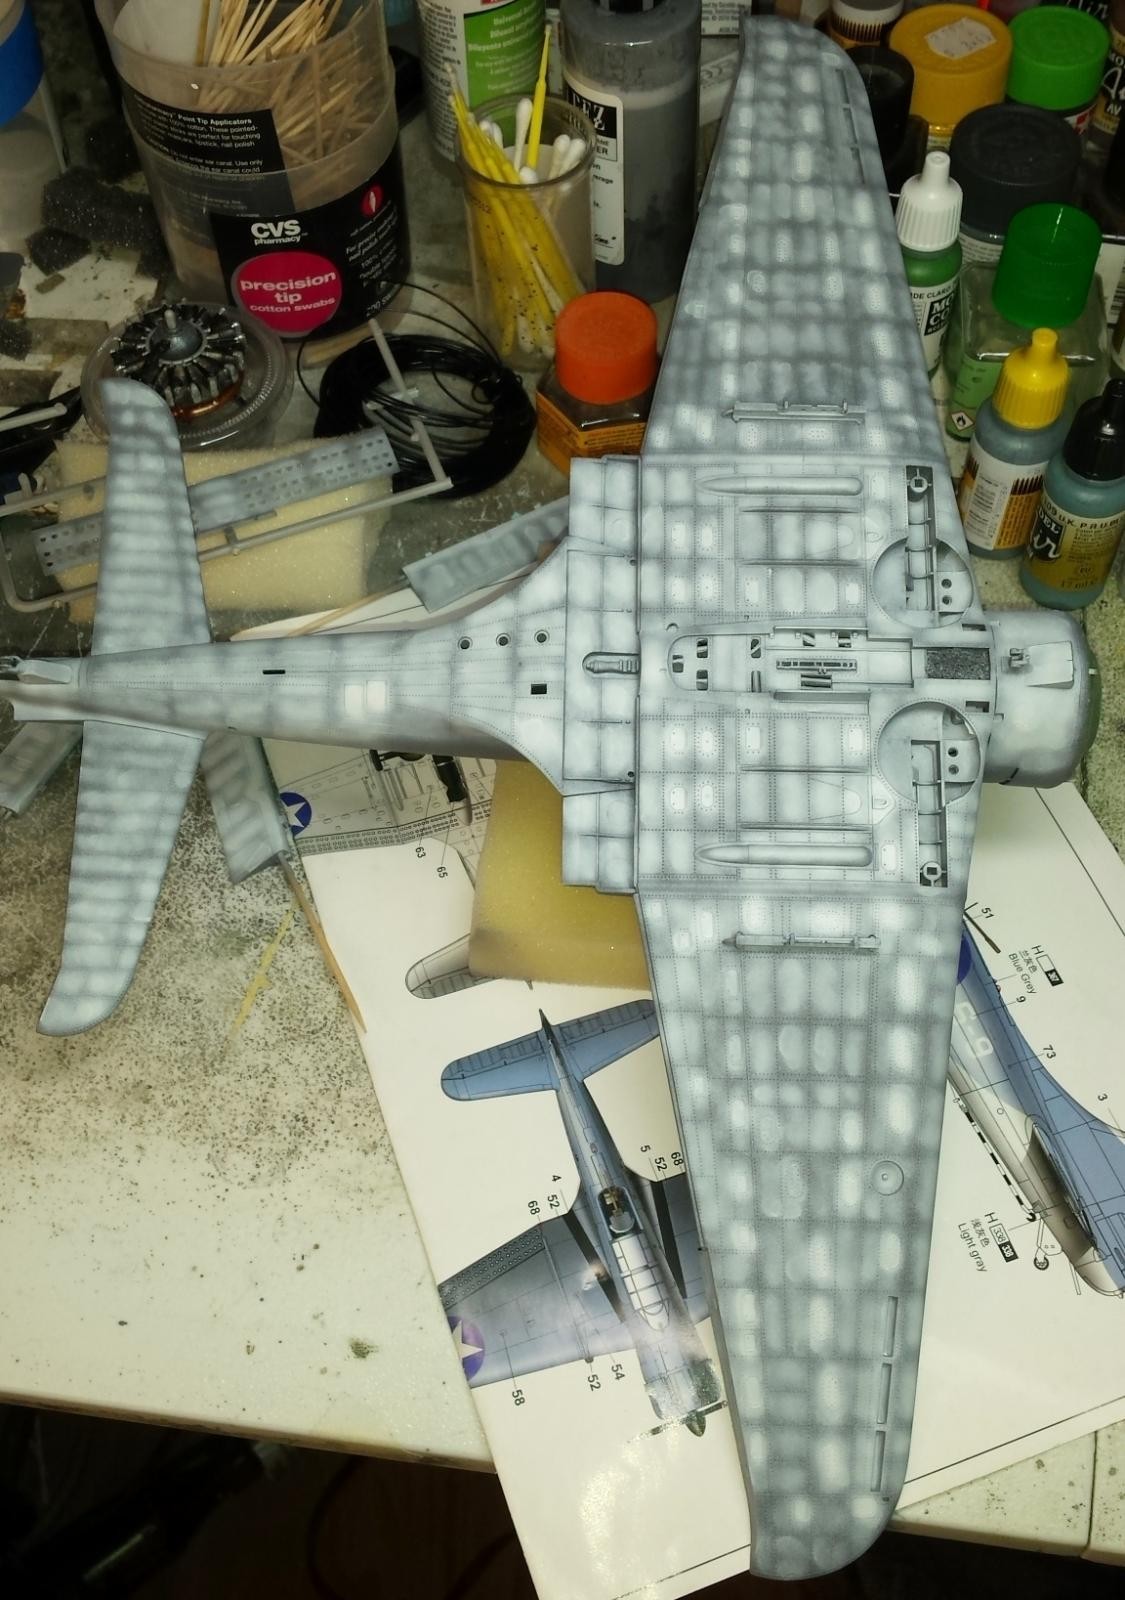
The last stage I completed is the base painting and pre-shading of the bottom surfaces of the aircraft. The base paint is Vallejo USAF Light Grey FS36495. Pictures show how the paint was built up in light layers of pre-shading with white paint only within the panels and rivet lines. This left a darker shade on all the rivets and panel lines from the dark grey primer. I varied the opacity of this white layer to add visual interest to the final coat. I then pre-shaded the recessed panel lines with very diluted flat-black. Finally I used a very diluted blend coat of the base color FS36495. This was applied very slowly in very light coats over all the pre-shading until the pre-shading was nicely blended into the base color and very faint remnants of the pre-shading showed through this blended base coat.
I am at a stand still now as I continue to research the top camo color. I have researched the internet and found several references which point out FS SPec numbers as good matches. Several manufactures make paints that are suppose to match these fs spec codes. I purchased several Vallejo bottles of paint with the exact FS SPecs and Navy "M-" designation such as the required Navy "M-485" blue-grey camo shade used during the Battle of Midway and many Navy aircraft including the SBD. When I tested these paints they did not resemble any of the colors seen on my reference photos. I dont even think they are close. The worst match was the Vallejo Light Grey M-486 supposedly used for the bottom camo color. It was completely wrong and did not even closely match any photo standards. You can see some of the colors tested on a color palette I made using the colors that have been recommended. I am not going to use any of these top colors. Instead I just ordered new paints from BombShell Brew" paints. Their excellent online pallets available on their products page show early US Navy colors and those colors are much closer. Any feedback regarding my color issues is welcomed as well as any suggestions on how to get a better match.


That's very nice work, Paul. I used a very similar method for sun-fading my Trumpeter SBD-2. Here's some photos you can use for ideas.
6 attached images. Click to enlarge.
Do you recall what colors/codes u used for the top camo color? Struggling with finding the right match. Every color I purchased for this build sucks and does not match what I am looking for. Your color is perfect!
It was a mixture of Gunze colors. If you can get hold of Xtracrylix, get their "blue-grey" color. Mixing it from Tamiya colors, I would use a bit of Tamiya "Intermediate Blue" with Tamiya "RAF Ocean Grey" and "eyeball it." And then go back and use "white" and then thin it and go over the whole thing a couple times with increasingly-thinned color with a bit more white each time.
Comin' along nicely, Paul...great set of WIP pics. 🙂
Paul. these Vallejo colors really look awful - don't know what they were thinking. I would suggest you take a look at Mr.Paint (www.mrpaint.sk), they produce really good colors which spray beatifully. The paints you are looking for are MRP-133 for the M-485 Blue Grey and MRP-124 for the M-495 Light Grey, although you can simply use some FS36440, as these are quite similar. I finished my Vindicator with this combination.
1 attached image. Click to enlarge.
OK, I found only one vendor in the USA that carried the Mr.Paint MPM brand. It is HobbyTown USA. I did order the MRP-133 Blue/Grey. Here is the problem. They are out of stock of the Mr. Paint Thinner. I have plenty of acrylic thinners for most formulas but not Mr.Paint. From what I read this brand of paint has a very different formula then all other acrylics and you must use the MPM Thinner. What do u know about this? Is it true? I could spray it out of the bottle but I do a lot of paint bending over pre-shading coats with very very thinned paint, so that just will not do.
I guess you ordered the paint that comes in glass bottles? These are actually lacquer paints - and yes, they are very thin out of the bottle. However, for thinning them I suggest using Mr. Color (Gunze) Levelling Thinner - I use it for MRP, Tamiya, Gunze... and it works brilliantly.
OH No dont want Lacquer, cant use in the house...aggg! Site said nothing at all about being lacquer. So what other type of Mr. Paint is there?
Boris. Just went back to order page for Mr. Paint in the glass bottles that I ordered and this is what it says "MR.PAINT is an acrylic color designed for spraying with your airbrush.". Taken right off the product page. I asked them to cancel my order but then I just read this? Very confused?
They are acrylic in so far as they contain acrylic resin - they are not, however, water-based acrylics like Vallejo, Life Color etc. So you cannot thin them with water, alcohol or any of the "mild" thinners used for water-based acrylics. And you cannot brush paint with them.
MRP introduced another line not too long ago, called "Aqua Colors". The name says it all, but M-485 is not yet in that range.
Huge advantages of the laquers are their spray quality (no tip dry in your airbrush), fast drying time of about ten minutes, and that they can be sprayed at really low pressure. I usually spray at something around 10psi, working close to the surface and not generating any overspray.
I actually got a refund for the Mr. Paint order b/c I reported it as mis-leading due to the acrylic label. The Hobby town agreed and is changing the description. As you mention he reports it as being an Acrylic pigment but with a Lacquer carrier. I know this is a better formula. That is why so many people are taking Tamiya Acrylics but mixing with their lacquer thinners for superior performance. I just cant b/c I dont have a fancy workshop set-up with proper ventilation and spray booth. I work in main part of the house. Would kill my whole family and wife would leave me if she did not die...LOL! Someday will build a workshop and go back to lacquers and oils.
Great build and detail photos, Paul! I love the real SBDs and yours looks outstanding so far. I look forward to the complete aircraft.
Very nice Paul! On my 1/72 Dauntless (link here: http://imodeler.com/2017/06/hasegawa-172-sbd-2-dauntless-midway/ ) I used Vallejo paints. Since I brush-painted, I used the model color line vs. the model air, but the model color can be thinned easily. I used Grey Blue 943 at a ratio of about 3 parts paint to 1 part white, then used Deck Tan 986 for the underside grey (trust me - it's grey!). I liked the result, at least for my scale.
Greg, thanx your suggestion and example may solve my issue. Your example 1/72 SBD looks the closest to the reference photo we are using and trying to mimic regarding tone/hue of the grey/blue. Some look to blue, Some look to grey or to light. Yours is a great combo. The other good news is I have those paints. I have the Vallejo Grey-Blue in both model air, and model color. I used the Vallejo USAF Light Grey for the underside already. Looks good. I did order more paint from Bombshell Brew Paints and Mr.Paint but dont know when I will get those.
Paul, could you upload your reference pic?
Here are some of the reference pictures we liked. These are actually selected by the customer of this build.
5 attached images. Click to enlarge.
I was pretty sure te Life Magazine pics would be among them 🙂 In case you haven't already seen it, take a look at this one: a short color film about Midway, directed by John Ford. The colors are a bit washed out, but I find it quite fascinating to see early SBD's and SB2U's flying around. https://www.youtube.com/watch?v=4h699GimH04
Great work to date. I have one of these in my "to build" stash and I'll be using your photos for reference.
Well hopefully I will have the final color worked out by the time you get going on yours.
This build is just great. The contributions show just how much people 'get' the fact that you are looking for a very specific personal color you clearly have in your head. The fact no-one is trying to assert their 'hex-spurt' knowledge with a definitive shade is pure iModeler. I hope you get that color your mind's eye is itching for, Paul.
David, I am with you on that one - although I have to admit I am a bit of an accuracy freak when it comes to colors. I think it is not so much about asserting any definitive shade, but rather about having a proper base to work with when introducing ones own take on a color. And some of the stuff paint manufacturers have been throwing at us lately is just awful.
Point in case: Right now I am testing various paints for British armor colors of WWII. We are being sold "real colors", "authentic colors" and who knows what. And some of them you take out of their fancy packaging and think immediately "well, this is strange". They are not even close to what you would expect, let alone any original specification. And when you ask the producers - which I did - they will tell you some bogus about "our own take" on that color or "lightened for scale effect" (the most stupid concept of all). Thing is, as long as we are not talking about in-theater colors obtained by random Joe through raiding the local minimarket, paints do follow specifications. Not researching these before throwing new products in our faces is pure laziness.
Off of my soap box now 🙂
And yes, I am really looking forward to seeing this build progress!
I'm 100% with you, Boris (now there's a phrase I never thought I'd hear myself say given the state of British politics). The base layer needs to be accurate, and there's no excuse for well funded companies not doing basic research. Lazy and cynical, I'd say.
In the Pacific theatre in particular, the weathering is a modelers dream - or nightmare, depending on how much OCD is running through the system (maybe Tom C could write a book called '50 Shades of Blue'). I just adore that washed out 'three shade' Navy scheme and I've no idea why. When I've built these projects it's almost drove me nuts trying to get the shades I wanted. There's something about those weathered blues that just 'sing' to me.
You've all seen theses photos before, but honestly, they are just beautiful - apologies for repeating -
I actually was looking for the exact decals for the #2 aircraft with the "Eight-Ball" insignia. No luck in finding this. Easy enough to make I guess but already put so much into this build. All out of colored ink and that would be another $40 bucks I dont have. I am suprised no decals exist b/c these are the most famous pictures of SBD-3s in existence and every body who wants to build an SBD comes across them.
Paul, you have all the skills, just make that 8 Ball - it'll make it all the more individual for the fact there's no off-the-shelf alternative.
I have this baby in the stash just waiting for a rainy day and I'll be watching your build closely regarding colours. I may need to retrofit her a little, but boy, I can't wait.
Built that exact model many years ago. Fantastic model very detailed will look awesome. BTW posted new article with the plane painted with the base color I came up with.
I really dont have the cash to buy ink right now. I have software, decal paper (I think?), and decal spray but that damn printer ink is so expensive.
Hell, Paul just paint it on. Black circle, white circle, little number 8. A little practice and it'll look great.
Very good. I did this same kit I think in 2014 and reposted it in 2017 for the Midway Group Build. A lot of people don’t like the kit, but I thought it was really good for additional detailing. The engine is especially nice.
Keep up the good work!
Nice work Paul. Hope you get the paint the way you want it.