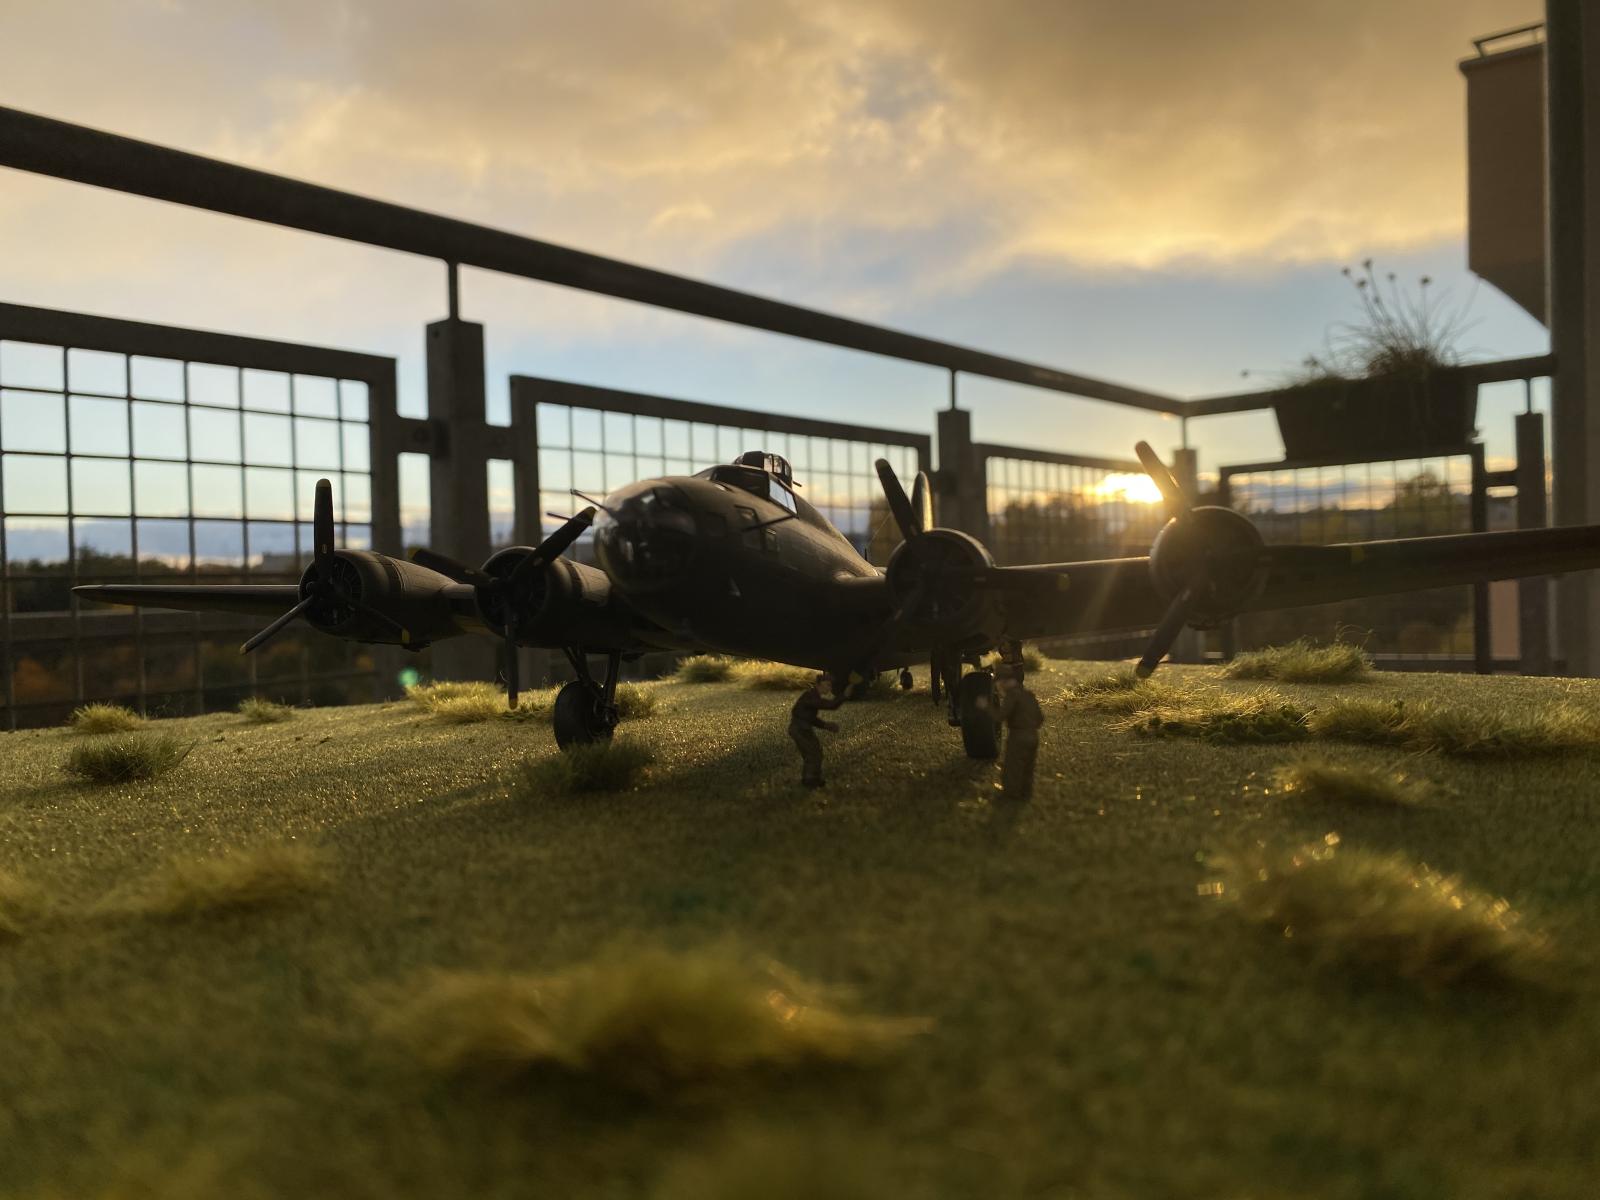
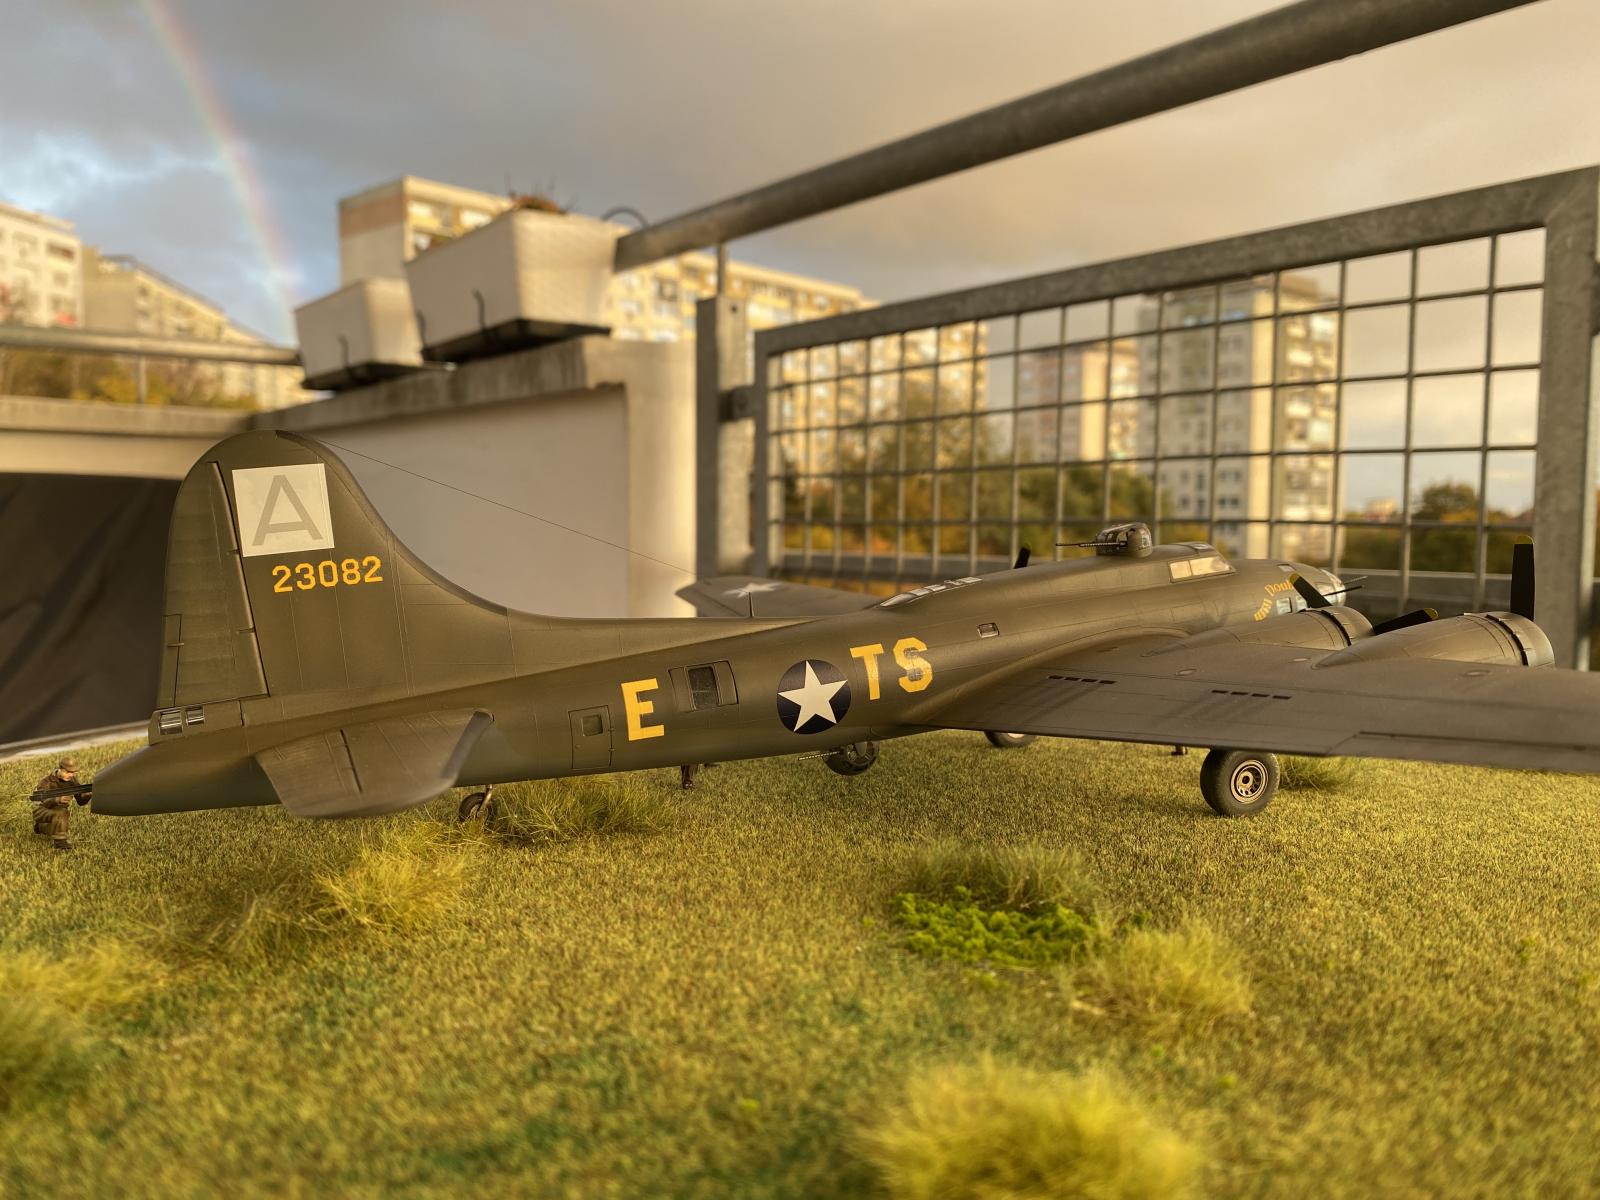
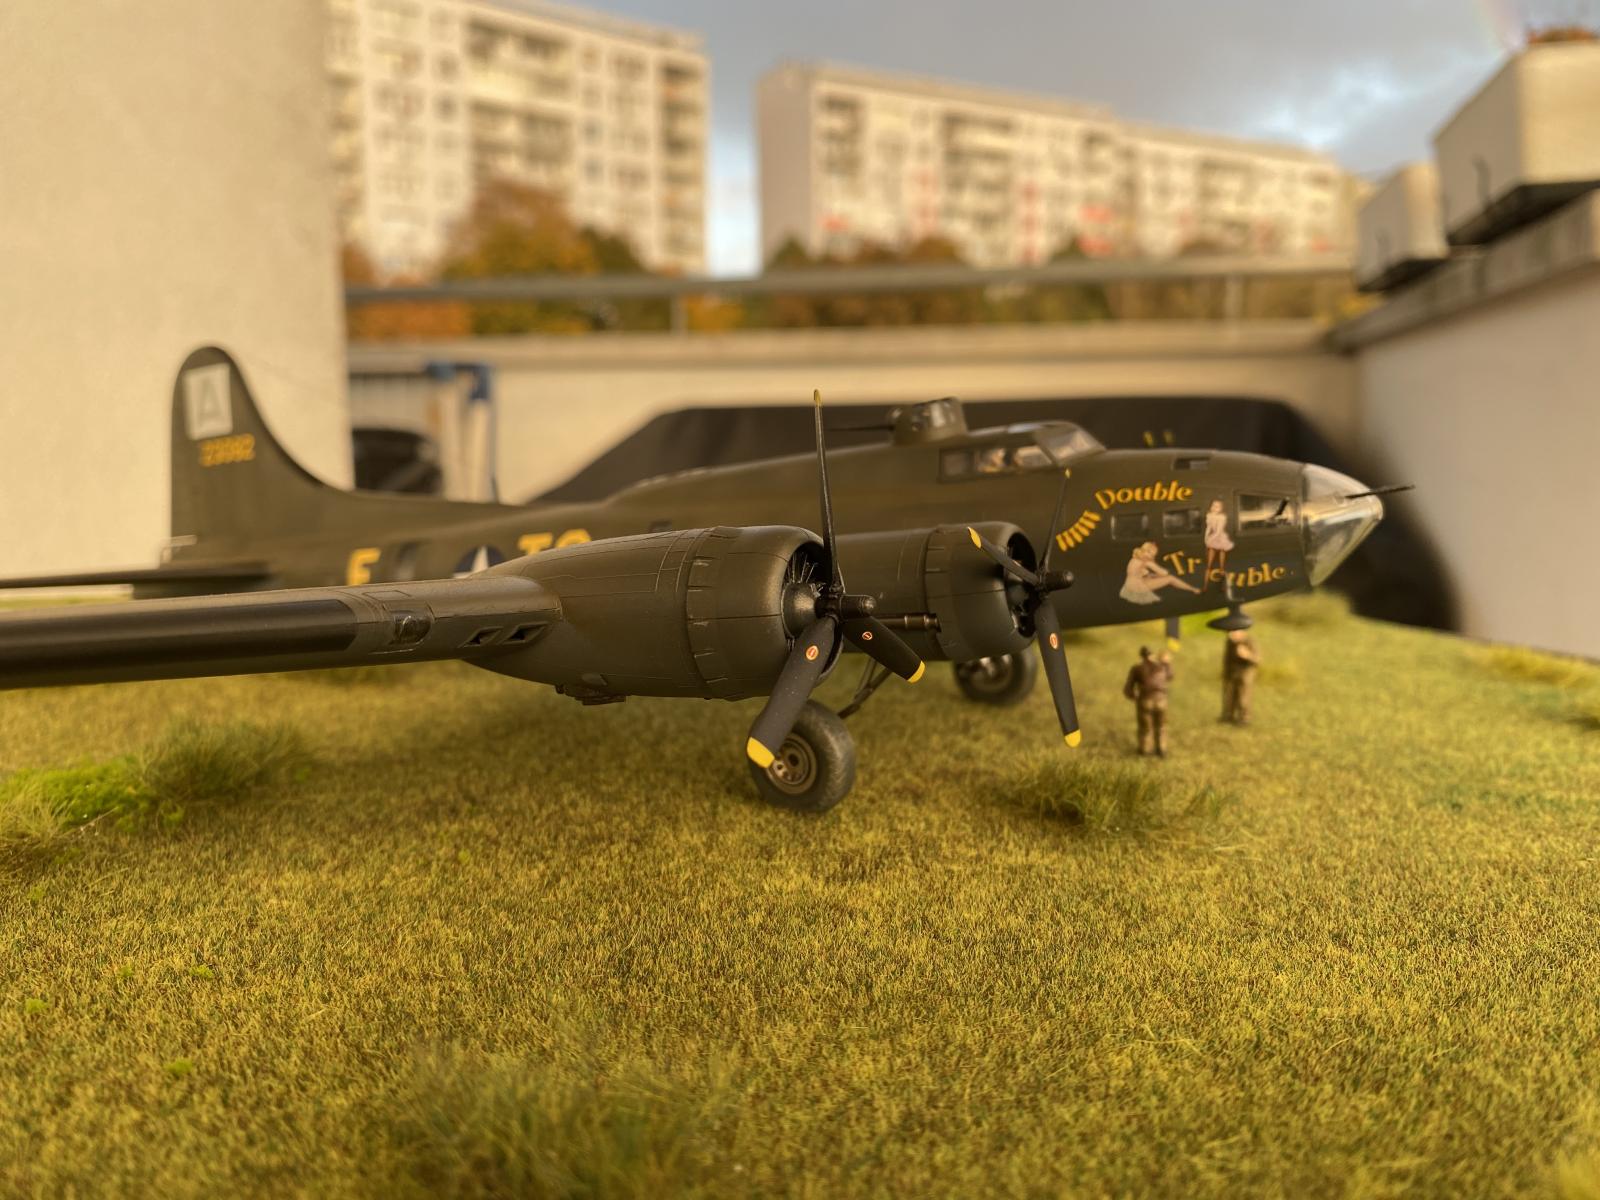
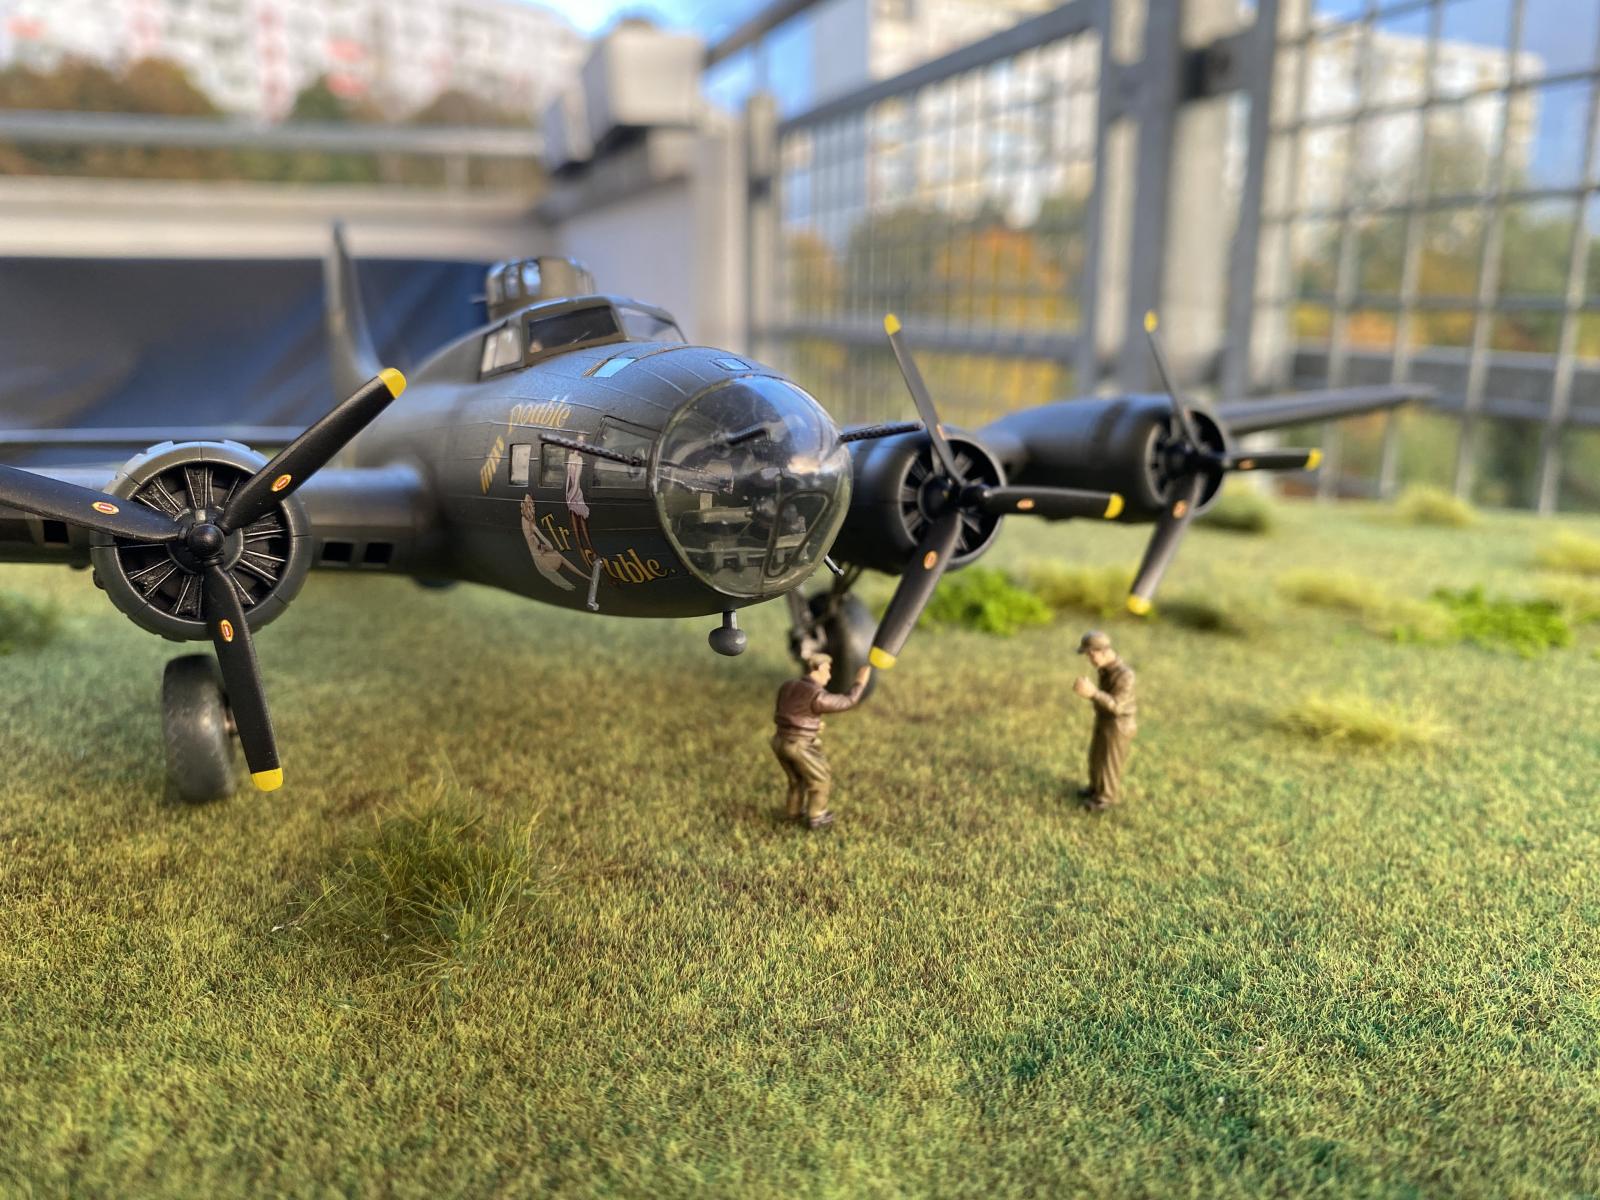
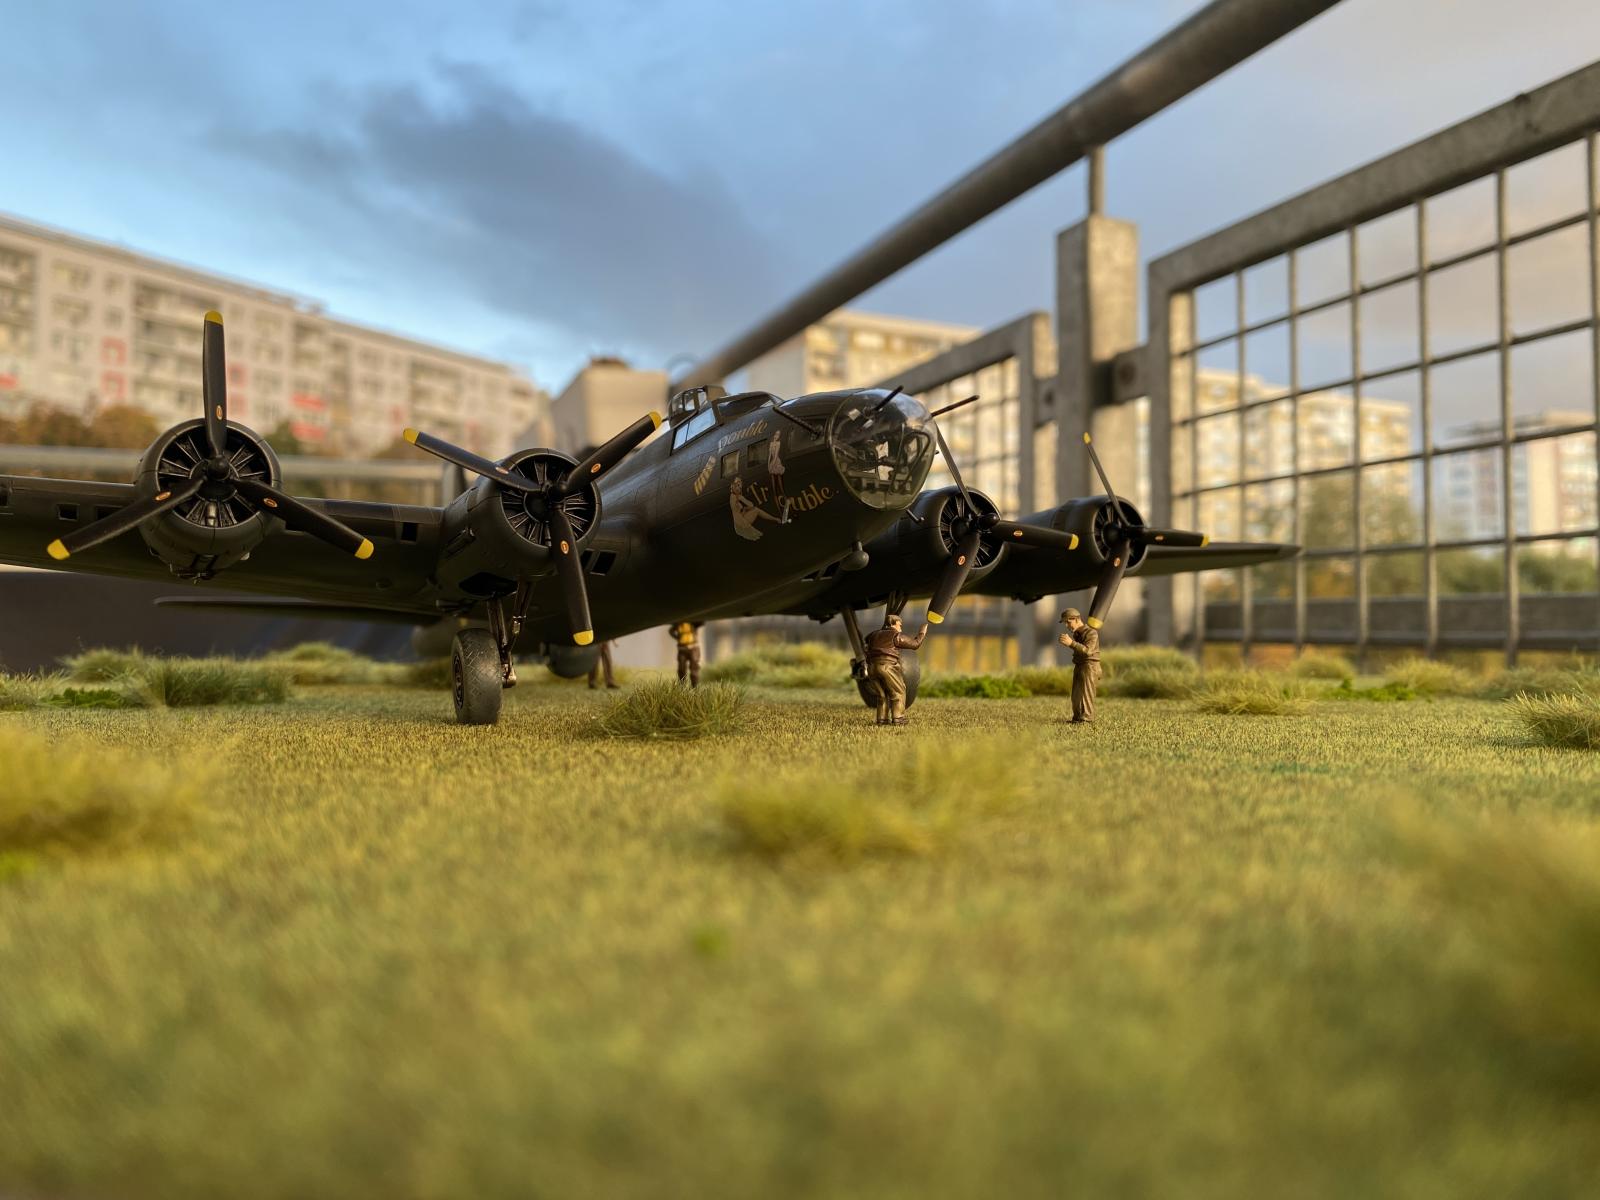
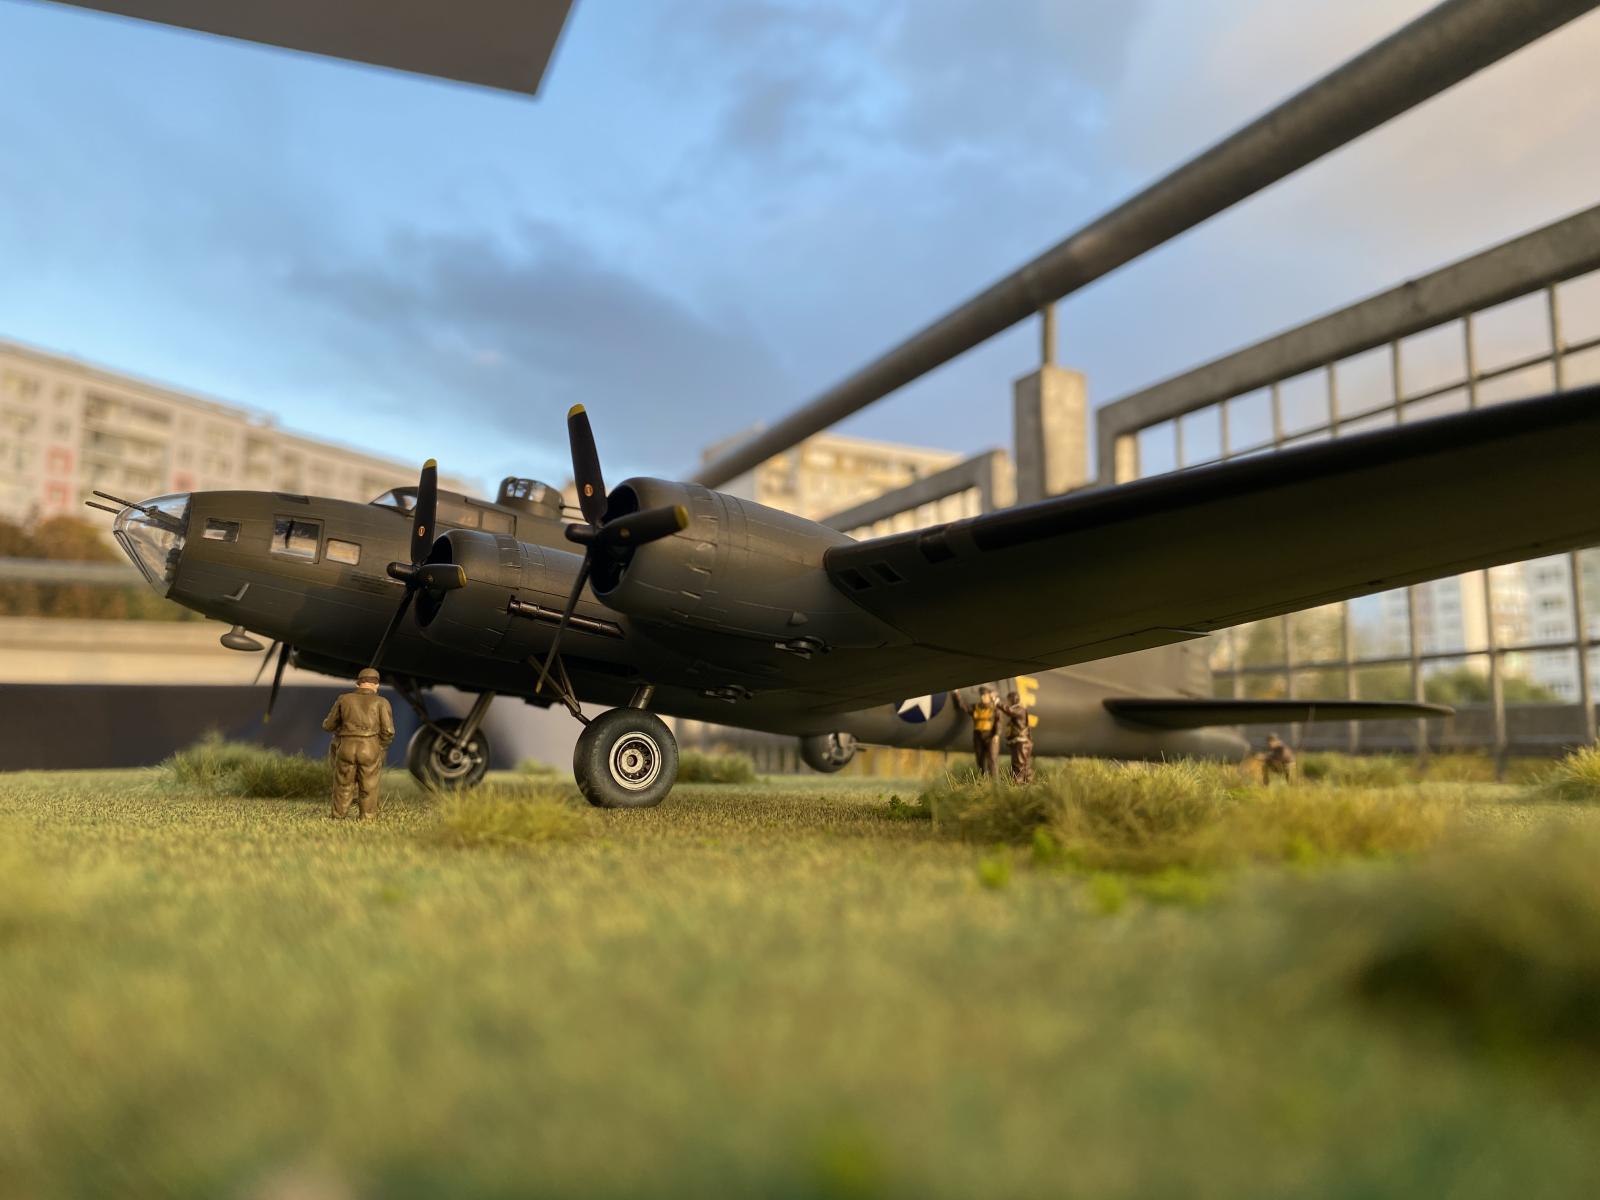
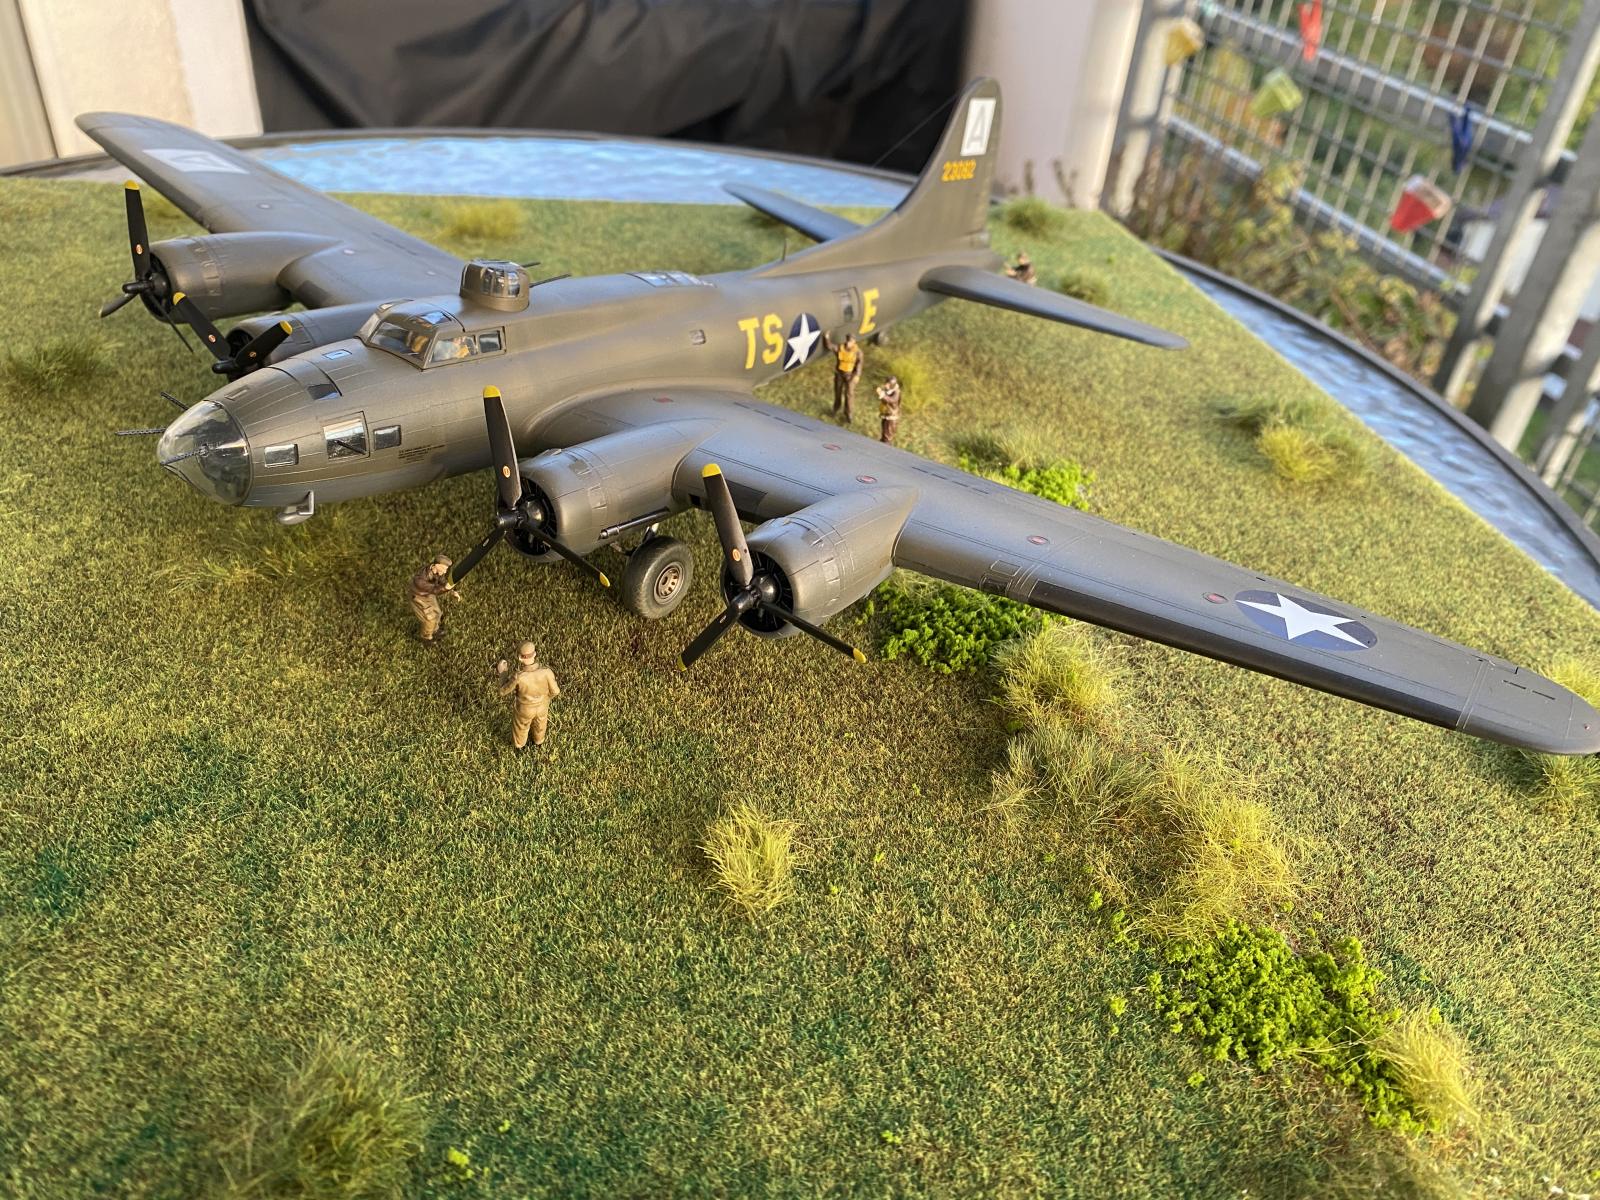
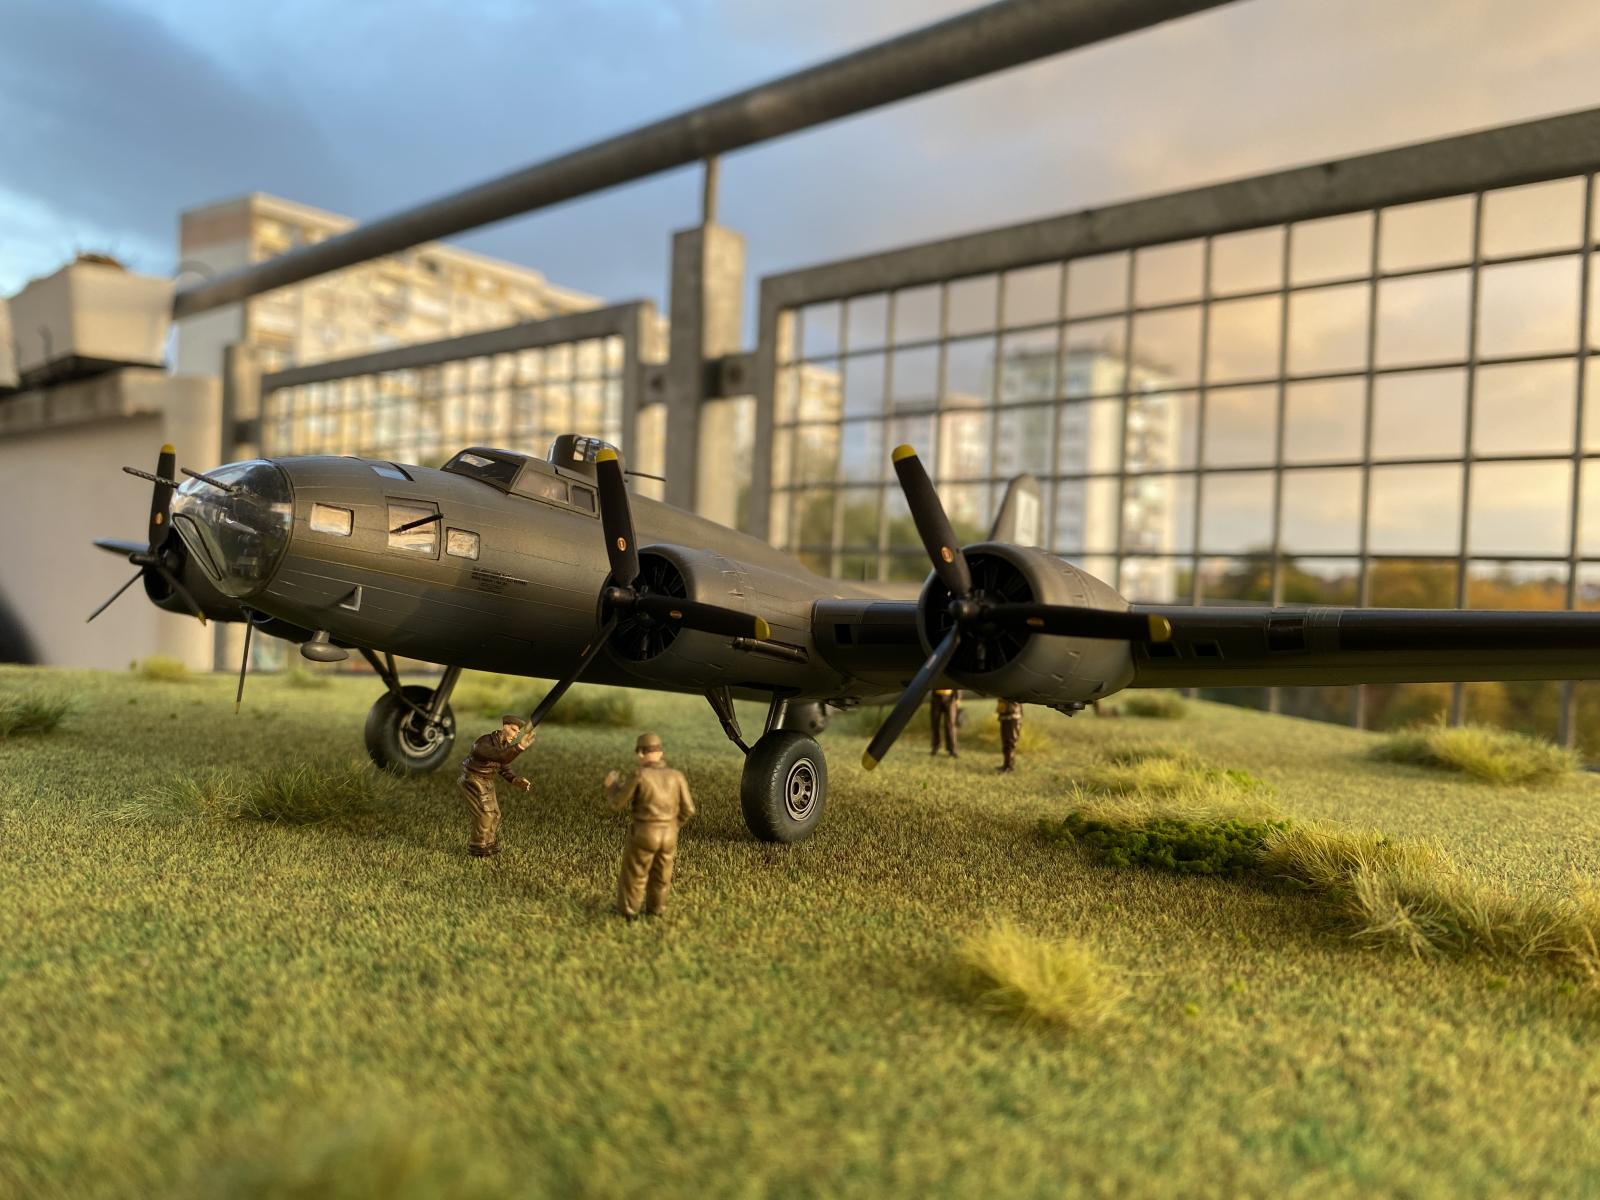
B-17 F Hasegawa, 94BG.
As you may remember, my last project was the B-17 G Airfix. Before the model was completely finished, I had the opportunity to buy the Hasegawa B-17 F on a rather occasional basis. The model of this company quite faithfully reflects the version F, because I heard that the analogous version of the F from Revell has flaws, including some points of glazing of the nose of the aircraft being omitted. Anyway, it seemed to me that I would build a Hasegawa model much simpler quickly and easily. In fact, the model had much fewer parts and some simplifications, such as the lack of concave section lines, but remember that this is a set that dates back to 1989 and the form itself is from 1976. It can therefore be considered a vintage construction. Finally, it turned out that the construction lasted practically the same as the construction of the Airfix model. First things first.
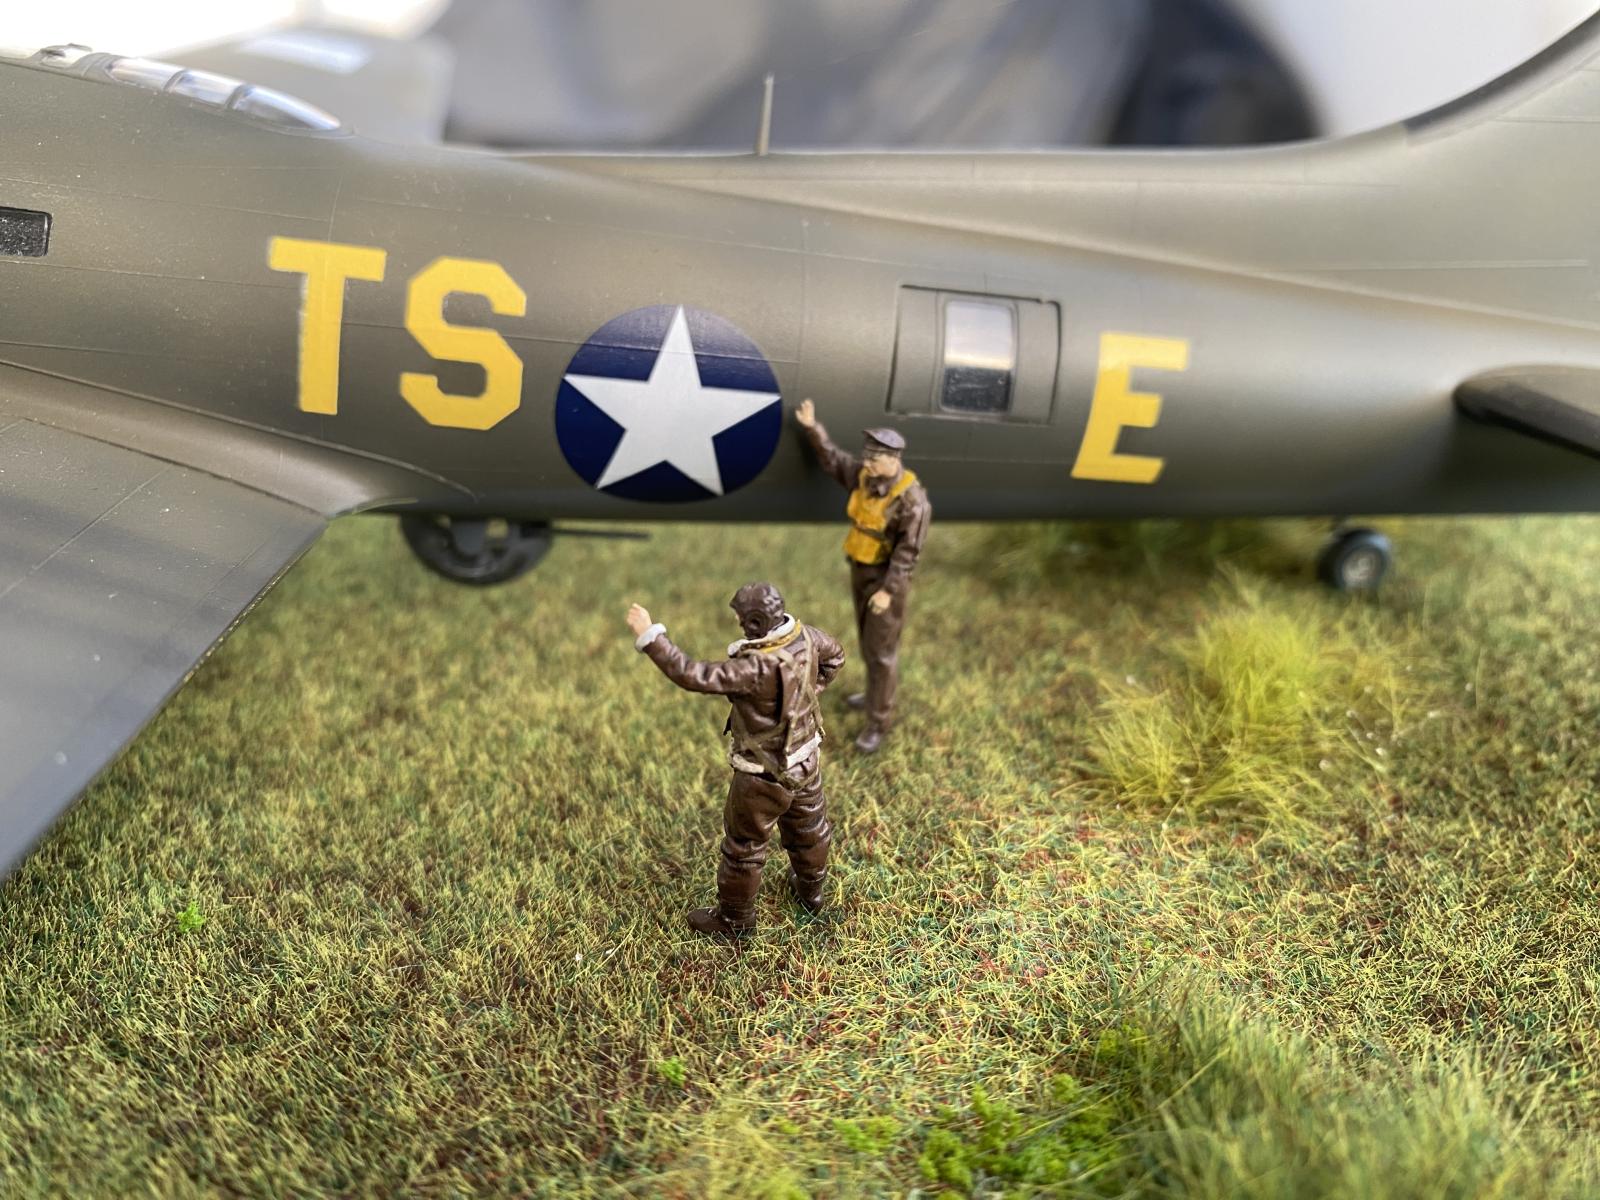
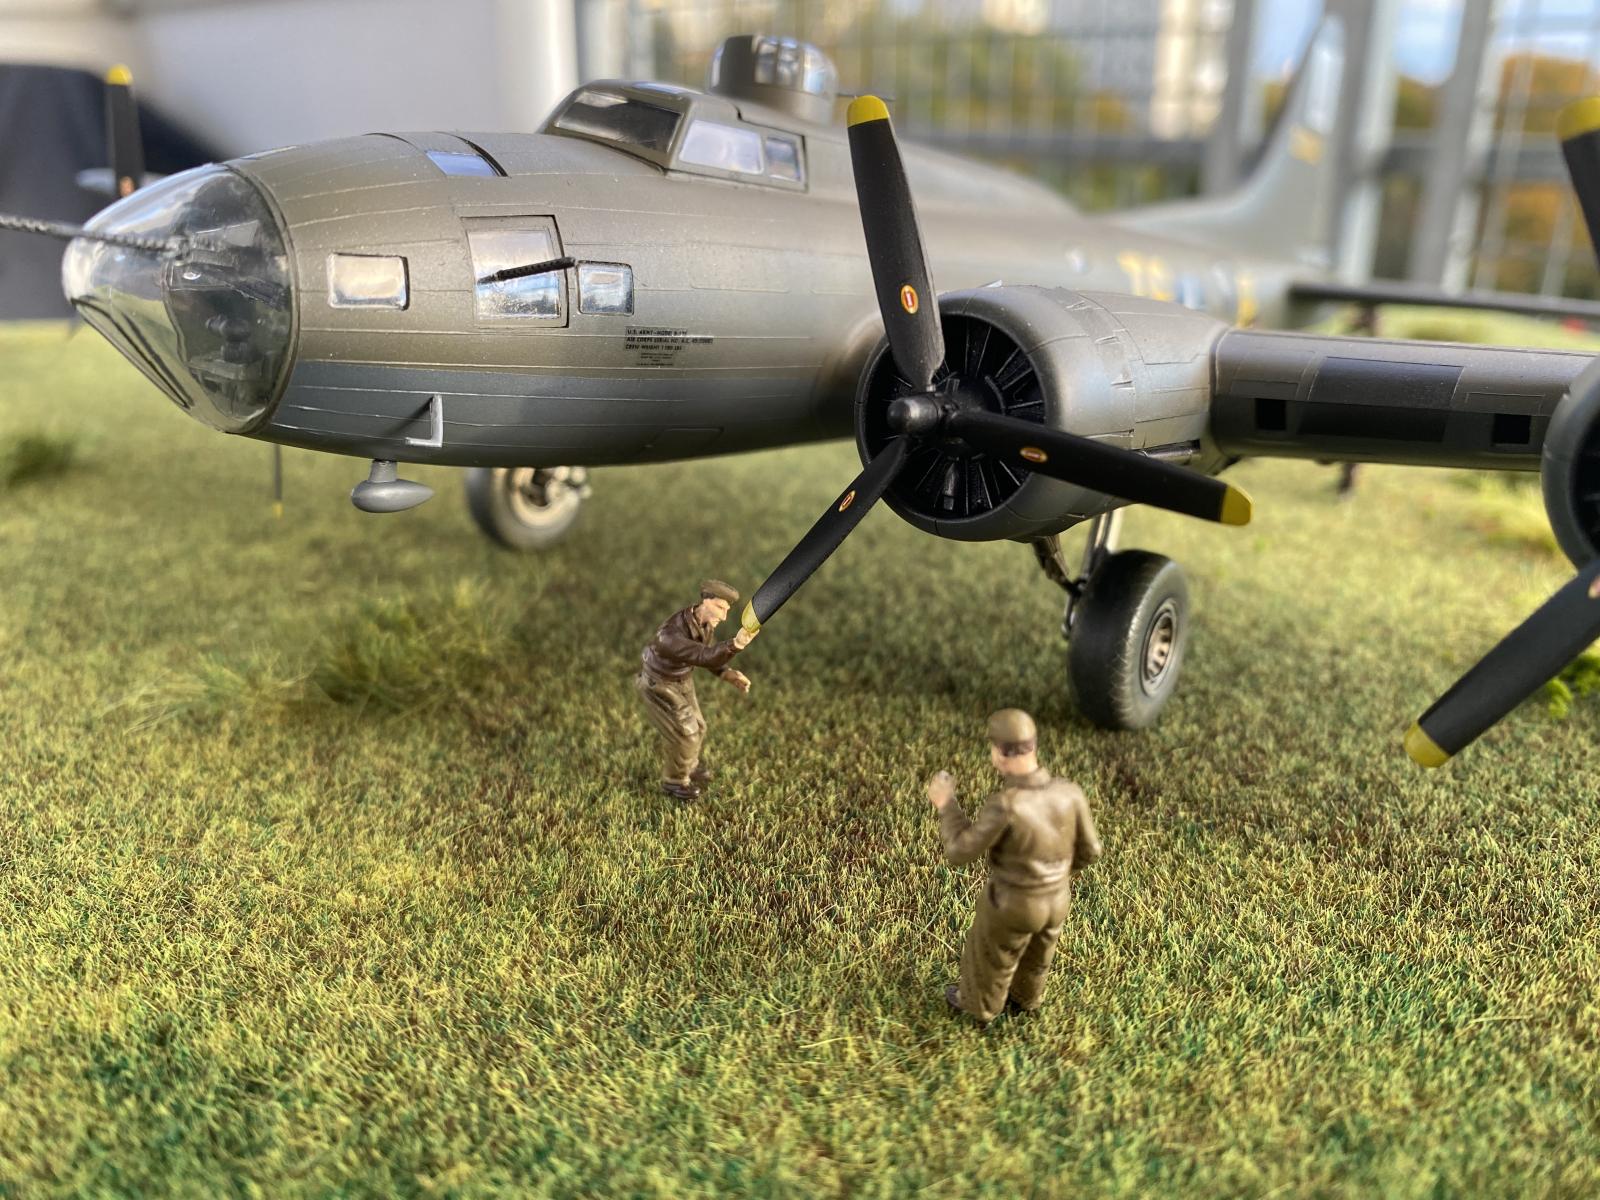
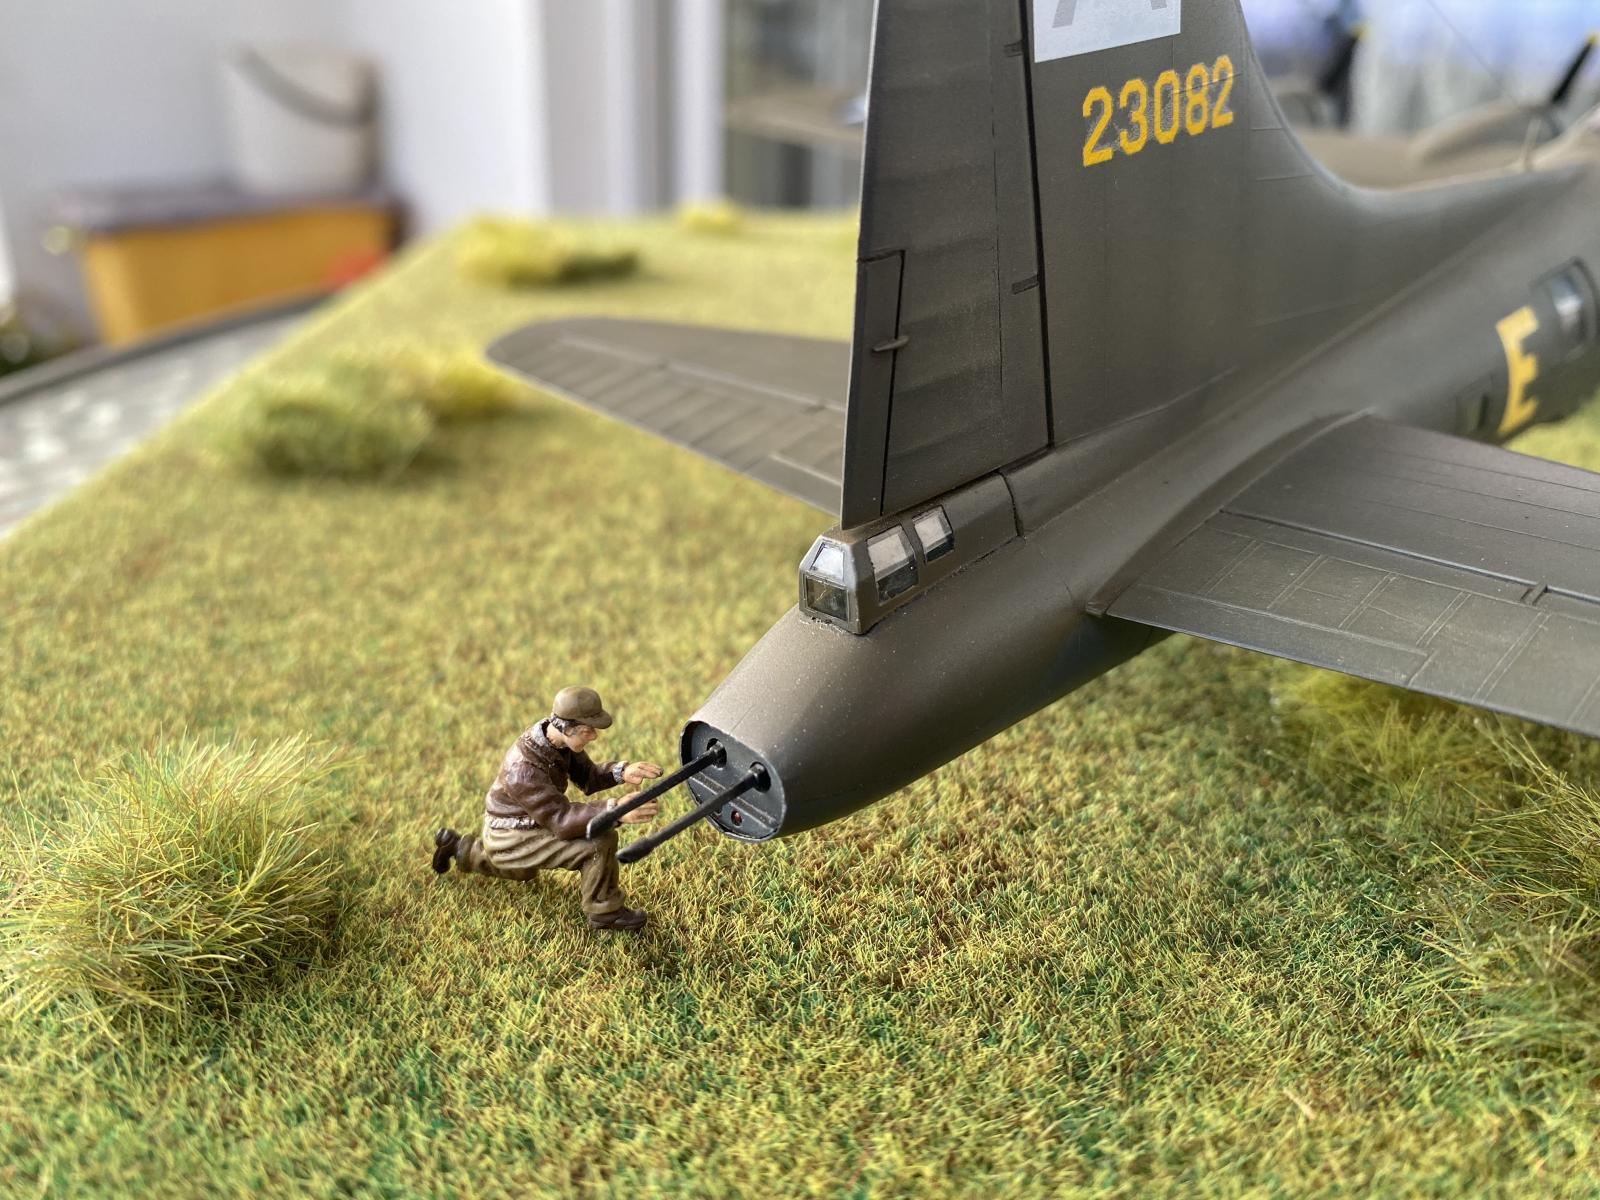
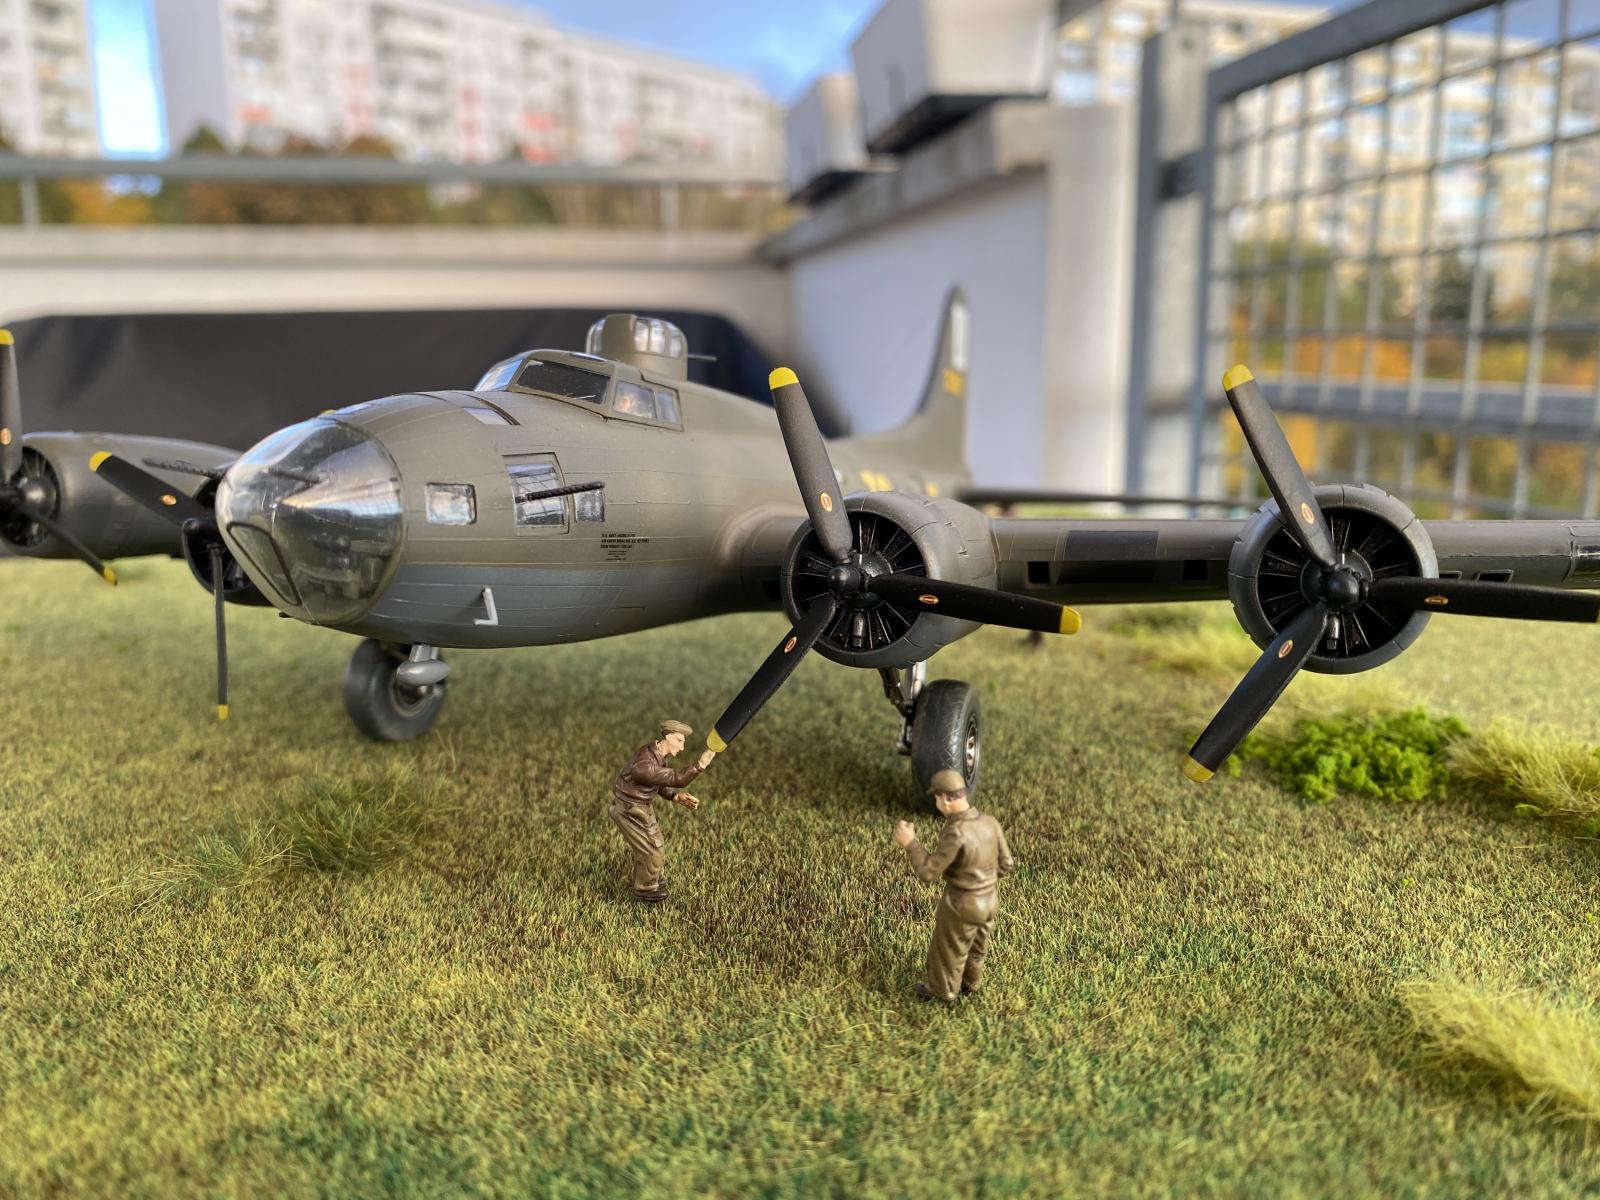
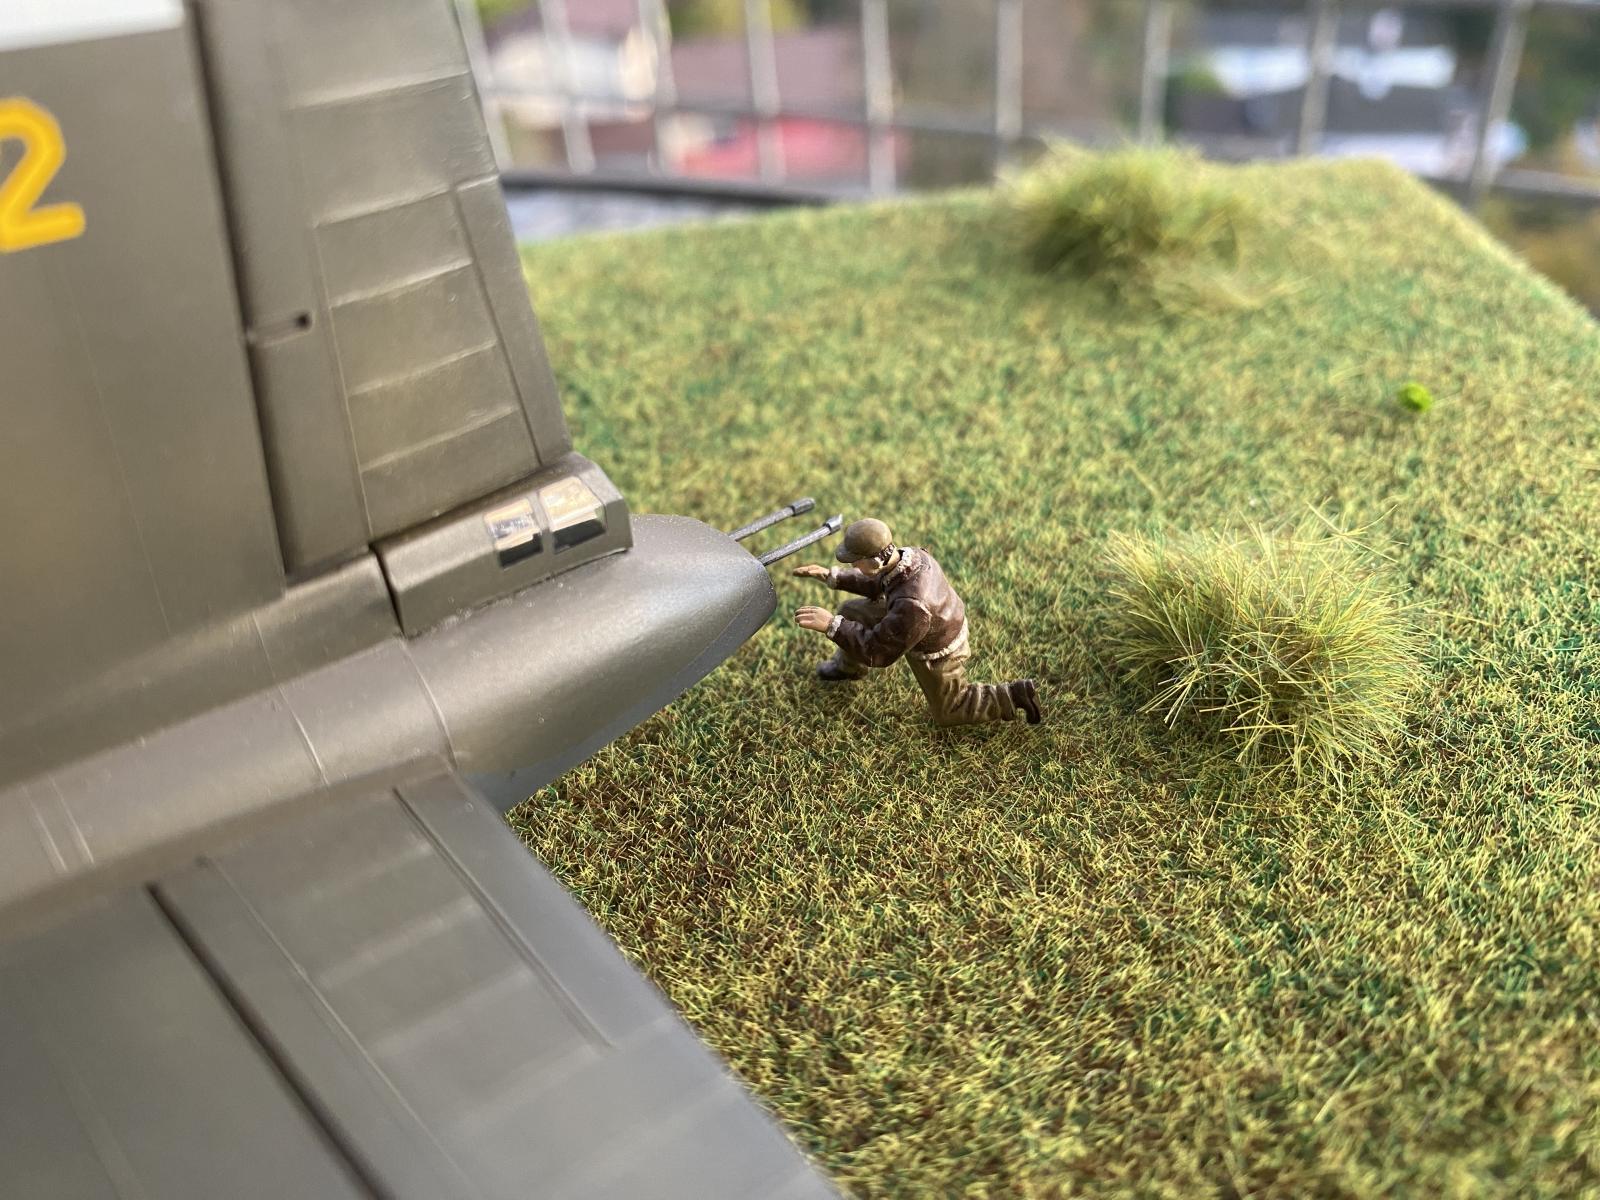
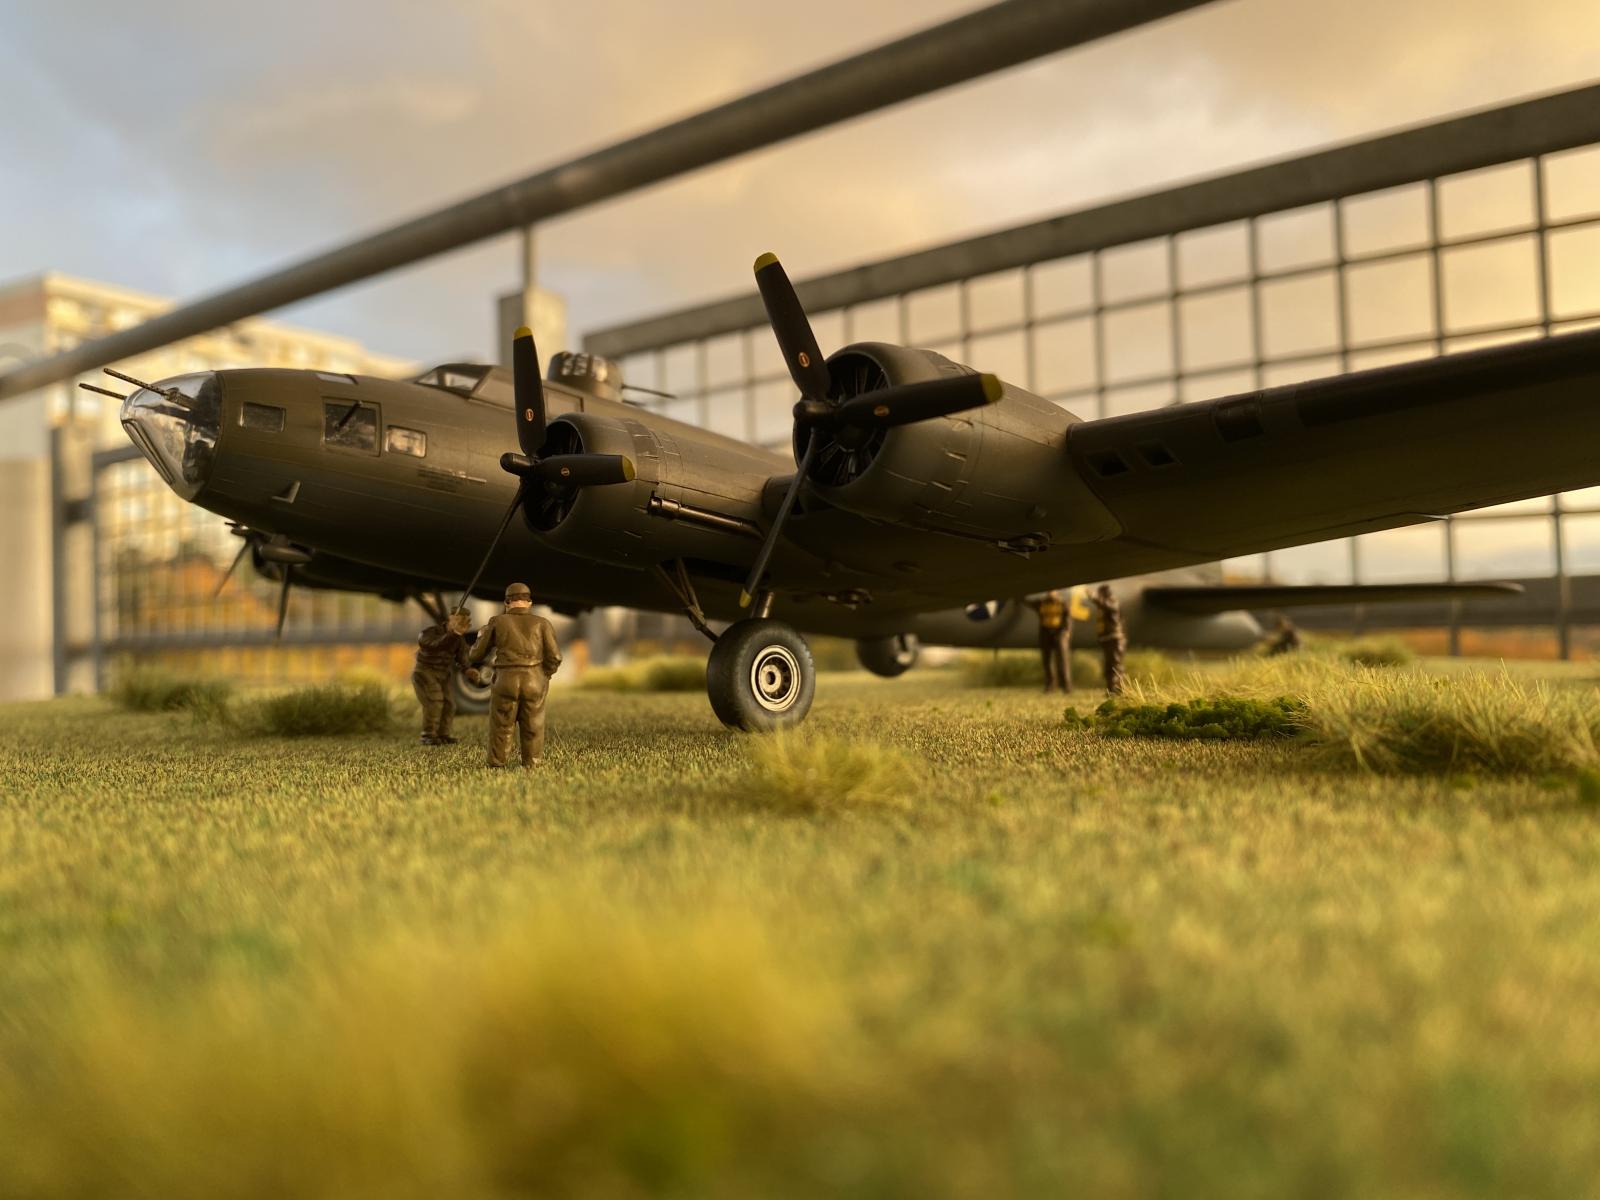
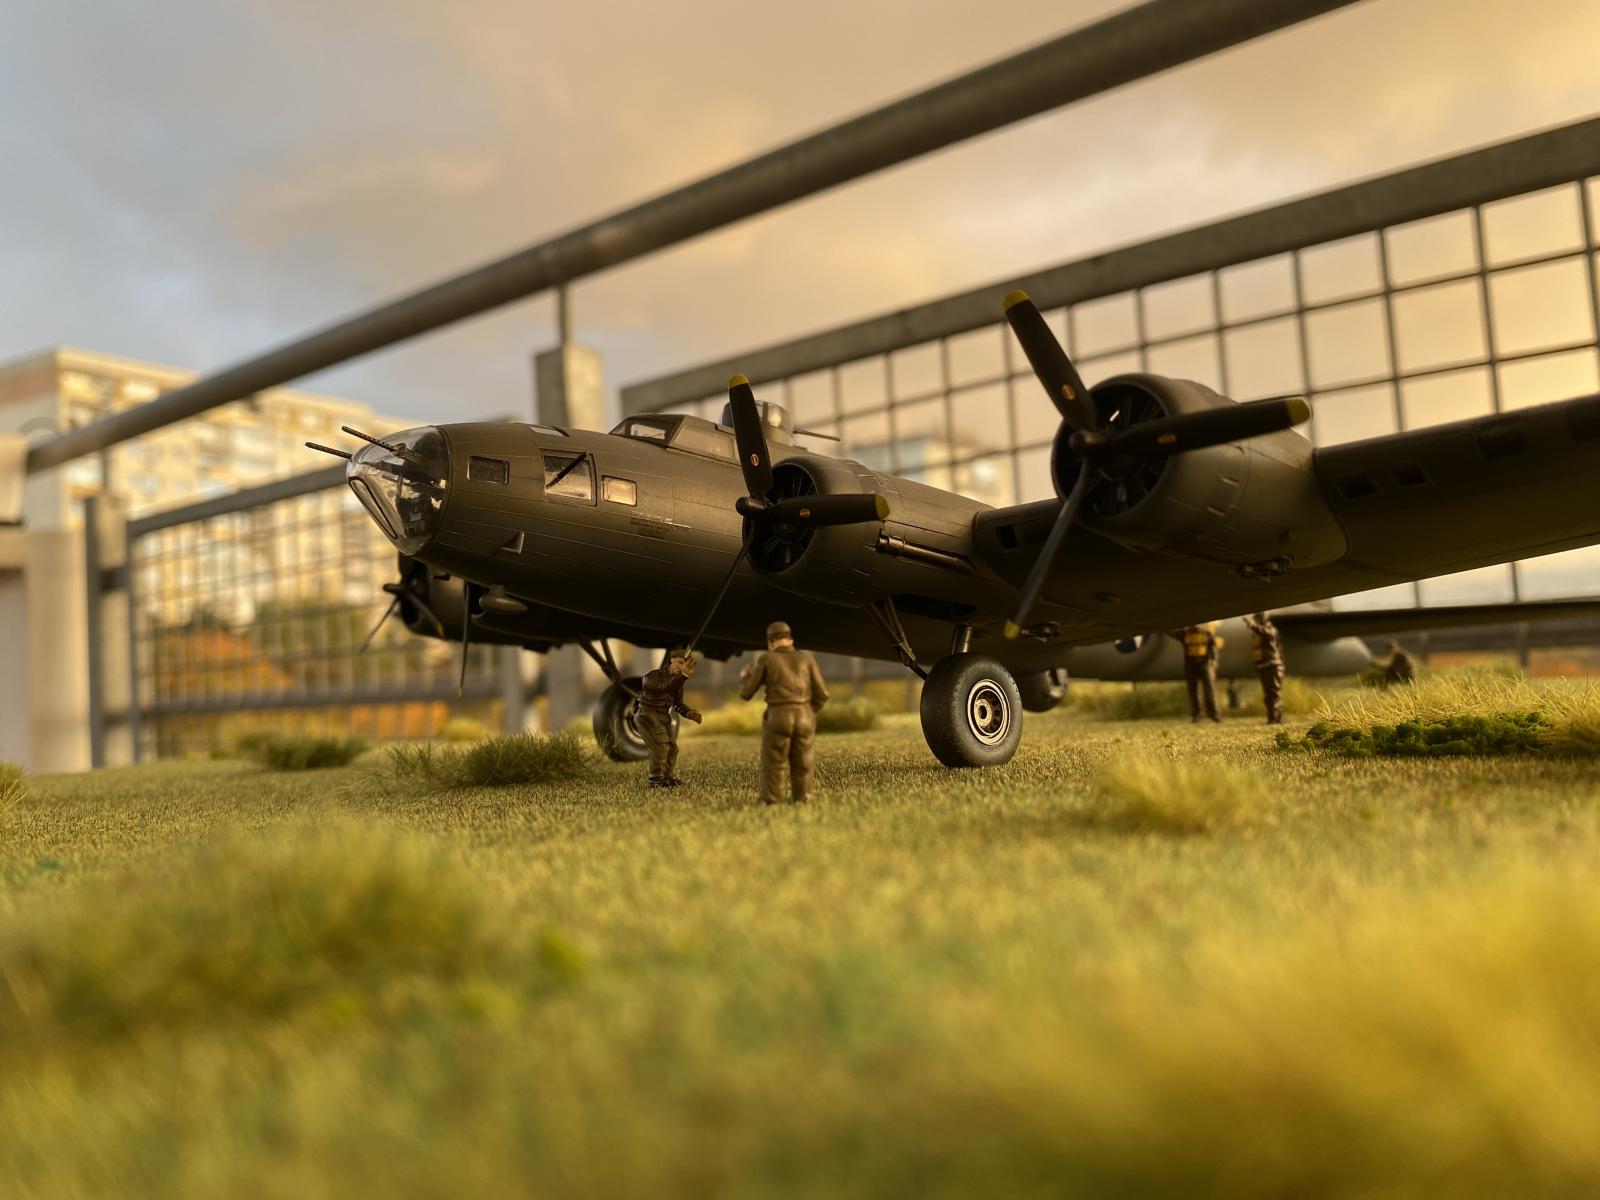
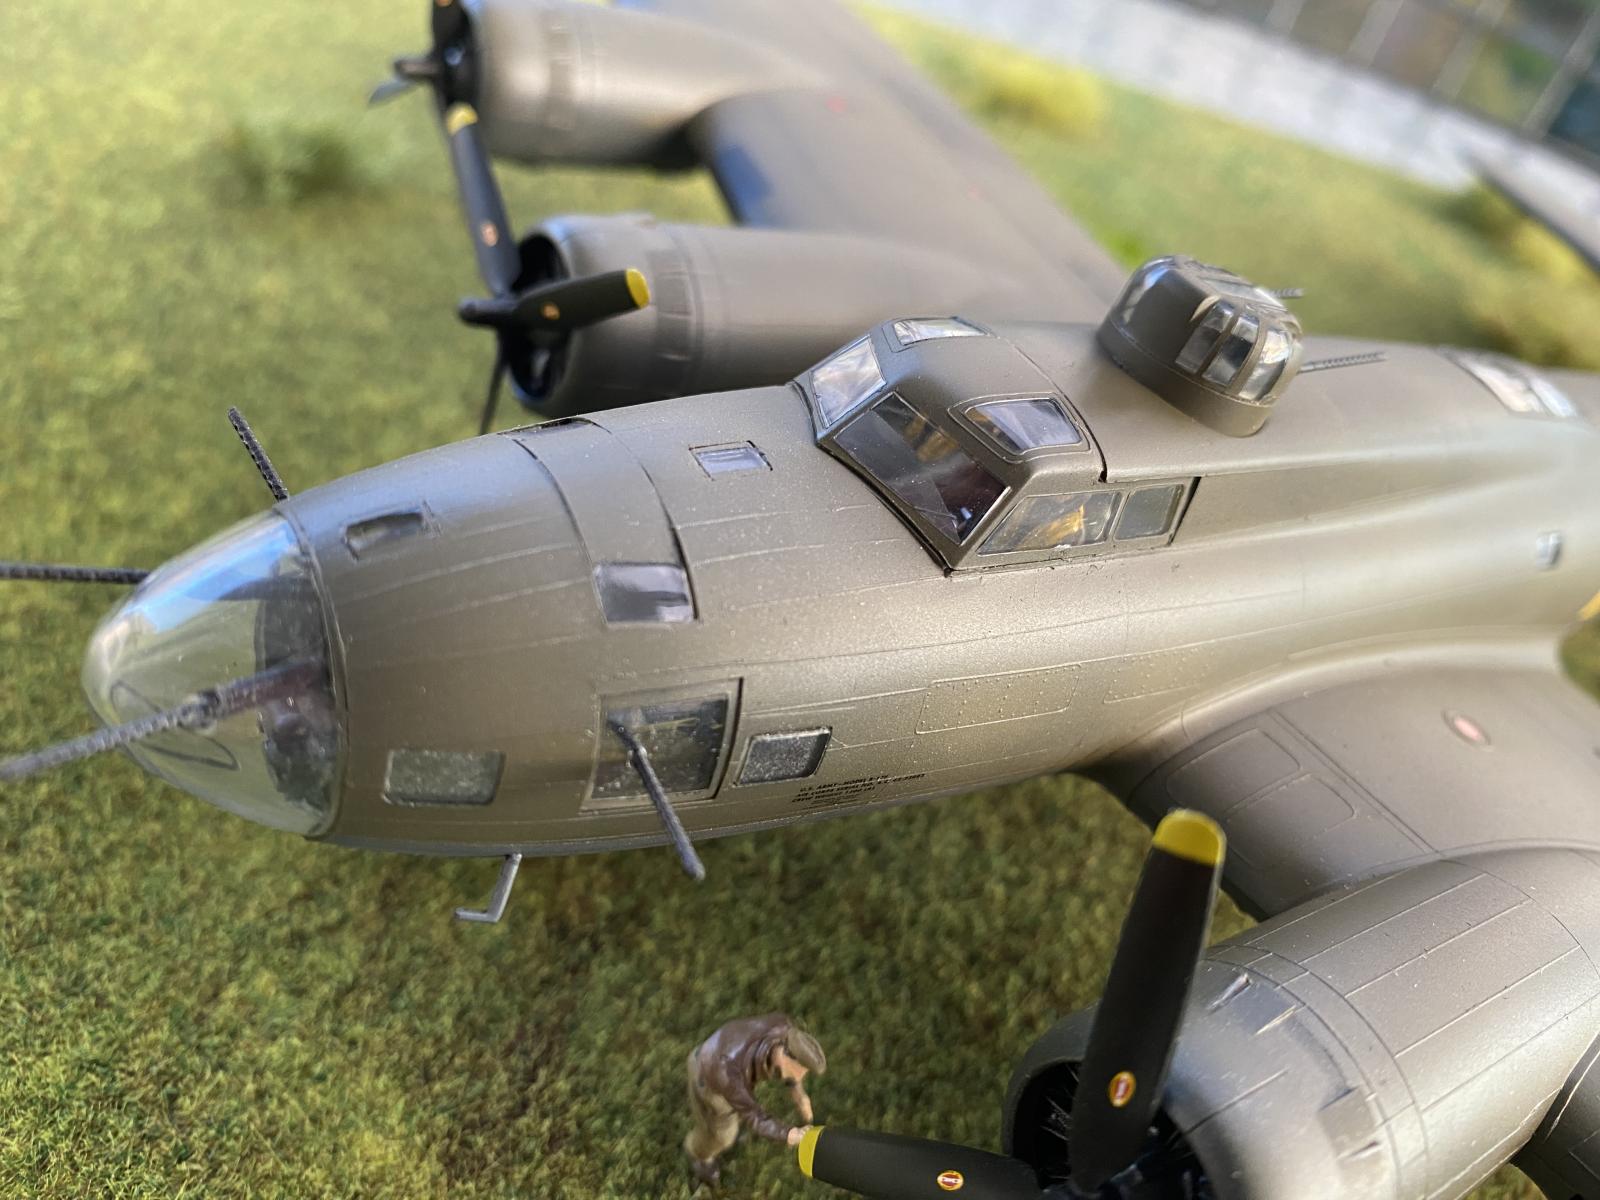
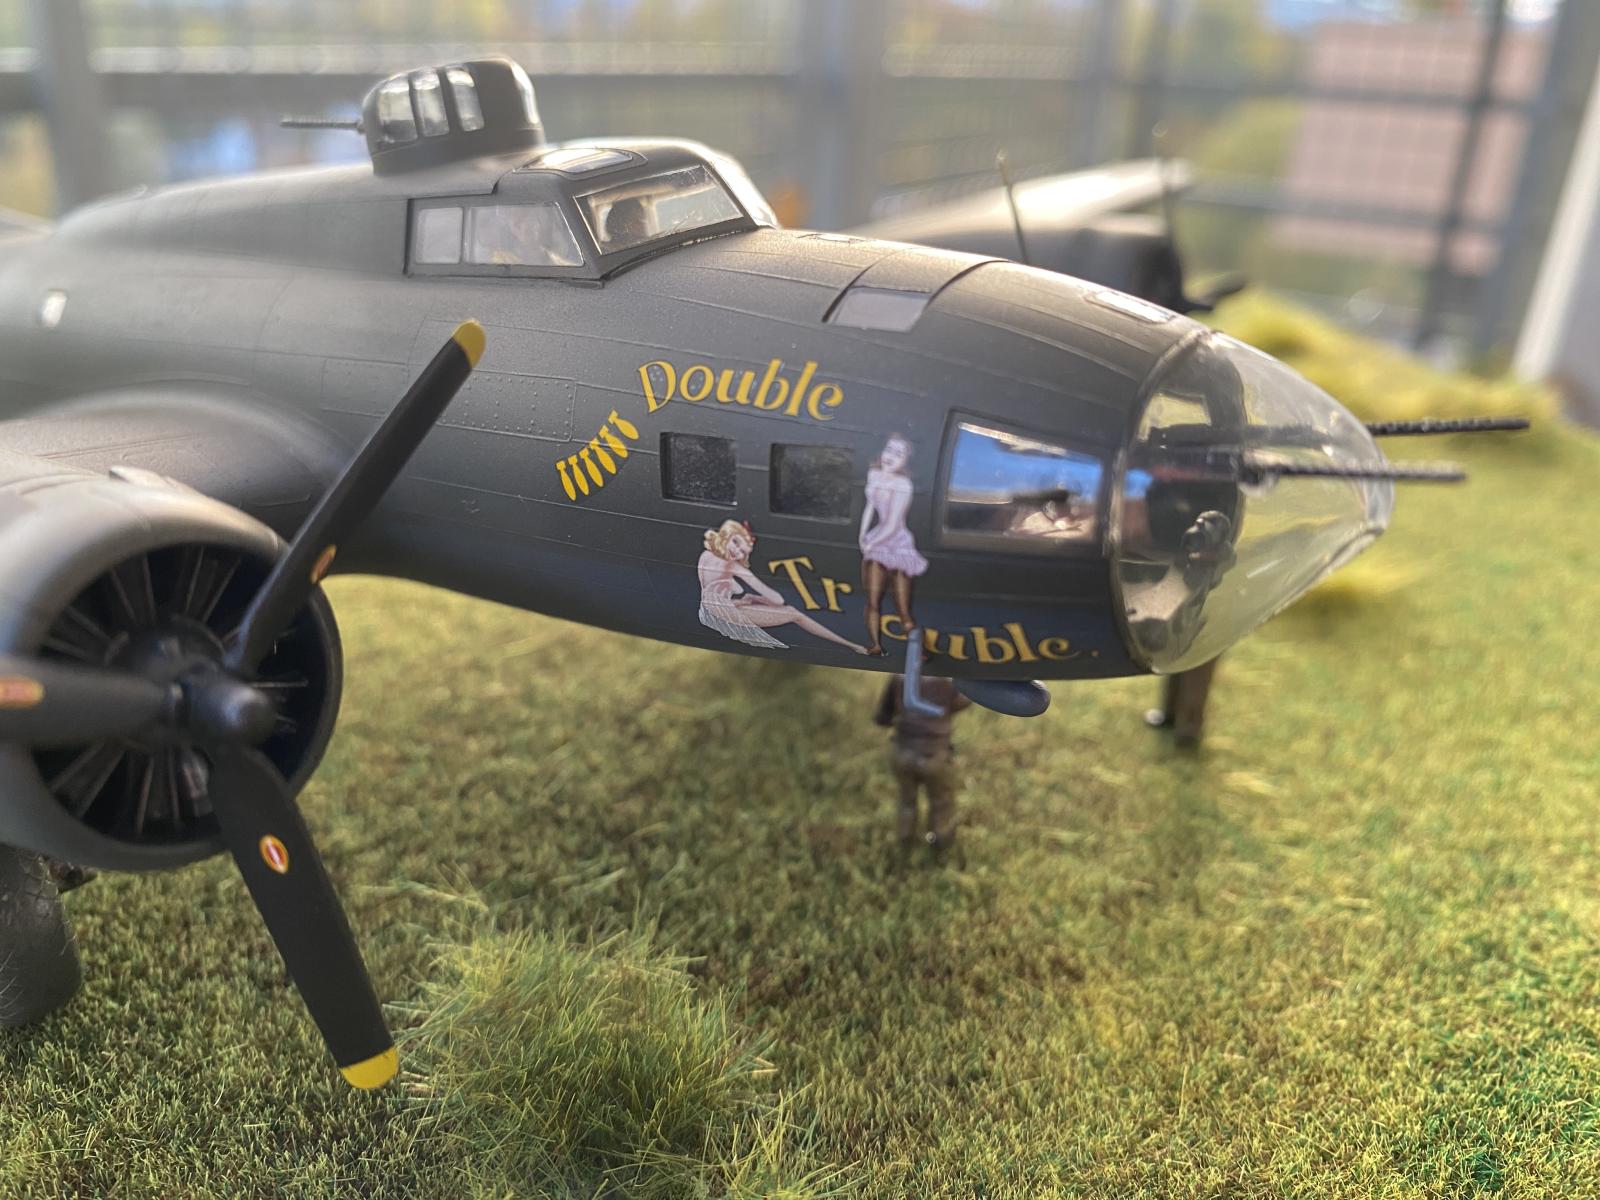
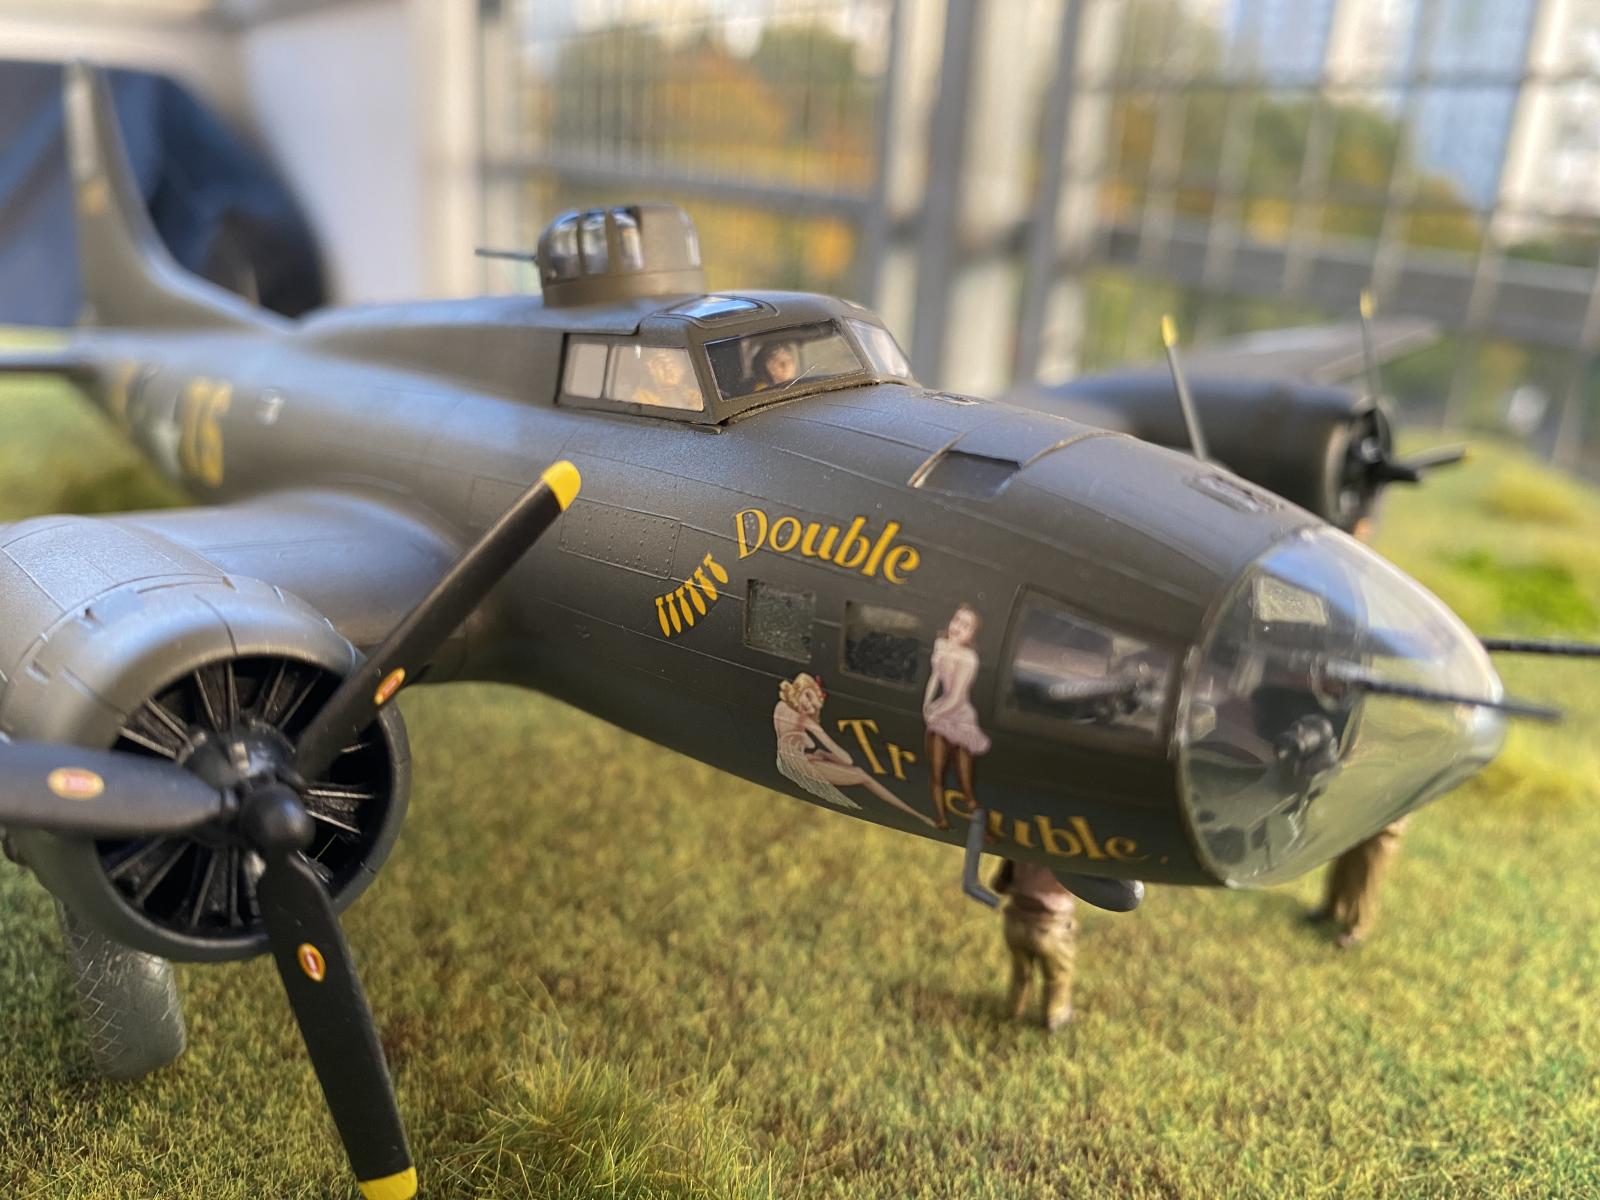
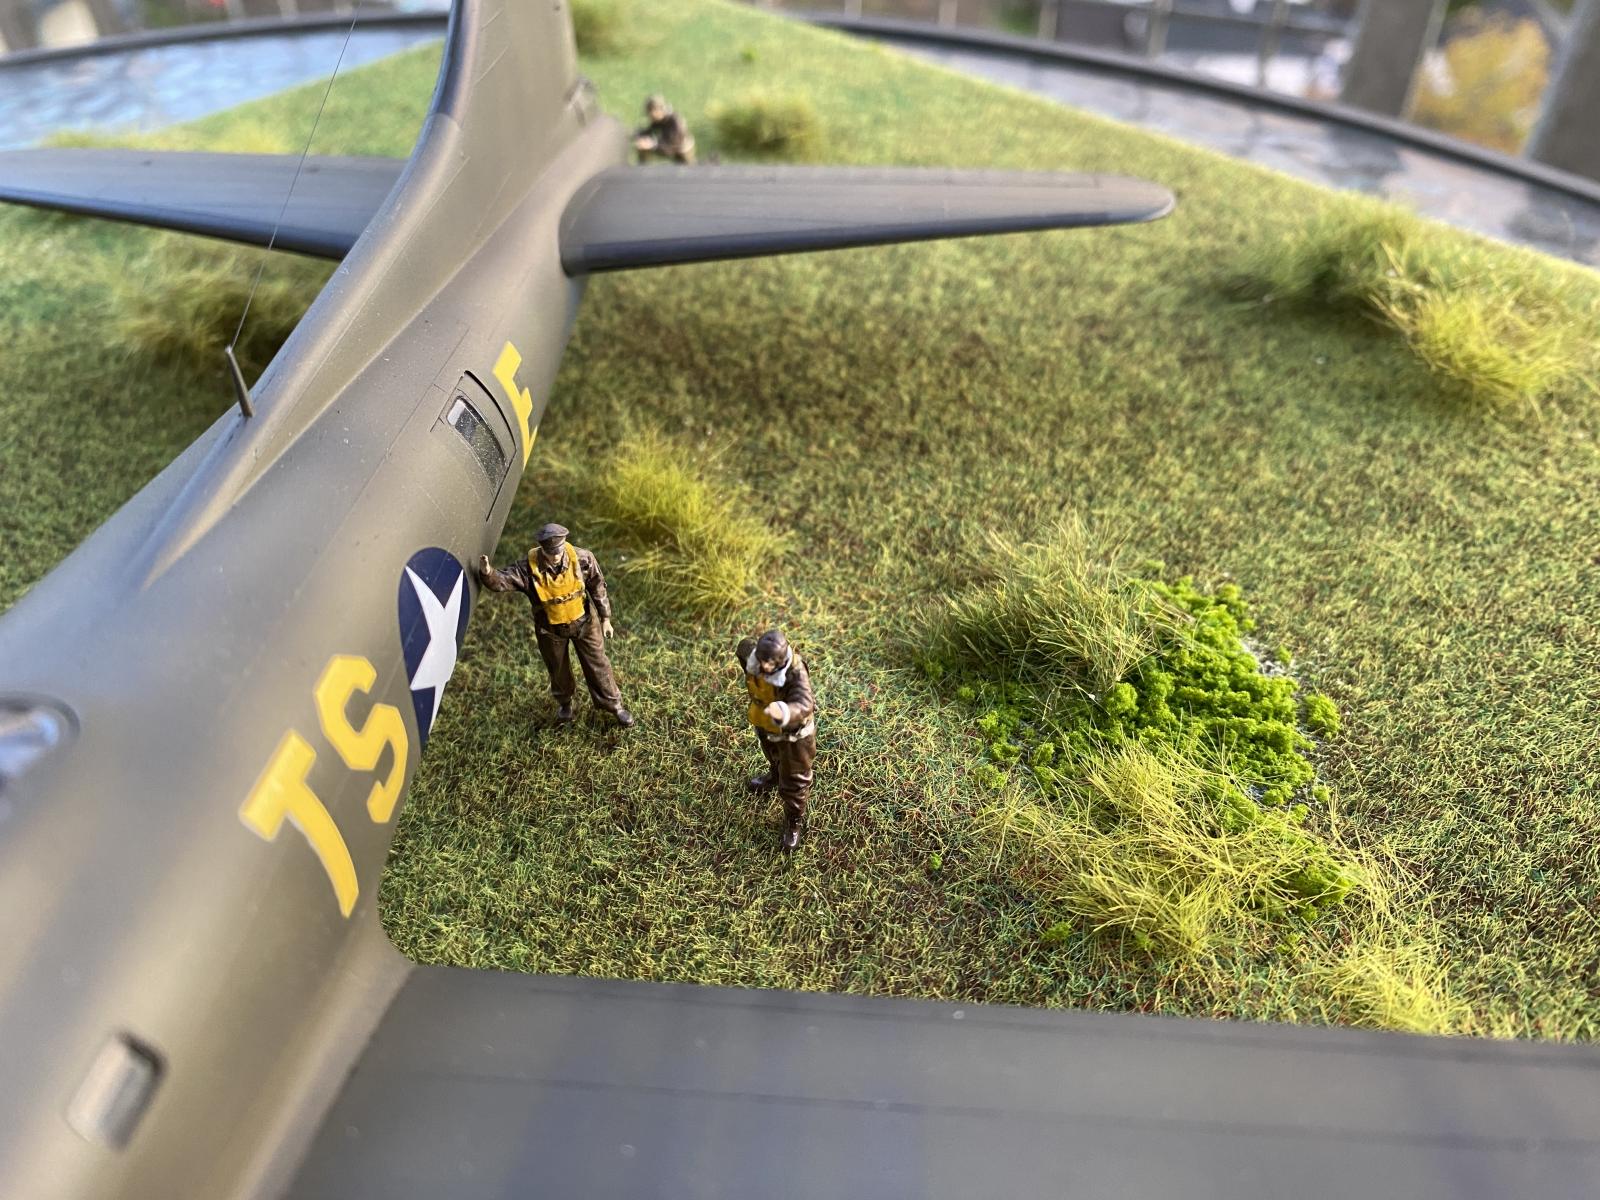
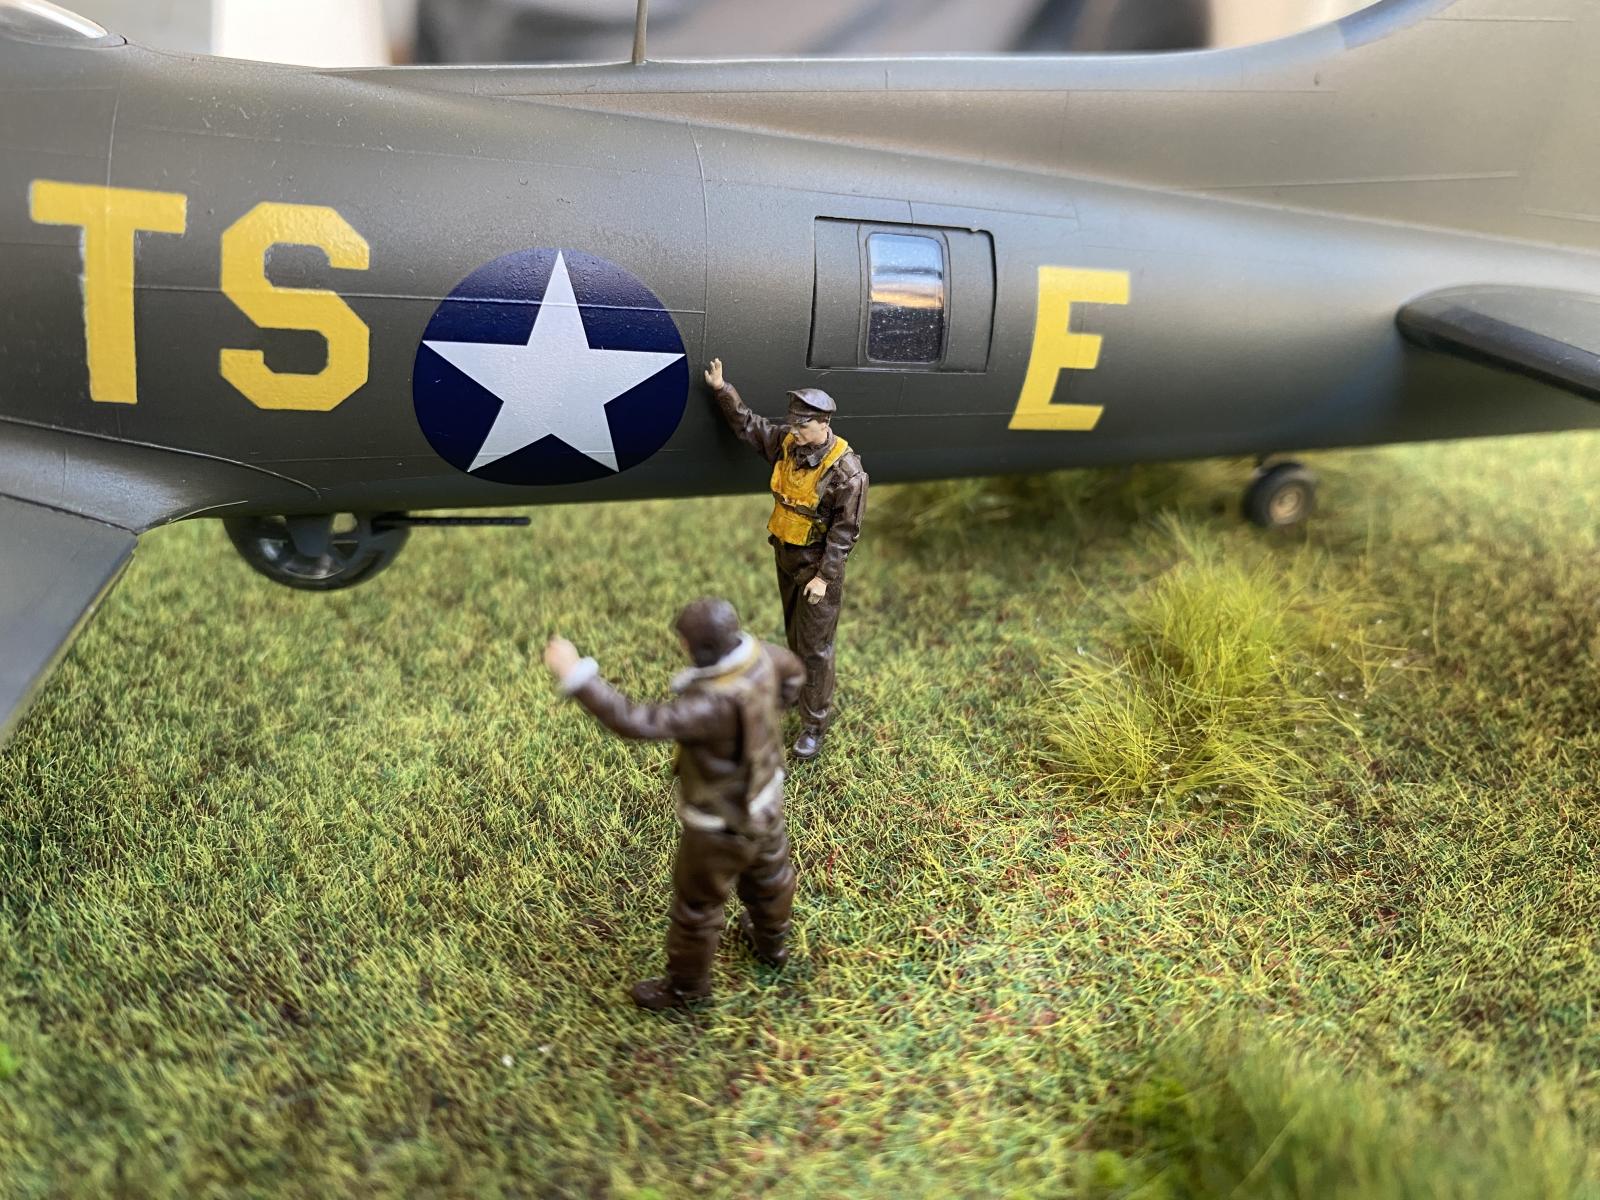
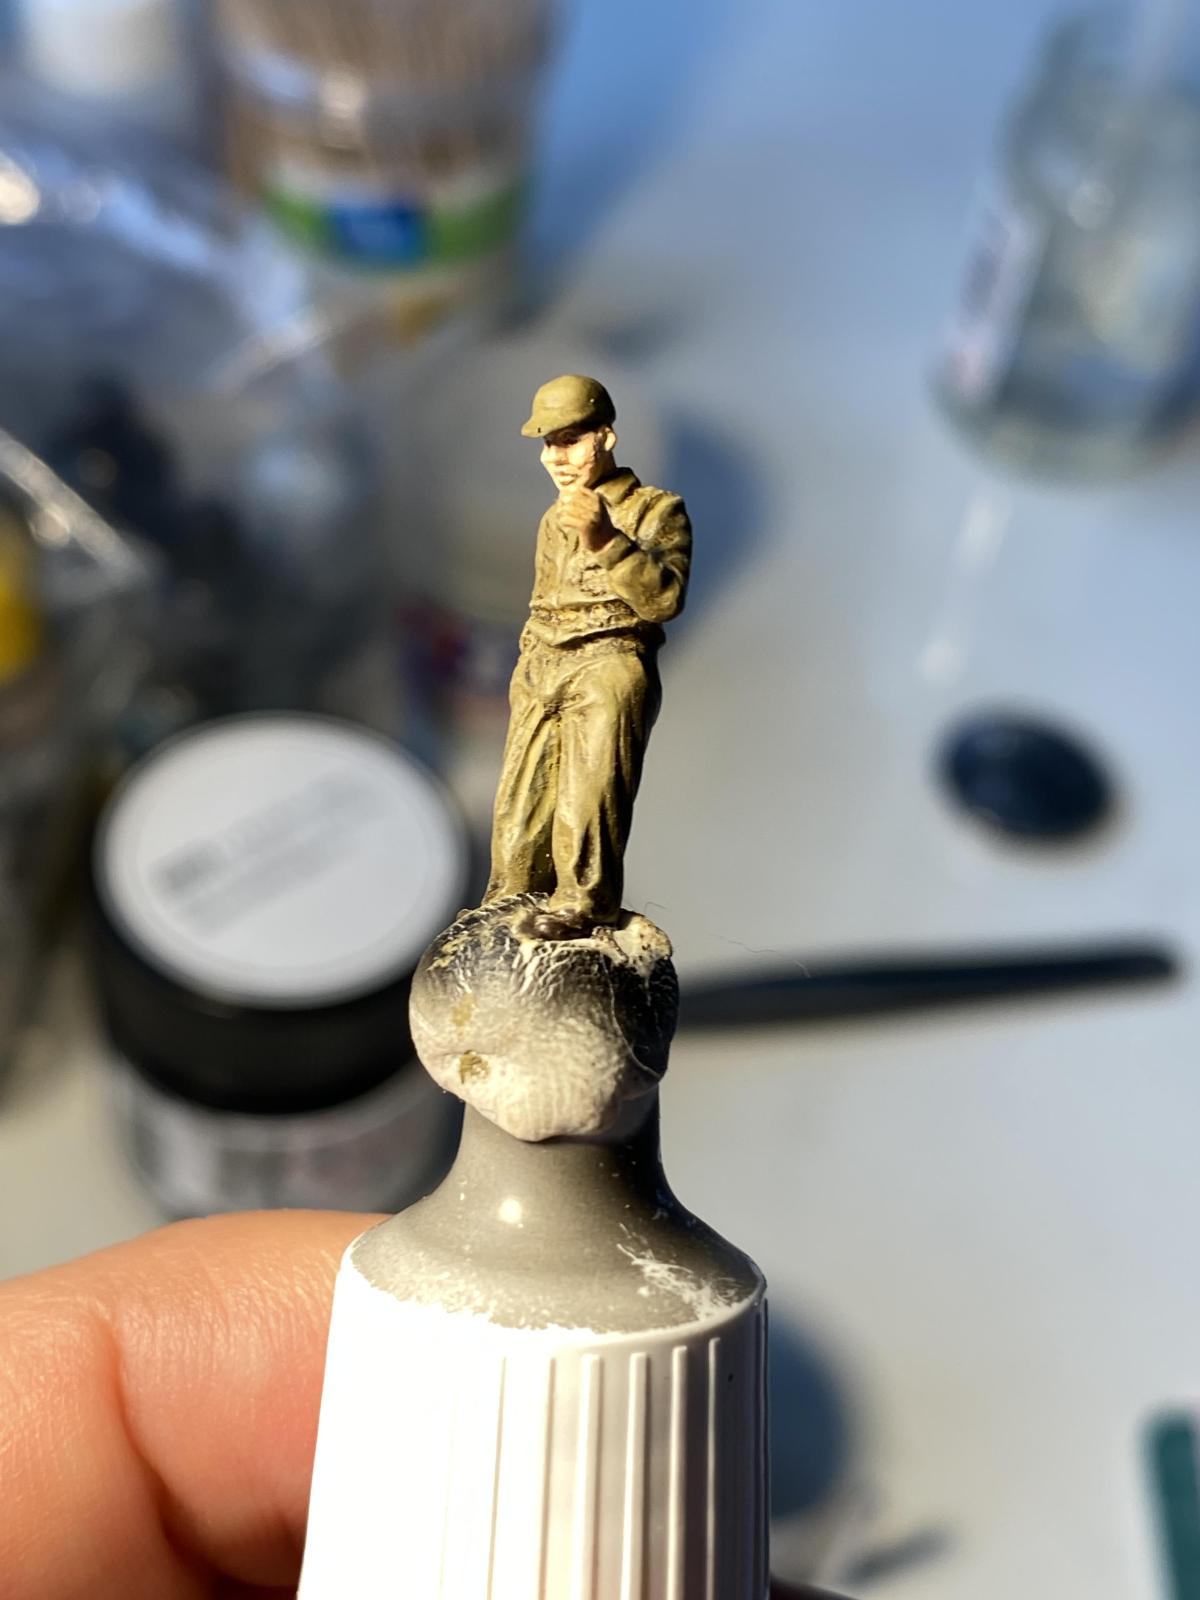
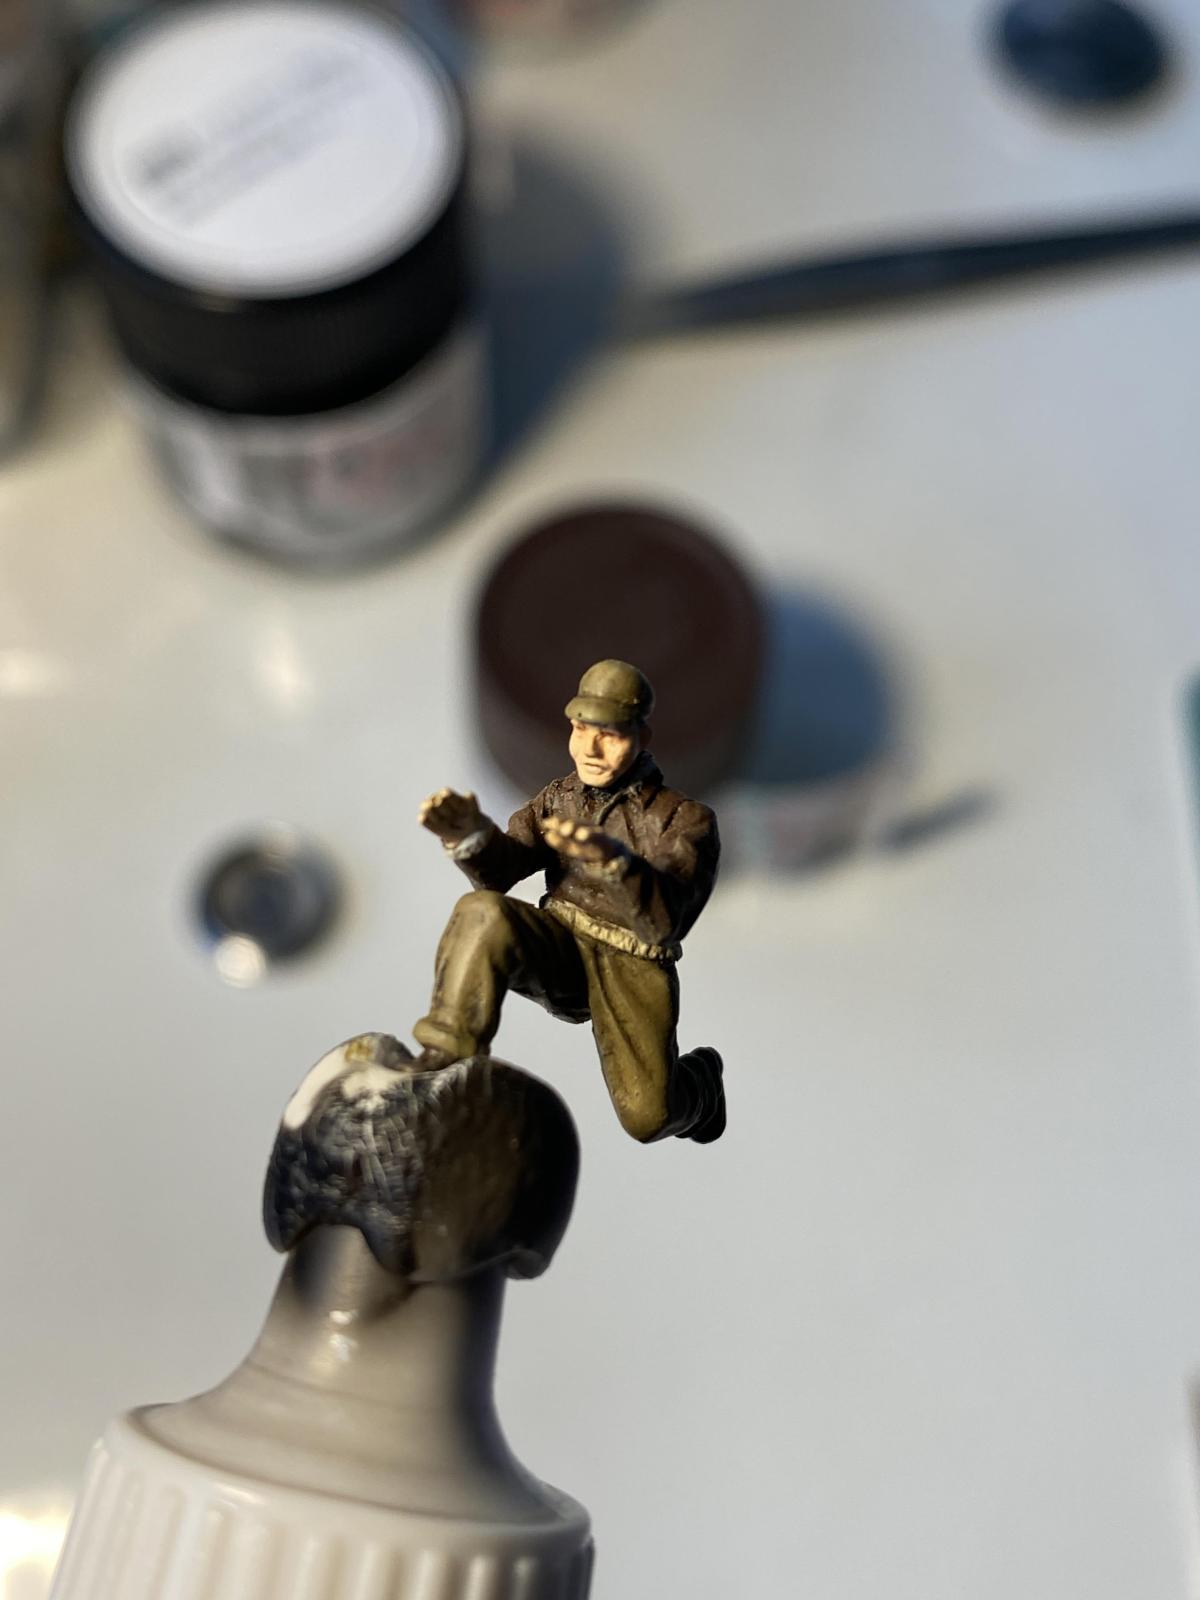
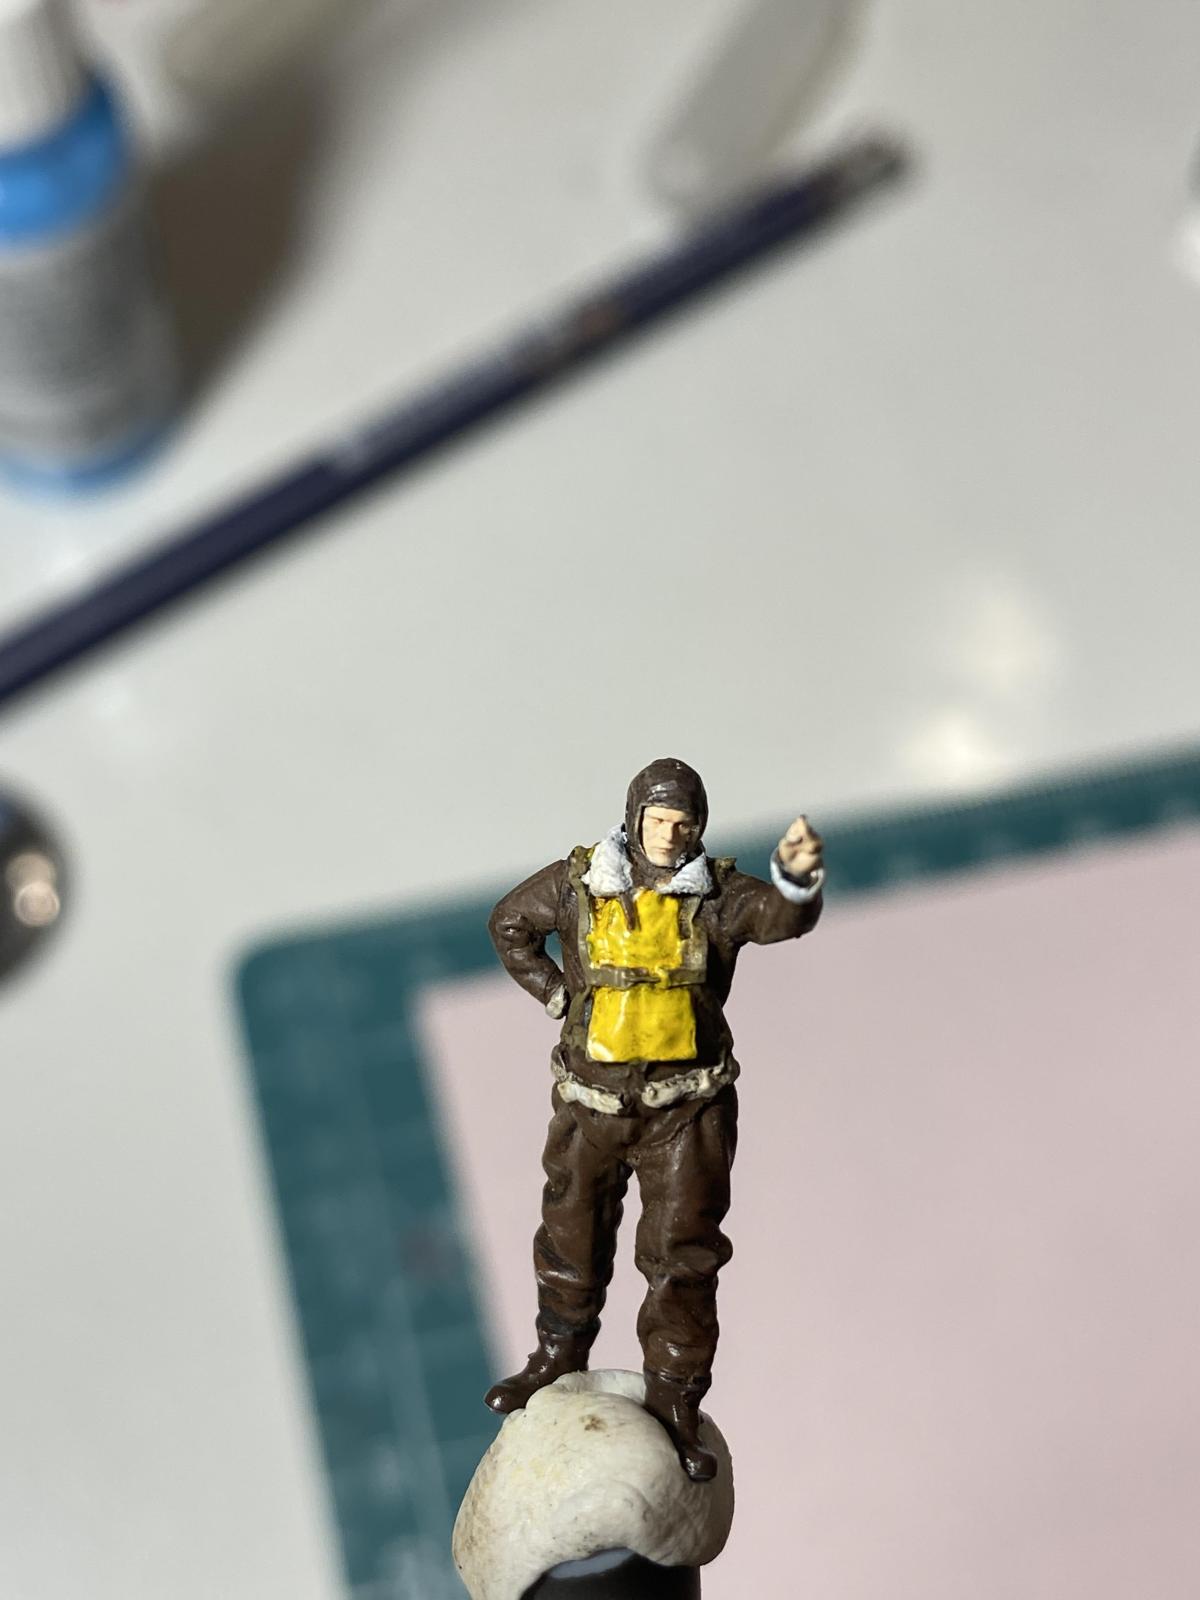
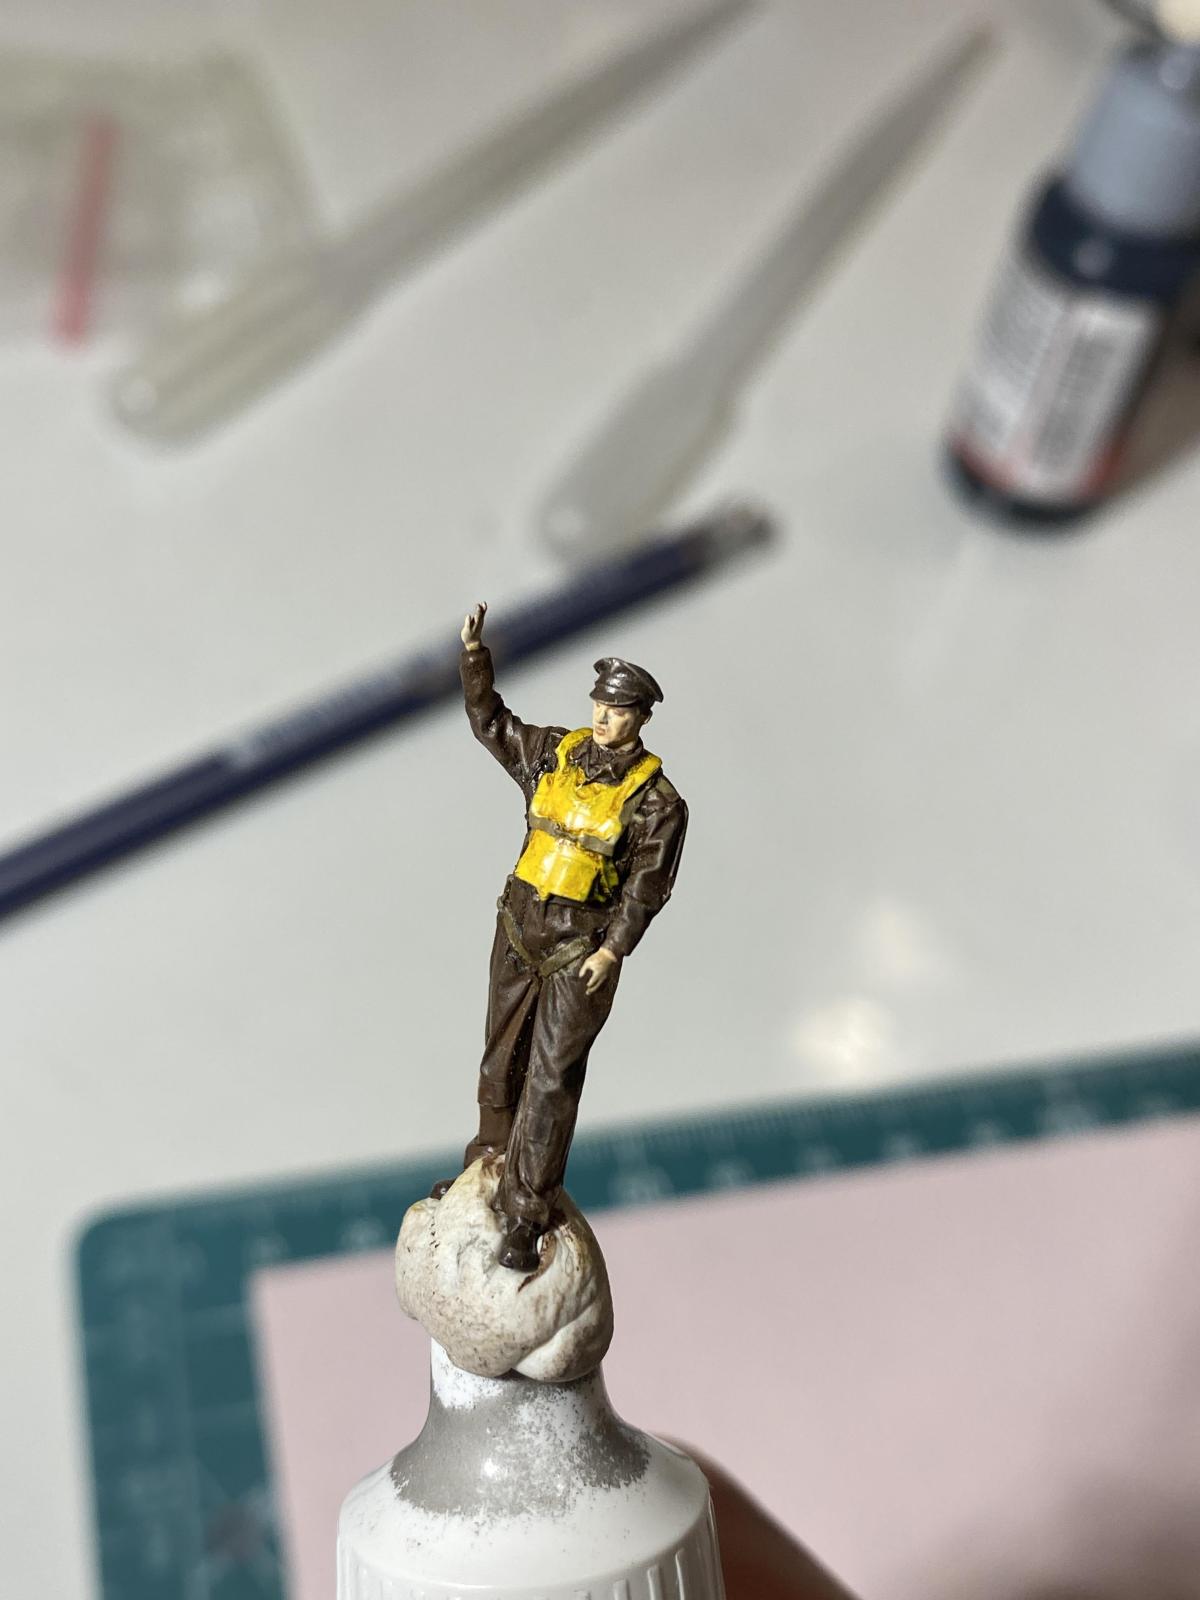
The model has a simplified interior that is limited to the front section of the bombardier and navigator and the pilots compartment. The set also includes two figures of pilots, quite good quality (similar to Airfix). Initially, I tried to make the construction in the OOB style, but the barrels of the rifles included in the set were so bulky that I finally bought two turned sets of Master barrels and used four M2 rifles from the Fine Molds set, which remained from my previous construction sites. The first part of the construction was carried out without major disruptions. The assembly of the fuselage required CA glue, because there were places where it clearly springed when pressed. For interior painting, I used the 351 MR color uniformly. The glazing is mounted from the inside, I used Tamiya Clear for this, it is stronger, for example, than Microscale glue. Nevertheless, attention is recommended when attaching the masks to the glazing, so as not to push the glazing inside. The glazing in the form of two small windows on the bridge of the nose is probably the worst. It is a semicircular strip of plastic that should fit into a cutout in the fuselage. However, its adjustment is quite moderate. This is probably the worst element of the model in my opinion. The wings fit fairly well. Practically very well from the top. However, from the bottom you had to use a slightly liquid putty. When assembling the engines, it should be noted that following the instructions will result in the propellers being glued at the stage of engine nacelles assembly, which of course makes painting difficult. That is why I gave up on mounting propellers at this stage (which of course made it difficult to securely mount the propellers in slightly too large holes in the engine mount). However, I solved it in the end by sticking pieces of masking tape on the propeller's mounting element. Thanks to this, they stuck rigidly in the engines and did not fall down. I also used CA glue for mounting motors placed in housings. You had a bit of a problem with the correct fit of these elements to the wing. It took some force. The interior of the wheel wells in the is completely simplified, but basically it is not visible at all. But the wheels made with a tread look decent, which I slightly flattened at the point of contact with the ground. And also kit has option with open flaps!
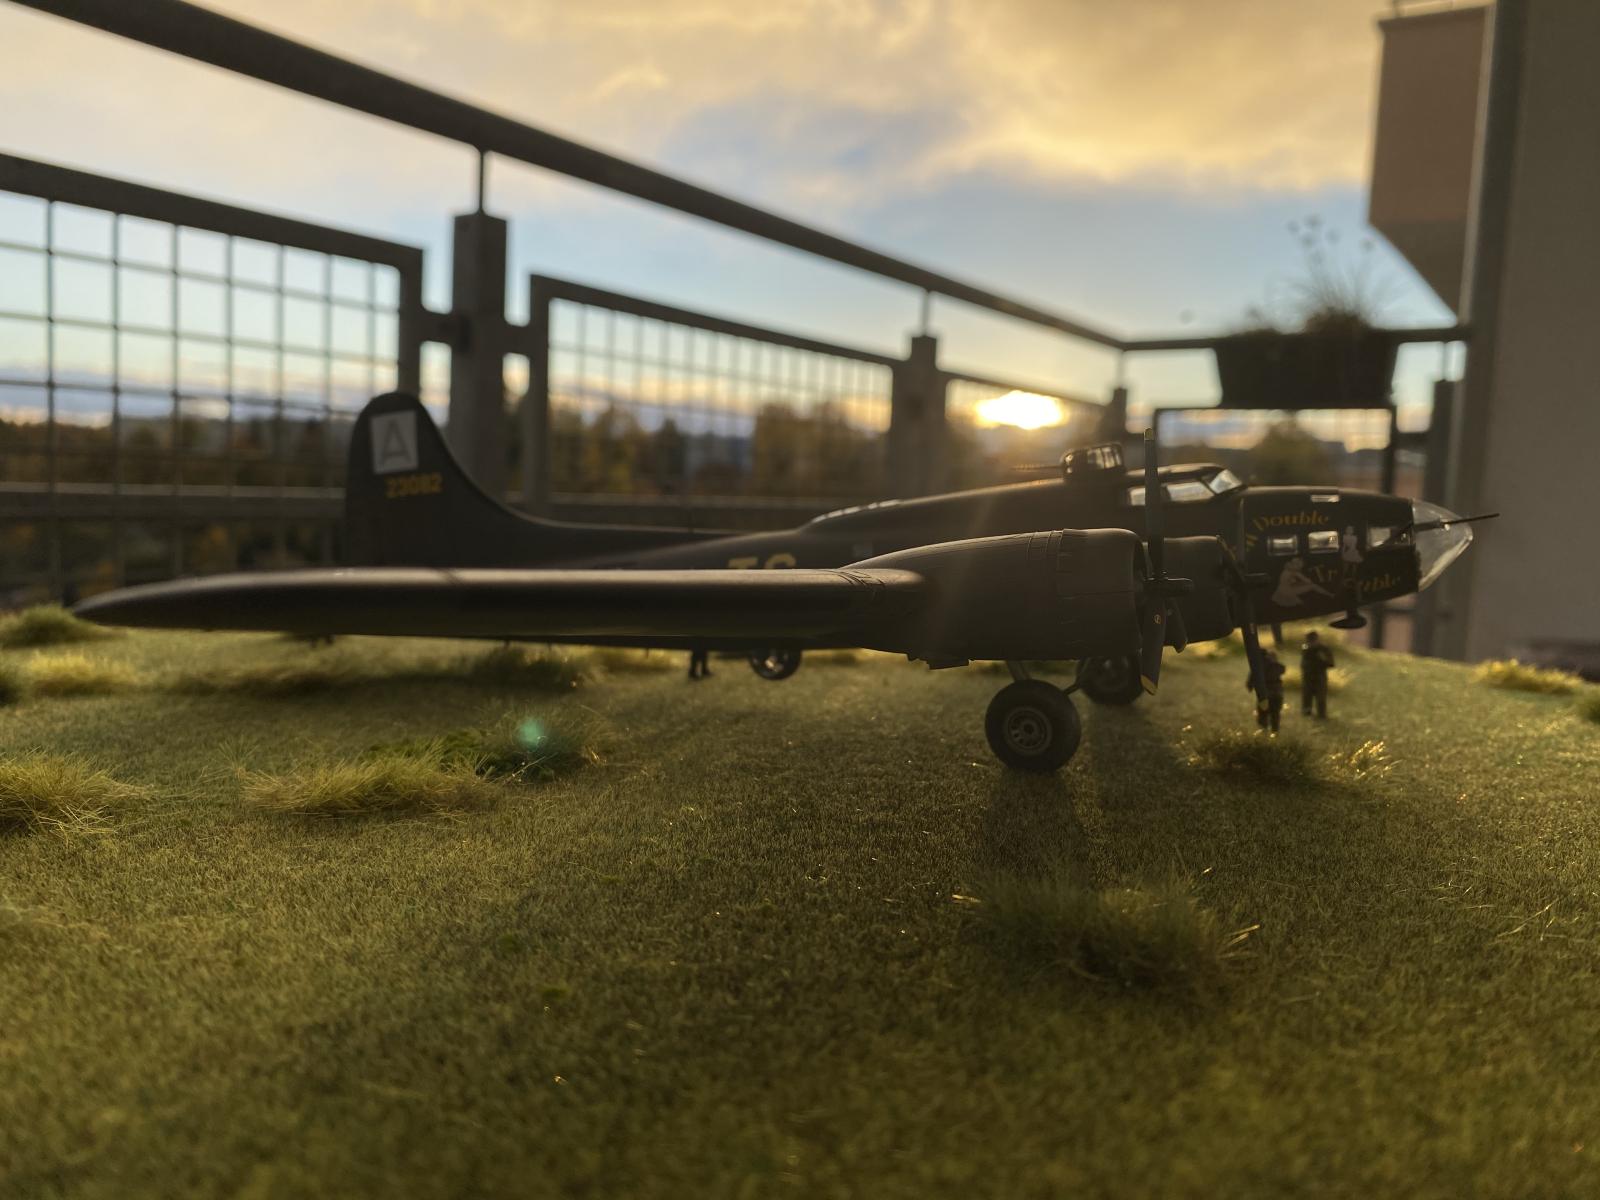
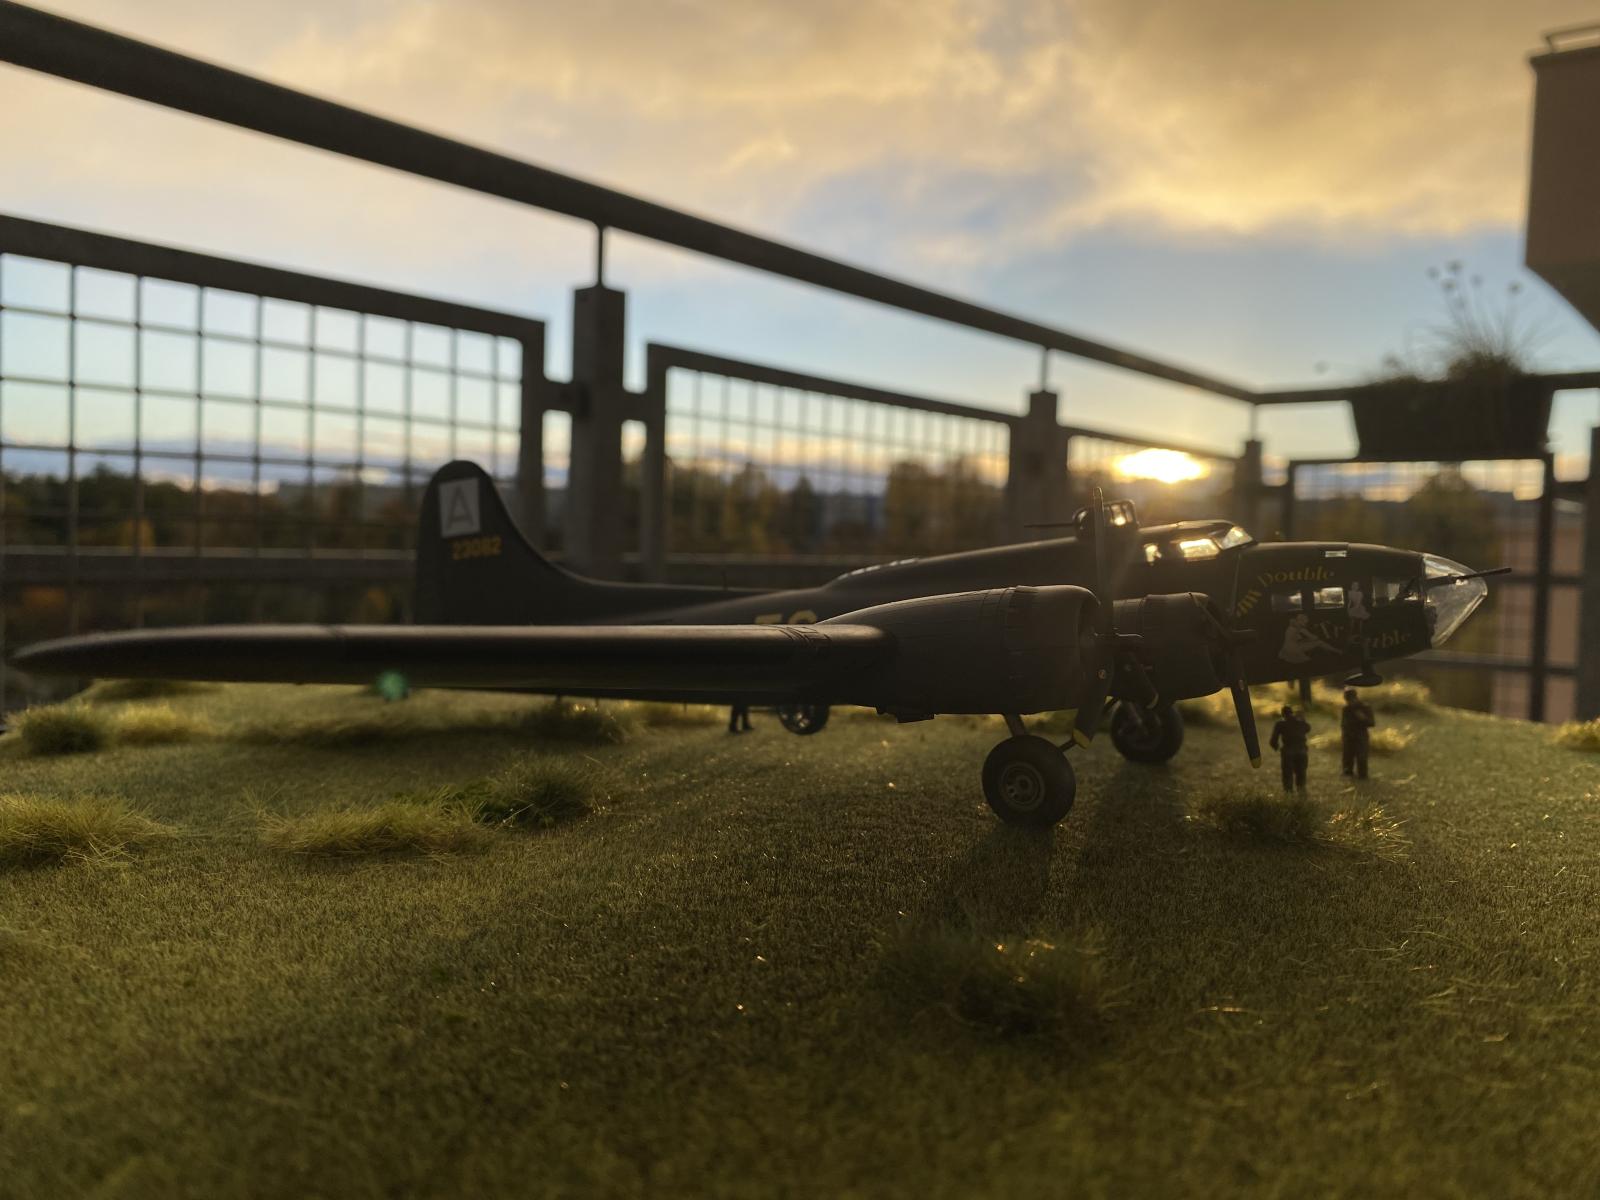
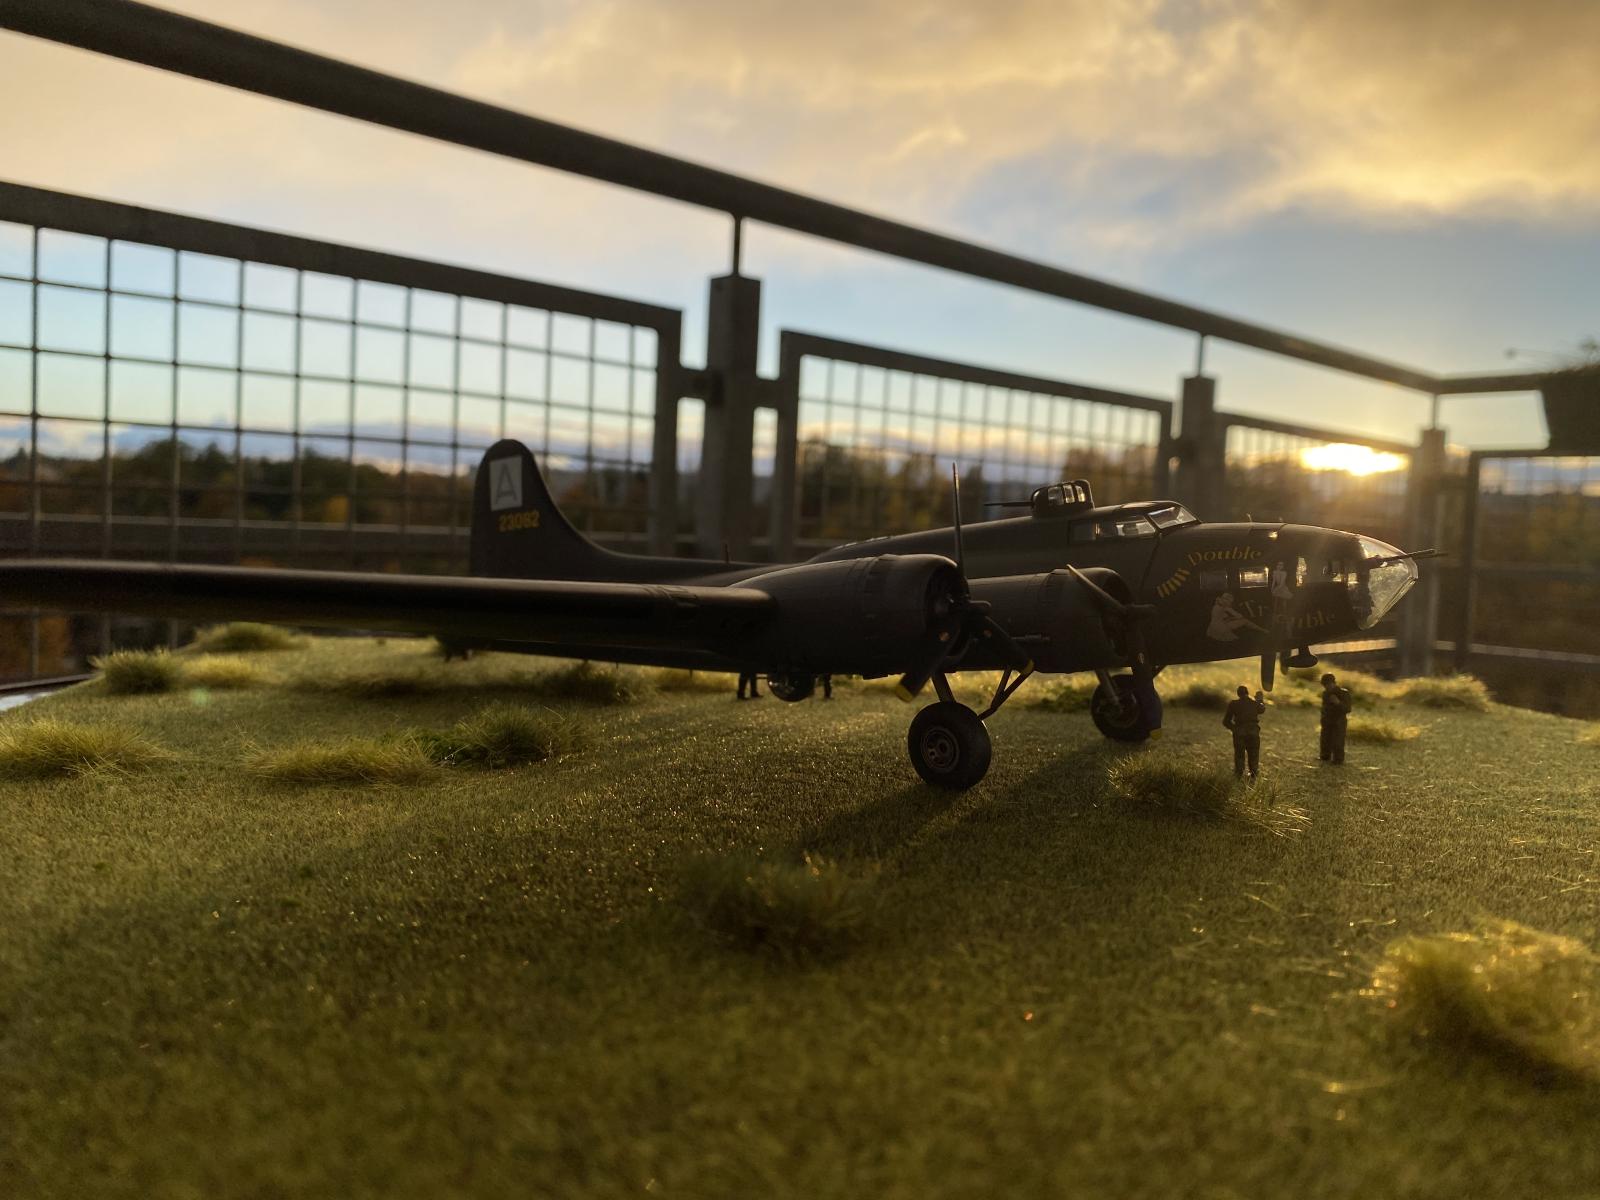
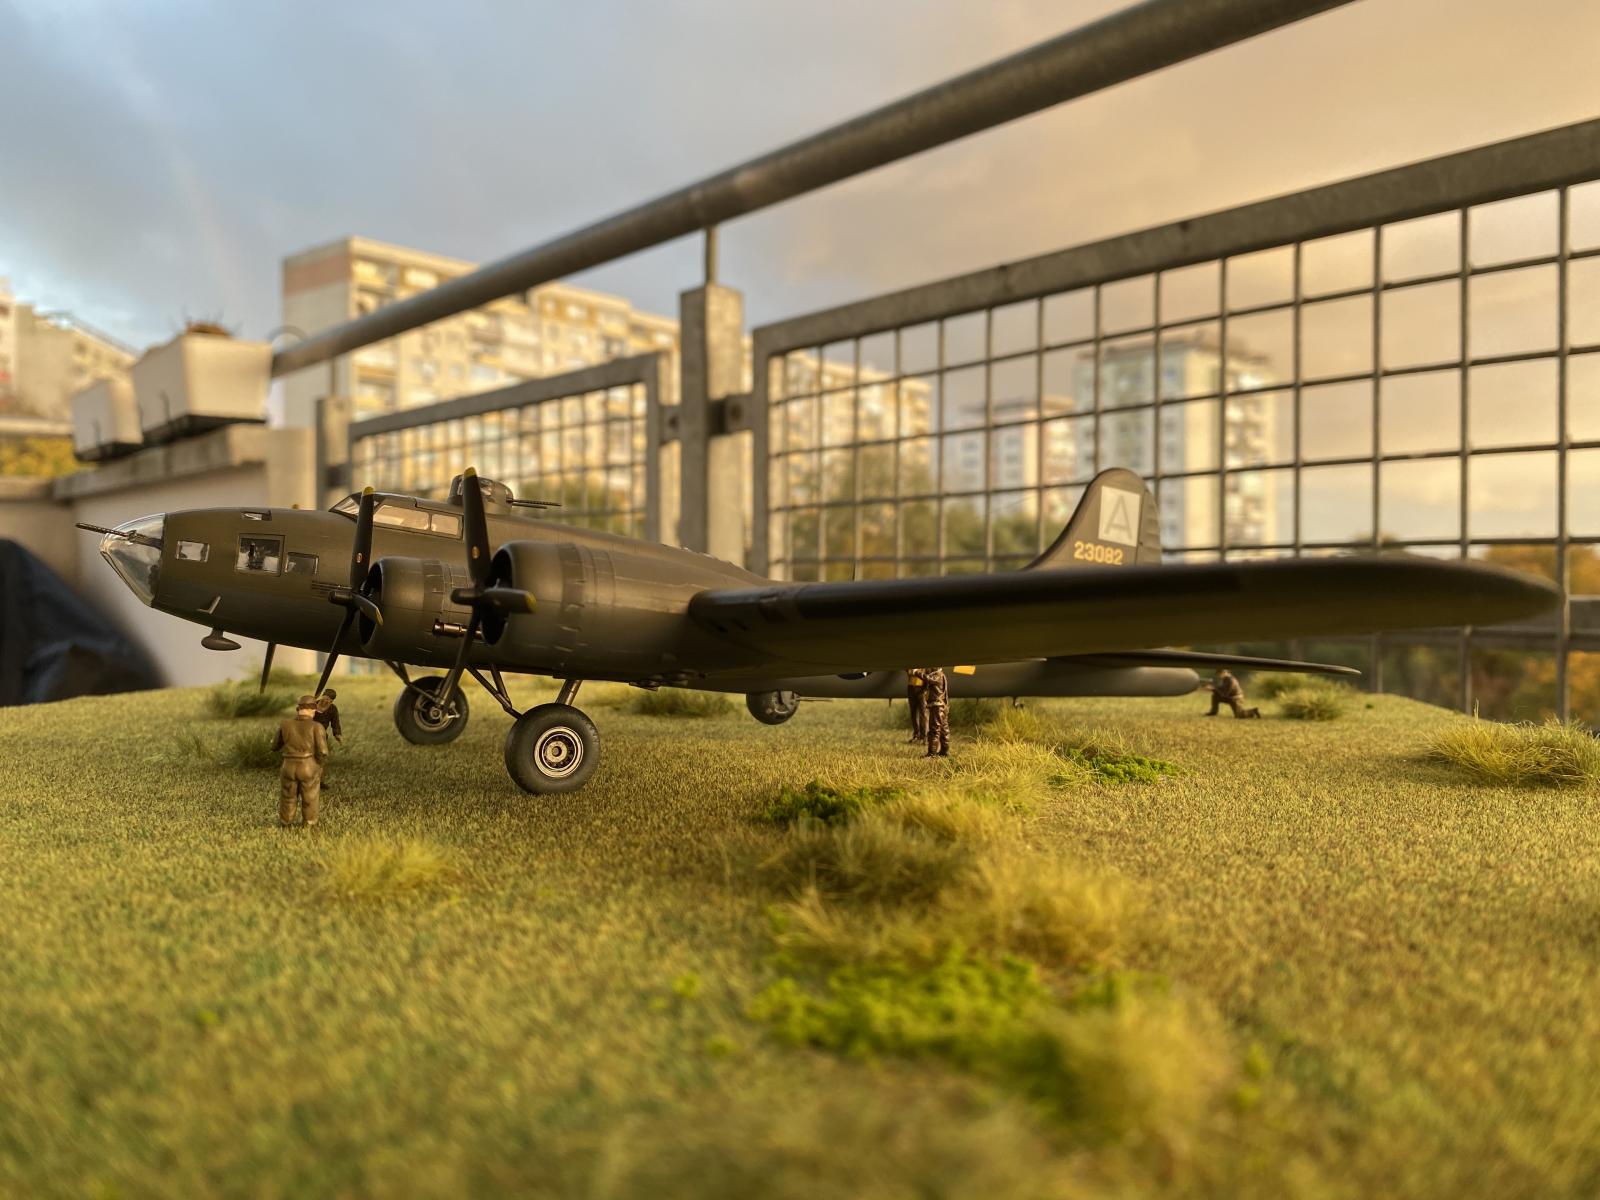
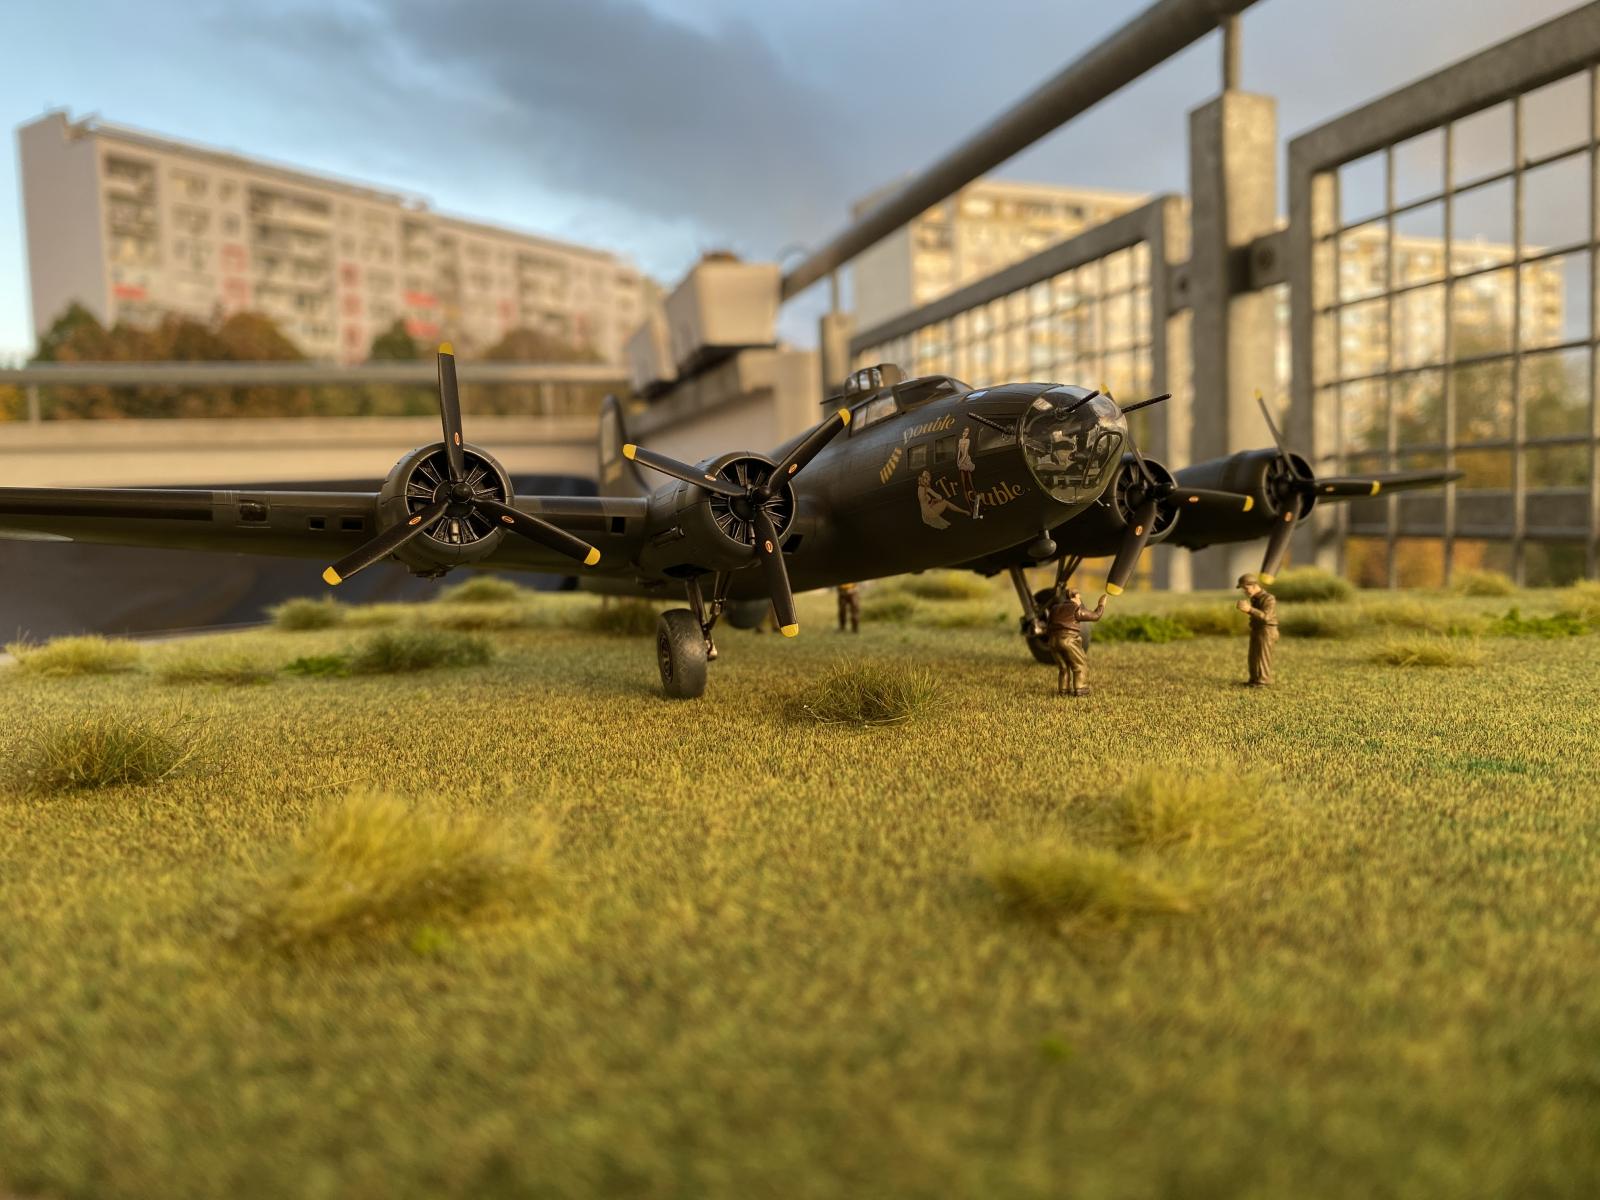
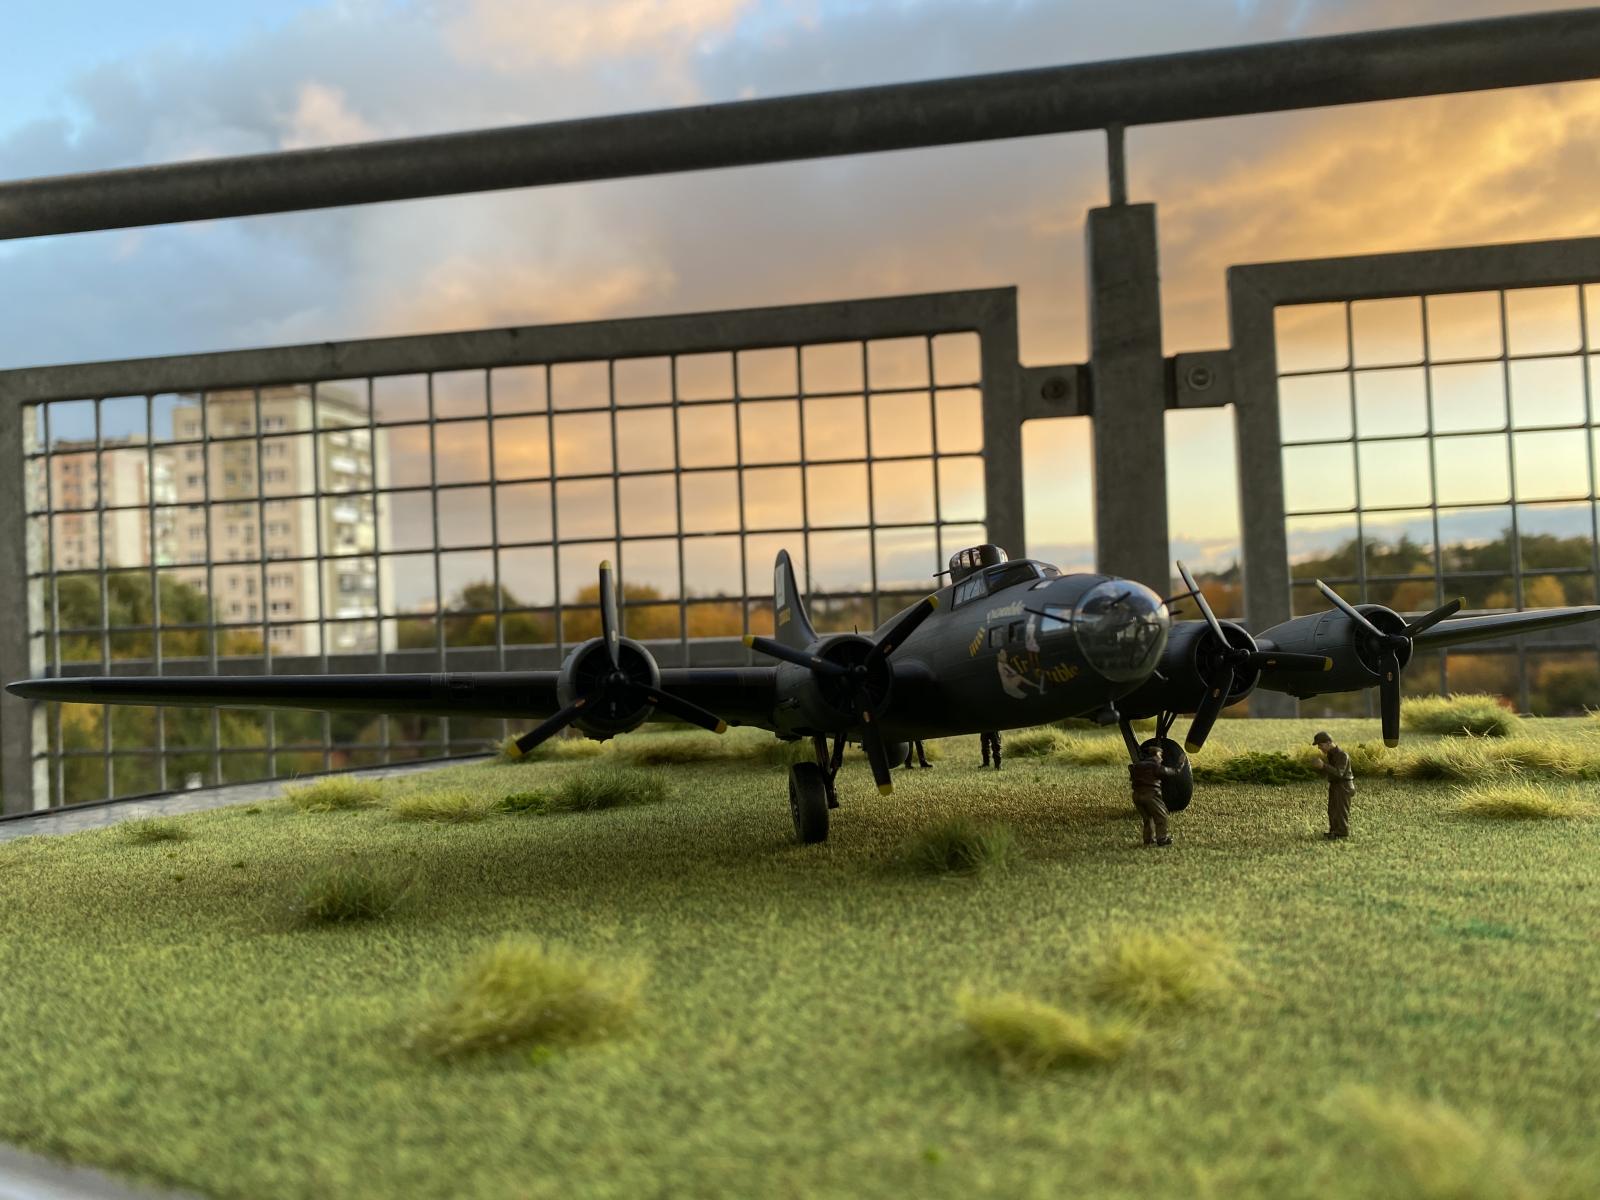
The model was painted as standard with Olive drab C12 and Neutral gray C13 on a layer of Black undercoat with the addition of gray in the form of pre-sheiding. In my opinion, the paints are very good. There were a few disasters during painting, like splashes of paint, which I had to fix by sanding a part of the wing to bare plastic and painting it again. Strangely enough, the crash site was practically corrected almost perfectly. I finally decided to make de-icing panels and used C33 matt black paint for this. The last disaster occurred during the assembly of the ridge turret. I wanted it in a rotating form, but it turned out that it did not fit perfectly and it burst the fuselage between the pilot's cabin and the seat, that I had to stick it back together, sand it to bare plastic and finally paint it. And so we got, not without adventures, to the happy ending.
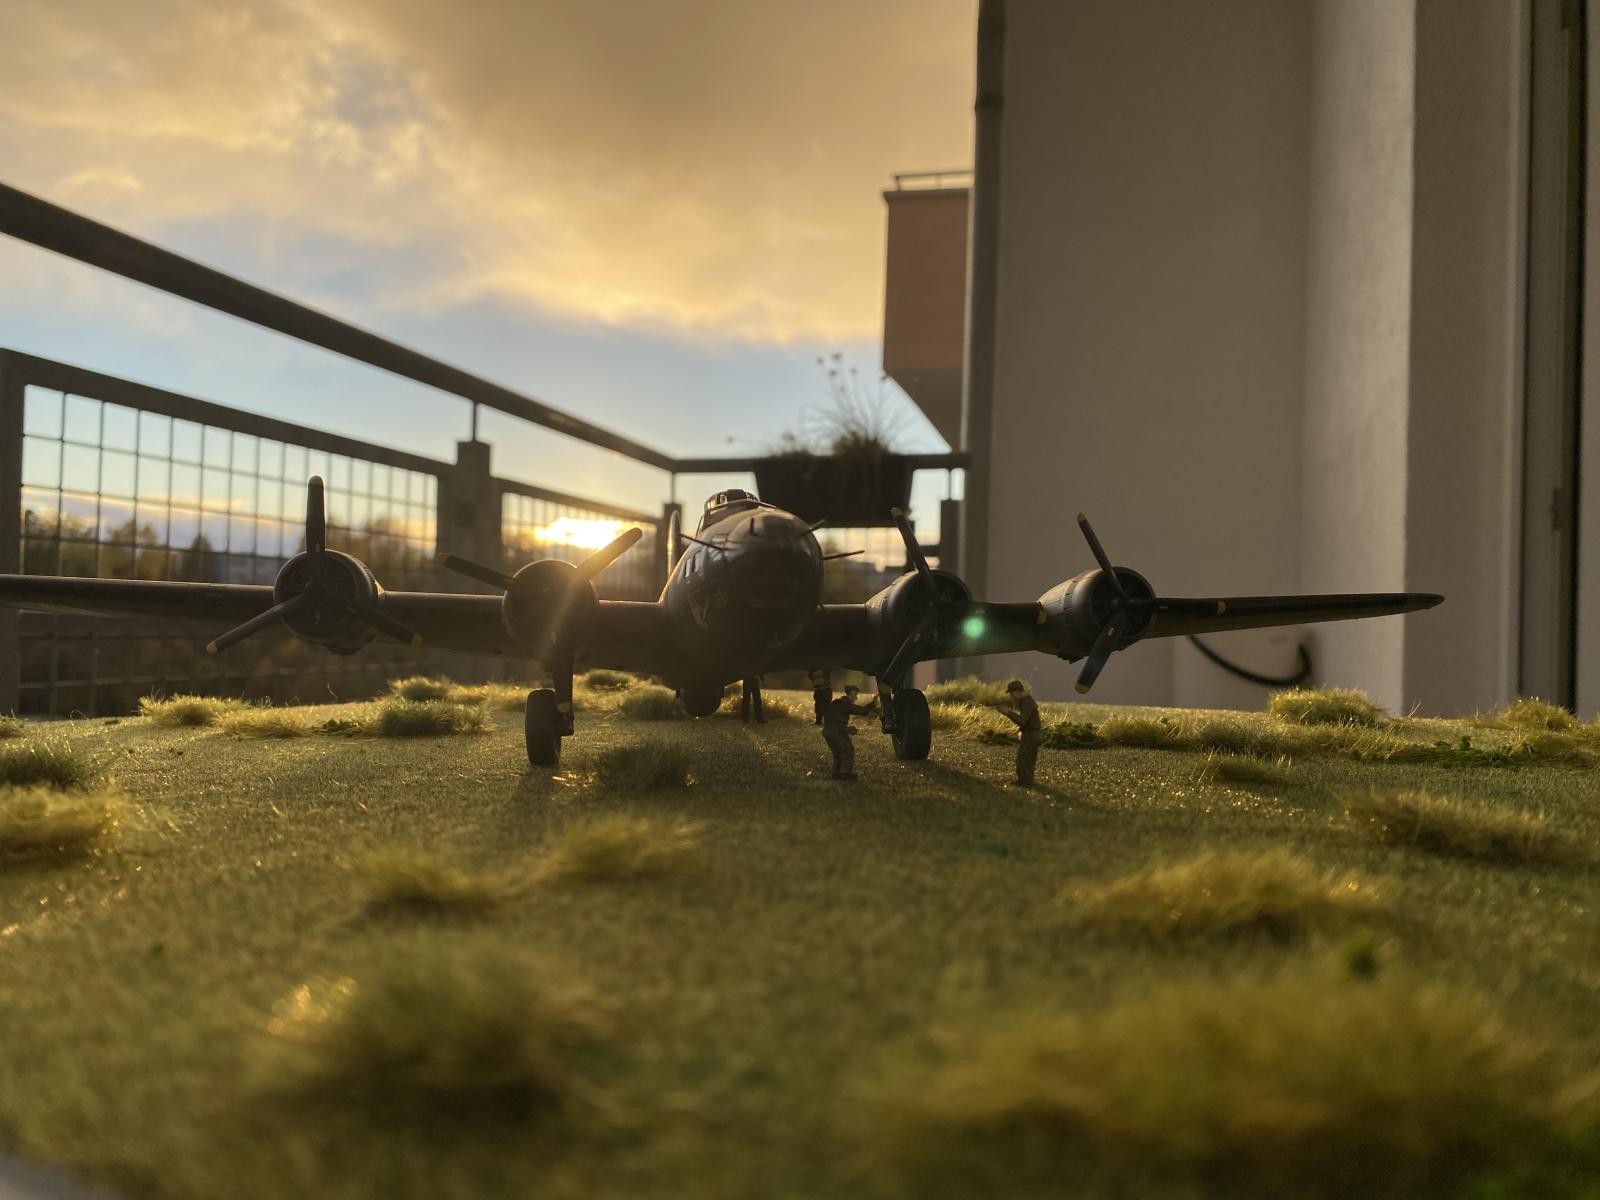
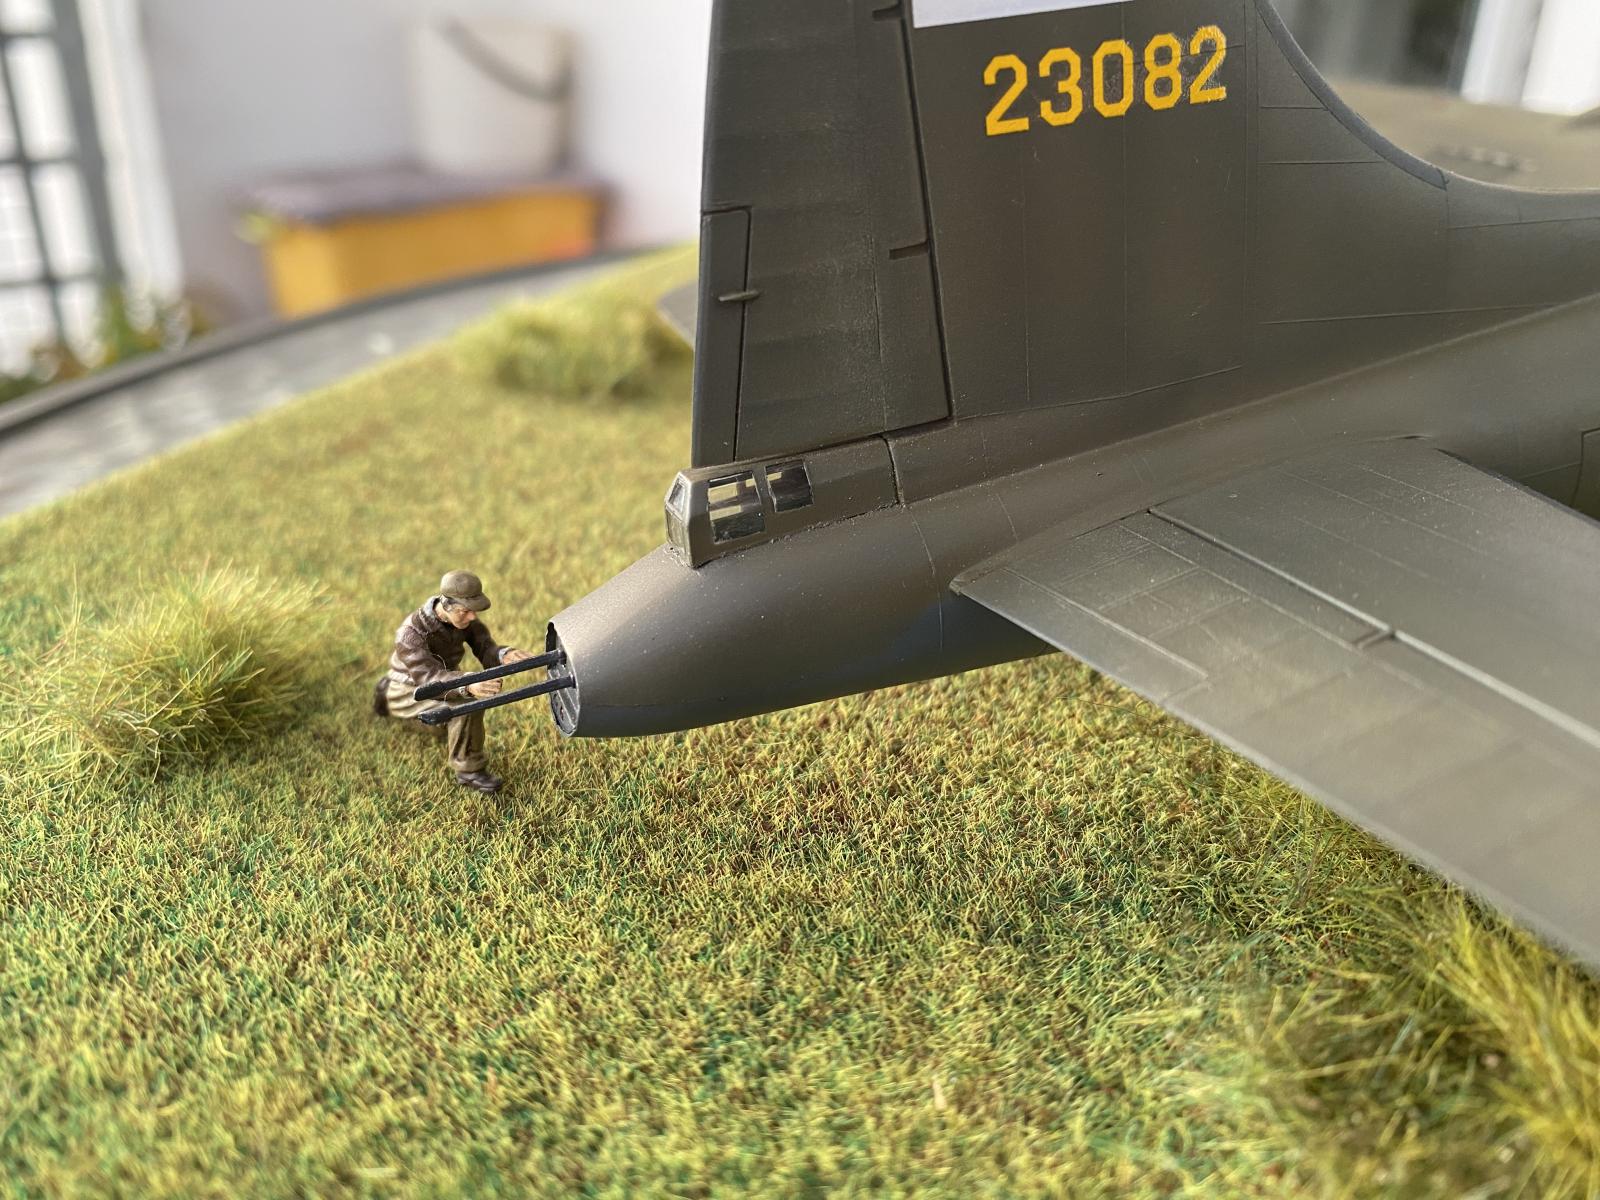
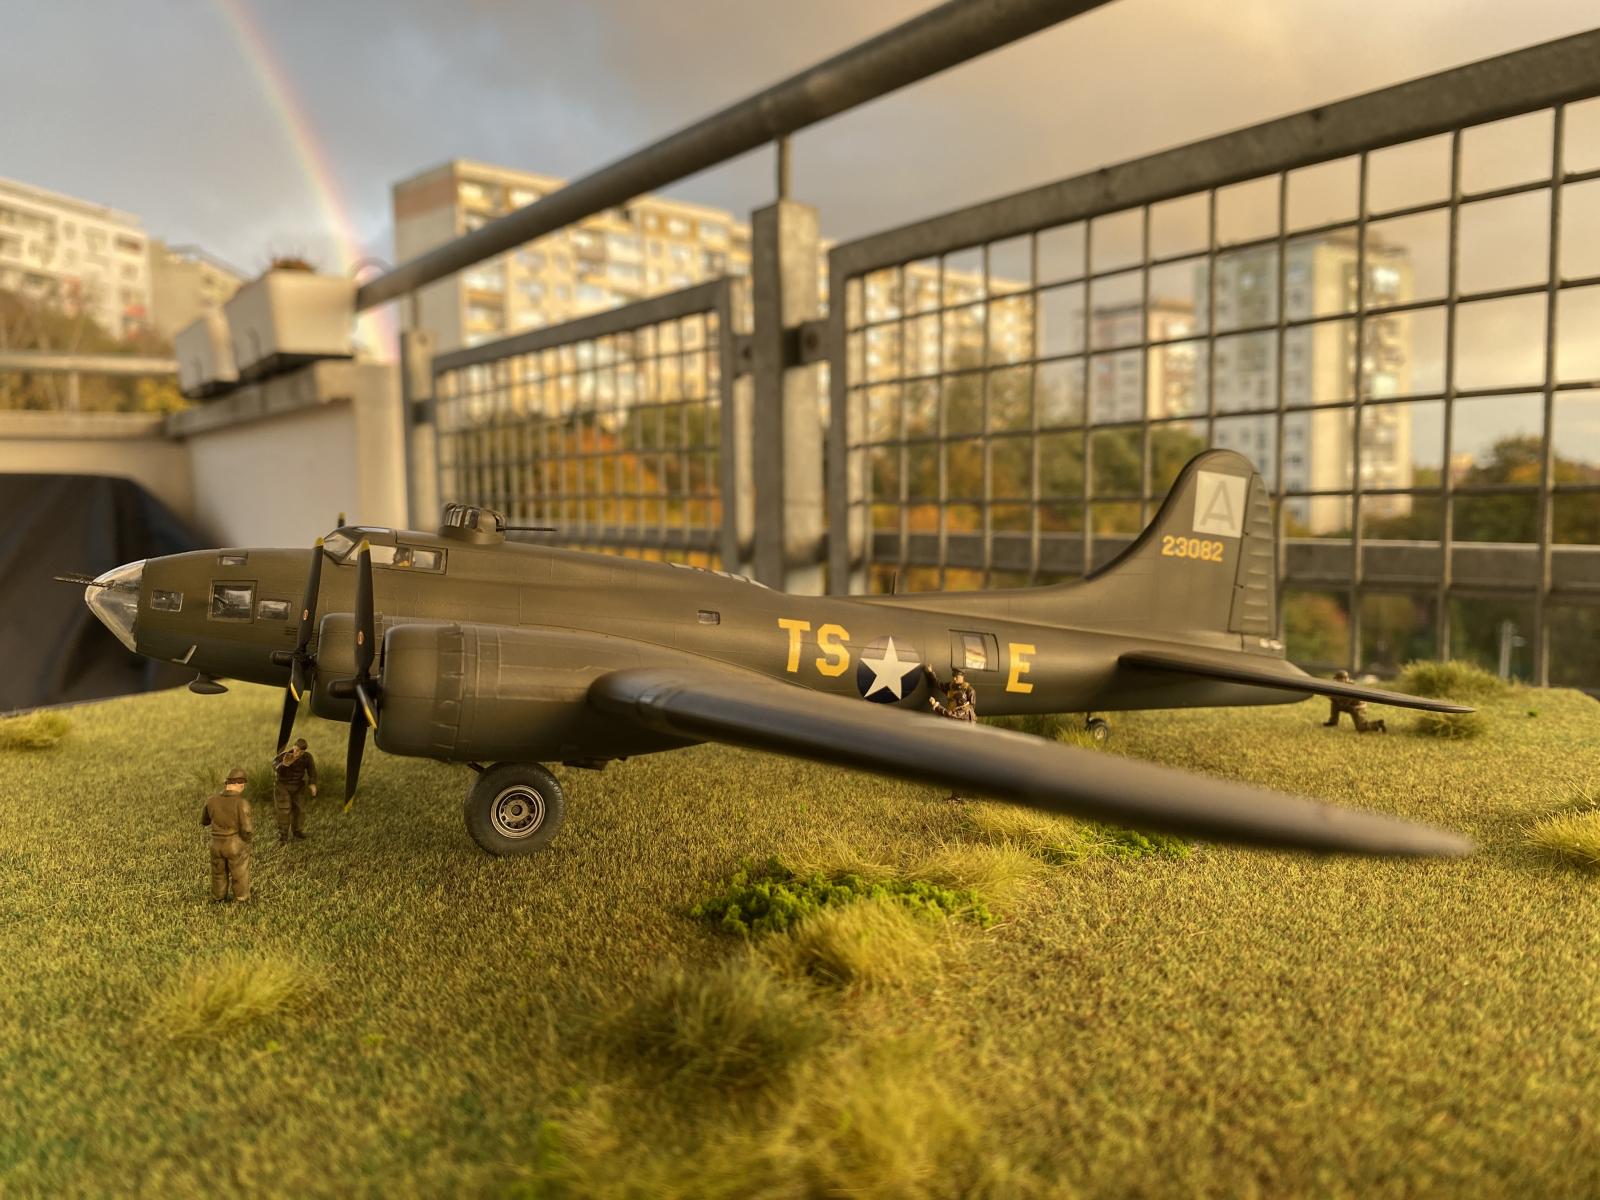
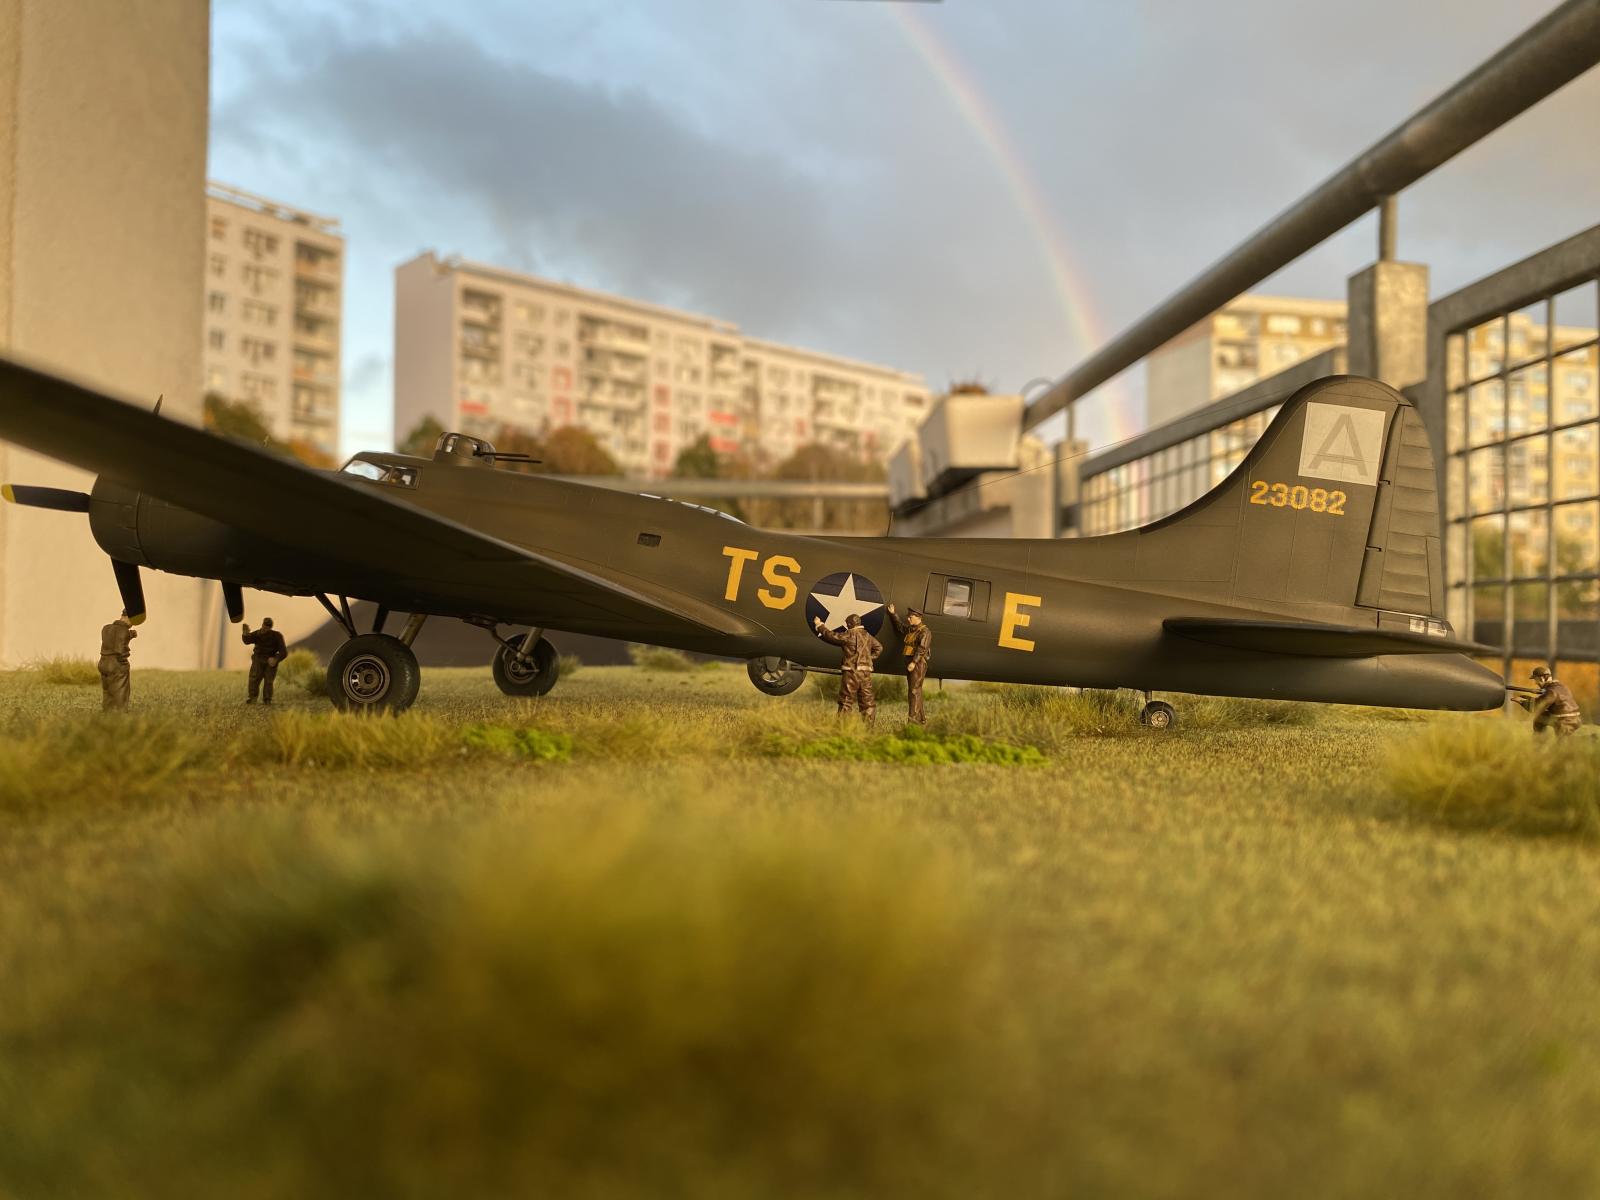
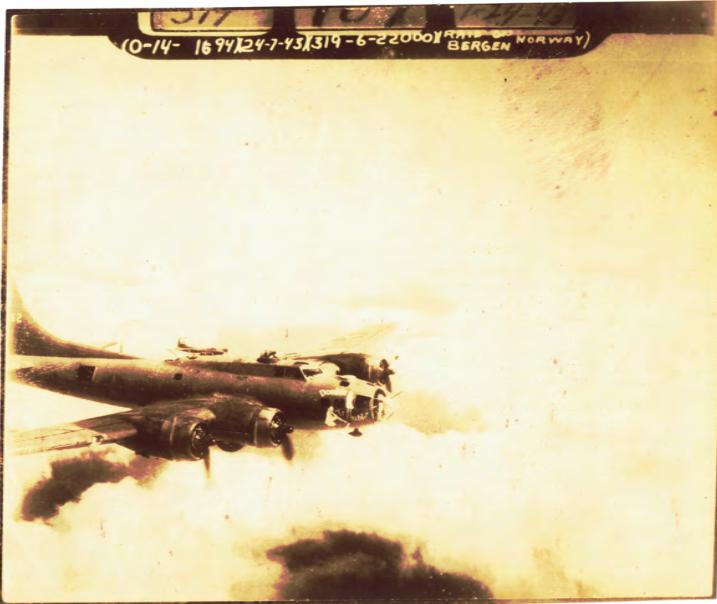
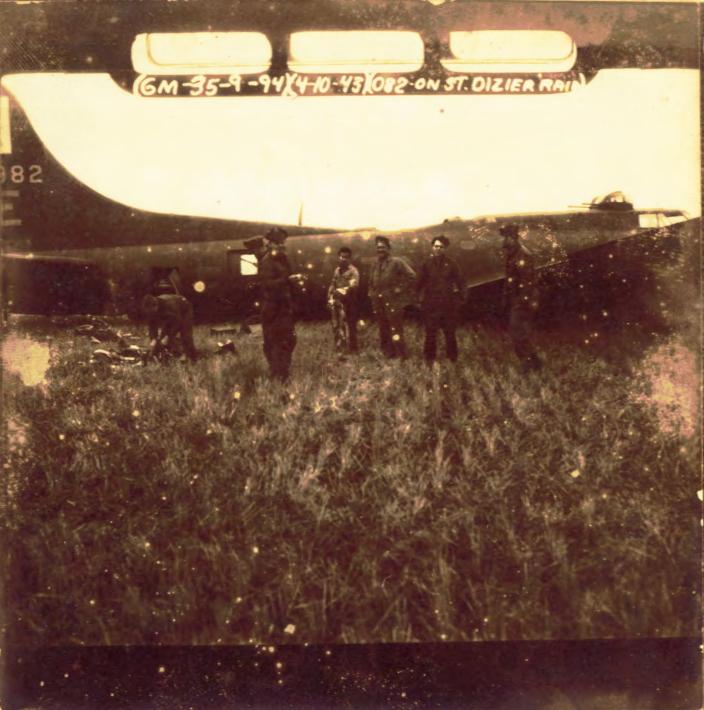
The thirty-year-old decals were unfortunately yellowed and I used the Kits-World set, which I supplemented with the appropriate markings from John vd Biggelaar @johnb, which I received by letter from the Netherlands (thank you!). The choice of decals was long and tedious, but in the end I decided on a 94BG plane, some of which I found unique decals on the internet. Group 94 BG took part in the first raid on the Focke Wulf factory in Malbork in 09 October 1943. I hope you like the model and photos.
Some vids about 94BG:
Lieutenant Lis will be back with a new unique project very soon!
PS. This plane had crash land at Margate in Kent in 4 october 1943 after ride over St. Diziger with crew Bill Winnieshiek, Navigator: George Dowling, Waist gunner: Vance VanHooser (wia, never flew again), rest unknown (10 Returned to Duty).
edit: I made some short slideshow about Hasegawa model.
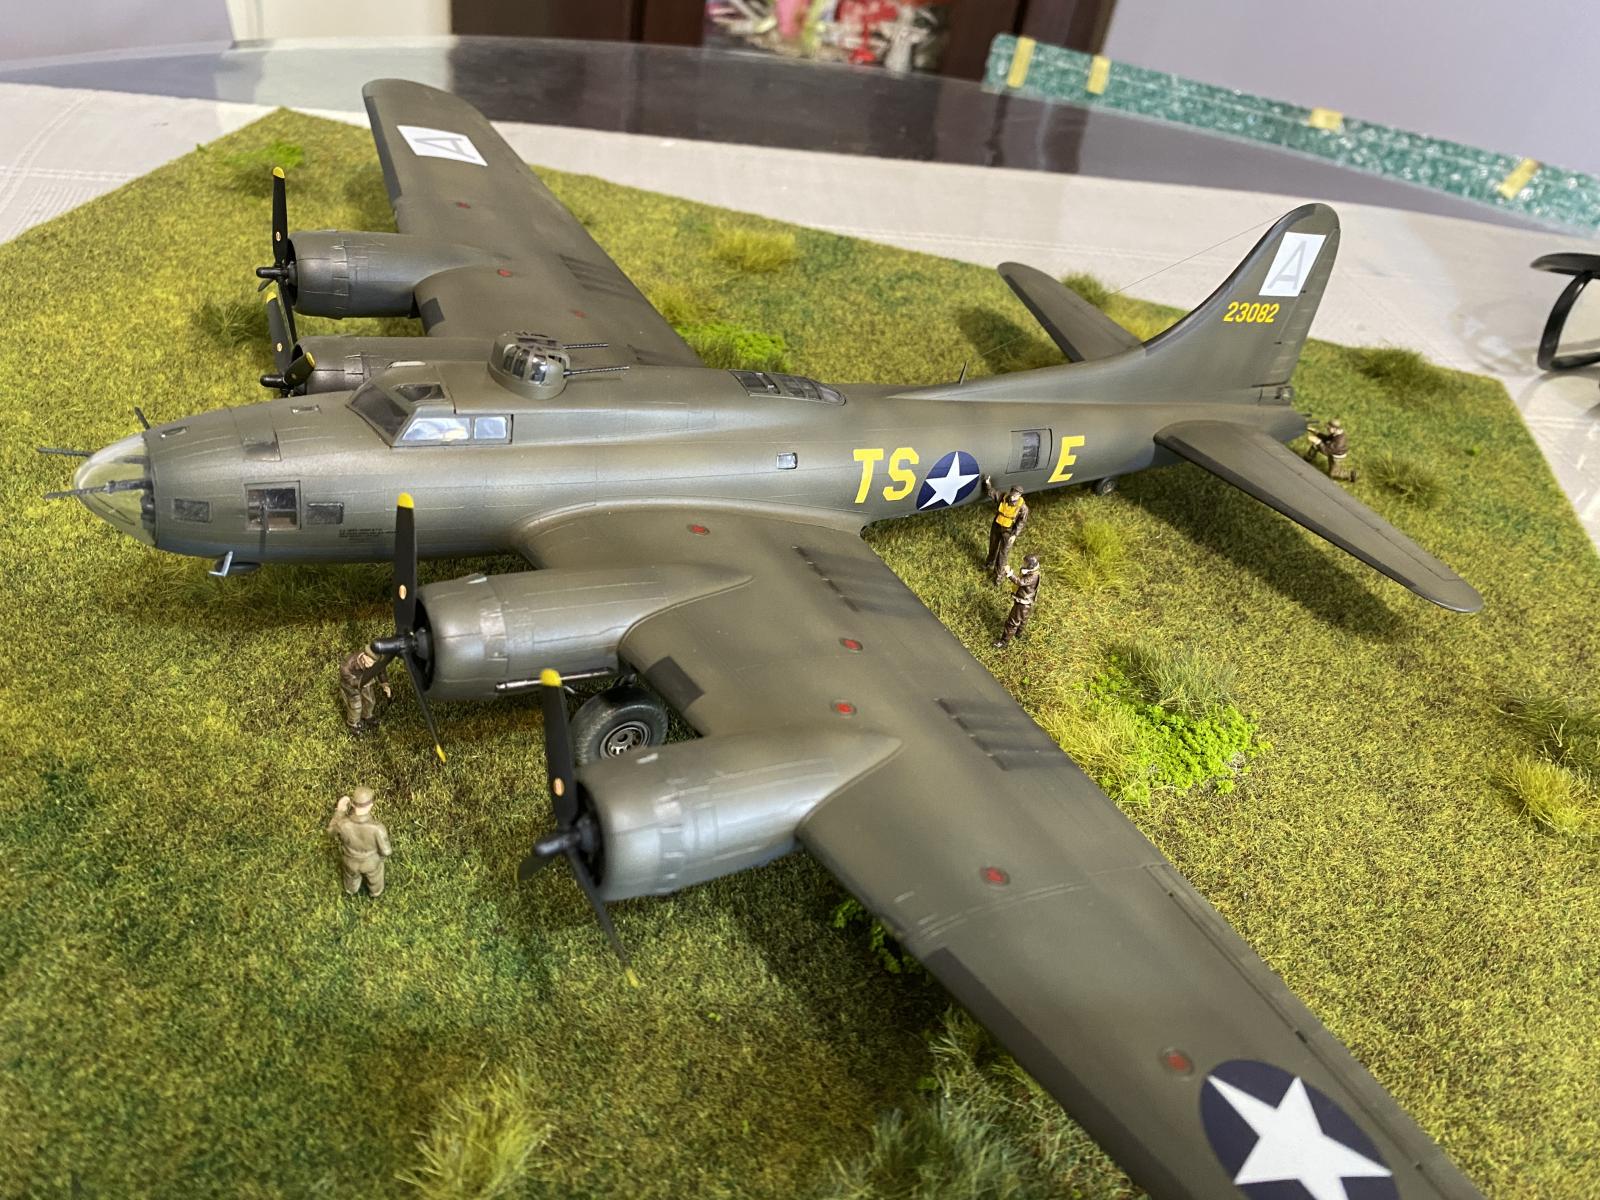


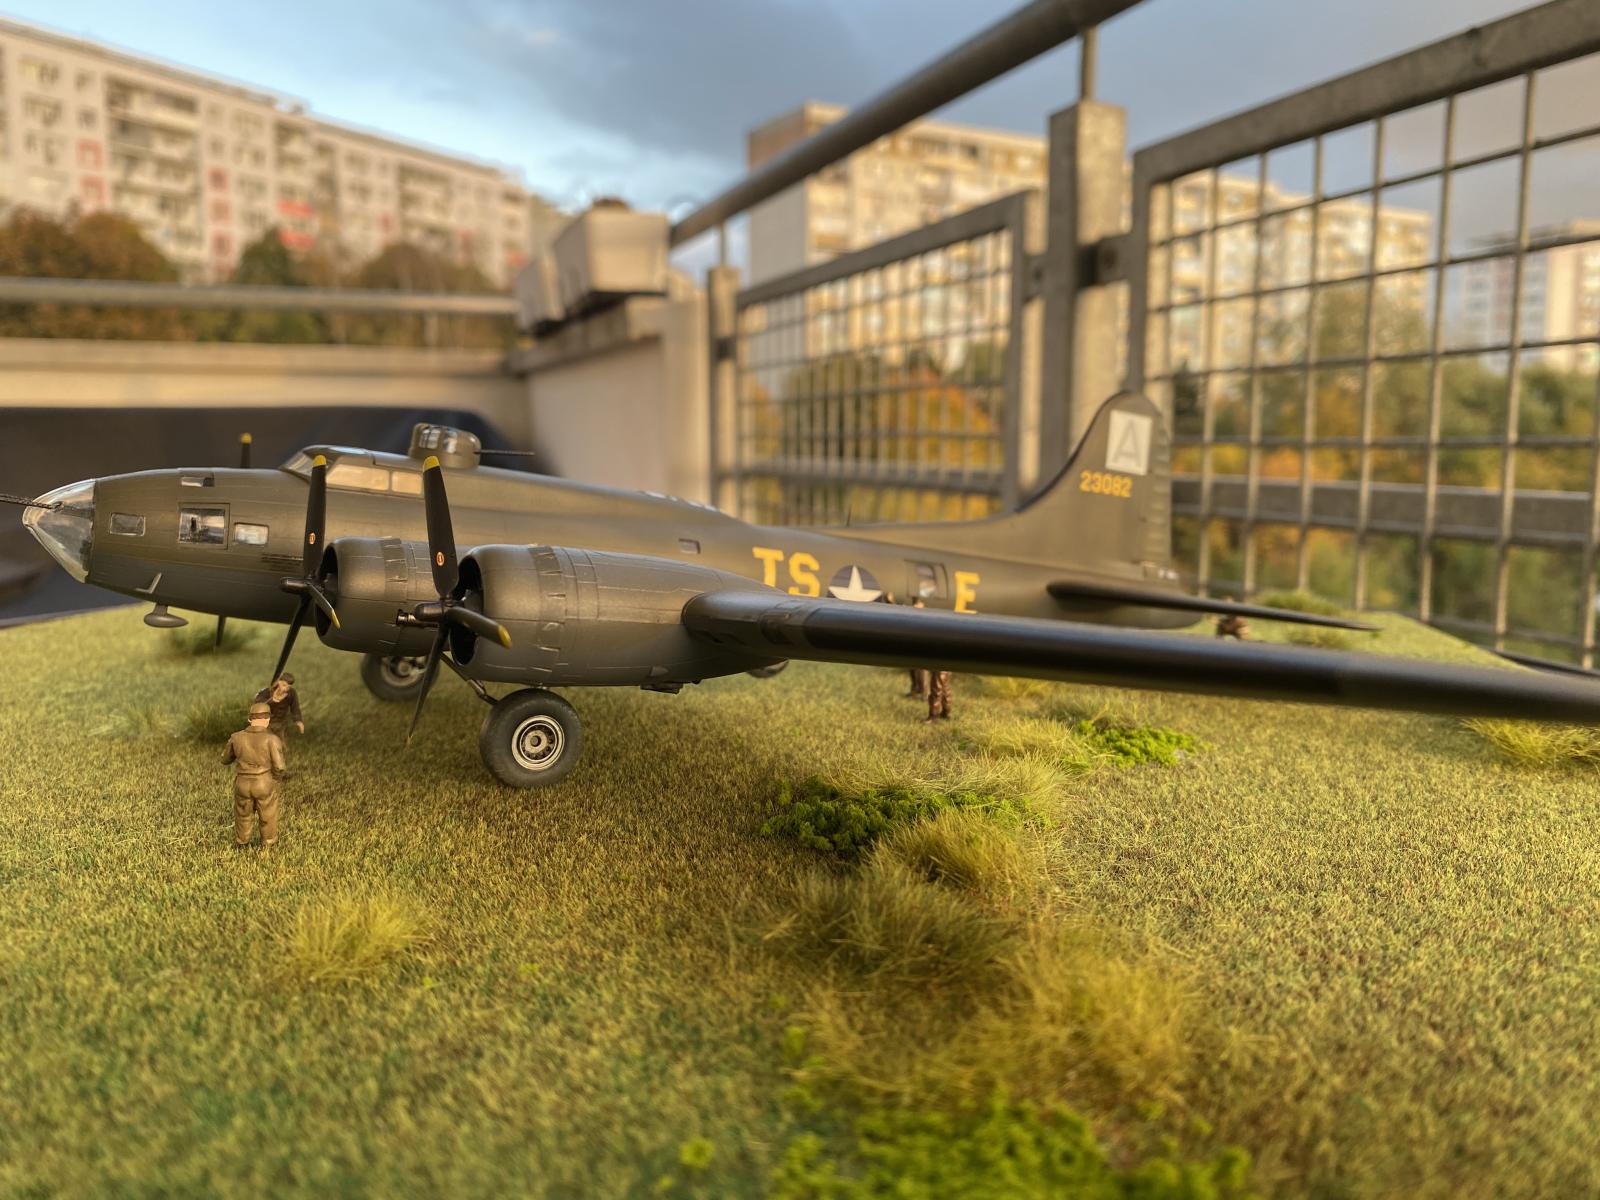


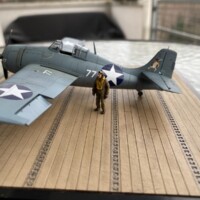
Excellent work on the B-17, the display base and photography. The crew figures are a nice added touch.
Thank You!
A wonderful result after a great but adventurous build, Lt. @lis! Your excellent skills brought this excellent model out of the classic Hasegawa kit.
A wonderful article as well and a joyfully followed build thread.
Well done, Lieutenant!
I'm glad that You like my wrok and enjoy my build thread! 🙂
Nice work on this kit. The Hasegawa B-17s do stand the test of time - I built both when they were new.
The interior detail is all you really need, since once closed up internal detail in a B-17 is hard to see outside of the nose.
Your comments always motivate me to continue working. Yes, the model has definitely stood the test of time and must have been an absolute hit in the 1980s. So far, in company stores, they want over $ 30 for the model, which I consider a fairly high price. Second-hand I managed to buy it for $ 20. In fact, the infiltration is completely invisible, even through the side shooting windows in the fuselage.
Superlative all over, Bernard @lis
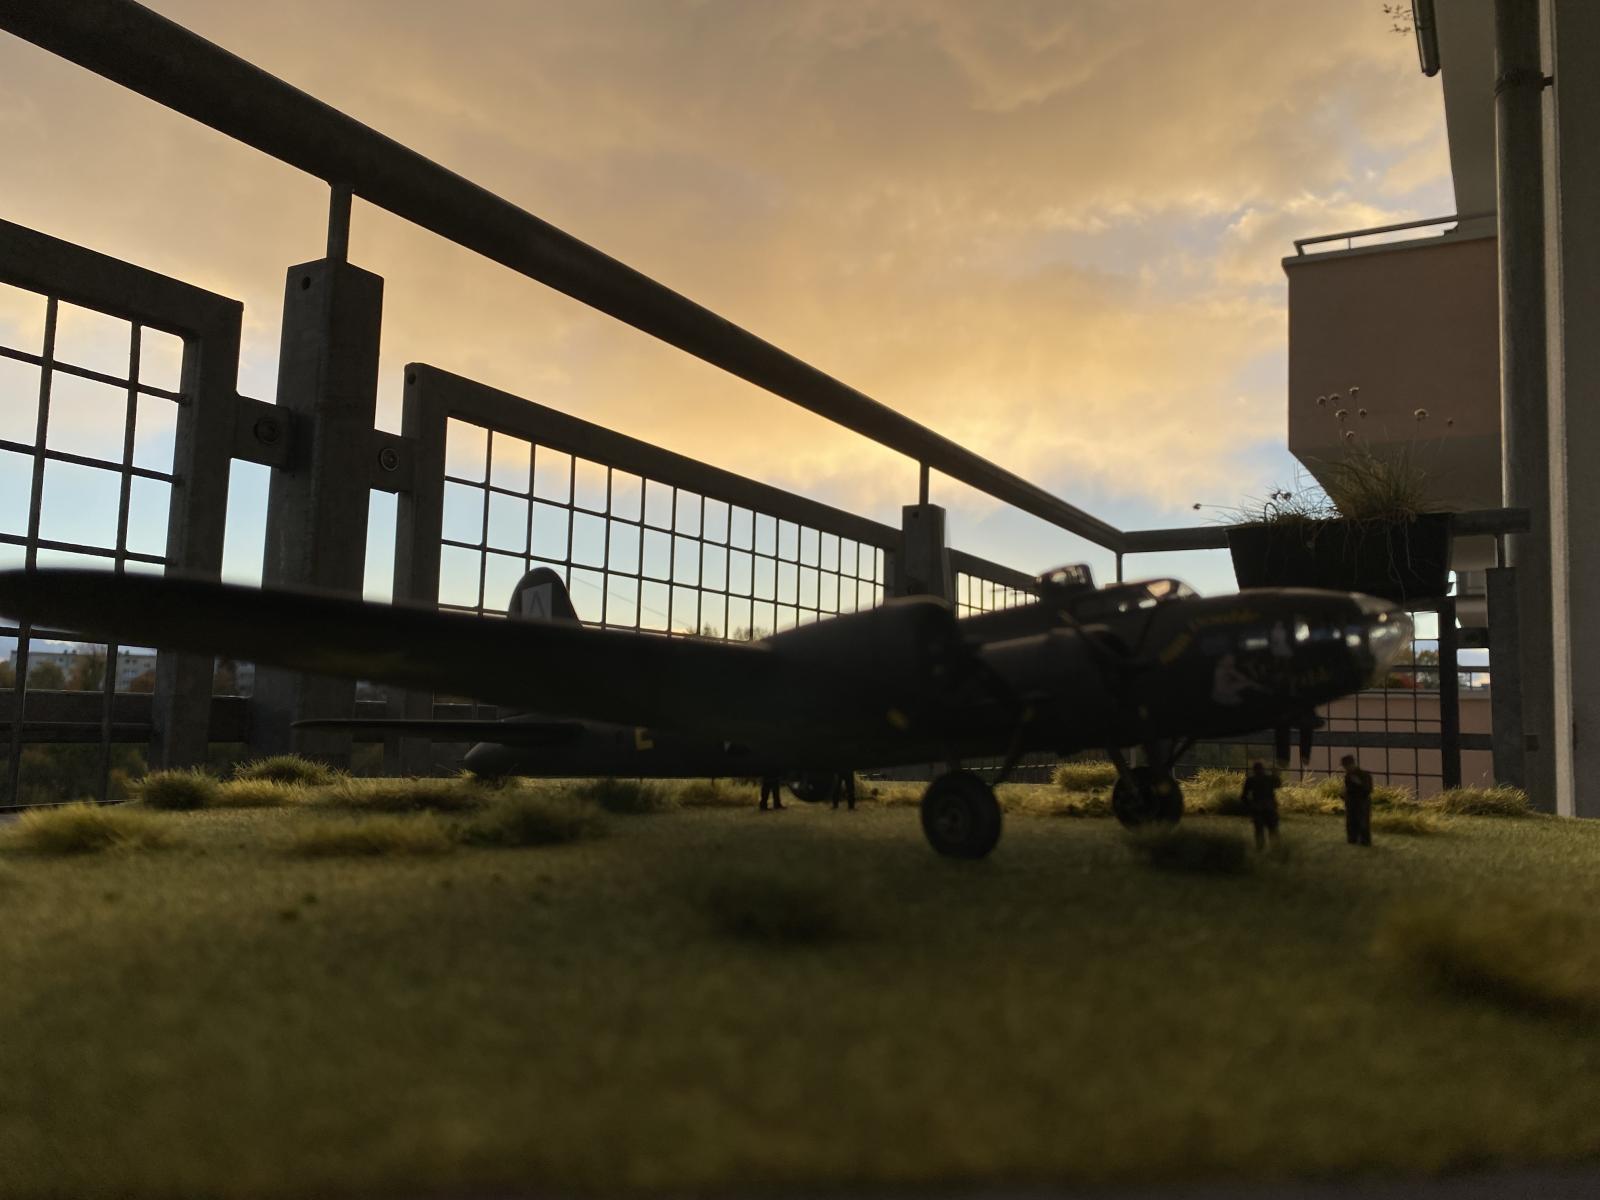
In normal light conditions she looks already amazing, but the sunset pictures and the rainbow in the background make it even more impressive.
Great work on the base as well.
The article is a pleasure to read and your thread was a pleasure to follow.
It will be hard to get my Fortress look as nice as yours.
@johnb Thank you for your very nice comment! I think your B-17 will be beautiful too and definitely more detailed 🙂 I hope You will enjoy my next project.
Nice work, Lis. I think that kit holds its own with the new Airfix kit and is superior to the new Revell model.
Thank You!
Great work, nice photos as well.
Thank You!
You obviously went the extra mile building this kit in overcoming the difficulties you encountered. The finished model, together with the base and background, look great in your photographs.
Thank you for your kind commentary. I am very pleased that you appreciate my work.
Great work on this older kit, Lis. I can't tell if those photos were taken at 'dawn' or 'dusk' but your finished Flying Fortress and the accompanying crew sure look good in that sunlight.
Nice work.
Thank You! It was dusk 🙂 after some rain with rainbow.
Nice job @lis on this fortress. I really like the diorama with the crew. thanks for sharing.
For building bombers your B4 and B-17 inspired me 🙂
Dear friend Lis, really great work, and very inspiring for me to make one of the ones I have on my shelf.
Congratulations!
Thank You! I will be wainting for Your build in Bomber Command 🙂
A nice-looking B-17 - well done!
Thank You!
Nice model and history!
Thanks for posting. Learn something new every day..
I’m glad that You like my story 🙂
Nice work, Lis. Great job on the B-17 build and nice touch with the ground crew.
Thank You! Paiting the crew was great pleasure 🙂