Jim Sullivan Group Build: 1/48 Birdcage F4U-1 and US Marines in Santa Barbara
In 1941 construction began on the new Santa Barbara Municipal Airport on California's southern coastline 7 miles west of the city in the town of Goleta. The airport is almost smack dab on the beach facing the Pacific Ocean and the Channel Islands. This location repurposed the existing Goleta airport that had just one runway adjacent to a swampy marsh prone to flooding the tarmac and hangers, an issue that is still a problem today. Looking west across the runways and marsh is the bluff where the UCSB campus now sits.
-
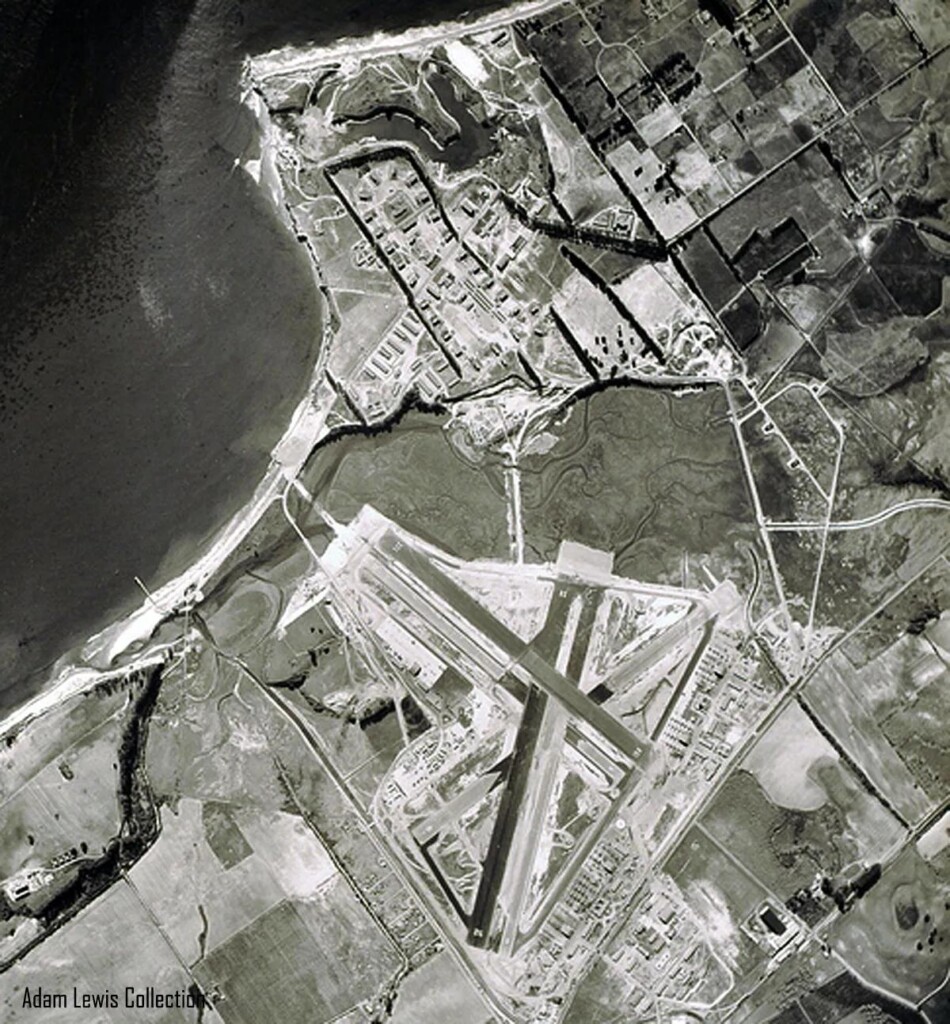
- 1. UCSB would be built on this bluff
- 2. wetlands
- 3. new runways
- 4. Santa Barbara 7 miles South.
- 5. Pacific Ocean
- 6. barracks constructed here
- 7. old single runway

In the late 30's the US Government sponsored a loan program to encourage construction of modern airports across the nation. Santa Barbara applied and received such a loan. Upon completion in December 1942, the USMC agreed to lease a large part of the airport to set up a bombing and gunnery training school for $2,600 a month while continuing to share the tower and airport facilities with civilian flights for the duration of WWII.
-
- 1. updated F4U-1A's with cowl flaps deleted.

VMF squadron flight trainees were brought up from San Diego and flew repurposed, already weary, early model Corsairs. Most of these stateside Corsairs had just two operational wing guns instead of the usual six so as not to waste live ammo that could be better used in the Pacific Theater. After completing training in Goleta, the Marine pilots and crew were rotated back to San Diego where they shipped out on carriers outfitted with new F4U-1A's and D's. Additional training for these new Corsairs took place during stopovers in Hawaii and Midway as the carriers made their way to the Philippines.
Marine Corp Command soon took over the new Spanish styled terminal and a large portion of the tarmac but they never made one monthly lease payment for reasons unknown. Barracks and additional hangers were built to meet the needs of the arriving Marine aviators and support crews. San Miguel Island right off the coast was the main practice bomb target.
Several buildings and two ex-Marine hangers still stand and are in use today at the Santa Barbara Airport in Goleta. There is ongoing program to raise funds for a museum honoring the history of the airport and the part it played in WWII. For more information look here:
https://goletahistory.com/the-marines-invade-goleta/
The Model:
-
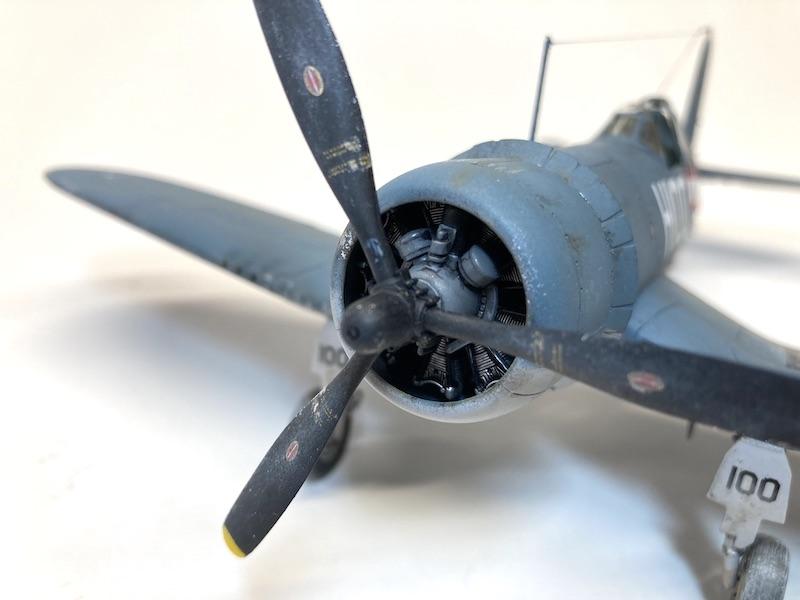
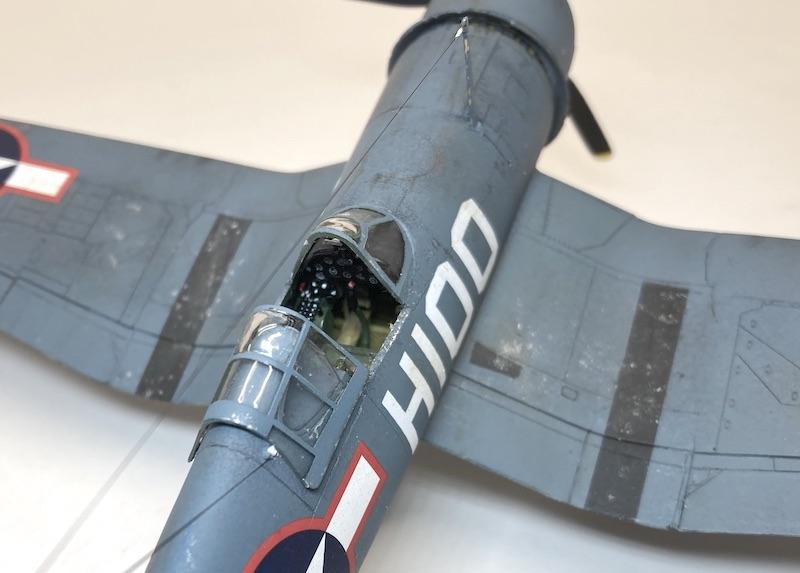
- 1. cowl goes all the way around
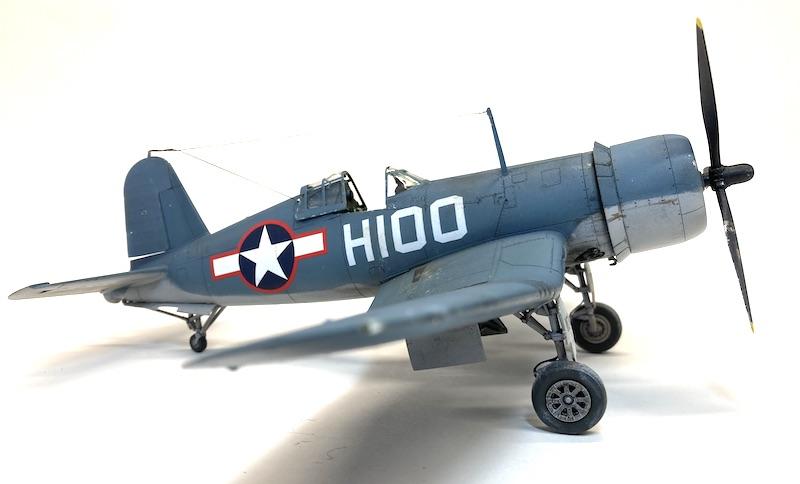
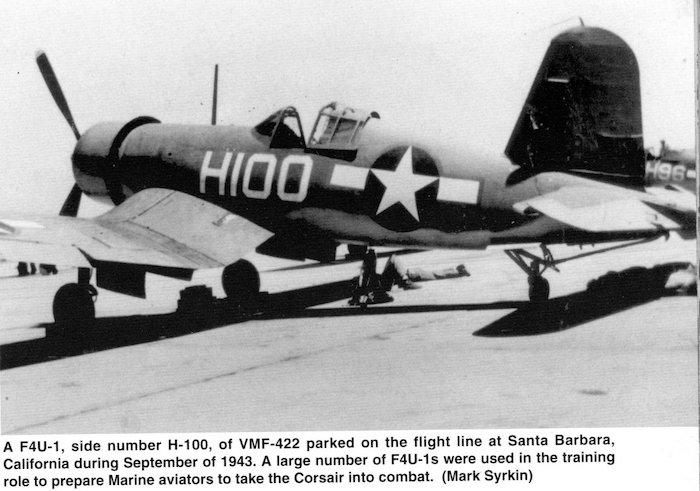
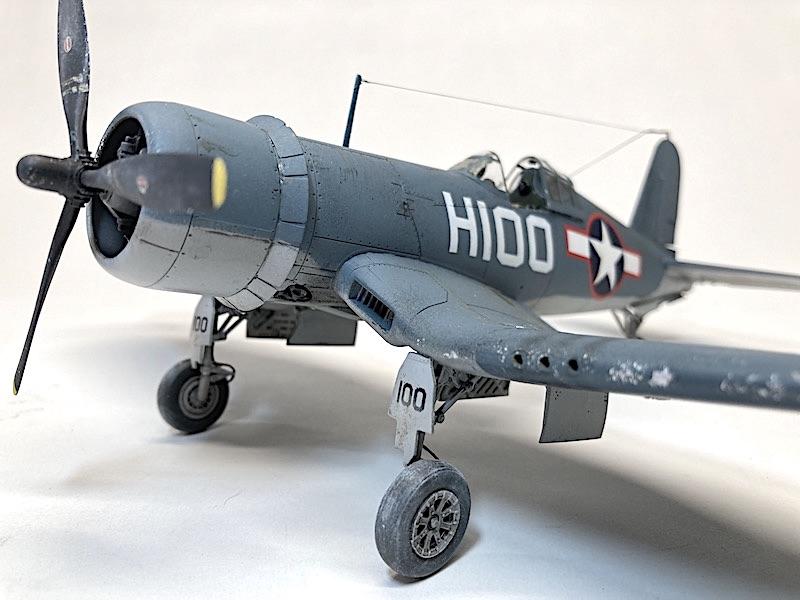
Jim Sullivan published this photo in his essential Squadron “F4U Corsair In Action” of a training F4U-1, H100, of VMF-422 parked at was then called the Santa Barbara Marine Air Base in September 1943 wearing red outlined stars and bars that caught my eye. I could find no additional information about this particular F4U-1, but I had to build it.
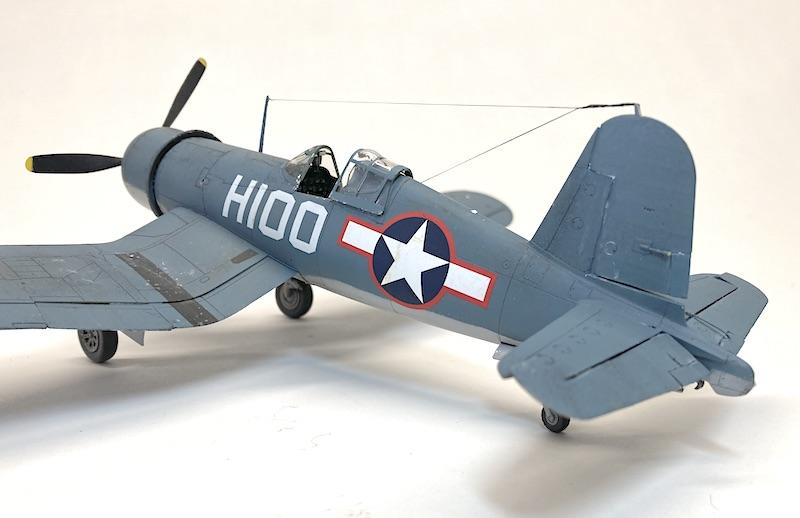
I used Tamiya's excellent 1/48 Birdcage Corsair I picked up at a model show 10-12 years ago that has been sitting on a shelf ever since. This is my second go round with this kit having built one when I first returned to modeling in the mid '90's.
The Build:
Construction was Tamiya smooth as expected. I did make a few modifications.
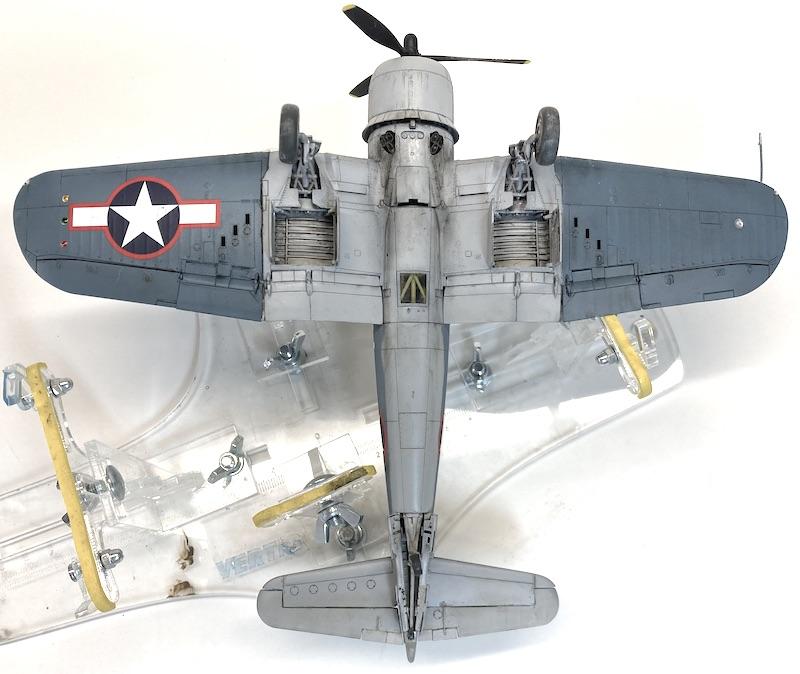
Early Birdcage Corsairs featured cooling flaps that went all the way around the cowl as you can see in this photo of H100. However the top three flaps when opened tended to spray oil aft of engine all the way to the windscreen. These were eliminated starting with the F4U-1A version. Hence all the oil spots on my build.
Tamiya should have caught this and included a third set of cooling flaps. (The kit open cowl is correct for later F4U-1A's and on.) Problem solved by splicing in three flaps cut from a spare Tamiya open cowl and installing it topside in the void to match the photo. E-Z.
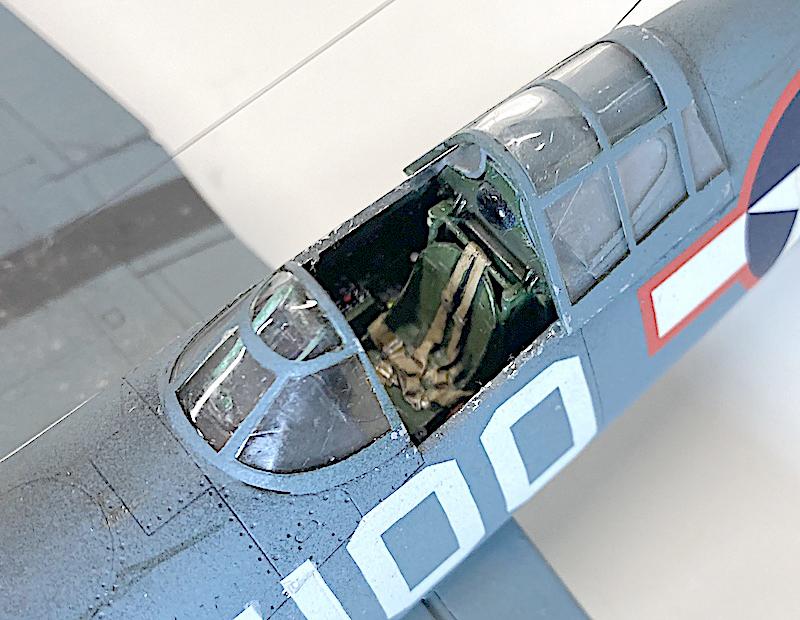
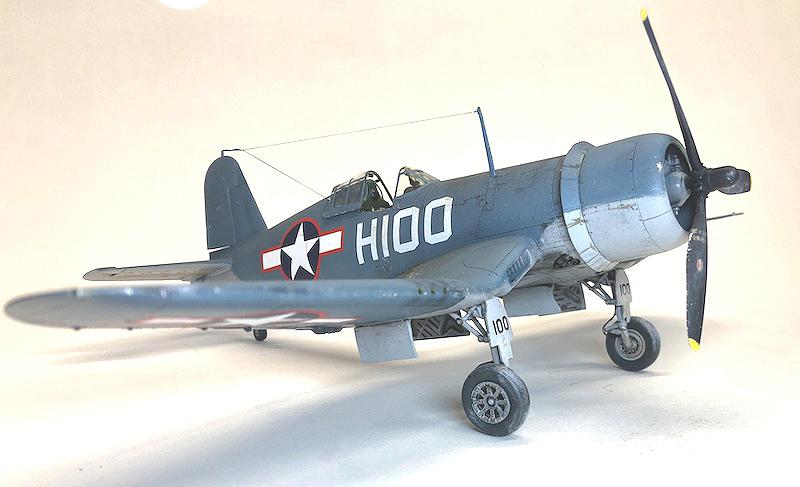
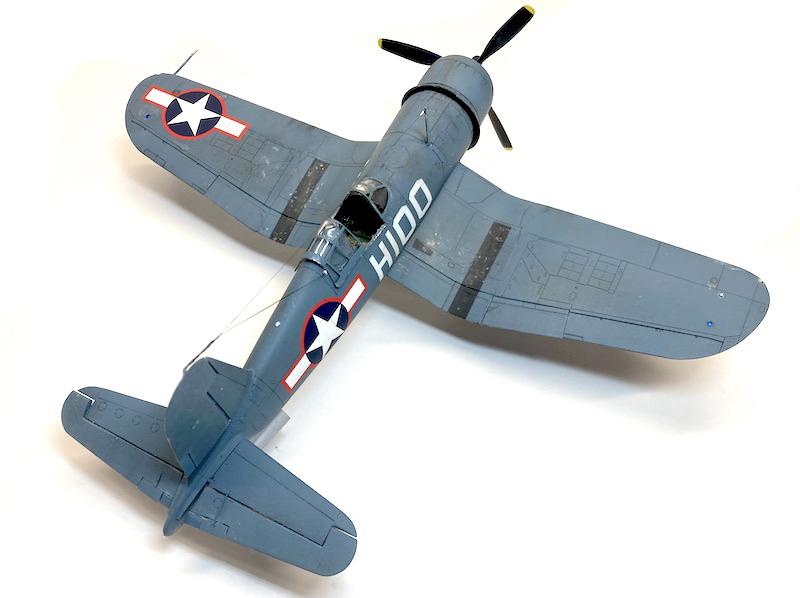
I wanted all the wing flaps in the up position as parked Corsairs are often spotted that way. Tamiya's kit flaps are designed to be down only. I replaced them with a resin set from Ultracast that also corrects the port side foot step that did not exist on Birdcage Corsairs. The rear stabilizers and elevators plus rudder also came from Ultracast as well as the pilot's seat. Using stretched sprue, I added brake lines and stabilizer actuator rods.
-
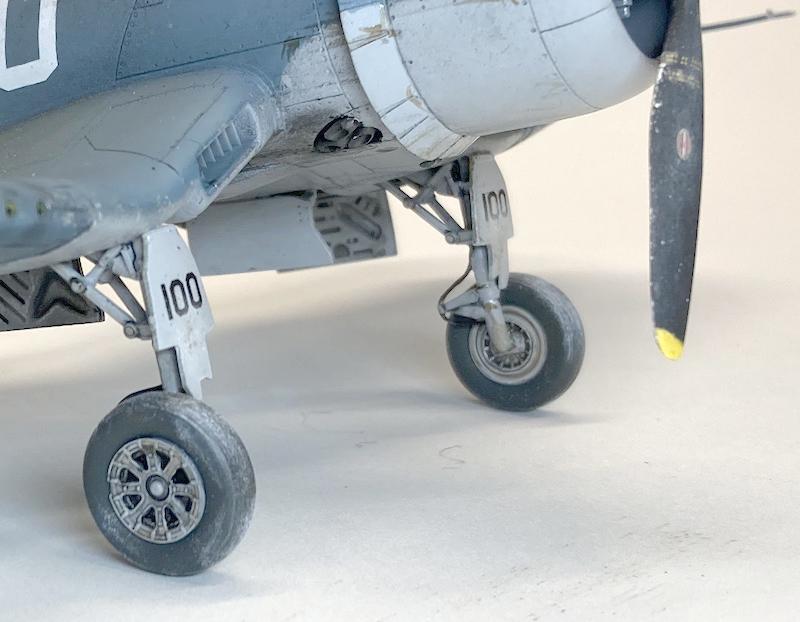
- 1. brake line
- 2. corrected Ultracast exhausts
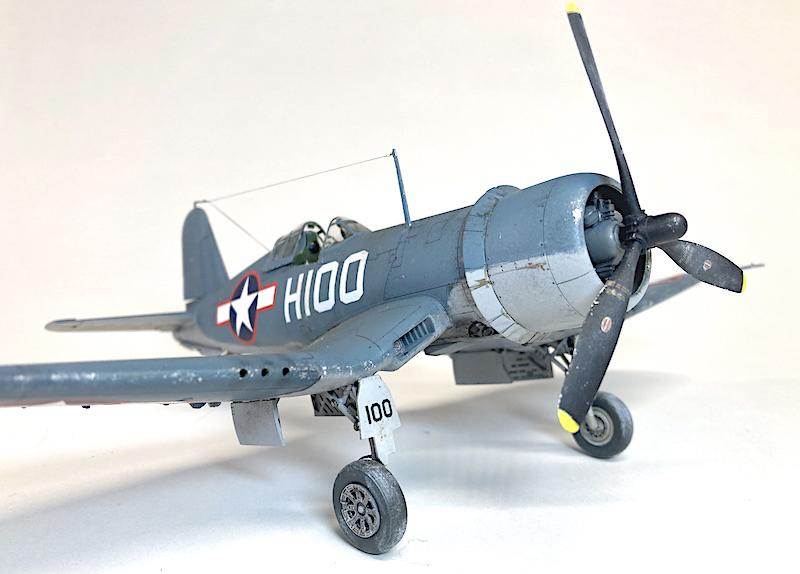
The kit wheels, although not sagged, are excellent and I used those. The tall Birdcage antenna mast is very flexible and tends to bend if one is attaching a wire so I made a replacement out of brass. I also added a rear view mirror to the front of the sliding canopy, clear wing navigation lights and a few other items.
Acrylic paint colors are my own Tamiya acrylic mixes. Decals are a mix from my decal dungeon with instrument dials by Mike Grant. Fine EZ Line was used for the antennas along with white glue for insulators, Weathering was done with AMMO engine oils and Doc O'Brien's Weathering Powders.
Here's a link to my blow-by-blow WIP build:
Much thanks to Louis Gardner @lgardner for organizing the Jim Sullivan Memorial Group build and answering all my Corsair questions.
Thanks for looking.
[Note that when you click on any of the photos below and the image goes full screen, click on it again when you want to view the next photo and so on and they will pop up like slide show. I used an iPhone here.]

-

- 1. oil spots
-
- 1. white ID light made from white glue
- 2. no foot step here
Outstanding build and an interesting story, too.
Eric, Loved watching the build. The finished product is outstanding! Well done. @eb801
Lovely looking Corsair Eric. I just finished a "-1D" recently, so i can truly appreciate the fine details of your build. The flaps-up pose is an understated change of presentation from what you normally see.
Loved following this and you definitely have a great result.
Excellent history and build.
Excellent post, Eric, just the right amount of historical information, and your attention to detail has resulted in an excellent model.
Excellent result, Eric! Great additions/ modifications as well! Loved reading your article as much as I loved following your build thread.
An awesome tribute to Jim.
Congratulations!
Excellent. Love the attention to detail.
Wonderful result on this Corsair, Eric @eb801
Your additions do really give it a perfect finish.
A great way to remember Jim Sullivan.
Great!
Beautiful Corsair Eric !
That is a phenomenal Corsair! Nice job on the model and I enjoyed the history summary.
that's a real beauty! Well done- looks fantastic
Great information and you ended up with a good looking build Eric, @eb801. I like the early Corsair better than the later, primarily due to the paint schemes, but there is something about the birdcage canopy that to me just looks better, even if it wasn't actually better.
Awesome build!
It was a pleasure following along for your group build, Eric (@eb801). Well done.
Eric Berg (@eb801)
It was a lot of fun watching you build your Corsair. I'm glad to have helped you figure out the cowling dilemma and other items. I used this same process on my "Mayberry Corsair". It's also a Tamiya kit that has the wrap around cowling vents like yours. I am very impressed with your Corsair build. I have never seen another one like it... and I will likely end up someday building one similar to it. They say copying is the best form of flattery. You nailed it ! From the flawless paint work to the correct colors, It's locked on... 🙂
You also taught me something about Tamiya's customer service. Thanks !
These early "Birdcage" planes went through a series of various changes during the production run. The top cowling flaps was one of them. They started out with the hydraulic system you mentioned, then this was eventually replaced with a simpler cable operated mechanical system. The top 3 vents would be secured down to help keep the oil from spraying on the windscreen. Vought came out with a stamped piece of metal that would be secured in place over the top vents. It was basically a formed metal cover that went over the top of the flaps.
The part was often shipped out and retro fitted onto early Corsairs in the field, and this setup of keeping the top three flaps down was carried on at the factory with the later versions of the F4U-1A and F4U-1D. They could have even removed these cooling flaps altogether, keeping the cowling closed on the top, since it also helped with the forward view. The F4U-4 had a completely different setup with the cowling, as did the rest of the following / later Corsairs.
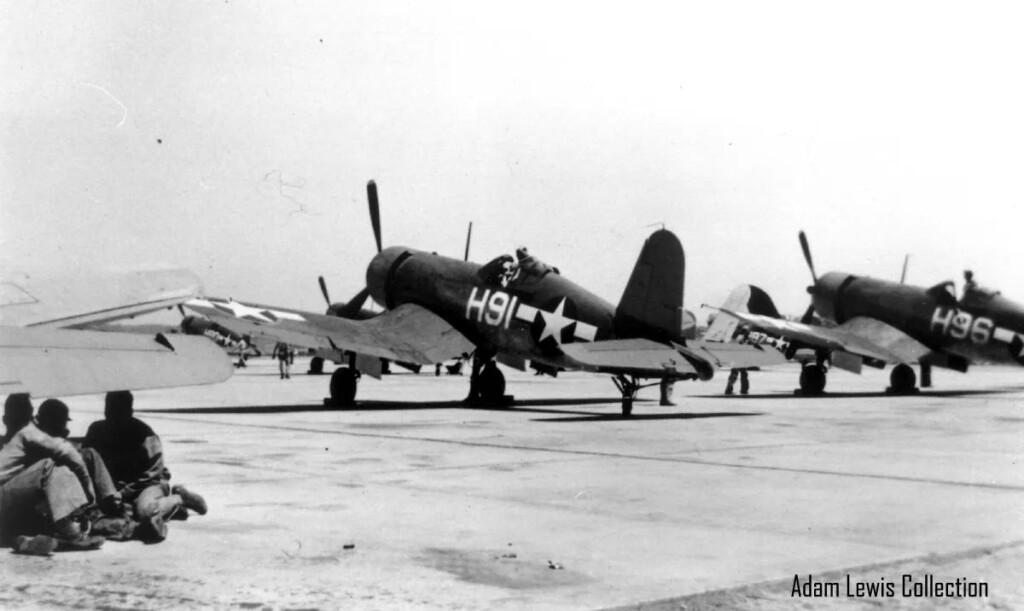
I believe the Corsairs you can see in the back ground in the pictures you posted have had this done to them as well. They all appear to be the "Birdcage" version. Tamiya got the cowling right, but they didn't with the step cutout in the inboard flap. It would have been nice if they included not only the early open style of engine flaps like you mentioned, but also including a set of flaps that were raised would have been nice too. But it is still a nice building kit with good fit even though it is over 20 years old now. You got the most out of it with your build. The brake lines are like icing on the cake.
Two thumbs up buddy ! I'm definitely clicking on several of the various "like" buttons before I leave.
I especially enjoyed reading your article.
Well done in all aspects. Thank you for the support with our Jim Sullivan group build. Jim would be proud to see this one built in his honor.
Thanks again !
@eb801 - Beautiful work Eric. The backstory and the build are both great.
For some reason I really like "birdcages", and this one is really excellent model about it. And comes with excellent background info, too.
As above great work!
Hey all you Birdcage aficionados - thanks for stopping by for a look-see and leaving all these nice comments. It’s been a real pleasure participating in the Jim Sullivan GB.
That's a great-looking Corsair! Well done.
Great Work Eric!