Monogram/Revell 1:48 A-6E Intruder
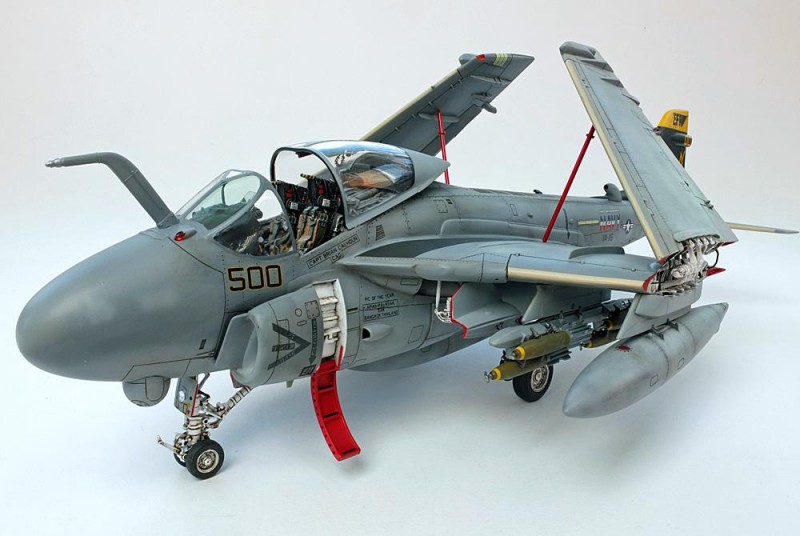
A-6E of VA-115 (Eagles), Atsugi Naval Air Station, 1996.
I saw the movie, Flight of the Intruder, in 1991 and I was immediately hooked on the A-6. Yeah, it was a cheesy movie with over the top lines but the real history underlining the movie is compelling as it illustrated the harrowing missions those night ground attack A-6 pilots endured in Vietnam, in addition, there were great flight scenes of A-6s.
Model Kit:
This is a build of the venerable Revell/Monogram A-6E kit # 4578, from 1988. This was an impressive kit from Monogram, which was merged with Revell to become one company, due to the impressive size of the model and excellent details on the cockpit and external surfaces. As typical with Revell/Monogram, the research was excellent resulting in an accurately shaped model well representing the real aircraft. Of course, the panel lines are of the raised type but I won't deduct points for this minor issue. It took another twenty-four years (2012) until Kinetic offered a recessed panel line version of it.
I bought this kit a long time ago and it lingered on my shelf waiting for its day in the Sun. Now is the time. To upgrade this kit and give it justice, I will be using a few aftermarket resin sets to embellish it:
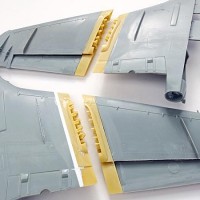
- Paragon wing fold or the flaps set.
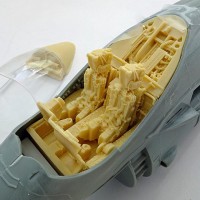
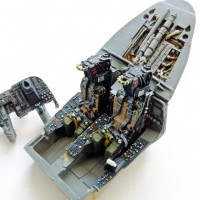
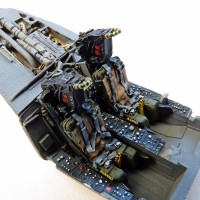
- Black Box A-6E cockpit set
Construction:
As with all Monogram models, I start my construction by sanding off all the raised panel lines and rescribed new recessed panel lines.
Wing Folds
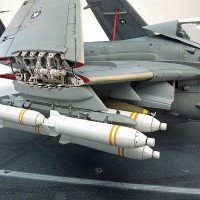
The most challenging aspect of this project is the installation of the Paragon wing folds. Paragon Design discontinued business around 2011, but Neil Burkhill's excellent products continue to live on in many modeller's stashes and show up on completed Monogram models. The quality of Neil's work is evident in this wing folds set: The resin details are clear without flash and the matchup of the fold joints are perfectly matched. However, mating each piece to the Monogram wing is not so precise and requires a lot of cutting, sanding, and filling. Installation of this resin set is not recommended for the beginner.
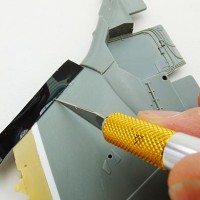
I start by cutting 8mm segments of the wing on each side of the wing fold. At the same time, I cut the panel from the top surface of each outer wings.
I glued the top and bottom wing panels together. A piece of styrene is glued between the wing panels to ensure the mid-wing thickness matches that of the mating resin piece. I did this for all four wing panels. The mating edges of each panel were square off by sanding them on a flat sanding block.
When all the edges and resin pieces are sanded and squared off, the resin wing folds were glued to each wing panel with thin quick-setting cyanoacrylate glue. After letting the cyanoacrylate glue dried for few hours, I sanded the resin/styrene joints flush as best I can. Then, a layer of Tamiya putty was applied to fill up the gaps and level the two mating surfaces. The process of filling with putty, sand, and the check is repeated six times until there's no more gaps, cracks, and surfaces are flat and level. During the last two checks, I spray the joints with a light coat of primer to help with the visual inspection.
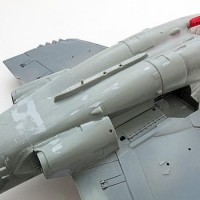
The fit of the wings to the fuselage is very difficult, to say the least. Gaps are everywhere. I had to use a fair amount of gap filling putty to blend all the parts together.
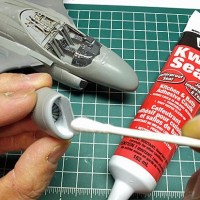
I'm using my new found trick again to tackle those difficult joints inside the air intakes. I painted the inside of the intakes with gloss white paint and then glue the assembly together. To cover up the highly visible gaps inside, I simply fill the gaps with household white caulking. I smooth out the caulking with a Q-tip wet with water. When done right, I get a "seamless s****r".
I spray the model with a thin coat of primer to help check all the joint filling and rescribing work. I noticed there are still some minor rescribing and putty work still left to do. I go back and fill any faulty joints with more putty and more sanding to achieve the best looking surface finish.
Painting
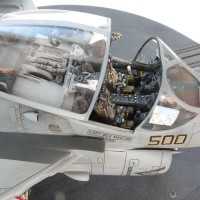
FS36231 dark gull grey should be the colour of the cockpit. However, it looks too dark when compared to many reference photos. Hence, I choose Gunze H334, Barley Gray, as the matching colour to use. The seat frame and cockpit console were painted with Tamiya X-1, Black, with a couple of drops of white paint. Seat cushions were painted with Vallejo FS34127, Russian Uniform and Tamiya XF-78, Wooden Deck Tan. The stencils on the seats were cut from leftover decals with small text on it just to give it busy look.
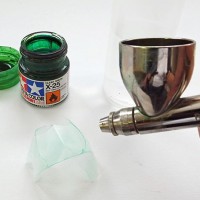
The front panels of the windshield on an A-6 were normally green tinted glass. I achieved the green tinting effect on the model's clear windshield by painting it with Tamiya Clear Green, X-25. I diluted the X-25 paint with acrylic paint thinner at a 10:1 thinner to paint ratio. The mixture is lightly sprayed onto the clear part at low pressure to avoid puddling effect. To avoid over darkening of the tinting effect, I only made two swift passes with the airbrush and that was enough. The windshield is then dipped in Future to seal the tint and enhance the clarity of the clear part. The finished product is perfect.
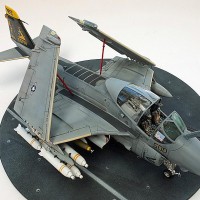
This model will depict the CAG aircraft of VA-115, Call Sign “Eagle”. The decals came from the AeroMaster sheet No. 48-537, Colorful A-6 Intruders. This marking depicts the CAG aircraft in 1995/1996 period when it was based in Atsugi Naval Air Station. Sadly, this aircraft was shot down by friendly fire by a Japanese destroyer during the REMPAC naval exercise.
VA-115 has a long and proud history dating all the way back to 1942 when they were flying Avengers. The marking, “EFR”, atop of the tail fin has various meaning depending on political correctness. One source I read says it was proclaimed by an inebriated Officer as he was running through the Barack yelling “Eagles F*****g Rules”. Another source has it defined as “Eagles Forever Rules”. Now, you tell me what a good standing Navy man would say? I'm sure political correctness is not foremost on his mind.
For a light grey paint scheme, I prefer to use the pre-shading technique to enhance panel lines. I sprayed all the panel lines and any significant rivet lines with a mixture of dark grey enamel paint. The verticle tail fin was painted with Model Master gloss black enamel.
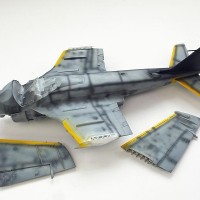
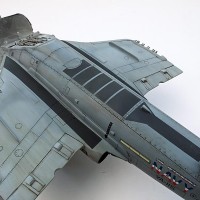
For the usual all grey Navy paint scheme for A-6E in the 80s and 90s, I painted the model with Model Master Light Ghost Grey (FS36375) and Dark Ghost Grey (FS36320). The tonal difference between these two greys are fairly light and so I darken the Dark Ghost Grey with a bit of black paint. I took me about five days to paint most of the parts for this model. Painting the wing folds and touch up painting was tedious. Finally, the model is good enough to be coated with two coats of Future in preparation for the panel wash.



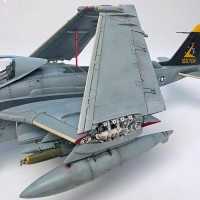

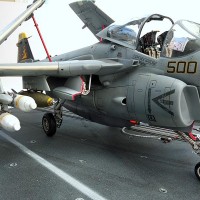
Wayne, this is amazing artwork and craftsmanship. Very well done. Thanks for the steps by step.
Thank you for your appreciation of my work.
Wayne there is so much to like about this fantastic work, but I have to say I have been back to look at the cockpit about 10 times - incredible!
Thank you for your appreciation of my work.
absolutely splendid work
Hi Wayne!. Outstanding skills, so much hard work here. Love the details and description of this fine A-6E very well done. Outstanding. i have a hobbyboss A-6E in my Collection just begging to get done.
Fantastic, really like it ?
Splendid! Two thumbs up...
Outstanding, Wayne. This is one of THE finest, 1/48 models I've ever seen.
Absolutely beautiful.
Beautiful job, perfect weathering and I know because I used to dodge this jet on the flight deck of Indy when I was stationed at Atsugi in CAG 5, VAW-115! A-6s and EA-6Bs were some of the worst, the exhaust points down and depending on where you are hits you about the knees, if you happen to be not paying attention and the pilot comes up on the throttle to taxi, you are eating non-skid! And the exhaust, ughhh, oil rich JP5 coats your face, makes your eyes water...Ahhh I loved those days! Thanks for the memories and greta great job, just perfect!
Rob
AECS(AW) retired
Rob, always good to hear feedback from guys there were there with the plane I modelled. Yes... good ol'days. cheers.
Wonderful work on the A-6E, Wayne. All of your effort really paid-off, resulting in a superbly-done model...CONGRATULATIONS!
Thank you for your appreciation of my work.
They've already said it all...and I agree wholeheartedly - one of the best I've seen. Helluva first post; can't wait to see more of your work. Welcome, my friend.
Thank you for your appreciation of my work.
That is one awesome looking Intruder! I love the load out and the finish on your model - it looks excellent!
LOL, I remember the shoot down as I was on that cruise, those aviators were mighty angry. We heard the call, the SAR helo brought them in a bit later. As I recall they were towing a target banner for a Japanese destroyer, and the CIWS (Sea Whiz) tracked the Intruder rather than the banner. I always wondered if the JMSDF painted an A-6 silhouette on that ship! I found this on the Net, sounds about right from what I remember!
https://aviation-safety.net/wikibase/wiki.php?id=57173
Yeah, I bet they were angry about the accidental shoot down. Wonder how it really happened.
Excellent Intruder! My dad, who flew the F-4 in Nam, said Flight of the Intruder was the most accurate depiction of what it was like to fly ground attack missions in VN. I hadn't paid much attention either to the A-6 until I read the book, then saw the movie.
BEAU-ti-ful build man! fantastic work.
Great inspiration.
I will never never understand why Paragon only produced the composite wing fold!
I wish they would have done the original wing fold first- I definitely would have picked a few up before they shut down.
The best I can find to help me out if i want standard winged A-6E's with a folded wing is to use the wolfpack wingfold for the EA-6A- which is the original fold mechanism, and pricey!
I hope to have an Operation Preying Mantis diorama with folded wings on an A-6E and KA-6D one day...
Fantastic Intruder!
Will always have a soft spot for that kite.
Probably, like you my love began after seeing the movie.
Wow, that wonderful work. Not just an A-6 fan but an in general Grumman aircraft fan and your work really fleshes out this Iron Works bird beautifly.
After seeing the movie after reading the book, I have to agree with your assesment to the film.
So, just putting this out there but the lead character in the book and movie went on in other books to fly F-14 Tomcats -could make a good companion piece to this one...
what? Lt. Jake Grafton went on to fly Tomcat? Really. Nice. I like William Defoe's character much better. I love his saying "You see, Iron Hand is my thing."
Yeah he is my favorite in that movie as well
Beautiful paintwork. The model is superb. Love the cockpit.
Thanks Tom. I've followed you from MM. Good to see your work and your writing.
Great job turning an old kit into a winner!
Wow impressive. I've tried to build that bird a long time ago. Didn't succeed .
I had a spare car tire to supply my airbrush then. Not the best of ideas.
But this is truly great.
All of the above, looks great!
Very nice and impressive work Wayne. You cannot go wrong with the old MONOGRAM kits, just love them, they fed and ignited our hobby in so many ways, memories that will never fade.
The extra detail really spruce this build up and your weathering technique is just fine … there and subtle … good one Wayne.
Hello Wayne,
Impressive job on this "oldie".
The finished result is stunning. Regards, Dirk / The Netherlands.
Excellent build Wayne. Very impressive work. You've turned the old gal into a showpiece.
Clark
Thank you.