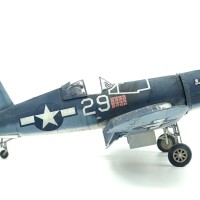
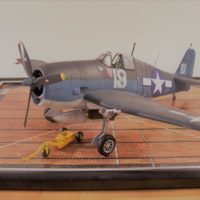
Tamiya F4U-1A Corsair, 1/48. Ira Kepford's Jolly Roger.
This article is part of a series:
Background
I've always loved the Corsair, particularly the mid-war four-tone scheme, and last year I built my first one which was Tom Blackburn's 'Big Hog'. A year later I wanted to do a new Corsair because I felt my skills had improved and I wanted to compare my work as well as practice some new techniques, so rather than do the same Corsair I decided to do another famous machine of VF-17 which is Ira Kepford's '29'.
It took a while to decide which one to do as there were actually two Corsairs marked '29' flown by Kepford, ultimately I decided on going for one that had what would be considered normal markings rather than the briefly used red bordered ones like 'Big Hog' has, and also because there are some beautiful in flight shots of BuNo.55995 as seen below which provided to be perfect painting references. This Corsair was the second '29' Kepford flew and was featured in some rather nice propaganda photoshoots which certainly makes a modeler 77 years later happy.
The Build
The full build can be seen over in the W.I.P Aircraft section, but let's summarise the build here briefly.
Firstly some (many) additions were given to the build, notably are the resin control surfaces by Aires, there's also some CMK Resin wheels, paint markings by Montex and decals by Microscale and Tamiya, an Aires resin cockpit and of course the riveting provided by Rosie the Riveter herself.
I wanted to show my improvements, but I also wanted to try new techniques and where better than on a kit I'm so familiar with after building 5 (now 8) of them. I chose to go with the resin cockpit not because I particularly wanted the extra detail but more so I could get some practice. Unsurpsingly this was a very difficult and tedious process, and whilst painting it was very enjoyable for me the difficulty of fitting it in and the problems it caused were less so.
I also went with rivets, the particularly Corsair knowledgeable amongst you may notice that the real aircraft was spot-welded however I went with the rivet tool to learn a new skill in a familiar kit, it's also worth noting that the rivets after a few coats are not visibly raised however have helped cause a really nice effect on the paintwork which I think was worth it. In the end I mark the rivet tool as one of those modelling concessions where a decrease in realism ends up actually making a more realistic looking model.
Painting
Painting was done largely with MRP paints and these were fantastic to work with, I enjoyed the painting process on this aircraft. Weathering was created with a double layer of chipping fluid inwhich the MRP White Aluminium was painted on, gloss coated, covered with MIGs chipping scratches fluid, painted in Zinc Chromite (XF-4), given another chipping fluid coat and then finally the main colours were applied. MRP paints dry very hard very fast so chipping it was difficult, but nonetheless this could be accomplished to a quite realistic looking result that I tried to match to photographs as best I could.
All colour coats were sprayed on with a 0.2mm airbrush, then the colours were lightened in the centre of panels and darkened on the panel lines. The camouflage was free-handed as the Corsair lacks any defined hard edge line on its scheme. I took note of how low the sea blue was painted on this particular airframe, especially around the nose.
Further weathering was done with Florymodels dark dirt wash, and a MIG Oilbrusher oils to create a sandy effect to represent this environment this aircraft was in.
Final Thoughts
Despite the challenges this build had particularly due to the resin parts, it overall produced a great result which I think definitely sits up there amongst my best kits so far. The Tamiya Corsair is an ol'reliable kit now but is a fun build that I recommend, I'm still not a fan of resin but extra experience never hurts. The only thing I'd personally change is the placement of the '29', though having a bit more freetime so they wouldn't take as long to build would be nice too!
Is it better than the previous VF-17 Corsair? I think so, if for nothing other than the riveting and chipping fluid. Comparing the two I think my major gripe with the 'Big Hog' is the colour, it just seems to be a bit too green in its colour and I think '29' is perhaps closer to what I think looks a better colour largely thanks to MRPs accurate colour as a base.
Comparing it to the real aircraft I think I got it pretty close, unfortunately problems with decals (Disappointly Microscale decals all seem to be either too big or too small, hence they weren't used much), the tape being the wrong shape which I didn't realise until too late, and the 29 being about 3mm too far forward meant this area is a personal gripe of mine as it doesn't match the photos as closely as I'd like after spending so much time trying to get the paint and weathering to match.
It's certainly been an interesting, if long-winded, experience. I do hope to do a full resin conversion on a Corsair one day but that day is not today, nor tomorrow, nor for a long time! Regardless experienced gained in riveting and using resin will come in helpful for future builds I'm sure.
Full build thread located here


@scalerambush, Harvey, that is a great model and an excellent article! ? You did a fine job on the Corsair; I've been eyeing the exact same kit in my stash for my next victim. Your article might be all it takes for me to now crack her open! Thanks for sharing and showing her! What an inspiration! ?
Thank you! I definitely recommend it opening it, it's a fine and easy build if you don't shove a lump of resin in the middle of it! Definitely a lot of interesting schemes from a variety of nations, each offering different weathering chances from the brand new factory fresh build or an aircraft with more sand than plane, whichever you fancy.
Nice work and crisp photography. A keeper I would think.
Thank you, definitely a keeper though part of that is that I'm a hoarder of old builds...
That is a model you should be very proud of. Beautiful painting with a seemingly right amount of weathering. I like it a lot
Thank you very much! The weathering on this one was quite enjoyable to do.
Absolutely top notch work Harvey! Beautiful work, truly.
Thank you very much!
A wonderful result in all aspects, Harvey!
Painting and weathering is exceptional.
Great research, as well.
Your build thread was amazingly informative, especially regarding painting and weathering techniques.
Congratulations!
Thank you very much, I appreciated seeing you in the thread from start to finish.
Very sharp work. Your paint and weathering are excellent.
Thank you very much!
Wow, Harvey! You nailed it. Most guys neglect to show the yellow primer on Corsairs when they weather the paint. Very, very nice!
Thank you! I like adding it when possible, really looks nice against the blues in my mind.
Really amazing, Harvey @scalerambush
This build is top notch, detailing painting and especially the weathering are superb.
Thanks for sharing the build progress, I definitely learned a lot from your techniques.
Thank you! I'm glad if anyone learns anything at all from my builds
Very nice work from step one to step last and a great result.
Thank you!
This is a great looing Corsair, excellent work. It does look like the real plane.
Thank you for the high praise!
Beautifully done,spot on with the weathering.
Thank you!
Ike would give you a big thumbs up on this one.
This is an amazing representation of a land-based USN fighter operating from crushed coral airbases in the Solomon Islands. You have created a great piece of history with these epic kits. Nicely done!
Thanks for posting this excellent article.
Very nicely done Harvey, my compliments to you on an extremely fine Corsair build.
🙂 ... Greetings ... 🙂 :
A very strong and vivid model Harvey !
My first Corsair model was the 1/32 scale version of the one flown by Ira Kepford.
This is by far a very great representation.
The weathering is well done as well as the overall model work.
Thank you for sharing these images.
Super result Harvey - nice work!
Man, two beautiful Corsairs posted back-to-back - what a treat! Excellent work on this - love all the rivets and detail work, and the paint work and weathering is beautifully executed. Love it!
Harvey, you’ve inspired me. On your recc I switched to the blue surround and am trying the double chipping layer on Hasegawa 1/72 kit. First time I’ve ever tried chipping fluid!
1 attached image. Click to enlarge.