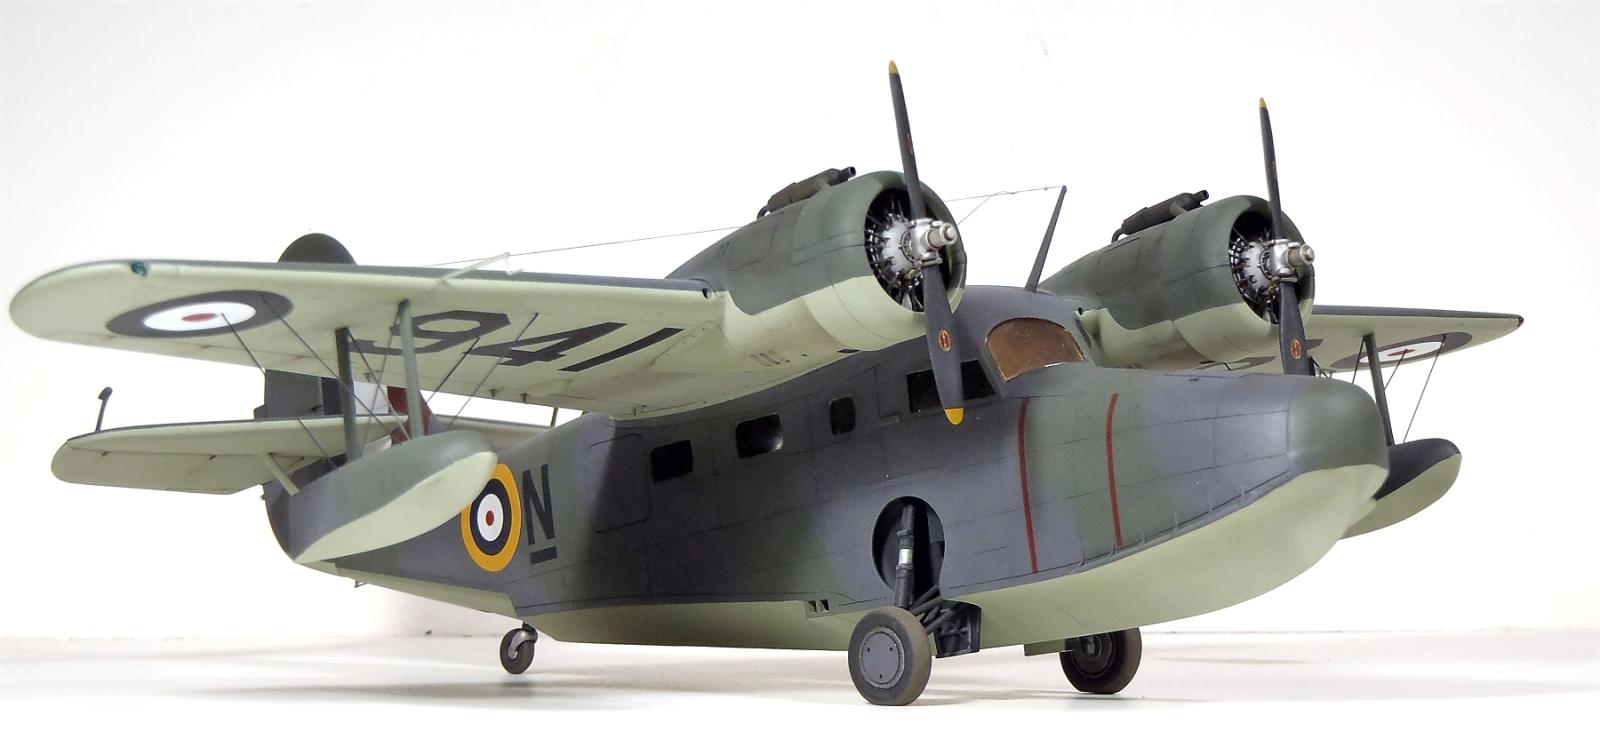
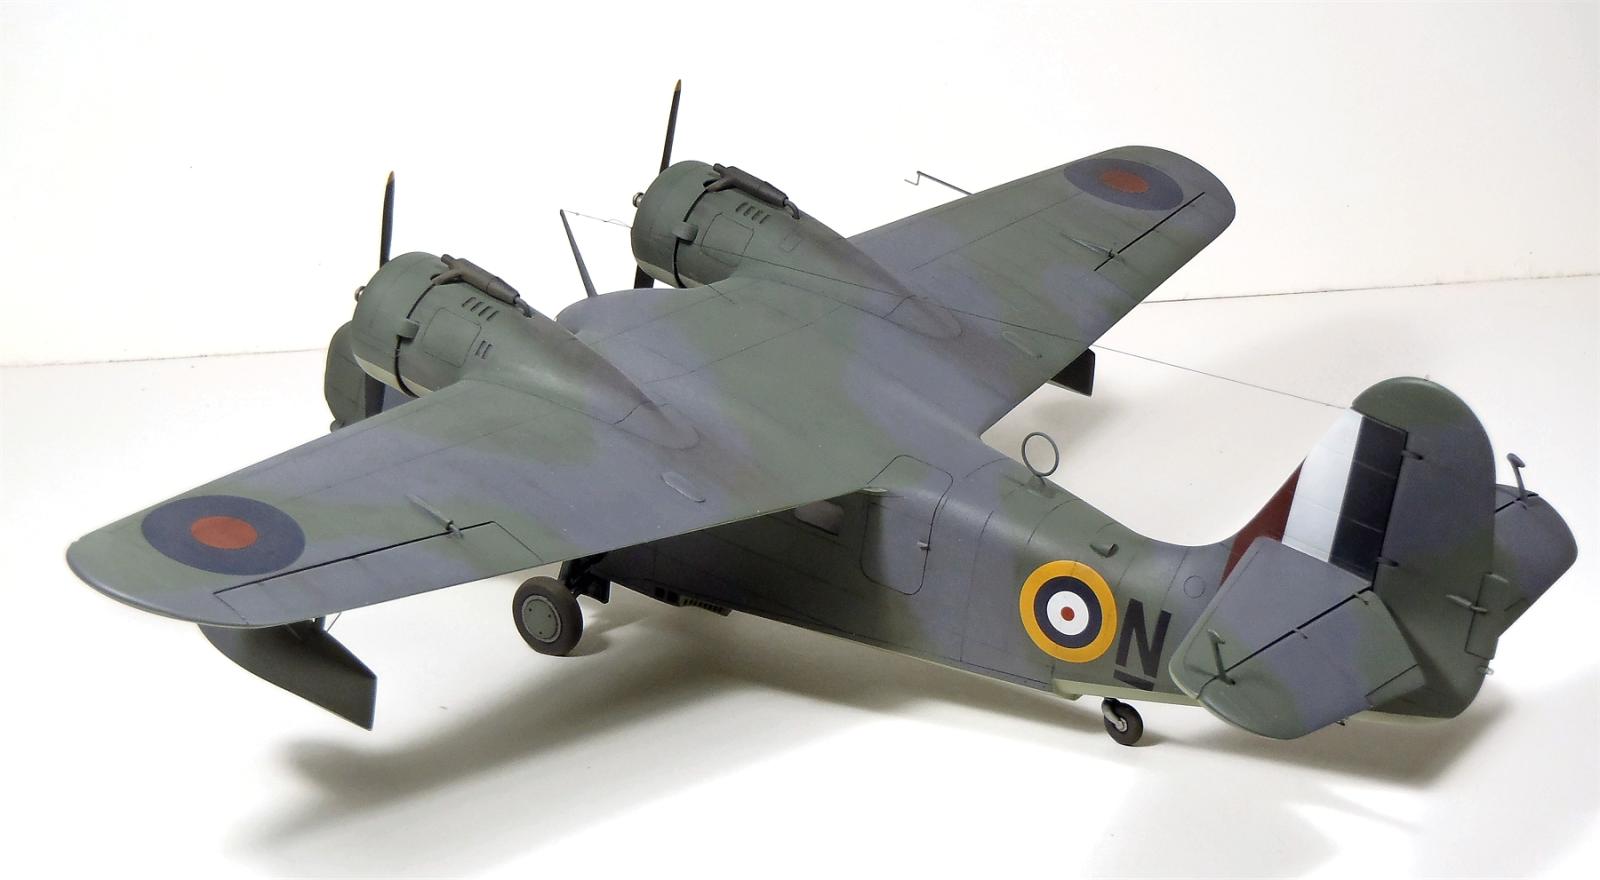
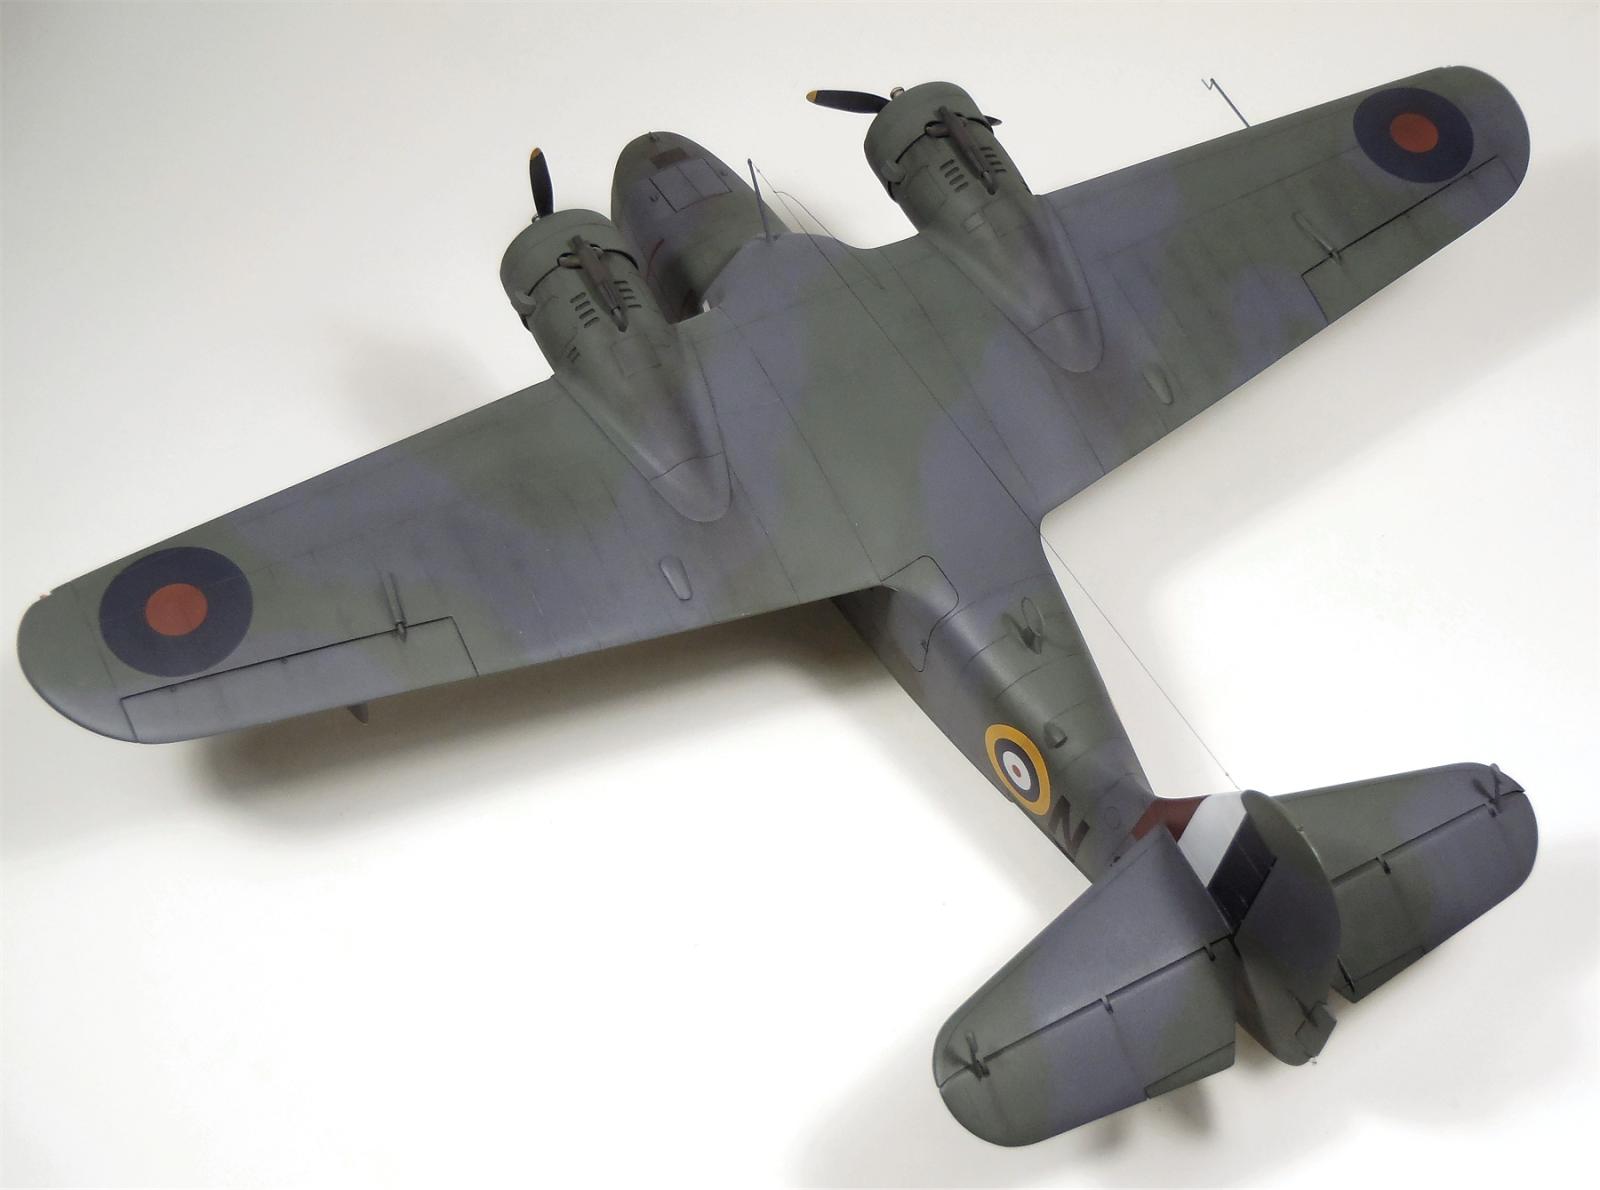
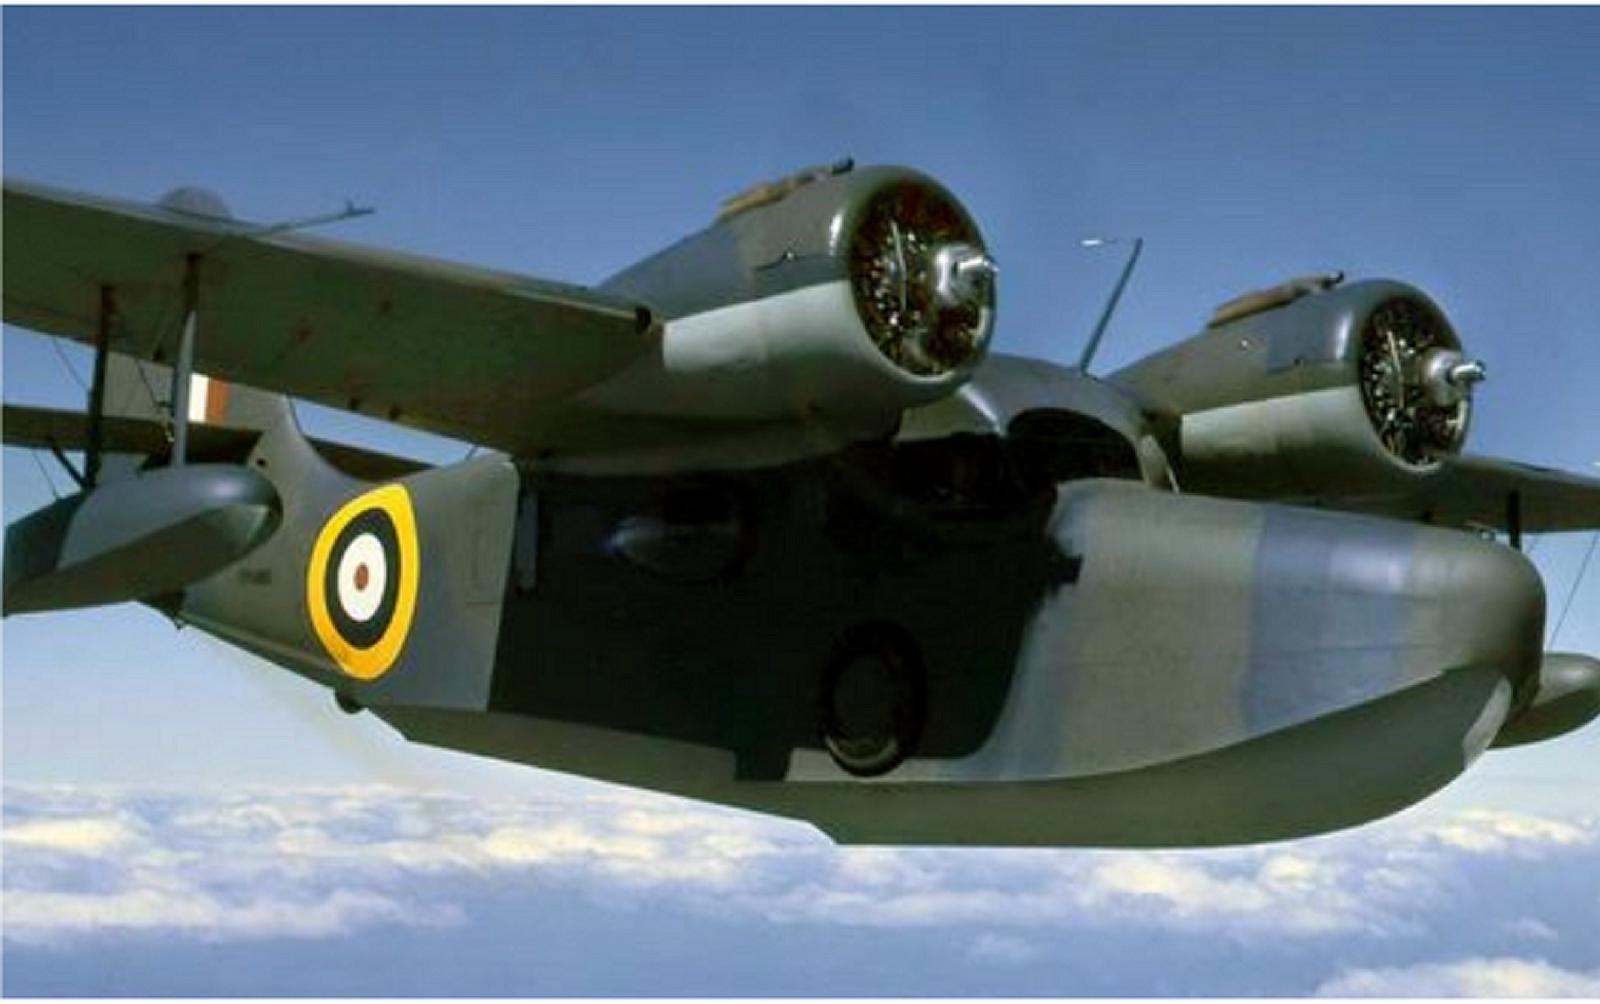
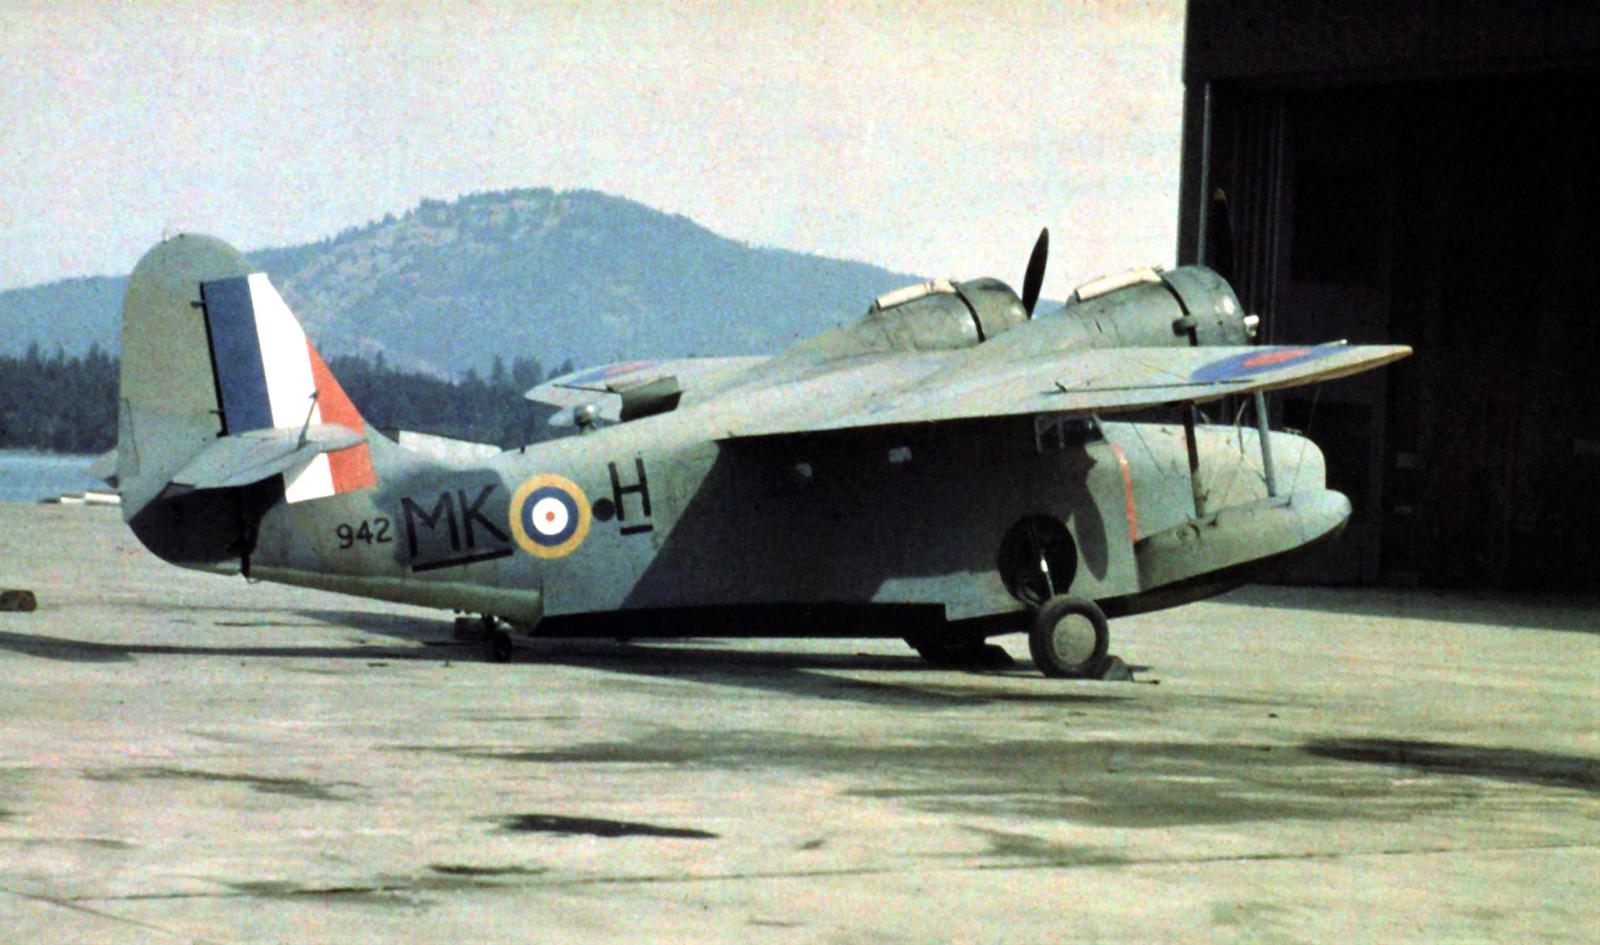
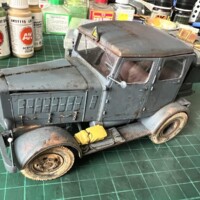
Grumman Goose (JRF) Mk III, No.13 Operational Training Squadron, RCAF base, Sea Island, B.C.
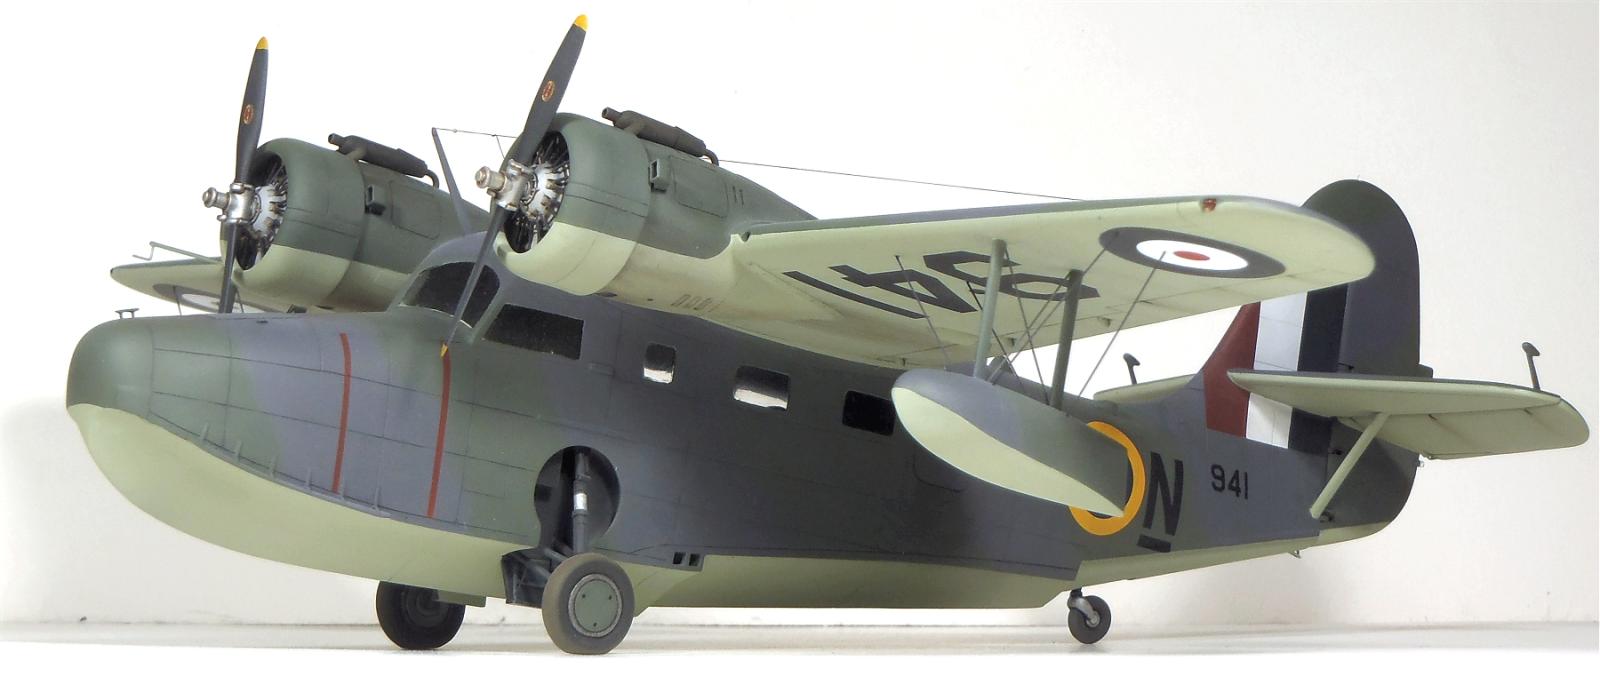
This is Czech Models 1/48 limited edition Grumman Goose JRF kit finished as an RCAF Goose Mk III.
Grumman Goose 941 was flown by No. 13 Operational Training Squadron based at RCAF Station Sea Island, British Columbia. Prior to military service the aircraft was on the Canadian civil aircraft registry as CF-BQE.
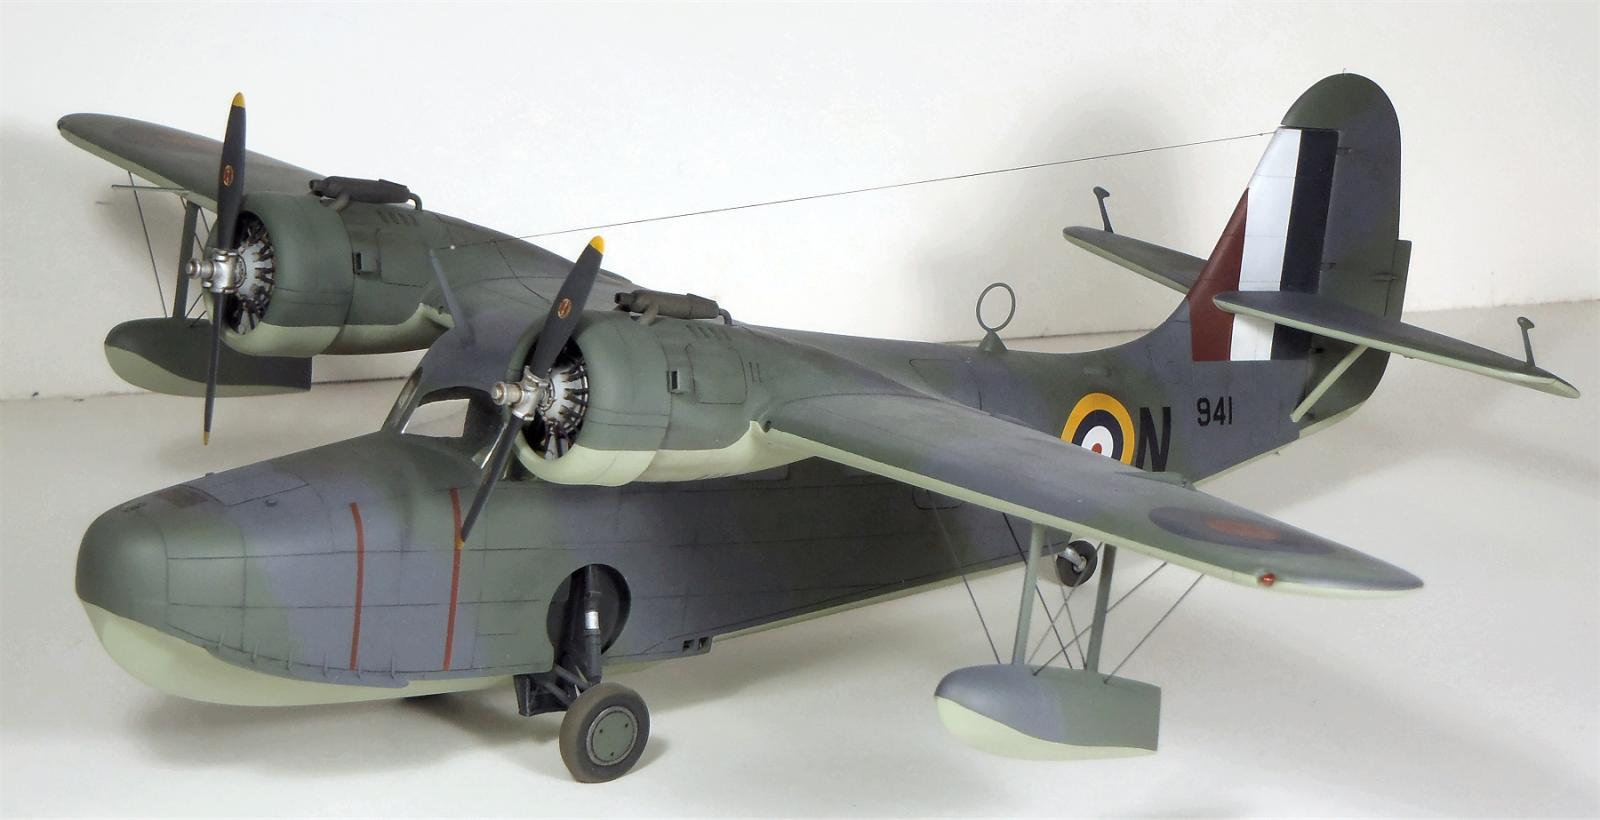
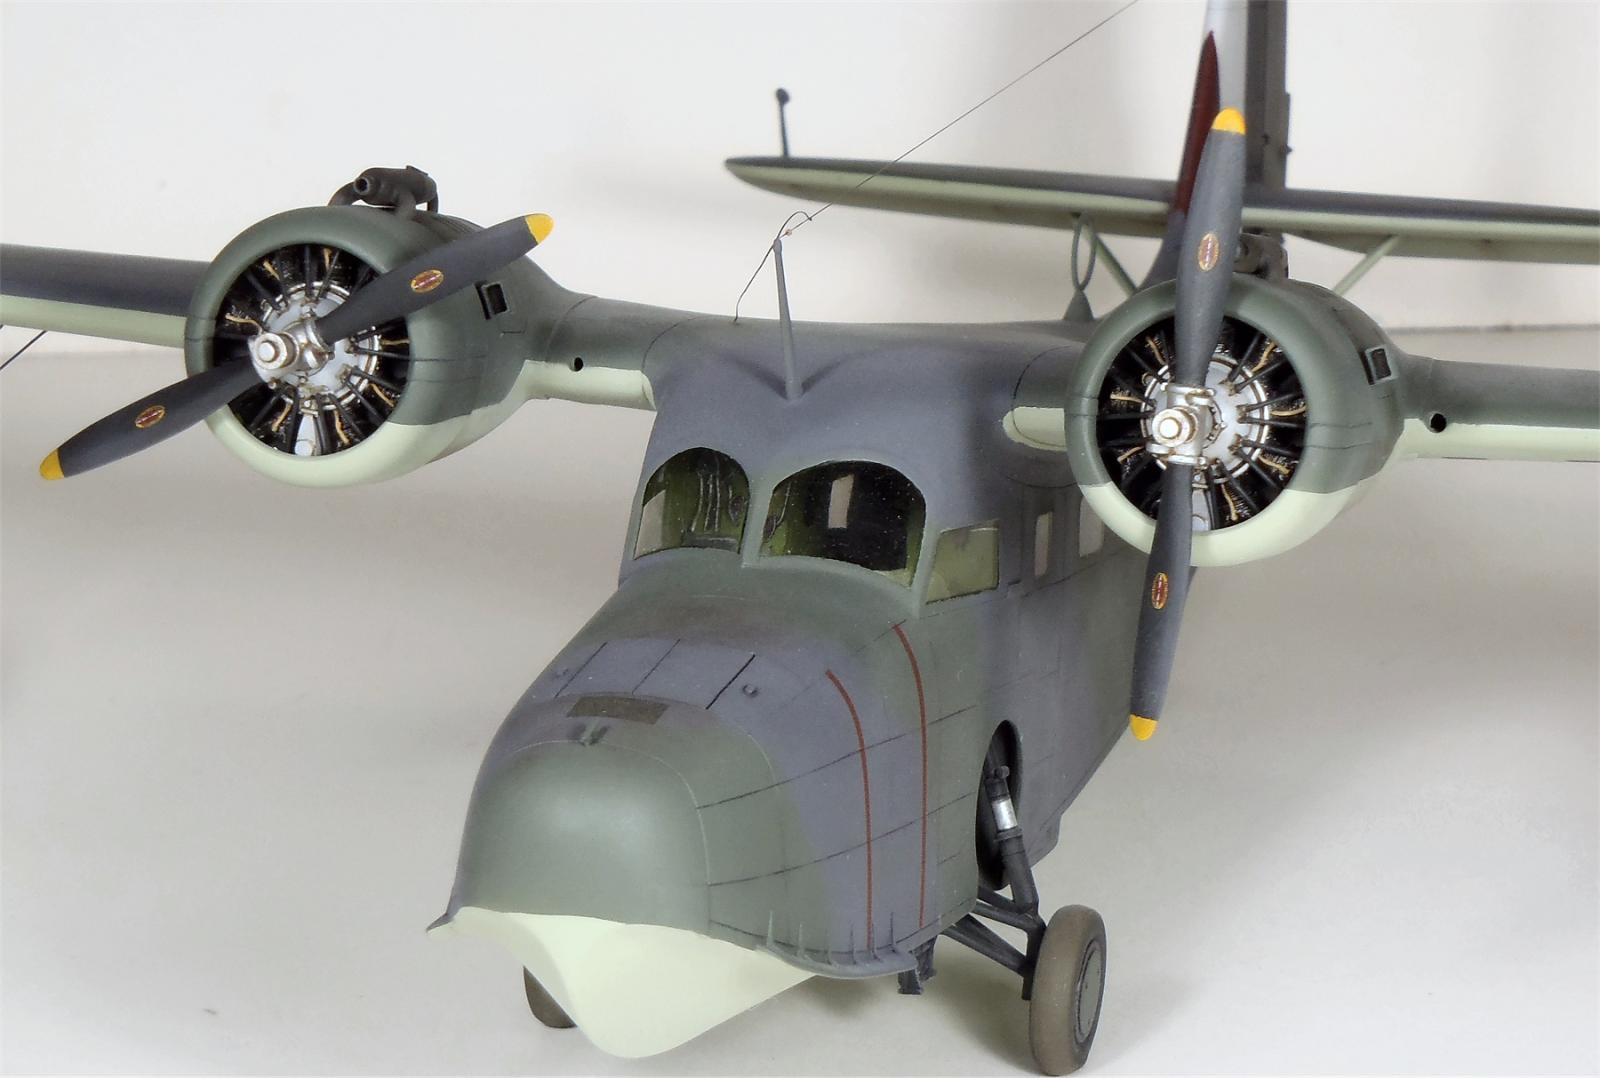
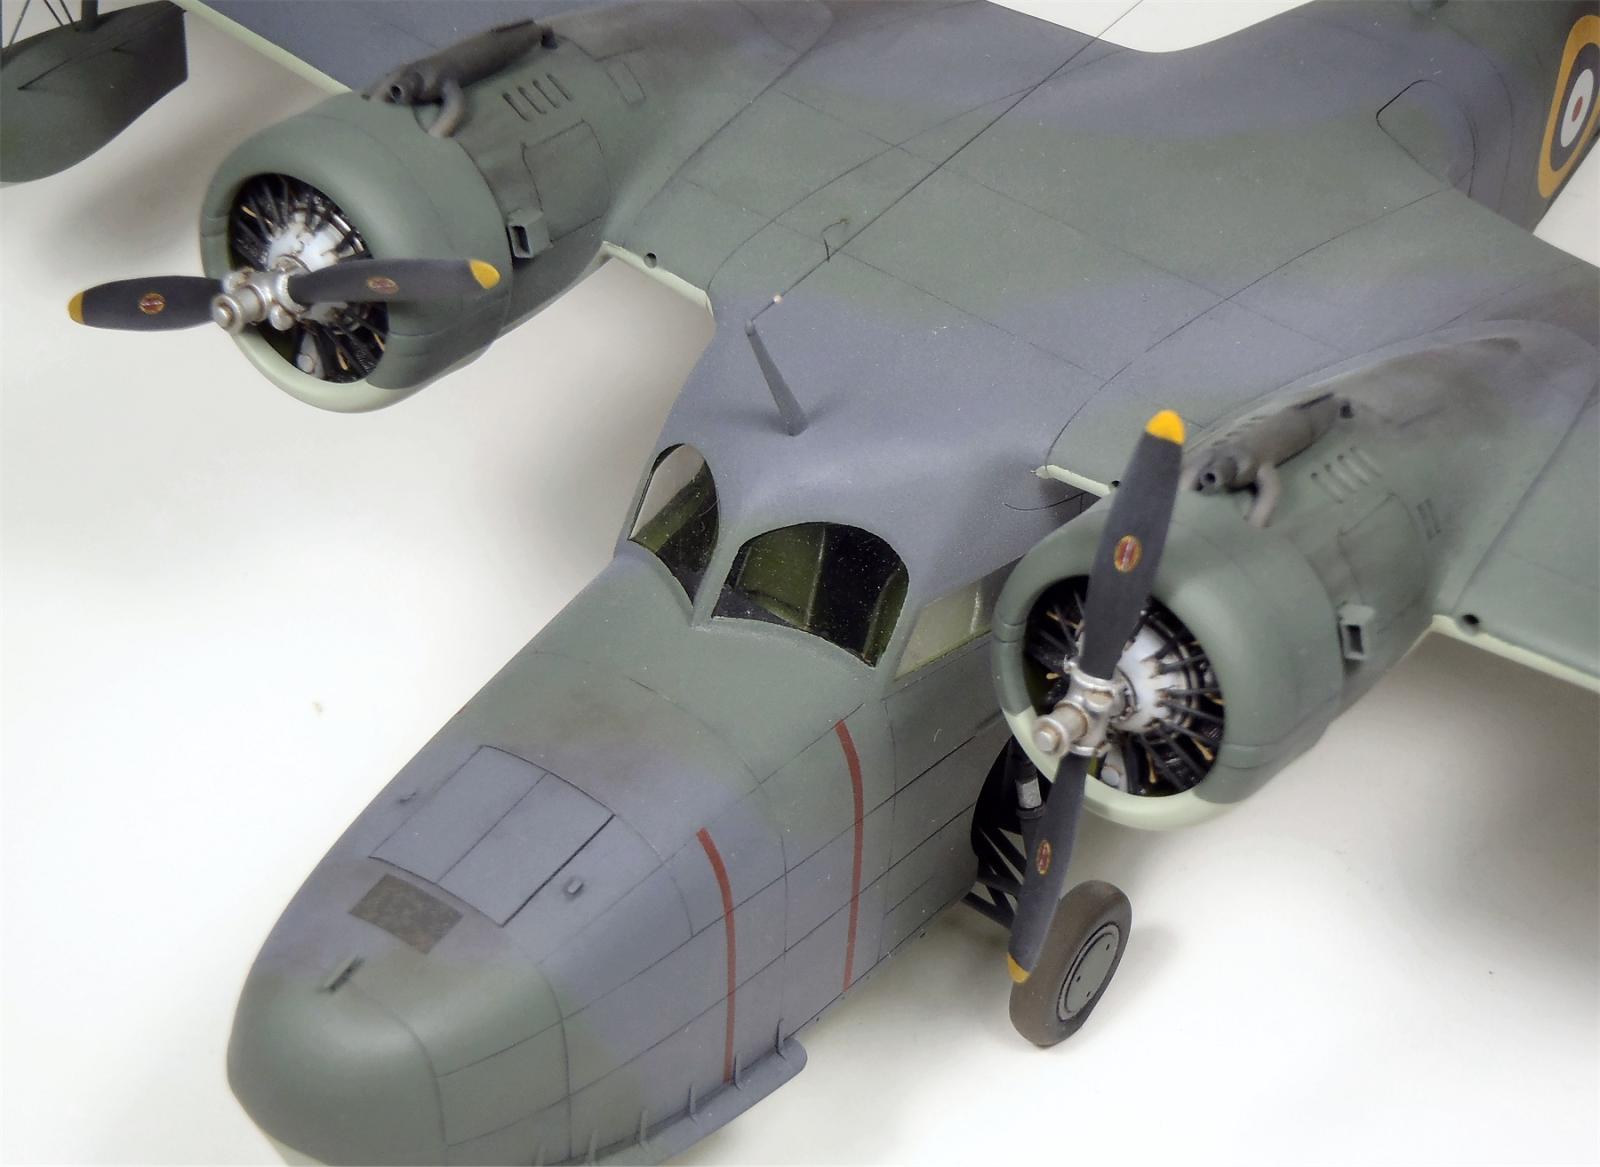
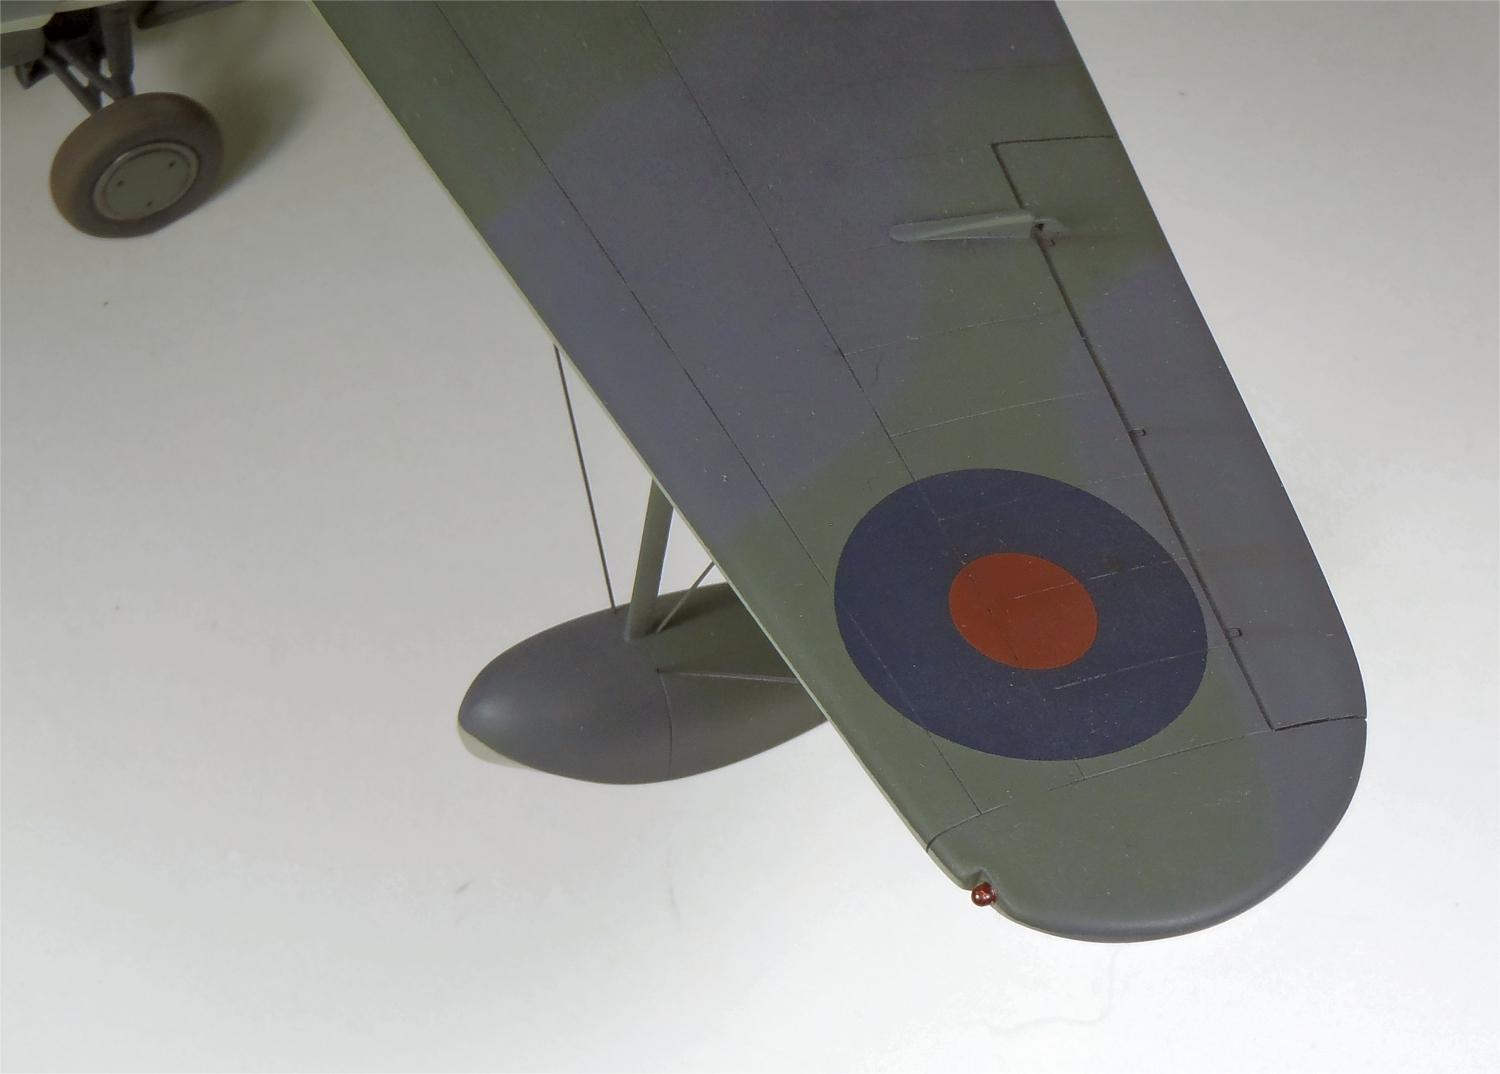
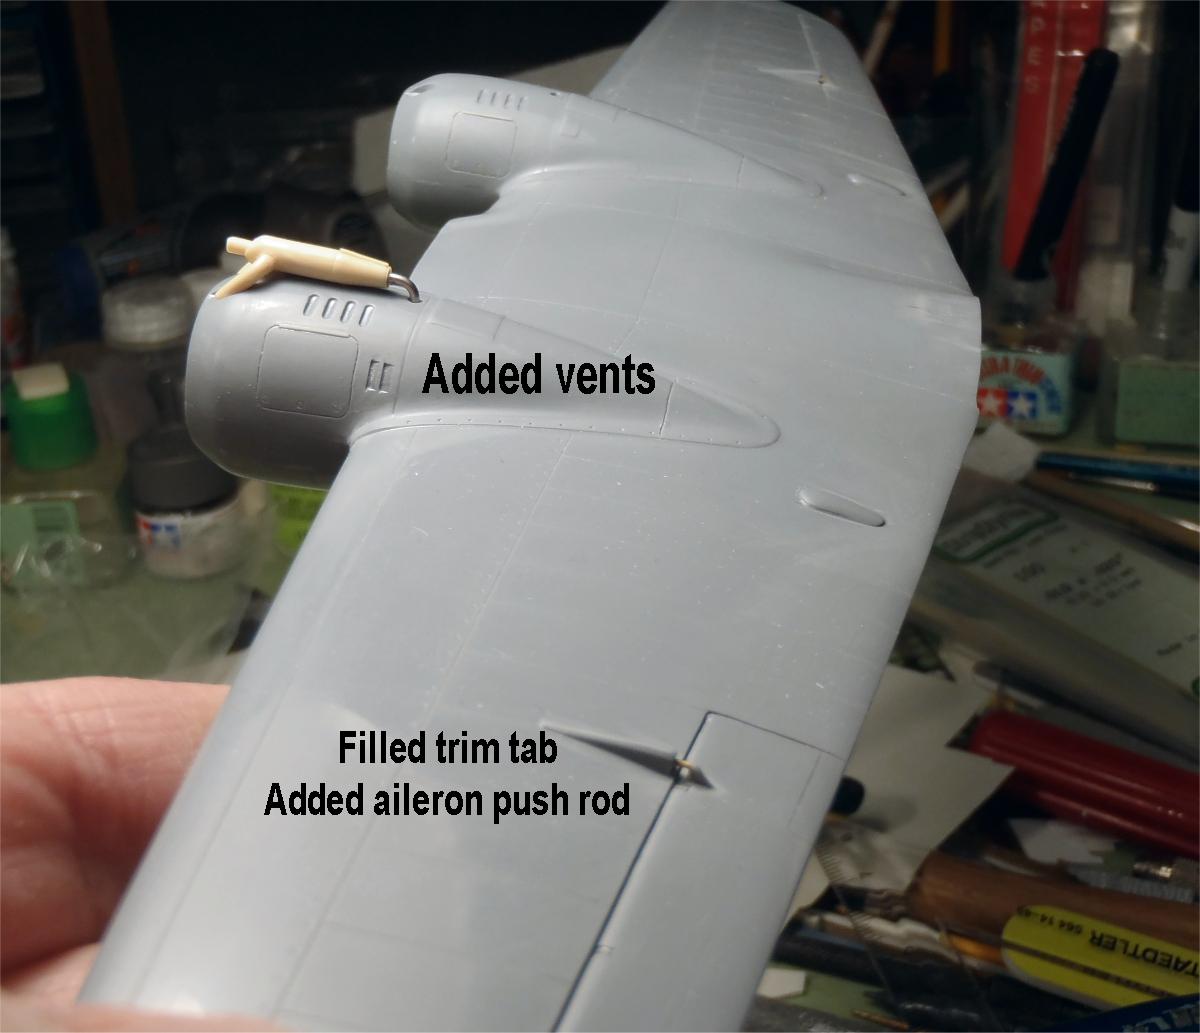
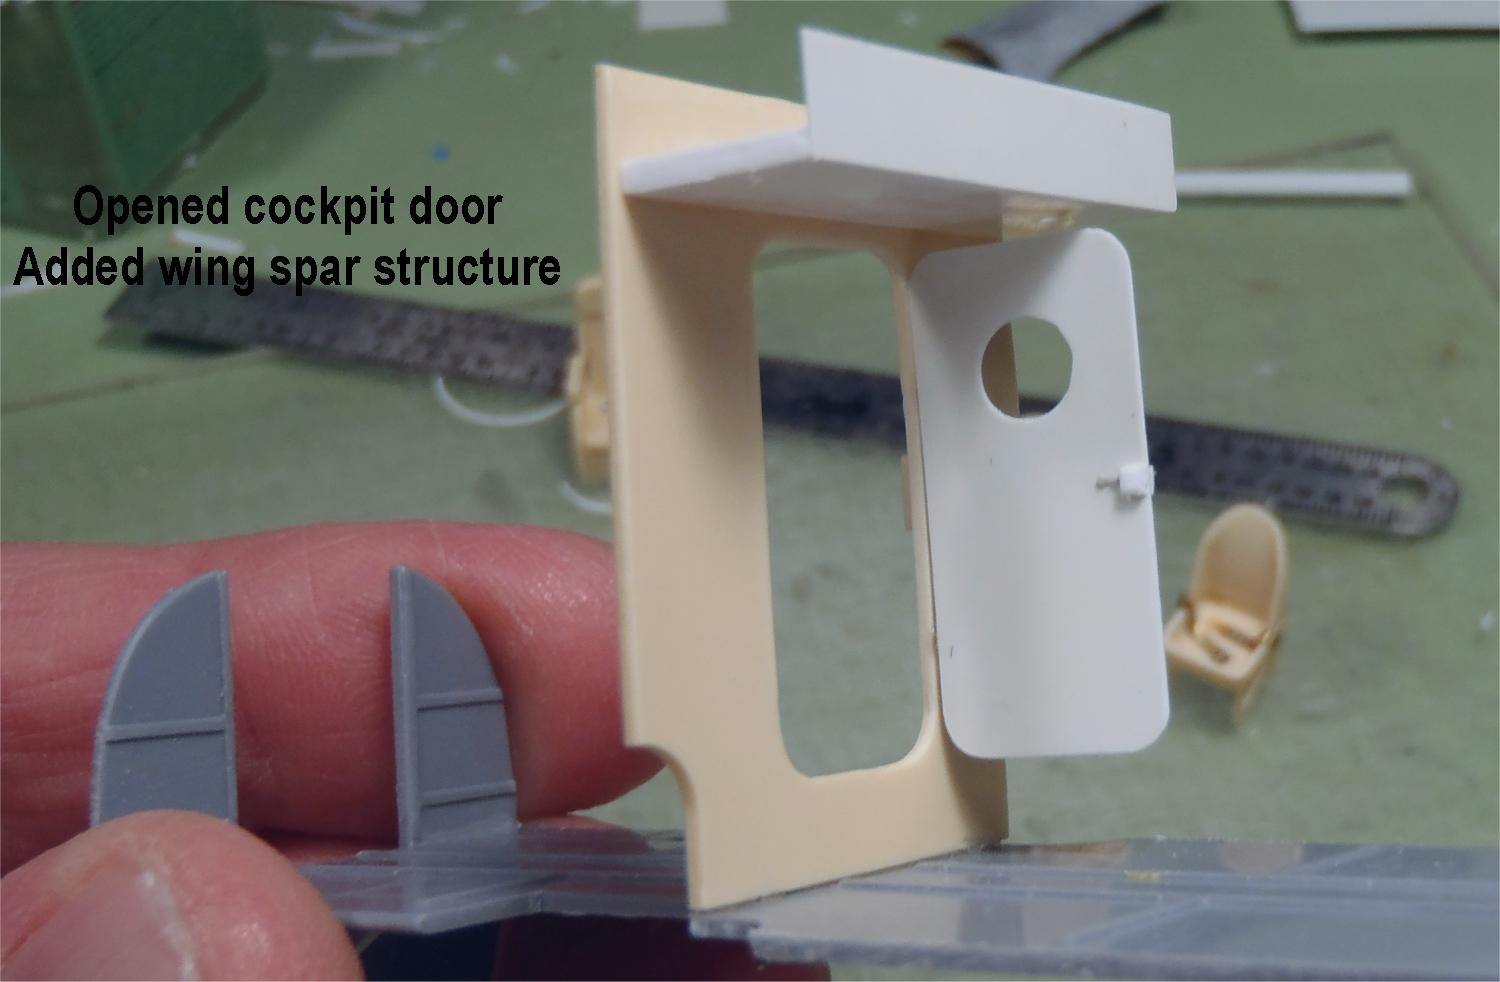
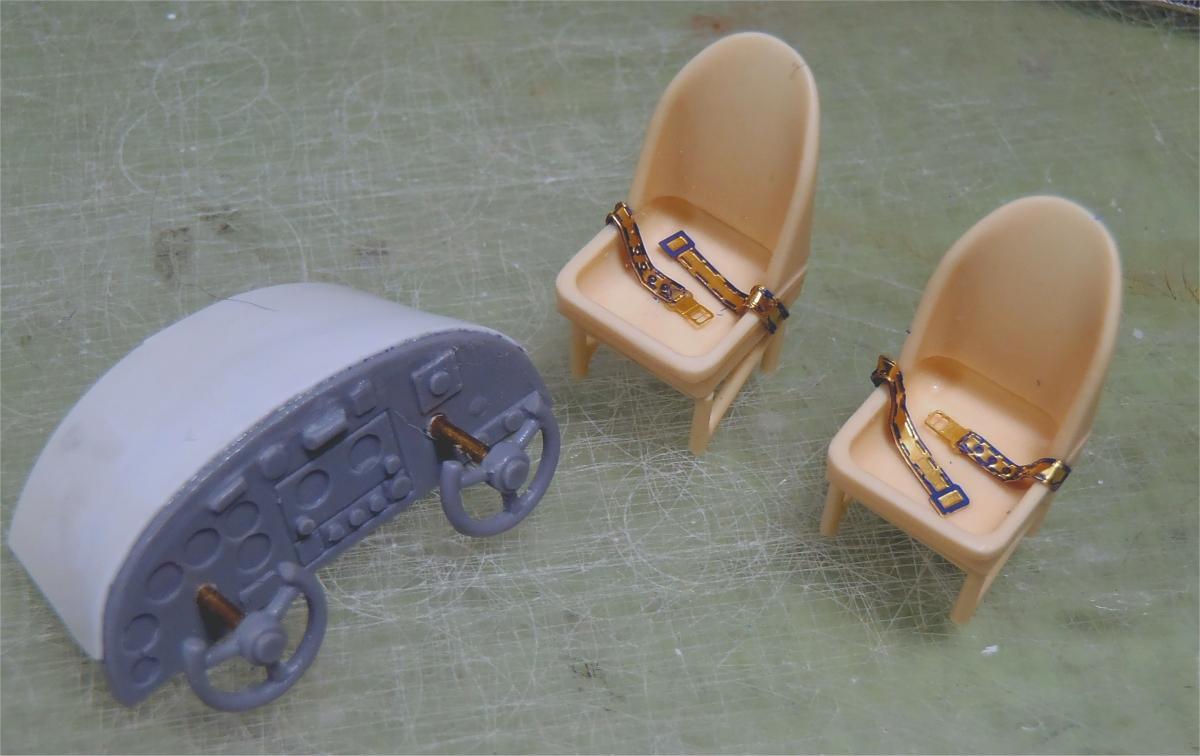
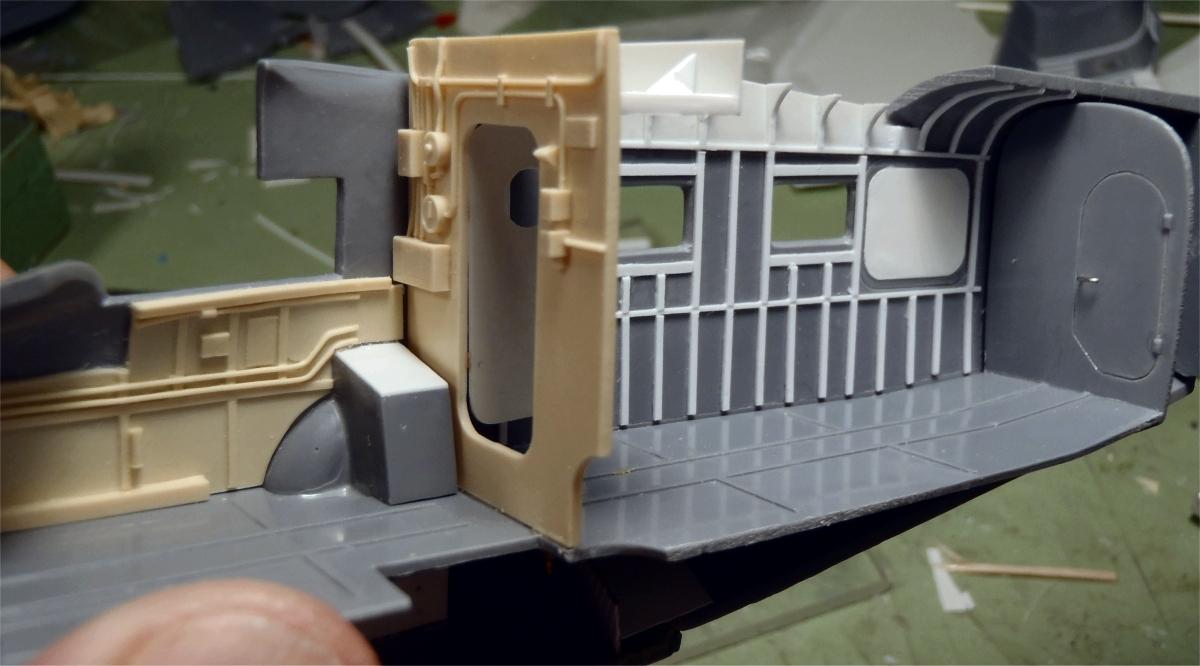
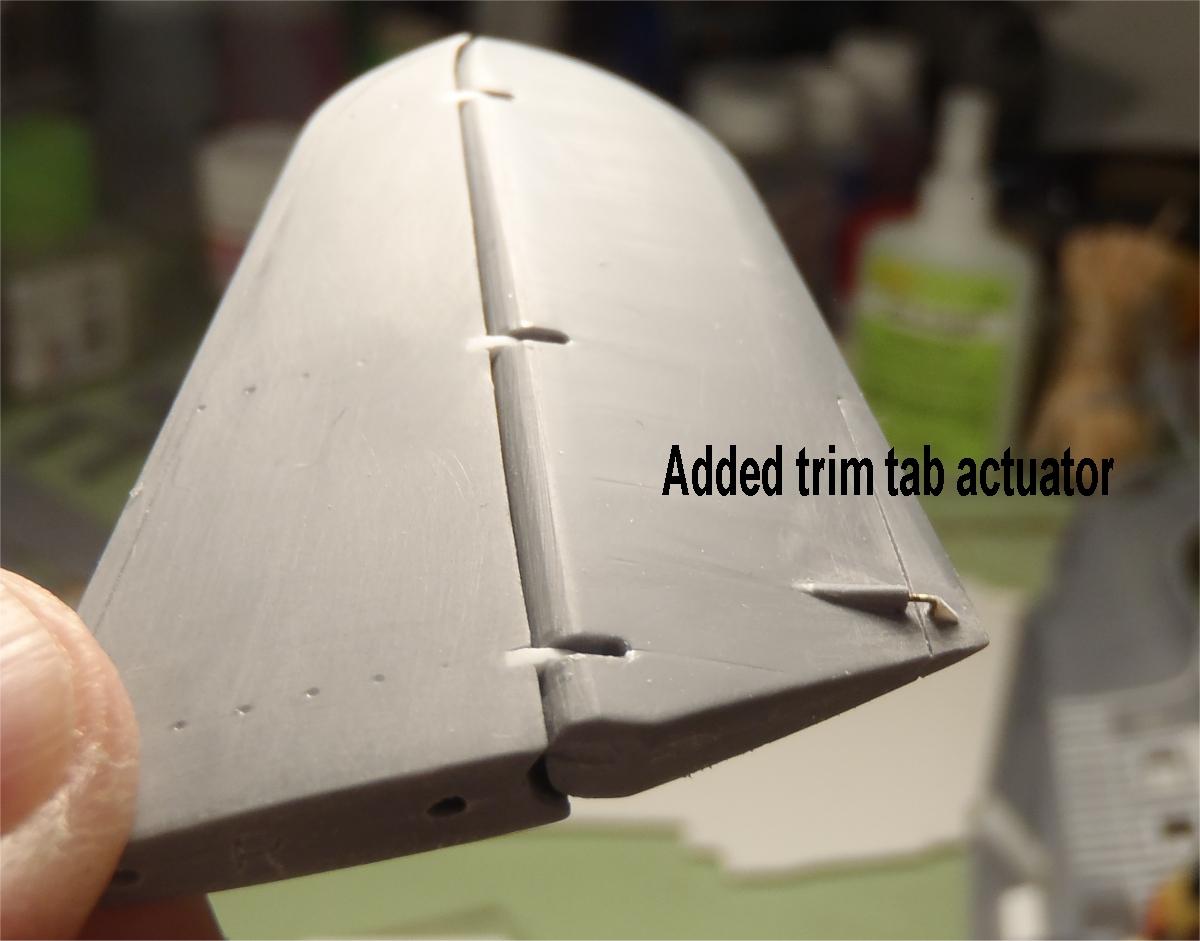
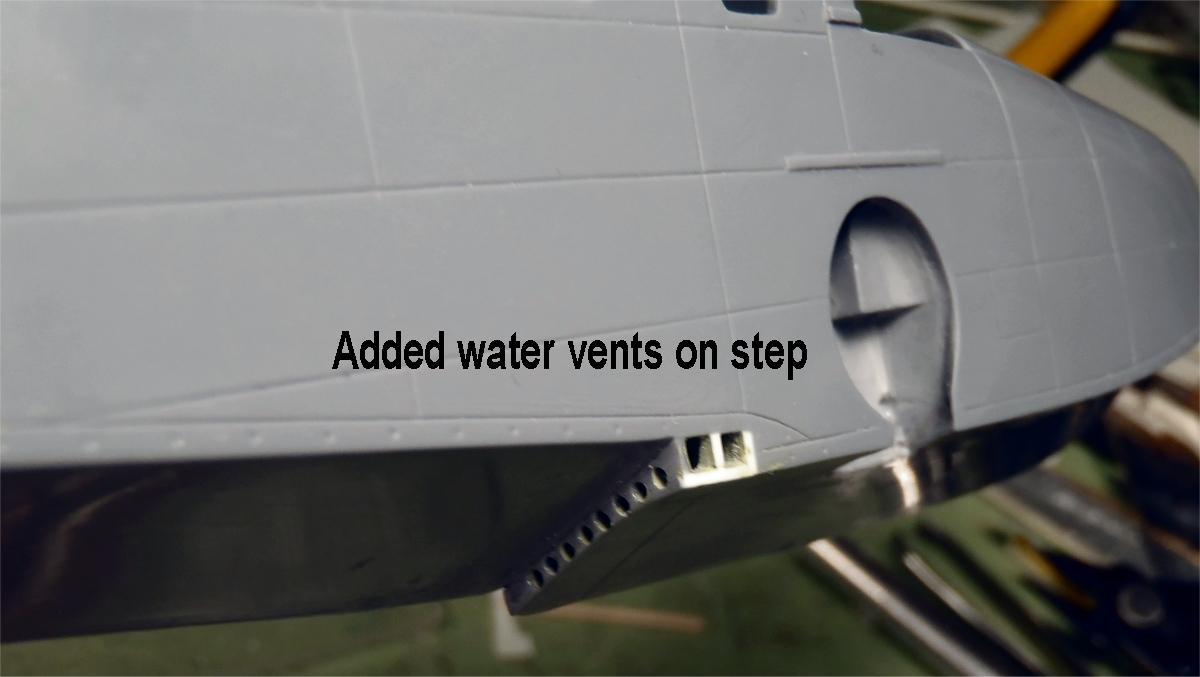
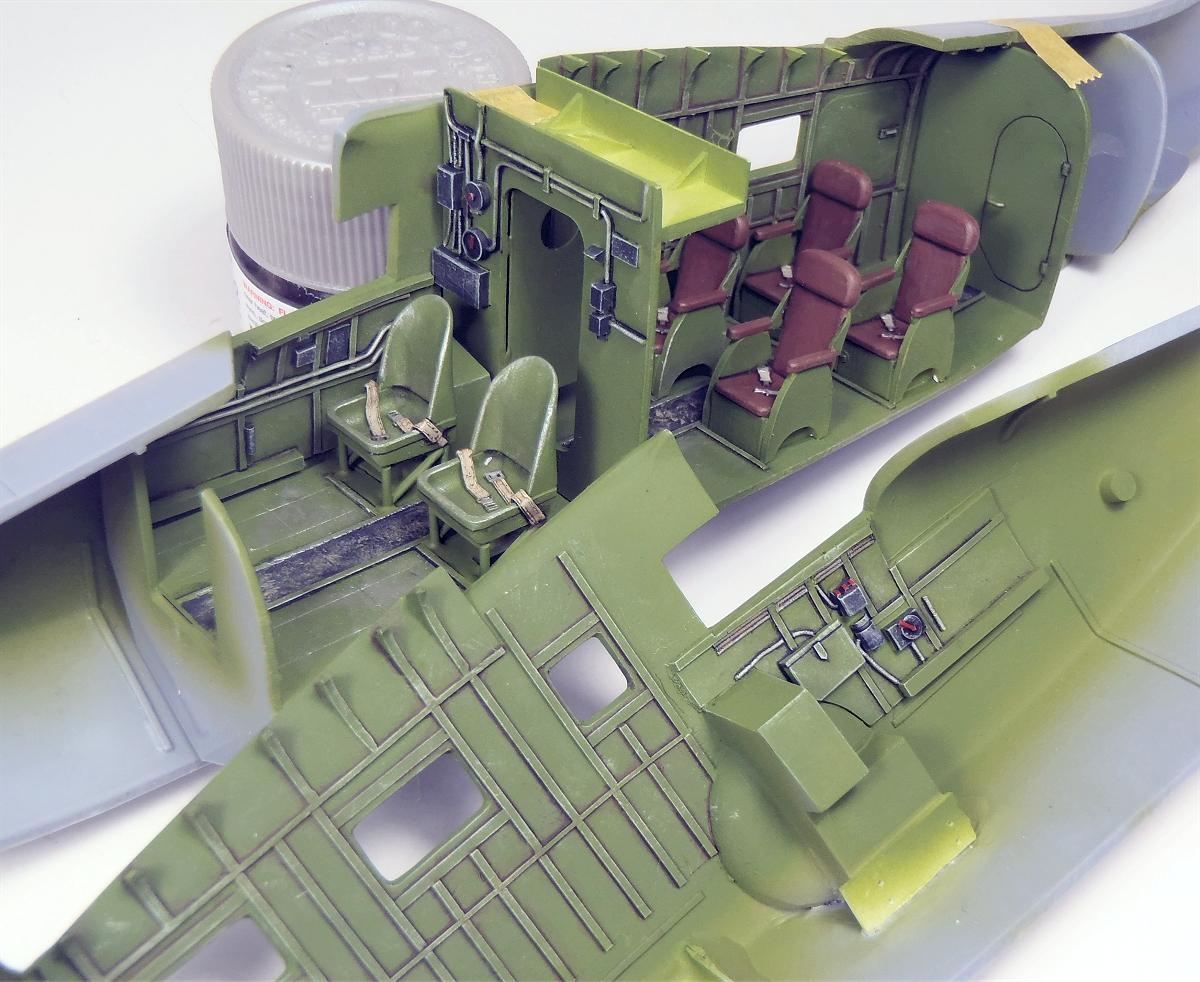
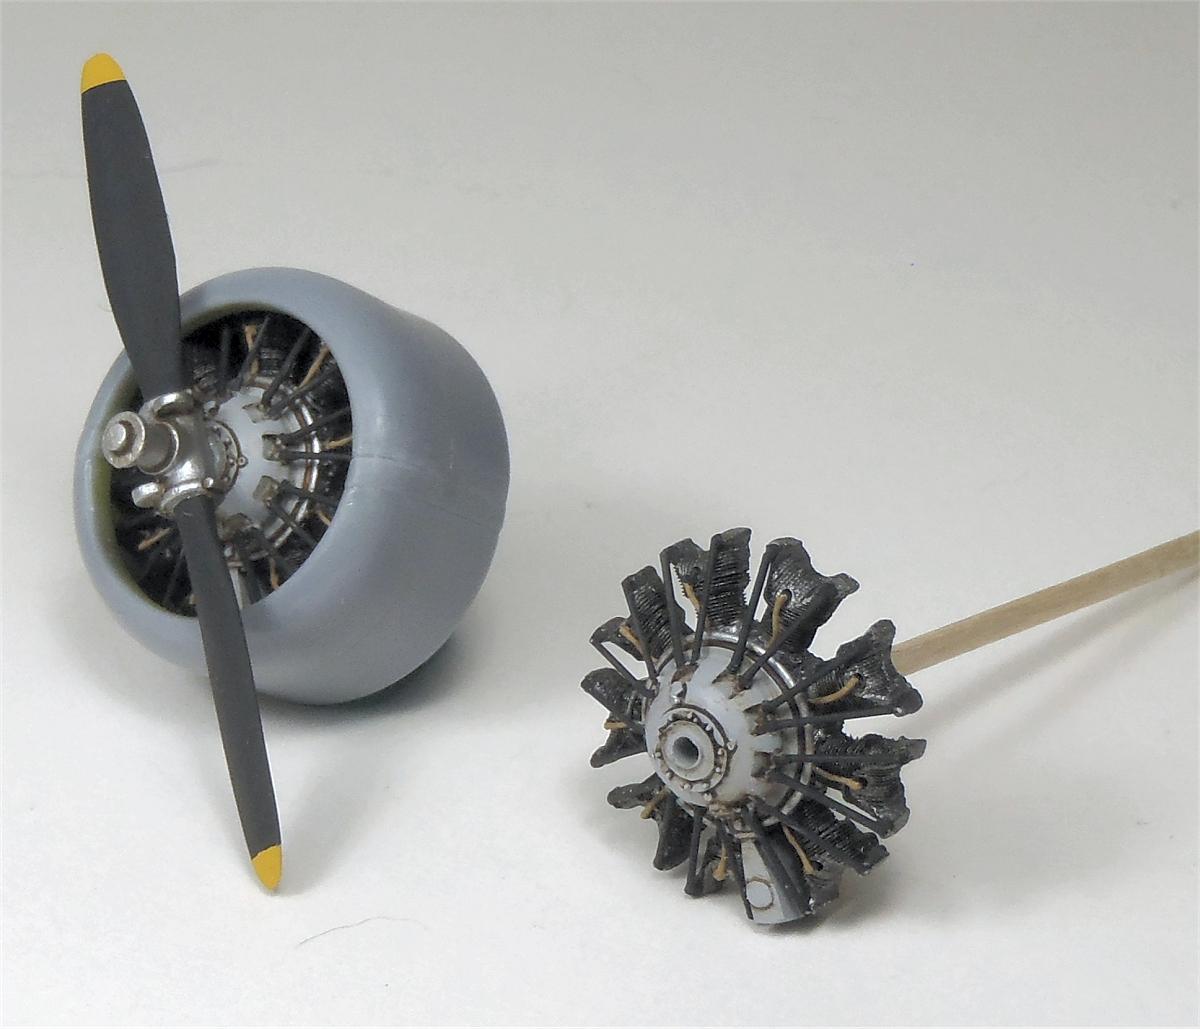
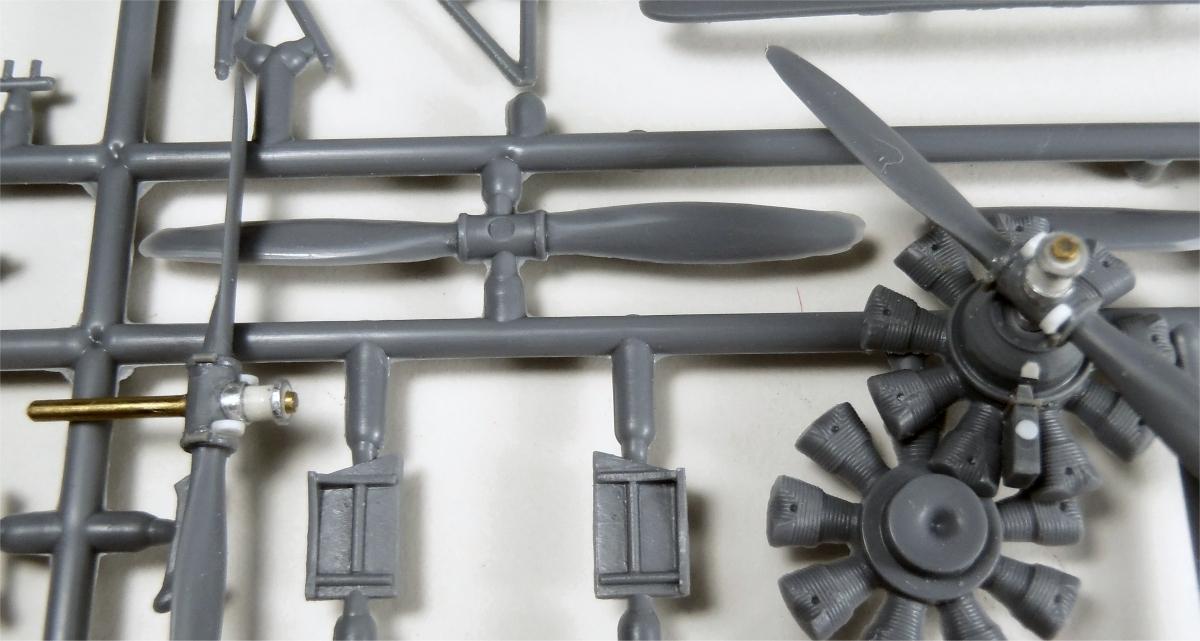
It was built with a full interior (which can't be seen), Vector resin engines, and my resin copies of highly modified kit props (11 brass, aluminum, and plastic parts in each prop!). Trailing edges thinned a lot, many details, panel lines, extra vents rescribed or added, trim tab and aileron actuators added, nav lights carved from colored bingo chips, and stretched sprue. Float rigging with .010" Phosphor-Bronze wire into predrilled holes.
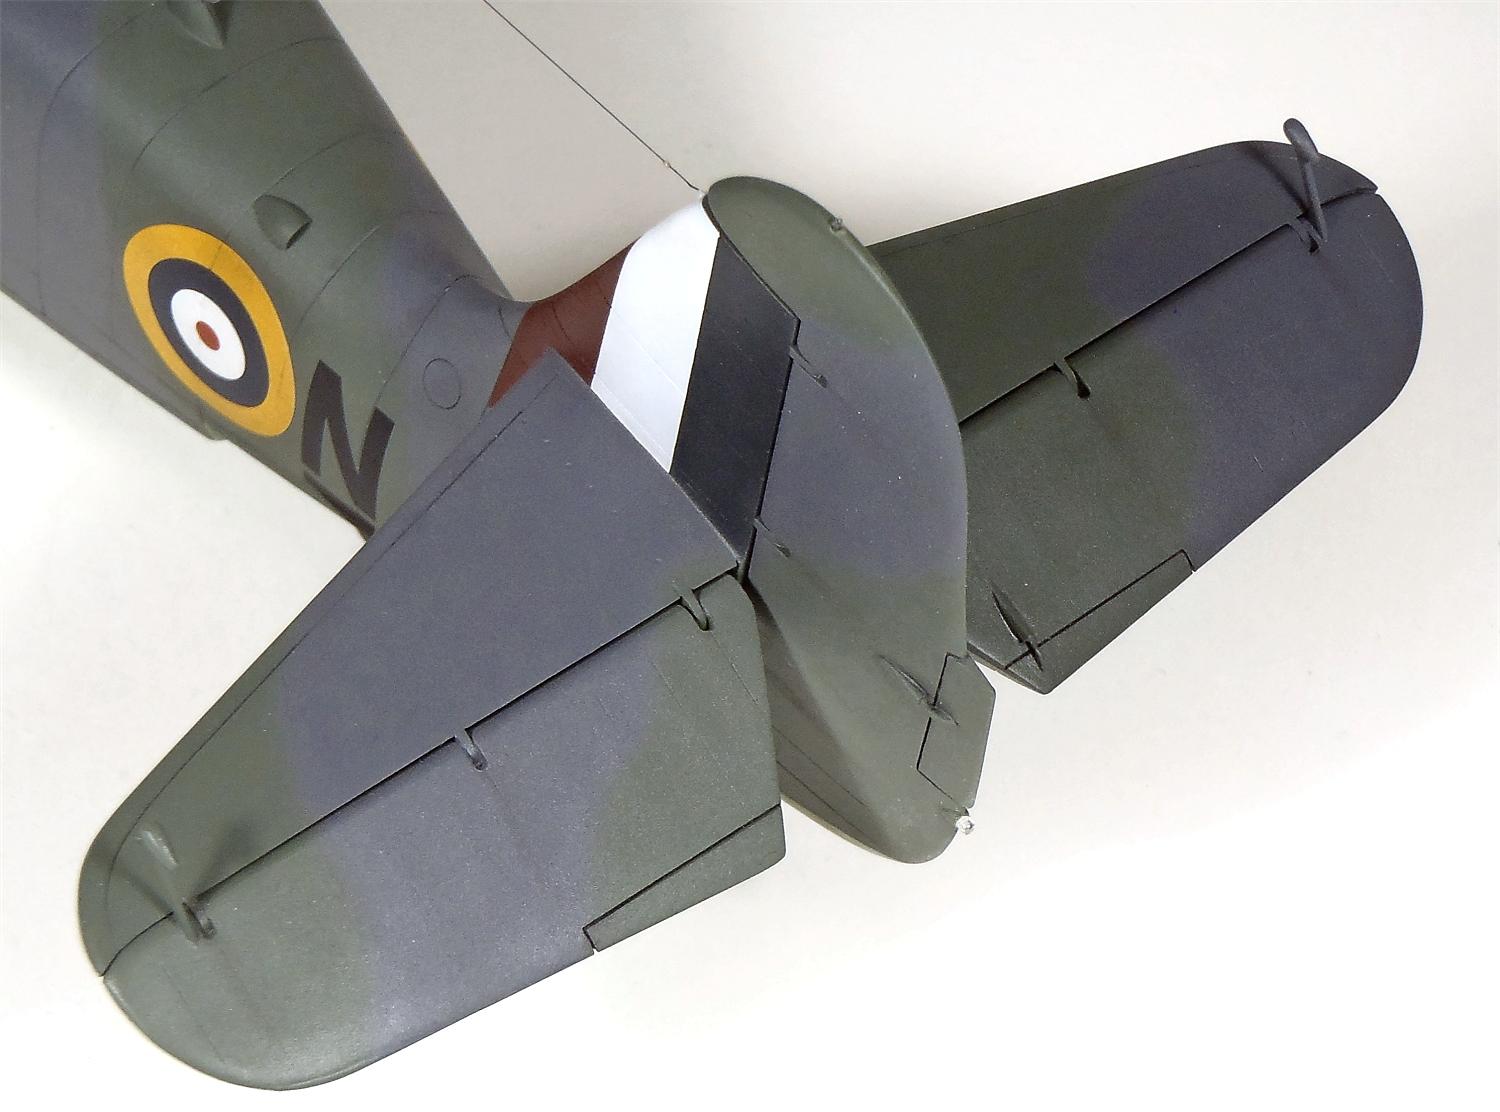
Painted with Tamiya acrylics, weather with oils and pastels. Some kit decals used, wing roundels, and tail flash masked and painted.
All and all, a fun kit. hope you like.
Colin

-

- 1. Carved from
Colored Bingo chips

-
- 1. Elevators seperated
and dropped


You sure went the extra mile on this Czech Model kit. That‘s quite an interior! Engines look much improved. Paint is well done! You knocked this Goose out of the park, Colin.
A lot of handy work to make this kit look handsome, well done!
This...is freakin awesome
Excellent modeling, Colin. The engines really stand out.
That's a fabulous build - the interior, engines, and especially the props put this build in a class by itself!
Thanks! The nice thing is, no one ever made nice aftermarket HS counter weight props of that style. Now that I am learning resin pressure casting, I have an unlimited supply!
These props are useful on such aircraft as the Beech 18, Kingfisher, Harvard, Beaver etc.
Excellent build Colin!
A superb result, Colin! I am amazed by your skills! You don't see too many Gooses built, let alone such excellent ones!
Excellent build, Colin @tail-dragon
Scratch building does add a lot to the detailing, especialy the interior and trimtabs for example.
Well done.
Wow, this looks soooo good!
Fantastic build and excellent paintjob!
A definite home run here. Great work all the way around and a super result.
Nicely done, Colin
Wow! Colin, you have a usual high standard of detailing what the plastic offers, but with this one you really pushed the envelope! It’s a shame that the beautiful and superbly detailed cockpit and passenger stations are obscured inside the fuselage, and the work around the engines really stands out.
A quick question regarding brass tubes- what sort of saw do you use to cut them? Thanks!
Thanks! I prefer to use thin walled brass tubing if possible, and I cut it all the wrong way!
I'll put a drill bit as large as will fit shank first part way into the tube to prevent collapsing it, and then will roll it back and forth with a large, curved X-acto blade. A light sanding or filing cleans up the raised edge and a quick spin on a #11 blade cleans up the inside edge.
I find it gives a nice cut, and squares up the end nicely when you roll it all the way round while cutting. (Hard on blades, though!)
If the tubing is too thick for that, I'll score it the same way, then use a Dremel cut off wheel.
Same way with Aluminum tubing - but much easier on blades!
Good hints! Thanks!
What an excellent model...amazing work!
Top notch! Love all of the detail and extra work you put in to making this an absolute stunner
Looks fabulous in this colour scheme, Colin, all your hard work was definitely worthwhile.
Colin, @tail-dragon, I have a special place in my heart for the Goose. I was involved in the 10 year long restoration of N642, a Goose that is one of the last four turbine conversions. You have really built a beauty with your extra efforts and excellent craftsmanship. I have this kit and would really appreciate any feed back on the foibles of the kit other than being a limited run kit already. Your extra work definitely made a difference in the appearance of this kit. I really think you did a wonderful job on this kit.
Great build and beautiful detail work - love it!
To Walt B.
I guess the big take away is never assume ANY part will fit without dry fit and rework first, scraping, shaving or filing. Dry fit everything over and over until the fit is as perfect as you can get it.
I installed the side windows early, filled, sanded and polished the outside then masked inside and out.
I reworked and fit the canopy halves (lots of scrapping and filing required) early into bare fuselage halves, but did not install at that time. I installed each canopy half after the fuselage was joined, but before the wing was installed, and used Extra thin cement on the seam above the windscreens and let capillary action draw the cement down between the windscreens. (Install the wing to fit the canopy top, rather than vice versa, makes life much easier) For the landing gear, cut some rectangles of thick (.030") plastic to fit inside the wheel well top from below, drill it to accept the main gear strut (strut actually goes to the inside position of the well, not the outside as they show) and trim the excess strut flush with the top of your rectangles. This is where you can adjust the length to get it to sit level. Fit the gear leg (don't glue yet) and cement the lower 'N' shape struts to the leg only and let dry. (makes a nice solid unit you can install easily) When ready to install gear, cut the upper 'V' shaped strut into individual legs, and trim and install one at a time.
Note - you have to cut the forward bottom of the wheel well on the hull in a diagonal, you can see where on the molding - gear doors will show you the angle - the diagonal is forward - required to get the 'N' struts to fit.
For the wing floats, predrill all holes for the rigging wires early, install the 'X' wires between struts before you install floats, and the lateral bracing wires after decalling.
Other than that, fit, trim, fit, trim, fit and then glue!
Oh yes, the resin engines are just copies of the plastic engines, and are quite poor, best to replace if possible, or rework a lot if not possible. Crankcase is much too big, and no oil sump - see photos or P&W R-985 for details
... and have fun!
Colin, @tail-dragon, Thanks for the feedback. It is much appreciated!
Wow, this is a gorgeous build! I have watched a lot of videos on this aircraft for a future build and looking at your build you have nailed it!
Colin,
You benefit from the Midas Touch. This Goose (kit) has laid a Golden Egg. All I can see is Gold on this build.
No choice but, to smash the like button.
Three thumbs up.
One of my all-time favorite planes, Colin (@tail-dragon). You have really made this kit shine, especially with your scratch-built additions. I have this kit in my stash, so I am using your build as the "how-to" for this kit.