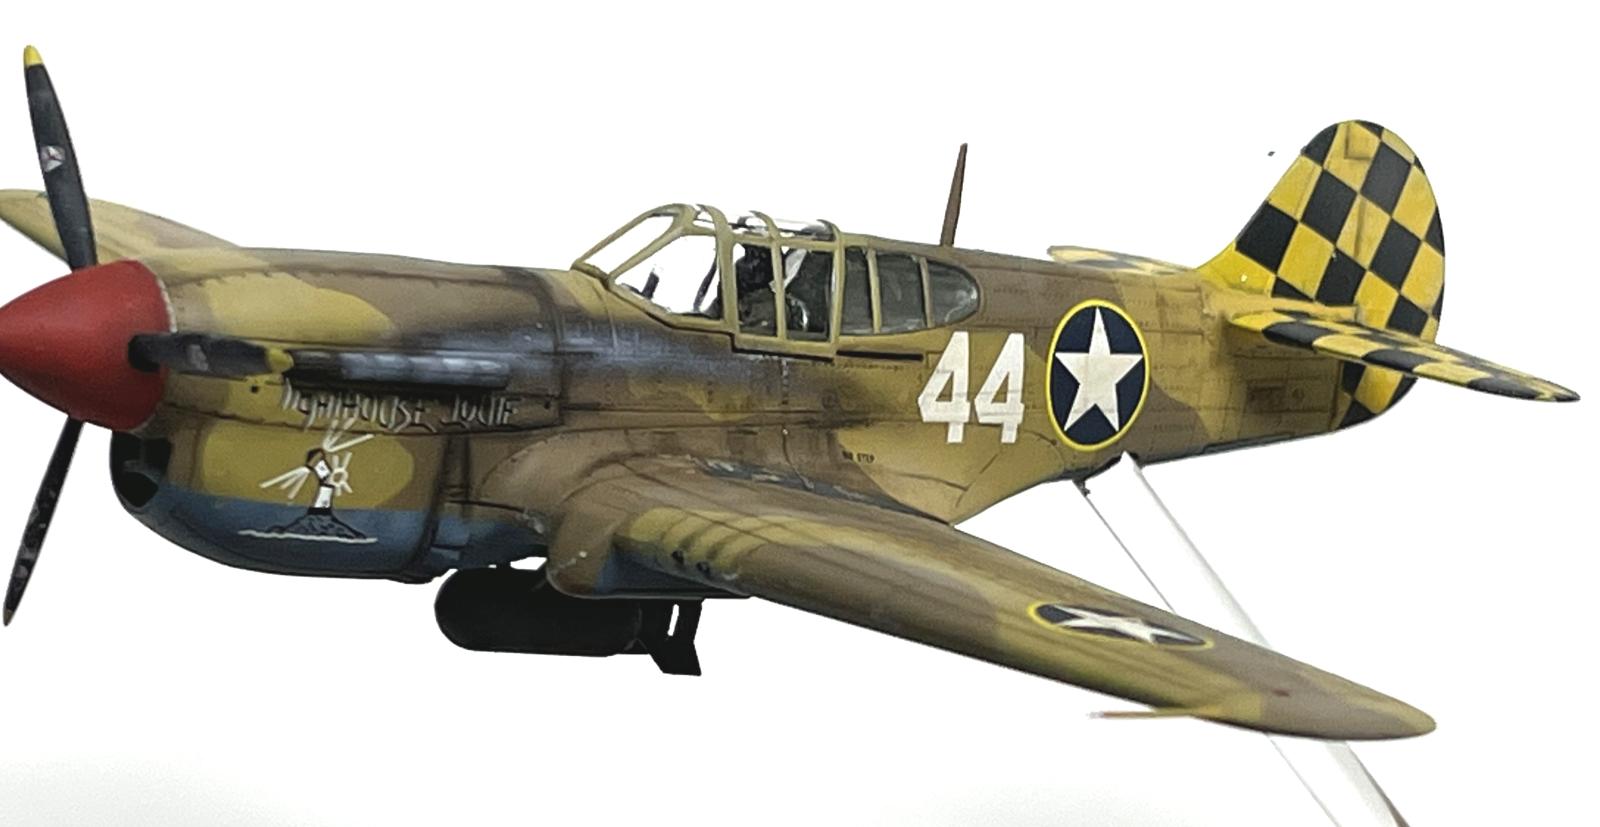
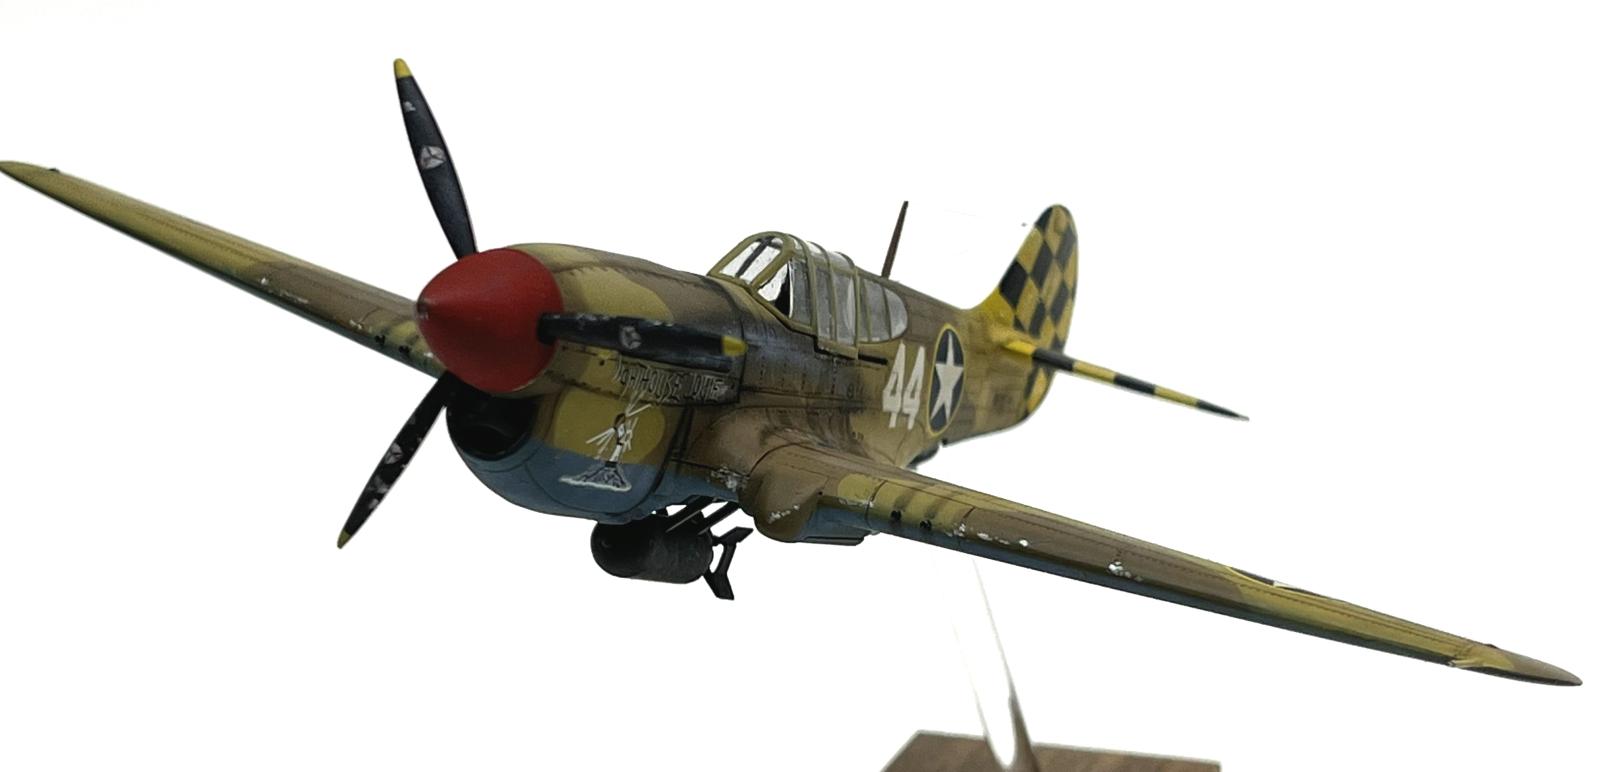
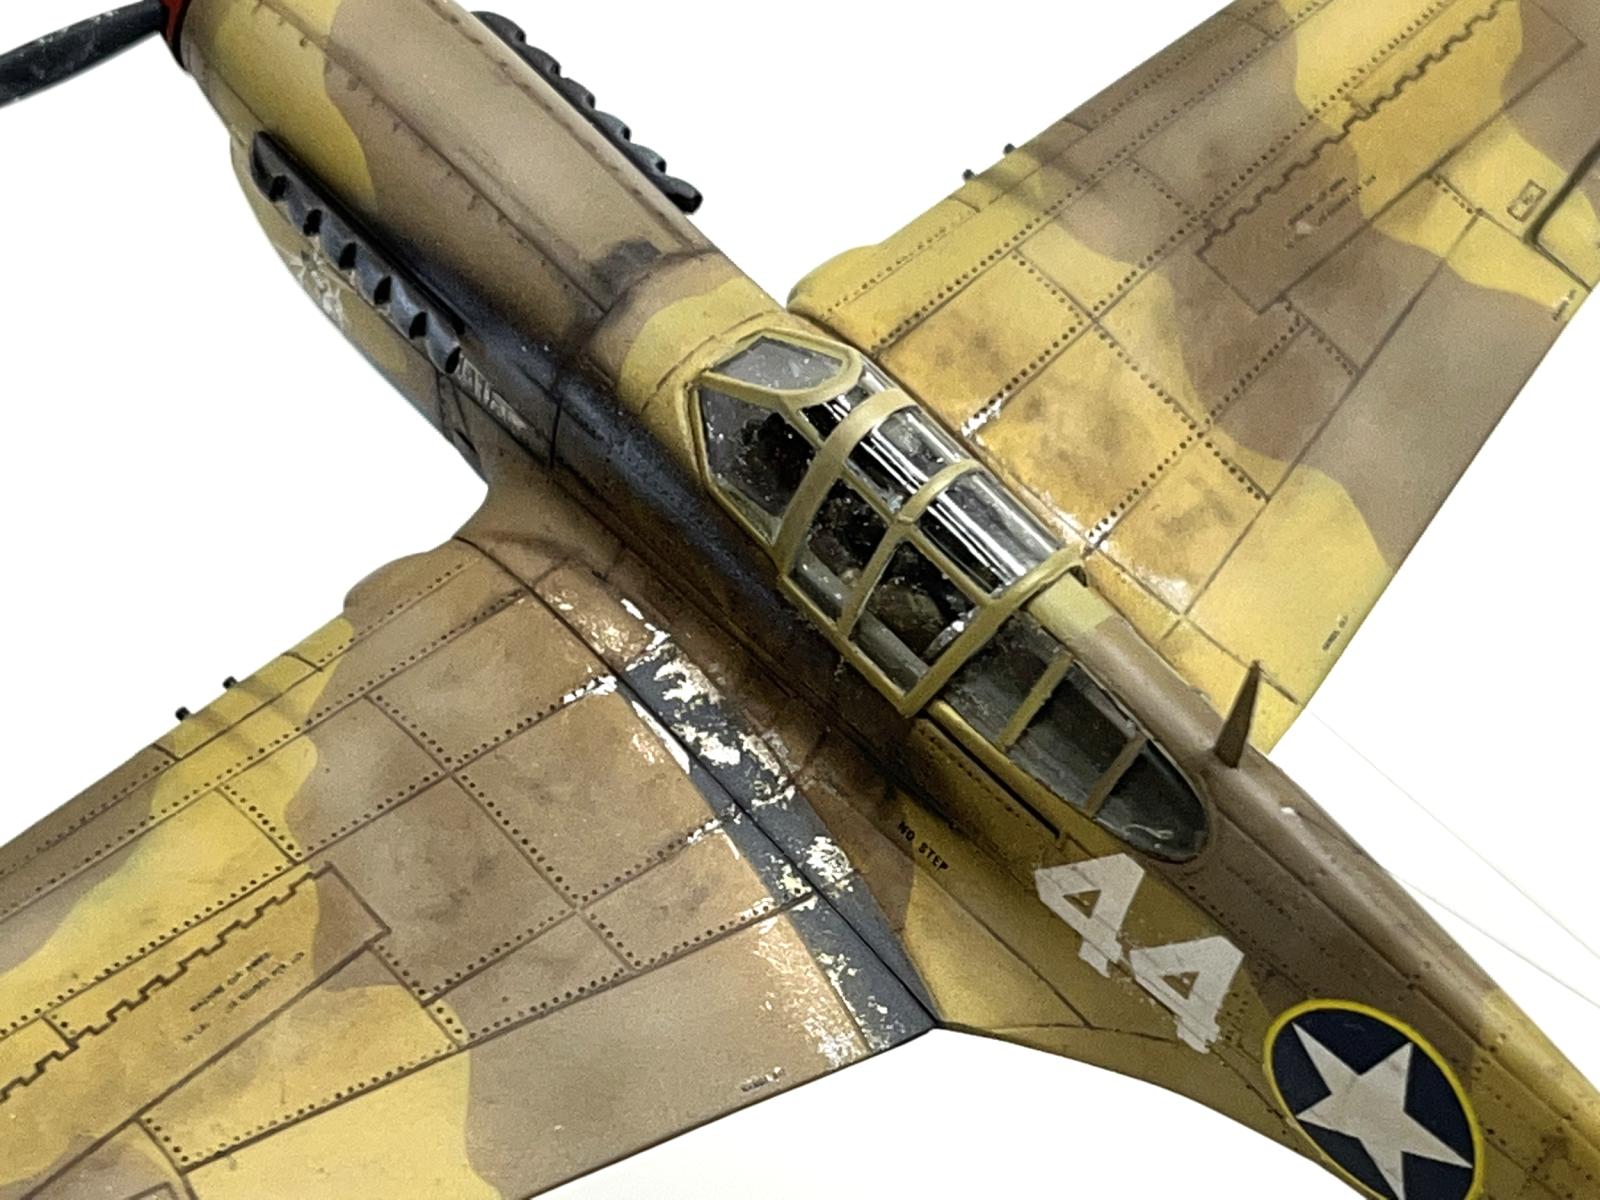
SMER 1/72 P-40L Warhawk, Operation Torch
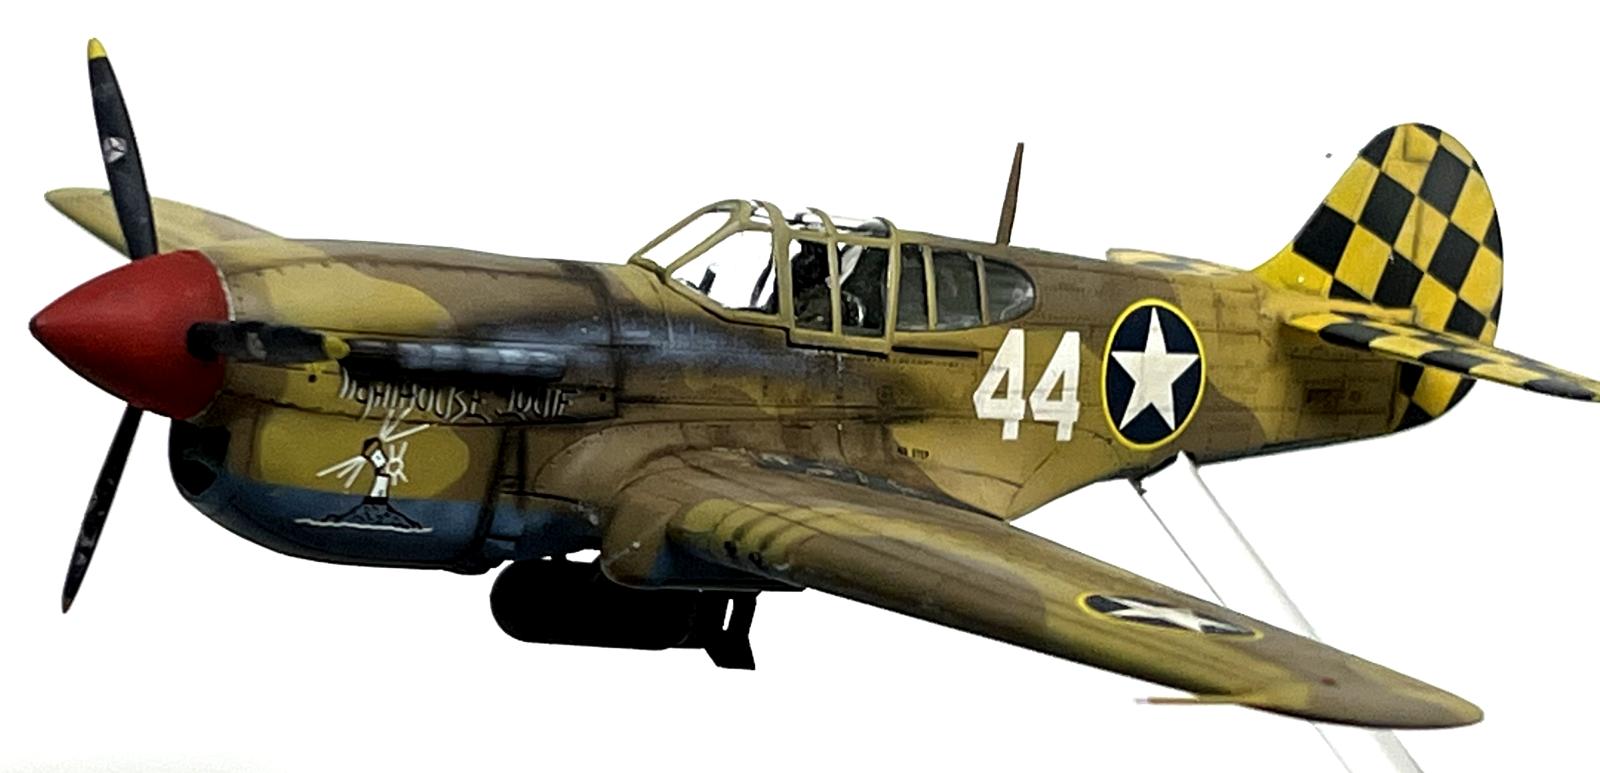
The kit had some decent recessed details, so I didn't do much additional engraving or riveting. I did have to make a few corrections to change from a K to an L. I deleted the guns and the pitot and replaced with hollow aluminum rod. Probably the worst fitting/looking area of this kit is the chin intake. I basically gave up on the idea of trying to make it look any better!
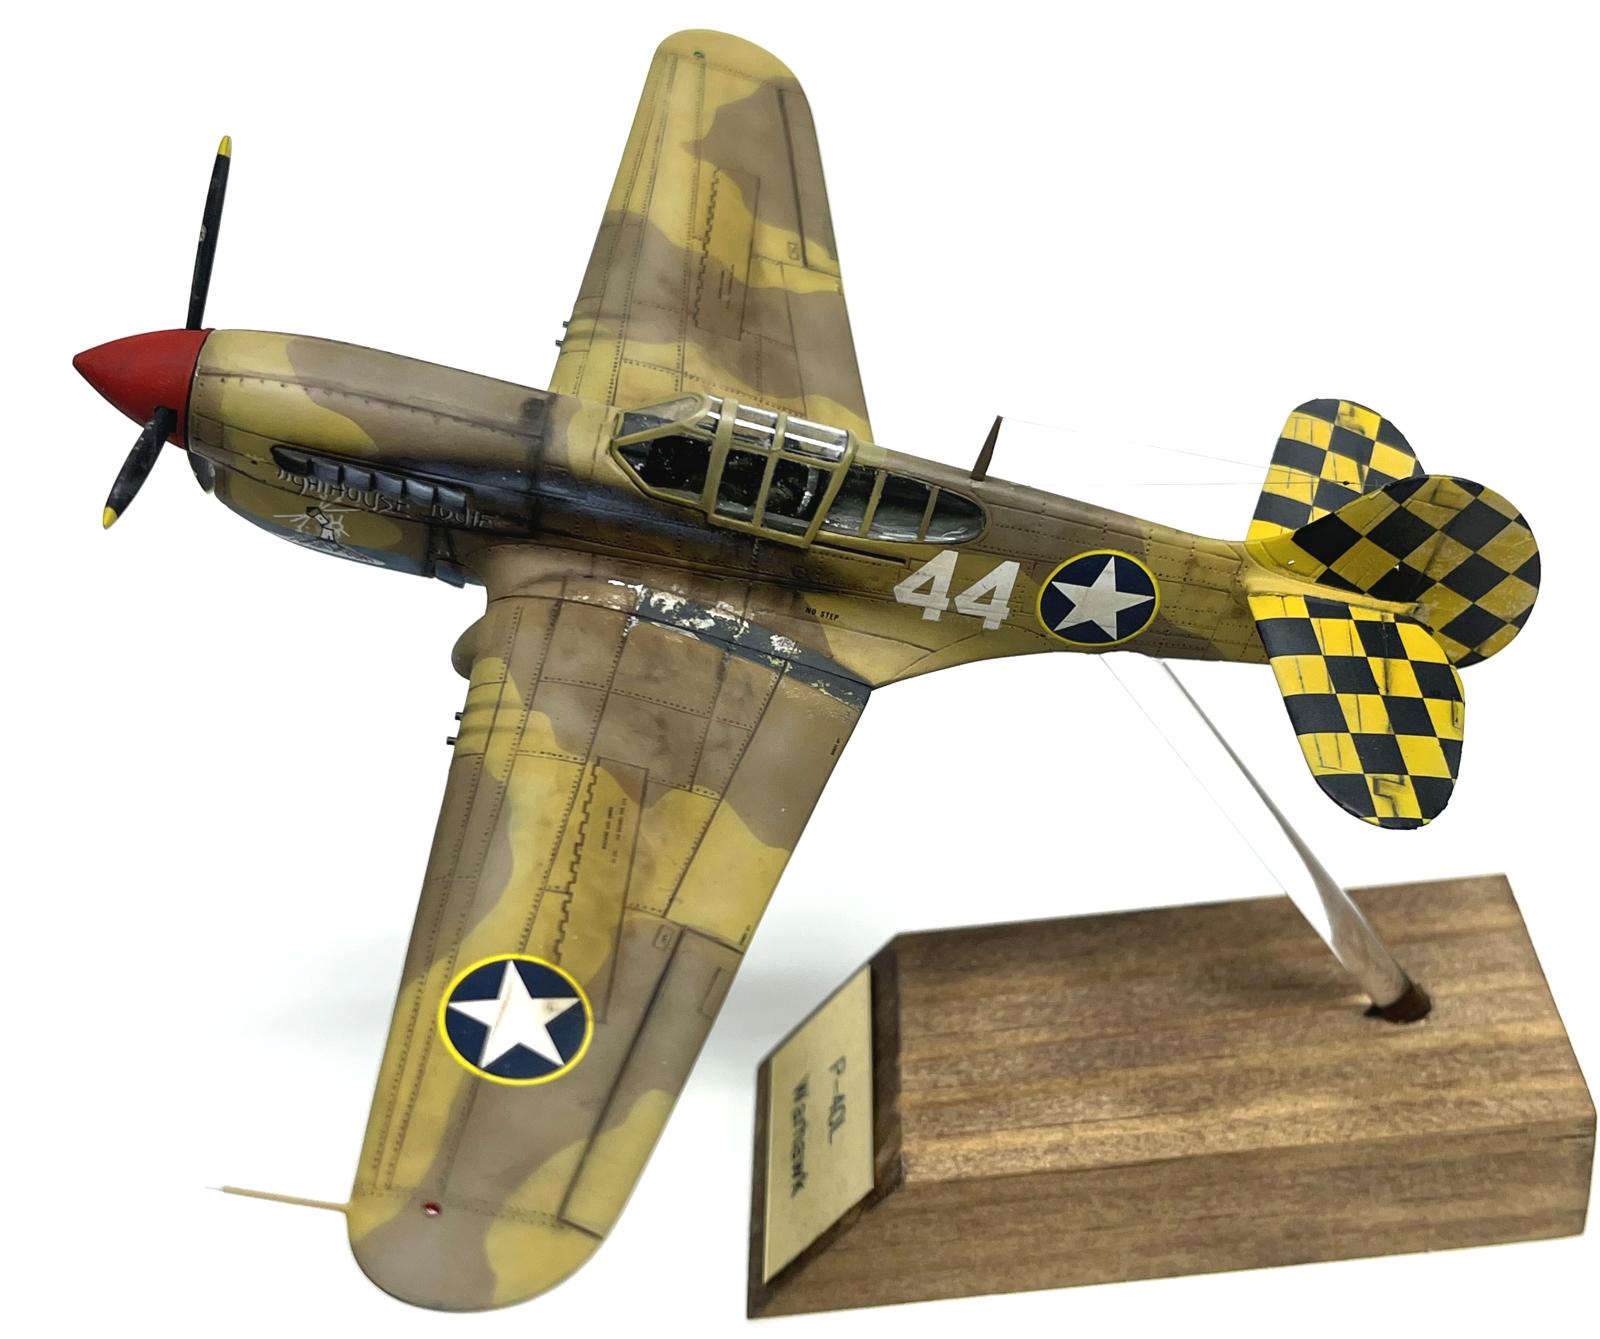
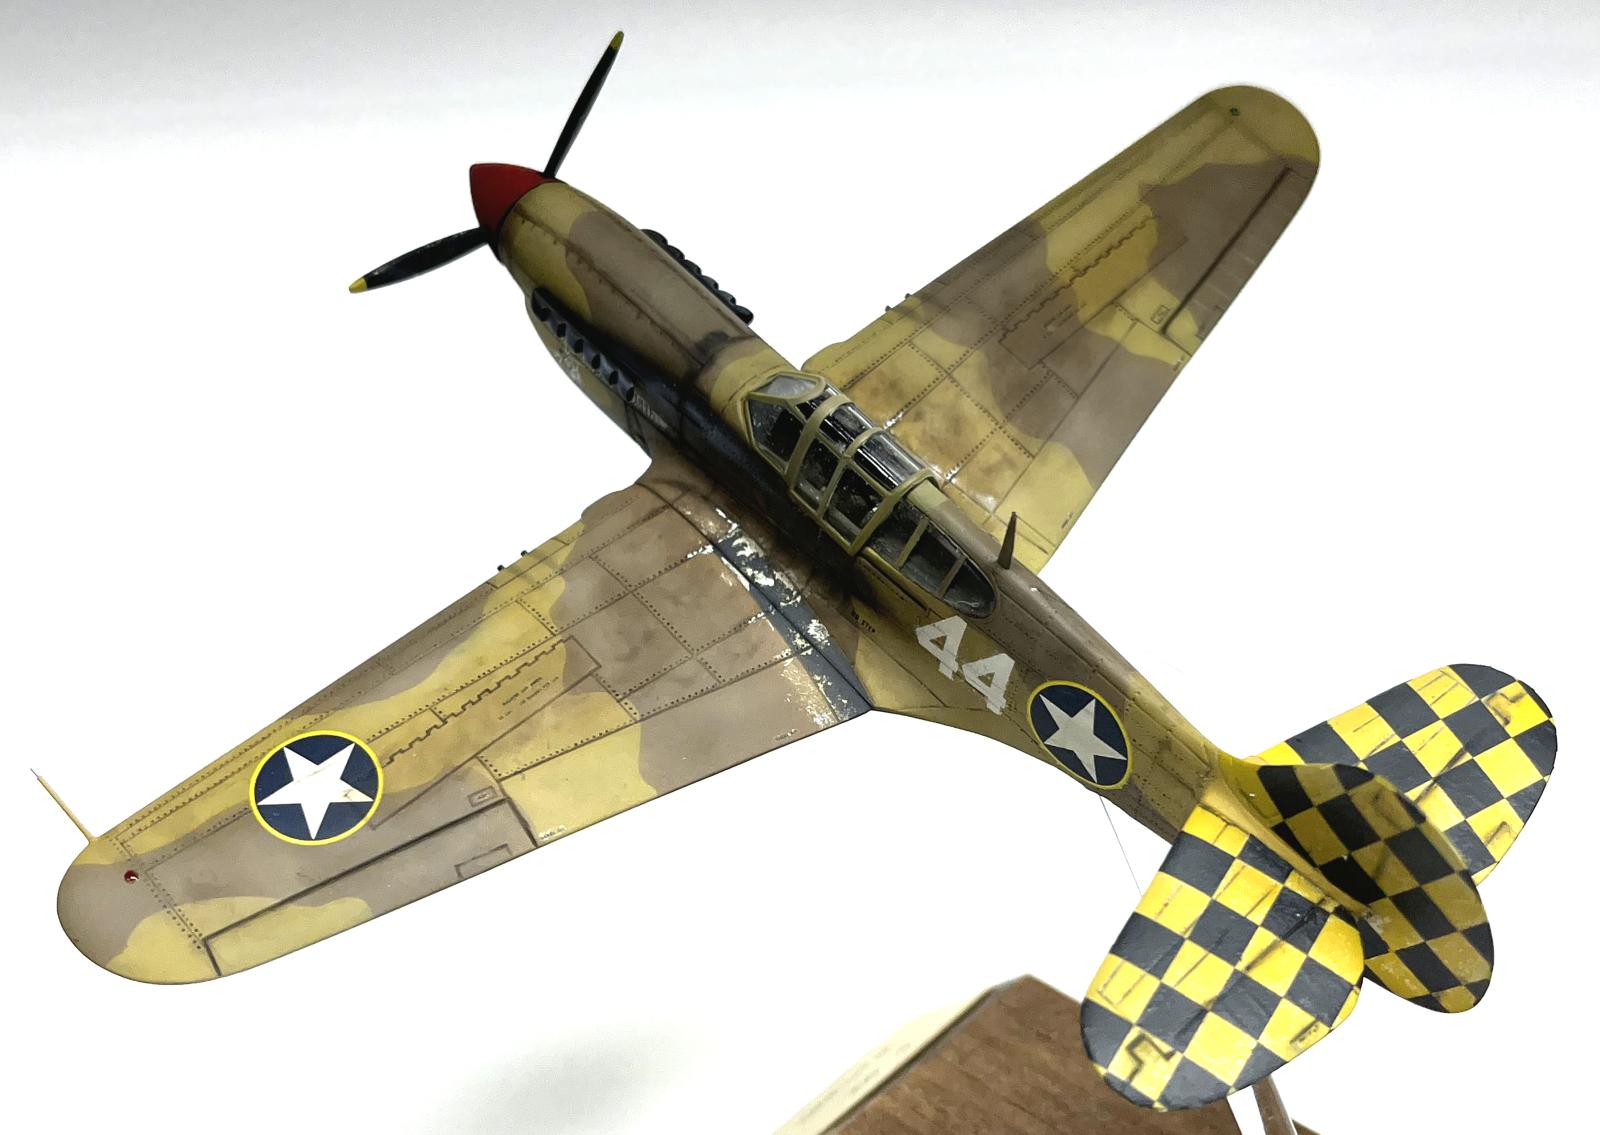
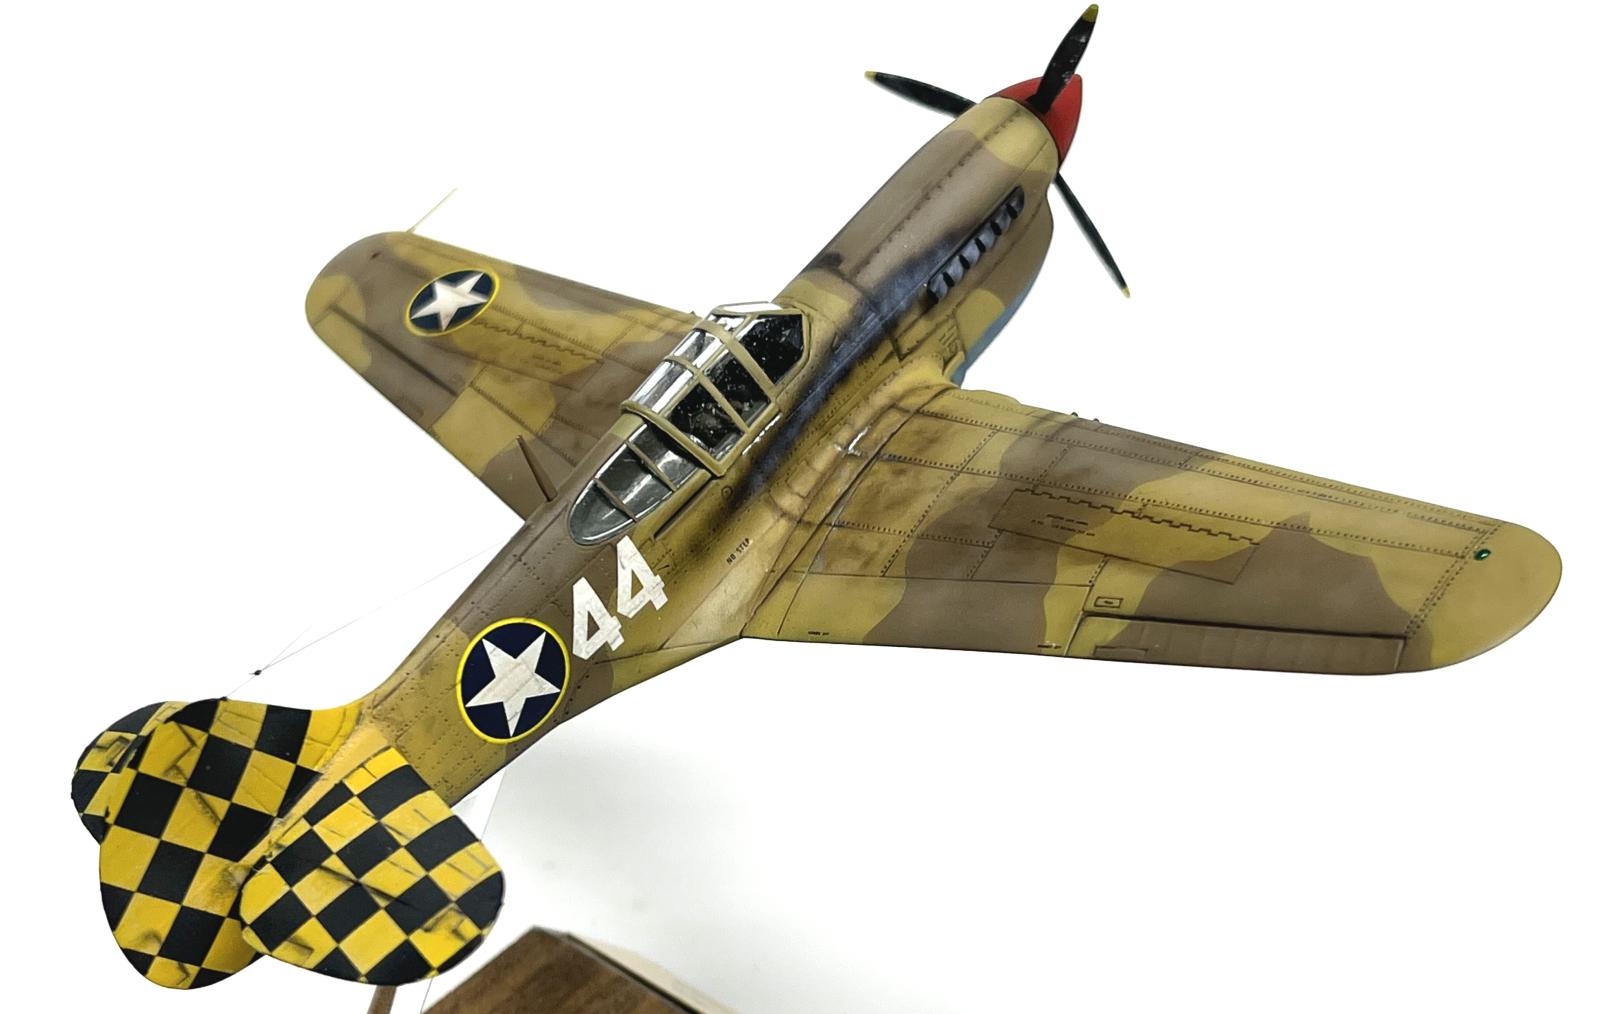
The canopy was designed in an odd way. The back panels were separate and were designed to just be glued directly to the fuselage indentions, so there wasn't an easy way to hide the minor smudginess from the glue.
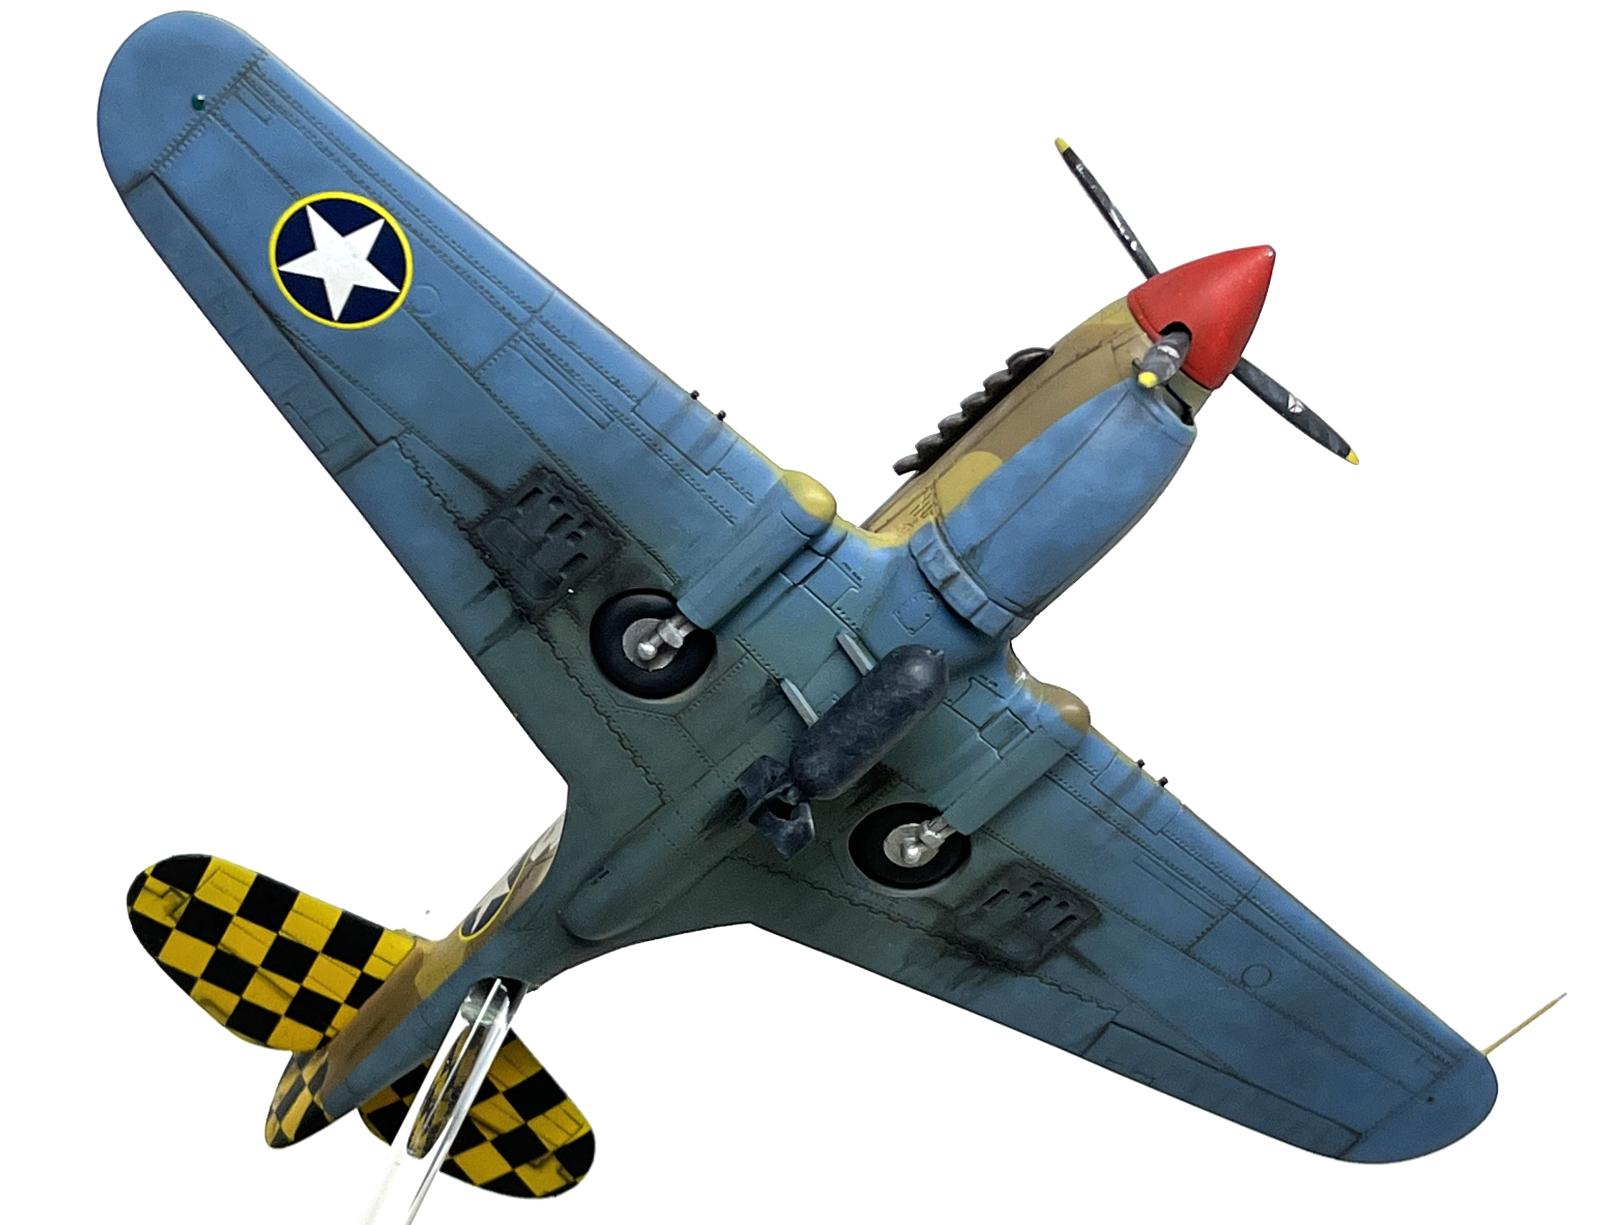
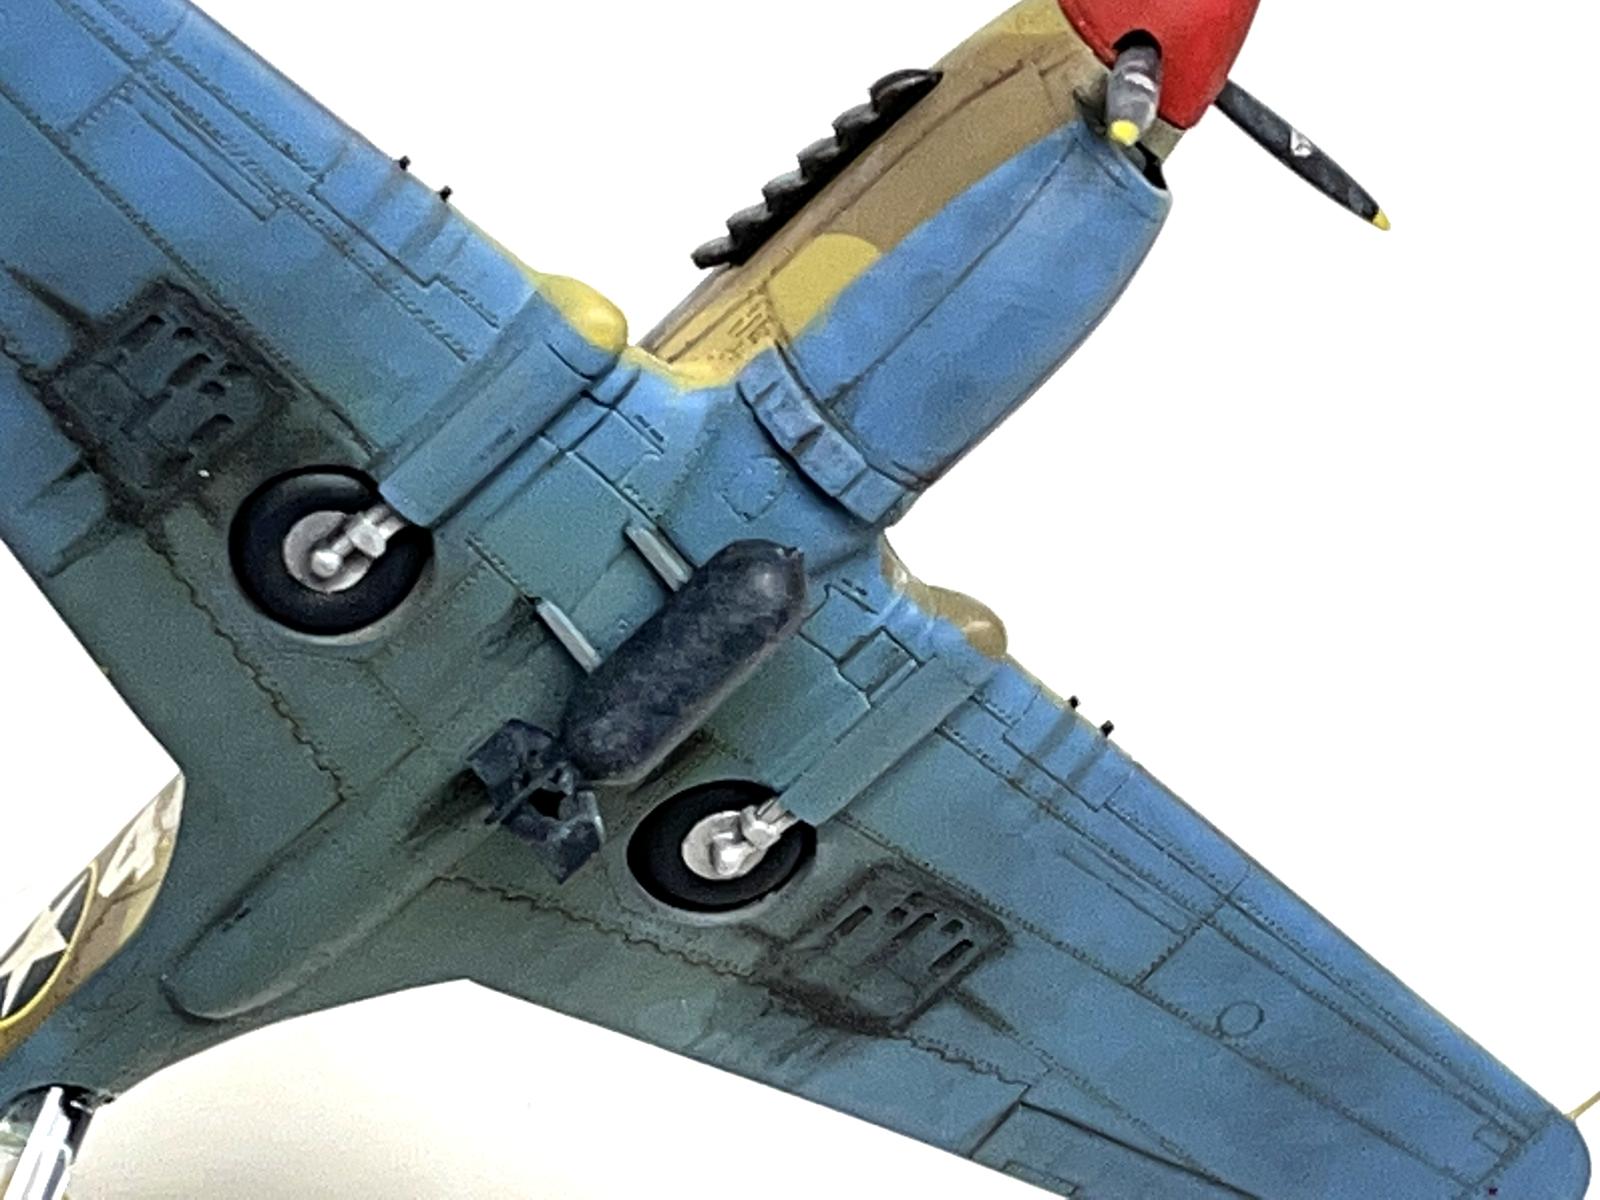
The kit didn't come with shackles – just two holes where either a bomb or tank (with pins on top) were inserted. I filled those holes and used a spare bomb/shackle from a Hasegawa kit (the recent N that I had finished).
FCM decals (same sheet as the recent N completed), and were pretty good to work with again, though I didn't quite get both sides of the tail checkers aligned together. This kit had some shape issues with the empennages, so there was trimming and touch-up work involved in getting those checkers down.
I love the desert scheme with the Torch markings, and couldn't resist the checkered tail! After putting down the main colors I lightened panel centers and knocked back the black on the checkers a bit with Tamiya Buff.
This was the first time I attempted to spray the exhaust stains instead of using chalk powers or Tamiya weathering master sets. It seems a little stark, and I think I got too much brown in the darker shade. Spraying did give me better control of the shape – I just need to refine my technique and use the right medium and/or colors.
There were no wing lights on the kit so I dabbed on drops of epoxy and painted it with clear paint.
I do love the P-40, though each brand kit has its own issues getting the wheels looking right into the retracted position!
The one bane of my existence since I started airbrushing (and thus masking/attaching the canopy before painting) is dust and plastic shavings that cling to the inside of the canopies. Some builds it is worse than others. I have used static wipes both before and after masking, and even rinsed out the interior when feasible before closing it up. I still end up with stuff stuck to the inside of the canopy. Any tips?


Gorgeous work as always Sir!
filthy dirty, I love it!
Hard to believe this is 1/72, Greg @gkittinger
The weathering looks really great as is the checkered tail sign.
Usually I leave the canopy open on my builds. How about leaving the canopy off during airbrushing and mount it once everything is finished.
Another winner, Greg! Love the extra touches. As John said, it is hard to believe it is 1/72!
Really nice looking P-40, Greg - your wash, panel lines and weathering look awesome. And the decals are pretty cool! I'm with John, I stuff the cockpit and wheel wells with foam then tape them over until the very end. And I tape the inside of the canopy to ensure overspray doesn't do any damage during the exterior airbrush and chaos as well. HTH...
Another beauty from your workbench, Greg. Very nice job.
For your canopy, try Pacer Formula 560 canopy glue. It's about the consistency of Elmer's and dries very strong and crystal clear. I've been using that for years on both my plastic and RC models. As for your plastic shavings - I've taken to using low pressure compressed air to blow everything out before I paint (maybe that canned air for cleaning keyboards would work also), then wiping the model down with isopropyl alcohol to get rid of the rest.
Well done, Greg!
Very nice Greg! Great weathering.
Wow Greg! @gkittinger
I suspect the plastic wasn’t the best P-40 L in the gentleman’s scale, but I really can’t tell because the work you put into it makes this one really stand out! I love the excellent paintwork in the checkers tail section, bravo!
As for your problems with dust partículas inside the canopy (an issue I don’t recall ever having myself) it’s probably best to solve what causes it, perhaps the room/area around your workbench is prone to dust in the air or surfaces?
Another great looking model from you, Greg, looking at it on my iPad screen it definitely looks bigger than 1/72, you certainly mastered those tail markings. I’m with Pedro above about the dust, I find computers somehow create a lot of dust in the atmosphere, maybe it’s the static electricity?
Looks great. Nice weathered look..
Great looking P-40, Greg. I think you have a few of us checking out the SMER kit online. Looks pretty decent.
Nice looking exhaust and airbrush work.
Nice work on this P-40 , Greg ! Looks excellent .
Your last build of the year Greg@gkittinger? Terrific. Way to finish up.
Nice paint work in 1/72, Greg!
Very nice and grubby! The paint work especially is great!
Great work Greg. You've done the sows ear to silk purse quite nicely!
Excellent recovery with a kit blessed by genetic mutations passed down by its forebearers. Looks great!
Awesome looking P-40 Greg! Great job on painting and weathering, I love the desert paint scheme and check board tail.
Amazing work Greg. Hard to believe it’s 1/72. Liked!
Greg this is breathtakingly beautiful. Your P-40 looks very realistic! Well done!